В настоящий момент товары недоступны для заказа на samsung.com/ru
В настоящий момент товары недоступны для заказа на samsung.com/ru
Выберите свое местоположение и язык.
Микроволновая печь с конвекцией MC28H5013AW, 28 л
MC28H5013AW/BW
-
OT_Others
Коды ошибок микроволновых печей SamsungЧасто задаваемые вопросы о бытовой технике Samsung. Узнайте подробнее о ‘Коды ошибок микроволновых печей Samsung’ с помощью службы поддержки Samsung.
-
OT_Others
Что делать, если при использовании духового шкафа появляется запах гари или неприятный запахЧасто задаваемые вопросы о бытовой технике Samsung. Узнайте подробнее о ‘Что делать, если при использовании духового шкафа появляется запах гари или неприятный запах’ с помощью службы поддержки Samsung
-
OT_Others
Нужно ли удалять пластину (картонку), находящуюся на стенке в микроволновой печиЧасто задаваемые вопросы о бытовой технике Samsung. Узнайте подробнее о ‘Нужно ли удалять пластину (картонку), находящуюся на стенке в микроволновой печи’ с помощью службы поддержки Samsung.
-
OT_Others
Как запустить режим «Разморозка» в микроволновой печи SamsungЧасто задаваемые вопросы о бытовой технике Samsung. Узнайте подробнее о ‘Как запустить режим «Разморозка» в микроволновой печи Samsung’ с помощью службы поддержки Samsung.
-
OT_Others
Что делать, если микроволновая печь Samsung не включаетсяЧасто задаваемые вопросы о Бытовой технике Samsung. Узнайте подробнее о ‘Что делать, если микроволновая печь Samsung не включается’ с помощью службы поддержки Samsung.
-
OT_Others
Что делать, если микроволновка Samsung не греетЧасто задаваемые вопросы о Бытовой технике Samsung. Узнайте подробнее о ‘Что делать, если микроволновка Samsung не греет’ с помощью службы поддержки Samsung.
-
OT_Others
Информация о декоративной рамке микроволновой печи SamsungЧасто задаваемые вопросы о Бытовой технике Samsung. Узнайте подробнее о ‘Информация о декоративной рамке микроволновой печи Samsung’ с помощью службы поддержки Samsung.
-
OT_Others
Ошибка C10 на микроволновой печи SamsungЧасто задаваемые вопросы о бытовой технике Samsung. Узнайте подробнее о ‘Ошибка C10 на микроволновой печи Samsung’ с помощью службы поддержки Samsung.
-
OT_Others
Ошибка CA1 на микроволновой печи SamsungЧасто задаваемые вопросы о бытовой технике Samsung. Узнайте подробнее о ‘Ошибка CA1 на микроволновой печи Samsung’ с помощью службы поддержки Samsung.
-
OT_Others
Ошибка E12 на микроволновой печи SamsungЧасто задаваемые вопросы о бытовой технике Samsung. Узнайте подробнее о ‘Ошибка E12 на микроволновой печи Samsung’ с помощью службы поддержки Samsung.
-
OT_Others
Ошибка E32 на микроволновой печи SamsungЧасто задаваемые вопросы о бытовой технике Samsung. Узнайте подробнее о ‘Ошибка E32 на микроволновой печи Samsung’ с помощью службы поддержки Samsung.
-
OT_Others
Ошибка C21 на микроволновой печи SamsungЧасто задаваемые вопросы о бытовой технике Samsung. Узнайте подробнее о ‘Ошибка C21 на микроволновой печи Samsung’ с помощью службы поддержки Samsung.
-
OT_Others
Горят не все сегменты на дисплее микроволновой печи SamsungЧасто задаваемые вопросы о бытовой технике Samsung. Узнайте подробнее о ‘Горят не все сегменты на дисплее микроволновой печи Samsung’ с помощью службы поддержки Samsung.
-
OT_Others
Что делать, если не открывается дверца в микроволновой печи SamsungЧасто задаваемые вопросы о бытовой технике Samsung. Узнайте подробнее о ‘Что делать, если не открывается дверца в микроволновой печи Samsung’ с помощью службы поддержки Samsung.
-
OT_Others
Зазор между корпусом и дверцей в микроволновой печи SamsungЧасто задаваемые вопросы о бытовой технике Samsung. Узнайте подробнее о ‘Зазор между корпусом и дверцей в микроволновой печи Samsung’ с помощью службы поддержки Samsung.
-
OT_Others
Что делать, если микроволновая печь отключилась во время работыЧасто задаваемые вопросы о бытовой технике Samsung. Узнайте подробнее о ‘Что делать, если микроволновая печь отключилась во время работы’ с помощью службы поддержки Samsung.
-
OT_Others
Как подобрать нишу для встраивания микроволновой печи SamsungЧасто задаваемые вопросы о Бытовой технике Samsung. Узнайте подробнее ‘Как подобрать нишу для встраивания микроволновой печи Samsung’ с помощью службы поддержки Samsung.
-
OT_Others
Ошибка E24 на микроволновой печи SamsungЧасто задаваемые вопросы о Бытовой технике Samsung. Узнайте подробнее о ‘Ошибка E24 на микроволновой печи Samsung’ с помощью службы поддержки Samsung.
-
OT_Others
Что делать, если не горит освещение в микроволновой печи SamsungЧасто задаваемые вопросы о Бытовой технике Samsung. Узнайте подробнее о ‘Что делать, если не горит освещение в микроволновой печи Samsung’ с помощью службы поддержки Samsung.
-
OT_Others
Ошибка C20 на микроволновой печи SamsungЧасто задаваемые вопросы о Бытовой технике Samsung. Узнайте подробнее о ‘Ошибка C20 на микроволновой печи Samsung’ с помощью службы поддержки Samsung.
-
OT_Others
Ошибка CF0 на микроволновой печи SamsungЧасто задаваемые вопросы о Бытовой технике Samsung. Узнайте подробнее о ‘Ошибка CF0 на микроволновой печи Samsung’ с помощью службы поддержки Samsung.
-
OT_Others
Эко-режим в микроволновой печи SamsungЧасто задаваемые вопросы о Бытовой технике Samsung. Узнайте подробнее о ‘Эко-режим в микроволновой печи Samsung’ с помощью службы поддержки Samsung.
-
OT_Others
Как установить время на микроволновой печи SamsungЧасто задаваемые вопросы о бытовой технике Samsung. Узнайте подробнее о ‘Как установить время на микроволновой печи Samsung’ с помощью службы поддержки Samsung.
-
OT_Others
Как отключить или включить звуковой сигнал в микроволновой печи SamsungЧасто задаваемые вопросы о бытовой технике Samsung. Узнайте подробнее о ‘Как отключить или включить звуковой сигнал в микроволновой печи Samsung’ с помощью службы поддержки Samsung.
-
OT_Others
Посторонний шум при работе микроволновой печи SamsungЧасто задаваемые вопросы о бытовой технике Samsung. Узнайте подробнее о ‘Посторонний шум при работе в микроволновой печи Samsung’ с помощью службы поддержки Samsung.
-
OT_Others
Писк или шум от микроволновой печи Samsung в режиме ожиданияЧасто задаваемые вопросы о Бытовой технике Samsung. Узнайте подробнее о ‘Писк или шум от микроволновой печи Samsung в режиме ожидания’ с помощью службы поддержки Samsung.
-
OT_Others
Не работают кнопки управления на микроволновой печи SamsungЧасто задаваемые вопросы о бытовой технике Samsung. Узнайте подробнее о ‘Не работают кнопки управления на микроволновой печи Samsung’ с помощью службы поддержки Samsung.
-
OT_Others
Что делать, если не крутится тарелка в микроволновой печи SamsungЧасто задаваемые вопросы о бытовой технике Samsung. Узнайте подробнее о ‘Что делать, если не крутится тарелка в микроволновой печи Samsung’ с помощью службы поддержки Samsung.
-
OT_Others
Что делать, если микроволновая печь Samsung начинает работать при неполном открытии дверцыЧасто задаваемые вопросы о Бытовой технике Samsung. Узнайте подробнее о ‘Что делать, если микроволновая печь Samsung начинает работать при неполном открытии дверцы’ с помощью службы поддержки Samsung.
-
OT_Others
Что делать, если микроволновая печь Samsung вибрирует во время работыЧасто задаваемые вопросы о бытовой технике Samsung. Узнайте подробнее о ‘Что делать, если микроволновая печь Samsung вибрирует во время работы’ с помощью службы поддержки Samsung.
-
OT_Others
Что делать, если при первом запуске микроволновой печи Samsung заметно задымлениеЧасто задаваемые вопросы о бытовой технике Samsung. Узнайте подробнее о ‘Что делать, если при первом запуске микроволновой печи Samsung заметно задымление’ с помощью службы поддержки Samsung.
-
OT_Others
Что делать при появлении запаха гари в микроволновой печи SamsungЧасто задаваемые вопросы о Бытовой технике Samsung. Узнайте подробнее о ‘Что делать при появлении запаха гари в микроволновой печи Samsung’ с помощью службы поддержки Samsung.
-
OT_Others
Что делать при появлении искр из микроволновой печи SamsungЧасто задаваемые вопросы о бытовой технике Samsung. Узнайте подробнее о ‘Что делать при появлении искр из микроволновой печи Samsung’ с помощью службы поддержки Samsung.
-
OT_Others
Почему нагреваются боковые стенки микроволновой печи SamsungЧасто задаваемые вопросы о Бытовой технике Samsung. Узнайте подробнее ‘Почему нагреваются боковые стенки микроволновой печи Samsung’ с помощью службы поддержки Samsung.
-
{{file.description}}
- Версия {{file.fileVersion}}
- {{file.fileSize}} MB
- {{file.fileModifiedDate}}
- {{file.osNames}}
ДОПОЛНИТЕЛЬНАЯ ИНФОРМАЦИЯ
Информация о гарантии
Узнайте, что входит в гарантийные обязательства


Индивидуальная поддержка
Получите помощь от официальных центров поддержки


Новости и уведомления
Обьявления о важных продуктах и услугах


Умная и с большим количеством программ
Оглавление
- Технические характеристики
- Комплектация
- Управление
- Инструкция и книга рецептов
- Эксплуатация
- Тестирование
- Выводы
Наблюдения показывают, что в своем отношении к микроволновым печам наши соотечественники разделились на два неравных лагеря. В подавляющем большинстве оказались те, которые используют микроволновку лишь для разогрева готовых блюд (в крайнем случае — для разморозки продуктов). Многие пользователи даже спустя годы после покупки микроволновой печи остаются в неведении относительно всех ее задокументированных способностей.
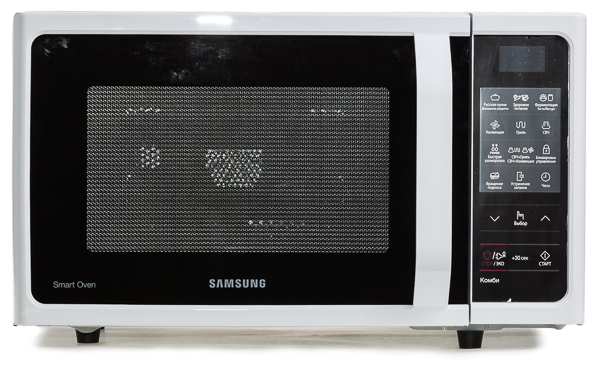
В меньшинстве остаются те, кто использует микроволновки «по полной»: осведомлены о наличии встроенных программ, знают, когда использовать гриль, а когда конвекцию и т. п. В нашем сегодняшнем обзоре — многофункциональная микроволновая печь, представленная компанией Samsung (MC28H5013). Мы решили разобраться, насколько широки возможности такого устройства, и насколько рационально использовать микроволновку в качестве замены более традиционных кухонных приборов.
Технические характеристики
| Общие характеристики | |
| Производитель | Samsung |
| Наименование модели | MC28H5013 (AK/AW) |
| Тип | микроволновая печь с грилем и конвекцией |
| Потребляемая мощность | максимальная — 2900 Вт микроволны — 1400 Вт гриль — 1500 Вт конвекция — максимум 2100 Вт |
| Материал корпуса | пластик, металл, стекло |
| Цвет корпуса | белый + черный |
| Объем камеры | 28 л |
| Покрытие камеры | биокерамическая эмаль |
| Тип открытия дверцы | ручка (потянуть) |
| Тип и расположение гриля | верхний, кварцевый |
| Количество программ | 75 для приготовления блюд по рецептам + программы для всех стандартных режимов |
| Гарантия производителя | 12 месяцев |
| Управление | |
| Тип управления | электронное |
| Тип кнопок | мембранные |
| Дисплей | светодиодный, голубой |
| Индикаторы | дисплей |
| Масса и габариты | |
| Упаковка (Ш×В×Г) | 58×46×37 см |
| Устройство (Ш×В×Г) | 52×31×48 см |
| Камера (Ш×В×Г) | 36×33×24 см |
| Вес с упаковкой | 20,2 кг |
| Вес без упаковки | 17,5 кг |
| Цены | |
| Средняя цена | T-10822064 |
| Розничные предложения | L-10822064-10 |
Комплектация
Микроволновая печь поставляется в коробке, выполненной в строгой цветовой гамме: на картонном фоне черным цветом нанесены изображения и текстовая информация, из которой пользователь может ознакомиться с основными функциями микроволновой печи.
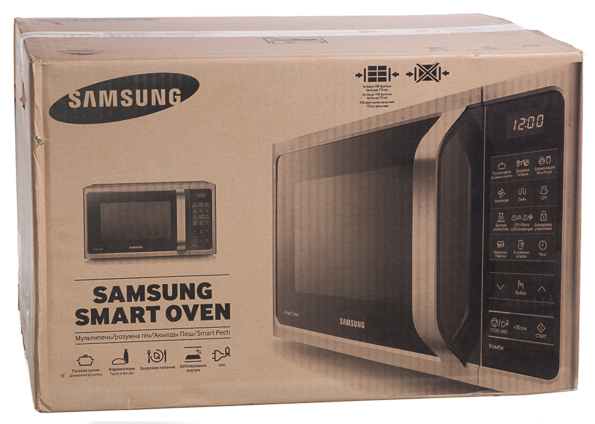
Судя по такому «спартанскому» дизайну, коробка не предназначена для выставления на витрину, а ее предназначение — исключительно функциональное: сохранить в целости и сохранности прибор до момента его распаковки. Помимо толстого картона для защиты печи используются пенопластовые вкладки.
Открыв коробку, внутри можно обнаружить:
- саму печь;
- две решетки для жарки (высокая и низкая);
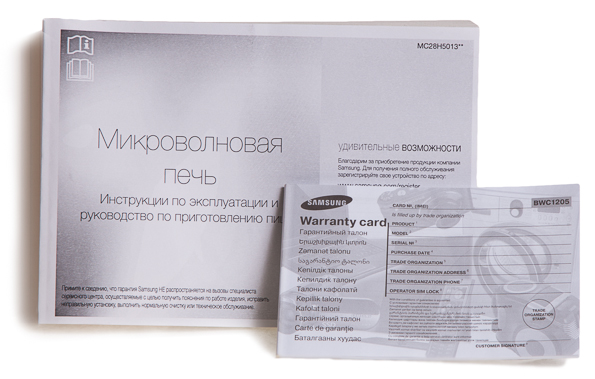
- инструкцию (она же книга рецептов);
- гарантийный талон.
В комплект также входят такие стандартные элементы, как стеклянный поднос и вращающееся кольцо под ним. В общем, как мы видим: здесь есть все необходимое, и нет ничего лишнего.
Материал внутреннего покрытия
Внутренние стенки камеры покрыты биокерамической эмалью, которая, по утверждению производителя, служит защитой от бактерий, легко очищается, устойчива к царапинам и прослужит 10 лет.
В нижней части находится элемент из жаропрочного пластика, на который устанавливается вращающееся кольцо и стеклянный поднос. Внутренняя поверхность дверцы — жаропрочное стекло, уплотнитель, металл. В механизм дверцы встроены блокировочные контакты, которые не дадут как включить печь с открытой дверцей, так и приостановят любой режим приготовления при ее открывании во время готовки.
Управление
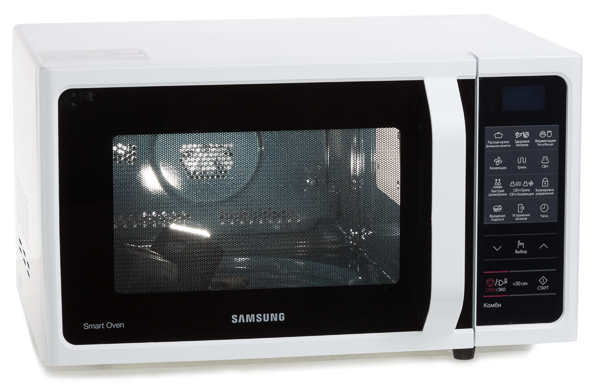
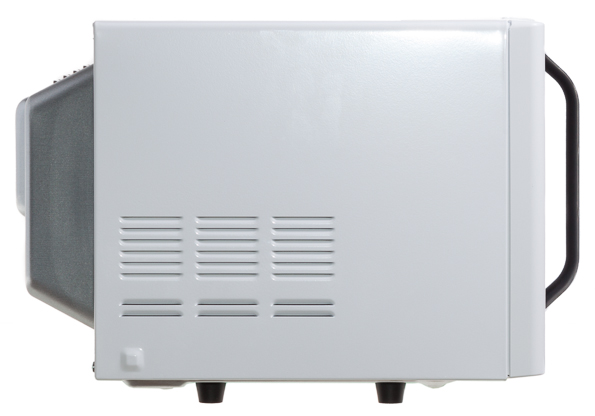
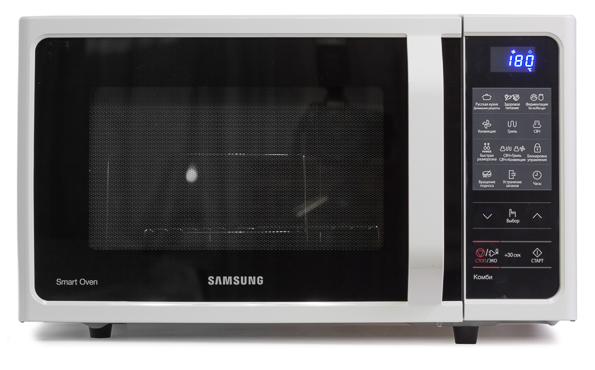
Внешний вид микроволновой печи также можно назвать классическим: это прямоугольный параллелепипед белого цвета с дверцей из стекла с черной металлической сеткой и панелью управления спереди и стальной поверхностью — сзади. Открывается печь классическим для микроволновок образом: нужно потянуть за ручку дверцы.

Управление производится с помощью плоской панели, в верхней части которой находится дисплей, в режиме бездействия предназначенный для демонстрации текущего времени, при выборе режима отображающий уже введенные параметры, а при работе устройства — показывающий время, оставшееся до окончания приготовления (а также установленную температуру в режиме конвекции). Помимо цифр, на дисплее отображаются пиктограммы.
Во время работы камера микроволновки подсвечивается, так что за процессом приготовления вашего блюда можно наблюдать. Впрочем, подсветку нельзя назвать слишком яркой, так что нужно быть готовым к тому, что в первое время придется периодически заглядывать внутрь, чтобы проконтролировать степень готовности блюда. Причем гораздо чаще это придется делать, если приготовление происходит на верхней решетке, когда блюдо с продуктами видно плохо.
Разобраться с управлением Samsung MC28H5013, не прибегая к чтению инструкции, возможно лишь частично. Без проблем удастся выставить время, запустить режим разогрева, конвекции или комбинированный режим (СВЧ+гриль/СВЧ+конвекция). Для всех остальных режимов и программ потребуется инструкция, в которой содержатся разъяснения, касающиеся того, что именно кроется под тем или иным номером программы.
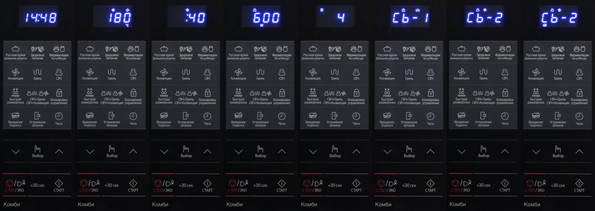
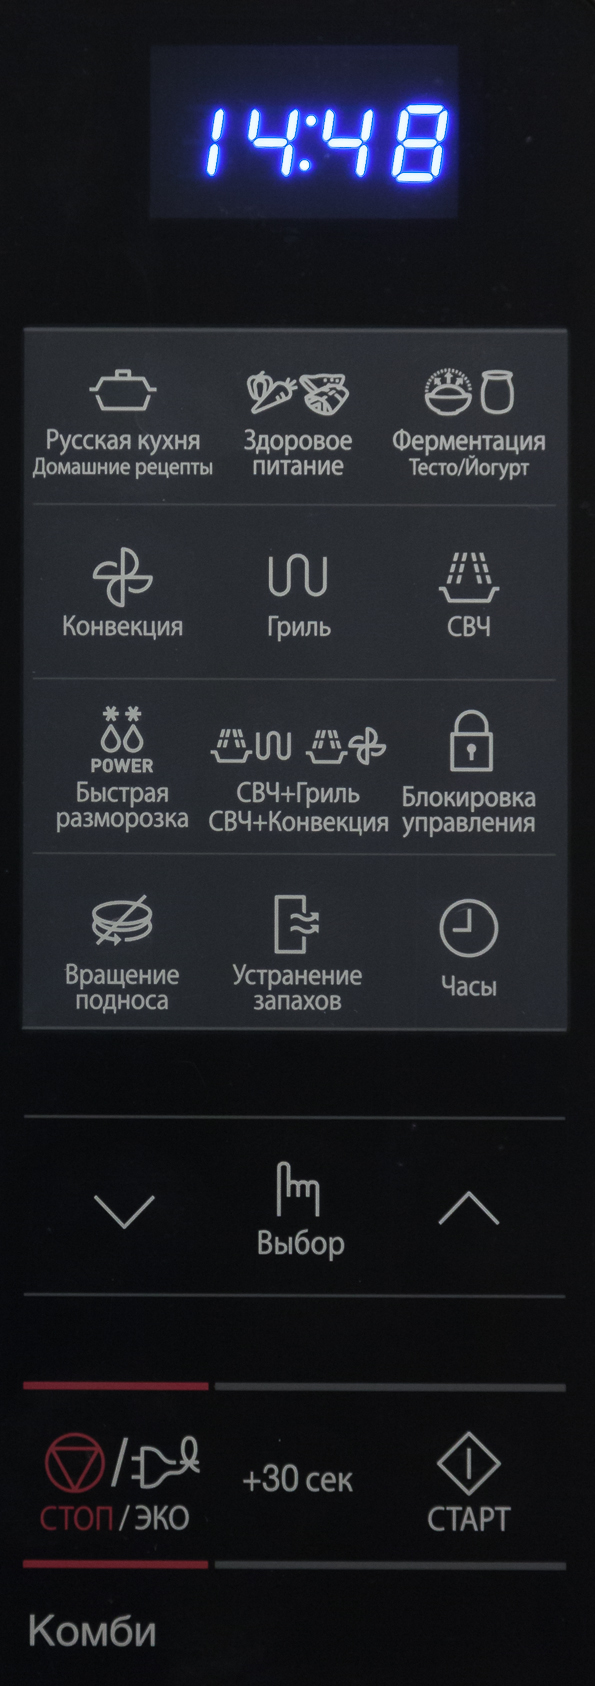
Управление микроволновой печью осуществляется с помощью 17 кнопок, с помощью которых можно установить один из возможных режимов работы (время, мощность, способ приготовления), либо выбрать программу для автоматического приготовления того или иного блюда. Для разморозки может потребоваться также указать вес продукта. Кнопки нажимаются легко, а каждое нажатие сопровождается звуковыми сигналом. На каждой кнопке содержится пиктограмма и текстовое пояснение на русском языке. Единственный недостаток — отсутствие подсветки. В условиях недостаточной освещенности, а также, когда прибор установлен выше или ниже уровня глаз, нередко приходится приглядываться для того, чтобы рассмотреть надписи.
Перечислим эти кнопки и дадим краткие пояснения:
- Русская кухня, Домашние рецепты — выбор номера предустановленной программы, рассчитанной на приготовление определенного блюда из книги рецептов, раздела «Русская кухня»;
- Здоровое питание — выбор номера предустановленной программы, рассчитанной на приготовление определенного блюда из книги рецептов, раздела «Здоровое питание» (приготовление каш и макарон, овощей, рыбы и курицы);
- Ферментация (тесто/йогурт) — выбор номера программы для расстойки разного типа теста, а также для приготовления домашнего йогурта;
- Конвекция — выбор режима конвекции (от 40 до 200 градусов, до 60 минут);
- Гриль — выбор режима «гриль» (до 60 минут);
- СВЧ — выбор времени приготовления и мощности (от 100 до 900 ватт);
- Быстрая разморозка — потребуется указать тип продукта и его вес;
- СВЧ+Гриль/СВЧ+конвекция — выбор соответствующего комбинированного режима (с установкой мощности для СВЧ и температуры для конвекции);
- Блокировка управления;
- Вращение подноса — (вкл/откл);
- Устранение запахов — режим самоочистки микроволновой печи;
- Часы — установка времени
Также присутствуют кнопки «Больше»/«Меньше», кнопка «Выбор», кнопка «+30 сек», кнопка запуска «Старт» и кнопка остановки «Стоп», которая также служит для перевода прибора в режим энергосбережения.
Как мы уже говорили, перед началом использования рекомендуется прочитать инструкцию. При этом желательно как минимум «по диагонали» просмотреть все разделы, а не только тот, в котором описана процедура, которой пользователь хочет воспользоваться в данный момент.
Несмотря на то, что функций довольно много, запутаться в них сложно: для выполнения большинства действий достаточно четко следовать указаниям, приведенным в инструкции.
Уровень мощности микроволн варьируется от низкого до высокого. Как водится, производитель приводит таблицу, выраженную в ваттах, что намекает на то, что в зависимости от выбранного режима мощность действительно меняется. Однако результаты наших замеров ставят это предположение под сомнение: в режиме микроволн энергопотребление всегда имело только 2 градации: максимальную и минимальную.
Диапазон задаваемых при конвекции температур составляет от 40 до 230 градусов (с шагом в 10). Это отличный разброс, позволяющий не только готовить традиционные блюда, но также экспериментировать с приготовлением на низких температурах (в том числе вручную установить режим расстойки теста, если нужного не нашлось в предустановленных программах).
Инструкция и книга рецептов
Инструкция на 44 страницах содержит подробную информацию, касающуюся всех вопросов, с которыми можно столкнуться в ходе использования прибора. Тут можно найти рекомендации, касающиеся выбора посуды, советы о том, на какой подставке лучше готовить то или иное блюдо, как лучше размораживать тот или иной продукт и т. д.
В инструкцию также включена книга рецептов, содержащая 60 рецептов в разделе «Русская кухня», 15 рецептов в разделе «Здоровое питание», а также 3 рецепта теста (пицца, кекс, хлеб) и рецепт йогурта (для соответствующих режимов), 10 рецептов для гриля, руководство по приготовлению свежих и замороженных овощей, по приготовлению риса и макаронных изделий, инструкции по разогреву детского питания, и даже специальные советы, касающиеся растапливания сливочного масла или засахарившегося меда, приготовления глазури или подрумянивания миндаля. Несложно подсчитать, что даже если готовить каждое из приведенных блюд по одному разу, то такого рациона хватит на несколько месяцев разнообразного питания.
Эксплуатация
Подготовка к использованию
Печь рекомендуется установить как отдельно стоящую на ровной горизонтальной поверхности на высоте не менее 85 см от пола, обеспечив зазор размером минимум 20 см сверху и 10 см сзади. Очевидно, что под тестируемый агрегат должно быть выделено стационарное место: переносить печь с места на место довольно трудоемкая задача. Перед первым использованием рекомендуется протереть печь влажной тканью и удалить внутренние компоненты и уплотнение дверцы.
Также настоятельно рекомендуется ознакомиться с инструкцией: в ней содержатся ответы на многие неочевидные вопросы, с которыми неизбежно придется столкнуться в ходе эксплуатации печи.
Также производитель рекомендует произвести установку часов перед началом эксплуатации. На качество приготовления продуктов это не повлияет, к тому же при каждом отключении от питания часы будут обнуляться. Энергонезависимой памяти, к сожалению, у данной печи не предусмотрено, так что в случае отключения электропитания часы придется выставлять заново, да и продолжить выполнение ранее запущенной программы не удастся.
Уход за микроволновкой
Все аксессуары — решетки, противень, а также стеклянный диск — легко моются в посудомоечной машине. Корпус и стеклянная дверца протирается помощью влажной салфетки с моющим средством, абразивы и растворители производитель применять категорически не рекомендует.
При наличии сильных загрязнений рекомендуется вскипятить внутри прибора стакан воды. Также существует специальная программа «Устранение запахов», предназначенная для удаления дыма и пара из микроволновой печи после завершения приготовления блюда.
Тестирование
Объективные тесты
В тесте на скорость нагрева в стандартную ГОСТ-овскую поллитровую банку наливается 500 мл воды с температурой 20 °C, после чего она нагревается определенное количество времени в режиме микроволн на максимальной мощности и потом, после перемешивания, температура воды измеряется повторно. Результаты тестирования вы можете видеть в таблице.
| Время | Температура |
| 30 сек | 30 °C |
| 1 мин | 37 °C |
| 2 мин | 54 °C |
| 3 мин | 70 °C |
| 4 мин | 79 °C |
| 5 мин | 92 °C |
Также мы провели замеры энергопотребления микроволновой печи в различных режимах работы. Здесь мы (за исключением спящего режима) приводим средние округленные до десятков значения, что вполне соответствует как точности используемого оборудования, так и смыслу требований, которые можно предъявлять к подобным тестам.
| Режим | Энергопотребление |
| Состояние покоя | от 0,4 до 0,6 Вт |
| Микроволны (максимум) | 1420 Вт |
| Микроволны (минимум) | сменяющие друг друга состояния: 40 Вт и 1420 Вт |
| Гриль (максимум) | 1350 Вт |
| Конвекция (максимум) | сменяющие друг друга состояния: 40 Вт и 1790-1840 Вт |
| Комби (конвекция+микроволны) | сменяющие друг друга состояния: 40, 1500 и 2000 Вт |
| Комби (гриль+микроволны) | сменяющие друг друга состояния: 1300 Вт и 2000 Вт |
Тестовые блюда
В качестве тестовых блюд мы решили приготовить следующее:
- Разморозка тестового образца фарша.
- Печеный картофель в режиме гриль+микроволны.
- Томаты-гриль в режиме гриль+микроволны.
- Курица по-китайски.
- Омлет.
- Лимонные шарики.
- Рис.
- Яйцо пашот.
При выборе режимов мы соблюдали общие рекомендации относительно разных продуктов, взятые из инструкции, а также просто исходили из здравого смысла.
Разморозка фарша
В качестве тестового образца выступил уже знакомый читателям iXBT по предыдущему тестированию фарш Николай весом 800 граммов, состоящий из постной говядины пополам со свининой средней жирности. Фарш был заморожен в виде комка округлой формы.
На устройстве был выбран режим «Быстрая разморозка», программа «Мясо» и установлен вес: 800 граммов. Встроенная программа решила, что для нашего куска фарша будет достаточно чуть больше 12 минут. Через некоторое время (примерно через 4 минуты) печь Samsung (MC28H5013) издала сигнал, после которого фарш требовалось перевернуть. На этот момент визуально фарш почти не начал размораживаться. По истечении 12 минут мы достали наш тестовый фарш и проверили, насколько он разморозился.
Результат нас не обрадовал: разморозилась лишь верхняя часть (1,5-2 сантиметра в глубину), в то время как центральная часть осталась замороженной. Тут нужно отметить, что разработчик «подстраховал» себя на такой случай и добавил, что после завершения программы «Быстрая разморозка» продукт нужно оставить на 20-90 минут. Мы по достоинству оценили данный «ход конем», однако в результате осталось легкое чувство недоумения: что же это за «быстрая разморозка», если на нее может потребоваться без малого два часа времени?
Печеный картофель в режиме гриль+микроволны
Согласно рецепту, картофель нужно разрезать пополам, после чего готовить на высокой подставке на мощности 600 Вт + гриль 7-8 минут. Довольно простой рецепт. Мы взяли картофель средней величины и в точности выполнили инструкции.

Результат: съедобно, но не слишком вкусно. Внутри картофель оказался как будто сваренный, в то время как верхняя часть едва подрумянилась под воздействием гриля. На наш вкус, такое блюдо имело бы смысл готовить на меньшей мощности микроволн и дольше держать под грилем.
Томаты-гриль
После эксперимента с картофелем мы решили протестировать еще один рецепт из раздела «Гриль» и остановили свой выбор на томатах с сыром. Помидоры требуется разрезать пополам, посыпать сверху сыром и разложить на плоском блюде из термоустойчивого стекла. Готовить в режиме 300 Вт + гриль 5-6 минут, после чего дать постоять 2-3 минуты.
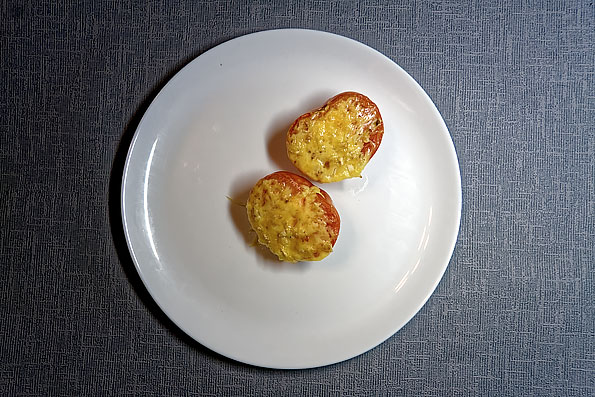
Результат оказался примерно тот же, что и в случае с картофелем: сыр, конечно, расплавился и слегка поджарился, а вот половинки томатов на вкус оказались слабо отличимы от сырых и были похожи скорее на «разогретые». Ну а после того, как блюдо остыло, разница и вовсе оказалась незаметной.
Курица по-китайски
Стоит отметить, что в данном рецепте изначально предполагались куриные крылышки, за неимением которых мы воспользовались куриной же голенью. Для маринада предполагалось взять 0,3 ложки соевого соуса, 0,3 чашки меда, 2 ст. л. сухого белого вина, столько же растительного масла, дольку чеснока и немного натертого имбиря.
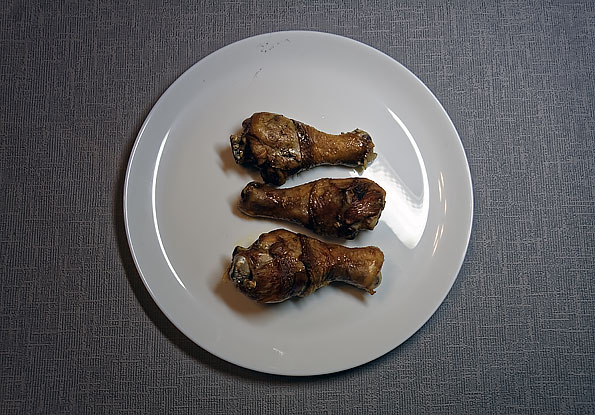
Предварительно промаринованные куски курицы готовятся на низкой подставке на предустановленной программе из набора «Русская кухня, домашние рецепты». Результат оказался вполне годным: курица равномерно пропеклась и оказалась весьма вкусной. Никаких нареканий.
Омлет
Еще один рецепт из «Русской кухни» — обычный омлет. Три яйца, 30 граммов молока, соль. Взбить и готовить прямо в тарелке на соответствующей программе.
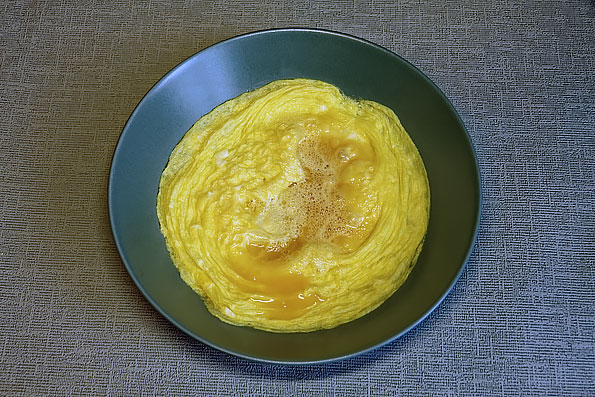
Результат — ниже среднего. По завершении работы автоматической программы омлет оказался откровенно сырым, пришлось доводить его до готовности вручную. К тому же нижняя часть омлета прилипла к тарелке, есть его было не слишком удобно.
Лимонные шарики
Лимонные шарики (еще один рецепт «русской кухни») готовятся из 100 граммов муки, 60 граммов сливочного масла, 40 граммов сахара, полтора яичных желтка, а также небольшого количество лимонной цедры и сахарной пудры.
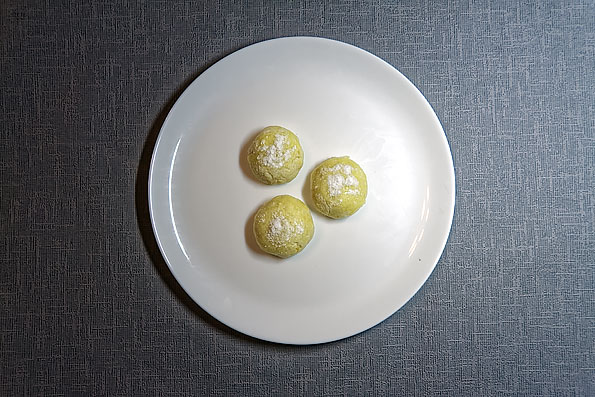
Готовятся они в два этапа: сначала смешивается тесто и формируются шарики, которые готовятся до сигнала микроволновой печи. После этого шарики требуется смазать яичным желтком, посыпать сахарной пудрой и продолжить приготовление. Результат: ощущение недоумения. По вкусу шарики не сильно отличались от обычного недорогого печенья. Времени было затрачено довольно много, а получившаяся порция вряд ли удовлетворила бы и двух человек. Есть ли смысл вообще начинать готовить ради получения пяти печенек (мини-кексов)?
Рис
Рис промывается, после чего заливается водой в соотношении 1:2 (250 г риса на 500 мл воды) и готовится около 17 минут на максимальной мощности в посуде с закрытой крышкой.
Результат: рис оказался сварен идеально. Впечатление было несколько подпорчено тем, что кипящая вода просочилась под крышку и вылилась на вращающийся круг микроволновки.
Яйцо пашот
Приступая к приготовлению этого блюда, мы были изначально настроены на неудачу. Яйцо-пашот — не самое простое блюдо, а тут его к тому же предполагается готовить на автоматической программе.
Согласно рецепту, нужно взять 300 мл воды и добавить туда 10-15 мл 15%-ного уксуса. Чашу с водой следует поместить в микроволновую печь, довести воду до кипения (микроволновка сама подаст сигнал в нужный момент), после чего размешать воду до появления воронки, вбить в нее разбитое яйцо и готовить до завершения приготовления (т. е. до сигнала печи, а не до истечения времени работы программы).
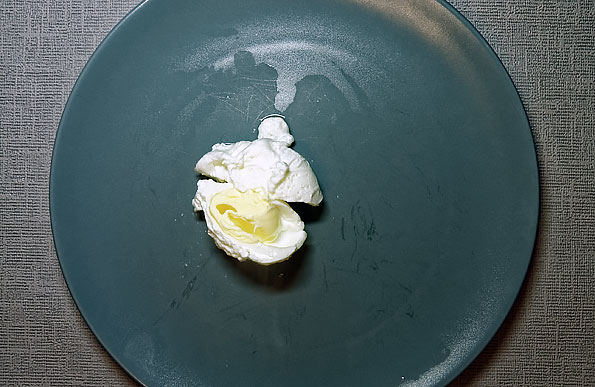
Результат: отлично. Мы были откровенно удивлены тому, насколько качественно отработала программа. Даже небольшое количество воды, выкипевшей через край чаши, не омрачило наше впечатление.
Выводы
Тестирование микроволновой печи Samsung с грилем и конвекцией (модель MC28H5013) было для нас весьма познавательным. Поскольку возможности прибора достаточно широки, мы смогли попробовать его в самых разных качествах. Ну а наличие большого числа рецептов позволило не задумываться о том, что именно в нем можно приготовить.
В результате мы убедились, что микроволновая печь может послужить полноценной заменой духового шкафа для небольшой семьи. Все заявленные функции работают корректно, так что микроволновкой можно одинаково успешно пользоваться как для разогрева, так и для приготовления блюд. Наличие конвекции и гриля, а также возможность комбинировать режимы открывают дополнительные варианты в случае, когда требуется получить румяную корочку или обработать продукт горячим воздухом. Также печь позволяет размораживать продукты, делать йогурты и производить расстойку теста перед выпечкой.
Печь проста в эксплуатации (однако инструкцию прочитать все же придется), надежна и удобна в использовании. Качество материалов и сборки также оказалось на уровне. Пожалуй, единственное, что нам не понравилось — качество приведенных рецептов и соответствующих им программ. Ни одно из вышеперечисленных блюд не вдохновило нас настолько, чтобы нам захотелось приготовить его повторно (кроме, разве что, яйца-пашот). Режим «быстрой разморозки» также оказался малоэффективным: если предполагается использовать микроволновую печь для этой задачи, придется потратить некоторое время на подбор подходящего режима.
В общем, не стоит ждать «ощущения чуда», подобного тому, которое появилось у многих при первом знакомстве с мультиваркой (надо всего лишь порезать ингредиенты, а готовит она сама!).
В случае с микроволновой печью (по крайней мере, с Samsung MC28H5013) такой трюк не пройдет. К этому прибору придется «привыкнуть», точно так же, как приходится привыкать к особенностям той или иной духовки или варочной поверхности. В остальном же Samsung MC28H5013 представляет собой качественный и многофункциональный кухонный прибор, оправдывающий свою цену.
Плюсы
- Высокое качество сборки.
- Простота в управлении.
- Широкая функциональность.
Минусы
- Прибор требует отдельного стационарного места на кухне.
- Посредственное качество приведенных рецептов и некоторых встроенных программ.

MC28H5013**
Microwave Oven
imagine the possibilities
Thank you for purchasing this Samsung product.
Owner’s instructions & Cooking guide
Please be advised that the Samsung warranty does NOT cover service calls
to explain product operation, correct improper installation, or perform normal
cleaning or maintenance.
This manual is made with 100 % recycled paper.
MC28H5013AW_BW_DE68-04234A-02_EN.indd 1
2014-07-11
5:12:00
contents
safety information
Safety information........................................................................................ 2
Quick look-up guide..................................................................................... 11
Oven features................................................................................................ 12
Oven........................................................................................................... 12
Control panel............................................................................................... 13
Accessories................................................................................................. 13
Oven use........................................................................................................ 14
How a microwave oven works..................................................................... 14
Checking that your oven is operating correctly............................................. 14
Setting the time........................................................................................... 15
Cooking/Reheating...................................................................................... 15
Power levels and time variations.................................................................. 16
Adjusting the cooking time.......................................................................... 16
Stopping the cooking.................................................................................. 16
Setting the energy save mode..................................................................... 16
Using the russia cusine features.................................................................. 17
Using the healthy cooking features.............................................................. 25
Using the dough proof / yogurt features...................................................... 27
Using the power defrost features................................................................. 28
Convection.................................................................................................. 29
Grilling......................................................................................................... 29
Choosing the accessories........................................................................... 29
Combining microwave and grill.................................................................... 30
Combining microwave and convection........................................................ 30
Using the child lock features........................................................................ 31
Using the turntable on/off features............................................................... 31
Using the deodorisation features................................................................. 32
Switching the beeper off.............................................................................. 32
Cookware guide........................................................................................... 32
Cooking guide............................................................................................... 33
Troubleshooting and error code................................................................. 42
Troubleshooting........................................................................................... 42
Error code................................................................................................... 43
Technical specifications.............................................................................. 43
USING THIS INSTRUCTION BOOKLET
You have just purchased a SAMSUNG microwave oven. Your Owner’s
Instructions contain valuable information on cooking with your microwave
oven:
• Safety precautions
• Suitable accessories and cookware
• Useful cooking tips
• Cooking tips
LEGEND FOR SYMBOLS AND ICONS
WARNING
Hazards or unsafe practices that may result in severe
personal injury or death.
CAUTION
Hazards or unsafe practices that may result in minor
personal injury or property damage.
Warning; Fire hazard
Warning; Hot surface
Warning; Electricity
Warning; Explosive material
Do NOT attempt.
Do NOT touch.
Do NOT disassemble.
Follow directions explicitly.
Unplug the power plug
from the wall socket.
Make sure the machine is
grounded to prevent electric
shock.
Call the service center for
help.
Note
Important
English - 2
MC28H5013AW_BW_DE68-04234A-02_EN.indd 2
2014-07-11
5:12:02
WARNING
(Microwave function only)
WARNING: If the door or door seals
are damaged, the oven must not be
operated until it has been repaired by a
competent person.
WARNING: It is hazardous for anyone
other than a competent person to carry
out any service or repair operation that
involves the removal of a cover which
gives protection against exposure to
microwave energy.
This appliance is intended to be used in
household only.
WARNING: Only allow children to use
the oven without supervision when
adequate instructions have been given
so that the child is able to use the oven
in a safe way and understands the
hazards of improper use.
WARNING: This appliance can be
used by children aged from 8 years
and above and persons with reduced
physical, sensory or mental capabilities
or lack of experience and knowledge
if they have been given supervision
or instruction concerning use of the
appliance in a safe way and understand
the hazards involved. Children shall not
play with the appliance. Cleaning and
user maintenance shall not be made by
children unless they are aged from 8
years and above and supervised.
Only use utensils that are suitable for use
in microwave ovens.
When heating food in plasitic or paper
containers, keep an eye on the oven due
to the possibility of ignitions.
01 SAFETY INFORMATION
IMPORTANT SAFETY INSTRUCTIONS
READ CAREFULLY AND KEEP FOR
FUTURE REFERENCE.
Make sure that these safety precautions are
obeyed at all times.
Before using the oven, confirm that the
following instructions are followed.
English - 3
MC28H5013AW_BW_DE68-04234A-02_EN.indd 3
2014-07-11
5:12:02
The microwave oven is intended for
heating food and beverages. Drying of
food or clothing and heating of warming
pads, slippers, sponges, damp cloth and
similar may lead to risk of injury, ignition
or fire.
If smoke is emitted, switch off or unplug
the appliance and keep the door closed
in order to stifle any flames.
WARNING: Microwave heating of
beverages can result in delayed eruptive
boiling, therefore care must be taken
when handling the container.
WARNING: The contents of feeding
bottles and baby food jars shall be
stirred or shaken and the temperature
checked before consumption, in order to
avoid burns.
Eggs in their shell and whole hard-boiled
eggs should not be heated in microwave
ovens since they may explode, even
after microwave heating has ended.
The oven should be cleaned regularly
and any food deposites removed.
Failure to maintain the oven in a clean
conditioin could lead to deterioration of
the surface that could adversely affect
the life of the appliance and possibly
result in a hazardous situation.
The appliance is not intended for
installing in road vehicles, caravans and
similar vehicles etc.
This appliance is not intended for use by
persons (including children) with reduced
physical, sensory or mental capabilities,
or lack of experience and knowledge,
unless they have been given supervision
or instruction concerning use of the
appliance by a person responsible for
their safety.
Children should be supervised to ensure
that they do not play with the appliance.
If the supply cord is damaged, it must be
replaced by the manufacturer, its service
agent or similarly qualified persons in
order to avoid a hazard.
WARNING: Liquids or other foods must
not be heated in sealed containers since
they are liable to explode;
English - 4
MC28H5013AW_BW_DE68-04234A-02_EN.indd 4
2014-07-11
5:12:02
During use the appliance becomes hot.
Care should be taken to avoid touching
heating elements inside the oven.
WARNING: Accessible parts may
become hot during use. Young children
should be kept away.
A steam cleaner is not to be used.
WARNING: Ensure that the appliance is
switched off before replacing the lamp to
avoid the possibility of electric shock.
WARNING: The appliance and its
accessible parts become hot during use.
Care should be taken to avoid touching
heating elements.
Children less than 8 years of age shall
be kept away unless continuously
supervised.
The temperature of accessible surfaces
may be high when the appliance is
operating.
The door or the outer surface may get
hot when the appliance is operating.
Keep the appliance and its cord out of
reach of children less than 8 years.
WARNING
(Oven function only) - Optional
WARNING: When the appliance is
operated in the combination mode,
children should only use the oven
under adult supervision due to the
temperatures generated.
01 SAFETY INFORMATION
The appliance should not be cleaned
with a water jet.
This oven should be positioned proper
direction and height permitting easy
access to cavity and control area.
Before using the your oven first time,
oven should be operated with the water
during 10 minute and then used.
If the oven generates a strange noise,
a burning smell, or smoke is emitted,
unplug the power plug immediately and
contact your nearest service center.
The microwave oven has to be
positioned so that plug is accessible.
The microwave oven is intended to be
used on the counter or counter top use
only, the microwave oven shall not be
placed in a cabinet.
English - 5
MC28H5013AW_BW_DE68-04234A-02_EN.indd 5
2014-07-11
5:12:02
This appliance can be used by
children aged from 8 years and above
and persons with reduced physical,
sensory or mental capabilities or lack of
experience and knowledge if they have
been given supervision or instruction
concerning use of the appliance in a
safe way and understand the hazards
involved. Children shall not play with
the appliance. Cleaning and user
maintenance shall not be made by
children without supervision.
Do not use harsh abrasive cleaners or
sharp metal scrapers to clean the oven
door glass since they can scratch the
surface, which may result in shattering of
the glass.
Appliances are not intended to be
operated by means of an external timer
or separate remote-control system.
This product is a Group 2 Class B ISM
equipment. The definition of group 2 which
contains all ISM equipment in which radiofrequency energy is intentionally generated
and/or used in the form of electromagnetic
radiation for the treatment of material, and
EDM and arc welding equipment.
For Class B equipment is equipment
suitable for use in domestic establishments
and in establishments directly connected
to a low voltage power supply network
which supplies buildings used for domestic
purposes.
INSTALLING YOUR MICROWAVE OVEN
Place the oven on a flat level surface 85 cm
above the floor. The surface should be strong
enough to safety bear the weight of the oven.
20 cm
10 cm
1.When you install your oven,
above
behind
make sure there is adequate
ventilation for your oven by
85 cm of
10 cm on
leaving at least 10 cm (4 inches) the floor the side
of space behind and, on the sides of the
oven and 20 cm (8 inches) of space above.
2.Remove all packing materials inside the oven.
3.Install the roller ring and turntable. Check
that the turntable rotates freely.
(Turntable type model only)
4.This microwave oven has to be positioned
so that plug is accessible.
English - 6
MC28H5013AW_BW_DE68-04234A-02_EN.indd 6
2014-07-11
5:12:03
CLEANING YOUR MICROWAVE OVEN
The following parts of your microwave oven
should be cleaned regularly to prevent
grease and food particles from building up:
•Inside and outside surfaces
•Door and door seals
•Turntable and Roller rings
(Turntable type model only)
ALWAYS ensure that the door seals are
clean and the door closes properly.
Failure to maintain the oven in a clean
condition could lead to deterioration of the
surface that could adversely affect the life
of the appliance and possibly result in a
hazardous situation.
1.Clean the outside surfaces with a soft cloth
and warm, soapy water. Rinse and dry.
2.Remove any splashes or stains on the
inside surfaces of oven with a soapy cloth.
Rinse and dry.
3.To loosen hardened food particles and
remove smells, place a cup of diluted
lemon juice in the oven and heat for ten
minutes at maximum power.
4.Wash the dishwasher-safe plate whenever
necessary.
DO NOT spill water in the vents. NEVER
use any abrasive products or chemical
solvents. Take particular care when
cleaning the door seals to ensure that no
particles:
•Accumulate
•Prevent the door from closing correctly
01 SAFETY INFORMATION
If the supply cord is damaged, it must be
replaced by the manufacturer, its service
agent or similarly qualified persons in
order to avoid a hazard.
For your personal safety, plug the cable
into a proper AC earthed socket.
Do not install the microwave oven in hot or
damp surroundings like next to a traditional
oven or radiator. The power supply
specifications of the oven must be respected
and any extension cable used must be
of the same standard as the power cable
supplied with the oven. Wipe the interior and
the door seal with a damp cloth before using
your microwave oven for the first time.
English - 7
MC28H5013AW_BW_DE68-04234A-02_EN.indd 7
2014-07-11
5:12:03
Clean the microwave oven cavity right after
each use with a mild detergent solution, but
let the microwave oven cool down before
cleaning in order to avoid injury.
When cleaning the upper
part inside the cavity, it will
be convenient to turn heater
downward by 45 ° and clean it.
(Swing heater model only)
STORING AND REPAIRING YOUR
MICROWAVE OVEN
A few simple precautions should be taken
when storing or having your microwave oven
serviced.
The oven must not be used if the door or
door seals are damaged:
•Broken hinge
•Deteriorated seals
•Distorted or bent oven casing
Only a qualified microwave service technician
should perform repair
NEVER remove the outer casing from
the oven. If the oven is faulty and needs
servicing or you are in doubt about its
condition:
•Unplug it from the wall socket
•Contact the nearest after-sales service
centre
If you wish to store your oven away
temporarily, choose a dry, dustfree place.
Reason : Dust and damp may adversely
affect the working parts in the oven.
This microwave oven is not intended for
commercial use.
The Light bulb should not be replaced in
person for safety reasons.
Please contact nearest authorised
Samsung customer care, to arrange for a
qualified engineer to replace the bulb.
WARNING
Only qualified staff should be allowed to modify or
repair the appliance.
Do not heat liquids and other food in sealed
containers for microwave function.
For your safety, do not use high-pressure water
cleaners or steam jet cleaners.
Do not install this appliance; near heater,
inflammable material; in a humid, oily or dusty
location, in a location exposed to direct sunlight and
water or where gas may leak; on un level ground.
This appliance must be properly grounded in
accordance with local and national codes.
English - 8
MC28H5013AW_BW_DE68-04234A-02_EN.indd 8
2014-07-11
5:12:04
Remove all foreign substances such as dust or
water from the power plug terminals and contact
points using a dry cloth on a regular basis.
Do not use a damaged power plug, damaged power
cord or loose wall socket. When the power plug
or power cord is damaged, contact your nearest
service centre.
Do not pull or excessively bend or place heavy
objecton the power cord.
Do not pour or directly spray water onto the oven.
Do not place objects on the oven, inside or on the
door of the oven.
Do not touch the power plug with wet hands.
Do not spray volatile material such as insecticide
onto the surface of the oven.
Do not turn the appliance off by unplugging the
power plug while an operation is in progress.
01 SAFETY INFORMATION
In the event of a gas leak (such as propane gas, LP
gas, etc.), ventilate immediately without touching the
power plug.
Do not store flammable materials in the oven. Take
special care when heating dishes or drinks that
contain alcohol as alcohol vapours may contact a
hot part of the oven.
Do not insert fingers or foreign substances, If any
foreign substance such as water has entered the
appliance, unplug the power plug and contact your
nearest service centre.
Keep children away from the door when opening or
closing it as they may bump themselves on the door
or catch their fingers in the door.
Do not apply excessive pressure or impact to the
appliance.
WARNING: Microwave heating of beverages can
result in delayed eruptive boiling, therefore care must
be taken when handling the container; To prevent
this situation ALWAYS allow a standing time of at
least 20 seconds after the oven has been switched
off so that the temperature can equalize. Stir during
heating, if necessary, and ALWAYS stir after heating.
In the event of scalding, follow these FIRST AID
instructions:
Do not place the oven over a fragile object such as a
sink or glass object.
Do not use benzene, thinner, alcohol, steam cleaner
or high pressure cleaner to clean the appliance.
Ensure that the power voltage, frequency and
current are the same as those of the product
specifications.
• Immerse the scalded area in cold water for at
least 10 minutes.
• Cover with a clean, dry dressing.
• Do not apply any creams, oils or lotions.
Plug the power plug into the wall socket firmly. Do
not use a multiple plug adapter, an extension cord or
an electric transformer.
Do not hook the power cord on a metal object,
insert the power cord between the objects or behind
the oven.
Do not put the tray or rack in water shortly after
cooking because it may cause breakage or damage
of the tray or rack.
English - 9
MC28H5013AW_BW_DE68-04234A-02_EN.indd 9
2014-07-11
5:12:06
Do not operate the microwave oven for deep
fat frying because the oil temperature cannot be
controlled.
This could result in a sudden boil over of the hot
liquid.
Stir liquids halfway during heating or after heating
ends and allow the liquid stand at least 20 seconds
after heating to prevent eruptive boiling.
Stand at arms length from the oven when opening
the door to avoid getting scalded by escaping hot air
or steam.
CAUTION
Do not operate the microwave oven when it is
empty. The microwave oven will automatically
shut down for 30 minutes for safety purposes. We
recommend placing a glass of water inside the oven
at all times to absorb microwave energy in case the
microwave oven is started accidentally.
Only use utensils that are suitable for use in
microwave ovens; DO NOT use any metallic
containers, Dinnerware with gold or silver trimmings,
Skewers, forks, etc.
Remove wire twist ties from paper or plastic bags.
Reason: Electric arcing or sparking may occur and
may damage the oven.
Install the oven in compliance with the clearances stated
in this manual. (See installing your microwave oven.)
Do not use your microwave oven to dry papers or
clothes.
Use shorter times for smaller amounts of food to
prevent overheating and burning food.
Do not immerse the power cable or power plug in
water and keep the power cable away from heat.
Eggs in their shell and whole hard-boiled eggs
should not be heated in microwave ovens since they
may explode, even after microwave heating has
ended; Also do not heat airtight or vacuum-sealed
bottles, jars, containers, nuts inshells, tomatoes etc.
Do not cover the ventilation slots with cloth or paper.
They may catch fire as hot air escapes from the
oven. The oven may also overheat and switch itself
off automatically, and will remain off until it cools
sufficiently.
Always use oven mitts when removing a dish from
the oven to avoid unintentional burns.
Take care when connecting other electrical
appliances to sockets near the oven.
PRECAUTIONS TO AVOID POSSIBLE EXPOSURE TO EXCESSIVE
MICROWAVE ENERGY.(MICROWAVE FUNCTION ONLY)
Failure to observe the following safety precautions may result in harmful exposure to
microwave energy.
(a) Under no circumstances should any attempt be made to operate the oven
with the door open or to tamper with the safety interlocks (door latches) or to
insert anything into the safety interlock holes.
(b) Do NOT place any object between the oven door and front face or allow
food or cleaner residues to accumulate on sealing surfaces. Ensure that the
door and door sealing surfaces are kept clean by wiping after use first with a
damp cloth and then with a soft dry cloth.
(c) Do NOT operate the oven if it is damaged until it has been repaired by a
qualified microwave service technician trained by the manufacturer. It is
particularly important that the oven door closes properly and that there is no
damage to the:
(1) door (bent)
(2) door hinges (broken or loose)
(3) door seals and sealing surfaces
(d) The oven should not be adjusted or repaired by anyone other than a properly
qualified microwave service technician trained by the manufacturer.
English - 10
MC28H5013AW_BW_DE68-04234A-02_EN.indd 10
2014-07-11
5:12:07
quick look-up guide
I want to cook some food.
1. Place the food in the oven. Press the Microwave button.
2. Press the Up or Down button until the appropriate power
level is displayed.
At that time, press the Select button to set the power level.
3. Select the cooking time by pressing the Up or Down button
as required.
4. Press Start button.
Result:
Cooking starts.
• When cooking has finished, the oven will
beep and flash “End” 4 times. The oven
will then beep one time per minute.
02 QUICK LOOK-UP GUIDE
Samsung will charge a repair fee for replacing an accessory or repairing a cosmetic
defect if the damage to the unit and/or damage to or loss of the accessory was
caused by the customer. Items this stipulation covers include:
(a) A Dented, Scratched, or Broken Door, Handle, Out-Panel, or Control Panel.
(b) A Broken or missing Tray, Guide Roller, Coupler, or Wire Rack.
• Use this appliance only for its intended purpose as described in this
instruction manual. Warnings and Important Safety Instructions in this
manual do not cover all possible conditions and situations that may occur.
It is your responsibility to use common sense, caution, and care when
installing, maintaining, and operating your appliance.
• Because these following operating instructions cover various models,
the characteristics of your microwave oven may differ slightly from those
described in this manual and not all warning signs may be applicable. If you
have any questions or concerns, contact your nearest service centre or find
help and information online at www.samsung.com.
• This microwave oven is supposed for heating food. It is intended for
domestic home-use only. Do not heat any type of textiles or cushions filled
with grains, which could cause burns and fire. The manufacturer cannot be
held liable for damage caused by improper or incorrect use of the appliance.
• Failure to maintain the oven in a clean condition could lead to deterioration of
the surface that could adversely affect the life of the appliance and possible
result in a hazardous situation.
CORRECT DISPOSAL OF THIS PRODUCT
(WASTE ELECTRICAL & ELECTRONIC EQUIPMENT)
(Applicable in countries with separate collection systems)
This marking on the product, accessories or literature indicates that the product and
its electronic accessories (e.g. charger, headset, USB cable) should not be disposed
of with other household waste at the end of their working life. To prevent possible
harm to the environment or human health from uncontrolled waste disposal, please
separate these items from other types of waste and recycle them responsibly to
promote the sustainable reuse of material resources.
Household users should contact either the retailer where they purchased this
product, or their local government office, for details of where and how they can take
these items for environmentally safe recycling.
Business users should contact their supplier and check the terms and conditions
of the purchase contract. This product and its electronic accessories should not be
mixed with other commercial wastes for disposal.
English - 11
MC28H5013AW_BW_DE68-04234A-02_EN.indd 11
2014-07-11
5:12:08
oven features
I want to Power Defrost some food.
1. Press the Power Defrost button.
OVEN
1
2
4
3
5
2. Set the cooking category by pressing the Up or Down
button. Press Select button to set desired.
3. Select the weight by pressing the Up or Down button as
required.
4. Press Start button.
Result:
Defrosting starts.
• When cooking has finished, the oven will
beep and flash “End” 4 times. The oven
will then beep one time per minute.
6
7
8
9
10
11
1. DOOR HANDLE
7. TURNTABLE
2. DOOR
8. COUPLER
3. VENTILATION HOLES
9. ROLLER RING
4. HEATING ELEMENT
10. SAFETY INTERLOCK HOLES
5. LIGHT
11. CONTROL PANEL
6. DOOR LATCHES
English - 12
MC28H5013AW_BW_DE68-04234A-02_EN.indd 12
2014-07-11
5:12:09
CONTROL PANEL
ACCESSORIES
Depending on the model that you have purchased, you are supplied with several
accessories that can be used in a variety of ways.
1. Roller ring, to be placed in the centre of the oven.
The roller ring supports the turntable.
2.Turntable, to be placed on the roller ring with the centre
fitting on to the coupler.
Purpose:
The turntable serves as the main cooking
surface; it can be easily removed for
cleaning.
3. High rack, Low rack, to be placed on the turntable.
Purpose:
1.
2.
3.
4.
5.
6.
7.
8.
RUSSIA CUSINE BUTTON
HEALTHY COOKING BUTTON
DOUGH PROOF / YOGURT BUTTON
CONVECTION BUTTON
GRILL BUTTON
MICROWAVE BUTTON
POWER DEFROST BUTTON
MW+GRILL / MW+CONV. BUTTON
03 OVEN FEATURES
Purpose:
The metal racks can be used to cook
two dishes at the same time. A small dish
may be placed on the turntable and a
second dish on the rack. The metal racks
can be used in grill, convection and
combination cooking.
9. CHILD LOCK BUTTON
10. TURN TABLE ON / OFF BUTTON
11. DEODORISATION BUTTON
12. CLOCK BUTTON
13. DOWN BUTTON
14. SELECT BUTTON
15. UP BUTTON
16. STOP / ECO BUTTON
17. +30s BUTTON
18. START BUTTON
English - 13
MC28H5013AW_BW_DE68-04234A-02_EN.indd 13
2014-07-11
5:12:10
oven use
CHECKING THAT YOUR OVEN IS OPERATING
CORRECTLY
HOW A MICROWAVE OVEN WORKS
The following simple procedure enables you to check that your oven is working correctly
at all times. If you are in doubt, refer to the section entitled “Troubleshooting” on the
42-43 page.
Microwaves are high-frequency electromagnetic waves; the energy released enables
food to be cooked or reheated without changing either the form or the colour.
You can use your microwave oven to:
• Defrost
• Reheat
• Cook
Cooking principle.
1. The microwaves generated by the magnetron reflected at
cavity and are distributed uniformly as the food rotates on
the turntable. The food is thus cooked evenly.
The oven must be plugged into an appropriate wall socket. The turntable must be
in position in the oven. If a power level other than the maximum (100 % - 900 W) is
used, the water takes longer to boil.
Open the oven door by pulling the handle on the right side of the door.
Place a glass of water on the turntable. Close the door.
2. The microwaves are absorbed by the food up to a depth of
about 1 inch (2.5 cm). Cooking then continues as the heat is
dissipated within the food.
Operate the Microwave mode and set the time to 4 or 5 minute
by pressing the +30s or Up and Down button the appropriate
number of time.
Result:The oven heats the water for 4 or 5 minutes.
The water should then be boiling.
3. Cooking times vary according to the container used and the
properties of the food:
• Quantity and density
• Water content
• Initial temperature (refrigerated or not)
As the centre of the food is cooked by heat dissipation, cooking continues even
when you have taken the food out of the oven. Standing times specified in recipes
and in this booklet must therefore be respected to ensure:
• Even cooking of the food right to the centre
• The same temperature throughout the food.
English - 14
MC28H5013AW_BW_DE68-04234A-02_EN.indd 14
2014-07-11
5:12:11
SETTING THE TIME
COOKING/REHEATING
Your microwave oven has an inbuilt clock. When power is supplied, “88:88” and then
“12:00” is automatically displayed on the display.
Please set the current time. The time can be displayed in either the 24-hour or 12-hour
notation. You must set the clock:
• When you first install your microwave oven
• After a power failure
The following procedure explains how to cook or reheat food.
ALWAYS check your cooking settings before leaving the oven unattended.
Open the door. Place the food in the centre of the turntable. Close the door. Never switch
the microwave oven on when it is empty.
Auto energy saving function
If you do not select any function when appliance is in the middle of setting or
operating with temporary stop condition, function is canceled and clock will be
displayed after 25 minutes.
Oven Lamp will be turned off after 5 minutes with door open condition.
1. Press the Microwave button.
Result:
The following indications are displayed:
(microwave mode)
2. Press the Up or Down button until the appropriate power
level is displayed.
At that time, press the Select button to set the power level.
• If don't set the power level within 5 seconds,
Automatically changes to the cooking time setting stage.
1. Press the Clock button.
04 OVEN USE
Do not forget to reset the clock when you switch to and from summer and winter
time.
3. Set the Cooking time by pressing the Up or Down button.
Result:
2. Press the Up or Down button to set time display type (12H
or 24H). At that time, press the Select ( ) button to set
the display type.
The cooking time is displayed.
4. Press the Start button.
3. Press the Up or Down button to set the hour.
4. Press the Select button.
Result:
The oven light comes on and the turntable
starts rotating. Cooking starts and when it
has finished:
• The oven beep and flash “End” 4 times.
The oven will then beep one time per
minute.
5. Press the Up or Down button to set the minute.
6. When the right time is displayed, press the Select button to
start the clock.
Result:
The time is displayed whenever you are not
using the microwave oven.
English - 15
MC28H5013AW_BW_DE68-04234A-02_EN.indd 15
2014-07-11
5:12:12
POWER LEVELS AND TIME VARIATIONS
STOPPING THE COOKING
The power level function enables you to adapt the amount of energy dissipated and thus
the time required to cook or reheat your food, according to its type and quantity. You can
choose between six power levels.
You can stop cooking at any time so that you can:
• Check the food
• Turn the food over or stir it
• Leave it to stand
Power level
Percentage
Output
HIGH
MEDIUM HIGH
MEDIUM
MEDIUM LOW
DEFROST
LOW
100 %
67 %
50 %
33 %
20 %
11 %
900 W
600 W
450 W
300 W
180 W
100 W
To stop the cooking...
Then...
Temporarily
Temporarily : Open the door or Press the stop button
once.
Result:
Cooking stops.
To resume cooking, close the door again and press
the Start button.
Completely : Press the stop button once.
Result:
Cooking stops.
If you wish to cancel the cooking settings, press the
Stop / Eco button again.
Completely
The cooking times given in recipes and in this booklet correspond to the specific power
level indicated.
If you select a...
Then the cooking time must be...
Higher power level
Lower power level
Decreased
Increased
SETTING THE ENERGY SAVE MODE
The oven has an energy save mode.
• Press the Stop / Eco button. (During Standby mode.)
Result :
Display off.
ADJUSTING THE COOKING TIME
You can adjust the cooking time by pressing the +30s, Up and Down button.
• To remove energy save mode, open the door or press the
Stop / Eco button and then display shows current time.
The oven is ready for use.
• Check how cooking is progressing at any time simply by opening the door
• Increase the remaining cooking time
To increase the cooking time of your food, press the +30s
button once for each 30 seconds that you wish to add.
• Example: To add three minutes, press the +30s button six
times.
To adjust the cooking time, press the Up or Down button.
English - 16
MC28H5013AW_BW_DE68-04234A-02_EN.indd 16
2014-07-11
5:12:13
USING THE RUSSIA CUSINE FEATURES
The sixty Russia Cusine features include/provide pre-programmed cooking times. You
do not need to set either the cooking times or the power level.
The following table presents quantities and appropriate Instructions about 60 Russia
Cusine Programmes.
Use only recipients that are microwave-safe.
Use oven gloves when taking out food.
Open the door. Place the food in the centre of the turntable. Close the door.
Code/Food
1-1
Porridge
2. Press the Up or Down button to select cook category.
3. Select the cook category by pressing the Select button.
1-2
Buckwheat
4. Press the Up or Down button to select cook type. Refer
to the table on the following page for a description of the
various pre-programmed settings.
1-3
Cheese toast
5. Press the Start button.
Result:
The food is cooked according to the preprogrammed setting selected.
• When cooking has finished, the oven will
beep and flash “End” 4 times. The oven
will then beep one time per minute.
1-4
Poached egg
1-5
Bread with
canned salmon
and hot
mayonnaise
1-6
Sausages with
canned pea
Ingredients / Instructions
Dry Russian porridge (Hercules) - 50 g, Sugar - 5 g, Salt - 0.5 g,
Boiling water - 200 ml, Cold Milk - 150 ml
Put into a big bowl shaped plate dry porridge, sugar, salt. Add
boiling water, milk, mix well. Start cooking. After preparation add
the butter, salt, sugar.
Buckwheat - 100 g, Salt - 2 g, Boiling water - 300 ml
Put into a bowl shaped plate buckwheat, salt. Add boiling water,
mix well. Start cooking. After preparation add the butter, salt, sugar.
Toast bread - 2 pc (26 to 28 g/pc), Cheese - 2 pc (20 g/pc)
Put on two toasts to the high rack. Start cooking. As soon as
oven beeps, upside down toasts and put on cheese to the
toasts. And continue cooking process.
Egg - 1 pc, Water - 300 ml, Russian vinegar 9 % - 10 to 15 ml
Put in bowl with water & vinegar into microwave oven. Bring
water to a boil. As soon as oven beeps, put out the bowl with
boiling water & vinegar. To make a funnel by a fork into the bowl,
drop inside egg without shell. Continue cooking process.
Bread - 2 pc (22 g/pc), Canned Salmon - 60 g (30 g/pc),
Mayonnaise - 36 g (18 g/pc), Chives (chopped) - 2 to 5 g
Put on two bread pieces to the high rack. Start cooking. As
soon as oven beeps, take away bread. And upside down bread
and put on canned salmon and mayonnaise to bread. Continue
cooking process. Decorate chopped chives on top.
Sausages - 2 pc (50 g/pc), Butter - 5 g, Canned pea - 135 g (dry
weight)
Put into a plate pricked sausages without plastic cover, add
butter a side. Put on the top of butter canned pea. Start cooking.
(continued)
04 OVEN USE
1. Breakfast
1. Press the Russian Cusine button.
English - 17
MC28H5013AW_BW_DE68-04234A-02_EN.indd 17
2014-07-11
5:12:13
Code/Food
Ingredients / Instructions
1-7
Omelette
Code/Food
Egg - 3 pc, Milk - 30 ml, Salt - 2 g
Whisk the egg with milk and salt, pour out egg to a plate. Start
cooking. After preparation add the butter.
Custard cheese - 90~100 g, Wheat - 10 g, Sugar (vanilla infused
1-8
sugar) - 10 g, Salt - 0.5 g, Egg - ¼ pc, Butter - 5~10 g (for
Syrniki
greasing), Fluor - 30 g
All ingredients except butter mix well. Make two tablet forms.
Grease on butter to the tablet forms. Put it on wax paper and on
high rack. Start cooking. As soon as oven beeps, upside down
tablet forms and continue cooking process.
Sugar - 45 g, Vanilla infused sugar - 5 g, Butter - 40 g, Egg 1-9
0.5 pc, Milk - 30 ml, Baking powder - 3 g, Wheat - 100 g
Keks
Mix well sugar, infused sugar and butter. Add beaten egg. Add
all next ingredients. Put it into a buttered bowl. Start cooking.
Give it cold before removing out the bowl.
Wheat - 100 g, Butter - 50 g, Sugar - 40 g, Egg yolk - 0.5 pc,
1-10
Warm water - 1 tbsp, Lemon zests, For topping: Egg yolk - 1 pc,
Lemon
shortbread bolls Ice sugar - 3~5 g
Mix well all ingredients. Make five balls. Put it on wax paper. Put
it on turntable. Start cooking. As soon as oven beeps, grease
egg yolk on the balls top, sprinkle with ice sugar and continue
cooking process. Leave it to cold.
Chicken livers - 500 g, Onions - 2 (thinly sliced), Garlic - 1 clove
1-11
(crushed), Cream (20 % fat) - 120 ml, Butter - 60 g, Vegetable
Chicken liver
oil - 2 tbsp, Salt and pepper
pate
Place in a large bowl, cream and vegetable oil, onion and garlic,
cover and place in oven then cook. When beeps, add 2 chicken
livers and cook again. Remove from oven and let it cool down.
To blend into a homogeneous mass, add cream, salt and
pepper. Transfer to a rectangular shape, smooth surface, cover
with foil and put to refrigerator for 2-3 hours. Blend it once more.
Serve with toast.
1-12
Vegetable
frittata
1-13
Sesame cheese
biscuits
1-14
Chocolate
cookies
1-15
Buckwheat
pudding
Ingredients / Instructions
Large potatoes (peeled and cut into thin circles) - 2, Onion (thinly
sliced) - 1, Eggs - 5, Small zucchini - 2, Red sweet pepper - 2,
Cream (cream milk, 35 % fat) - 450 ml, Grated parmesan cheese
- 2 tbsp
Spread 1 cup of potatoes and onions in a round baking dish
so that the entire bottom was closed. Mix the cream with the
eggs, pour half the mixture into the potatoes and place in MWO.
Zucchini and peppers cut into thin strips. Arrange potatoes in a
circle on the “rays of” pour the remaining cream and egg mixture,
sprinkle with Parmesan cheese. Start cooking.
Flour - 1 Cup, Butter - 125 g, Cheese with blue mold (Dorblue) 60 g, Grated parmesan cheese - 2 tbsp, Chopped green onions
- 0.25 Cup, Sesame seeds - 0.5 Cup
Sift flour on the table. Butter cut into small pieces and rub into
the flour. Add crumbled blue cheese, parmesan and green
onions. Mix well. Close the dough into a ball, wrap in foil and
place in refrigerator for 30 minutes. Divide the dough into small
balls, roll them in sesame.
Place on lightly greased baking sheet and cook.
Flour - 1.5 Cups, Pinch of salt, Butter - 120 g, Dark chocolate 125 g, Sugar - 0.5 cups, Egg - 1, Chopped walnuts - 60 g
Put in a bowl of melted butter and chocolate and sugar then
allow to cool. Beat in the egg mixture, add the sifted flour and
salt. Mix well. Add nuts, steer again. Tablespoons of the dough
circles spread out onto a lightly greased baking sheet. Then
cook.
(а) Custard cheese 9 % - 120 to 140 g, Sugar - 10 to 15 g, Salt 0.5 g, Egg - ½ pc, Ready cooked buckwheat - 140 g
(b) Butter - 5 g, Bread crumbs - 1 to 2 g
(c) Sour cream - 30 g
Mix all ingredients(a). Put into buttered and covered with bread
crumbs bowl shaped plate(b). Cover sour cream on top(c). Start
cooking.
English - 18
MC28H5013AW_BW_DE68-04234A-02_EN.indd 18
2014-07-11
5:12:13
2. Lunch
Code/Food
2-1
Borsch
2-3
Meat solyanka
2-4
Vegetable soup
Code/Food
Ingredients / Instructions
2-5
Chicken noodle
soup
Vermicelli - 15 g, Chicken fillet - 50 g, Carrot graded - 15 g,
Onion julienned - 10 g, Chicken stock or water with dry
concentrate - 440 ml. Greenary for serving
Put vermicelli into a big bowl, add boiling stock. Cut fillet into
slices and add with all other ingredients. Mix well and start
cooking.
(1) White bread - 10 g, Milk - 15 ml
(2) Pork & beef minced meat -120 g, Salt - 2 g, Black pepper 1 g
(3) Bread crumbs - 5 g
Drop milk to bread(1). Mix it well with minced meat. Add
spices(2). Form it in two balls, cover with bread crumbs(3). Put it
on a plate on the high rack. Start cooking.
Salmon steak with bone and skin - 200 to 250 g, Salt - 1 g,
Lemon - 15 g (squeeze juice), Oil - 5 g
Salmon steak season, oil. Put it on a plate. Put the plate on the
low rack and start cooking.
(1) Pork neck - 150 g, Carrot graded - 20 g, Onion julienned 20 g, Chicken stock or water with dry concentrate - 100 ml
(2) Mix for sauce: Wheat - 5 g, Dijon mustard - 20 g, Sour Cream
- 30 g, Water - 50 ml
Cut meat into batons, prepare vegetables.add chicken stock.(1)
Pour into a plate. Mix well and start cooking.
Prepare all ingredients for the mix for sauce(2). As soon as oven
beeps, Pour the mix into stock with meat, mix it and continue
cooking process.
Frozen Pelmeni - 15 pc (10 to 12 g one piece), Chicken stock or
water with dry concentrate - 400 ml, Whole black pepper - 3 to
5 pc, Bay leaf - 1 pc.
Put all ingredients into a big bowl plate, add boiling stock.
Cover with a plastic bowl shaped lid. Start cooking. After
preparation add the butter, sour cream.
(continued)
2-6
Cutlets
2-7
Grilled salmon
steak
2-8
Pork neck with
mustard sauce
2-9
Pelmeni
04 OVEN USE
2-2
Schi
Ingredients / Instructions
(1) Beetroot graded - 50 g, Cabbage julienned - 20 g, Carrot
graded - 15 g, Onion julienned - 10 g, Tomato paste - 15 g,
Sugar - 5 g
(2) Beef stock or water with dry concentrate - 650 ml, Bay leaf
- 1 pc
Russian vinegar 9 % - 5 ml if you like. Garlic, greenary and sour
cream for serving
Put all ingredients(1) into a big bowl, add hot stock and start
cooking. As soon as oven beeps, add bay leaf. Mix well and
continue cooking process.
(1) Cabbage julienned - 45 g, Carrot graded - 15 g, Onion
julienned - 10 g, Potato batons - 25 g, Tomato paste - 10 g, Beef
stock or water with dry concentrate - 400 ml
(2) Beef stock or water with dry concentrate - 100 ml, Bay leaf 1 pc. Greenary for serving
Put all ingredients(1) into a big bowl, add boiling stock. Start
cooking. As soon as oven beeps, mix well, add stock, bay
leaf(2). And continue cooking process.
(1) Onion julienned - 45 g, Beef stock or water with dry
concentrate - 350 ml
(2) Capers - 7 g, Salted cucumber graded - 50 g, Tomato paste
- 30 g, Black Olives - 16 g, Liquid of Black Olives - 20 ml, Bay
leaf - 1 pc, Meat assorted - 30 g, Beef stock or water with dry
concentrate - 350 ml
Put onion into a big bowl, add boiling stock(1). Start cooking. As
soon as oven beeps, add all next ingredients(2).
Mix well, add stock, bay leaf and continue cooking process.
Frozen vegetables - 150 g, Vegetable stock or water with dry
concentrate - 300 ml. Greenary for serving
Put all ingredients into a big bowl, add boiling stock. Start
cooking.
English - 19
MC28H5013AW_BW_DE68-04234A-02_EN.indd 19
2014-07-11
5:12:13
Code/Food
2-10
Dry fruit
compote
2-11
Chinese
chicken wings
2-12
Fish with
crunchy cheese
topping
2-13
Fish with
broccoli and
almonds
Ingredients / Instructions
Code/Food
Dry apricot - 25 g, Prune - 20 g, Dry apple - 15 g, Sugar - 10 g,
Lemon acid - 2 dash, Boiling water - 600 ml
Put all ingredients into a big bowl, add boiling water. Start
cooking.
Chicken wings - 12, Soy sauce - 0.3 Cup, Honey - 2 tbsp, Dry
white wine - 2 tbsp, Vegetable oil - 2 tbsp, Minced clove of garlic
- 1, Grated ginger root - 0.5 tsp, sesame seeds
A phalanx of the extreme wings tuck inside. Mix soy sauce,
honey, wine, oil, garlic and ginger. Put the wings in the marinade
and refrigerator for one night. On the next day to pass the wings
on a baking sheet, sprinkle with sesame seeds on the low rack
and start cook.
Fillets of white sea fish - 4 (200 g each), Bacon (finely chopped)
- 2 strips, Finely chopped nuts - 0.25 Cup, White bread crumbs 1 cup, Soft cheese like Camembert - 125 g, Butter - 3 tbsp
Place a fish fillet in a suitable form for baking. Cheese cut into
very thin slices and place on top of fish. Mix the melted butter
with bacon, walnuts and bread crumbs. Put an even layer on fish
and start to cook.
Walleye fillets (fish, 400 g each) - 2, Orange juice - 1.5 Cup, Zest
of orange - 1, Small head broccoli - 1, Chopped almonds into
crumbs - 0.3 Cup, Butter - 2 tbsp, Cornstarch - 3 tbsp, Salt and
pepper
Mix the melted butter and cook the starch in oven during 1 min
with 900 W. Add orange juice and zest, continue to cook another
2 minutes with 900 W. Cut the broccoli into small florets. Place
the perch fillet in a suitable form on the sides to put broccoli
florets, cooked pour the sauce and sprinkle with nuts. Start to
cook.
2-14
Calamari with
pesto
2-15
Beef stroganoff
Ingredients / Instructions
Squid rings - 500 g, Dry white wine - 0.5 Cups, Lemon juice 2 tbsp
For the sauce: Basil leaves - 1.5 Cup, Roasted pine nuts 0.25 Cup, Crushed cloves of garlic - 2, Olive oil - 0.5 Cup, Salt
and pepper
Prepare the sauce. Blender chop the basil leaves, nuts and garlic
in a homogeneous mass. Continuing to whisk, pour in olive oil.
To add salt and pepper. Two rings of squid in a bowl, pour the
wine and lemon juice, mix well and place in oven and cook. Stir
the sauce finished ring.
Beef - 600 g, Onions (medium) - 2 (thinly sliced), Sour cream
- 100 g, Tomato paste - 25 g, Flour - 1 tbsp , Beef stock 1.5 Cups, Salt and pepper
The meat cut into pieces of a 20 mm thick pieces, repel to a
thickness of 7-10 mm, and then cut them into thin strips length
of 3-4 cm. Sprinkle with flour, salt and pepper and mix well.
Place the meat in the form and add the onion, tomato paste and
stock. Cover and place in oven then cook. When beeps, add the
cream and cook again.
English - 20
MC28H5013AW_BW_DE68-04234A-02_EN.indd 20
2014-07-11
5:12:13
3. Dinner
Code/Food
Ingredients / Instructions
3-1
Meatloaf with
hard boiled egg
Minced meat (beef & pork) - 150 g, Hardboiled egg - 1 pc, Salt - 2 g,
Black pepper powder - 0.5 g
3-3
Meat balls in
tomato sauce
Add spice into meat and mix hard by hand. Roll meat into round
form. Put in the center of meat round the egg. Cover the egg by
meat from all side. Form it in arc form. Put it on a plate. Put the
plate on the turntable. Start cooking.
(1) Meat ovals
(а) Minced meat (beef & pork) - 120 g, Cooked regular rice 25 g, Cabbage chopped - 25 g, Salt - 1 to 2 g, Black pepper
powder - 0.5 g
(b) Onion julienned - 30 g, Beef stock or water with dry
concentrate - 100 ml
(2) Mix for sauce: Wheat - 5 g, Tomato paste - 10 g, Sour Cream
- 30 g, Water - 50 ml
Add vegetables and spice into meat and mix hard by hand(a).
Form it in two ovals. Put onion into a bowl shaped plate.
Put meat ovals on it, add the stock(b). Put the plate on the
high rack. Start cooking. Prepare all ingredients for the Mix for
sauce(2). As soon as oven beeps, pour the mix into stock with
meat ovals. Upside down it and continue cooking process.
(1) Meat balls
(2) White bread - 30 g, Milk - 35 ml, Minced meat (beef & pork) 130 g, Salt - 1 to 2 g, Black pepper powder - 0.5 g
(3) Onion julienned - 15 g, Carrot julienned - 30 g, Beef stock or
water with dry concentrate - 100 ml
(4) Mix for sauce:
Wheat - 5 g, Tomato paste - 20 g, Water - 75 ml
Put bread into milk. Add it inside minced meat. Season it and
mix hard by hand(2). Form it in two balls.
Put onion and carrot into a bowl shaped plate(3). Put meat
balls on it, add the stock. Put the plate on the high rack. Start
cooking. Prepare all ingredients for the Mix for sauce(4). As soon
as oven beeps, pour the mix into stock with meat balls. Upside
down it and continue cooking process.
3-5
Turkey steamed
with vegetables
3-6
Baked potato
3-7
Ratatouille
3-8
Russian old
style fish
Ingredients / Instructions
Onion julienned - 15 g, Carrot julienned - 20 g, Chicken legs 2 pc (160 to 180 g), Prunes - 5 to 7 pc (50 g), Chicken stock or
water with dry concentrate - 150 ml
Put onion and carrot into a plate. Put chicken legs on it, add
prunes and the stock. Put the plate in microwave oven. Start
cooking. As soon as oven beeps, upside down it and continue
cooking process.
Turkey filet batons - 150 g, Zucchini julienned - 50 g, Onion
julienned - 15 g, Carrot julienned - 20 g, Chicken stock or water
with dry concentrate - 100 ml
Put all ingredients into a bowl shaped plate add boiling stock.
Start cooking.
Big size potato (160 - 200 g) - 1 to 2 pc
Peel potatoes, to put it to the not deep dish without water and
cover with food film. Put in microwave. Start cooking. Put butter
or sour cream or cheese or something else before serving.
Zucchini diced - 100 g, Carrot diced - 60 g, Bell pepper diced
- 75 g, Onion diced - 45 g, Garlic chopped - 6 g, Tomato paste
- 10 g, Oregano and Basil - to taste, Vegetables stock or water
with dry concentrate - 150 ml
Put all ingredients into a bowl shaped plate.
(Add oregano & basil). Mix well. Start cooking.
(1) Beetroot julienned - 30 g, Carrot julienned - 30 g, Onion
julienned - 15 g, Fish/Chicken stock or water with dry
concentrate - 200 ml
(2) Mix for sauce: Wheat - 10 g, Tomato paste - 10 g, Sour
cream - 30 g, Water - 50 ml
(3) Carp or pike perch filet - 150 g, Bay leaf - 1 pc
Put all ingredients into a bowl shaped plate add boiling stock.(1)
Start cooking. As soon as oven beep, stir in mix for sauce with
veg and stock (2). Add fish and bay leaf (3). Continue cooking
process.
(continued)
04 OVEN USE
3-2
Lazy cabbage
rolls
Code/Food
3-4
Chicken legs
with prunes
English - 21
MC28H5013AW_BW_DE68-04234A-02_EN.indd 21
2014-07-11
5:12:13
Code/Food
3-9
Moscow style
fish
3-10
Frozen pizza
3-11
Loin of pork
with spinach
and nuts
3-12
Meatballs with
rice
3-13
Honey roast
lamb
Ingredients / Instructions
Code/Food
Ingredients / Instructions
(1) Champignons - 30 g, Pike perch fillet - 150 g, Oil - 5 g
(2) Sour cream - 30 g (2 х 15 g)
(3) Backed potato round cut - 2 pc per 60 to 70 g, Salt - 5 g,
White pepper powder - 0.5 g, Graded cheese - 25 g
Put mushrooms on a plate fish aside. Drop oil on it(1). Start
cooking. As soon as oven beeps, put a half of sour cream on
a ceramic plate (in the center) (2). Put cooked mushrooms on
it. Put Fish on it. Season it. Put around fish cut potato. Put on
potato cheese(3). Continue cooking process.
Frozen pizza - 350 g
Put frozen pizza with wax paper on the grill rack. Start cooking.
Pork carbonado - 1 kg, Fresh frozen spinach - 250 g, Small
onion - 1 (chopped), Minced clove of garlic - 1, Pine nuts 3 tbsp, Fresh white bread crumbs - 0.25 Cup, Butter - 1 tbsp,
Salt and pepper
Prepare the filling. Defrost spinach, squeeze out excess liquid
well. Place butter and onion in a small form, put in oven for
1 minute with 900 W. Add the spinach, garlic, nuts and bread
crumbs. Season with salt and pepper, mix well. Open pork
carbonado with knife, beat it a little, add salt and pepper, put the
filling, twist rolls, fix with skewer and tighten with a thread. Place
in oven and cook. When beeps, turning once.
Ground beef - 500 g, Cooked rice - 2 Cup, Large onion
(chopped) - 1, Minced clove of garlic - 1, Egg - 1, Tomatoes in
juice - 400 g, Salt and pepper
Mix well cooked rice with minced meat, onions, garlic and egg.
Season with salt and pepper. Wet hands shape from small meat
balls with a diameter of approximately 5 cm. Put them in shape.
Add tomatoes, along with the juice and place in oven then cook.
When beeps, turning once.
Lamb leg - 1.5 kg, Honey - 3 tbsp, Mustard - 1 tbsp, Salt and
pepper
Mix the honey and mustard. Rub the lamb with salt and pepper,
brush with honey dressing. Place the meat on a baking sheet
and cook. When beeps, once turned.
3-14
Chicken cheese
rolls
Chicken fillets - 4, Brie cheese - 125 g, Chopped parsley 1 tbsp, Eggs - 2, Fresh white bread crumbs - 2 Cups, Salt and
pepper
Chicken fillet a repulse into a thin layer. With cheese, cut peel
and mash it together with the parsley. Place the fillets on each
one-quarter of the prepared stuffing. Close fillet rolls, secure with
wooden toothpicks edge. Dip each roll in beaten egg, then bread
crumbs. Place on baking sheet and cook.
Chicken (1.25 kg) - 1, Tomatoes in juice - 450 g, Dry red wine
- 0.5 Cup, Large onion - 1 (chopped), Pitted black olives 0.5 Cup, Small plates of sliced mushrooms - 250 g, Chopped
parsley - 2 tbsp, Curry powder - 1 tsp, Flour - 20 g, Salt and
pepper
Chicken cut into portions, rub with salt and pepper.
Mix mashed with a fork in the form of tomatoes, wine, onions,
olives, fluor and curry. Put the pieces in the shape of a chicken,
mix well. Cover and place in oven then start to cook. When
beeps, add the mushrooms and cook again. Before serving,
sprinkle with parsley.
3-15
Chicken in
tomato sauce
English - 22
MC28H5013AW_BW_DE68-04234A-02_EN.indd 22
2014-07-11
5:12:13
4. Special Occasions
Code/Food
4-2
Fish pie
rasstegai
4-3
Cheese in bread
crumbs
4-4
Chicken
shashlik
Ingredients / Instructions
Code/Food
(1) Bell pepper - 2 pc per 80 g, Minced meat (beef & pork) - 150
to 190 g (divide to two part), Cooked regular rice - 10 to 20 g,
Salt - 5 g, Black pepper powder - 0.5 g, Beef stock or water with
dry concentrate - 200 ml
(2) Mix for sauce: Wheat - 5 g, Tomato paste - 20 g, Water 50 ml
Add rice inside minced meat. Season it and mix hard by hand.
Remove the center and seeds from the pepper. Stuff pepper by
meat. Put it into a bowl shaped plate add stock(1). Start cooking.
Prepare all ingredients for the Mix for sauce(2). As soon as oven
beeps, pour the mix into stock with stuffed pepper. Upside down
it and continue cooking process.
(1) Frozen puff pastry (2 square forms) - ¼ part of form
(2) Filling: Pike perch filet small diced - 25 g, Champignons diced
- 6 g, Cooked regular rice - 4 g, Egg yolk - ¼ pc for brushing
Defrost the pastry. Cut pastry to necessary size(1).
Mix all ingredients for filling(2). Put filling in the center of piece of
pastry. Form it to boat. Brush it with egg yolk. Put it on a plate.
Put the plate on the low rack. Start cooking.
Cheese - 125 g (4 to 5 pc per 25 g each), Egg - 0.5 pc, Bread
crumbs - 3 to 5 g
Cut cheese into bricks. Put into egg yolk and covered with bread
crumbs. Put cheese on a wax paper. Then put it on the high
rack. Start cooking.
Chicken leg filet - 380 g, Tomato paste - 20 g, Salt - 5 g, Garlic
chopped - 3 g, Oil - 7 g, Regular yogurt - 70 g, Sticks. For
marinate: tomatoes, olive oil, salt, pepper, lemon peel
Cut filet into 3 x 3 cm dices. For marinate mix tomatoes smashed
in blender, olive oil, salt, pepper, lemon peel. Mix marinate with
chicken filet. Pickle meat for more than 1 hour. Put chicken
pieces to the wooden skewers.
Put it on the plate and on the high rack. Start cooking.
4-5
Boyar style
meat
4-6
Coulibiac with
salmon
4-7
Salmon shashlik
4-8
Trout baked
with vegetables
4-9
Cookies
Ingredients / Instructions
Pork neck - 280 g (cut in 4 pieces), Salt - 2 g, Black pepper
powder - 0.5 g, Champignons slices - 45 g, Mayonnaise - 55 g
Season meat. Put meat on the plate. Put plate on the high rack.
Start cooking. As soon as oven beeps, put champignons on
meat and cover with mayonaise. Continue cooking process.
Frozen puff pastry - 130 g
Filling: Salmon filet small diced - 100 g, Salt - 1 g, Pan fried onion
diced - 20 g, Hardboiled egg small diced - 30 g, Egg yolk - 1 pc
for brushing
Defrost pastry. Roll it to 2 mm thin. Mix all ingredients for filling.
Put filling in the center of pastry. Combine ends of the pastry
together. Form it. Make some cuts. Brush it by egg yolk. Put
formed pastry on a wax paper. Then put it on the low rack. Start
cooking.
Salmon big diced - 350 to 370 g, Lemon - 25 g (squeeze juice),
Salt - 5 g, Oil - 10 g, Parsley chopped - 10 g, Sticks
Mix all ingredients and fish. Marinate 15 - 20 min. Put on sticks it.
Put it on the plate and on the high rack. Start cooking.
Butter - 5 g, Carrot julienned - 35 g, Onion julienned - 25 g,
Garlic chopped - 3 g, Celery leaves chopped - 5 g, Trout - 1 pc
(220 to 250 g), Salt - 1 g, White pepper powder - 0.5 g, Butter
-5g
Grease butter in the centre of wax paper. Put carrot, onion,
garlic and celery on it. Put seasoned trout on vegetables. Grease
butter on top of the fish. Cover it. Put it into microwave oven and
start cooking.
Wheat - 85 g, Ice sugar - 25 g, Butter - 50 g, Egg - 0.5 ps, Salt
-1g
Mix well wheat, ice sugar and butter. Add salt and egg.
Mix well. Form it in two tablet forms. Put it with wax paper on the
low rack. Start cooking.
(continued)
04 OVEN USE
4-1
Bell pepper
stuffed with
meat
English - 23
MC28H5013AW_BW_DE68-04234A-02_EN.indd 23
2014-07-11
5:12:14
Code/Food
4-10
Cranberry fruit
drink
4-11
Lemon slice
4-12
Profiteroles with
chocolate
4-13
Apple pie
Ingredients / Instructions
Code/Food
Frozen cranberry - 50 g, Sugar - 35 g, Water - 200 ml
Frozen cranberry cut by mincer. Put all ingredients into a big
bowl. Start cooking. Cool and strain.
Flour - 1.5 Cup, Butter - 60 g, Sugar - 0.5 Cup, Egg - 1
For the filling: Condensed milk - 400 ml, Egg yolks - 2, Lemon
juice - 0.5 Cup
Melt the butter with the sugar and cool then drive an egg.
Add sifted flour and knead the dough. Put the dough in the form
of silicon with low bumpers. Mix the condensed milk with egg
yolks and lemon juice. Distribute evenly over the dough and put
in the oven and cook.
Flour - 1 Cup, Butter - 125 g, Water - 1 Cup, Eggs - 4, Dark
chocolate - 100 g, Whipped cream
In a bowl, mix butter with water and cook for 3 min with 600 W.
Allow to cool, add flour and mix well. One by one add the eggs,
mixing thoroughly each time. Transfer to a pastry bag and circles
to isolate the dough on a baking sheet then cook. Cut the
profiteroles and let cool on a wire rack. Fill with whipped cream.
Serve profiteroles with hot chocolate.
Flour - 2.5 Cup, Powdered sugar - 0.3 Cup, Chilled butter 185 g, Protein 1, Sugar - 1 tbsp
For the filling: Large apples - 4, Sugar - 4 tbsp + 2 tbsp
Sift the flour on the table along with the powdered sugar. Butter
cut into small cubes and rub into the flour. Add 1-2 tbsp water
and knead a soft elastic dough. Wrap it in foil and place in
refrigerator for 1 hour. Apples cut into thin slices, removing the
core. 2/3 roll out dough into a circle of diameter 22 cm. Cover
the baking dish them 18 cm in diameter, making the bumpers.
Place 3 slices of apples on the dough. Sprinkle with sugar. Roll
out remaining dough into a circle. Lubricate the edge of the cake
protein, cover with second piece of dough and tucks the edge.
Sprinkle with remaining sugar. Cook.
4-14
Walnut pie
4-15
Strawberry
roulade
Ingredients / Instructions
Flour - 1.5 Cup, Powdered sugar - 1 tbsp, Butter - 125 g, Lemon
juice - 1 tbsp
For the filling: Chopped walnuts - 250 g, Sugar - 0.75 Cup, Flour
- 2 tbsp, Honey - 1 Cup, Butter - 30 g, Eggs - 3
Sift the flour on the table along with the powdered sugar. Butter
cut into small cubes and rub into the flour. Add lemon juice
and 1 tbsp water. Knead the dough. Wrap it in foil and place
in refrigerator for 1 hour. Prepare the filling. Beat in blender,
honey, sugar, flour, butter and eggs into a homogeneous mass.
Put pastry into the form, making boards, to put filling regularly,
decorate with walnuts, pour the cooked mixture and place in the
oven then cook.
Flour - 2 Cups, Pinch of salt, Milk - 125 ml, Butter - 25 g,
Vegetable oil - 0.5 tbsp, Egg - 2, Sugar - 2 tbsp, Dry yeast - 7 g,
pinch of vanillin
For the filling: Strawberries - 700 g, Sugar - 0.5 Cup, Corn starch
- 2 tbsp
In a large bowl, dissolve yeast in warm milk, add sugar and
half the sifted flour and salt. Stir and leave for 1 hour. Add the
remaining flour, 1 egg, butter and vegetable oil. Knead the
dough and leave in a warm place for 1.5 hours. Once the dough
knead. Strawberries cut into slices and mix with sugar and
starch. Knead dough again and roll out on floured surface into a
very thin layer. Put the filling on the dough, leaving a free margin
(approximately 2 cm). Minimize plastic rolls, tucks the edge.
Brush with remaining lightly beaten egg. Place the loaf in the
oven then cook.
English - 24
MC28H5013AW_BW_DE68-04234A-02_EN.indd 24
2014-07-11
5:12:14
USING THE HEALTHY COOKING FEATURES
The fifteen Healthy Cooking features provide pre-programmed cooking times. You do
not need to set either the cooking times or the power level. You can adjust the size of the
serving by pressing the Up or Down button.
The following table presents quantities, standing times and appropriate Instructions about
15 Healthy Cooking Programmes. This is composed of Grain/Pasta(1), Vegetables(2)
and Poultry/Fish(3).
Use only recipients that are microwave-safe.
Use oven gloves when taking out food.
1. Grain/Pasta
1. Press the Healthy cook button.
Code/Food
2. Press the Up or Down button to select cook category.
3. Select the cook category by pressing the Select button.
4. Press the Up or Down button to select cook type.
Serving Size
Instructions
1-1
Brown Rice
150-200 g
200-250 g
Use a large glass ovenware dish with lid. Add
cold water of double quantity. Cook covered.
Stir before standing time and add salt and
herbs. Stand for 5-10 minutes.
1-2
Quinoa
150-200 g
200-250 g
1-3
Macaroni
100-150 g
200-250 g
Use a large glass ovenware dish with lid. Add
cold water of double quantity. Cook covered.
Stir before standing time and add salt and
herbs. Stand for 1-3 minutes.
Use a large glass ovenware dish with lid. Add
hot boiling water of 4 times, a pinch of salt and
stir well. Cook uncovered. Stir before standing
time and drain thoroughly afterwards. Stand
for 1-3 minutes.
5. Select the cook type by pressing the Select button.
04 OVEN USE
Open the door. Place the food in the centre of the turntable. Close the door.
6. Press the Up or Down button to select serving size. Refer
to the table on the following page for a description of the
various pre-programmed settings.
7. Press the Strat button.
Result:
The food is cooked according to the preprogrammed setting selected.
• When cooking has finished, the oven will
beep and flash “End” 4 times.
The oven will then beep one time per
minute.
English - 25
MC28H5013AW_BW_DE68-04234A-02_EN.indd 25
2014-07-11
5:12:14
2. Vegetables
Code/Food
2-1
Green Beans
3. Poultry/Fish
Serving Size
Instructions
Code/Food
Serving Size
Instructions
200-250 g
300-350 g
Rinse and clean green beans. Put them
evenly into a glass bowl with lid. Add 30 ml
(2 tablespoons) water when cooking for
200-250 g and add 45 ml (3 tablespoons) for
300-450 g. Put bowl in the centre of turntable.
Cook covered. Stir after cooking. Stand for
1-2 minutes.
Rinse and clean spinach. Put into a glass bowl
with lid. Do not add water. Put bowl in the
centre of turntable. Cook covered. Stir after
cooking. Stand for 1-2 minutes.
Wash and peel potatoes, cut into halves and
put into a glass bowl with lid. Add 15-30 ml
of water (1-2 tablespoons). Stir after cooking.
When cooking higher quantities stir once
during cooking. Stand for 3-5 minutes.
Put the fresh potato gratin into a glass pyrex
dish. Put the dish on the low rack. Stand for
2-3 minutes.
Rinse and slice eggplants. Brush with oil and
spices. Put slices evenly on the high rack.
Turnover after beep sounds. Press start to
continue. (The oven keeps operating if you do
not turnover) Stand for 1-2 minutes.
Rinse and clean tomatoes. Cut them into
halves and put in an ovenware dish. Add
grated cheese on top. Put dish on the high
rack.
3-1
Chicken Breasts
300-350 g
400-450 g
3-2
Turkey Breasts
300-350 g
400-450 g
Rinse chicken breast and put on a ceramic
plate. Cover with microwave cling film and
pierce film. Put dish on the turntable. Stand for
2 minutes.
Rinse turkey breast and put on deep glass
ovenware dish. Cover with microwave cling
film and pierce film. Put dish on the turntable.
Stand for 2 minutes.
3-3
Grilled Chicken
Breasts
300-350 g
400-450 g
Rinse chicken breast, marinate and put them
on the high rack. Turnover as soon as the
beep sounds. Stand for 2 minutes.
3-4
Grilled Fish
Fillets
3-5
Grilled Salmon
Steaks
3-6
Roast Fish
200-300 g
400-500 g
Put fish fillets evenly on the high rack. Turnover
as soon as the beep sounds. Stand for
1-2 minutes.
200-250 g
300-350 g
Put fish steaks evenly on the high rack.
Turnover as soon as the beep sounds. Stand
for 2 minutes.
200-300 g
400-500 g
Brush skin of whole fish (trout or gilthead) with
oil and add herbs and spices. Put fish side by
side, head to tail on the high rack. Turnover as
soon as the beep sounds. Stand for 3 minutes.
2-2
Spinach
100-150 g
200-250 g
2-3
Peeled Potatoes
300-350 g
400-450 g
500-550 g
2-4
Potatoes Gratin
400-450 g
800-850 g
2-5
Grilled
Eggplants
100-150 g
200-250 g
2-6
Grilled Tomatoes
400-450 g
600-650 g
English - 26
MC28H5013AW_BW_DE68-04234A-02_EN.indd 26
2014-07-11
5:12:14
USING THE DOUGH PROOF / YOGURT FEATURES
The five dough proof / yogurt features provide pre-programmed cooking times. You do
not need to set either the cooking times or the power level. You can adjust the dough
proof / yogurt category by pressing the Up or Down button after press the Dough Proof
/ Yogurt button. First, place the food in the centre of the turntable and close the door.
2. Select the type of food that you are cooking by Up or Down
button. No.1 is Dough Proof and No.2 is Homemade Yogurt.
You have to choose the number that you want to use for
cooking by pressing the Up or Down button. Refer to the
table on the following page for a description of the various
pre-programmed settings. At that time, press the Select
button to select the type of food.
3. Select the food by pressing the Up or Down button.
1. Dough proof
Code/Food
Serving Size
1-1
Pizza Dough
1-2
Cake Dough
1-3
Bread Dough
300-500 g
Put dough in suitable sized bowl and set on the low
rack. Cover with aluminium foil.
Instructions
500-800 g
Put dough in suitable sized bowl and set on the low
rack. Cover with aluminium foil.
600-900 g
Put dough in suitable sized bowl and set on the low
rack. Cover with aluminium foil.
04 OVEN USE
1. Press the Dough Proof / Yogurt button.
The following table presents how to use the auto programme for rising dough proof or
homemade yogurt.
2. Homemade Yogurt
Code/Food
Serving Size
Instructions
2-1
Small Cups
500 g
2-2
Large Bowl
500 g
Distribute 150 g natural yogurt into 5 ceramic cups or
small glass jars evenly (30 g each). Add 100 ml milk
into each cup. Use long-life milk (room-temperature;
3,5 % fat). Cover each with cling film and set in a
circle on turntable. After finish, keep 6 hours in a
refrigerator.
For the first time we recommend to use dried yoghurt
bacteria ferment.
Mix 150 g natural yogurt with 500 ml long-life milk
(room-temperature; 3,5 % fat). Pour evenly into large
glass bowl. Cover with cling film and set on turntable.
After finish, keep 6 hours in a refrigerator.
For the first time we recommend to use dried yoghurt
bacteria ferment.
4. Press the Start button.
Turntable is not operating during yogurt cooking.
English - 27
MC28H5013AW_BW_DE68-04234A-02_EN.indd 27
2014-07-11
5:12:15
USING THE POWER DEFROST FEATURES
The Power Defrost feature enables you to defrost meat, poultry, fish, bread, cake
and fruit. The defrost time and power level are set automatically. You simply select the
programme and the weight.
Use only containers that are microwave-safe.
Open the door. Place the frozen food on a ceramic in the centre of the turntable. Close
the door.
The following table presents the various Power Defrost Programmes, quantities,
standing times and appropriate Instructions. Remove all kind of package material before
defrosting.
Place meat, poultry and fish on a flat glass plate or on a ceramic plate, arrange bread and
cake on kitchen paper.
Code/Food
Serving Size
Instructions
1. Press the Power Defrost button.
1
Meat
200-1500 g
2. Select the type of food that you are cooking by pressing
the Up or Down button. Refer to the table on the following
page for a description of the various pre-programmed
settings. At that time, press the Select button to select the
type of food.
2
Poultry
200-1500 g
3. Select the size of the serving by pressing the Up or Down
button.
3
Fish
200-1500 g
Shield the tail of a whole fish with aluminium foil.
Turn the fish over, when the oven beeps. This
programme is suitable for whole fishes as well as for
fish fillets. Stand for 20-80 minutes.
4
Bread/Cake
125-1000 g
5
Fruit
100-600 g
Put bread horizontally on a piece of kitchen paper
and turn over, as soon as the oven beeps. Place
cake on a ceramic plate and if possible, turn over,
as soon as the oven beeps. (Oven keeps operating
and is stopped, when you open the door.)
This programme is suitable for all kinds of bread,
sliced or whole, as well as for bread rolls and
baguettes. Arrange bread rolls in a circle.
This programme is suitable for all kinds of yeast
cake, biscuit, cheese cake and puff pastry. It is not
suitable for short/crust pastry, fruit and cream cakes
as well as for cake with chocolate topping. Stand for
10-60 minutes.
Spread fruits evenly into a flat glass dish.
This programme is suitable for all kind of fruits.
Stand for 5-20 minutes.
4. Press the Start button.
Result:
• Defrosting begins.
• The oven beeps through defrosting to remind
you to turn the food over. (except fruit)
5. If oven will beep and operate stop, must turn the food over
(ex: Meat, Poultry, Fish). And press the Start button again to
finish defrosting.
Result:
When cooking has finished, the oven will
beep and flash “End” 4 times. The oven will
then beep one time per minute.
Shield the edges with aluminium foil. Turn the meat
over, when the oven beeps.
This programme is suitable for beef, lamb, pork,
steaks, chops, minced meat. Stand for 20-90
minutes.
Shield the leg and wing tips with aluminium foil.
Turn the poultry over, when the oven beeps. This
programme is suitable for whole chicken as well as
for chicken portions. Stand for 20-90 minutes.
English - 28
MC28H5013AW_BW_DE68-04234A-02_EN.indd 28
2014-07-11
5:12:15
GRILLING
The convection mode enables you to cook food in the same way as in a traditional oven.
The microwave mode is not used. You can set the temperature, as required, in a range
varying from 40 °C to 200 °C. The maximum cooking time is 60 minutes.
• Always use oven gloves when touching the recipients in the oven, as they will be
very hot.
• You can get better cooking and browning, if you use the low rack.
Check that the heating element is in the horizontal position. Open the door and place the
recipient on the low rack and set on turntable.
The grill enables you to heat and brown food quickly, without using microwaves.
• Always use oven gloves when touching the recipients in the oven, as they will be
very hot.
• You can get better cooking and grilling results, if you use the high rack.
1. Open the door and place the food on the rack.
1. Press the Convection button.
Result:
2. Press the Grill button.
The following indications are displayed:
Result:
The following indications are displayed:
(grill mode)
• You cannot set the temperature of the grill.
(convection mode)
180 °C
(temperature)
3. Set the grilling time by pressing the Up or Down button.
• The maximum grilling time is 60 minutes.
2. Set the temperature by pressing the Up or Down button.
(Temperature : 40~200 °C, 10 °C interval)
• If don't set the temperature within 5 seconds,
Automatically changes to the cooking time setting stage.
4. Press the Start button.
3. Press the Select button.
Result:
4. Set the cooking time by pressing the Up or Down button.
(If you want to preheat the oven, omit this step.)
Grilling starts.
• When cooking has finished, the oven will
beep and flash “End” 4 times. The oven
will then beep one time per minute.
CHOOSING THE ACCESSORIES
Traditional convection cooking does require cookware. You
should, however, use only cookware that you would use in your
normal oven.
5. Press the Start button.
Result:
04 OVEN USE
CONVECTION
Cooking starts.
• When cooking has finished, the oven will
beep and flash “End” 4 times. The oven
will then beep one time per minute.
Microwave-safe containers are not usually suitable for
convection cooking; don’t use plastic containers, dishes, paper
cups, towels, etc.
If you wish to select a combined cooking mode (microwave and grill or convection), use
only recipients that are microwave-safe and oven-proof.
For further details on suitable cookware and utensils, refer to the Cookware Guide
on page 32.
English - 29
MC28H5013AW_BW_DE68-04234A-02_EN.indd 29
2014-07-11
5:12:16
COMBINING MICROWAVE AND GRILL
COMBINING MICROWAVE AND CONVECTION
You can also combine microwave cooking with the grill, to cook quickly and brown at the
same time.
ALWAYS use microwave-safe and oven-proof cookware. Glass or ceramic dishes
are ideal as they allow the microwaves to penetrate the food evenly.
ALWAYS use oven gloves when touching the recipients in the oven, as they will be
very hot.
You can improve cooking and grilling, if you use the high rack.
Open the door. Place the food on the rack best suited to the type of food to be cooked.
Place the rack on the turntable. Close the door.
Combination cooking uses both microwave energy and convection heating. No
preheating is required as the microwave energy is immediately available.
Many foods can be cooked in combination mode, particularly:
• Roast meats and poultry
• Pies and cakes
• Egg and cheese dishes
ALWAYS use microwave-safe and oven-proof cookware. Glass or ceramic dishes
are ideal as they allow the microwaves to penetrate the food evenly.
ALWAYS use oven gloves when touching the recipients in the oven, as they will be
very hot.
You can get better cooking and browning, if you use the low rack.
1. Press the MW+Grill / MW+Conv. button.
Result:
The following indications are displayed:
Cb - 1
Open the door. Place the food on the turntable or on the low rack which should then be
placed on the turntable. Close the door. The heating element must be in the horizontal
position.
(Microwave + Grill)
2. Make the display indicating Cb - 1 by pressing the Up or
Down button, and then press the Select button.
Result:
1. Press the MW+Grill / MW+Conv. button.
The following indications are displayed:
Result:
(microwave & grill combi mode)
600 W (output power)
The following indications are displayed:
Cb - 1
3. Select the appropriate power level by pressing the Up
or Down button until the corresponding output power is
displayed (600, 450, 300 W). At that time, press the Select
button to set the power level.
• You cannot set the temperature of the grill.
• If don't set the power level within 5 seconds,
Automatically changes to the cooking time setting stage.
4. Set the cooking time by pressing the Up or Down button.
• The maximum cooking time is 60 minutes.
5. Press the Start button.
Result:
• Combination cooking starts.
• When cooking has finished, the oven will
beep and flash “End” 4 times. The oven
will then beep one time per minute.
(Microwave+Grill)
2. Make the display indicating Cb - 2 by pressing the Up or
Down button, and then press the Select button.
Result:
The following indications are displayed:
(microwave & convection combi mode)
600 W (output power)
3. Select the appropriate power level by pressing the Up
or Down button until the corresponding output power
is displayed (600, 450, 300, 180, 100 W). At that
time, press the Select button to set the power level.
• If don't set the power level within 5 seconds,
Automatically changes to the cooking time setting stage.
(Default: 180 °C )
English - 30
MC28H5013AW_BW_DE68-04234A-02_EN.indd 30
2014-07-11
5:12:16
USING THE CHILD LOCK FEATURES
Your microwave oven is fitted with a special child lock programme, which enables
the oven to be “locked” so that children or anyone unfamiliar with it cannot operate it
accidentally.
1. Press the Child Lock button for three second.
Result :
5. Set the cooking time by pressing the Up or Down button.
• The maximum cooking time is 60 minutes.
6. Press the Start button.
Result:
• Combination cooking starts.
• The oven is heated to the required
temperature and then microwave
cooking continues until the cooking time
is over.
• When cooking has finished, the oven will
beep and flash “End” 4 times. The oven
will then beep one time per minute.
• The oven is locked (no functions can be
selected).
• The display shows “L”.
04 OVEN USE
4. Select the appropriate temperature by pressing the Up or
Down button. (Temperature : 200~40 °C) At that time, press
the Select button to set the temperature.
• If don't set the temperature within 5 seconds,
Automatically changes to the cooking time setting stage.
2. To unlock the oven, press the Child Lock button for
three second.
Result :
The oven can be used normally.
USING THE TURNTABLE ON/OFF FEATURES
The Turntable on/off button enables you to use large dishes which fill the whole oven by
stopping the turntable from rotating (only manual cooking mode).
The results will be less satisfactory in this case as the cooking is less even. We
recommend that you turn the dish by hand halfway through the cooking process.
WARNING
Never operate the turntable without food in the oven.
Reason: This may cause fire or damage to the unit.
1. Press the Turntable on/off button.
Result:
The turntable will not rotate.
The following indications are displayed:
2. To switch the turntable rotating back on, press the
Turntable on/off button again.
Result:
The turntable will rotate.
This Turntable on/off button is available only during manual cooking mode.
English - 31
MC28H5013AW_BW_DE68-04234A-02_EN.indd 31
2014-07-11
5:12:17
USING THE DEODORISATION FEATURES
Use the feature after cooking odorous food or when there is a lot of smoke in the oven
interior. First clean the oven interior.
1. Press the Deodorisation button after you have finished
cleaning.
cookware guide
To cook food in the microwave oven, the microwaves must be able to penetrate the food,
without being reflected or absorbed by the dish used.
Care must therefore be taken when choosing the cookware. If the cookware is marked
microwave-safe, you do not need to worry.
The following table lists various types of cookware and indicates whether and how they
should be used in a microwave oven.
2. Press the Start button.
Cookware
Aluminum foil
Microwave-safe
Comments
✓✗
Can be used in small quantities to
protect areas against overcooking.
Arcing can occur if the foil is too close
to the oven wall or if too much foil is
used.
Do not preheat for more than
8 minutes.
Porcelain, pottery, glazed earthenware
and bone china are usually suitable,
unless decorated with a metal trim.
Some frozen foods are packaged in
these dishes.
The deodorisation time has been specified as 5 minutes.
You can also adjust Deodorisation time by pressing the +30s button.
The maximum deodorisation time is 15 minutes.
SWITCHING THE BEEPER OFF
You can switch the beeper off whenever you want.
1. Press the Start and Stop / Eco button at the same time.
(one second)
Result:
The oven does not beep to indicate the end
of a function.
2. To switch the beeper back on, press the Start and Stop /
Eco buttons again at the same time. (one second)
Result:
The oven operates normally.
Crust plate
✓
China and
earthenware
✓
Disposable
polyester
cardboard dishes
✓
Fast-food packaging
• Polystyrene cups
containers
✓
• Paper bags or
newspaper
• Recycled paper
or metal trims
✗
Can be used to warm food.
Overheating may cause the polystyrene
to melt.
May catch fire.
✗
May cause arcing.
English - 32
MC28H5013AW_BW_DE68-04234A-02_EN.indd 32
2014-07-11
5:12:18
cooking guide
Cookware
Microwave-safe
Comments
✓
Can be used, unless decorated with a
metal trim.
Can be used to warm foods or liquids.
Delicate glass may break or crack if
heated suddenly.
Must remove the lid. Suitable for
warming only.
MICROWAVES
Glassware
• Glass jars
✓
✓
Metal
• Dishes
• Freezer bag twist
ties
✗
✗
May cause arcing or fire.
✓
For short cooking times and warming.
Also to absorb excess moisture.
✗
May cause arcing.
• Containers
✓
• Cling film
✓
Particularly if heat-resistant
thermoplastic. Some other plastics may
warp or discolour at high temperatures.
Do not use Melamine plastic.
Can be used to retain moisture. Should
not touch the food. Take care when
removing the film as hot steam will
escape.
Only if boilable or oven-proof. Should
not be airtight. Prick with a fork, if
necessary.
Paper
• Plates, cups,
napkins and
kitchen paper
• Recycled paper
Plastic
• Freezer bags
✓✗
Wax or greaseproof paper
✓
✓
: Recommended
✓✗
Microwave energy actually penetrates food, attracted and absorbed by its water, fat and
sugar content.
The microwaves cause the molecules in the food to move rapidly. The rapid movement of
these molecules creates friction and the resulting heat cooks the food.
COOKING
Cookware for microwave cooking:
Cookware must allow microwave energy to pass through it for maximum efficiency.
Microwaves are reflected by metal, such as stainless steel, aluminium and copper, but
they can penetrate through ceramic, glass, porcelain and plastic as well as paper and
wood. So food must never be cooked in metal containers.
Food suitable for microwave cooking:
Many kinds of food are suitable for microwave cooking, including fresh or frozen
vegetables, fruit, pasta, rice, grains, beans, fish, and meat. Sauces, custard, soups,
steamed puddings, preserves, and chutneys can also be cooked in a microwave oven.
Generally speaking, microwave cooking is ideal for any food that would normally be
prepared on a hob. Melting butter or chocolate, for example (see the chapter with tips,
techniques and hints).
05 COOKWARE GUIDE
• Oven-totableware
• Fine glassware
Covering during cooking
To cover the food during cooking is very important, as the evaporated water rises as
steam and contributes to cooking process. Food can be covered in different ways: e.g.
with a ceramic plate, plastic cover or microwave suitable cling film.
Standing times
After cooking is over food the standing time is important to allow the temperature to even
out within the food.
Can be used to retain moisture and
prevent spattering.
: Use caution
✗
: Unsafe
English - 33
MC28H5013AW_BW_DE68-04234A-02_EN.indd 33
2014-07-11
5:12:18
Cooking Guide for frozen vegetables
Cooking Guide for fresh vegetables
Use a suitable glass pyrex bowl with lid. Cook covered for the minimum time – see table.
Continue cooking to get the result you prefer.
Stir twice during cooking and once after cooking. Add salt, herbs or butter after cooking.
Cover during standing time.
Use a suitable glass pyrex bowl with lid. Add 30-45 ml cold water (2-3 tbsp.) for every
250 g unless another water quantity is recommended – see table. Cook covered for the
minimum time – see table. Continue cooking to get the result you prefer. Stir once during
and once after cooking. Add salt, herbs or butter after cooking. Cover during a standing
time of 3 minutes.
Hint:
Cut the fresh vegetables into even sized pieces. The smaller they are
cut, the quicker they will cook.
Food
Spinach
Broccoli
Peas
Green Beans
Portion
Power
Time (min.)
150 g
600 W
5-6
Instructions
Add 15 ml (1 tbsp.) cold water. Serve after 2-3 minutes standing.
300 g
600 W
8-9
Instructions
Add 30 ml (2 tbsp.) cold water. Serve after 2-3 minutes standing.
300 g
600 W
7-8
Instructions
Add 15 ml (1 tbsp.) cold water. Serve after 2-3 minutes standing.
300 g
600 W
7½-8½
Instructions
Add 30 ml (2 tbsp.) cold water. Serve after 2-3 minutes standing.
300 g
600 W
7-8
Instructions
Add 15 ml (1 tbsp.) cold water. Serve after 2-3 minutes standing.
Mixed
Vegetables
(Carrots/Peas/
Corn)
300 g
600 W
7½-8½
Mixed
Vegetables
Instructions
(Chinese style) Add 15 ml (1 tbsp.) cold water. Serve after 2-3 minutes standing.
Food
Broccoli
Portion
Power
Time (min.)
250 g
500 g
900 W
4½-5
7-8
Instructions
Brussels
Sprouts
Carrots
Prepare even sized florets. Arrange the stems to the centre. Serve after
3 minutes standing.
250 g
6-6½
900 W
Instructions
Add 60-75 ml (5-6 tbsp.) water. Serve after 3 minutes standing.
250 g
4½-5
900 W
Instructions
Cauliflower
Cut carrots into even sized slices. Serve after 3 minutes standing.
250 g
5-5½
900 W
500 g
7½-8½
Instructions
Courgettes
Prepare even sized florets. Cut big florets into halves. Arrange stems to
the centre. Serve after 3 minutes standing.
250 g
4-4½
900 W
Instructions
Egg plants
Cut courgettes into slices. Add 30 ml (2 tbsp.) water or a knob of
butter. Cook until just tender. Serve after 3 minutes standing.
250 g
3½-4
900 W
Instructions
Cut egg plants into small slices and sprinkle with 1 tablespoon lemon
juice. Serve after 3 minutes standing.
English - 34
MC28H5013AW_BW_DE68-04234A-02_EN.indd 34
2014-07-11
5:12:18
Cooking Guide for rice and pasta
Food
Leeks
Portion
Power
Time (min.)
250 g
900 W
4-4½
Use a large glass pyrex bowl with lid - rice doubles in volume during
cooking. Cook covered.
After the cooking time is over, stir before standing time and salt or
add herbs and butter.
Remark: the rice may not have absorbed all water after the cooking
time is finished.
Pasta:
Use a large glass pyrex bowl. Add boiling water, a pinch of salt and
stir well. Cook uncovered.
Stir occasionally during and after cooking. Cover during standing time
and drain thoroughly afterwards.
Instructions
Mushrooms
Cut leeks into thick slices. Serve after 3 minutes standing.
125 g
1½-2
900 W
250 g
2½-3
Instructions
Onions
Prepare small whole or sliced mushrooms. Do not add any water.
Sprinkle with lemon juice. Spice with salt and pepper. Drain before
serving. Serve after 3 minutes standing.
250 g
5-5½
900 W
Food
Instructions
Pepper
Potatoes
White Rice
(Parboiled)
Cut onions into slices or halves. Add only 15 ml (1 tbsp.) water.
Serve after 3 minutes standing.
250 g
4½-5
900 W
Cut pepper into small slices.
250 g
500 g
900 W
Brown Rice
(Parboiled)
4-5
7-8
Instructions
Turnip
Cabbage
Weigh the peeled potatoes and cut them into similar sized halves or
quarters. Serve after 3 minutes standing.
250 g
5½-6
900 W
Instructions
Cut turnip cabbage into small cubes. Serve after 3 minutes standing.
Mixed Rice
(Rice + Wild
rice)
Mixed Corn
(Rice + Grain)
Pasta
Portion
Power
Time (min.)
250 g
900 W
15-16
375 g
17½-18½
Instructions
Add cold water of double quantity. Serve after 5 minutes standing.
250 g
900 W
20-21
375 g
22-23
Instructions
Add cold water of double quantity. Serve after 5 minutes standing.
250 g
900 W
16-17
Instructions
Add 500 ml cold water. Serve after 5 minutes standing.
250 g
900 W
17-18
Instructions
Add 400 ml cold water. Serve after 5 minutes standing.
250 g
900 W
10-11
06 COOKING GUIDE
Rice:
Instructions
Add 1000 ml hot water. Serve after 5 minutes standing.
English - 35
MC28H5013AW_BW_DE68-04234A-02_EN.indd 35
2014-07-11
5:12:18
REHEATING
REHEATING BABY FOOD
Your microwave oven will reheat food in a fraction of the time that conventional ovens
hobs normally take.
Use the power levels and reheating times in the following chart as a guide. The times in
the chart consider liquids with a room temperature of about +18 to +20 °C or a chilled
food with a temperature of about +5 to +7 °C.
BABY FOOD:
Empty into a deep ceramic plate. Cover with plastic lid. Stir well after reheating! Let stand
for 2-3 minutes before serving. Stir again and check the temperature. Recommended
serving temperature: between 30-40 °C.
BABY MILK:
Pour milk into a sterilised glass bottle. Reheat uncovered. Never heat a baby’s bottle with
teat on, as the bottle may explode if overheated. Shake well before standing time and
again before serving ! Always carefully check the temperature of baby milk or food before
giving it to the baby. Recommended serving temperature: ca. 37 °C.
Arranging and covering
Avoid reheating large items such as joint of meat - they tend to overcook and dry out
before the centre is piping hot. Reheating small pieces will be more successful.
Power levels and stirring
Some foods can be reheated using 900 W power while others should be reheated using
600 W, 450 W or even 300 W.
Check the tables for guidance.
In general, it is better to reheat food using a lower power level, if the food is delicate, in
large quantities, or if it is likely to heat up very quickly (mince pies, for example).
Stir well or turn food over during reheating for best results. When possible, stir again
before serving.
Take particular care when heating liquids and baby foods. To prevent eruptive boiling
of liquids and possible scalding, stir before, during and after heating. Keep them in the
microwave oven during standing time. We recommend putting a plastic spoon or glass
stick into the liquids. Avoid overheating (and therefore spoiling) the food. It is preferable to
underestimate cooking time and add extra heating time, if necessary.
Heating and standing times
When reheating food for the first time, it is helpful to make a note of the time taken - for
future reference.
Always make sure that the reheated food is piping hot throughout.
Allow food to stand for a short time after reheating - to let the temperature even out.
The recommended standing time after reheating is 2-4 minutes, unless another time is
recommended in the chart.
Take particular care when heating liquids and baby food. See also the chapter with the
safety precautions.
REMARK:
Baby food particularly needs to be checked carefully before serving to prevent burns.
Use the power levels and times in the next table as a guide lines for reheating.
Reheating Liquids and Food
Use the power levels and times in this table as a guide lines for reheating.
Food
Drinks (Coffee,
Tea and Water)
Soup (Chilled)
REHEATING LIQUIDS
Always allow a standing time of at least 20 seconds after the oven has been switched off
to allow the temperature to even out. Stir during heating, if necessary, and ALWAYS stir
after heating. To prevent eruptive boiling and possible scalding, you should put a spoon
or glass stick into the beverages and stir before, during and after heating.
Portion
Power
Time (min.)
150 ml (1 cup)
900 W
1-1½
300 ml (2 cups)
2-2½
450 ml (3 cups)
3-3½
600 ml (4 cups)
3½-4
Instructions
Pour into cups and reheat uncovered: 1 cup in the centre, 2 cups
opposite of each other, 3 cups in a circle. Keep in microwave
oven during standing time and stir well. Serve after 1-2 minutes
standing.
250 g
900 W
2½-3
350 g
3-3½
450 g
3½-4
550 g
4½-5
Instructions
Pour into a deep ceramic plate or deep ceramic bowl. Cover with
plastic lid. Stir well after reheating. Stir again before serving.
Serve after 2-3 minutes standing.
English - 36
MC28H5013AW_BW_DE68-04234A-02_EN.indd 36
2014-07-11
5:12:18
Reheating Baby Food and Milk
Food
Stew (Chilled)
Filled Pasta
with Sauce
(Chilled)
Plated Meal
(Chilled)
Power
Use the power levels and times in this table as guide lines for reheating.
Time (min.)
350 g
600 W
4½-5½
Instructions
Put stew in a deep ceramic plate. Cover with plastic lid. Stir
occasionally during reheating and again before standing and
serving.
Serve after 2-3 minutes standing.
350 g
600 W
3½-4½
Instructions
Put pasta (e.g. spaghetti or egg noodles) on a flat ceramic plate.
Cover with microwave cling film. Stir before serving.
Serve after 3 minutes standing.
350 g
600 W
4-5
Instructions
Put filled pasta (e.g. ravioli, tortellini) in a deep ceramic plate.
Cover with plastic lid. Stir occasionally during reheating and again
before standing and serving. Serve after 3 minutes standing.
350 g
600 W
4½-5
450 g
5½-6½
Instructions
Plate a meal of 2-3 chilled components on a ceramic dish. Cover
with microwave cling-film. Serve after 3 minutes standing.
Food
Baby Food
(Vegetables +
Meat)
Baby Porridge
(Grain + Milk +
Fruit)
Baby Milk
Portion
Power
Time
190 g
600 W
30 sec.
Instructions
Empty into ceramic deep plate. Cook covered. Stir after cooking
time. Before serving, stir well and check the temperature carefully.
Serve after 2-3 minutes standing.
190 g
600 W
20 sec.
Instructions
Empty into ceramic deep plate. Cook covered. Stir after cooking
time. Before serving, stir well and check the temperature carefully.
Serve after 2-3 minutes standing.
100 ml
300 W
30-40 sec.
200 ml
1 min. to 1 min.
10 sec.
Instructions
Stir or shake well and pour into a sterilized glass bottle. Place into
the centre of turntable. Cook uncovered. Before serving, shake
well and check the temperature carefully. Serve after 2-3 minutes
standing.
06 COOKING GUIDE
Pasta with
Sauce (Chilled)
Portion
400 g
600 W
6-7
Cheese Fondue
Ready-To-Serve Instructions
(Chilled)
Put the ready-to-serve cheese fondue in a suitable sized glass pyrex
bowl with lid. Stir occasionally during and after reheating. Stir well
before serving. Serve after 1-2 minutes standing.
English - 37
MC28H5013AW_BW_DE68-04234A-02_EN.indd 37
2014-07-11
5:12:18
DEFROSTING
Microwaves are an excellent way of defrosting frozen food. Microwaves gently defrost
frozen food in a short period of time. This can be of great advantage, if unexpected
guests suddenly show up.
Frozen poultry must be thoroughly thawed before cooking. Remove any metal ties and
take it out of any wrapping to allow thawed liquid to drain away.
Put the frozen food on a dish without cover. Turn over half way, drain off any liquid and
remove any giblets as soon as possible. Check the food occasionally to make sure that it
does not feel warm.
If smaller and thinner parts of the frozen food start to warm up, they can be shield by
wrapping very small strips of aluminium foil around them during defrosting.
Should poultry start to warm up on the outer surface, stop thawing and allow it to stand
for 20 minutes before continuing.
Leave the fish, meat and poultry to stand in order to complete defrosting. The standing
time for complete defrosting will vary depending on the quantity defrosted. Please refer to
the table below.
Hint:
Food
Poultry
Chicken Pieces
Whole Chicken
Fish
Fish Fillets
Whole Fish
Flat food defrosts better than thick and smaller quantities need
less time than bigger ones. Remember this hint while freezing and
defrosting food.
For defrosting of frozen food with a temperature of about -18 to -20 °C, use the following
table as a guide.
Food
Meat
Minced Meat
Pork Steaks
Portion
Power
Time (min.)
250 g
500 g
180 W
6-7
8-13
250 g
180 W
7-8
Instructions
Place the meat on turntable. Shield thinner edges with
aluminium foil. Turn over after half of defrosting time!
Serve after 15-30 minutes standing.
Fruits
Berries
Bread
Bread Rolls
(Each ca. 50 g)
Toast/Sandwich
Portion
Power
Time (min.)
500 g (2 pcs)
180 W
14-15
1200 g
180 W
32-34
Instructions
First, put chicken pieces first skin-side down, whole chicken
first breast-side-down on a flat ceramic plate. Shield the
thinner parts like wings and ends with aluminium foil. Turn
over after half of defrosting time!
Serve after 15-60 minutes standing.
200 g
180 W
6-7
400 g
180 W
11-13
Instructions
Put frozen fish in the middle of a flat ceramic plate. Arrange
the thinner parts under the thicker parts. Shield narrow ends
of fillets and tail of whole fish with aluminium foil. Turn over
after half of defrosting time!
Serve after 10-25 minutes standing.
300 g
180 W
6-7
Instructions
Spread fruit on a flat, round glass dish (with a large diameter).
Serve after 5-10 minutes standing.
2 pcs
4 pcs
180 W
1-1½
2½-3
250 g
180 W
4-4½
Instructions
Arrange rolls in a circle or bread horizontally on kitchen paper
in the middle of turntable. Turn over after half of defrosting
time! Serve after 5-20 minutes standing.
English - 38
MC28H5013AW_BW_DE68-04234A-02_EN.indd 38
2014-07-11
5:12:19
GRILL
Grill Guide for Fresh Food
The grill-heating element is located underneath the ceiling of the cavity. It operates while
the door is closed and the turntable is rotating. The turntable’s rotation makes the food
brown more evenly. Preheating the grill for 3-5 minutes will make the food brown more
quickly.
Preheat the grill with the grill-function for 2-3 minutes.
Use the power levels and times in this table as guide lines for grilling.
Use oven gloves when taking out.
Food suitable for grilling:
Chops, sausages, steaks, hamburgers, bacon and gammon rashers, thin fish portions,
sandwiches and all kinds of toast with toppings.
Important remark:
Whenever the grill only mode is used, please remember that food must be placed on the
high rack, unless another instruction is recommended.
MICROWAVE + GRILL
This cooking mode combines the radiant heat that is coming from the grill with the speed
of microwave cooking. It operates only while the door is closed and the turntable is
rotating. Due to the rotation of the turntable, the food browns evenly. Three combination
modes are available with this model:
600 W + Grill, 450 W + Grill and 300 W + Grill.
Cookware for cooking with microwave + grill
Please use cookware that microwaves can pass through. Cookware should be
flameproof. Do not use metal cookware with combination mode. Do not use any type of
plastic cookware, as it can melt.
Food suitable for microwave + grill cooking:
Food suitable for combination mode cooking include all kinds of cooked food which
need reheating and browning (e.g. baked pasta), as well as foods which require a short
cooking time to brown the top of the food. Also, this mode can be used for thick food
portions that benefit from a browned and crispy top (e.g. chicken pieces, turning them
over half way through cooking). Please refer to the grill table for further details.
Important remark:
Whenever the combination mode (microwave + grill) is used, the food should be placed
on the high rack, unless another instruction is recommended. Please refer to the
instructions in the following chart.
The food must be turned over, if it is to be browned on both sides.
Fresh food
Toast Slices
Grilled
Tomatoes
TomatoCheese Toast
Toast Hawaii
(Ham,
Pineapple,
Cheese slices)
Baked
Potatoes
Gratin
Potatoes/
Vegetables
(Chilled)
Portion
Power
1 step (min.)
2 step (min.)
4 pcs
Grill only
3-4
2-3
(each 25 g)
Instructions
Put toast slices side by side on the high rack.
400 g (2 pcs)
300 W + Grill
5-6
Instructions
Cut tomatoes into halves. Put some cheese on top. Arrange in a
circle in a flat glass pyrex dish. Place it on the high rack. Stand for
2-3 minutes.
4 pcs (300 g)
300 W + Grill
4-5
Instructions
Toast the bread slices first. Put the toast with topping on the high
rack. Stand for 2-3 minutes.
4 pcs (500 g)
300 W + Grill
5-6
Instructions
Toast the bread slices first. Put the toast with topping on the high
rack. Stand for 2-3 minutes.
500 g
600 W + Grill
7-8
Instructions
Cut potatoes into halves. Put them in a circle on the high rack with
the cut side to the grill.
450 g
450 W + Grill
9-11
Instructions
Put the fresh gratin into a small glass pyrex dish. Put the dish on
the high rack. After cooking stand for 2-3 minutes.
(continued)
06 COOKING GUIDE
Cookware for grilling:
Should be flameproof and may include metal. Do not use any type of plastic cookware,
as it can melt.
English - 39
MC28H5013AW_BW_DE68-04234A-02_EN.indd 39
2014-07-11
5:12:19
CONVECTION
Fresh food
Portion
Power
Baked Apples
1 step (min.)
2 step (min.)
2 apples
300 W + Grill
7-8
(ca. 400 g)
Instructions
Core the apples and fill them with raisins and jam. Put some
almond slices on top. Put apples on a flat glass pyrex dish. Place
the dish directly on the low rack.
500 g (2 pcs)
300 W + Grill
8-10
6-8
Chicken
Pieces
Instructions
Brush chicken pieces with oil and spices. Put them in a circle on
the high rack. After grilling stand for 2-3 minutes.
1200 g
450 W + Grill
18-19
17
Roast Chicken
Instructions
Brush the chicken oil and spices. Put the chicken on the low rack.
After grilling stand for 5 minutes.
400-500 g
300 W + Grill
5-7
5½-6½
Roast Fish
Instructions
Brush skin of whole fish with oil and add herbs and spices. Put two
fishes side by side (head to tail) on the high rack. After grilling stand
for 2-3 minutes.
Cooking with convection is the traditional and well known method of cooking food in a
traditional oven with hot air.
The heating element and the fan position is at the back-wall, so that the hot air is
circulating. This mode is supported by the top heating element.
Cookware for convection cooking:
All conventional ovenproof cookware, baking tins and sheets – anything you would
normally use in a traditional convection oven – can be used.
Food suitable for convection cooking:
All biscuits, individual scones, rolls and cakes should be made by this mode as well as
rich fruit cakes, choux pastry and soufflés.
MICROWAVE + CONVECTION
This mode combines the microwave energy with the hot air and is therefore reducing the
cooking time while giving the food a brown and crispy surface.
Cooking with convection is the traditional and well known method of cooking food in an
oven with hot air circulated by a fan on the back-wall.
Cookware for cooking with microwaves + convection:
Should be able to let the microwaves pass through. Should be ovenproof (like glass,
pottery or china without metal trims); similar to the cookware described under Microwave
+ Grill.
Food suitable for Microwave + Convection cooking:
All kinds of meats and poultry as well as casseroles and gratin dishes, sponge cakes and
light fruit cakes, pies and crumbles, roast vegetables, scones and breads.
English - 40
MC28H5013AW_BW_DE68-04234A-02_EN.indd 40
2014-07-11
5:12:19
Convection Guide for fresh and frozen food
Preheat the convection with the auto pre-heat function to the desired temperature. Use
the power levels and times in this table as guide lines for convection cooking. Use oven
gloves when taking out.
PIZZA
Frozen Pizza
(Ready baked)
Portion
Power
300 g
1 step 300 W + 200 °C
2 step Grill
1 step
(min.)
2 step
(min.)
11-12
2-3
Instructions
Place the pizza on the low rack.
After baking stand for 2-3 minutes.
PASTA
Frozen Lasagne
400 g
1 step 450 W + 200 °C
2 step Convt. 200 °C
15-16
5-6
Instructions
Put into a suitable sized glass pyrex dish or leave in the original
packaging (take care that this is suitable for microwaves and oven
heat). Put frozen pasta gratin on the low rack. After cooking stand
for 2-3 minutes.
MEAT
Roast Beef/
Roast Lamb
(Medium)
Roast Chicken
1200-1300 g
600 W + 180 °C
20-23
10-13
Instructions
Brush beef/ lamb with oil and spice it with pepper, salt and
paprika. Put it on the low rack, first with the fat side down. After
cooking wrap in aluminium foil and stand for 10-15 minutes.
1000-1100 g
450 W + 200 °C
20-22
20
Instructions
Brush chicken with oil and spices. Put chicken first breast side
down, second side breast side up on the low rack. Stand for
5 minutes.
BREAD
Fresh Bread
Rolls
Garlic Bread
(Chilled,
Prebaked)
CAKE
Marble Cake
(Fresh Dough)
Small Cakes
(Fresh Dough)
Cookies
(Fresh Dough)
Frozen Cake
Portion
Power
1 step
(min.)
2 step
(min.)
6 pcs (350 g)
100 W + 180 °C
8-10
Instructions
Put bread rolls in a circle on the low rack. Stand for 2-3 minutes.
200 g (1 pc)
180 W + 200 °C
8-10
Instructions
Put the chilled baguette on baking paper on the low rack. After
baking stand for 2-3 minutes.
500 g
Only 180 °C
38-43
Instructions
Put the fresh dough in a small rectangular black metal baking dish
(length 25 cm). Put the cake on the low rack. After baking stand
for 5-10 minutes.
10 x 28 g
Only 160 °C
26-28
Instructions
Fill the fresh dough evenly in paper cups and set on baking tray
on the low rack.
After baking stand for 5 minutes.
200-250 g
Only 200 °C
15-20
Instructions
Put the chilled croissants on baking paper on the low rack.
1000 g
180 W + 180 °C
18-20
Instructions
Put the frozen cake directly on the low rack. After defrost and
warming stand for 15-20 minutes.
06 COOKING GUIDE
Fresh food
Fresh food
English - 41
MC28H5013AW_BW_DE68-04234A-02_EN.indd 41
2014-07-11
5:12:19
troubleshooting and error code
SPECIAL HINTS
MELTING BUTTER
Put 50 g butter into a small deep glass dish. Cover with plastic lid.
Heat for 30-40 seconds using 900 W, until butter is melted.
TROUBLESHOOTING
If you have any of the problems listed below try the solutions given.
MELTING CHOCOLATE
Put 100 g chocolate into a small deep glass dish.
Heat for 3-5 minutes, using 450 W until chocolate is melted.
Stir once or twice during melting. Use oven gloves while taking out!
This is normal.
• Condensation inside the oven.
• Air flow around the door and outer casing.
• Light reflection around the door and outer casing.
• Steam escaping from around the door or vents.
MELTING CRYSTALLIZED HONEY
Put 20 g crystallized honey into a small deep glass dish.
Heat for 20-30 seconds using 300 W, until honey is melted.
The oven does not start when you press the Start button.
• Is the door completely closed?
MELTING GELATINE
Lay dry gelatine sheets (10 g) for 5 minutes into cold water.
Put drained gelatine into a small glass pyrex bowl.
Heat for 1 minute using 300 W. Stir after melting.
COOKING GLAZE/ICING (FOR CAKE AND GATEAUX)
Mix instant glaze (approximately 14 g) with 40 g sugar and 250 ml cold water. Cook
uncovered in a glass pyrex bowl for 3½ to 4½ minutes using 900 W, until glaze/icing is
transparent. Stir twice during cooking.
COOKING JAM
Put 600 g fruits (for example mixed berries) in a suitable sized glass pyrex bowl with lid.
Add 300 g preserving sugar and stir well.
Cook covered for 10-12 minutes using 900 W.
Stir several times during cooking. Empty directly into small jam glasses with twist-off lids.
Stand on lid for 5 minutes.
COOKING PUDDING
Mix pudding powder with sugar and milk (500 ml) by following the manufacturers
instructions and stir well. Use a suitable sized glass pyrex bowl with lid. Cook covered for
6½ to 7½ minutes using 900 W.
Stir several times well during cooking.
BROWNING ALMOND SLICES
Spread 30 g sliced almonds evenly on a medium sized ceramic plate.
Stir several times during browning for 3½ to 4½ minutes using 600 W.
Let it stand for 2-3 minutes in the oven. Use oven gloves while taking out!
The food is not cooked at all.
• Have you set the timer correctly and/or pressed the Start button?
• Is the door closed?
• Have you overloaded the electric circuit and caused a fuse to blow or a breaker to be
triggered?
The food is either overcooked or undercooked.
• Was the appropriate cooking length set for the type of food?
• Was an appropriate power level chosen?
The light bulb is not working.
• The Light bulb should not be replaced in person for safety reasons. Please contact
nearest authorised Samsung customer care, to arrange for a qualified engineer to
replace the bulb.
The oven causes interference with radios or televisions.
• Slight interference may be observed on televisions or radios when the oven
is operating. This is normal. To solve this problem, install the oven away from
televisions, radios and aerials.
• If interference is detected by the oven’s microprocessor, the display may be reset. To
solve this problem, disconnect the power plug and reconnect it. Reset the time.
Sparking and cracking occur inside the oven (arcing).
• Have you used a dish with metal trimmings?
• Have you left a fork or other metal utensil inside the oven?
• Is aluminum foil too close to the inside walls?
English - 42
MC28H5013AW_BW_DE68-04234A-02_EN.indd 42
2014-07-11
5:12:19
Smoke and bad smell when initial operating.
• It’s a temporary condition by new component heating. Smoke and smell will
disappear completely after 10 minutes operation.
To remove smell more quickly, please operate microwave oven with putting lemon
formation or lemon juice in the cabinet.
• The model and serial numbers, normally printed on the rear of the oven
• Your warranty details
• A clear description of the problem
Model
Power source
Then contact your local dealer or SAMSUNG aftersales service.
“SE” message indicates.
• Clean the keys and check if there is water on the surface around key. Turn off the
microwave oven and try setting again. If it occurs again, call your local SAMSUNG
Customer Care Centre.
“E-24” message indicates
• Before the microwave can overheat, the “E-24” message appears on the display.
If the “E-24” message appears, press the Stop/Eco key to utilize the initialization
mode. After the oven cools, try operating the oven. If the “E-24” message appears
again, contact your local Samsung Customer Care Centre.
MC28H5013**
230 V ~ 50 Hz AC
Power consumption
Maximum power
Microwave
Grill
Convection
ERROR CODE
For any codes not listed above, or if the suggested solution does not solve the
problem, contact your local SAMSUNG Customer Care Centre.
SAMSUNG strives to improve its products at all times. Both the design specifications and
these user instructions are thus subject to change without notice.
2900 W
1400 W
1500 W
Max. 2100 W
Output power
100 W / 900 W - 6 levels (IEC-705)
Operating frequency
2450 MHz
Dimensions (W x D x H)
Outside
Oven cavity
Volume
517 x 474.8 x 310 mm
358 x 327 x 235.5 mm
1.0 Cubic feet
07 TROUBLESHOOTING & TECHNICAL SPEC
If the above guidelines do not enable you to solve the problem, then contact your
local SAMSUNG customer service centre.
Please have the following information read;
technical specifications
Weight
Net
17.5 kg approx.
оборудование класса I
Символ «не для пищевой продукции» применяется в
соответствие с техническим регламентом Таможенного
союза «О безопасности упаковки» 005/2011 и указывает на
то, что упаковка данного продукта не предназначена для
повторного использования и подлежит утилизации. Упаковку
данного продукта запрещается использовать для хранения
пищевой продукции.
Символ «петля Мебиуса» указывает на возможность
утилизации упаковки. Символ может быть дополнен
обозначением материала упаковки в виде цифрового и/или
буквенного обозначения.
English - 43
MC28H5013AW_BW_DE68-04234A-02_EN.indd 43
2014-07-11
5:12:20
Производитель : Samsung Electronics Co., Ltd /
Самсунг Электроникс Ко., Лтд
Адрес производителя :
(Мэтан-донг) 129, Самсунг-ро, Йонгтонг-гу,Сувон-си,
Гйонгги-до, Корея, 443-742
Адрес мощностей производства :
ЛОТ 2, ЛЕБУХ 2, НОРС КЛАНГ СТРЕЙТС, ЭРИА 21,
ИНДАСТРИАЛ ПАРК, 42000
ПОРТ КЛАНГ, СЕЛАНГОР ДАРУЛ ЭСАН, МАЛАЙЗИЯ
Страна производства : Малайзия
Импортер в России :
ООО «Самсунг Электроникс Рус Компани»
Адрес: 125009, г. Москва, Россия, ул. Воздвиженка 10, 4 этаж
-
RUSSIA
8-800-555-55-55
GEORGIA
0-800-555-555
ARMENIA
0-800-05-555
AZERBAIJAN 0-88-555-55-55
www.samsung.com/ru/support
www.samsung.com/support
KAZAKHSTAN 8-10-800-500-55-500(GSM: 7799, VIP care 7700)
UZBEKISTAN 8-10-800-500-55-500
KYRGYZSTAN 8-10-800-500-55-500
www.samsung.com/kz_ru/support
TADJIKISTAN 8-10-800-500-55-500
MONGOLIA
7-495-363-17-00
BELARUS
810-800-500-55-500
MOLDOVA
0-800-614-40
UKRAINE
0-800-502-000
www.samsung.com/support
www.samsung.com/ua/support (Ukrainian)
www.samsung.com/ua_ru/support (Russian)
DE68-04234A-02
MC28H5013AW_BW_DE68-04234A-02_EN.indd 44
2014-07-11
5:12:20