-
Contents
-
Table of Contents
-
Bookmarks
Quick Links
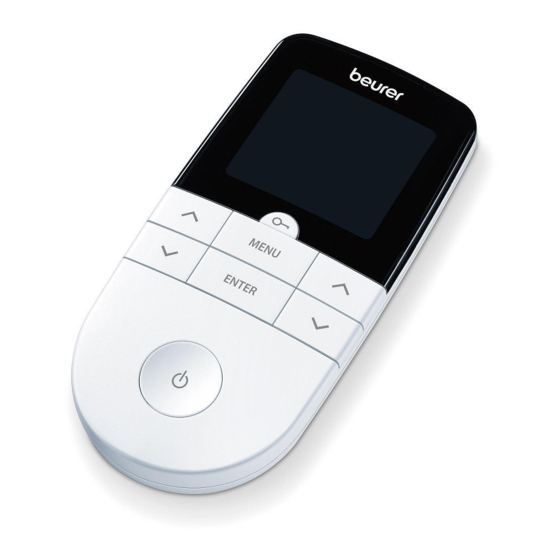
EM 49
EN Digital EMS/TENS unit
Instructions for use
Related Manuals for Beurer EM 49
Summary of Contents for Beurer EM 49
-
Page 1
EM 49 EN Digital EMS/TENS unit Instructions for use… -
Page 2: Table Of Contents
Read these instructions for use carefully and keep them for later ENGLISH use, be sure to make them accessible to other users and observe the information they contain. Table of contents Signs and symbols 1. Getting to know your device …………..3 2.
-
Page 3: Getting To Know Your Device
4 x adhesive electrodes (45 x 45 mm) The CE labelling certifies that the product complies with the essential requirements of Directive 93/42/EEC on medical 3 x AAA batteries products. Manufacturer 1. Getting to know your device What is a digital EMS/TENS unit and what can it The device can emit effective output values above 10 mA, averaged over every five-second interval Digital EMS/TENS units fall into the electrostimulation device…
-
Page 4: Important Notes
TENS, or transcutaneous electrical nerve stimulation, relates • Muscle training to support the strengthening of specific muscles to the electrical stimulation of the nerves via the skin. TENS is or muscle groups, and to achieve the desired changes to physical an effective non-pharmacological method of treating different proportions types of pain that have a variety of causes.
-
Page 5
• If you use an insulin pump Before using the device, consult your doctor if any of the • If you have a high temperature (e.g. > 39°C) following applies to you: • If you have a known or acute cardiac arrhythmia, or disorders of •… -
Page 6
• For hygiene reasons, the electrodes may only be used on one • Treatment of the skin with moisturising lotions or ointments person. beforehand is not recommended as this considerably increases • If the device does not work properly, or you feel unwell or the electrode wear and may cause unpleasant current peaks. -
Page 7: Device Description
Display (full screen): • Choking hazard! Small children may swallow and choke on 1 Menu batteries. Store the batteries out of the reach of small children. 2 Program number • Observe the plus (+) and minus (-) polarity signs. 3 Impulse intensity channel 2 ( •…
-
Page 8: Use
5. Use intensity in the display changes accordingly. If the program is in a pause phase, the intensity cannot be increased. 5.1 Notes on use • The device switches itself off automatically if it is not used for General information one minute (automatic switch-off).
-
Page 9: Program Overview
6. Program overview 6.2 EMS program table The digital EMS/TENS unit features a total of over 70 programs: Progr. Area of application, indications Running time Possible • 15 TENS programs (min) electrode positions • 35 EMS programs Warming up 1-27 •…
-
Page 10: Massage Program Table
6.3 MASSAGE program table Progr. Area of application, indications Running time Possible (min) electrode Progr. Area of application, indications Running Possible positions time (min) electrode Tightening the shoulder muscles positions Strengthening the lower back muscles 4-11 Tapping massage 1 Maximising the strength of the lower back 4-11 Tapping massage 2 muscles…
-
Page 11: Information Regarding The Positioning Of Electrodes
6.4 Information regarding the positioning of electrodes…
-
Page 12: Customisable Programs
It is fundamental to the intended success of electrostimulation electrodes of a channel so that the area affected by the pain applications that electrodes are positioned sensibly. is between the electrodes or to position one electrode directly We recommend that you consult your doctor to establish the ideal on the area affected by the pain and the other electrode at a electrode positions for your intended application area.
-
Page 13
˄/˅ 1. Place the electrodes on the desired area for treatment (for 3. Use the setting buttons to select the impulse frequency you positioning suggestions see electrode positions in section 6.4) want and use the ENTER button to confirm. ˄/˅ and connect them to the device. -
Page 14: Doctor’s Function
˄/˅ working time and pause time for this program to between 1 and 30 3. Use the setting buttons to select the working time («on seconds each. time») you want and use the ENTER button to confirm. ˄/˅ 4. Use the setting buttons to select the pause time («off time») 1.
-
Page 15: Current Parameters
Deletion of the Doctor’s function is confirmed with a long acoustic more easily to lower impulse frequencies up to 15 Hz, whereas fast- signal. reacting fibres only respond from approximately 35 Hz onwards. Impulses of approx. 45 – 70 Hz are linked with constant tension in Therapy memory the muscles and quicker fatigue.
-
Page 16: Cleaning And Storage
10. Cleaning and storage electronics retailers. You are legally required to dispose of the batteries. Adhesive electrodes Note: The codes below are printed on • To ensure that the adhesive electrodes remain adhesive for as batteries containing harmful substances: long as possible, clean them carefully with a damp, lint-free cloth Pb = Battery contains lead, Cd = Battery contains or clean the underside of the electrodes under lukewarm, running cadmium, Hg = Battery contains mercury.
-
Page 17: Replacement Parts And Wearing Parts
Please note that portable and 14. Technical specifications mobile HF communication systems may interfere with this unit. Name and model EM 49 More details can be requested from the stated Customer Services Type EM 49 address or found at the end of the instructions for use.
-
Page 18: Notes On Electromagnetic Compatibility
The following warranty terms shall apply: for medical products, as well as those of the Medizinproduktegesetz 1. The warranty period for BEURER products is either 5 years or- if (German Medical Devices Act). longer- the country specific warranty period from date of Purchase.
-
Page 20
Beurer GmbH • Söflinger Straße 218 • 89077 Ulm, Germany • www.beurer.com www.beurer-gesundheitsratgeber.com • www.beurer-healthguide.com…
инструкцияBeurer EM 49

DE
Digital EMS/TENS
Gebrauchsanweisung ………………………………2
EN Digital EMS/TENS unit
Instructions for use ……………………………….. 21
FR Appareil EMS/TENS numérique
Mode d’emploi ………………………………………38
ES Aparato digital TENS/EMS
Instrucciones de uso ……………………………..57
IT EMS/TENS digitale
Istruzioni per l‘uso …………………………………76
TR Dijital EMS/TENS
Kullanım kılavuzu …………………………………..94
RU Тренажер для мышц живота
EMS/TENS
Инструкция по применению ………………..111
PL Cyfrowe urządzenie do elektrycznej
stymulacji mięśni i nerwów
Instrukcja obsługi …………………………………130
Посмотреть инструкция для Beurer EM 49 бесплатно. Руководство относится к категории массажер, 21 человек(а) дали ему среднюю оценку 8.8. Руководство доступно на следующих языках: русский, английский. У вас есть вопрос о Beurer EM 49 или вам нужна помощь? Задайте свой вопрос здесь
Главная
| Beurer | |
| EM 49 | |
| массажеры | |
| 4211125662059 | |
| русский, английский | |
| Руководство пользователя (PDF), Техническая спецификация (PDF) |
Вес и размеры
| Ширина | 132 mm |
| Глубина | 63 mm |
| Высота | 27 mm |
| Вес | 170 g |
| Ширина упаковки | 53 mm |
| Глубина упаковки | 221 mm |
| Высота упаковки | 162 mm |
| Масса брутто | 443 g |
Технические характеристики
| Формат | Клейкая пластина |
| Диапазон частоты пульса | 1 — 150 Hz |
| Количество каналов | 2 канала |
| Ширина імпульсу | 450 µs |
| Количество программ | 64 |
| Цвет товара | Белый |
| Количество электродов | 4 |
| Таймер | Да |
| Продолжительность таймера (минимум) | 5 min |
| Продолжительность таймера (максимум) | 100 min |
| Интенсивность нагрузки | 500 Ω |
| Автовыключение | Нет |
| Регулируемая крепкость | Да |
Энергопитание
| Питание от батареи | Да |
| Число поддерживаемых батарей | 3 |
| Тип батареек | AAA |
| Технология батареи | Щелочной |
| Напряжение батареи | 1.5 V |
Экран
| Встроенный экран | Да |
| Тип дисплея | ЖК |
Содержимое упаковки
| Инструкция | Да |
| Руководство пользователя | Да |
показать больше
Не можете найти ответ на свой вопрос в руководстве? Вы можете найти ответ на свой вопрос ниже, в разделе часто задаваемых вопросов о Beurer EM 49.
Какой вес Beurer EM 49?
Beurer EM 49 имеет вес 170 g.
Какая высота Beurer EM 49?
Beurer EM 49 имеет высоту 27 mm.
Какая ширина Beurer EM 49?
Beurer EM 49 имеет ширину 132 mm.
Какая толщина Beurer EM 49?
Beurer EM 49 имеет толщину 63 mm.
Инструкция Beurer EM 49 доступно в русский?
Да, руководствоBeurer EM 49 доступно врусский .
Не нашли свой вопрос? Задайте свой вопрос здесь

Краткие характеристики
Назначение
для тренировки мышц, для лечения и профилактики заболеваний, для массажа
Перейти к характеристикам
Характеристики Миостимулятор Beurer EM49
Общие характеристики
Назначение
для тренировки мышц, для лечения и профилактики заболеваний, для массажа
Сфера использования
домашняя
Особенности
таймер, дисплей
Комплектация
прибор, поясной зажим, 2 соединительных кабеля, 4 самоклеящихся электрода, 3 батарейки типа ААА
Дополнительная информация
35 программ EMS, 15 программ TENS, 20 программ массажа; длительность импульсов 50 — 450 мкс на импульс; функция Doctor’s Function; длительность процедуры регулируется от 5 до 100 минут
Батарейки в комплекте
есть
Все характеристики
Не является публичной офертой
Информация о товаре носит справочный характер и не является публичной офертой. Характеристики, комплект поставки и внешний вид товара могут отличаться от указанных или быть изменены производителем без предварительного уведомления. Перед покупкой проверяйте информацию на официальном сайте производителя.
Если вы заметили ошибку или неточность в описании товара, пожалуйста, выделите часть текста с ошибкой и нажмите кнопку «Сообщить об ошибке».
Отзывов пока нет
Будьте первым, кто напишет отзыв о товаре, и получите бонусы
4. Подготовка к работе
1. Снимите с прибора защелку для ремня, если
она установлена.
2. Нажмите на крышку отделения для батареек
на обратной стороне прибора и сдвиньте ее
вниз.
3. Вставьте 3 алкалиновые батарейки типа AAA
на 1,5 В. Обязательно проследите за тем, что-
бы батарейки были установлены с правильной
полярностью в соответствии с маркировкой.
4. Снова тщательно закройте крышку отделения
для батареек (рис. 1).
5. При необходимости снова вставьте поясной
зажим.
6. Подключите соединительный кабель к элект-
родам (рис. 2).
Для удобного подключения электроды ос-
нащены зажимом.
7. Введите штекер соединительного кабеля
в разъем на верхней стороне прибора (рис. 3).
8. Не тяните, не перекручивайте и не перегибай-
те провода (рис. 4).
При замене или извлечении батареек все
настройки будут сброшены.
5. Применение
5.1 Указания к применению
• Если прибор не используется в течение 1 минуты, то он ав-
томатически отключается (автоматика отключения). При
повторном включении на ЖК-экране появится выбор меню,
последний выбранный пункт меню будет мигать.
Рис. 1
• Если нажать на допустимую кнопку, то раздастся короткий
сигнал, при нажатии на недопустимую кнопку прозвучат два
коротких сигнала.
• Вы можете прервать стимуляцию в любой момент кратким
нажатием кнопки ВКЛ./ВЫКЛ.
стимуляции еще раз нажмите кнопку ВКЛ./ВЫКЛ.
Рис. 2
новите желаемую интенсивность импульса заново.
5.2 Начало использования
Шаг 1. Выберите из таблицы (см. раздел «6. Обзор программ»)
программу, соответствующую Вашим целям.
Шаг 2. Разместите электроды в необходимой области (рекомен-
Рис. 3
дации по размещению см. раздел «6.4 Указания по размещению
электродов») и подключите их к устройству.
Шаг 3. Нажмите кнопку ВКЛ./ВЫКЛ.
бор.
Шаг 4. Нажатием на кнопку MENU перейдите в меню
Рис. 4
/
ENTER.
Шаг 5. С помощью кнопок настройки
димый номер программы и подтвердите нажатием на кнопку
ENTER. При запуске стимулирующего лечения интенсивность
импульса
сы на электроды пока не отправляются.
112
(пауза). Для продолжения
, чтобы включить при-
и подтвердите свой выбор нажатием кнопки
˄/˅
и
по умолчанию установлена на 00. Импуль-
и уста-
/
выберите необхо-