-
Contents
-
Table of Contents
-
Troubleshooting
-
Bookmarks
Quick Links
Related Manuals for Native Instruments komplete kontrol s series
Summary of Contents for Native Instruments komplete kontrol s series
-
Page 1
MANUAL… -
Page 2
The information in this document is subject to change without notice and does not represent a commitment on the part of Native Instruments GmbH. The software described by this docu- ment is subject to a License Agreement and may not be copied to other media. No part of this… -
Page 3
NATIVE INSTRUMENTS FRANCE SARL SHENZHEN NATIVE INSTRUMENTS COMPANY Limited 113 Rue Saint-Maur 203B & 201B, Nanshan E-Commerce Base Of 75011 Paris Innovative Services France Shi Yun Road, Shekou, Nanshan, Shenzhen www.native-instruments.com China www.native-instruments.com © NATIVE INSTRUMENTS GmbH, 2017. All rights reserved. -
Page 4: Table Of Contents
Table of Contents Table of Contents Welcome to KOMPLETE KONTROL …………….10 Document Conventions ………………….. 10 Box Contents ……………………..12 System Requirements ……………………. 12 Accessibility ……………………..14 1.4.1 Feature Overview ………………….. 15 1.4.2 Hardware Overview ………………..17 1.4.3 Training Mode ………………….18 New Features in KOMPLETE KONTROL 1.9 …………..
-
Page 5
Table of Contents Perform Panel ……………………..43 Plug-in Panel ……………………..44 Instrument Area …………………….. 44 Keyboard Overview ………………..46 Transport Section ……………………48 Perform Section …………………….. 49 Control Section ……………………… 50 Light Guide ……………………..52 Touch Strips ……………………..53 Transpose Buttons ……………………53 Global Controls and Preferences ……………. -
Page 6
Table of Contents 7.5.6 Preferences – Hardware Page ………………77 MIDI Communication ………………..80 Host Automation ……………………. 81 8.1.1 Automation IDs for the Perform Panel ……………. 81 8.1.2 Recording Automation ………………..82 Using the Keyboard in MIDI Mode ………………..85 Using the Keyboard as Stand-Alone MIDI Controller ………….. -
Page 7
Table of Contents 10.9 Working with Favorites ………………….. 111 10.9.1 Adding Preset Files to the Favorites …………….112 10.9.2 Displaying Favorites in the Results List …………..113 10.9.3 Removing Preset Files from the Favorites …………..114 10.10 Performing a Text Search ………………….116 10.11 Displaying Preset File Information ……………….. -
Page 8
Table of Contents 13 Playing and Editing Scales and Chords …………… 143 13.1 A Note about Music Theory ………………….144 13.2 Playing a Scale ……………………… 145 13.3 Playing Chords ……………………… 146 13.4 Editing Scales and Chords ………………….146 13.5 Setting the Scale Parameters ………………… 147 13.5.1 Scale Root Note …………………. -
Page 9
Table of Contents 14.6.2 Other Dynamic ………………….173 14.6.3 Other Gate ……………………. 173 14.7 Setting the Advanced Parameters ………………..174 14.7.1 Advanced Retrigger ………………..174 14.7.2 Advanced Repeat ………………….. 175 14.7.3 Advanced Offset ………………….175 14.7.4 Advanced Inversion ………………..175 14.8 Setting the Range Parameters ……………….. -
Page 10: Welcome To Komplete Kontrol
KOMPLETE KONTROL offers advanced integration with a number of hosts and provides full control of any Instruments supporting NKS, both from Native Instruments and partners. The keyboard lets you browse your Instruments in an intuitive way and play them creatively with KOMPLETE KONTROL’s unique Scale engine and Arpeggiator.
-
Page 11
Welcome to KOMPLETE KONTROL Document Conventions ▪ Text appearing in (drop-down) menus (such as Open…, Save as… etc.) in the software and paths to locations on your hard disk or other storage devices is printed in italics. ▪ Text appearing elsewhere (labels of buttons, controls, text next to checkboxes etc.) in the software is printed in blue. -
Page 12: Box Contents
Welcome to KOMPLETE KONTROL Box Contents Box Contents The box contains the following items: ▪ Information flyer providing: ▪ the hardware serial number of the KOMPLETE KONTROL S-Series keyboard ▪ a web link for downloading the KOMPLETE SELECT software bundle (including KOM- PLETE KONTROL) ▪…
-
Page 13
Welcome to KOMPLETE KONTROL System Requirements www.native-instruments.com/products/komplete/bundles/komplete-11/specifications/ KOMPLETE KONTROL — Manual — 13… -
Page 14: Accessibility
Welcome to KOMPLETE KONTROL Accessibility Accessibility KOMPLETE KONTROL offers a set of accessibility features for visually-impaired users. These are focused exclusively on the KOMPLETE KONTROL S-Series keyboard itself and include voice-over for the following features: ▪ All Perform and Transpose buttons, Parameter Page Left / Right buttons and key Naviga- tion buttons.
-
Page 15: Feature Overview
Welcome to KOMPLETE KONTROL Accessibility 1.4.1 Feature Overview The following table outlines the availability of accessibility features for different aspects of KOMPLETE KONTROL from both the KOMPLETE KONTROL S-Series keyboard and the KOM- PLETE KONTROL software. Feature Acces- Acces- Notes sible sible from…
-
Page 16
Welcome to KOMPLETE KONTROL Accessibility Feature Acces- Acces- Notes sible sible from from Key- Soft- board ware Navigate tracks Logic Pro X, GarageBand, Cubase control Pro, Cubase Artist, Nuendo, and Live: audible feedback is dependent on host. Control transport Logic Pro X, GarageBand, Cubase Pro, Cubase Artist, Nuendo, and Live: audible feedback is dependent on host. -
Page 17: Hardware Overview
Welcome to KOMPLETE KONTROL Accessibility 1.4.2 Hardware Overview The KOMPLETE KONTROL S-Series keyboard is divided into five main sections: Transpose, Perform, Transport, the Control section and Navigate. The Transpose section is on the far left of the keyboard next to the keybed and directly above the two Touch Strips.
-
Page 18: Training Mode
Welcome to KOMPLETE KONTROL Accessibility 1.4.3 Training Mode KOMPLETE KONTROL S-Series Training Mode makes it easy to locate a specific button or pa- rameter without accidentally triggering an action. When Training Mode is activated, all button presses and parameter names are announced but the corresponding action is not triggered. To activate or deactivate Training Mode from the KOMPLETE KONTROL S-Series key- ►…
-
Page 19: New Features In Komplete Kontrol 1.9
New Features in KOMPLETE KONTROL 1.9 New Features in KOMPLETE KONTROL 1.9 ▪ KOMPLETE KONTROL 1.9 adds support for the next generation of KOMPLETE KONTROL S49 and S61 keyboards. ▪ Additionally, it introduces the comprehensive Preview function to the Browser. Now you can preview sounds when browsing Factory Preset files for all KOMPLETE and NKS Instru- ments.
-
Page 20: The Komplete Kontrol Workflow
The KOMPLETE KONTROL Workflow The KOMPLETE KONTROL Workflow KOMPLETE KONTROL brings all the sounds from KOMPLETE and the Native Kontrol Standard (NKS) to the heart of your workflow. Its advanced integration in a number of hosts enables you to quickly capture ideas, with immediate access to the sounds you need—all directly from the KOMPLETE KONTROL S-Series keyboard.
-
Page 21
The KOMPLETE KONTROL Workflow ▪ Host integration: Advanced integration in a number of hosts allows you control core func- tionality directly from the keyboard. For more information, refer to ↑4.3, Setting up Host Integration ↑9, Host Integration. ▪ Browser: The Browser is your interface for finding, loading and organizing Instruments and Preset files from the KOMPLETE KONTROL Library. -
Page 22: Setting Up Komplete Kontrol
Setting up KOMPLETE KONTROL Setting up KOMPLETE KONTROL This section provides basic setup information and guides you through the process of integrat- ing KOMPLETE KONTROL with supported hosts. The KOMPLETE KONTROL software is installed both as a stand-alone application as well as a VST, Audio Unit, and AAX plug-in.
-
Page 23: Connecting The Keyboard To The Computer
Setting up KOMPLETE KONTROL Connecting the Keyboard to the Computer Connecting the Keyboard to the Computer This section assumes that you have assembled and connected the power supply accord- ing to the instructions printed on the Safety Instructions flyer found in the product box. To connect the KOMPLETE KONTROL S-Series keyboard to your computer: Attach the ‘device end’…
-
Page 24: Setting Up The Stand-Alone Application
Setting up KOMPLETE KONTROL Setting up the Stand-Alone Application Setting up the Stand-Alone Application When you launch the KOMPLETE KONTROL software from its installation directory, it starts as a stand-alone application independently from a host. By default the application uses the standard audio interface of your computer. In order to use another audio interface, and receive MIDI notes from the keyboard, you need configure the ap- plication in its Preferences.
-
Page 25
Setting up KOMPLETE KONTROL Setting up the Stand-Alone Application Preferences panel — Audio page Click on MIDI to display the MIDI page. Click on Input to display the available devices for incoming MIDI signals. Click the Komplete Kontrol checkboxes to activate incoming MIDI signals from the key- board. -
Page 26: Setting Up Host Integration
Setting up KOMPLETE KONTROL Setting up Host Integration Preferences panel — MIDI page (entries may vary on your computer) The software is configured and ready to be controlled with the keyboard. → The MIDI Output settings are required for using KOMPLETE KONTROL’s Smart Play features with other MIDI instruments.
-
Page 27
Setting up KOMPLETE KONTROL Setting up Host Integration ▪ MASCHINE ▪ Apple Logic Pro X ▪ Apple GarageBand ▪ Ableton Live ▪ Steinberg Cubase / Nuendo Before using the KOMPLETE KONTROL S-Series keyboard to control a supported host, a few configuration steps are required: Configuring Your Host for Use with the Keyboard For some of KOMPLETE KONTROL’s advanced integration features to function as intended,… -
Page 28: Setting Up Apple Logic Pro X And Garageband
Setting up KOMPLETE KONTROL Setting up Host Integration 4.3.1 Setting up Apple Logic Pro X and GarageBand Apple Logic Pro X and GarageBand are automatically configured for advanced integration with KOMPLETE KONTROL once you launch the respective application for the first time after in- stalling the KOMPLETE KONTROL software.
-
Page 29
Setting up KOMPLETE KONTROL Setting up Host Integration Installing the KOMPLETE KONTROL Instrument Racks KOMPLETE KONTROL is loaded into Ableton Live in the form of an Instrument Rack. In order to make the required Instrument Rack available in Ableton Live’s browser, it needs to be added to your Ableton Live User Library: Navigate to the following folder: Macintosh HD/Library/Application Support/Native Instru- ments/Host Integration/Ableton Live/… -
Page 30: Setting Up Ableton Live (Windows)
The MIDI Remote Script allows Ableton Live to recognize KOMPLETE KONTROL as a control surface. It needs to be copied into Live’s MIDI Remote Scripts directory: Ensure that Ableton Live is not running. Navigate to the following folder: C:\Program Files\Common Files\Native Instruments\Host Integration\Ableton Live\ Copy the Komplete_Kontrol_Mk2 folder to the clipboard.
-
Page 31: Connecting Pedals To The Keyboard
Setting up KOMPLETE KONTROL Connecting Pedals to the Keyboard Configuring Ableton Live for KOMPLETE KONTROL Once the MIDI Remote Script and the Instrument Rack file are installed in the correct loca- tion, you need to add KOMPLETE KONTROL as a control surface in Ableton Live’s preferences. Start Ableton Live.
-
Page 32
Setting up KOMPLETE KONTROL Connecting Pedals to the Keyboard The pedal inputs on the rear panel of the keyboard. These inputs allow you to connect sustain and expression pedals in order to further refine your performance. ▪ SUSTAIN: Lets you connect a footswitch to control sustain of the notes you play. This is an on/off switch. -
Page 33: Connecting External Midi Equipment To The Keyboard
Setting up KOMPLETE KONTROL Connecting External MIDI Equipment to the Keyboard The correct polarity for your sustain pedal is set. → Connecting External MIDI Equipment to the Keyboard The KOMPLETE KONTROL S-Series keyboard has dedicated MIDI sockets that allow you to di- rectly connect other MIDI devices using a 5-pin DIN MIDI cable and integrate the keyboard into your MIDI setup.
-
Page 34: Software Overview
Software Overview Software Overview This section gives an overview of the areas and controls of the KOMPLETE KONTROL software. Overview of the KOMPLETE KONTROL software. (1) Header: Provides access to general functions like the Main menu, the Preset display, the Transport and Master Volume controls, as well as options to show and hide user interface areas.
-
Page 35: Header
Software Overview Header Header The header is where you find general settings that affect KOMPLETE KONTROL globally. It al- so lets you access additional user interface areas. 11 12 13 13 The header. (1) KOMPLETE KONTROL logo: Opens the About screen, which shows the version number of the KOMPLETE KONTROL software.
-
Page 36
Software Overview Header (10) Tempo control: Lets you adjust the tempo in BPM (beats per minute). (11) Master Volume control: Lets you adjust the overall output volume of KOMPLETE KON- TROL. The meter shows the current peak level of the output signal. (12) CPU meter: Represents the current load on your computer’s processor;… -
Page 37: Browser
Software Overview Browser Browser The Browser gives you access to your KOMPLETE KONTROL Library and lets you add, edit, and organize Preset files. In the Browser’s Library pane, you can browse for all the Instruments and Preset files contained in your Library. In the Files pane, you can find and load compatible files from your hard drive, or add them to the Library.
-
Page 38: Library Pane
Software Overview Browser 5.2.1 Library Pane Library pane contains the following elements: Library pane. (1) Library: Displays the Library pane. (2) Content selector: The Globe icon selects factory content and the User icon selects user con- tent. Only Preset files of the selected content type are displayed in the results list (7). (3) Instrument selector: Selects a particular Instrument, Instrument category, and bank of the selected Instrument.
-
Page 39
Software Overview Browser (4) TYPES: Lets you browse for Preset files based on Type and Sub-Type tags that have been applied to them. You can collapse or expand this section by clicking on the little arrow next to TYPES. (5) MODES: Lets you browse for Preset files based on Mode tags that have been applied to them. -
Page 40: Instrument Selector
Software Overview Browser 5.2.2 Instrument Selector The Instrument selector allows you to limit your search to a certain Instrument category, a par- ticular Instrument, or a specific Bank of the Instrument. You can also load an Instrument along with its default Preset file directly from the Instrument selector. The Instrument selector.
-
Page 41
Software Overview Browser (1) Instrument selector header: The header shows the selected Instrument—if there is no selec- tion it shows a generic label (All Instruments). Click on the header to open or close the Instru- ment selector. (2) Category / Vendor selector: Allows you to sort the Instrument list by Category or by Vendor. -
Page 42: Files Pane
Software Overview Browser 5.2.3 Files Pane Files pane contains following elements: Files pane in the Browser. (1) Files tab: Displays the Files pane. (2) Favorite bar: Displays all your favorite folders. A click on any favorite folder lets you jump directly to that particular path and display its content in the Result list (5).
-
Page 43: Perform Panel
Software Overview Perform Panel (3) Location bar: Displays the selected path. The Location bar provides various tools to quickly navigate your file system. (4) Recent Locations button: Opens a list of the last visited locations for quickly jumping to any of them.
-
Page 44: Plug-In Panel
Software Overview Plug-in Panel (2) ARP: Clicking the round button left of switches the Arpeggiator on or off. Clicking the label displays the Arpeggiator’s parameters. See ↑14, Playing and Editing the Arpeggiator for details. (3) TOUCHSTRIP: Clicking the TOUCHSTRIP label displays the Touch Strips’ parameters. See ↑15, Configuring the Touch Strips for details.
-
Page 45
Software Overview Instrument Area The Instrument area displaying the Instrument Form. KOMPLETE KONTROL — Manual — 45… -
Page 46: Keyboard Overview
Keyboard Overview Keyboard Overview The KOMPLETE KONTROL S-Series keyboard is tightly integrated in the software and can be used to browse, control and play your Instruments as well as to control supported hosts. The keyboard is available in four sizes: The S25, S49, and S61 are equipped with the same top-quality semi-weighted Fatar keybed with aftertouch.
-
Page 47
Keyboard Overview TRANSPORT section: Controls the transport of supported hosts. TRANSPOSE buttons: The OCT- OCT+ buttons let you transpose the entire keybed one octave down or up, respectively. (4)Touch Strips: The Pitch Strip and the Modulation Strip are automatically assigned to corre- sponding controls of the loaded Instrument. -
Page 48: Transport Section
Keyboard Overview Transport Section Transport Section TRANSPORT section at the far left on the keyboard gives you quick and easy access to functions like play, record, loop, etc. in supported hosts. TRANSPORT section. (1) LOOP: Switches between standard and loop playback. (2) RWD: Moves the song position backward.
-
Page 49: Perform Section
Keyboard Overview Perform Section Perform Section The buttons of the PERFORM section on the far left of the KOMPLETE KONTROL S-Series keyboard let you switch the Scale engine and the Arpeggiator on or off and access their param- eter for editing. The parameters will be visible and editable via the displays and knobs in the Control section.
-
Page 50: Control Section
Keyboard Overview Control Section Control Section The Control section is located at the center of the KOMPLETE KONTROL S-Series keyboard. The knobs, buttons, and displays are automatically assigned to parameters of the loaded In- strument or selected mode. They provide immediate control and allow for deep editing of vari- ous aspects of KOMPLETE KONTROL.
-
Page 51
Keyboard Overview Control Section PAGE display: Tells you the current control mapping. The PAGE display reflects the map- ping by displaying e.g. or ARP. KOMPLETE KONTROL — Manual — 51… -
Page 52: Light Guide
Keyboard Overview Light Guide Light Guide The Light Guide visualizes the key mapping of loaded Instruments and sample mapping. By color coding sample based Instruments and indicating active and inactive keys in scales using the LEDs above the keybed. The Smart Play settings are also reflected by the Light Guide. This means that when you select e.g.
-
Page 53: Touch Strips
Keyboard Overview Touch Strips Touch Strips The two Touch Strips let you control pitch and modulation parameters of the loaded Instru- ment. The Touch Strips on the KOMPLETE KONTROL S-Series keyboard. The left Touch Strip, called Pitch Strip, is automatically assigned to the pitch bend parameter of the loaded and does not need to be assigned via MIDI learn.
-
Page 54: Global Controls And Preferences
Global Controls and Preferences Instrument Views Global Controls and Preferences This sections introduces the global controls and the Preferences you can access via the Header of KOMPLETE KONTROL. Instrument Views Once you have loaded an Instrument from the Browser, it appears in the Instrument area of the KOMPLETE KONTROL software.
-
Page 55: Default View
Global Controls and Preferences Instrument Views 7.1.1 Default View The Default View is the view that first appears when you load an Instrument from the Browser. It gives you access to some of the most important features of each KOMPLETE Instrument with an easy-to-use interface.
-
Page 56
Global Controls and Preferences Instrument Views POLYPLEX in additional view. Besides of selecting Additional View via the KOMPLETE KONTROL Menu and the application menu, you can also do this by clicking the button in the KOMPLETE KONTROL header. Clicking it again will return to the Default View. The + button opens and closes the Additional View. -
Page 57: Edit View
Global Controls and Preferences Instrument Views 7.1.3 Edit View Edit view is only available for Instruments powered by KONTAKT or REAKTOR. In the Edit View you have also the possibility to open any KOMPLETE Instrument that can be loaded or played by either the KONTAKT PLAYER or REAKTOR PLAYER. This gives you access to all the flexible controls and features you would normally have when using KONTAKT or RE- AKTOR in stand-alone mode.
-
Page 58: Switching Instances
Global Controls and Preferences Switching Instances Edit view enables you to access files that cannot be loaded from the KOMPLETE KON- TROL Browser, e.g. KONTAKT Multis which can be loaded from the KONTAKT Browser in edit view. Switching Instances When two or more instances of the KOMPLETE KONTROL software are running (e.g. as a plug- in on different tracks of the host), you must choose which instance you want to control from the KOMPLETE KONTROL S-Series keyboard.
-
Page 59
Global Controls and Preferences Switching Instances Switching to an Instance from the Keyboard When using KOMPLETE KONTROL as a plug-in in a host without advanced integration, you cannot rely on automatic switching between instances. However, you can still select a particu- lar instance of the KOMPLETE KONTROL software from the keyboard by using the on-screen overlay. -
Page 60: Transport And Tempo
Global Controls and Preferences Transport and Tempo Transport and Tempo If KOMPLETE KONTROL is used in stand-alone mode, it features its own transport and tempo settings. They are used by sequenced KONTAKT and REAKTOR Instruments as well as the Ar- peggiator.
-
Page 61: Clock Resetting Commands
Global Controls and Preferences Transport and Tempo 7.3.1 Clock Resetting Commands Clock Resetting Commands from the Software ▪ When the internal clock is stopped, clicking the Reset button allows you to start playback from the beginning by pressing the Play button. ▪…
-
Page 62: Adjusting Master Volume
Global Controls and Preferences Adjusting Master Volume While holding SHIFT push and turn the Control encoder. The tempo adjusts in increments of one. → Adjusting Master Volume The Master Volume slider lets you adjust the overall output volume of KOMPLETE KONTROL. The Volume meter shows the current peak level of the output signal.
-
Page 63: Preferences — Audio Page
Global Controls and Preferences Preferences Click Edit > Preferences in the KOMPLETE KONTROL menu: ► 7.5.1 Preferences – Audio Page Audio page holds settings related to your audio interface when KOMPLETE KONTROL is running as a stand-alone application. When using KOMPLETE KONTROL as a plug-in, the audio configuration is managed by the host, and the Audio page is not available.
-
Page 64
Global Controls and Preferences Preferences Preferences panel — Audio page Setting Description Driver Here you can select the audio driver. Device This allows you to choose from the available devices if you have connected more than one audio interface. Status This shows you whether your audio interface is currently running. -
Page 65
Global Controls and Preferences Preferences Setting Description Buffer Size macOS: This slider allows you to adjust the buffer size of your audio interface in samples. Lower values result in a more immediate playing response but increase the CPU load, and may result in audible clicks and pops. -
Page 66: Preferences — Midi Page
Global Controls and Preferences Preferences 7.5.2 Preferences – MIDI Page MIDI page allows you to set up the MIDI input and output ports that you want to use when KOMPLETE KONTROL is running as a stand-alone application. When using KOMPLETE KONTROL as a plug-in, the MIDI configuration is managed by the host, and the MIDI page is not available.
-
Page 67: Preferences — General Page
Native Instruments ap- plications when they are used in real life situations. The data sent to Native Instruments is one hundred percent anonymous and will not affect performance.
-
Page 68
Global Controls and Preferences Preferences Usage Data Tracking in the KOMPLETE KONTROL Preferences. To enable or disable Usage Tracking: Open the General page of the Preferences by clicking Preferences… in the MASCHINE menu. Click the Allow usage data tracking checkbox to enable or disable user data tracking. KOMPLETE KONTROL — Manual — 68… -
Page 69: Preferences — Library Page
Global Controls and Preferences Preferences 7.5.4 Preferences – Library Page Library page allows you to edit the locations of all KOMPLETE KONTROL Library files (both Factory and User) that appear in the Library pane of the Browser. At the top of the page, the Factory User buttons allow you to switch between the…
-
Page 70
Global Controls and Preferences Preferences Element Description Location column Shows the path of each library. If you have moved any library to another location on your computer, click the folder icon on the left of that library and select its new path. Product column Shows the name of each product. -
Page 71
Global Controls and Preferences Preferences User Pane User pane shows all user libraries currently used. These include KOMPLETE KONTROL’s standard user directory as well as any other user directory you might have defined. These libra- ries will appear in the User view of the Browser’s Library pane. -
Page 72
Alias column to set the alias for that new location. The alias of the default user folder, Native Instruments User Directory, cannot be edited — this is the location where all your user files will be stored by default. Scan user content… -
Page 73
Removing Folders from the User Library You can also remove any user folder from your library—except the default user content directo- Native Instruments User Content. KOMPLETE KONTROL — Manual — 73… -
Page 74: Preferences — Plug-Ins Page
Global Controls and Preferences Preferences 7.5.5 Preferences – Plug-ins Page Plug-ins page allows you to manage your VST plug-ins in KOMPLETE KONTROL. At the top of the page, the Manager Locations buttons allow you to switch between the Manager pane and the Locations pane.
-
Page 75
Global Controls and Preferences Preferences Preferences panel — the Plug-ins page’s Manager pane. Element Description Checkbox column Activates or deactivates a plug-in for use in KOMPLETE KONTROL. Plug-in column Lists all available VST plug-ins in KOMPLETE KONTROL. Always use latest If this option in enabled (default), Library content is loaded version of NI Plug- with the latest version of the associated plug-in. -
Page 76
Global Controls and Preferences Preferences Locations Pane Locations pane allows you manage the folders containing your plug-ins on the hard drive. KOMPLETE KONTROL scans these folders for VST plug-ins and adds them to the Manager pane. You can Remove folders from the list, as well as use the Rescan function to update the available plug-ins in KOMPLETE KONTROL according to any changes made to the… -
Page 77: Preferences — Hardware Page
Global Controls and Preferences Preferences Setting Description Plug-in column Lists all folders that KOMPLETE KONTROL scans for VST plug-ins. Opens a file dialogue that lets you add another folder to the list. Remove Removes the currently selected folder from the list. Rescan Scans all folders in the list for compatible plug-ins and updates the…
-
Page 78
Global Controls and Preferences Preferences Preferences panel — Hardware page. Setting Description Keyboard Velocity Scaling Velocity Scaling determines how your playing is translated into velocity values: starting from Soft 3 (a soft touch is enough to get a big velocity value) through Linear (default) to Hard 3 (you really have to press the key hard to get a big velocity value). -
Page 79
Global Controls and Preferences Preferences Setting Description Enabled Light Guide allows you to switch the colored LEDs above the keybed on or off. The Light Guide visualizes MIDI patterns being played back from the host as well as shows you the active keys in any scale from the Perform Panel. Navigate Browse Mode Switches between the… -
Page 80: Midi Communication
MIDI Communication MIDI Communication KOMPLETE KONTROL provides you with flexible MIDI control and host automation capabili- ties for easy integration with your MIDI environment. Incoming MIDI KOMPLETE KONTROL and the Instruments you load inside it can be controlled via MIDI and the host (when KOMPLETE KONTROL is loaded as a plug-in): ▪…
-
Page 81: Host Automation
MIDI Communication Host Automation MIDI output is only supported by the stand-alone application as well as the VST and AAX versions of the plug-in. The AU (Audio Unit) version of the plug-in does not support MIDI output. Host Automation When you load KOMPLETE KONTROL as a plug-in in a host, the parameters of the loaded In- strument, the Scale engine, and the Arpeggiator become available for automation from the host.
-
Page 82: Recording Automation
MIDI Communication Host Automation Automation ID Parameter Mode (Arp) Type (Arp) Rate (Arp) Sequence (Arp) Swing (Arp) Octaves (Arp) Dynamic (Arp) Gate (Arp) Retrigger (Arp) Repeat (Arp) Offset (Arp) Inversion (Arp) Min. Key (Arp) Max. Key (Arp) Hold (Arp) 8.1.2 Recording Automation Many hosts require that you have enabled transport record in order to record automation, while others make use of dedicated automation controls.
-
Page 83
MIDI Communication Host Automation Changing the State of an On/Off Switch To change the state of an on/off switch: Click the corresponding button with your computer mouse. Turn the knob on the keyboard currently assigned to the corresponding parameter. KOMPLETE KONTROL — Manual — 83… -
Page 84
MIDI Communication Host Automation Selecting Another Entry from a Drop-Down Menu To select another entry from a drop-down menu: Click the corresponding menu with your computer mouse and select an entry. Turn the knob on the keyboard currently assigned to the corresponding parameter. Changing the Value of a Drag Control To change the value of a drag control: Click and drag the corresponding drag control with your computer mouse. -
Page 85: Using The Keyboard In Midi Mode
MIDI Communication Using the Keyboard in MIDI Mode Turn the knob on the keyboard currently assigned to the corresponding parameter. Some hosts let you handle automation by using automation IDs that are mapped to specific parameters of the plug-in. KOMPLETE KONTROL comes with a predefined list of automation IDs that lets the host find them automatically.
-
Page 86: Using The Keyboard As Stand-Alone Midi Controller
MIDI Communication Using the Keyboard as Stand-Alone MIDI Controller MIDI Assignment The MIDI mode’s versatility is made possible by the Controller Editor application, which allows you to freely define MIDI assignments for the controls on the keyboard. The Controller Editor is installed during the KOMPLETE KONTROL installation procedure.
-
Page 87: Host Integration
Host Integration Integration with MASCHINE Host Integration When using advanced host integration, the KOMPLETE KONTROL S-Series keyboard becomes the centerpiece of your studio setup. You can use it to control not only the Instrument loaded in KOMPLETE KONTROL, but also core functionality of supported hosts. Advanced integration of KOMPLETE KONTROL is available in the following hosts: ▪…
-
Page 88
Host Integration Integration with MASCHINE PERFORM Section Button on KOMPLETE KONTROL S-Series Action in MASCHINE SCALE Enable/disable SCALE for the selected Group Enable/Disable ARP for the selected Group SHIFT SCALE Edit SCALE for the selected Group SHIFT Edit ARP for the selected Group TRANSPORT Section Button on KOMPLETE KONTROL S-Series Action in MASCHINE… -
Page 89
Host Integration Integration with MASCHINE Button on KOMPLETE KONTROL S-Series Action in MASCHINE Move the song position forwards by Pattern Grid increments SHIFT Move the song position backwards by Step Grid increments SHIFT Move the song position forwards by Step Grid increments TRANSPOSE Section Button on KOMPLETE KONTROL S-Series… -
Page 90
Host Integration Integration with MASCHINE Button on KOMPLETE KONTROL S-Series Action in MASCHINE Navigate Arrows Left Navigate arrow Select the previous Plug-in Slot of selected Sound Slot Right Navigate arrow Select the next Plug-in Slot of selected Sound Slot Up Navigate arrow Select the previous Sound Slot of selected Group Down Navigate arrow… -
Page 91: Integration With Maschine
Host Integration Integration with MASCHINE Integration with MASCHINE If you own MASCHINE, you can control many of MASCHINE’s functions directly from the KOMPLETE KONTROL S-Series keyboard. Furthermore, the Arrange buttons on the keyboard give you access to certain modes and views of the MASCHINE software that makes the integra- tion of KOMPLETE KONTROL into MASCHINE straight-forward.
-
Page 92: Integration With Ableton Live
Host Integration Integration with Ableton Live Button on KOMPLETE KONTROL S-Series Action in Logic Pro X / Garage Band SHIFT Enable / disable the count-in STOP Stop SHIFT STOP Enable / disable the metronome LOOP Enable / disable cycle LOOP + Control encoder Move the cycle by its own length Control encoder…
-
Page 93
Host Integration Integration with Ableton Live Button on KOMPLETE KONTROL S-Series Action in Logic Pro X / Garage Band LOOP Enable / disable cycle LOOP + Control encoder Move the cycle by its own length Control encoder Move the song position in one bar increments Navigate Up Track up Navigate Down… -
Page 94: Browsing The Library
Browsing the Library Browser Basics Browsing the Library The Browser is the place where you can find and load Instruments and Preset Files in KOM- PLETE KONTROL as well as organizing your own Preset files. You will at first learn about the Browser basics followed by explaining the browsing workflows.
-
Page 95: About The Library And Meta-Information
Browsing the Library Browser Basics ▪ Alternatively, you can use the knobs and displays on the keyboard for browsing your KOM- PLETE KONTROL Library. In this case, the Browser functions are mapped directly to the keyboard’s Control section, making the KOMPLETE KONTROL Browser workflow available without using the computer screen.
-
Page 96: Browsing The Library Vs. Browsing Your Hard Disks
Browsing the Library Browser Basics Tags To help you find the right Preset file quickly and efficiently, the Library implements various techniques that go far beyond the classic folder structure of your operating system—the usage of tags. For example, each Preset file included in the Library contain tags which describe the Preset file according to following aspects: ▪…
-
Page 97: Selecting Browse Mode Keyboard
Browsing the Library Selecting Browse Mode Keyboard Library pane respectively the Files pane can be accessed by clicking the corresponding tab at the top of the Browser. Click the desired tab to show the corresponding pane of the Browser. Browsing and loading files from the file system using the KOMPLETE KONTROL S-Ser- ies keyboard is not possible.
-
Page 98: Opening The Browser
Browsing the Library Opening the Browser The Browser functions are now mapped to the Control section and can be controlled with → the page buttons and knobs. 10.3 Opening the Browser A click on the Browser button (the magnifier symbol) in the header opens and closes the Browser.
-
Page 99: Choosing Between Factory Content And User Content
Browsing the Library Choosing Between Factory Content and User Content 10.4 Choosing Between Factory Content and User Content The Content selector shows two icons, one representing the factory content on the left, and one representing the user content on the right: The Content selector.
-
Page 100: Loading An Instrument With Its Default Preset File
Browsing the Library Loading an Instrument with its default Preset File Press the left and right Page buttons choose between FACTORY content and USER con- ► tent. By default, the FACTORY content is selected. 10.5 Loading an Instrument with its default Preset File The Instrument selector allows you to limit your search to a certain Instrument category, a par- ticular Instrument, or a specific Bank of the Instrument.
-
Page 101
Browsing the Library Loading an Instrument with its default Preset File Sort the Instruments by Category or by Vendor using the Category / Vendor selector. Navigate through the Instrument groups to find the Instrument to your liking. Place the mouse over the Instrument entry in the Instrument selector and click on the ar- row symbol that appears in the upper right corner of the Instrument entry. -
Page 102
Browsing the Library Loading an Instrument with its default Preset File The Instrument with its default Preset file has been loaded. With your selection the In- → strument selector automatically closes, the Instrument name and icon appear in the In- strument selector header. -
Page 103: Filtering Preset Files By Bank
Browsing the Library Filtering Preset Files by Bank Loading an Instrument using the Keyboard In order to load an Instrument on the keyboard: Press and hold SHIFT to access the secondary Browser functions. While holding SHIFT press turn Knob 1 to either select CATEGORY VENDOR for sorting…
-
Page 104: Resetting The Instrument Selection
Browsing the Library Resetting the Instrument Selection Click the arrow under the Instrument icon to open the Bank drop-down menu. Choose a Bank from the available entries. Upon your selection the Bank drop-down menu closes and displays the selected Bank. →…
-
Page 105: Types And Modes Filters
Browsing the Library Types and Modes Filters To reset the selection made in the Instrument selector, click the little cross at the right of ► the Instrument name: The Instrument selection is reset. The Instrument selector displays the generic label →…
-
Page 106
Browsing the Library Types and Modes Filters TYPES MODES filters for MASSIVE As soon the desired tags in the tag filters are selected the search is limited to the Preset files that are tagged correspondingly. Tags can also be deselected to broaden the search. Types The tags of the TYPE… -
Page 107
Browsing the Library Types and Modes Filters ▪ In general, Mode tags will rather refer to technical terms (e.g., Arpeggiated, Percussive, Synthetic, etc.). ▪ The MODES filter is always displayed. You can start your search with the MODES filter be- fore (or even without) using the TYPES filter. -
Page 108: Filtering Preset Files By Types And Modes
Browsing the Library Types and Modes Filters 10.8.1 Filtering Preset Files by Types and Modes In this tutorial you will learn how to filter find a bass line Preset file exemplary from the MON- ARK Instrument using the Types filter. We assume here you have already selected the MON- Instrument in the Instrument selector.
-
Page 109
Browsing the Library Types and Modes Filters ⇨ Upon your selection the second level of tags appears underneath with Sub-Types like Ana- Bass, Fingered Bass, etc. KOMPLETE KONTROL — Manual — 109… -
Page 110
Browsing the Library Types and Modes Filters Select the Sub-Type matching the desired characteristic for your bass line. By selecting any of these tags, say, Distorted Bass, you will narrow your search to this particular Sub- Type of bass sounds. Select the Synthetic tag from the… -
Page 111: Selecting Multiple Tags From The Same Level
Browsing the Library Types and Modes Filters ⇨ Upon your selection the second level of tags appears above Knob 6 displaying All Sub- Types. Turn Knob 6 to select the Sub-Type matching the desired characteristic for your bass line, say, Distorted Bass.
-
Page 112: Adding Preset Files To The Favorites
Browsing the Library Working with Favorites The KOMPLETE KONTROL Browser showing all Favorites tagged with the Type Bass 10.9.1 Adding Preset Files to the Favorites To add a Preset File to the Favorites: Place the mouse cursor over any selected or unselected entry in the Results list. ⇨…
-
Page 113: Displaying Favorites In The Results List
Browsing the Library Working with Favorites Click on the Set Favorite icon to add the corresponding Preset file to the Favorites. The Preset file is added to the Favorites, indicated by the lit Set Favorite icon next to its → name.
-
Page 114: Removing Preset Files From The Favorites
Browsing the Library Working with Favorites Click on the Favorites icon next to the search field to activate the Favorites filter. ► The Favorites icon is now lit and the Results list shows all favorite Preset Files. → Displaying all Preset Files to the Favorites on the Keyboard In order to display all Favorites in the Results list on the keyboard: Press and hold SHIFT.
-
Page 115
Browsing the Library Working with Favorites Click on the lit Set Favorite icon to remove the corresponding Preset file from the Favor- ► ites. The Preset file is removed from the Favorites, indicated by the hidden Set Favorite icon. → The next time you select the Favorites filter, the Preset file will not be shown in the Re- sults list. -
Page 116: 10.10 Performing A Text Search
Browsing the Library Performing a Text Search 10.10 Performing a Text Search In the search field you can enter your search query. The search considers all properties such as Preset file names, Instruments, Banks, Type and Mode tags, directly as you type. The search field.
-
Page 117: 10.12 Auditioning Your Preset Files
Browsing the Library Auditioning your Preset Files The Information box provides various information on the selected file(s). If the selected files have different characteristics, the corresponding fields in the Information box will read multi. 10.12 Auditioning your Preset Files When you are browsing Preset Files, you can audition Preset Files by using the Prehear feature at the bottom of the Browser.
-
Page 118
Browsing the Library Auditioning your Preset Files In order to hear audio of the Prehear feature it is mandatory to configure the audio inter- face in the Preferences of KOMPLETE KONTROL. Auditioning Your Preset Files using the Keyboard You can also enable/disable the Prehear feature on the keyboard: Press and hold SHIFT to call up the Browser’s secondary functions in the displays. -
Page 119: 10.13 Browsing Via The On-Screen Overlay
Browsing the Library Browsing via the On-Screen Overlay 10.13 Browsing via the On-Screen Overlay When the default Browse Mode On-Screen Overlay is selected in the Preferences, pressing the BROWSE button on the KOMPLETE KONTROL S-Series keyboard brings up a large and easy- to-see on-screen overlay on your computer screen.
-
Page 120
Browsing the Library Browsing via the On-Screen Overlay (1) Content selector: Selects the files that are browsed. Switch the User icon off to search the factory content, or on to search the user content. (2) Instrument selector: Select to open a drop-down menu where you can select a particular In- strument and sometimes the Bank of the selected Instrument. -
Page 121: Managing The Library
PLETE KONTROL Library. On your hard drive, the user Preset file s are saved in the following folder (sorted by Instrument, in corresponding subfolders): ▪ Windows: C:\Users\<your user name>\Documents\Native Instruments\User Content\ ▪ macOS: Macintosh HD/Users/<your user name>/Documents/Native Instruments/User Con- tent/ The files saved for KOMPLETE Instruments with KOMPLETE KONTROL are compatible with the stand-alone and plug-in versions.
-
Page 122
Managing the Library Saving Preset Files to the User Library In the File submenu of the KOMPLETE KONTROL menu, click on Save : Or, if you want to save a Preset file you are working on with a new name, click on Save As…… -
Page 123: Deleting User Preset Files From The User Library
Managing the Library Deleting User Preset Files from the User Library Your new Preset file immediately appears in the user content section of the Library pane. → 11.2 Deleting User Preset Files from the User Library You can delete user Preset file s directly from the Results list: Right-click the desired Preset file and select Delete from the context menu.
-
Page 124: Editing The Tags And Properties Of User Preset Files
Managing the Library Editing the Tags and Properties of User Preset Files 11.3 Editing the Tags and Properties of User Preset Files When you save user Preset file s in KOMPLETE KONTROL, they are automatically assigned to Instruments and Banks depending on the Instrument you are using. To further define the at- tributes of your user Preset file s, you can edit the Type and Mode tags as well as the general properties of the file.
-
Page 125
Managing the Library Editing the Tags and Properties of User Preset Files Click and drag the upper edge of the Attribute Editor upwards to increase its size. This makes it easier to navigate in the list of available tags. KOMPLETE KONTROL — Manual — 125… -
Page 126
Managing the Library Editing the Tags and Properties of User Preset Files Assign the appropriate tags to your file by clicking the checkboxes next to their names. Click on MODES to edit the Mode tags for your file. You can assign them in the same way you assigned the Type tags before, by clicking on the checkboxes next to their names. -
Page 127: Working With The Files Pane
Managing the Library Working with the Files Pane Click on PROPERTIES to edit additional information included in your file. You can enter your name in the Author field, or, in case you intend to share the file, leave a note in the Comment field for other users to read.
-
Page 128: Additional Features In The Results List In The Files Pane
Managing the Library Working with the Files Pane The Result list of the Files pane. 11.4.1 Additional Features in the Results List in the Files Pane In the Files Pane the Results list offers a context menu with additional commands. You can open it with a right-click on the selected entry or entries, respectively.
-
Page 129: Navigating To File Locations With The Location Bar
Managing the Library Working with the Files Pane Command Description Refresh Refreshes the display of the list, in case items have been modified in that folder. Find in Explorer / Find in Finder Opens an Explorer/Finder window pointing to the selected folder.
-
Page 130: Navigating To Recent File Locations
Managing the Library Working with the Files Pane ◦ If all the levels cannot be displayed in the path, click the double left-pointing arrow left of the path to display the remaining upper levels (up to the Workspace, representing the highest level in your file system), and select any entry in the list to jump to that location.
-
Page 131
Managing the Library Working with the Files Pane The Favorite bar, at the top of the Files pane. Favorite folders can be useful if you often return to the same location while browsing your file system in the Files pane. The default favorite folders are the roots of each of your hard disks, your desktop folder, and your user folder. -
Page 132: Loading Vst Plug-Ins
Managing the Library Loading VST Plug-ins In the Results list, right-click the desired folder and select Add to Favorites from the con- text menu. You can also remove any Favorite from the Favorite bar: To remove a favorite folder, right-click it in the Favorite bar and select Remove from Fa- ►…
-
Page 133
Managing the Library Loading VST Plug-ins KOMPLETE Instruments and NKS Instruments in the KOMPLETE KONTROL Browser However, you can also load plug-ins directly, allowing you to integrate any VST plug-in in KOM- PLETE KONTROL. This way you can play your VST plug-ins using the Smart Play features, map their parameters to the controls on the keyboard, and save Preset files for them in your KOM- PLETE KONTROL User Library. -
Page 134: Installing Nks Instruments
Managing the Library Installing NKS Instruments Click on the plug-in you want to load in the Plug-ins submenu of the KOMPLETE KON- ► TROL menu. If your VST plug-ins do not show up in the Plug-ins submenu, check if the VST plug-in folders on your hard drive are correctly added to the Locations pane on the Preferences’…
-
Page 135
Managing the Library Installing NKS Instruments NKS Instruments can be found in the KOMPLETE KONTROL Browser next to your KOM- PLETE Instruments. All of their Preset file s are fully tagged, so filtering in the Browser gives you matching Results from both KOMPLETE Instruments and NKS Instruments. And when you load a Preset file from an NKS Instrument, its parameters are automatically mapped to the controls on the keyboard. -
Page 136
Managing the Library Installing NKS Instruments Click on Add a serial in the top-left corner of Native Access. Enter the serial number of the Instrument and click SERIAL. ⇨ Native Access asks you to browse to the folder containing the Instrument files. Before you do this, ensure that you have copied the folder to its final location on your computer. -
Page 137: Importing Komplete Kontrol-Compatible User Files
Managing the Library Importing KOMPLETE KONTROL-Compatible User Files Click on INSTALL to add the Instrument to your KOMPLETE KONTROL Library. The Instrument is installed. KOMPLETE KONTROL automatically scans for the new con- → tent and adds it to the KOMPLETE KONTROL Browser. The KOMPLETE KONTROL Library and the KONTAKT Browser reference the Instrument files contained in the folder.
-
Page 138
Managing the Library Importing KOMPLETE KONTROL-Compatible User Files For this you will have to import the files into the Library first. Importing files does not mean they will be moved from the directory they currently reside in, they will only be referenced by the Browser. -
Page 139: Controlling Instrument Parameters
Controlling Instrument Parameters Pre-Mapped Instruments Controlling Instrument Parameters This section introduces you to controlling Instrument parameters using the KOMPLETE KON- TROL S-Series keyboard and explains how to customize parameter mappings. 12.1 Pre-Mapped Instruments All KOMPLETE and NKS Instruments are pre-mapped , which means that the keyboard’s knobs and Touch Strips are automatically assigned to key parameters as soon as you load an Instrument in KOMPLETE KONTROL.
-
Page 140: Switching Parameter
Controlling Instrument Parameters Switching Parameter Pages 12.3 Switching Parameter Pages Many Instruments are equipped with much more than eight parameters. To provide quick ac- cess to additional parameters, the Page buttons (left and right arrows) to the left of the Control section let you skip through parameter pages.
-
Page 141
Controlling Instrument Parameters Customizing Parameter Mappings ▪ Add and rename sections on the pages to group controls. In order to make your changes permanent, you have to save the Preset file to the KOM- PLETE KONTROL User Library. For more information, refer to ↑11.1, Saving Preset Files to the User Library. -
Page 142
Controlling Instrument Parameters Customizing Parameter Mappings Double-click on the empty space above a parameter, enter a name, and then press [enter] ► or click elsewhere to create a new section starting with the chosen parameter. To rename an existing section, double-click on it and enter a new name. Press [enter] or ►… -
Page 143: Playing And Editing Scales And Chords
Playing and Editing Scales and Chords Playing and Editing Scales and Chords KOMPLETE KONTROL’s Scale engine comes equipped with a vast amount of scales that you can select and use to play your Instruments. This opens up possibilities to play an Instrument such as a piano according to, e.g., the minor pentatonic scale without hitting a “false”…
-
Page 144: A Note About Music Theory
Playing and Editing Scales and Chords A Note about Music Theory To switch on the Scale engine, click the blue check box next to SCALE in the Perform ► section so it is filled. Activating the Scale Engine on the Keyboard To switch on the Scale engine, press SCALE in the…
-
Page 145: Playing A Scale
Playing and Editing Scales and Chords Playing a Scale belonging to some scale, you are certain to stay “in key” within that scale. Important to note though, is that scales are not made up by absolute note values, but rather consist of relative changes in pitch—or steps along the scale.
-
Page 146: Playing Chords
Playing and Editing Scales and Chords Playing Chords To select a scale, turn Knob 2 (BANK, by default set to MAIN) and Knob 3 (TYPE, by de- fault set to MAJOR) until you find a scale you like. To play the scale you selected, ensure that the SCALE button is lit.
-
Page 147: Setting The Scale Parameters
Playing and Editing Scales and Chords Setting the Scale Parameters To edit the Scale engine parameters in the KOMPLETE KONTROL software, click on ► SCALE in the Perform panel so it is highlighted. To enable Scale Edit mode and map the Scale engine parameters to the keyboard’s Con- ►…
-
Page 148: Scale Root Note
Playing and Editing Scales and Chords Setting the Scale Parameters SCALE parameters Root Note, Bank, and Type. 13.5.1 Scale Root Note The first SCALE parameter is Root Note. On the keyboard, it is mapped to Knob 1 of the Con- trol section in Scale Edit mode.
-
Page 149: Scale Bank And Type
Playing and Editing Scales and Chords Setting the Scale Parameters ▪ A# ▪ B 13.5.2 Scale Bank and Type The second and third SCALE parameters from the left are Bank and Type. On the keyboard, they are mapped to Knob 2 and Knob 3 of the Control section in Scale Edit mode. Use them to decide the scale pattern according to which the notes will be mapped onto the keys of the KOMPLETE KONTROL S-Series keyboard.
-
Page 150
Playing and Editing Scales and Chords Setting the Scale Parameters Scale Bank Type Degree Formula Maj Pent Main Maj Pent 1 2 3 5 6 1 ♭3 4 5 ♭7 Min Pent Main Min Pent 1 ♭3 4 ♯4 5 ♭7 Blues Main Blues… -
Page 151
Playing and Editing Scales and Chords Setting the Scale Parameters Scale Bank Type Degree Formula 1 2 3 4 ♭5 ♭6 ♭7 Major Locrian Modes Maj Loc 1 2 ♭3 4 ♭5 ♭6 ♭7 Minor Locrian Modes Min Loc 1 ♭2 ♭3 ♭4 ♭5 ♭6 ♭7 Super Locrian Modes Sup Loc… -
Page 152
Playing and Editing Scales and Chords Setting the Scale Parameters Scale Bank Type Degree Formula 1 ♭2 3 4 5 ♭6 ♭7 Jewish 1 World Jewish 1 1 2 ♭3 ♯4 5 6 ♭7 Jewish 2 World Jewish 2 1 ♭2 ♭3 ♯4 5 ♭6 7 Indian 1 World Indian 1… -
Page 153
Playing and Editing Scales and Chords Setting the Scale Parameters Scale Bank Type Degree Formula 1 ♭2 ♭3 5 b6 Bhupalam 5-Tone Bhupalam Amritavarshini 5-Tone Amrita 1 3 ♯4 5 7 1 2 ♭3 4 ♯4 ♯5 6 7 Octatonic Modern Octatonc 1 2 3 ♯4 5 6 ♭7… -
Page 154
Playing and Editing Scales and Chords Setting the Scale Parameters Scale Bank Type Degree Formula 1 ♭2 3 4 5 6 7 Neapolitan Maj Major Nea Maj 1 2 3 4 ♭5 ♭6 ♭7 Major Locrian Major Maj Loc 1 2 ♭3 3 5 6 Blues Major Major Blues Ma… -
Page 155: Setting The Key Mode Parameter
Playing and Editing Scales and Chords Setting the Key Mode Parameter Scale Bank Type Degree Formula 1 ♭3 4 5 ♭7 Penta 2 Minor Penta 2 1 ♭3 5 ♭6 ♭7 Penta 3 Minor Penta 3 13.6 Setting the Key Mode Parameter KEY MODE parameter Mode.
-
Page 156
Playing and Editing Scales and Chords Setting the Key Mode Parameter Guide Mode In Guide mode, the notes are mapped to the keyboard in the same way as in Mapped mode, however notes outside of the selected scale remain active. The mapping only affects the repre- sentation of the scale by means of the Light Guide. -
Page 157: Setting The Chord Parameters
Playing and Editing Scales and Chords Setting the Chord Parameters Scale Type Mapping in Key Mode: Easy Minor Corresponding Mapping R Example with Root Note: C 13.7 Setting the Chord Parameters 13.7.1 Chord mode CHORD parameter Mode. The first CHORD parameter is Mode.
-
Page 158
Playing and Editing Scales and Chords Setting the Chord Parameters Harm CHORD Mode is set to Harm, the CHORD Type menu allows you to specify the interval of notes in the selected SCALE Type that will constitute the chord: E.g. a triad in the form of the root note, the third note, and the fifth note (CHORD Type value 1-3-5). -
Page 159: Chord Type
Playing and Editing Scales and Chords Setting the Chord Parameters 13.7.2 Chord Type CHORD parameter Type. The second CHORD parameter is Type. On the keyboard, it is mapped to Knob 6 of the Control section in Scale Edit mode. Use it to define a chord that will be generated from a single note used as input.
-
Page 160
Playing and Editing Scales and Chords Setting the Chord Parameters The note interval is added onto the key of an incoming MIDI note, either from the KOM- PLETE KONTROL S-Series keyboard or from the host. For example, you can select to play a C minor triad by setting Root Note to C,… -
Page 161
Playing and Editing Scales and Chords Setting the Chord Parameters ▪ Maj 1 ▪ Maj 2 ▪ Maj 3 ▪ Maj 4 ▪ Maj 5 ▪ Maj 6 ▪ Maj 7 ▪ Maj 8 ▪ Min 1 ▪ Min 2 ▪… -
Page 162: Chord Position
Playing and Editing Scales and Chords Setting the Chord Parameters Chord Type Semitones Added above Played Note Major 4 and 7 Minor 3 and 7 Sus 4 (Suspended 4) 5 and 7 Maj 7 (Major 7) 4, 7 and 11 Min 7 (Minor 7) 3, 7 and 10 Dom 7 (Dominant 7)
-
Page 163
Playing and Editing Scales and Chords Setting the Chord Parameters Position parameter is available when CHORD Type is set to Harm or Chd Set and includes the following values: Position Description Root The root-position of the selected chord is always played. -1 to -8 Decreasing Position with negative values moves the highest note of the current chord down by an octave, this inverts the chord to… -
Page 164: Playing And Editing The Arpeggiator
Playing and Editing the Arpeggiator Playing and Editing the Arpeggiator Smart Play features a flexible and versatile Arpeggiator that lets you play your Instruments in note sequences according to the keys you press on the keyboard. You can also use the Arpeg- giator in combination with the scales and chords created with the Scale engine.
-
Page 165: Playing Arpeggiator Sequences
Playing and Editing the Arpeggiator Playing Arpeggiator Sequences To switch on the Arpeggiator, click the blue check box next to in the Perform panel ► so it is filled. Activating the Arpeggiator on the Keyboard To switch on the Arpeggiator, press in the PERFORM section on the keyboard.
-
Page 166: Using A Sustain Pedal To Control The Arpeggiator
Playing and Editing the Arpeggiator Using a Sustain Pedal to Control the Arpeggiator To adjust the OCTAVES reach of the Arpeggiator, turn Knob 6 (by default set to 1) to e.g. 14.2 Using a Sustain Pedal to Control the Arpeggiator You can use a sustain pedal to control the Arpeggiator.
-
Page 167: Setting The Main Parameters
Playing and Editing the Arpeggiator Setting the Main Parameters PAGE display in the keyboard’s Control section reads ARP, indicating that you are → editing the Arpeggiator parameters. Note that the Arpeggiator Edit mode consists of two pages. Available Arpeggiator Parameters ▪…
-
Page 168: Main Mode
Playing and Editing the Arpeggiator Setting the Main Parameters 14.4.1 Main Mode The first MAIN parameter is Mode. On the keyboard, it is mapped to Knob 1 of the Control section when Arpeggiator Edit mode is selected. lt lets you select either Arp or Note Repeat. Depending on your selection, a different set of Arpeggiator parameters will be available for fur- ther editing.
-
Page 169: Setting The Rhythm Parameters
Playing and Editing the Arpeggiator Setting the Rhythm Parameters 14.5 Setting the Rhythm Parameters RHYTHM parameters Rate, Sequence, and Swing allow you to create interesting rhythms for the arpeggiator sequence. RHYTHM parameters Rate, Sequence, and Swing. 14.5.1 Rhythm Rate The first RHYTHM parameter, Rate, is available in both Arp and Note Repeat mode.
-
Page 170: Rhythm Sequence
Playing and Editing the Arpeggiator Setting the Rhythm Parameters ▪ 1/8 Dotted (1/8 ▪ 1/4 Triplet (1/4 ▪ 1/8 ▪ 1/16 Dotted (1/16 ▪ 1/8 Triplet (1/8 ▪ 1/16 ▪ 1/32 Dotted (1/32 ▪ 1/16 Triplet (1/16 ▪ 1/32 ▪ 1/64 Dotted (1/64 ▪…
-
Page 171: Rhythm Swing
Playing and Editing the Arpeggiator Setting the Rhythm Parameters ▪ Off ▪ 1 ▪ 2 ▪ 3 ▪ 4 ▪ 5 ▪ 6 ▪ 7 ▪ 8 To display the set value of the SEQUENCE parameter, tap Knob 4. 14.5.3 Rhythm Swing The third RHYTHM…
-
Page 172: Setting The Other Parameters
Playing and Editing the Arpeggiator Setting the Other Parameters Using Swing in combination with the Gate parameter adds further variations in note duration. For example, if Gate is set to 100%, KOMPLETE KONTROL sends a MIDI note-off message before each note and plays back the sequence legato. If Gate is set to values larger or smaller than 100%, then notes will be scaled after the value of the…
-
Page 173: Other Dynamic
Playing and Editing the Arpeggiator Setting the Other Parameters ▪ 3 ▪ 4 ▪ 5 ▪ 6 ▪ 7 ▪ 8 To display the set value of the OCTAVES parameter, tap Knob 6. 14.6.2 Other Dynamic The second OTHER parameter, Dynamic, is only available in Arp mode. On the keyboard it is mapped to Knob 7 of the Control section when Arpeggiator Edit mode is selected.
-
Page 174: Setting The Advanced Parameters
Playing and Editing the Arpeggiator Setting the Advanced Parameters To display the set value of the GATE parameter, tap Knob 8. 14.7 Setting the Advanced Parameters ADVANCED parameters Retrigger, Repeat, Offset, and Inversion allow you to explore alter- native versions of the same arpeggiator sequence. ADVANCED parameters Retrigger, Repeat, Offset, and Inversion.
-
Page 175: Advanced Repeat
Playing and Editing the Arpeggiator Setting the Advanced Parameters 14.7.2 Advanced Repeat The second ADVANCED parameter, Repeat, is only available in Arp mode. On the keyboard, it is mapped to Knob 2 of the Control section when PAGE 2 of ARP EDIT mode is selected.
-
Page 176: Setting The Range Parameters
Playing and Editing the Arpeggiator Setting the Range Parameters ▪ If the arpeggiator sequence consists of a 3 note cycle (1 — 2 — 3), Type is set to Up, and Inversion is set to 2, the Arpeggiator output is 1 — 2 — 3 – (2 — 3 — 1 octave up) — (3 — 1 — 2 octave up) — repeat.
-
Page 177: Setting The Hold Parameter
Playing and Editing the Arpeggiator Setting the Hold Parameter The Arpeggiator can still generate pitches above the Max. Key setting. 14.9 Setting the Hold Parameter HOLD parameter On / Off. HOLD parameter On / Off is available in both Arp and Note Repeat mode. On the key- board, it is mapped to Knob 8 of the Control section when PAGE 2 of…
-
Page 178: Configuring The Touch Strips
Configuring the Touch Strips Accessing the Touch Strip Settings Configuring the Touch Strips In this section you learn how to configure the Touch Strips and about the effect on the usage. 15.1 Accessing the Touch Strip Settings In order to configure the behavior of the Touch Strips, you can open the Perform Panel in the KOMPLETE KONTROL software or access the parameters directly from the keyboard’s Control section.
-
Page 179
Configuring the Touch Strips Accessing the Touch Strip Settings ⇨ The Touch Strip settings for the Pitch Strip are shown in the Perform Panel. In order to display the Modulation Strip settings, click on Modulation. The Touch Strip settings for the Modulation Strip are shown in the Perform Panel. →… -
Page 180
Configuring the Touch Strips Accessing the Touch Strip Settings Press SHIFT OCT- for accessing Pitch Strip settings or press SHIFT OCT+ for access- ing Modulation Strip settings. ⇨ The Touch Strip settings are displayed in the Control section and can be tweaked using the knobs. -
Page 181: Configuring The Pitch Strip
Configuring the Touch Strips Configuring the Pitch Strip 15.2 Configuring the Pitch Strip The Pitch Strip (left Touch Strip) on the KOMPLETE KONTROL S-Series keyboard can be con- figured by either Absolute mode or Relative mode. Both modes are described below. Absolute Mode (default) The Pitch Strip keyboard corresponds to the usual behavior for a pitch bend control.
-
Page 182: Enabling Absolute Mode
Configuring the Touch Strips Configuring the Pitch Strip Turn the Strength control to adjust the rebound rate. The higher the Strength setting, the quicker the value will jump back. → Adjusting Relative Mode on the Hardware You can also access the Strength setting on the keyboard: Press…
-
Page 183
Configuring the Touch Strips Configuring the Pitch Strip Click on the Touch Ctl menu (default value Absolute). Click on the entry Relative in the drop-down list. Relative mode is now enabled. → Switching to Absolute Mode on the Hardware You can also access the Strength setting on the keyboard: Press… -
Page 184: Configuring The Modulation Strip
Configuring the Touch Strips Configuring the Modulation Strip 15.3 Configuring the Modulation Strip The right Touch Strip on the KOMPLETE KONTROL S-Series keyboard is a highly versatile modulation control that can be individually configured using Modulation Strip Modes with dis- tinctive parameters.
-
Page 185
Configuring the Touch Strips Configuring the Modulation Strip Spring Mode This mode simulates a simple spring that can be deflected both up and down from its default position, which is the middle of the Modulation Strip. The current position of the spring (the parameter value) is indicated by a blue LED. -
Page 186
Configuring the Touch Strips Configuring the Modulation Strip Friction slider: Adjusts the friction of the surface that slows down the ball once you have ▪ removed your finger. The higher the Friction value, the quicker the ball will decelerate and stop. -
Page 187: Selecting And Editing A Modulation Strip Mode
Configuring the Touch Strips Configuring the Modulation Strip Walls button: Sets the behavior of the ball when it reaches the range limits. If Walls is set ▪ to on, the ball bounces off the range limit and continues its trip in the opposite direction. Walls is set to off, the ball jumps to the opposite range limit and continues from there in the same direction.
-
Page 188
Configuring the Touch Strips Configuring the Modulation Strip Selecting and Editing a Modulation Strip Mode from Hardware You can also select a Mode and edit its additional parameters on the keyboard: Press SHIFT OCT+ to view the Modulation Strip parameters in the Control section. Select a mode by turning Knob 1. -
Page 189: Troubleshooting
Troubleshooting If you are experiencing problems related to your product that the supplied documentation does not cover, you can get further help in the Support section of the Native Instruments website: https://support.native-instruments.com/hc The Support section allows you to search both the Knowledge Base and the Support Communi- ty for content related to your issue.
-
Page 190
Please open and read this Readme file before contacting Technical Support. User Forum In the Native Instruments User Forum, you can discuss product features directly with other users and with experts moderating the forum. You can reach the User Forum via: http:// www.native-instruments.com/forum. -
Page 191: Index
Index Index [174] Retrigger Rhythm [169] [170] Accessibility [14] [170] Sequence [14] Activate Voice-over [171] Swing ARP button [49] [169] Tempo ARP Page [51] Type [168] Arpeggiator [166] [173] Velocity [174] Advanced Arpeggiator Mode [173] Dynamic Note Repeat [168] [173] Gate Arpeggiator sequence [145] [166]…
-
Page 192
Index BROWSE button [119] Chord mode [157] Browse Mode [94] Chord Position [162] [97] Chord Type [159] Hardware [94] [161] On-Screen-Overlay Chromatic Scale Browser Chords [145] [94] [157] in-depth Chord Set [119] [157] [159] [162] On-Screen Overlay Generating [98] [157] showing and hiding Harmonizer Chromatic Scale… -
Page 193
Index Displays Hardware browsing [97] [50] Help [189] Control section Driver Hold [177] [64] host selecting an audio driver Dynamic [173] [27] Configuration Host automation [81] host Configuration [27] Favorites [111] Host Control [48] [111] Host Transport Control [48] Show [111] File [121]… -
Page 194
Index key switch [50] Latching the Arpeggiator Key velocity [77] [177] Hold Keyboard Latency [65] [46] LEDs Controls Overview [46] Keybed [52] Keyboard LEDs [52] [52] Light Guide Knobs Library [95] [137] [50] importing your own files Control section KOMPLETE KONTROL [121] saving files to [46]… -
Page 195
Index Master Volume [36] Native Kontrol Standard [134] Max. Key [176] [134] MIDI Note Repeat [168] [81] [168] automation Mode configuring [66] [33] connecting external equipment OCT- button [47] [81] controlling parameters via OCT+ button [47] [85] Mode Octaves [172] MIDI Mode [85] Offset… -
Page 196
Index Pre-listening Samples [117] Pre-Mapped Instruments [139] Page buttons [50] PRESET display [50] [50] Skipping Pages PAGE display [51] Parameter Pages [51] Rate [169] Perform panel Repeat [175] [143] Scale Result list PERFORM section [43] [127] in Files pane [49] ARP button in Library pane [39]… -
Page 197
Index output routing [63] [63] settings Sample Spring [117] pre-listening [185] Modulation Strip Sample rate Stepped [64] selecting [187] Modulation Strip Saving Swing [171] [121] files to the Library Switching Instances [58] Scale [143] [157] [159] [162] Chord [157] Chord mode Tag Filter [162] Chord Position… -
Page 198
Index VST plug-ins [74] [132] [132] loading Velocity scaling [77] [74] managing Voice-over [14] Volume Control [36] KOMPLETE KONTROL — Manual — 198…

MANUAL

Disclaimer
The information in this document is subject to change without notice and does not represent a commitment on the part of Native Instruments GmbH. The software described by this document is subject to a License Agreement and may not be copied to other media. No part of this publication may be copied, reproduced or otherwise transmitted or recorded, for any purpose, without prior written permission by Native Instruments GmbH, hereinafter referred to as Native Instruments.
“Native Instruments”, “NI” and associated logos are (registered) trademarks of Native Instruments GmbH.
Ableton is a trademark of Ableton AG.
VST, HALion, Cubase, and Nuendo are registered trademarks of Steinberg Media Technologies GmbH. ASIO is a trademark and software of Steinberg Media Technologies GmbH.
Mac, macOS, GarageBand, Logic, iTunes and iPod are registered trademarks of Apple Inc., registered in the U.S. and other countries.
Windows, Windows Vista and DirectSound are registered trademarks of Microsoft Corporation in the United States and/or other countries.
All other trademarks are the property of their respective owners and use of them does not imply any affiliation with or endorsement by them.
Document authored by: Jan Ola Korte, Christian Schulz, Gustav Sto. Tomas, David Gover, and Nicolas Sidi
Software version: 2.0.5 (10/2018)
Hardware version: KOMPLETE KONTROL S-Series MK2
Special thanks to the Beta Test Team, who were invaluable not just in tracking down bugs, but in making this a better product.
Contact
NATIVE INSTRUMENTS GmbH
Schlesische Str. 29-30 D-10997 Berlin Germany
www.native-instruments.de
NATIVE INSTRUMENTS K.K.
YO Building 3F
Jingumae 6-7-15, Shibuya-ku, Tokyo 150-0001
Japan www.native-instruments.co.jp
NATIVE INSTRUMENTS FRANCE SARL
113 Rue Saint-Maur
75011 Paris France
www.native-instruments.com
NATIVE INSTRUMENTS North America, Inc.
6725 Sunset Boulevard 5th Floor
Los Angeles, CA 90028 USA www.native-instruments.com
NATIVE INSTRUMENTS UK Limited
18 Phipp Street London EC2A 4NU UK
www.native-instruments.co.uk
SHENZHEN NATIVE INSTRUMENTS COMPANY Limited
5F, Shenzhen Zimao Center
111 Taizi Road, Nanshan District, Shenzhen, Guangdong
China www.native-instruments.com
© NATIVE INSTRUMENTS GmbH, 2019. All rights reserved.

Table of Contents
Table of Contents
|
1 Welcome to KOMPLETE KONTROL ……………………………………………………………………. |
12 |
||
|
1.1 |
Document Conventions ………………………………………………………………………………………………… |
12 |
|
|
1.2 |
Box Contents ……………………………………………………………………………………………………………… |
15 |
|
|
1.3 |
System Requirements ………………………………………………………………………………………………….. |
15 |
|
|
1.4 |
Accessibility ………………………………………………………………………………………………………………. |
16 |
|
|
1.4.1 |
Keyboard Overview ……………………………………………………………………………………….. |
16 |
|
|
1.4.2 |
Activating Accessibility Features ……………………………………………………………………. |
19 |
|
|
1.4.3 |
Training Mode ……………………………………………………………………………………………… |
20 |
|
|
1.4.4 |
Feature Overview and Keyboard Shortcuts ……………………………………………………….. |
20 |
|
|
2 The KOMPLETE KONTROL Workflow …………………………………………………………………. |
23 |
||
|
3 Setting up KOMPLETE KONTROL ………………………………………………………………………. |
25 |
||
|
3.1 |
Connecting the Keyboard to the Computer ………………………………………………………………………. |
26 |
|
|
3.2 |
Setting up the Stand-Alone Application ………………………………………………………………………….. |
27 |
|
|
3.3 |
Setting up Host Integration ………………………………………………………………………………………….. |
29 |
|
|
3.3.1 |
Setting up Apple Logic Pro X and GarageBand …………………………………………………. |
30 |
|
|
3.3.2 |
Setting up Steinberg Cubase/Nuendo ……………………………………………………………… |
30 |
|
|
3.3.3 |
Setting up Ableton Live (macOS) ……………………………………………………………………. |
31 |
|
|
3.3.4 |
Setting up Ableton Live (Windows) …………………………………………………………………. |
33 |
|
|
3.4 |
Connecting Pedals to the Keyboard ……………………………………………………………………………….. |
35 |
|
|
3.5 |
Connecting External MIDI Equipment to the Keyboard ………………………………………………………. |
38 |
|
|
4 Software Overview ……………………………………………………………………………………….. |
40 |
||
|
4.1 |
Header ………………………………………………………………………………………………………………………. |
41 |
|
|
4.2 |
Browser …………………………………………………………………………………………………………………….. |
43 |
|
|
4.2.1 |
Library Pane ……………………………………………………………………………………………….. |
44 |
|
|
4.2.2 |
Product Selector ………………………………………………………………………………………….. |
46 |
KOMPLETE KONTROL S-Series — Manual — 4

|
Table of Contents |
|||
|
4.2.3 |
Files Pane …………………………………………………………………………………………………… |
48 |
|
|
4.2.4 |
Browser on the Keyboard ………………………………………………………………………………. |
49 |
|
|
4.3 |
Perform Panel …………………………………………………………………………………………………………….. |
50 |
|
|
4.4 |
Plug-in Panel ……………………………………………………………………………………………………………… |
51 |
|
|
4.5 |
Plug-in Chain Panel ……………………………………………………………………………………………………. |
52 |
|
|
4.6 |
MIDI Assignment Editor ……………………………………………………………………………………………….. |
53 |
|
|
4.7 |
Plug-in Area ………………………………………………………………………………………………………………. |
55 |
|
|
5 Keyboard Overview ………………………………………………………………………………………. |
56 |
||
|
5.1 |
Perform and Edit Section ……………………………………………………………………………………………… |
59 |
|
|
5.2 |
Transport Section ……………………………………………………………………………………………………….. |
61 |
|
|
5.3 |
Control Section …………………………………………………………………………………………………………… |
62 |
|
|
5.4 |
Mode Buttons …………………………………………………………………………………………………………….. |
63 |
|
|
5.5 |
4-D Encoder ……………………………………………………………………………………………………………….. |
65 |
|
|
5.6 |
Keybed and Light Guide ……………………………………………………………………………………………….. |
66 |
|
|
5.7 |
Touch Strip ………………………………………………………………………………………………………………… |
67 |
|
|
5.8 |
Transpose and Fixed Velocity Buttons …………………………………………………………………………….. |
68 |
|
|
6 Global Controls and Preferences …………………………………………………………………….. |
69 |
||
|
6.1 |
Instrument Views ………………………………………………………………………………………………………… |
69 |
|
|
6.1.1 |
Default View ……………………………………………………………………………………………….. |
70 |
|
|
6.1.2 |
Additional View ……………………………………………………………………………………………. |
70 |
|
|
6.1.3 |
Edit View ……………………………………………………………………………………………………. |
72 |
|
|
6.2 |
Switching Instances ……………………………………………………………………………………………………. |
73 |
|
|
6.3 |
Transport and Tempo …………………………………………………………………………………………………… |
75 |
|
|
6.3.1 |
Resetting the Clock ……………………………………………………………………………………… |
76 |
|
|
6.3.2 |
Adjusting Tempo ………………………………………………………………………………………….. |
76 |
|
|
6.4 |
Adjusting Master Volume ……………………………………………………………………………………………… |
77 |
KOMPLETE KONTROL S-Series — Manual — 5

|
Table of Contents |
|||
|
6.5 |
Preferences ………………………………………………………………………………………………………………… |
78 |
|
|
6.5.1 |
Preferences – Audio Page ……………………………………………………………………………… |
78 |
|
|
6.5.2 |
Preferences – MIDI Page ……………………………………………………………………………….. |
81 |
|
|
6.5.3 |
Preferences – General Page …………………………………………………………………………… |
82 |
|
|
6.5.4 |
Preferences – Library Page ……………………………………………………………………………. |
84 |
|
|
6.5.5 |
Preferences – Plug-ins Page …………………………………………………………………………. |
89 |
|
|
6.6 |
Keyboard Settings ……………………………………………………………………………………………………….. |
92 |
|
|
6.7 |
Loading a Plug-in in Default State ………………………………………………………………………………… |
93 |
|
|
7 MIDI Communication ……………………………………………………………………………………. |
95 |
||
|
7.1 |
Host Automation …………………………………………………………………………………………………………. |
96 |
|
|
7.1.1 |
Recording Automation ………………………………………………………………………………….. |
96 |
|
|
7.1.2 |
Automation IDs for the Perform Panel ……………………………………………………………… |
97 |
|
|
7.2 |
Using the Keyboard in MIDI Mode ………………………………………………………………………………….. |
98 |
|
|
7.3 |
Using the Keyboard as Stand-Alone MIDI Controller …………………………………………………………. |
99 |
|
|
8 Using the MIDI Assignment Editor ……………………………………………………………………. |
102 |
||
|
8.1 |
The Mapping System …………………………………………………………………………………………………… |
102 |
|
|
8.2 |
Opening the MIDI Assignment Editor ……………………………………………………………………………… |
103 |
|
|
8.3 |
Assigning MIDI Messages to Control Elements ………………………………………………………………… |
105 |
|
|
8.4 |
Renaming Control Elements …………………………………………………………………………………………. |
107 |
|
|
8.5 |
Creating a New MIDI Template ……………………………………………………………………………………… |
107 |
|
|
8.6 |
Renaming MIDI Templates ……………………………………………………………………………………………. |
109 |
|
|
8.7 |
Creating Key Zones ……………………………………………………………………………………………………… |
110 |
|
|
8.7.1 |
About Key Zones ………………………………………………………………………………………….. |
110 |
|
|
8.7.2 |
Splitting a Key Zone ……………………………………………………………………………………… |
112 |
|
|
8.7.3 |
Selecting another MIDI Channel for a Key Zone ………………………………………………… |
114 |
|
|
8.7.4 |
Recoloring Key Zone ……………………………………………………………………………………… |
115 |
KOMPLETE KONTROL S-Series — Manual — 6

|
Table of Contents |
||||
|
8.7.5 |
Resizing Key Zones ………………………………………………………………………………………. |
116 |
||
|
8.7.6 |
Disabling a Key Zone ……………………………………………………………………………………. |
117 |
||
|
8.7.7 |
Deleting a Key Zone ……………………………………………………………………………………… |
119 |
||
|
8.7.8 |
Transposing Key Zones …………………………………………………………………………………. |
120 |
||
|
8.8 |
MIDI Message Types and Assignments …………………………………………………………………………… |
122 |
||
|
8.8.1 |
MIDI Message Types – Type Menu …………………………………………………………………… |
122 |
||
|
8.8.2 |
Assignments for Knobs …………………………………………………………………………………. |
123 |
||
|
8.8.3 |
Assignments for Buttons ………………………………………………………………………………. |
125 |
||
|
8.8.4 |
Assignments for Key Zones ……………………………………………………………………………. |
126 |
||
|
8.8.5 |
Assignments for the Touch Strip …………………………………………………………………….. |
127 |
||
|
8.8.6 |
Assignments for Pedals (Switch) ……………………………………………………………………. |
128 |
||
|
8.8.7 |
Assignments for Pedals (Continuous) ……………………………………………………………… |
129 |
||
|
9 |
Host Integration |
………………………………………………………………………………………….. |
130 |
|
|
9.1 |
Integration with MASCHINE ………………………………………………………………………………………….. |
131 |
||
|
9.1.1 |
Basic Control Functions ………………………………………………………………………………… |
131 |
||
|
9.1.2 |
Advanced Integration Control Functions ………………………………………………………….. |
135 |
||
|
9.2 |
Integration with Apple Logic Pro X and GarageBand ………………………………………………………… |
143 |
||
|
9.3 |
Integration with Ableton Live ………………………………………………………………………………………… |
146 |
||
|
9.4 |
Integration with Steinberg Cubase and Nuendo ………………………………………………………………. |
149 |
||
|
10 |
Browsing the Library …………………………………………………………………………………….. |
152 |
||
|
10.1 |
Browser Basics …………………………………………………………………………………………………………… |
153 |
||
|
10.1.1 |
Product Types: Instrument and Effect ……………………………………………………………… |
153 |
||
|
10.1.2 |
About the Library and Meta-Information ………………………………………………………….. |
153 |
||
|
10.1.3 |
Browsing the Library vs. Browsing Your Hard Disks …………………………………………… |
154 |
||
|
10.2 |
Opening the Browser …………………………………………………………………………………………………… |
156 |
||
|
10.3 |
Loading Preset Files ……………………………………………………………………………………………………. |
157 |
KOMPLETE KONTROL S-Series — Manual — 7

|
Table of Contents |
||||
|
10.4 |
Choosing Between Factory Content and User Content ………………………………………………………. |
158 |
||
|
10.5 |
Filtering Preset Files by Product ……………………………………………………………………………………. |
159 |
||
|
10.6 |
Filtering Preset Files by Bank ……………………………………………………………………………………….. |
163 |
||
|
10.7 |
Resetting the Product Selection …………………………………………………………………………………….. |
166 |
||
|
10.8 |
Types and Modes Tag Filters …………………………………………………………………………………………. |
167 |
||
|
10.8.1 |
Filtering Preset Files by Types and Modes ………………………………………………………… |
170 |
||
|
10.8.2 |
Selecting Multiple Tags from the Same Level …………………………………………………… |
174 |
||
|
10.9 |
Working with Favorites ………………………………………………………………………………………………… |
175 |
||
|
10.9.1 |
Adding Preset Files to the Favorites ………………………………………………………………… |
175 |
||
|
10.9.2 |
Displaying Favorites in the Results List …………………………………………………………… |
178 |
||
|
10.9.3 |
Removing Preset Files from the Favorites ………………………………………………………… |
180 |
||
|
10.10 |
Performing a Text Search ……………………………………………………………………………………………… |
181 |
||
|
10.11 |
Displaying Preset File Information …………………………………………………………………………………. |
181 |
||
|
10.12 |
Auditioning your Preset Files ………………………………………………………………………………………… |
182 |
||
|
11 |
Working with Effects ……………………………………………………………………………………. |
184 |
||
|
11.1 |
Opening the Plug-in Chain Panel ………………………………………………………………………………….. |
184 |
||
|
11.2 |
Adding Effects ……………………………………………………………………………………………………………. |
185 |
||
|
11.3 |
Selecting Plug-in Slots ………………………………………………………………………………………………… |
188 |
||
|
11.4 |
Reordering Effects ………………………………………………………………………………………………………. |
189 |
||
|
11.5 |
Scrolling the Plug-in Chain ………………………………………………………………………………………….. |
190 |
||
|
11.6 |
Bypassing Effects ……………………………………………………………………………………………………….. |
191 |
||
|
11.7 |
Removing Effects ……………………………………………………………………………………………………….. |
193 |
||
|
12 |
Managing the Library ……………………………………………………………………………………. |
195 |
||
|
12.1 |
Saving Preset Files to the User Library …………………………………………………………………………… |
195 |
||
|
12.2 |
Deleting User Preset Files from the User Library ………………………………………………………………. |
197 |
||
|
12.3 |
Editing the Tags and Properties of User Preset Files ………………………………………………………… |
198 |
KOMPLETE KONTROL S-Series — Manual — 8

|
Table of Contents |
|||
|
12.4 |
Working with the Files Pane ………………………………………………………………………………………….. |
201 |
|
|
12.4.1 |
Additional Results List Features List in the Files Pane ………………………………………. |
202 |
|
|
12.4.2 |
Navigating to File Locations with the Location Bar ……………………………………………. |
203 |
|
|
12.4.3 |
Navigating to Recent File Locations ……………………………………………………………….. |
204 |
|
|
12.4.4 |
Working with File Location Favorites ……………………………………………………………….. |
205 |
|
|
12.5 |
Loading VST Plug-ins ………………………………………………………………………………………………….. |
206 |
|
|
12.6 |
Installing NKS Instruments …………………………………………………………………………………………… |
207 |
|
|
12.7 |
Importing KOMPLETE KONTROL-Compatible User Files ……………………………………………………… |
210 |
|
|
13 Controlling Instrument and Effect Parameters …………………………………………………….. |
212 |
||
|
13.1 |
About Pre-Mapped Instruments and Effects ……………………………………………………………………. |
212 |
|
|
13.2 |
Adjusting Parameters ………………………………………………………………………………………………….. |
212 |
|
|
13.3 |
Switching Parameter Pages ………………………………………………………………………………………….. |
213 |
|
|
13.4 |
Customizing Parameter Mappings using the Plug-in Panel ……………………………………………….. |
213 |
|
|
14 Smart Play – Playing and Editing Scales and Chords …………………………………………… |
216 |
||
|
14.1 |
A Note about Music Theory ……………………………………………………………………………………………. |
216 |
|
|
14.2 |
Activating the Scale Engine ………………………………………………………………………………………….. |
218 |
|
|
14.3 |
Selecting and Playing a Scale ………………………………………………………………………………………. |
219 |
|
|
14.4 |
Playing Chords …………………………………………………………………………………………………………… |
219 |
|
|
14.5 |
Editing Scales and Chords …………………………………………………………………………………………… |
220 |
|
|
14.6 |
Setting the SCALE Parameters ………………………………………………………………………………………. |
221 |
|
|
14.6.1 |
SCALE Root Note ………………………………………………………………………………………….. |
221 |
|
|
14.6.2 |
SCALE Bank and Type …………………………………………………………………………………… |
222 |
|
|
14.7 |
Setting the KEY MODE Parameter ………………………………………………………………………………….. |
230 |
|
|
14.8 |
Setting the CHORD Parameters …………………………………………………………………………………….. |
233 |
|
|
14.8.1 |
CHORD Mode ………………………………………………………………………………………………. |
233 |
|
|
14.8.2 |
CHORD Type ………………………………………………………………………………………………… |
234 |
KOMPLETE KONTROL S-Series — Manual — 9

|
Table of Contents |
|||
|
14.8.3 |
CHORD Position …………………………………………………………………………………………… |
238 |
|
|
15 Smart Play – Playing and Editing Arpeggiator Sequences …………………………………….. |
240 |
||
|
15.1 |
Playing Arpeggiator Sequences …………………………………………………………………………………….. |
241 |
|
|
15.2 |
Using a Sustain Pedal to Control the Arpeggiator …………………………………………………………….. |
242 |
|
|
15.3 |
Using Arpeggiator Snapshots on the Keyboard ………………………………………………………………… |
242 |
|
|
15.4 |
Editing the Arpeggiator ……………………………………………………………………………………………….. |
243 |
|
|
15.5 |
MAIN Parameters ………………………………………………………………………………………………………… |
244 |
|
|
15.5.1 |
MAIN Mode ………………………………………………………………………………………………….. |
244 |
|
|
15.5.2 |
MAIN Type …………………………………………………………………………………………………… |
245 |
|
|
15.6 |
RHYTHM Parameters ……………………………………………………………………………………………………. |
245 |
|
|
15.6.1 |
RHYTHM Rate ……………………………………………………………………………………………… |
246 |
|
|
15.6.2 |
RHYTHM Sequence ……………………………………………………………………………………….. |
247 |
|
|
15.6.3 |
RHYTHM Swing ……………………………………………………………………………………………. |
248 |
|
|
15.7 |
OTHER Parameters ……………………………………………………………………………………………………… |
248 |
|
|
15.7.1 |
OTHER Octaves ……………………………………………………………………………………………. |
249 |
|
|
15.7.2 |
OTHER Dynamic …………………………………………………………………………………………… |
249 |
|
|
15.7.3 |
OTHER Gate ………………………………………………………………………………………………… |
250 |
|
|
15.8 |
ADVANCED Parameters ………………………………………………………………………………………………… |
250 |
|
|
15.8.1 |
ADVANCED Retrigger ……………………………………………………………………………………. |
251 |
|
|
15.8.2 |
ADVANCED Repeat ……………………………………………………………………………………….. |
251 |
|
|
15.8.3 |
ADVANCED Offset ………………………………………………………………………………………… |
251 |
|
|
15.8.4 |
ADVANCED Inversion …………………………………………………………………………………….. |
252 |
|
|
15.9 |
RANGE Parameters ……………………………………………………………………………………………………… |
252 |
|
|
15.9.1 |
RANGE Min. Key …………………………………………………………………………………………… |
253 |
|
|
15.9.2 |
RANGE Max. Key …………………………………………………………………………………………… |
253 |
KOMPLETE KONTROL S-Series — Manual — 10
![]()
Table of Contents
|
15.10 HOLD Parameter …………………………………………………………………………………………………………. |
253 |
|
Index ………………………………………………………………………………………………………… |
255 |
KOMPLETE KONTROL S-Series — Manual — 11

Welcome to KOMPLETE KONTROL
Document Conventions
1Welcome to KOMPLETE KONTROL
Thank you for choosing KOMPLETE KONTROL!
The KOMPLETE KONTROL software and its dedicated keyboard—the KOMPLETE KONTROL S-Series—form a tightly integrated music production and performance system that brings all the sounds from KOMPLETE and the Native Kontrol Standard (NKS) to the heart of your workflow.
KOMPLETE KONTROL offers advanced integration with a number of hosts and provides full control of any Instruments supporting NKS, both from Native Instruments and partners. The keyboard lets you browse your Instruments and Effects in an intuitive way and play them creatively with KOMPLETE KONTROL’s unique Scale engine and Arpeggiator.
We hope you enjoy this fantastic instrument as much as we do. —The team at Native Instruments
1.1Document Conventions
This document uses particular formatting to point out special facts and to warn you of potential issues. The icons introducing the following notes let you see what kind of information can be expected:
The speech bubble icon indicates a useful tip that may often help you to solve a task more efficiently.
The exclamation mark icon highlights important information that is essential for the given context.
The red cross icon warns you of serious issues and potential risks that require your full attention.
Furthermore, the following formatting is used:
KOMPLETE KONTROL S-Series — Manual — 12

Welcome to KOMPLETE KONTROL
Document Conventions
▪Text appearing in (drop-down) menus (such as Open…, Save as… etc.) in the software and paths to locations on your hard disk or other storage devices is printed in italics.
▪Text appearing elsewhere (labels of buttons, controls, text next to checkboxes etc.) in the software is printed in blue. Whenever you see this formatting applied, you will find the same text appearing somewhere on the screen.
▪Text appearing on the displays of the controller is printed in light grey. Whenever you see this formatting applied, you will find the same text on a controller display.
▪Text appearing on labels of the hardware controller is printed in orange. Whenever you see this formatting applied, you will find the same text on the controller.
▪Important names and concepts are printed in bold.
▪References to keys on your computer’s keyboard you’ll find put in square brackets (e.g., “Press [Shift] + [Enter]”).
►Single instructions are introduced by this play button type arrow.
→Results of actions are introduced by this smaller arrow.
Naming Convention
Throughout the documentation we will refer to KOMPLETE KONTROL keyboard (or just keyboard) as the hardware controller and KOMPLETE KONTROL software as the software installed on your computer.
Unlabeled Buttons on the Keyboard
The buttons and knobs above and below the displays on the KOMPLETE KONTROL keyboard do not have labels.
KOMPLETE KONTROL S-Series — Manual — 13

Welcome to KOMPLETE KONTROL
Document Conventions
|
1 |
2 |
3 |
4 |
5 |
6 |
7 |
8 |
|
1 |
2 |
3 |
4 |
5 |
6 |
7 |
8 |
The unlabeled buttons and knobs on the KOMPLETE KONTROL keyboard.
For better reference, we applied a special formatting here: throughout the document, the elements are capitalized and numbered, so the buttons above the displays are written Button 1 to Button 8, while the knobs under the displays are written Knob 1 to Knob 8.
KOMPLETE KONTROL S-Series — Manual — 14

Welcome to KOMPLETE KONTROL
Box Contents
1.2Box Contents
The box contains the following items:
▪KOMPLETE KONTROL keyboard
▪USB cable
The included 3 meter USB cable only works in conjunction with the KOMPLETE KONTROL S88 keyboard.
▪Power supply (only included in the KOMPLETE KONTROL S88 box)
▪Information flyer providing:
◦the hardware serial number of the KOMPLETE KONTROL keyboard
◦a web link for downloading the KOMPLETE KONTROL software and the KOMPLETE SELECT software bundle
▪Safety Instructions flyer
1.3System Requirements
For KOMPLETE KONTROL to fully function as indented, your system needs to meet certain requirements. The latest KOMPLETE KONTROL system requirements and compatibility information is available here:
http://www.native-instruments.com/komplete-kontrol-s-series/specifications/
KOMPLETE
KOMPLETE KONTROL is optimized for use with KOMPLETE SELECT, KOMPLETE and KOMPLETE ULTIMATE.
The latest KOMPLETE system requirements and compatibility information is available here: http://www.native-instruments.com/products/komplete/
KOMPLETE KONTROL S-Series — Manual — 15

Welcome to KOMPLETE KONTROL
Accessibility
1.4Accessibility
KOMPLETE KONTROL offers a set of accessibility features for visually-impaired users. These are focused exclusively on the KOMPLETE KONTROL keyboard itself and include speech output via your computer for the following features:
▪Perform, Transpose, Page left / right buttons
▪All Browser functions
▪Instance switching
▪The current edit mode, including the Plug-in panel and the Perform panel (Scale, Arp)
▪Names of parameters and parameter sections when touching knobs, including all edit modes
▪Tempo (KOMPLETE KONTROL stand-alone application only)
The accessibility features are particularly useful when combined with KOMPLETE KONTROL’s host integration and Apple VoiceOver in Apple Logic Pro X and GarageBand.
1.4.1Keyboard Overview
The buttons and knobs on the KOMPLETE KONTROL keyboard are organized in the following groups:
▪Perform and Edit section
▪Transport section
▪Solo and Mute buttons
▪Preset and Page buttons
▪Arrange buttons (only functional in MASCHINE)
▪Control section
▪Navigation and Mode buttons
▪4-Directional Push Encoder (referred to as the 4-D encoder)
KOMPLETE KONTROL S-Series — Manual — 16

Welcome to KOMPLETE KONTROL
Accessibility
▪ Transpose and Fixed Velocity buttons
The Perform and Edit section is located at the top left of the keyboard. It contains six buttons that are arranged in two rows.
The buttons in the first row are (from left to right):
▪SHIFT
▪SCALE (Edit)
▪ARP (Edit)
The buttons in the second row are (from left to right):
▪UNDO (Redo)
▪QUANTIZE
▪AUTO
The Transport section is located directly below the Perform and Edit section. It contains six buttons that are arranged in two rows.
The buttons in the first row are (from left to right):
▪LOOP
▪METRO
▪TEMPO
The buttons in the second row are (from left to right):
▪PLAY (Restart)
▪REC (Count-In)
▪STOP
The Solo and Mute buttons are located to the top right of the Perform and Edit section. The two buttons are arranged in a row.
The buttons are (from left to right):
▪Mute
▪Solo
KOMPLETE KONTROL S-Series — Manual — 17

Welcome to KOMPLETE KONTROL
Accessibility
The Preset and Page buttons are located to the bottom right of the Perform and Edit section, below the Solo and Mute buttons. The four buttons are arranged in a column.
The buttons are (from top to bottom):
▪PRESET Up
▪PRESET Down
▪Page Left and Page Right (next to each other)
The Arrange buttons, which are only functional in MASCHINE, are located to the right of the Solo and Mute buttons and the Preset and Page buttons. The five buttons are arranged in a column.
The buttons are (from top to bottom):
▪SCENE
▪PATTERN
▪TRACK
▪KEY MODE
▪CLEAR
The Control section is located in the center of the KOMPLETE KONTROL keyboard. It contains eight buttons and eight knobs. The buttons are arranged in a row at the very top of the keyboard. The knobs are arranged in a row directly above the keybed.
The Navigation and Mode buttons are on the top right of the KOMPLETE KONTROL keyboard. The six buttons are arranged in two rows.
The buttons in the first row are (from left to right):
▪BROWSER
▪PLUG-IN
▪MIXER
The buttons in the second row are (from left to right):
▪INSTANCE
▪MIDI
KOMPLETE KONTROL S-Series — Manual — 18

Welcome to KOMPLETE KONTROL
Accessibility
▪ SETUP
The 4-D encoder is located directly below the Navigation and Mode buttons.
The Transpose and Fixed Velocity buttons are located at the far left of the keyboard next to the keybed and directly above the Pitch and Modulation wheels. The three buttons are arranged in a row.
The buttons are (from left to right):
▪FIXED VEL (TS Mode)
▪OCT Down
▪OCT Up
1.4.2Activating Accessibility Features
In order to activate or deactivate the accessibility features from the KOMPLETE KONTROL keyboard while the KOMPLETE KONTROL software is running:
1.Press and hold the SHIFT button on the top left of the keyboard.
2.While holding SHIFT, press the MIXER button on the top right of the keyboard.
→The accessibility features are activated or deactivated.
When the accessibility features are activated, you can choose whether or not speech output should be enabled for names of Preset files while browsing:
1.Press and hold the SHIFT button on the top left of the keyboard.
2.While holding SHIFT, press Button 5 in the Control section.
→Speech output for names of Preset files while browsing is enabled or disabled.
The accessibility features are designed to be used with the KOMPLETE KONTROL plug-in. However, the KOMPLETE KONTROL stand-alone application must be opened after initial installation and after installing additional Instruments and Effects. This will ensure that all Instruments and Effects are displayed correctly in the KOMPLETE KONTROL Browser.
KOMPLETE KONTROL S-Series — Manual — 19

Welcome to KOMPLETE KONTROL
Accessibility
1.4.3Training Mode
KOMPLETE KONTROL Training Mode makes it easy to locate a specific button or parameter without accidentally triggering an action. When Training Mode is activated, all button presses and parameter names are announced but the corresponding action is not triggered.
Activating Training Mode
►To activate or deactivate Training Mode from the KOMPLETE KONTROL keyboard while the KOMPLETE KONTROL software is running, double-press the SHIFT button on the top left of the keyboard.
Training Mode is only available when the accessibility features have been activated.
1.4.4Feature Overview and Keyboard Shortcuts
The following overview outlines the availability of accessibility features for different aspects of KOMPLETE KONTROL from both the KOMPLETE KONTROL keyboard and the KOMPLETE KONTROL software. In the table you also can find the relevant keyboard shortcut.
KOMPLETE KONTROL S-Series — Manual — 20
![]()
|
Welcome to KOMPLETE KONTROL |
||||
|
Accessibility |
||||
|
Feature |
Accessible from |
Keyboard Shortcut |
||
|
Keyboard |
||||
|
Accessibility Mode |
Enable or disable Accessibility |
Yes |
SHIFT + MIXER |
|
|
mode |
||||
|
Enable or disable speech |
SHIFT + Button 5 |
|||
|
output for names of Preset |
||||
|
files |
||||
|
Browser |
Browse for Factory and User |
Yes |
Page left button |
|
|
Preset files |
or Page right |
|||
|
button |
||||
|
Switch between Category and |
Yes |
SHIFT + Knob 1 |
||
|
Vendor sorting |
||||
|
Set Preset file Favorites |
Yes |
SHIFT + Knob 4 |
||
|
Sort by Favorites |
SHIFT + Knob 3 |
|||
|
Save and edit User Preset files |
No |
|||
|
Browse for NKS plug-ins from |
Yes |
Supported by |
||
|
other vendors |
default |
|||
|
Instrument control |
Adjust key Instrument |
Yes |
Knob 1 – 8 |
|
|
parameters |
||||
|
Custom map Instrument |
No |
|||
|
parameters |
||||
|
Smart Play |
Accessing Scale and Chord |
Yes |
SHIFT + SCALE |
|
|
Parameters |
Edit |
|||
|
Adjust Scale & Chord |
Knob 1 – 8 |
|||
|
parameters |
||||
|
Accessing Arp Parameters |
Yes |
SHIFT + ARP Edit |
||
|
Adjust Arp parameters |
Knob 1 – 8 |
|||
KOMPLETE KONTROL S-Series — Manual — 21

|
Welcome to KOMPLETE KONTROL |
||||
|
Accessibility |
||||
|
Feature |
Accessible from |
Keyboard Shortcut |
||
|
Keyboard |
||||
|
Selecting Parameter Pages |
Page left or Page |
|||
|
right |
||||
|
Touch Strips |
Adjust Touch Strip parameters |
No |
||
|
Tempo |
Adjust BPM |
Yes |
TEMPO + Knob 1 |
|
|
Training mode |
Find a control without |
Yes |
||
|
accidentally triggering actions |
||||
|
Enabling or disabling Training |
Yes |
Double-press |
||
|
mode |
SHIFT |
|||
|
Preferences |
Adjust software & hardware |
No |
||
|
preferences |
||||
|
Software dialog |
Be notified if a dialog box |
Yes |
Supported by |
|
|
opens in the software (dialog |
default |
|||
|
content is not available for |
||||
|
speech output) |
||||
Accessibility for KOMPLETE KONTROL’s host integration is only available when using Apple VoiceOver in Logic Pro X and GarageBand. For more information about KOMPLETE KONTROL’s host integration features, refer to ↑9, Host Integration.
KOMPLETE KONTROL S-Series — Manual — 22

The KOMPLETE KONTROL Workflow
2The KOMPLETE KONTROL Workflow
KOMPLETE KONTROL brings all the sounds from KOMPLETE and the Native Kontrol Standard (NKS) to the center of your workflow. Its advanced integration in a number of hosts enables you to quickly capture ideas, with immediate access to the sounds you need, all directly from the KOMPLETE KONTROL keyboard.
The KOMPLETE KONTROL workflow is streamlined to remove any obstacles when sketching out a new song in a supported host:
1.Select a track that hosts the KOMPLETE KONTROL plug-in with the navigation controls on the keyboard. This is made possible by KOMPLETE KONTROL’s advanced host integration.
2.Find Preset files you like from any of the Instruments and Effects in your KOMPLETE KONTROL Library by browsing with the keyboard, supported by the Browser’s filters and Preview functions.
3.Use the keyboard’s Control section to adjust the loaded Instrument and Effect(s) and create your own unique sound.
4.Optionally, you can enable KOMPLETE KONTROL’s Smart Play features to enrich your playing with the Scale engine and the Arpeggiator.
5.Record a new clip in the host, conveniently controlling transport and loop functions directly from the keyboard. Again, made possible by KOMPLETE KONTROL’s advanced host integration.
6.If you need to start over, undo and redo functions are right at your fingertips. To further refine your recording, you can apply quantization and automation to a clip by pressing the corresponding buttons on the keyboard.
→You have quickly captured a musical idea and can continue sketching out a new song by repeating the process and layering more tracks.
KOMPLETE KONTROL S-Series — Manual — 23

The KOMPLETE KONTROL Workflow
Key Features
The following key features facilitate the KOMPLETE KONTROL workflow:
▪Browser: The Browser is your interface for finding, loading and organizing Instruments, Effects, and Preset files from the KOMPLETE KONTROL Library. For more information, refer to ↑10, Browsing the Library, ↑11, Working with Effects, and ↑12, Managing the Library.
▪Instrument and Effect control: The Touch Strip and knobs on the keyboard are pre-mapped to all KOMPLETE and NKS Instruments and Effects for immediate control. For more information, refer to ↑13, Controlling Instrument and Effect Parameters and ↑8.8.5, Assignments for the Touch Strip.
▪Smart Play: The Scale engine and the Arpeggiator let you play and generate scales, chords, and arpeggiator sequences. For more information, refer to ↑14, Smart Play – Playing and Editing Scales and Chords and ↑15, Smart Play – Playing and Editing Arpeggiator Sequences.
▪Host integration: Advanced integration in a number of hosts allows you control core functionality directly from the keyboard. For more information, refer to ↑3.3, Setting up Host Integration and ↑9, Host Integration.
KOMPLETE KONTROL S-Series — Manual — 24
Setting up KOMPLETE KONTROL
3Setting up KOMPLETE KONTROL
This section provides basic setup information for using the KOMPLETE KONTROL stand-alone software, and guides you through the process of integrating KOMPLETE KONTROL in supported hosts.
The KOMPLETE KONTROL software is installed both as a stand-alone application as well as a VST, Audio Unit, and AAX plug-in.
The KOMPLETE KONTROL stand-alone application must be opened once before using the plug-in within your DAW for the first time, and after installing new Instruments and Effects.
The KOMPLETE KONTROL stand-alone application directly communicates with your audio and MIDI interfaces, which you can configure in the KOMPLETE KONTROL Preferences. When KOMPLETE KONTROL is used as a plug-in within a host, the communication with your audio and MIDI interfaces is managed by the host.
For details about the audio and MIDI configuration of the host, and how to load plug-ins, please refer to its documentation.
KOMPLETE KONTROL S-Series — Manual — 25

Setting up KOMPLETE KONTROL
Connecting the Keyboard to the Computer
3.1Connecting the Keyboard to the Computer
To connect the KOMPLETE KONTROL keyboard to your computer:
1.Attach the device end of the included USB cable to the USB socket on the rear panel of the keyboard.
2.Attach the computer end of the USB cable to an available USB 2.0 (or later) port on your computer.
3.Press the power switch on the rear panel of the keyboard to switch it on.
→The keyboard is now detected by the operating system.
Non-powered USB hubs are not supported. The keyboard should always be connected directly to the USB port of the computer, or be used with a powered USB hub.
KOMPLETE KONTROL S-Series — Manual — 26

Setting up KOMPLETE KONTROL
Setting up the Stand-Alone Application
3.2Setting up the Stand-Alone Application
When you launch the KOMPLETE KONTROL software from its installation directory, it starts as a stand-alone application independently from a host.
By default, the application uses the standard audio interface of your computer. In order to use another audio interface, and receive MIDI notes from the keyboard, you need to configure the application in the Preferences.
Configuring Audio Interface
1.In the KOMPLETE KONTROL menu click on Edit > Preferences to open the Preferences.
2.Click on Audio to display the Audio page.
3.Select the hardware driver supported by your audio interface from the Driver drop-down menu.
4.Select the audio interface from the Device drop-down menu.
5.Under Routings, select the left and right output channels of your audio interface you want to use for KOMPLETE KONTROL’s master output in the Komplete Kontrol Out 1 L and Komplete Kontrol Out 1 R drop-down menus.
KOMPLETE KONTROL S-Series — Manual — 27

Setting up KOMPLETE KONTROL
Setting up the Stand-Alone Application
Preferences panel — Audio page
Enabling MIDI Control
1.Click on MIDI to display the MIDI page.
2.Click on Input to display the available devices for incoming MIDI signals.
3.Click the Komplete Kontrol checkboxes to activate incoming MIDI signals from the keyboard.
KOMPLETE KONTROL S-Series — Manual — 28

Setting up KOMPLETE KONTROL
Setting up Host Integration
Preferences panel — MIDI page (entries may vary on your computer)
→The software is configured and ready to be controlled with the keyboard.
The MIDI Output settings are required for using KOMPLETE KONTROL’s Smart Play features with other MIDI instruments.
3.3Setting up Host Integration
KOMPLETE KONTROL integrates with a number of hosts to facilitate a fluent workflow for performing and recording music with your KOMPLETE KONTROL Library.
Advanced integration of KOMPLETE KONTROL is available in the following hosts: ▪ MASCHINE 2
KOMPLETE KONTROL S-Series — Manual — 29

Setting up KOMPLETE KONTROL
Setting up Host Integration
▪Apple Logic Pro X
▪Apple GarageBand
▪Ableton Live 9
▪Steinberg Cubase Artist 8.5/9/9.5
▪Steinberg Cubase Pro 8.5/9/9.5
▪Steinberg Nuendo 7/8
Before using the KOMPLETE KONTROL keyboard to control a supported host, a few configuration steps are required:
3.3.1Setting up Apple Logic Pro X and GarageBand
Apple Logic Pro X and GarageBand are automatically configured for advanced integration with KOMPLETE KONTROL once you launch the respective application for the first time after installing the KOMPLETE KONTROL software. Ensure that the keyboard is connected and switched on before launching the application.
A dialog asks you to confirm this after launching the application:
►When the message OSC app “KOMPLETE KONTROL S-Series” wants to connect to Logic Pro X / GarageBand appears on screen, click OK.
The KOMPLETE KONTROL stand-alone application must be opened once before using the plug-in within your DAW for the first time, and after installing new Instruments and Effects.
For a detailed overview of Integration controls for Logic Pro X / GarageBand refer to ↑9.2, Integration with Apple Logic Pro X and GarageBand.
3.3.2Setting up Steinberg Cubase/Nuendo
Steinberg Cubase/Nuendo must be configured for advanced integration with KOMPLETE KONTROL.
1.Ensure that the keyboard is connected and switched on before launching the application.
2.Launch Steinberg Cubase/Nuendo.
KOMPLETE KONTROL S-Series — Manual — 30
![]()
Setting up KOMPLETE KONTROL
Setting up Host Integration
3.In Steinberg Cubase/Nuendo, open the Device Setup. from the Devices menu (Steinberg Cubase 9.5: Studio Setup from the Studio menu).
4.Click the + button in the upper left corner of the Device Setup and select Komplete Kontrol S-Series from the drop-down menu.
5.Set MIDI Input and MIDI Output for Komplete Kontrol S-Series to the ports named Komplete Kontrol DAW (macOS) / KOMPLETE KONTROL (not KOMPLETE KONTROL EXT, Windows).
→Steinberg Cubase Nuendo is now ready to be used with KOMPLETE KONTROL.
The KOMPLETE KONTROL stand-alone application must be opened once before using the plug-in within your DAW for the first time, and after installing new Instruments and Effects.
For a detailed overview of Integration controls for Steinberg/Nuendo refer to ↑9.4, Integration with Steinberg Cubase and Nuendo.
3.3.3Setting up Ableton Live (macOS)
Ableton Live must be configured for advanced integration with KOMPLETE KONTROL.
Installing the MIDI Remote Script
The MIDI Remote Script allows Ableton Live to recognize KOMPLETE KONTROL as a control surface. It must be copied into Live’s MIDI Remote Scripts directory:
1.Ensure that Ableton Live is not running.
2.Navigate to the following folder: Macintosh HD/Library/Application Support/Native Instruments/Host Integration/Ableton Live/
3.Copy the _NativeInstruments folder, as well as the Komplete_Kontrol_Mk2 folder to the clipboard.
4.Open your Applications folder and right-click the Ableton Live application symbol. In the context menu, click Show Package Contents.
5. In the Ableton Live package, navigate to Contents > App-Resources > MIDI Remote Scripts.
KOMPLETE KONTROL S-Series — Manual — 31

Setting up KOMPLETE KONTROL
Setting up Host Integration
6.Paste the folders you have copied to the clipboard into the MIDI Remote Scripts folder.
Installing the KOMPLETE KONTROL Instrument Racks
KOMPLETE KONTROL is loaded into Ableton Live in the form of an Instrument Rack. In order to make the required Instrument Rack available in Ableton Live’s browser, it must be added to your Ableton Live User Library:
1.Navigate to the following folder: Macintosh HD/Library/Application Support/Native Instruments/Host Integration/Ableton Live/.
2.Copy the KOMPLETE KONTROL VST.adg file to the clipboard.
3.Paste the file you have copied to the clipboard into your Ableton Live Instrument Rack folder. By default this folder is located here: Macintosh HD/Users/*Username*/Music/ Ableton/User Library/Presets/Instruments/Instrument Rack/.
Configuring Ableton Live for KOMPLETE KONTROL
Once the MIDI Remote Script and the Instrument Rack file are installed in the correct location, you need to add KOMPLETE KONTROL as a control surface in Ableton Live’s preferences.
1.Launch Ableton Live.
2.In Ableton Live, go to the Preferences and open the MIDI / Sync tab.
3. Assign a free Control Surface slot to KOMPLETE KONTROL by selecting KOMPLETE KONTROL MK2 from the drop-down menu.
4.Leave both the Input and the Output for the KOMPLETE KONTROL control surface set to
None.
Loading KOMPLETE KONTROL in Ableton Live
The KOMPLETE KONTROL stand-alone application must be opened once before using the plug-in within your DAW for the first time, and after installing new Instruments and Effects.
1.Ensure that the keyboard is connected and switched on.
KOMPLETE KONTROL S-Series — Manual — 32

Setting up KOMPLETE KONTROL
Setting up Host Integration
2.To load KOMPLETE KONTROL in Ableton Live, drag the KOMPLETE KONTROL Instrument Rack from the browser to an empty MIDI track. You can find it here in the Ableton Live browser: Instruments/Instrument Rack/KOMPLETE KONTROL VST.adg.
→You are now ready to use KOMPLETE KONTROL within Ableton Live.
You must use the KOMPLETE KONTROL Instrument Rack (KOMPLETE KONTROL VST.adg) to ensure a reliable connection with the KOMPLETE KONTROL keyboard.
For a detailed overview of Integration controls for Ableton Live refer to ↑9.3, Integration with Ableton Live.
3.3.4Setting up Ableton Live (Windows)
Ableton Live must be configured for advanced integration with KOMPLETE KONTROL.
Installing the MIDI Remote Script
The MIDI Remote Script allows Ableton Live to recognize KOMPLETE KONTROL as a control surface. It must be copied into Live’s MIDI Remote Scripts directory:
1.Ensure that Ableton Live is not running.
2.Navigate to the following folder: C:\Program Files\Common Files\Native Instruments\Host Integration\Ableton Live\
3.Copy the _NativeInstruments folder, as well as the Komplete_Kontrol_Mk2 folder to the clipboard.
4.Navigate to the MIDI Remote Scripts folder in Ableton Live’s installation directory: C:\ProgramData\Ableton\Live 9\Resources\MIDI Remote Scripts
5.Paste the folders you have copied to the clipboard into the MIDI Remote Scripts folder.
Installing the KOMPLETE KONTROL Instrument Racks
KOMPLETE KONTROL is loaded into Ableton Live in the form of an Instrument Rack. In order to make the required Instrument Rack available in Ableton Live’s browser, it must be added to your Ableton Live User Library:
KOMPLETE KONTROL S-Series — Manual — 33

Setting up KOMPLETE KONTROL
Setting up Host Integration
1.Navigate to the following folder: C:\Program Files\Common Files\Native Instruments\Host Integration\Ableton Live\
2.Copy the KOMPLETE KONTROL VST.adg file to the clipboard.
3.Paste the file you have copied to the clipboard into your Ableton Live Instrument Rack folder. By default this folder is located here: C:\Users\*Username*\Documents\Ableton \User Library\Presets\Instruments\Instrument Rack\
Configuring Ableton Live for KOMPLETE KONTROL
Once the MIDI Remote Script and the Instrument Rack file are installed in the correct location, you need to add KOMPLETE KONTROL as a control surface in Ableton Live’s preferences.
1.Launch Ableton Live.
2.In Ableton Live, go to the Preferences and open the MIDI / Sync tab.
3.Assign a free Control Surface slot to KOMPLETE KONTROL by selecting it from the dropdown menu.
4.Leave both the Input and the Output for the KOMPLETE KONTROL control surface set to
None.
Loading KOMPLETE KONTROL in Ableton Live
The KOMPLETE KONTROL stand-alone application must be opened once before using the plug-in within your DAW for the first time, and after installing new Instruments and Effects.
►To load KOMPLETE KONTROL in Ableton Live, drag the KOMPLETE KONTROL Instrument Rack (KOMPLETE KONTROL VST.adg) from the browser to an empty MIDI track. You can find it here in the Ableton Live browser: Instruments/Instrument Rack/KOMPLETE KONTROL VST.adg
For a detailed overview of Integration controls for Ableton Live refer to ↑9.3, Integration with Ableton Live.
KOMPLETE KONTROL S-Series — Manual — 34

Setting up KOMPLETE KONTROL
Connecting Pedals to the Keyboard
3.4Connecting Pedals to the Keyboard
The KOMPLETE KONTROL keyboard provides you two pedal inputs (in the form of 1/4″ sockets) on its rear panel: PEDAL A and PEDAL B.
The pedal inputs on the rear panel of the keyboard.
These inputs both allow you to connect either a continuous or a switch pedal in order to further refine your performance. They can be freely configured for sustain or expression behavior.
You can define the MIDI messages assigned to the pedal inputs in KOMPLETE KONTROL’s MIDI Assignment editor. For more information, refer to ↑8, Using the MIDI Assignment Editor.
Connecting Pedals
►Connect a continuous or switch pedal to the PEDAL A or PEDAL B inputs on the rear panel of the keyboard.
Configuring the Pedal Input for a Sustain Pedal
When a switch pedal is connected:
1.Click the MIDI Assignment editor button in the Header to open the MIDI Assignment editor.
2.Select the control element type PEDALS.
KOMPLETE KONTROL S-Series — Manual — 35

Setting up KOMPLETE KONTROL
Connecting Pedals to the Keyboard
3.Select the pedal input you want to configure, either Pedal A or Pedal B.
4.Select Switch from the Mode drop-down menu.
5.Depending on inverted tip/ring connectivity of the pedal, select either Tip or Ring.
→The pedal input is configured for a switch pedal with sustain behavior. If you need to change the MIDI Control Change message assigned to the pedal input, refer to ↑8, Using the MIDI Assignment Editor.
Configuring the Pedal Input for an Expression Pedal
When a continuous pedal is connected:
1.Click the MIDI Assignment editor button in the Header to open the MIDI Assignment editor.
KOMPLETE KONTROL S-Series — Manual — 36

Setting up KOMPLETE KONTROL
Connecting Pedals to the Keyboard
2.Select the control element type PEDALS.
3.Select the pedal input you want to configure, either Pedal A or Pedal B.
4.Select Continuous from the Mode drop-down menu.
→The pedal input is configured for a continuous pedal with expression behavior. If you need to change the MIDI Control Change message assigned to the pedal input, refer to ↑8, Using the MIDI Assignment Editor.
Depending on the type of pedal, you need to make further adjustments by using the provided options. The following table gives you an overview of these options:
KOMPLETE KONTROL S-Series — Manual — 37

|
Setting up KOMPLETE KONTROL |
||
Connecting External MIDI Equipment to the Keyboard |
||
|
Option |
Description |
|
|
Invert toggle switch |
Some continuous pedals internally support the inverted pedal |
|
|
range but cannot be configured on the pedal directly. The |
||
|
Invert Range function allows you to invert the range of the |
||
|
pedal connected to the keyboard. |
||
|
Swap T/R toggle switch |
Allows you to use pedals with inverted tip/ring connectivity. |
|
|
Recalibrate button |
Allows you to recalibrate the input. |
|
When using the MIDI Assignment editor, all keyboard controls (i.e. navigation, transport, etc.) are blocked.
3.5Connecting External MIDI Equipment to the Keyboard
The KOMPLETE KONTROL keyboard has dedicated MIDI sockets that allow you to directly connect other MIDI devices using a 5-pin DIN MIDI cable and integrate the keyboard into your MIDI setup.
The MIDI sockets on the rear panel of the KOMPLETE KONTROL keyboard.
To connect your external MIDI equipment:
1.Connect the device receiving MIDI signals to the MIDI OUT socket on the rear panel of the keyboard using a 5-pin DIN MIDI cable.
2.Connect the device sending MIDI signals to the MIDI IN socket on the rear panel of the keyboard using a 5-pin DIN MIDI cable.
→The MIDI equipment is connected.
Depending on your use case, additional configuration is required in the software:
KOMPLETE KONTROL S-Series — Manual — 38

Setting up KOMPLETE KONTROL
Connecting External MIDI Equipment to the Keyboard
▪If KOMPLETE KONTROL is running as a stand-alone application, you need to activate the corresponding MIDI inputs and outputs of the keyboard on the MIDI page of the Preferences. For more information refer to ↑7.3, Using the Keyboard as Stand-Alone MIDI Controller.
▪If KOMPLETE KONTROL is running as a plug-in in a host, the MIDI configuration is managed by the host. For more information refer to ↑7.2, Using the Keyboard in MIDI Mode.
▪If you are using the keyboard as MIDI controller without a USB connection, MIDI data is directly sent and received via the keyboard’s MIDI IN and MIDI OUT sockets. For detailed information on MIDI mapping refer to ↑8, Using the MIDI Assignment Editor.
KOMPLETE KONTROL S-Series — Manual — 39

Software Overview
4Software Overview
This section gives an overview of the areas and controls of the KOMPLETE KONTROL software.
1
Overview of the KOMPLETE KONTROL software.
(1) Header: Provides access to general functions like the Main menu, the Preset display, the Transport and Master Volume controls, as well as options to show and hide user interface areas. For more information, refer to ↑4.1, Header.
(2) Plug-in area: Shows your loaded Instrument or Effect and lets you control it directly in the software. For more information, refer to ↑4.7, Plug-in Area.
(3) Browser: Lets you browse for Instruments and Effects, and manage all your Preset files. For more information, refer to ↑4.2, Browser.
KOMPLETE KONTROL S-Series — Manual — 40
![]()
Software Overview
Header
4.1Header
The header is where you find general settings that affect KOMPLETE KONTROL globally. It also lets you access additional user interface areas.
|
1 |
2 |
4 |
5 |
7 |
9 |
11 |
13 |
15 |
|
3 |
6 |
8 |
10 |
12 |
14 |
The header.
(1) KOMPLETE KONTROL logo: Opens the About screen, which shows the version number of the KOMPLETE KONTROL software.
(2) Browser button: Shows or hides the Browser. For more information, refer to ↑4.2, Browser.
(3) KOMPLETE KONTROL menu: Opens the KOMPLETE KONTROL menu, which contains a number of general functions and settings, including the Preferences.
(4) Preset display: Displays the name of the loaded Preset file or KONTAKT key switch. The arrow buttons on the right skip to the next Preset file in the Browser’s Results list.
(5) Perform panel button: Shows or hides the Perform panel, which gives you access to the parameters of the Scale engine and the Arpeggiator. The Perform panel button lights up blue when the Scale engine and/or the Arpeggiator are enabled. For more information, refer to ↑4.3, Perform Panel.
(6) Plug-in panel button: Shows or hides the Plug-in panel, which allows you to customize the parameter mapping for the Control section on the keyboard for every Preset file. For more information, refer to ↑4.4, Plug-in Panel.
(7) Plug-in chain panel button: Shows or hides the Plug-in chain panel and lights up white when enabled. For more information, refer to ↑4.5, Plug-in Chain Panel.
(8) View button: Switches between Default view and Additional view of the loaded Instrument. The View button only appears if the loaded Instrument contains an Additional view. The View button is not available when an Effect is selected.
KOMPLETE KONTROL S-Series — Manual — 41

Software Overview
Header
(9) Keyboard button: Shows the currently connected keyboard, S49, S61, or S88. If multiple instances of the KOMPLETE KONTROL software are running (for example in a host), clicking the button connects the keyboard to this instance. This indicator only appears if at least one compatible device is connected. For more information, refer to ↑6.2, Switching Instances.
(10) Transport controls: Lets you start, stop, and reset the internal clock. When KOMPLETE KONTROL is loaded as a plug-in in a host, the transport automatically follows the host transport and this feature is greyed out. For more information, refer to ↑6.3, Transport and Tempo.
(11) Tempo control: Lets you adjust the tempo in BPM (beats per minute). For more information, refer to ↑6.3, Transport and Tempo.
(12) Master Volume control: Lets you adjust the overall output volume of KOMPLETE KONTROL. The meter shows the current peak level of the output signal. For more information, refer to ↑6.4, Adjusting Master Volume.
(13) CPU meter: Represents the current load on your computer’s processor; it should not go above 70% to avoid clicks and interruptions.
(14) MIDI Assignment editor button: Lets you to access all the settings related to the keyboard’s MIDI mode, as well as pedals. This button only appears in the KOMPLETE KONTROL standalone application. For more information, refer to ↑8, Using the MIDI Assignment Editor.
(15) NI logo: The NI logo opens the About screen, which shows the version number of the KOMPLETE KONTROL software.
KOMPLETE KONTROL S-Series — Manual — 42

Software Overview
Browser
4.2Browser
The Browser provides you access to your KOMPLETE KONTROL Library and lets you add, edit, and organize Preset files. It consists of the Library pane together with the Product selector, and of the Files pane which are explained in the following overviews.
For more information on using the Browser and managing your Preset files, refer to ↑10, Browsing the Library, ↑11, Working with Effects, respectively ↑12, Managing the Library.
KOMPLETE KONTROL S-Series — Manual — 43

Software Overview
Browser
4.2.1Library Pane
The Library pane is where you browse for Instruments, Effects, and Preset files. It consists of the following elements:
|
1 |
3 |
|
|
2 |
||
|
4 |
||
|
5 |
|
6 |
|||||||
|
11 |
7 |
||||||
|
8 |
|||||||
|
10 |
9 |
||||||
The Library pane.
(1) Library: Displays the Library pane.
(2) Product Type icon: Displays the current context either of browsing for Instruments or browsing for Effects. This is determined automatically by the currently selected Plug-in slot in the Plug-in chain. For more information on switching between Product Types, refer to ↑10.1.1, Product Types: Instrument and Effect.
(3) Content selector: The Globe icon selects factory content and the User icon selects user content. Only Preset files of the selected content type are displayed in the Results list (8). For more information, refer to ↑10.4, Choosing Between Factory Content and User Content.
KOMPLETE KONTROL S-Series — Manual — 44

Software Overview
Browser
(4) Product selector: Selects a particular Instrument or Effect, Instrument category, and Bank of the selected Product. Only Preset files matching your selection are displayed in the Results list (8). For more information, refer to ↑4.2.2, Product Selector.
(5) TYPES: Lets you browse for Preset files based on Type and Sub-Type tags that have been applied to them. You can collapse or expand this section by clicking on the little arrow next to TYPES. For more information, refer to ↑10.8, Types and Modes Tag Filters.
(6) MODES: Lets you browse for Preset files based on Mode tags that have been applied to them. You can collapse or expand this section by clicking on the little arrow next to MODES. For more information, refer to ↑10.8, Types and Modes Tag Filters.
(7) Favorites: Lets you filter the search results by Favorites. When enabled, only favorite Preset files are displayed in the Results list (8). For more information, refer to ↑10.9, Working with Favorites.
(8) Results list: Displays all Preset files that match your entered search criteria. For more information, refer to ↑10.3, Loading Preset Files.
(9) Control bar: Provides useful tools when browsing and editing the KOMPLETE KONTROL Library:
▪The Information button (i) displays additional information for the selected Preset file(s).
▪The EDIT button opens the Attribute editor for displaying and editing the tags and properties of the selected Preset file(s).
For more information, refer to ↑10.11, Displaying Preset File Information.
(10) Prehear controls: Lets you audition Preset files. For more information, refer to ↑10.12, Auditioning your Preset Files.
(11) Search field: Lets you perform a text search. For more information, refer to ↑10.10, Performing a Text Search.
KOMPLETE KONTROL S-Series — Manual — 45

Software Overview
Browser
4.2.2Product Selector
When browsing for Instruments or Effects the Product selector allows you to limit your search to a certain category, a particular Product, and Banks of Instruments.
1
2
3
The Product selector.
(1) Product selector header: The header displays the selected Product. If there is no selection it shows a generic label (All Instruments or All Effects). A click on the header opens or closes the Product selector.
KOMPLETE KONTROL S-Series — Manual — 46

Software Overview
Browser
(2) Category / Vendor selector: Allows you to sort the Product list by Category or by Vendor.
(3) Product list: Displays all Products that are available in your KOMPLETE KONTROL Library.
If Category is selected in the Category / Vendor selector, the Product list is sorted by the following categories:
▪DRUMS & PERCUSSION
▪SAMPLED INSTRUMENTS
▪SYNTHESIZERS
▪NO CATEGORY
If Vendor is selected in the Category / Vendor selector, the Product list is sorted by the names of the manufacturers.
For more information, refer to ↑10.5, Filtering Preset Files by Product and ↑10.6, Filtering Preset Files by Bank.
KOMPLETE KONTROL S-Series — Manual — 47

Software Overview
Browser
4.2.3Files Pane
The Files pane contains following elements:
1
5
6
The Files pane in the Browser.
(1) Files: Displays the Files pane. For more information, refer to ↑12.4, Working with the Files Pane.
KOMPLETE KONTROL S-Series — Manual — 48

Software Overview
Browser
(2) Favorite bar: Displays all your favorite folders. A click on any favorite folder lets you jump directly to that particular path and display its content in the Result list (5). For more information, refer to ↑12.4.4, Working with File Location Favorites.
(3) Location bar: Displays the selected path. The Location bar provides various tools to quickly navigate your file system. For more information, refer to ↑12.4.2, Navigating to File Locations with the Location Bar.
(4) Recent Locations button: Opens a list of the last visited locations for quickly jumping to any of them. For more information, refer to ↑12.4.3, Navigating to Recent File Locations.
(5) Results list: Displays the content (files and folders) of the folder shown in the Location bar. Only files compatible with KOMPLETE KONTROL are displayed. For more information, refer to ↑12.4.1, Additional Results List Features List in the Files Pane.
(6) Control bar: Provides useful tools when browsing your file system:
▪The Information button (i) displays additional information about the selected files.
▪The IMPORT button lets you import the content of the selected folder to the KOMPLETE KONTROL Library. Before any files are imported, you can choose which tags will be assigned to the files in the Attribute editor.
For more information, refer to ↑12.3, Editing the Tags and Properties of User Preset Files and ↑12.7, Importing KOMPLETE KONTROL-Compatible User Files.
4.2.4Browser on the Keyboard
On the keyboard displays, the Browser is organized as follows:
The Browser on the keyboard´s displays.
KOMPLETE KONTROL S-Series — Manual — 49

Software Overview
Perform Panel
▪The left display shows the Product selector parameters which allow you to narrow your search by selecting the content type (factory or user content), as well as a Product category, a Product, a BANK, and a SUB-BANK.
▪The right display shows the parameters to further refine your search by selecting the desired TYPE and possibly MODE tags. It also shows you the corresponding Results list.
4.3Perform Panel
The Perform panel lets you access all the parameters related to the Scale engine and the Arpeggiator.
1 2 3
The Perform panel.
(1) SCALE: Clicking the round button left of SCALE switches the Scale engine on or off. Clicking the SCALE label displays the Scale engine’s parameters. See ↑14, Smart Play – Playing and Editing Scales and Chords for details.
(2) ARP: Clicking the round button left of ARP switches the Arpeggiator on or off. Clicking the ARP label displays the Arpeggiator’s parameters. See ↑15, Smart Play – Playing and Editing Arpeggiator Sequences for details.
(3) Parameter pages: If multiple pages of parameters are available, you can switch between them here.
KOMPLETE KONTROL S-Series — Manual — 50
 Loading…
Посмотреть инструкция для Native Instruments Komplete Kontrol S88 MK2 бесплатно. Руководство относится к категории миди-клавиатуры, 3 человек(а) дали ему среднюю оценку 7.1. Руководство доступно на следующих языках: английский. У вас есть вопрос о Native Instruments Komplete Kontrol S88 MK2 или вам нужна помощь? Задайте свой вопрос здесь
Не можете найти ответ на свой вопрос в руководстве? Вы можете найти ответ на свой вопрос ниже, в разделе часто задаваемых вопросов о Native Instruments Komplete Kontrol S88 MK2.
Инструкция Native Instruments Komplete Kontrol S88 MK2 доступно в русский?
К сожалению, у нас нет руководства для Native Instruments Komplete Kontrol S88 MK2, доступного в русский. Это руководство доступно в английский.
Не нашли свой вопрос? Задайте свой вопрос здесь
-
Page 1
MANUAL… -
Page 2
The information in this document is subject to change without notice and does not represent a commitment on the part of Native Instruments GmbH. The software described by this docu- ment is subject to a License Agreement and may not be copied to other media. No part of this… -
Page 3
NATIVE INSTRUMENTS FRANCE SARL SHENZHEN NATIVE INSTRUMENTS COMPANY Limited 113 Rue Saint-Maur 203B & 201B, Nanshan E-Commerce Base Of 75011 Paris Innovative Services France Shi Yun Road, Shekou, Nanshan, Shenzhen www.native-instruments.com China www.native-instruments.com © NATIVE INSTRUMENTS GmbH, 2017. All rights reserved. -
Page 4: Table Of Contents
Table of Contents Table of Contents Welcome to KOMPLETE KONTROL …………….10 Document Conventions ………………….. 10 Box Contents ……………………..12 System Requirements ……………………. 12 Accessibility ……………………..14 1.4.1 Feature Overview ………………….. 15 1.4.2 Hardware Overview ………………..17 1.4.3 Training Mode ………………….18 New Features in KOMPLETE KONTROL 1.9 …………..
-
Page 5
Table of Contents Perform Panel ……………………..43 Plug-in Panel ……………………..44 Instrument Area …………………….. 44 Keyboard Overview ………………..46 Transport Section ……………………48 Perform Section …………………….. 49 Control Section ……………………… 50 Light Guide ……………………..52 Touch Strips ……………………..53 Transpose Buttons ……………………53 Global Controls and Preferences ……………. -
Page 6
Table of Contents 7.5.6 Preferences – Hardware Page ………………77 MIDI Communication ………………..80 Host Automation ……………………. 81 8.1.1 Automation IDs for the Perform Panel ……………. 81 8.1.2 Recording Automation ………………..82 Using the Keyboard in MIDI Mode ………………..85 Using the Keyboard as Stand-Alone MIDI Controller ………….. -
Page 7
Table of Contents 10.9 Working with Favorites ………………….. 111 10.9.1 Adding Preset Files to the Favorites …………….112 10.9.2 Displaying Favorites in the Results List …………..113 10.9.3 Removing Preset Files from the Favorites …………..114 10.10 Performing a Text Search ………………….116 10.11 Displaying Preset File Information ……………….. -
Page 8
Table of Contents 13 Playing and Editing Scales and Chords …………… 143 13.1 A Note about Music Theory ………………….144 13.2 Playing a Scale ……………………… 145 13.3 Playing Chords ……………………… 146 13.4 Editing Scales and Chords ………………….146 13.5 Setting the Scale Parameters ………………… 147 13.5.1 Scale Root Note …………………. -
Page 9
Table of Contents 14.6.2 Other Dynamic ………………….173 14.6.3 Other Gate ……………………. 173 14.7 Setting the Advanced Parameters ………………..174 14.7.1 Advanced Retrigger ………………..174 14.7.2 Advanced Repeat ………………….. 175 14.7.3 Advanced Offset ………………….175 14.7.4 Advanced Inversion ………………..175 14.8 Setting the Range Parameters ……………….. -
Page 10: Welcome To Komplete Kontrol
KOMPLETE KONTROL offers advanced integration with a number of hosts and provides full control of any Instruments supporting NKS, both from Native Instruments and partners. The keyboard lets you browse your Instruments in an intuitive way and play them creatively with KOMPLETE KONTROL’s unique Scale engine and Arpeggiator.
-
Page 11
Welcome to KOMPLETE KONTROL Document Conventions ▪ Text appearing in (drop-down) menus (such as Open…, Save as… etc.) in the software and paths to locations on your hard disk or other storage devices is printed in italics. ▪ Text appearing elsewhere (labels of buttons, controls, text next to checkboxes etc.) in the software is printed in blue. -
Page 12: Box Contents
Welcome to KOMPLETE KONTROL Box Contents Box Contents The box contains the following items: ▪ Information flyer providing: ▪ the hardware serial number of the KOMPLETE KONTROL S-Series keyboard ▪ a web link for downloading the KOMPLETE SELECT software bundle (including KOM- PLETE KONTROL) ▪…
-
Page 13
Welcome to KOMPLETE KONTROL System Requirements www.native-instruments.com/products/komplete/bundles/komplete-11/specifications/ KOMPLETE KONTROL — Manual — 13… -
Page 14: Accessibility
Welcome to KOMPLETE KONTROL Accessibility Accessibility KOMPLETE KONTROL offers a set of accessibility features for visually-impaired users. These are focused exclusively on the KOMPLETE KONTROL S-Series keyboard itself and include voice-over for the following features: ▪ All Perform and Transpose buttons, Parameter Page Left / Right buttons and key Naviga- tion buttons.
-
Page 15: Feature Overview
Welcome to KOMPLETE KONTROL Accessibility 1.4.1 Feature Overview The following table outlines the availability of accessibility features for different aspects of KOMPLETE KONTROL from both the KOMPLETE KONTROL S-Series keyboard and the KOM- PLETE KONTROL software. Feature Acces- Acces- Notes sible sible from…
-
Page 16
Welcome to KOMPLETE KONTROL Accessibility Feature Acces- Acces- Notes sible sible from from Key- Soft- board ware Navigate tracks Logic Pro X, GarageBand, Cubase control Pro, Cubase Artist, Nuendo, and Live: audible feedback is dependent on host. Control transport Logic Pro X, GarageBand, Cubase Pro, Cubase Artist, Nuendo, and Live: audible feedback is dependent on host. -
Page 17: Hardware Overview
Welcome to KOMPLETE KONTROL Accessibility 1.4.2 Hardware Overview The KOMPLETE KONTROL S-Series keyboard is divided into five main sections: Transpose, Perform, Transport, the Control section and Navigate. The Transpose section is on the far left of the keyboard next to the keybed and directly above the two Touch Strips.
-
Page 18: Training Mode
Welcome to KOMPLETE KONTROL Accessibility 1.4.3 Training Mode KOMPLETE KONTROL S-Series Training Mode makes it easy to locate a specific button or pa- rameter without accidentally triggering an action. When Training Mode is activated, all button presses and parameter names are announced but the corresponding action is not triggered. To activate or deactivate Training Mode from the KOMPLETE KONTROL S-Series key- ►…
-
Page 19: New Features In Komplete Kontrol 1.9
New Features in KOMPLETE KONTROL 1.9 New Features in KOMPLETE KONTROL 1.9 ▪ KOMPLETE KONTROL 1.9 adds support for the next generation of KOMPLETE KONTROL S49 and S61 keyboards. ▪ Additionally, it introduces the comprehensive Preview function to the Browser. Now you can preview sounds when browsing Factory Preset files for all KOMPLETE and NKS Instru- ments.
-
Page 20: The Komplete Kontrol Workflow
The KOMPLETE KONTROL Workflow The KOMPLETE KONTROL Workflow KOMPLETE KONTROL brings all the sounds from KOMPLETE and the Native Kontrol Standard (NKS) to the heart of your workflow. Its advanced integration in a number of hosts enables you to quickly capture ideas, with immediate access to the sounds you need—all directly from the KOMPLETE KONTROL S-Series keyboard.
-
Page 21
The KOMPLETE KONTROL Workflow ▪ Host integration: Advanced integration in a number of hosts allows you control core func- tionality directly from the keyboard. For more information, refer to ↑4.3, Setting up Host Integration ↑9, Host Integration. ▪ Browser: The Browser is your interface for finding, loading and organizing Instruments and Preset files from the KOMPLETE KONTROL Library. -
Page 22: Setting Up Komplete Kontrol
Setting up KOMPLETE KONTROL Setting up KOMPLETE KONTROL This section provides basic setup information and guides you through the process of integrat- ing KOMPLETE KONTROL with supported hosts. The KOMPLETE KONTROL software is installed both as a stand-alone application as well as a VST, Audio Unit, and AAX plug-in.
-
Page 23: Connecting The Keyboard To The Computer
Setting up KOMPLETE KONTROL Connecting the Keyboard to the Computer Connecting the Keyboard to the Computer This section assumes that you have assembled and connected the power supply accord- ing to the instructions printed on the Safety Instructions flyer found in the product box. To connect the KOMPLETE KONTROL S-Series keyboard to your computer: Attach the ‘device end’…
-
Page 24: Setting Up The Stand-Alone Application
Setting up KOMPLETE KONTROL Setting up the Stand-Alone Application Setting up the Stand-Alone Application When you launch the KOMPLETE KONTROL software from its installation directory, it starts as a stand-alone application independently from a host. By default the application uses the standard audio interface of your computer. In order to use another audio interface, and receive MIDI notes from the keyboard, you need configure the ap- plication in its Preferences.
-
Page 25
Setting up KOMPLETE KONTROL Setting up the Stand-Alone Application Preferences panel — Audio page Click on MIDI to display the MIDI page. Click on Input to display the available devices for incoming MIDI signals. Click the Komplete Kontrol checkboxes to activate incoming MIDI signals from the key- board. -
Page 26: Setting Up Host Integration
Setting up KOMPLETE KONTROL Setting up Host Integration Preferences panel — MIDI page (entries may vary on your computer) The software is configured and ready to be controlled with the keyboard. → The MIDI Output settings are required for using KOMPLETE KONTROL’s Smart Play features with other MIDI instruments.
-
Page 27
Setting up KOMPLETE KONTROL Setting up Host Integration ▪ MASCHINE ▪ Apple Logic Pro X ▪ Apple GarageBand ▪ Ableton Live ▪ Steinberg Cubase / Nuendo Before using the KOMPLETE KONTROL S-Series keyboard to control a supported host, a few configuration steps are required: Configuring Your Host for Use with the Keyboard For some of KOMPLETE KONTROL’s advanced integration features to function as intended,… -
Page 28: Setting Up Apple Logic Pro X And Garageband
Setting up KOMPLETE KONTROL Setting up Host Integration 4.3.1 Setting up Apple Logic Pro X and GarageBand Apple Logic Pro X and GarageBand are automatically configured for advanced integration with KOMPLETE KONTROL once you launch the respective application for the first time after in- stalling the KOMPLETE KONTROL software.
-
Page 29
Setting up KOMPLETE KONTROL Setting up Host Integration Installing the KOMPLETE KONTROL Instrument Racks KOMPLETE KONTROL is loaded into Ableton Live in the form of an Instrument Rack. In order to make the required Instrument Rack available in Ableton Live’s browser, it needs to be added to your Ableton Live User Library: Navigate to the following folder: Macintosh HD/Library/Application Support/Native Instru- ments/Host Integration/Ableton Live/… -
Page 30: Setting Up Ableton Live (Windows)
The MIDI Remote Script allows Ableton Live to recognize KOMPLETE KONTROL as a control surface. It needs to be copied into Live’s MIDI Remote Scripts directory: Ensure that Ableton Live is not running. Navigate to the following folder: C:Program FilesCommon FilesNative InstrumentsHost IntegrationAbleton Live Copy the Komplete_Kontrol_Mk2 folder to the clipboard.
-
Page 31: Connecting Pedals To The Keyboard
Setting up KOMPLETE KONTROL Connecting Pedals to the Keyboard Configuring Ableton Live for KOMPLETE KONTROL Once the MIDI Remote Script and the Instrument Rack file are installed in the correct loca- tion, you need to add KOMPLETE KONTROL as a control surface in Ableton Live’s preferences. Start Ableton Live.
-
Page 32
Setting up KOMPLETE KONTROL Connecting Pedals to the Keyboard The pedal inputs on the rear panel of the keyboard. These inputs allow you to connect sustain and expression pedals in order to further refine your performance. ▪ SUSTAIN: Lets you connect a footswitch to control sustain of the notes you play. This is an on/off switch. -
Page 33: Connecting External Midi Equipment To The Keyboard
Setting up KOMPLETE KONTROL Connecting External MIDI Equipment to the Keyboard The correct polarity for your sustain pedal is set. → Connecting External MIDI Equipment to the Keyboard The KOMPLETE KONTROL S-Series keyboard has dedicated MIDI sockets that allow you to di- rectly connect other MIDI devices using a 5-pin DIN MIDI cable and integrate the keyboard into your MIDI setup.
-
Page 34: Software Overview
Software Overview Software Overview This section gives an overview of the areas and controls of the KOMPLETE KONTROL software. Overview of the KOMPLETE KONTROL software. (1) Header: Provides access to general functions like the Main menu, the Preset display, the Transport and Master Volume controls, as well as options to show and hide user interface areas.
-
Page 35: Header
Software Overview Header Header The header is where you find general settings that affect KOMPLETE KONTROL globally. It al- so lets you access additional user interface areas. 11 12 13 13 The header. (1) KOMPLETE KONTROL logo: Opens the About screen, which shows the version number of the KOMPLETE KONTROL software.
-
Page 36
Software Overview Header (10) Tempo control: Lets you adjust the tempo in BPM (beats per minute). (11) Master Volume control: Lets you adjust the overall output volume of KOMPLETE KON- TROL. The meter shows the current peak level of the output signal. (12) CPU meter: Represents the current load on your computer’s processor;… -
Page 37: Browser
Software Overview Browser Browser The Browser gives you access to your KOMPLETE KONTROL Library and lets you add, edit, and organize Preset files. In the Browser’s Library pane, you can browse for all the Instruments and Preset files contained in your Library. In the Files pane, you can find and load compatible files from your hard drive, or add them to the Library.
-
Page 38: Library Pane
Software Overview Browser 5.2.1 Library Pane Library pane contains the following elements: Library pane. (1) Library: Displays the Library pane. (2) Content selector: The Globe icon selects factory content and the User icon selects user con- tent. Only Preset files of the selected content type are displayed in the results list (7). (3) Instrument selector: Selects a particular Instrument, Instrument category, and bank of the selected Instrument.
-
Page 39
Software Overview Browser (4) TYPES: Lets you browse for Preset files based on Type and Sub-Type tags that have been applied to them. You can collapse or expand this section by clicking on the little arrow next to TYPES. (5) MODES: Lets you browse for Preset files based on Mode tags that have been applied to them. -
Page 40: Instrument Selector
Software Overview Browser 5.2.2 Instrument Selector The Instrument selector allows you to limit your search to a certain Instrument category, a par- ticular Instrument, or a specific Bank of the Instrument. You can also load an Instrument along with its default Preset file directly from the Instrument selector. The Instrument selector.
-
Page 41
Software Overview Browser (1) Instrument selector header: The header shows the selected Instrument—if there is no selec- tion it shows a generic label (All Instruments). Click on the header to open or close the Instru- ment selector. (2) Category / Vendor selector: Allows you to sort the Instrument list by Category or by Vendor. -
Page 42: Files Pane
Software Overview Browser 5.2.3 Files Pane Files pane contains following elements: Files pane in the Browser. (1) Files tab: Displays the Files pane. (2) Favorite bar: Displays all your favorite folders. A click on any favorite folder lets you jump directly to that particular path and display its content in the Result list (5).
-
Page 43: Perform Panel
Software Overview Perform Panel (3) Location bar: Displays the selected path. The Location bar provides various tools to quickly navigate your file system. (4) Recent Locations button: Opens a list of the last visited locations for quickly jumping to any of them.
-
Page 44: Plug-In Panel
Software Overview Plug-in Panel (2) ARP: Clicking the round button left of switches the Arpeggiator on or off. Clicking the label displays the Arpeggiator’s parameters. See ↑14, Playing and Editing the Arpeggiator for details. (3) TOUCHSTRIP: Clicking the TOUCHSTRIP label displays the Touch Strips’ parameters. See ↑15, Configuring the Touch Strips for details.
-
Page 45
Software Overview Instrument Area The Instrument area displaying the Instrument Form. KOMPLETE KONTROL — Manual — 45… -
Page 46: Keyboard Overview
Keyboard Overview Keyboard Overview The KOMPLETE KONTROL S-Series keyboard is tightly integrated in the software and can be used to browse, control and play your Instruments as well as to control supported hosts. The keyboard is available in four sizes: The S25, S49, and S61 are equipped with the same top-quality semi-weighted Fatar keybed with aftertouch.
-
Page 47
Keyboard Overview TRANSPORT section: Controls the transport of supported hosts. TRANSPOSE buttons: The OCT- OCT+ buttons let you transpose the entire keybed one octave down or up, respectively. (4)Touch Strips: The Pitch Strip and the Modulation Strip are automatically assigned to corre- sponding controls of the loaded Instrument. -
Page 48: Transport Section
Keyboard Overview Transport Section Transport Section TRANSPORT section at the far left on the keyboard gives you quick and easy access to functions like play, record, loop, etc. in supported hosts. TRANSPORT section. (1) LOOP: Switches between standard and loop playback. (2) RWD: Moves the song position backward.
-
Page 49: Perform Section
Keyboard Overview Perform Section Perform Section The buttons of the PERFORM section on the far left of the KOMPLETE KONTROL S-Series keyboard let you switch the Scale engine and the Arpeggiator on or off and access their param- eter for editing. The parameters will be visible and editable via the displays and knobs in the Control section.
-
Page 50: Control Section
Keyboard Overview Control Section Control Section The Control section is located at the center of the KOMPLETE KONTROL S-Series keyboard. The knobs, buttons, and displays are automatically assigned to parameters of the loaded In- strument or selected mode. They provide immediate control and allow for deep editing of vari- ous aspects of KOMPLETE KONTROL.
-
Page 51
Keyboard Overview Control Section PAGE display: Tells you the current control mapping. The PAGE display reflects the map- ping by displaying e.g. or ARP. KOMPLETE KONTROL — Manual — 51… -
Page 52: Light Guide
Keyboard Overview Light Guide Light Guide The Light Guide visualizes the key mapping of loaded Instruments and sample mapping. By color coding sample based Instruments and indicating active and inactive keys in scales using the LEDs above the keybed. The Smart Play settings are also reflected by the Light Guide. This means that when you select e.g.
-
Page 53: Touch Strips
Keyboard Overview Touch Strips Touch Strips The two Touch Strips let you control pitch and modulation parameters of the loaded Instru- ment. The Touch Strips on the KOMPLETE KONTROL S-Series keyboard. The left Touch Strip, called Pitch Strip, is automatically assigned to the pitch bend parameter of the loaded and does not need to be assigned via MIDI learn.
-
Page 54: Global Controls And Preferences
Global Controls and Preferences Instrument Views Global Controls and Preferences This sections introduces the global controls and the Preferences you can access via the Header of KOMPLETE KONTROL. Instrument Views Once you have loaded an Instrument from the Browser, it appears in the Instrument area of the KOMPLETE KONTROL software.
-
Page 55: Default View
Global Controls and Preferences Instrument Views 7.1.1 Default View The Default View is the view that first appears when you load an Instrument from the Browser. It gives you access to some of the most important features of each KOMPLETE Instrument with an easy-to-use interface.
-
Page 56
Global Controls and Preferences Instrument Views POLYPLEX in additional view. Besides of selecting Additional View via the KOMPLETE KONTROL Menu and the application menu, you can also do this by clicking the button in the KOMPLETE KONTROL header. Clicking it again will return to the Default View. The + button opens and closes the Additional View. -
Page 57: Edit View
Global Controls and Preferences Instrument Views 7.1.3 Edit View Edit view is only available for Instruments powered by KONTAKT or REAKTOR. In the Edit View you have also the possibility to open any KOMPLETE Instrument that can be loaded or played by either the KONTAKT PLAYER or REAKTOR PLAYER. This gives you access to all the flexible controls and features you would normally have when using KONTAKT or RE- AKTOR in stand-alone mode.
-
Page 58: Switching Instances
Global Controls and Preferences Switching Instances Edit view enables you to access files that cannot be loaded from the KOMPLETE KON- TROL Browser, e.g. KONTAKT Multis which can be loaded from the KONTAKT Browser in edit view. Switching Instances When two or more instances of the KOMPLETE KONTROL software are running (e.g. as a plug- in on different tracks of the host), you must choose which instance you want to control from the KOMPLETE KONTROL S-Series keyboard.
-
Page 59
Global Controls and Preferences Switching Instances Switching to an Instance from the Keyboard When using KOMPLETE KONTROL as a plug-in in a host without advanced integration, you cannot rely on automatic switching between instances. However, you can still select a particu- lar instance of the KOMPLETE KONTROL software from the keyboard by using the on-screen overlay. -
Page 60: Transport And Tempo
Global Controls and Preferences Transport and Tempo Transport and Tempo If KOMPLETE KONTROL is used in stand-alone mode, it features its own transport and tempo settings. They are used by sequenced KONTAKT and REAKTOR Instruments as well as the Ar- peggiator.
-
Page 61: Clock Resetting Commands
Global Controls and Preferences Transport and Tempo 7.3.1 Clock Resetting Commands Clock Resetting Commands from the Software ▪ When the internal clock is stopped, clicking the Reset button allows you to start playback from the beginning by pressing the Play button. ▪…
-
Page 62: Adjusting Master Volume
Global Controls and Preferences Adjusting Master Volume While holding SHIFT push and turn the Control encoder. The tempo adjusts in increments of one. → Adjusting Master Volume The Master Volume slider lets you adjust the overall output volume of KOMPLETE KONTROL. The Volume meter shows the current peak level of the output signal.
-
Page 63: Preferences — Audio Page
Global Controls and Preferences Preferences Click Edit > Preferences in the KOMPLETE KONTROL menu: ► 7.5.1 Preferences – Audio Page Audio page holds settings related to your audio interface when KOMPLETE KONTROL is running as a stand-alone application. When using KOMPLETE KONTROL as a plug-in, the audio configuration is managed by the host, and the Audio page is not available.
-
Page 64
Global Controls and Preferences Preferences Preferences panel — Audio page Setting Description Driver Here you can select the audio driver. Device This allows you to choose from the available devices if you have connected more than one audio interface. Status This shows you whether your audio interface is currently running. -
Page 65
Global Controls and Preferences Preferences Setting Description Buffer Size macOS: This slider allows you to adjust the buffer size of your audio interface in samples. Lower values result in a more immediate playing response but increase the CPU load, and may result in audible clicks and pops. -
Page 66: Preferences — Midi Page
Global Controls and Preferences Preferences 7.5.2 Preferences – MIDI Page MIDI page allows you to set up the MIDI input and output ports that you want to use when KOMPLETE KONTROL is running as a stand-alone application. When using KOMPLETE KONTROL as a plug-in, the MIDI configuration is managed by the host, and the MIDI page is not available.
-
Page 67: Preferences — General Page
Native Instruments ap- plications when they are used in real life situations. The data sent to Native Instruments is one hundred percent anonymous and will not affect performance.
-
Page 68
Global Controls and Preferences Preferences Usage Data Tracking in the KOMPLETE KONTROL Preferences. To enable or disable Usage Tracking: Open the General page of the Preferences by clicking Preferences… in the MASCHINE menu. Click the Allow usage data tracking checkbox to enable or disable user data tracking. KOMPLETE KONTROL — Manual — 68… -
Page 69: Preferences — Library Page
Global Controls and Preferences Preferences 7.5.4 Preferences – Library Page Library page allows you to edit the locations of all KOMPLETE KONTROL Library files (both Factory and User) that appear in the Library pane of the Browser. At the top of the page, the Factory User buttons allow you to switch between the…
-
Page 70
Global Controls and Preferences Preferences Element Description Location column Shows the path of each library. If you have moved any library to another location on your computer, click the folder icon on the left of that library and select its new path. Product column Shows the name of each product. -
Page 71
Global Controls and Preferences Preferences User Pane User pane shows all user libraries currently used. These include KOMPLETE KONTROL’s standard user directory as well as any other user directory you might have defined. These libra- ries will appear in the User view of the Browser’s Library pane. -
Page 72
Alias column to set the alias for that new location. The alias of the default user folder, Native Instruments User Directory, cannot be edited — this is the location where all your user files will be stored by default. Scan user content… -
Page 73
Removing Folders from the User Library You can also remove any user folder from your library—except the default user content directo- Native Instruments User Content. KOMPLETE KONTROL — Manual — 73… -
Page 74: Preferences — Plug-Ins Page
Global Controls and Preferences Preferences 7.5.5 Preferences – Plug-ins Page Plug-ins page allows you to manage your VST plug-ins in KOMPLETE KONTROL. At the top of the page, the Manager Locations buttons allow you to switch between the Manager pane and the Locations pane.
-
Page 75
Global Controls and Preferences Preferences Preferences panel — the Plug-ins page’s Manager pane. Element Description Checkbox column Activates or deactivates a plug-in for use in KOMPLETE KONTROL. Plug-in column Lists all available VST plug-ins in KOMPLETE KONTROL. Always use latest If this option in enabled (default), Library content is loaded version of NI Plug- with the latest version of the associated plug-in. -
Page 76
Global Controls and Preferences Preferences Locations Pane Locations pane allows you manage the folders containing your plug-ins on the hard drive. KOMPLETE KONTROL scans these folders for VST plug-ins and adds them to the Manager pane. You can Remove folders from the list, as well as use the Rescan function to update the available plug-ins in KOMPLETE KONTROL according to any changes made to the… -
Page 77: Preferences — Hardware Page
Global Controls and Preferences Preferences Setting Description Plug-in column Lists all folders that KOMPLETE KONTROL scans for VST plug-ins. Opens a file dialogue that lets you add another folder to the list. Remove Removes the currently selected folder from the list. Rescan Scans all folders in the list for compatible plug-ins and updates the…
-
Page 78
Global Controls and Preferences Preferences Preferences panel — Hardware page. Setting Description Keyboard Velocity Scaling Velocity Scaling determines how your playing is translated into velocity values: starting from Soft 3 (a soft touch is enough to get a big velocity value) through Linear (default) to Hard 3 (you really have to press the key hard to get a big velocity value). -
Page 79
Global Controls and Preferences Preferences Setting Description Enabled Light Guide allows you to switch the colored LEDs above the keybed on or off. The Light Guide visualizes MIDI patterns being played back from the host as well as shows you the active keys in any scale from the Perform Panel. Navigate Browse Mode Switches between the… -
Page 80: Midi Communication
MIDI Communication MIDI Communication KOMPLETE KONTROL provides you with flexible MIDI control and host automation capabili- ties for easy integration with your MIDI environment. Incoming MIDI KOMPLETE KONTROL and the Instruments you load inside it can be controlled via MIDI and the host (when KOMPLETE KONTROL is loaded as a plug-in): ▪…
-
Page 81: Host Automation
MIDI Communication Host Automation MIDI output is only supported by the stand-alone application as well as the VST and AAX versions of the plug-in. The AU (Audio Unit) version of the plug-in does not support MIDI output. Host Automation When you load KOMPLETE KONTROL as a plug-in in a host, the parameters of the loaded In- strument, the Scale engine, and the Arpeggiator become available for automation from the host.
-
Page 82: Recording Automation
MIDI Communication Host Automation Automation ID Parameter Mode (Arp) Type (Arp) Rate (Arp) Sequence (Arp) Swing (Arp) Octaves (Arp) Dynamic (Arp) Gate (Arp) Retrigger (Arp) Repeat (Arp) Offset (Arp) Inversion (Arp) Min. Key (Arp) Max. Key (Arp) Hold (Arp) 8.1.2 Recording Automation Many hosts require that you have enabled transport record in order to record automation, while others make use of dedicated automation controls.
-
Page 83
MIDI Communication Host Automation Changing the State of an On/Off Switch To change the state of an on/off switch: Click the corresponding button with your computer mouse. Turn the knob on the keyboard currently assigned to the corresponding parameter. KOMPLETE KONTROL — Manual — 83… -
Page 84
MIDI Communication Host Automation Selecting Another Entry from a Drop-Down Menu To select another entry from a drop-down menu: Click the corresponding menu with your computer mouse and select an entry. Turn the knob on the keyboard currently assigned to the corresponding parameter. Changing the Value of a Drag Control To change the value of a drag control: Click and drag the corresponding drag control with your computer mouse. -
Page 85: Using The Keyboard In Midi Mode
MIDI Communication Using the Keyboard in MIDI Mode Turn the knob on the keyboard currently assigned to the corresponding parameter. Some hosts let you handle automation by using automation IDs that are mapped to specific parameters of the plug-in. KOMPLETE KONTROL comes with a predefined list of automation IDs that lets the host find them automatically.
-
Page 86: Using The Keyboard As Stand-Alone Midi Controller
MIDI Communication Using the Keyboard as Stand-Alone MIDI Controller MIDI Assignment The MIDI mode’s versatility is made possible by the Controller Editor application, which allows you to freely define MIDI assignments for the controls on the keyboard. The Controller Editor is installed during the KOMPLETE KONTROL installation procedure.
-
Page 87: Host Integration
Host Integration Integration with MASCHINE Host Integration When using advanced host integration, the KOMPLETE KONTROL S-Series keyboard becomes the centerpiece of your studio setup. You can use it to control not only the Instrument loaded in KOMPLETE KONTROL, but also core functionality of supported hosts. Advanced integration of KOMPLETE KONTROL is available in the following hosts: ▪…
-
Page 88
Host Integration Integration with MASCHINE PERFORM Section Button on KOMPLETE KONTROL S-Series Action in MASCHINE SCALE Enable/disable SCALE for the selected Group Enable/Disable ARP for the selected Group SHIFT SCALE Edit SCALE for the selected Group SHIFT Edit ARP for the selected Group TRANSPORT Section Button on KOMPLETE KONTROL S-Series Action in MASCHINE… -
Page 89
Host Integration Integration with MASCHINE Button on KOMPLETE KONTROL S-Series Action in MASCHINE Move the song position forwards by Pattern Grid increments SHIFT Move the song position backwards by Step Grid increments SHIFT Move the song position forwards by Step Grid increments TRANSPOSE Section Button on KOMPLETE KONTROL S-Series… -
Page 90
Host Integration Integration with MASCHINE Button on KOMPLETE KONTROL S-Series Action in MASCHINE Navigate Arrows Left Navigate arrow Select the previous Plug-in Slot of selected Sound Slot Right Navigate arrow Select the next Plug-in Slot of selected Sound Slot Up Navigate arrow Select the previous Sound Slot of selected Group Down Navigate arrow… -
Page 91: Integration With Maschine
Host Integration Integration with MASCHINE Integration with MASCHINE If you own MASCHINE, you can control many of MASCHINE’s functions directly from the KOMPLETE KONTROL S-Series keyboard. Furthermore, the Arrange buttons on the keyboard give you access to certain modes and views of the MASCHINE software that makes the integra- tion of KOMPLETE KONTROL into MASCHINE straight-forward.
-
Page 92: Integration With Ableton Live
Host Integration Integration with Ableton Live Button on KOMPLETE KONTROL S-Series Action in Logic Pro X / Garage Band SHIFT Enable / disable the count-in STOP Stop SHIFT STOP Enable / disable the metronome LOOP Enable / disable cycle LOOP + Control encoder Move the cycle by its own length Control encoder…
-
Page 93
Host Integration Integration with Ableton Live Button on KOMPLETE KONTROL S-Series Action in Logic Pro X / Garage Band LOOP Enable / disable cycle LOOP + Control encoder Move the cycle by its own length Control encoder Move the song position in one bar increments Navigate Up Track up Navigate Down… -
Page 94: Browsing The Library
Browsing the Library Browser Basics Browsing the Library The Browser is the place where you can find and load Instruments and Preset Files in KOM- PLETE KONTROL as well as organizing your own Preset files. You will at first learn about the Browser basics followed by explaining the browsing workflows.
-
Page 95: About The Library And Meta-Information
Browsing the Library Browser Basics ▪ Alternatively, you can use the knobs and displays on the keyboard for browsing your KOM- PLETE KONTROL Library. In this case, the Browser functions are mapped directly to the keyboard’s Control section, making the KOMPLETE KONTROL Browser workflow available without using the computer screen.
-
Page 96: Browsing The Library Vs. Browsing Your Hard Disks
Browsing the Library Browser Basics Tags To help you find the right Preset file quickly and efficiently, the Library implements various techniques that go far beyond the classic folder structure of your operating system—the usage of tags. For example, each Preset file included in the Library contain tags which describe the Preset file according to following aspects: ▪…
-
Page 97: Selecting Browse Mode Keyboard
Browsing the Library Selecting Browse Mode Keyboard Library pane respectively the Files pane can be accessed by clicking the corresponding tab at the top of the Browser. Click the desired tab to show the corresponding pane of the Browser. Browsing and loading files from the file system using the KOMPLETE KONTROL S-Ser- ies keyboard is not possible.
-
Page 98: Opening The Browser
Browsing the Library Opening the Browser The Browser functions are now mapped to the Control section and can be controlled with → the page buttons and knobs. 10.3 Opening the Browser A click on the Browser button (the magnifier symbol) in the header opens and closes the Browser.
-
Page 99: Choosing Between Factory Content And User Content
Browsing the Library Choosing Between Factory Content and User Content 10.4 Choosing Between Factory Content and User Content The Content selector shows two icons, one representing the factory content on the left, and one representing the user content on the right: The Content selector.
-
Page 100: Loading An Instrument With Its Default Preset File
Browsing the Library Loading an Instrument with its default Preset File Press the left and right Page buttons choose between FACTORY content and USER con- ► tent. By default, the FACTORY content is selected. 10.5 Loading an Instrument with its default Preset File The Instrument selector allows you to limit your search to a certain Instrument category, a par- ticular Instrument, or a specific Bank of the Instrument.
-
Page 101
Browsing the Library Loading an Instrument with its default Preset File Sort the Instruments by Category or by Vendor using the Category / Vendor selector. Navigate through the Instrument groups to find the Instrument to your liking. Place the mouse over the Instrument entry in the Instrument selector and click on the ar- row symbol that appears in the upper right corner of the Instrument entry. -
Page 102
Browsing the Library Loading an Instrument with its default Preset File The Instrument with its default Preset file has been loaded. With your selection the In- → strument selector automatically closes, the Instrument name and icon appear in the In- strument selector header. -
Page 103: Filtering Preset Files By Bank
Browsing the Library Filtering Preset Files by Bank Loading an Instrument using the Keyboard In order to load an Instrument on the keyboard: Press and hold SHIFT to access the secondary Browser functions. While holding SHIFT press turn Knob 1 to either select CATEGORY VENDOR for sorting…
-
Page 104: Resetting The Instrument Selection
Browsing the Library Resetting the Instrument Selection Click the arrow under the Instrument icon to open the Bank drop-down menu. Choose a Bank from the available entries. Upon your selection the Bank drop-down menu closes and displays the selected Bank. →…
-
Page 105: Types And Modes Filters
Browsing the Library Types and Modes Filters To reset the selection made in the Instrument selector, click the little cross at the right of ► the Instrument name: The Instrument selection is reset. The Instrument selector displays the generic label →…
-
Page 106
Browsing the Library Types and Modes Filters TYPES MODES filters for MASSIVE As soon the desired tags in the tag filters are selected the search is limited to the Preset files that are tagged correspondingly. Tags can also be deselected to broaden the search. Types The tags of the TYPE… -
Page 107
Browsing the Library Types and Modes Filters ▪ In general, Mode tags will rather refer to technical terms (e.g., Arpeggiated, Percussive, Synthetic, etc.). ▪ The MODES filter is always displayed. You can start your search with the MODES filter be- fore (or even without) using the TYPES filter. -
Page 108: Filtering Preset Files By Types And Modes
Browsing the Library Types and Modes Filters 10.8.1 Filtering Preset Files by Types and Modes In this tutorial you will learn how to filter find a bass line Preset file exemplary from the MON- ARK Instrument using the Types filter. We assume here you have already selected the MON- Instrument in the Instrument selector.
-
Page 109
Browsing the Library Types and Modes Filters ⇨ Upon your selection the second level of tags appears underneath with Sub-Types like Ana- Bass, Fingered Bass, etc. KOMPLETE KONTROL — Manual — 109… -
Page 110
Browsing the Library Types and Modes Filters Select the Sub-Type matching the desired characteristic for your bass line. By selecting any of these tags, say, Distorted Bass, you will narrow your search to this particular Sub- Type of bass sounds. Select the Synthetic tag from the… -
Page 111: Selecting Multiple Tags From The Same Level
Browsing the Library Types and Modes Filters ⇨ Upon your selection the second level of tags appears above Knob 6 displaying All Sub- Types. Turn Knob 6 to select the Sub-Type matching the desired characteristic for your bass line, say, Distorted Bass.
-
Page 112: Adding Preset Files To The Favorites
Browsing the Library Working with Favorites The KOMPLETE KONTROL Browser showing all Favorites tagged with the Type Bass 10.9.1 Adding Preset Files to the Favorites To add a Preset File to the Favorites: Place the mouse cursor over any selected or unselected entry in the Results list. ⇨…
-
Page 113: Displaying Favorites In The Results List
Browsing the Library Working with Favorites Click on the Set Favorite icon to add the corresponding Preset file to the Favorites. The Preset file is added to the Favorites, indicated by the lit Set Favorite icon next to its → name.
-
Page 114: Removing Preset Files From The Favorites
Browsing the Library Working with Favorites Click on the Favorites icon next to the search field to activate the Favorites filter. ► The Favorites icon is now lit and the Results list shows all favorite Preset Files. → Displaying all Preset Files to the Favorites on the Keyboard In order to display all Favorites in the Results list on the keyboard: Press and hold SHIFT.
-
Page 115
Browsing the Library Working with Favorites Click on the lit Set Favorite icon to remove the corresponding Preset file from the Favor- ► ites. The Preset file is removed from the Favorites, indicated by the hidden Set Favorite icon. → The next time you select the Favorites filter, the Preset file will not be shown in the Re- sults list. -
Page 116: 10.10 Performing A Text Search
Browsing the Library Performing a Text Search 10.10 Performing a Text Search In the search field you can enter your search query. The search considers all properties such as Preset file names, Instruments, Banks, Type and Mode tags, directly as you type. The search field.
-
Page 117: 10.12 Auditioning Your Preset Files
Browsing the Library Auditioning your Preset Files The Information box provides various information on the selected file(s). If the selected files have different characteristics, the corresponding fields in the Information box will read multi. 10.12 Auditioning your Preset Files When you are browsing Preset Files, you can audition Preset Files by using the Prehear feature at the bottom of the Browser.
-
Page 118
Browsing the Library Auditioning your Preset Files In order to hear audio of the Prehear feature it is mandatory to configure the audio inter- face in the Preferences of KOMPLETE KONTROL. Auditioning Your Preset Files using the Keyboard You can also enable/disable the Prehear feature on the keyboard: Press and hold SHIFT to call up the Browser’s secondary functions in the displays. -
Page 119: 10.13 Browsing Via The On-Screen Overlay
Browsing the Library Browsing via the On-Screen Overlay 10.13 Browsing via the On-Screen Overlay When the default Browse Mode On-Screen Overlay is selected in the Preferences, pressing the BROWSE button on the KOMPLETE KONTROL S-Series keyboard brings up a large and easy- to-see on-screen overlay on your computer screen.
-
Page 120
Browsing the Library Browsing via the On-Screen Overlay (1) Content selector: Selects the files that are browsed. Switch the User icon off to search the factory content, or on to search the user content. (2) Instrument selector: Select to open a drop-down menu where you can select a particular In- strument and sometimes the Bank of the selected Instrument. -
Page 121: Managing The Library
PLETE KONTROL Library. On your hard drive, the user Preset file s are saved in the following folder (sorted by Instrument, in corresponding subfolders): ▪ Windows: C:Users<your user name>DocumentsNative InstrumentsUser Content ▪ macOS: Macintosh HD/Users/<your user name>/Documents/Native Instruments/User Con- tent/ The files saved for KOMPLETE Instruments with KOMPLETE KONTROL are compatible with the stand-alone and plug-in versions.
-
Page 122
Managing the Library Saving Preset Files to the User Library In the File submenu of the KOMPLETE KONTROL menu, click on Save : Or, if you want to save a Preset file you are working on with a new name, click on Save As…… -
Page 123: Deleting User Preset Files From The User Library
Managing the Library Deleting User Preset Files from the User Library Your new Preset file immediately appears in the user content section of the Library pane. → 11.2 Deleting User Preset Files from the User Library You can delete user Preset file s directly from the Results list: Right-click the desired Preset file and select Delete from the context menu.
-
Page 124: Editing The Tags And Properties Of User Preset Files
Managing the Library Editing the Tags and Properties of User Preset Files 11.3 Editing the Tags and Properties of User Preset Files When you save user Preset file s in KOMPLETE KONTROL, they are automatically assigned to Instruments and Banks depending on the Instrument you are using. To further define the at- tributes of your user Preset file s, you can edit the Type and Mode tags as well as the general properties of the file.
-
Page 125
Managing the Library Editing the Tags and Properties of User Preset Files Click and drag the upper edge of the Attribute Editor upwards to increase its size. This makes it easier to navigate in the list of available tags. KOMPLETE KONTROL — Manual — 125… -
Page 126
Managing the Library Editing the Tags and Properties of User Preset Files Assign the appropriate tags to your file by clicking the checkboxes next to their names. Click on MODES to edit the Mode tags for your file. You can assign them in the same way you assigned the Type tags before, by clicking on the checkboxes next to their names. -
Page 127: Working With The Files Pane
Managing the Library Working with the Files Pane Click on PROPERTIES to edit additional information included in your file. You can enter your name in the Author field, or, in case you intend to share the file, leave a note in the Comment field for other users to read.
-
Page 128: Additional Features In The Results List In The Files Pane
Managing the Library Working with the Files Pane The Result list of the Files pane. 11.4.1 Additional Features in the Results List in the Files Pane In the Files Pane the Results list offers a context menu with additional commands. You can open it with a right-click on the selected entry or entries, respectively.
-
Page 129: Navigating To File Locations With The Location Bar
Managing the Library Working with the Files Pane Command Description Refresh Refreshes the display of the list, in case items have been modified in that folder. Find in Explorer / Find in Finder Opens an Explorer/Finder window pointing to the selected folder.
-
Page 130: Navigating To Recent File Locations
Managing the Library Working with the Files Pane ◦ If all the levels cannot be displayed in the path, click the double left-pointing arrow left of the path to display the remaining upper levels (up to the Workspace, representing the highest level in your file system), and select any entry in the list to jump to that location.
-
Page 131
Managing the Library Working with the Files Pane The Favorite bar, at the top of the Files pane. Favorite folders can be useful if you often return to the same location while browsing your file system in the Files pane. The default favorite folders are the roots of each of your hard disks, your desktop folder, and your user folder. -
Page 132: Loading Vst Plug-Ins
Managing the Library Loading VST Plug-ins In the Results list, right-click the desired folder and select Add to Favorites from the con- text menu. You can also remove any Favorite from the Favorite bar: To remove a favorite folder, right-click it in the Favorite bar and select Remove from Fa- ►…
-
Page 133
Managing the Library Loading VST Plug-ins KOMPLETE Instruments and NKS Instruments in the KOMPLETE KONTROL Browser However, you can also load plug-ins directly, allowing you to integrate any VST plug-in in KOM- PLETE KONTROL. This way you can play your VST plug-ins using the Smart Play features, map their parameters to the controls on the keyboard, and save Preset files for them in your KOM- PLETE KONTROL User Library. -
Page 134: Installing Nks Instruments
Managing the Library Installing NKS Instruments Click on the plug-in you want to load in the Plug-ins submenu of the KOMPLETE KON- ► TROL menu. If your VST plug-ins do not show up in the Plug-ins submenu, check if the VST plug-in folders on your hard drive are correctly added to the Locations pane on the Preferences’…
-
Page 135
Managing the Library Installing NKS Instruments NKS Instruments can be found in the KOMPLETE KONTROL Browser next to your KOM- PLETE Instruments. All of their Preset file s are fully tagged, so filtering in the Browser gives you matching Results from both KOMPLETE Instruments and NKS Instruments. And when you load a Preset file from an NKS Instrument, its parameters are automatically mapped to the controls on the keyboard. -
Page 136
Managing the Library Installing NKS Instruments Click on Add a serial in the top-left corner of Native Access. Enter the serial number of the Instrument and click SERIAL. ⇨ Native Access asks you to browse to the folder containing the Instrument files. Before you do this, ensure that you have copied the folder to its final location on your computer. -
Page 137: Importing Komplete Kontrol-Compatible User Files
Managing the Library Importing KOMPLETE KONTROL-Compatible User Files Click on INSTALL to add the Instrument to your KOMPLETE KONTROL Library. The Instrument is installed. KOMPLETE KONTROL automatically scans for the new con- → tent and adds it to the KOMPLETE KONTROL Browser. The KOMPLETE KONTROL Library and the KONTAKT Browser reference the Instrument files contained in the folder.
-
Page 138
Managing the Library Importing KOMPLETE KONTROL-Compatible User Files For this you will have to import the files into the Library first. Importing files does not mean they will be moved from the directory they currently reside in, they will only be referenced by the Browser. -
Page 139: Controlling Instrument Parameters
Controlling Instrument Parameters Pre-Mapped Instruments Controlling Instrument Parameters This section introduces you to controlling Instrument parameters using the KOMPLETE KON- TROL S-Series keyboard and explains how to customize parameter mappings. 12.1 Pre-Mapped Instruments All KOMPLETE and NKS Instruments are pre-mapped , which means that the keyboard’s knobs and Touch Strips are automatically assigned to key parameters as soon as you load an Instrument in KOMPLETE KONTROL.
-
Page 140: Switching Parameter
Controlling Instrument Parameters Switching Parameter Pages 12.3 Switching Parameter Pages Many Instruments are equipped with much more than eight parameters. To provide quick ac- cess to additional parameters, the Page buttons (left and right arrows) to the left of the Control section let you skip through parameter pages.
-
Page 141
Controlling Instrument Parameters Customizing Parameter Mappings ▪ Add and rename sections on the pages to group controls. In order to make your changes permanent, you have to save the Preset file to the KOM- PLETE KONTROL User Library. For more information, refer to ↑11.1, Saving Preset Files to the User Library. -
Page 142
Controlling Instrument Parameters Customizing Parameter Mappings Double-click on the empty space above a parameter, enter a name, and then press [enter] ► or click elsewhere to create a new section starting with the chosen parameter. To rename an existing section, double-click on it and enter a new name. Press [enter] or ►… -
Page 143: Playing And Editing Scales And Chords
Playing and Editing Scales and Chords Playing and Editing Scales and Chords KOMPLETE KONTROL’s Scale engine comes equipped with a vast amount of scales that you can select and use to play your Instruments. This opens up possibilities to play an Instrument such as a piano according to, e.g., the minor pentatonic scale without hitting a “false”…
-
Page 144: A Note About Music Theory
Playing and Editing Scales and Chords A Note about Music Theory To switch on the Scale engine, click the blue check box next to SCALE in the Perform ► section so it is filled. Activating the Scale Engine on the Keyboard To switch on the Scale engine, press SCALE in the…
-
Page 145: Playing A Scale
Playing and Editing Scales and Chords Playing a Scale belonging to some scale, you are certain to stay “in key” within that scale. Important to note though, is that scales are not made up by absolute note values, but rather consist of relative changes in pitch—or steps along the scale.
-
Page 146: Playing Chords
Playing and Editing Scales and Chords Playing Chords To select a scale, turn Knob 2 (BANK, by default set to MAIN) and Knob 3 (TYPE, by de- fault set to MAJOR) until you find a scale you like. To play the scale you selected, ensure that the SCALE button is lit.
-
Page 147: Setting The Scale Parameters
Playing and Editing Scales and Chords Setting the Scale Parameters To edit the Scale engine parameters in the KOMPLETE KONTROL software, click on ► SCALE in the Perform panel so it is highlighted. To enable Scale Edit mode and map the Scale engine parameters to the keyboard’s Con- ►…
-
Page 148: Scale Root Note
Playing and Editing Scales and Chords Setting the Scale Parameters SCALE parameters Root Note, Bank, and Type. 13.5.1 Scale Root Note The first SCALE parameter is Root Note. On the keyboard, it is mapped to Knob 1 of the Con- trol section in Scale Edit mode.
-
Page 149: Scale Bank And Type
Playing and Editing Scales and Chords Setting the Scale Parameters ▪ A# ▪ B 13.5.2 Scale Bank and Type The second and third SCALE parameters from the left are Bank and Type. On the keyboard, they are mapped to Knob 2 and Knob 3 of the Control section in Scale Edit mode. Use them to decide the scale pattern according to which the notes will be mapped onto the keys of the KOMPLETE KONTROL S-Series keyboard.
-
Page 150
Playing and Editing Scales and Chords Setting the Scale Parameters Scale Bank Type Degree Formula Maj Pent Main Maj Pent 1 2 3 5 6 1 ♭3 4 5 ♭7 Min Pent Main Min Pent 1 ♭3 4 ♯4 5 ♭7 Blues Main Blues… -
Page 151
Playing and Editing Scales and Chords Setting the Scale Parameters Scale Bank Type Degree Formula 1 2 3 4 ♭5 ♭6 ♭7 Major Locrian Modes Maj Loc 1 2 ♭3 4 ♭5 ♭6 ♭7 Minor Locrian Modes Min Loc 1 ♭2 ♭3 ♭4 ♭5 ♭6 ♭7 Super Locrian Modes Sup Loc… -
Page 152
Playing and Editing Scales and Chords Setting the Scale Parameters Scale Bank Type Degree Formula 1 ♭2 3 4 5 ♭6 ♭7 Jewish 1 World Jewish 1 1 2 ♭3 ♯4 5 6 ♭7 Jewish 2 World Jewish 2 1 ♭2 ♭3 ♯4 5 ♭6 7 Indian 1 World Indian 1… -
Page 153
Playing and Editing Scales and Chords Setting the Scale Parameters Scale Bank Type Degree Formula 1 ♭2 ♭3 5 b6 Bhupalam 5-Tone Bhupalam Amritavarshini 5-Tone Amrita 1 3 ♯4 5 7 1 2 ♭3 4 ♯4 ♯5 6 7 Octatonic Modern Octatonc 1 2 3 ♯4 5 6 ♭7… -
Page 154
Playing and Editing Scales and Chords Setting the Scale Parameters Scale Bank Type Degree Formula 1 ♭2 3 4 5 6 7 Neapolitan Maj Major Nea Maj 1 2 3 4 ♭5 ♭6 ♭7 Major Locrian Major Maj Loc 1 2 ♭3 3 5 6 Blues Major Major Blues Ma… -
Page 155: Setting The Key Mode Parameter
Playing and Editing Scales and Chords Setting the Key Mode Parameter Scale Bank Type Degree Formula 1 ♭3 4 5 ♭7 Penta 2 Minor Penta 2 1 ♭3 5 ♭6 ♭7 Penta 3 Minor Penta 3 13.6 Setting the Key Mode Parameter KEY MODE parameter Mode.
-
Page 156
Playing and Editing Scales and Chords Setting the Key Mode Parameter Guide Mode In Guide mode, the notes are mapped to the keyboard in the same way as in Mapped mode, however notes outside of the selected scale remain active. The mapping only affects the repre- sentation of the scale by means of the Light Guide. -
Page 157: Setting The Chord Parameters
Playing and Editing Scales and Chords Setting the Chord Parameters Scale Type Mapping in Key Mode: Easy Minor Corresponding Mapping R Example with Root Note: C 13.7 Setting the Chord Parameters 13.7.1 Chord mode CHORD parameter Mode. The first CHORD parameter is Mode.
-
Page 158
Playing and Editing Scales and Chords Setting the Chord Parameters Harm CHORD Mode is set to Harm, the CHORD Type menu allows you to specify the interval of notes in the selected SCALE Type that will constitute the chord: E.g. a triad in the form of the root note, the third note, and the fifth note (CHORD Type value 1-3-5). -
Page 159: Chord Type
Playing and Editing Scales and Chords Setting the Chord Parameters 13.7.2 Chord Type CHORD parameter Type. The second CHORD parameter is Type. On the keyboard, it is mapped to Knob 6 of the Control section in Scale Edit mode. Use it to define a chord that will be generated from a single note used as input.
-
Page 160
Playing and Editing Scales and Chords Setting the Chord Parameters The note interval is added onto the key of an incoming MIDI note, either from the KOM- PLETE KONTROL S-Series keyboard or from the host. For example, you can select to play a C minor triad by setting Root Note to C,… -
Page 161
Playing and Editing Scales and Chords Setting the Chord Parameters ▪ Maj 1 ▪ Maj 2 ▪ Maj 3 ▪ Maj 4 ▪ Maj 5 ▪ Maj 6 ▪ Maj 7 ▪ Maj 8 ▪ Min 1 ▪ Min 2 ▪… -
Page 162: Chord Position
Playing and Editing Scales and Chords Setting the Chord Parameters Chord Type Semitones Added above Played Note Major 4 and 7 Minor 3 and 7 Sus 4 (Suspended 4) 5 and 7 Maj 7 (Major 7) 4, 7 and 11 Min 7 (Minor 7) 3, 7 and 10 Dom 7 (Dominant 7)
-
Page 163
Playing and Editing Scales and Chords Setting the Chord Parameters Position parameter is available when CHORD Type is set to Harm or Chd Set and includes the following values: Position Description Root The root-position of the selected chord is always played. -1 to -8 Decreasing Position with negative values moves the highest note of the current chord down by an octave, this inverts the chord to… -
Page 164: Playing And Editing The Arpeggiator
Playing and Editing the Arpeggiator Playing and Editing the Arpeggiator Smart Play features a flexible and versatile Arpeggiator that lets you play your Instruments in note sequences according to the keys you press on the keyboard. You can also use the Arpeg- giator in combination with the scales and chords created with the Scale engine.
-
Page 165: Playing Arpeggiator Sequences
Playing and Editing the Arpeggiator Playing Arpeggiator Sequences To switch on the Arpeggiator, click the blue check box next to in the Perform panel ► so it is filled. Activating the Arpeggiator on the Keyboard To switch on the Arpeggiator, press in the PERFORM section on the keyboard.
-
Page 166: Using A Sustain Pedal To Control The Arpeggiator
Playing and Editing the Arpeggiator Using a Sustain Pedal to Control the Arpeggiator To adjust the OCTAVES reach of the Arpeggiator, turn Knob 6 (by default set to 1) to e.g. 14.2 Using a Sustain Pedal to Control the Arpeggiator You can use a sustain pedal to control the Arpeggiator.
-
Page 167: Setting The Main Parameters
Playing and Editing the Arpeggiator Setting the Main Parameters PAGE display in the keyboard’s Control section reads ARP, indicating that you are → editing the Arpeggiator parameters. Note that the Arpeggiator Edit mode consists of two pages. Available Arpeggiator Parameters ▪…
-
Page 168: Main Mode
Playing and Editing the Arpeggiator Setting the Main Parameters 14.4.1 Main Mode The first MAIN parameter is Mode. On the keyboard, it is mapped to Knob 1 of the Control section when Arpeggiator Edit mode is selected. lt lets you select either Arp or Note Repeat. Depending on your selection, a different set of Arpeggiator parameters will be available for fur- ther editing.
-
Page 169: Setting The Rhythm Parameters
Playing and Editing the Arpeggiator Setting the Rhythm Parameters 14.5 Setting the Rhythm Parameters RHYTHM parameters Rate, Sequence, and Swing allow you to create interesting rhythms for the arpeggiator sequence. RHYTHM parameters Rate, Sequence, and Swing. 14.5.1 Rhythm Rate The first RHYTHM parameter, Rate, is available in both Arp and Note Repeat mode.
-
Page 170: Rhythm Sequence
Playing and Editing the Arpeggiator Setting the Rhythm Parameters ▪ 1/8 Dotted (1/8 ▪ 1/4 Triplet (1/4 ▪ 1/8 ▪ 1/16 Dotted (1/16 ▪ 1/8 Triplet (1/8 ▪ 1/16 ▪ 1/32 Dotted (1/32 ▪ 1/16 Triplet (1/16 ▪ 1/32 ▪ 1/64 Dotted (1/64 ▪…
-
Page 171: Rhythm Swing
Playing and Editing the Arpeggiator Setting the Rhythm Parameters ▪ Off ▪ 1 ▪ 2 ▪ 3 ▪ 4 ▪ 5 ▪ 6 ▪ 7 ▪ 8 To display the set value of the SEQUENCE parameter, tap Knob 4. 14.5.3 Rhythm Swing The third RHYTHM…
-
Page 172: Setting The Other Parameters
Playing and Editing the Arpeggiator Setting the Other Parameters Using Swing in combination with the Gate parameter adds further variations in note duration. For example, if Gate is set to 100%, KOMPLETE KONTROL sends a MIDI note-off message before each note and plays back the sequence legato. If Gate is set to values larger or smaller than 100%, then notes will be scaled after the value of the…
-
Page 173: Other Dynamic
Playing and Editing the Arpeggiator Setting the Other Parameters ▪ 3 ▪ 4 ▪ 5 ▪ 6 ▪ 7 ▪ 8 To display the set value of the OCTAVES parameter, tap Knob 6. 14.6.2 Other Dynamic The second OTHER parameter, Dynamic, is only available in Arp mode. On the keyboard it is mapped to Knob 7 of the Control section when Arpeggiator Edit mode is selected.
-
Page 174: Setting The Advanced Parameters
Playing and Editing the Arpeggiator Setting the Advanced Parameters To display the set value of the GATE parameter, tap Knob 8. 14.7 Setting the Advanced Parameters ADVANCED parameters Retrigger, Repeat, Offset, and Inversion allow you to explore alter- native versions of the same arpeggiator sequence. ADVANCED parameters Retrigger, Repeat, Offset, and Inversion.
-
Page 175: Advanced Repeat
Playing and Editing the Arpeggiator Setting the Advanced Parameters 14.7.2 Advanced Repeat The second ADVANCED parameter, Repeat, is only available in Arp mode. On the keyboard, it is mapped to Knob 2 of the Control section when PAGE 2 of ARP EDIT mode is selected.
-
Page 176: Setting The Range Parameters
Playing and Editing the Arpeggiator Setting the Range Parameters ▪ If the arpeggiator sequence consists of a 3 note cycle (1 — 2 — 3), Type is set to Up, and Inversion is set to 2, the Arpeggiator output is 1 — 2 — 3 – (2 — 3 — 1 octave up) — (3 — 1 — 2 octave up) — repeat.
-
Page 177: Setting The Hold Parameter
Playing and Editing the Arpeggiator Setting the Hold Parameter The Arpeggiator can still generate pitches above the Max. Key setting. 14.9 Setting the Hold Parameter HOLD parameter On / Off. HOLD parameter On / Off is available in both Arp and Note Repeat mode. On the key- board, it is mapped to Knob 8 of the Control section when PAGE 2 of…
-
Page 178: Configuring The Touch Strips
Configuring the Touch Strips Accessing the Touch Strip Settings Configuring the Touch Strips In this section you learn how to configure the Touch Strips and about the effect on the usage. 15.1 Accessing the Touch Strip Settings In order to configure the behavior of the Touch Strips, you can open the Perform Panel in the KOMPLETE KONTROL software or access the parameters directly from the keyboard’s Control section.
-
Page 179
Configuring the Touch Strips Accessing the Touch Strip Settings ⇨ The Touch Strip settings for the Pitch Strip are shown in the Perform Panel. In order to display the Modulation Strip settings, click on Modulation. The Touch Strip settings for the Modulation Strip are shown in the Perform Panel. →… -
Page 180
Configuring the Touch Strips Accessing the Touch Strip Settings Press SHIFT OCT- for accessing Pitch Strip settings or press SHIFT OCT+ for access- ing Modulation Strip settings. ⇨ The Touch Strip settings are displayed in the Control section and can be tweaked using the knobs. -
Page 181: Configuring The Pitch Strip
Configuring the Touch Strips Configuring the Pitch Strip 15.2 Configuring the Pitch Strip The Pitch Strip (left Touch Strip) on the KOMPLETE KONTROL S-Series keyboard can be con- figured by either Absolute mode or Relative mode. Both modes are described below. Absolute Mode (default) The Pitch Strip keyboard corresponds to the usual behavior for a pitch bend control.
-
Page 182: Enabling Absolute Mode
Configuring the Touch Strips Configuring the Pitch Strip Turn the Strength control to adjust the rebound rate. The higher the Strength setting, the quicker the value will jump back. → Adjusting Relative Mode on the Hardware You can also access the Strength setting on the keyboard: Press…
-
Page 183
Configuring the Touch Strips Configuring the Pitch Strip Click on the Touch Ctl menu (default value Absolute). Click on the entry Relative in the drop-down list. Relative mode is now enabled. → Switching to Absolute Mode on the Hardware You can also access the Strength setting on the keyboard: Press… -
Page 184: Configuring The Modulation Strip
Configuring the Touch Strips Configuring the Modulation Strip 15.3 Configuring the Modulation Strip The right Touch Strip on the KOMPLETE KONTROL S-Series keyboard is a highly versatile modulation control that can be individually configured using Modulation Strip Modes with dis- tinctive parameters.
-
Page 185
Configuring the Touch Strips Configuring the Modulation Strip Spring Mode This mode simulates a simple spring that can be deflected both up and down from its default position, which is the middle of the Modulation Strip. The current position of the spring (the parameter value) is indicated by a blue LED. -
Page 186
Configuring the Touch Strips Configuring the Modulation Strip Friction slider: Adjusts the friction of the surface that slows down the ball once you have ▪ removed your finger. The higher the Friction value, the quicker the ball will decelerate and stop. -
Page 187: Selecting And Editing A Modulation Strip Mode
Configuring the Touch Strips Configuring the Modulation Strip Walls button: Sets the behavior of the ball when it reaches the range limits. If Walls is set ▪ to on, the ball bounces off the range limit and continues its trip in the opposite direction. Walls is set to off, the ball jumps to the opposite range limit and continues from there in the same direction.
-
Page 188
Configuring the Touch Strips Configuring the Modulation Strip Selecting and Editing a Modulation Strip Mode from Hardware You can also select a Mode and edit its additional parameters on the keyboard: Press SHIFT OCT+ to view the Modulation Strip parameters in the Control section. Select a mode by turning Knob 1. -
Page 189: Troubleshooting
Troubleshooting If you are experiencing problems related to your product that the supplied documentation does not cover, you can get further help in the Support section of the Native Instruments website: https://support.native-instruments.com/hc The Support section allows you to search both the Knowledge Base and the Support Communi- ty for content related to your issue.
-
Page 190
Please open and read this Readme file before contacting Technical Support. User Forum In the Native Instruments User Forum, you can discuss product features directly with other users and with experts moderating the forum. You can reach the User Forum via: http:// www.native-instruments.com/forum. -
Page 191: Index
Index Index [174] Retrigger Rhythm [169] [170] Accessibility [14] [170] Sequence [14] Activate Voice-over [171] Swing ARP button [49] [169] Tempo ARP Page [51] Type [168] Arpeggiator [166] [173] Velocity [174] Advanced Arpeggiator Mode [173] Dynamic Note Repeat [168] [173] Gate Arpeggiator sequence [145] [166]…
-
Page 192
Index BROWSE button [119] Chord mode [157] Browse Mode [94] Chord Position [162] [97] Chord Type [159] Hardware [94] [161] On-Screen-Overlay Chromatic Scale Browser Chords [145] [94] [157] in-depth Chord Set [119] [157] [159] [162] On-Screen Overlay Generating [98] [157] showing and hiding Harmonizer Chromatic Scale… -
Page 193
Index Displays Hardware browsing [97] [50] Help [189] Control section Driver Hold [177] [64] host selecting an audio driver Dynamic [173] [27] Configuration Host automation [81] host Configuration [27] Favorites [111] Host Control [48] [111] Host Transport Control [48] Show [111] File [121]… -
Page 194
Index key switch [50] Latching the Arpeggiator Key velocity [77] [177] Hold Keyboard Latency [65] [46] LEDs Controls Overview [46] Keybed [52] Keyboard LEDs [52] [52] Light Guide Knobs Library [95] [137] [50] importing your own files Control section KOMPLETE KONTROL [121] saving files to [46]… -
Page 195
Index Master Volume [36] Native Kontrol Standard [134] Max. Key [176] [134] MIDI Note Repeat [168] [81] [168] automation Mode configuring [66] [33] connecting external equipment OCT- button [47] [81] controlling parameters via OCT+ button [47] [85] Mode Octaves [172] MIDI Mode [85] Offset… -
Page 196
Index Pre-listening Samples [117] Pre-Mapped Instruments [139] Page buttons [50] PRESET display [50] [50] Skipping Pages PAGE display [51] Parameter Pages [51] Rate [169] Perform panel Repeat [175] [143] Scale Result list PERFORM section [43] [127] in Files pane [49] ARP button in Library pane [39]… -
Page 197
Index output routing [63] [63] settings Sample Spring [117] pre-listening [185] Modulation Strip Sample rate Stepped [64] selecting [187] Modulation Strip Saving Swing [171] [121] files to the Library Switching Instances [58] Scale [143] [157] [159] [162] Chord [157] Chord mode Tag Filter [162] Chord Position… -
Page 198
Index VST plug-ins [74] [132] [132] loading Velocity scaling [77] [74] managing Voice-over [14] Volume Control [36] KOMPLETE KONTROL — Manual — 198…
Базирующаяся в Берлине музыкальная технологическая компания Native Instruments изначально зарекомендовала себя с помощью программных инструментов, которые тщательно воссоздали классические синтезаторы и клавишные вместе с целым рядом новаторских программ для диджеев.
В более поздние годы она стала аппаратным обеспечением, которое дополняет их обширную линейку программного обеспечения, выпустив свою первую волну контроллеров Komplete Kontrol для интеллектуальных клавиатур еще в 2014 году.
Стремясь переосмыслить скромное миди-пианино как для продюсеров, так и для исполнителей, контроллеры легко интегрировались с невероятно всеобъемлющим программным набором инструментов и эффектов Komplete от NI, позволяя вам быстро получать доступ к инструментам и звукам из ваших библиотек.
Как только ваш звук был выбран и загружен, все параметры патча, такие как фильтры, эффекты и панорамирование, автоматически сопоставлялись со встроенными аппаратными поворотными контроллерами клавиатуры. Точно так же на клавиатурах был набор выделенных кнопок для элементов управления воспроизведением, которые также автоматически сопоставлялись с выбранным программным обеспечением для записи, таким как Logic Pro X или Ableton Live.
Они также привлекли внимание благодаря Lightguide — шикарному набору светодиодных индикаторов RGB над клавишами, которые могли отображать шкалы и отображать переключатели и зоны при использовании программного сэмплера NI Kontakt.
В целом, он выполнил поставленную цель — не подпускать производителей музыки к мышам, а вместо этого сосредоточиться на создании мелодий. Перенесемся на несколько лет вперед, и новая серия клавиатур MK 2 Komplete Kontrol, похоже, сделает еще один шаг вперед.
Обновления дизайна
Стремясь теперь держать игроков подальше от своих мониторов, все обновленные модели оснащены парой экранов с высоким разрешением, встроенных в верхней части, которые изменяют то, что отображается в соответствии с вашей текущей операцией, делая навигацию, настройку и микширование звуков еще проще.
Наряду с 49- и 61-клавишными моделями поставляется этот недавно выпущенный флагман — S88 MK2 — обновленная версия полноразмерного, семиоктавного контроллера NI, который также имеет полностью утяжеленные клавиши с ударным действием для реалистичного ощущения рояля во время игры.
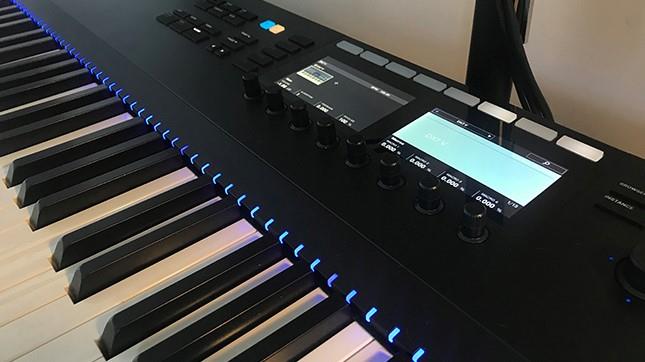
Стилистически все остается верным оригинальному S88 с тем же корпусом из матового металла, в то время как размеры практически одинаковы, а это означает, что любому, кто обновляется по сравнению с предшественником, не нужно настраивать свое рабочее место, чтобы в него вписаться.
Неудивительно, что вес прибавляется в 13,2 кг / 29,1 фунта, что можно предположить благодаря добавлению новых экранов и отремонтированной утяжеленной кровати. Это, безусловно, полезно для тех, кто думает взять его с собой в дорогу для концертов, но далеко не чрезмерно для клавиатуры в стиле рабочей станции.
Одной из самых больших нареканий к клавиатурам MK1 были две сенсорные вертикальные полоски слева с подсветкой, которые заменили привычный мод и колеса, которые вы обычно находите на клавиатуре контроллера Midi. Какими бы крутыми они ни казались, многие игроки оплакивали тот факт, что они не чувствовали себя такими же тактильными, как традиционные колеса.
NI, кажется, склонился к общественному требованию и заменил полосы более знакомым настроенным двойным колесом. Тем не менее, это лучшее из ситуации обоих миров, так как под ними проходит горизонтальная сенсорная полоса, которая может быть назначена для функций модуляции или основного тона, а также для других функций, и ее гораздо проще использовать в этой ориентации.
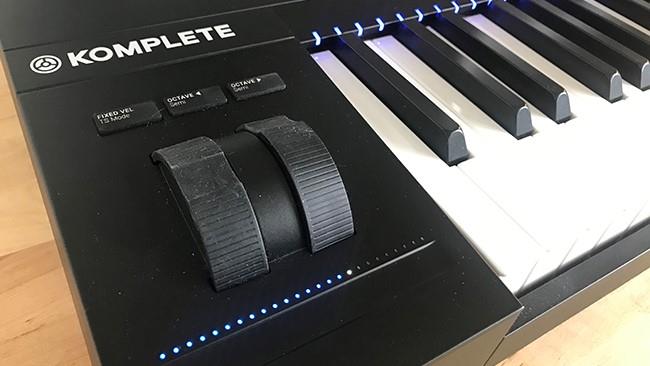
Верхняя часть кнопок тоже немного переосмыслилась. Наряду с массивом из восьми поворотных контроллеров, которые управляют длиной двух экранов под дисплеями, есть также восемь функциональных кнопок вверху с четырехмерным нажимным кодером, который можно поворачивать или использовать в виде джойстика для навигации по меню. Большинство из этих изменений призваны помочь лучшей интеграции с программным обеспечением для записи DAW (Digital Audio Workstation) — подробнее об этом позже.
В задней части клавиатуры это та же история, что и раньше, с двумя портами Midi и двумя входами педального контроллера рядом с разъемом для адаптера питания и портом USB 2.0 для связи с вашим главным компьютером.
Программное обеспечение Komplete Kontrol
Прилагаемое программное обеспечение Komplete Kontrol для Mac и ПК, которое используется для просмотра и загрузки звуков и инструментов, также обновилось с 1 дня MK. Возможность использования автономно или в качестве вставной вставки в вашей DAW, наиболее полезным из улучшений является то, что предварительный просмотр аудио теперь запускается при прокрутке списков инструментов, что означает, что вам не нужно ждать загрузки всего патча перед услышав, как это звучит.
В то время как экранный браузер по-прежнему прост в навигации благодаря использованию ключевых слов тегов, чтобы помочь точно определить нужные звуки, добавление экранов клавиатуры в сочетании с соответствующими поворотными контроллерами, несомненно, делает поиск именно того, что Вы хотите намного быстрее.
Мы все еще смотрели на экран нашего компьютера, хотя разочаровывающая неспособность правильно изменить размер окна браузера Komplete Kontrol на нашем Mac часто подталкивала нас к использованию дисплея клавиатуры для навигации.
S88 поставляется в комплекте с Komplete Select 12, всесторонним выбором основных моментов из широкого спектра программных инструментов и эффектов от NI, предоставляя приличную палитру звуков для начинающих в мире производства музыки, а также предлагая отличную витрину для интеграция клавиатуры.
Комплект состоит из 14 инструментов, включая The Gentleman (старинное пианино), Retro Machines MK2 (коллекция классических синтезаторов 70-х и 80-х годов) и Massive (флагманский современный синтезатор NI, ставший чем-то вроде в последние годы для производителей грязи и дабстепа).
Это довольно здоровенная программа (более 20 ГБ), поэтому есть долгая загрузка и установка, чтобы подготовиться к ней, прежде чем потеряться в звуках, и также стоит предупредить, что она служит довольно заманчивым шлюзом для того, чтобы тратить больше денег на полный пакет Komplete 12 который предлагает до 90000 звуков и более 150 различных инструментов и эффектов.
Сторонние инструменты
Помимо возможности просмотра инструментов NI на жестком диске, Komplete Kontrol может также просматривать и автоматически сопоставлять любые инструменты и эффекты сторонних производителей, которые поддерживают формат плагинов NKS Native (Native Kontrol Standard). Хотя еще не все разработчики программного синтезатора находятся на борту, поддержка этого формата определенно растет, и такие крупные фирмы, как Waves и Waldorf, делают свое программное обеспечение совместимым.
Возможно, наиболее значимым из них является конкурент Soft NI Arturia. Мы опробовали превосходный V Collection 6 Suite французского разработчика с Komplete Kontrol, который легко интегрировался. Возможность настройки фильтров и огибающих на Mini V (великолепно точное воспроизведение легендарного синтезатора Mini Moog от Arturia) с помощью автоматически отображаемых ручек клавиатуры определенно открыла новые области выражения и подтолкнула нас к изучению возможности подстройки звуков таким образом, как мы раньше не было.
Как упоминалось ранее, интеграция с DAW была значительно улучшена благодаря гораздо более значительному управлению такими программами, как Ableton Live, Logic Pro X, GarageBand и Cubase. Помимо аппаратных кнопок для управления воспроизведением и записью, джойстик-подобный основной поворотный контроллер можно использовать для перемещения между дорожками и прокрутки параметров.
Еще лучше новая кнопка микшера, которая во время нашего тестирования с Logic Audio X на iMac оказалась одной из наших любимых функций и для производителей, пожалуй, самым полезным преимуществом дисплеев клавиатуры. После нажатия он вызывает микшер DAW на двойных экранах клавиатуры, позволяя вам использовать ручки для регулировки громкости и панорамирования, а также функциональные кнопки для приглушения и соло-треков.
Световоды
Хотя светодиоды ярче и немного тоньше, чем на устройствах MK1, мало что изменилось с радужными светодиодами Light Guide, которые проходят вдоль верхней части кровати для ключей. Несмотря на небольшие изменения в функции, она остается одним из самых впечатляющих аспектов клавиатуры.
Для тех, кто не совсем разбирается в своих весах, направляющие огни выделяют ноты, которые вы можете играть, чтобы оставаться в тональности, и которые можно отрегулировать для любой клавиши или режима. Бог посланник для начинающих пианистов, мы также видим, что это полезный инструмент обучения для музыкальных педагогов.
Световые направляющие также могут использоваться не только для того, чтобы мешать вам играть ноты: они показывают расколы клавиатуры при использовании инструмента с более чем одним звуком, и они также невероятно полезны, когда загружен ударный или ударный инструмент, такой как Drumlab, с различные звуки, обозначенные цветом по категориям, такие как удары, петли, хай-хэты и т. д.
В темных условиях источники света немного ослепляют, поэтому те, кто использует его на сцене, могут выключить их во время выступления. Мы также хотели бы видеть добавленную опцию, чтобы иметь возможность создавать и сохранять собственные световые ориентиры для сторонних плагинов, которые не поддерживают NKS.
В другом месте функция Smart Play контроллера предлагает режим аккордов, позволяющий вам играть сложные аккорды с помощью одной клавиши, в то время как встроенный арпеджиатор позволяет воспроизводить последовательности одним нажатием клавиши, с восемью регуляторами контроллера, позволяющими вам управлять его направлением, скоростью, ритмом , шаблоны и варианты.
Ключевые действия
Полностью утяжеленные, взвешенные, нажимные клавиши действия заметно тише в использовании, чем оригинальный S88, являющийся побочным продуктом новой пены памяти, демпфирующей внутри изголовья клавиш, но в свою очередь он также имеет несколько более тяжелый, возможно, более реалистичный чувствую при игре.
Пианистические действия — вещь довольно личная, и ваша собственная техника сыграет важную роль в том, как вы справляетесь с S88. Как толстяк-слоновой кости, я обнаружил, что нажатие тяжелой клавиши требовало от меня более сильного нажатия, чем при использовании других утяжеленных клавиатур, таких как P-45 B от Yamaha, но это не заняло много времени, привыкнуть к этому, и, что особенно важно, на протяжении всего нашего тестирования он никогда не чувствовал себя менее отзывчивым. Как и в случае чего-либо настолько субъективного, если вы особенно чутко относитесь к действиям, мы всегда советуем попробовать, прежде чем покупать, если можете.
С ключевой кроватью, дающей реалистичное чувство фортепьяно, кажется немного неправильным, что педали демпфирования и сустейна не были включены как часть фортепьяно, хотя недорогие педали экспрессии могут быть по крайней мере добавлены через задние порты. Точно так же нет никаких ползунковых регуляторов, которые регулярно являются характеристиками конкурирующих миди-контроллеров, таких как линейка Novation SL MK III, — очень жаль, поскольку они определенно выиграют от режима микшера и некоторых связанных органов сцепного устройства в Komplete Select.
- Лучшее бесплатное ПО для создания музыки 2019 года