- Manuals
- Brands
- Diamante Manuals
- DVR
- DMT9
- Manual
-
Bookmarks
Quick Links
Summary of Contents for Diamante DMT9
-
Page 1
Manual… -
Page 2
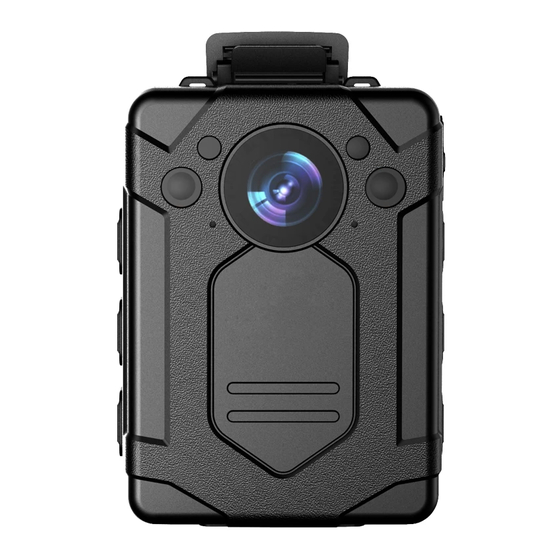
OVERVIEW 1. Photoresistor 13. Clip Slot 2. IR LED Light 14. Display Screen 3. Microphone 15. Menu/Confirm Button 4. LED Fill Light 16. Up/Left Button 5. Lens 17. Down/Right Button 6. Audio Recording Button 18. Back Button 7. Video Resolution Switch 19. -
Page 3: Specifications
FUNCTIONALITIES SPECIFICATIONS Description Functionality Specifications Infrared LED can record more details in Image Sensor CMOS IR LED Light low-light environment. 2304x1296p(30 FPS) / 1920x1080P(30 FPS) Video Resolution Lens To record images 1280×720(60 FPS)/ 1280×720(30 FPS) Audio Recording Press this button to start/stop recording Video Format H.264 .MOV Button…
-
Page 4
GETTING STARTED GETTING STARTED 1. Power ON/OFF 4. Infrared Light In low-light environment (At night or in the dark), 1) Power ON : Single-press to turn on camera turning on IR can help user to record more details, and from OFF-mode, and enter into Preview Mode. images recorded will be black and white. -
Page 5
GETTING STARTED GETTING STARTED 8. Video Recording 11. Post-recording In SETUP-Video menu, set Post-record with a In Preview Mode, single-press to start recording specified length, the unit will automatically extend video, press the button again to stop recording. recording with the specified length. When using “Press and Hold”… -
Page 6
GETTING STARTED GETTING STARTED 19. Switch Between Video Recording and 000:00:15 17:11:42 Audio Recording 1) When video is being recorded, press to stop recording video and start audio recording, video will be saved. PID:000000 N:8888888 2) When an audio file is being recorded, press 2017/05/04 201927 17:11:24… -
Page 7
GETTING STARTED Q & A Question Analysis Answer 22. Charging Out of battery Charge for 3.5 hours. Camera can’t be powered Mainboard Use Reset button Protection Working Camera was time of Charging time should not be less than not fully camera 3.5 hours. -
Page 8
N O T I C E F O R U S E R 3) The product malfunction caused by the fall and transportation failures after purchase. 4) The product malfunction caused by Not in accordance with the user manual operation. 5) The malfunction and damaged caused by the other barriers (man-made factors or external device).
Specifications:1764/1764091-dmt9.pdf file (19 Mar 2023) |
Accompanying Data:
Diamante DMT9 DVR PDF Manual (Updated: Sunday 19th of March 2023 10:52:57 AM)
Rating: 4.6 (rated by 58 users)
Compatible devices: EDVR, HK-RA208 Series, Standalone DVR 2007, MDVR-14, RAS-413-C, HB series, A95LC, Transporter.
Recommended Documentation:
Manual (Text Version):
(Ocr-Read Summary of Contents of some pages of the Diamante DMT9 Document (Main Content), UPD: 19 March 2023)
-
2, 1 2 3 4 5 6 7 8 9 11 15 16 17 18 19 14 20 21 22 23 1. Photoresistor 2. IR LED Light 3. Microphone 4. LED Fill Light 5. Lens 6. Audio Recording Button 7. Video Resolution Switch 8. Power ON/OFF 9. Charging/WIFI Indicator 10. Working Indicator 11. Loudspeaker 12. Reset Button 13. Clip Slot 14. Display…
-
3, Diamante DMT9 19 No. Description Functionality Infrared LED can record more details in low-light environment. 5 Lens To record images Press this button to start/stop recording audio file. Audio Recording Button 6 9 Charging/WIFI Indicator Charging indicator is blue, when battery is fully charged, this indica…
-
4, 1. Power ON/OFF 1) Power ON : Single-press to turn on camera from OFF-mode, and enter into Preview Mode. 2) Power OFF : Press and hold to turn off camera. Before shutting down, video being recorded will be saved. 04 GETTING STARTED 2. Turn ON/OFF Screen Light Single-press “Power Button” …
-
5, 06 000:00:15 17:11:42 2017/05/04 201927 17:11:24 PID:000000 N:8888888S GETTING STARTED 8. Video Recording In Preview Mode, single-press to start recording video, press the button again to stop recording. When using “Press and Hold” to start recording, there will be a “ ” icon appea…
-
6, 08 000:00:15 17:11:42 2017/05/04 201927 17:11:24 PID:000000 N:8888888S 16. Video resolution Switch Single-press “ ”to change video resolution directly in Preview Mode. GETTING STARTED FN 17. Change User ID Find “Change User ID”in SETUP-Settings, default password is 000000, use to conf…
-
7, Diamante DMT9 10 Drop-in Dock GETTING STARTED 22. Charging 23. Connect with External Camera Connect with external camera, the unit will record video via external camera, not the main camera. 11 Q & A Even if within the warranty period, if the following occurs, certain maintenance costs will be charged. 1) The malfunction…
-
8, 3) The product malfunction caused by the fall and transportation failures after purchase. 4) The product malfunction caused by Not in accordance with the user manual operation. 5) The malfunction and damaged caused by the other barriers (man-made factors or external device). N O T I C E F O R U S E R 12 …
-
Diamante DMT9 User Manual
-
Diamante DMT9 User Guide
-
Diamante DMT9 PDF Manual
-
Diamante DMT9 Owner’s Manuals
Recommended: CADENCE PHYSICAL VERIFICATION SYSTEM, VMX-B Soft Start Packages, NR-10, 2826
Product Types by Diamante:
- DVR
Operating Impressions, Questions and Answers:
Автосервис «Ралли»
МЕНЮ
Носимый видеорегистратор дмт 9 инструкция — 95 фото
Обновлено: 05.09.2023


Читайте также:
- Резина альтензо отзывы кто производитель — 98 фото
- Распорка нижняя приора автопродукт — 84 фото
- Самый дешевый ларгус кросс — 98 фото
OVERVIEW
1
2
3
6
7
8
9
10
1. Photoresistor
2. IR LED Light
3. Microphone
4. LED Fill Light
5. Lens
6. Audio Recording Button
7. Video Resolution Switch
8. Power ON/OFF
9. Charging/WIFI Indicator
10. Working Indicator
11. Loudspeaker
12. Reset Button
4
5
13. Clip Slot
14. Display Screen
15. Menu/Confirm Button
16. Up/Left Button
17. Down/Right Button
18. Back Button
19. USB port
20. Video Recording Button
21. Photo Button
22. Fill Light/ Tagging Button
23. Dock Interface
01
11
12
13
14
15
16
17
18
19
20
21
22
23