Инструкция по работе с программой Novalct mars для светодиодных экранов. Первичная настройка, подключение контроллера, загрузка файла скана для модуля, установка параметров экрана и подключения кабинетов. Регулировка яркости светодиодного видеоэкрана (ручная и автоматическая по времени или по датчику). Тестовые утилиты программы для проверки экрана.
Скачать программу NovaLCT Mars 5.3 по ссылке https://yadi.sk/d/LKDw91WBMYPdXA
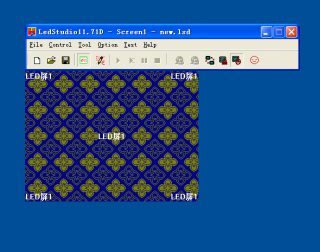
LED Studio — Программа для управления светодиодными экранами на контроллерах LINSN.
LED Studio — это не только мощный проигрыватель поддерживающий широкий спектр форматов программ, таких, как текстовые документы (TXT, DOC), рисунки (BMP, JPG, GIF, PCX) и анимацию (MPG, MPEG, MPV, MPA, AVI, VCD, SWF, RM, RA, RMJ, ASF), но и инструмент настройки светодиодного экрана.Version: v12.61

Инструкция LED Studio на русском языке.
Инструкция для LED Sudio на русском языке. В ней описаны все возможности программы, и все процессы по настройке светодиодного экрана. Описан процесс установки и удаления программы. Процессы настройки показа текстовой информации, изображений, видео и таблиц. Описано, как настраивать домашнюю страницу экрана. Узнать, как отобразить базу данных Access на светодиодном экране вы так же можете в данной инструкции. Настройки удалённого соединения с экраном, установки мультидисплея и т.д. Все эти функции подробно описаны в инструкции для LED Studio на русском языке.

Инструкция настройки экранов на контролерах LINSN на русском языке.
Инструкция на русском языке. В ней описана настройка конфигурации светодиодного экрана на контролерах Linsn через программу LED Studio. Перечислены основные типы экранов по способу их подключения, а также основные этапы настроек конфигурации с приведением примеров.
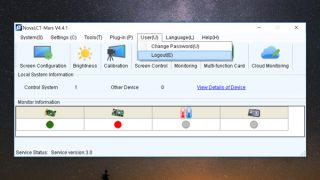
NovaLCT-Mars
Программа для управления и настройки светодиодных экранов на контроллерах NovaStar.Version: V4.5.1
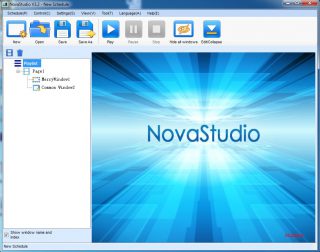
NovaStudio
NovaStudio представляет собой мощный, профессиональный и простой в использовании проигрыватель, поддерживающий широкий спектр форматов программ.
Version: V3.4

Инструкция NovaStudio на русском языке
Инструкция на русском языке для программы NovaStudio. Включает в себя требования эксплуатации, инструкции по созданию видеоряда изображений, информацию о добавлении видеоролика, выводе значений датчика температуры, даты/времени, передачи информации на экран. Так же включает в себя информацию по устранению неисправностей.

Инструкция настройки экранов на контролерах Nova на русском языке
Инструкция на русском языке. В ней описана настройка конфигурации светодиодного экрана на контролерах Nova через программу Nova LST Mars. Перечислены основные типы экранов по способу их подключения, а также основные этапы настроек конфигурации с приведением примеров.
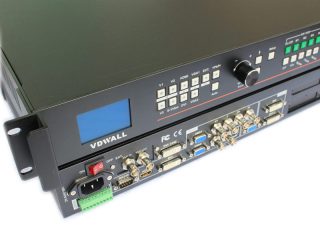
Руководство пользователя при работе с видеопроцессором VDWALL LVP605 series на русском языке
Руководство по VDWALL LVP605 переведено на русский язык и включает в себя инструкции по подключению и использованию видеопроцессора. Описывается внешний вид устройства, его характеристики, встроенный интерфейс управления. Здесь вы найдете информацию о том, как настроить видеопроцессор для вывода изображения на экран. Как наложить текст, отрегулировать такие параметры, как яркость, насыщенность и резкость, настроить аудио и составной экран. Так же описана управляющая программа для этого процессора.
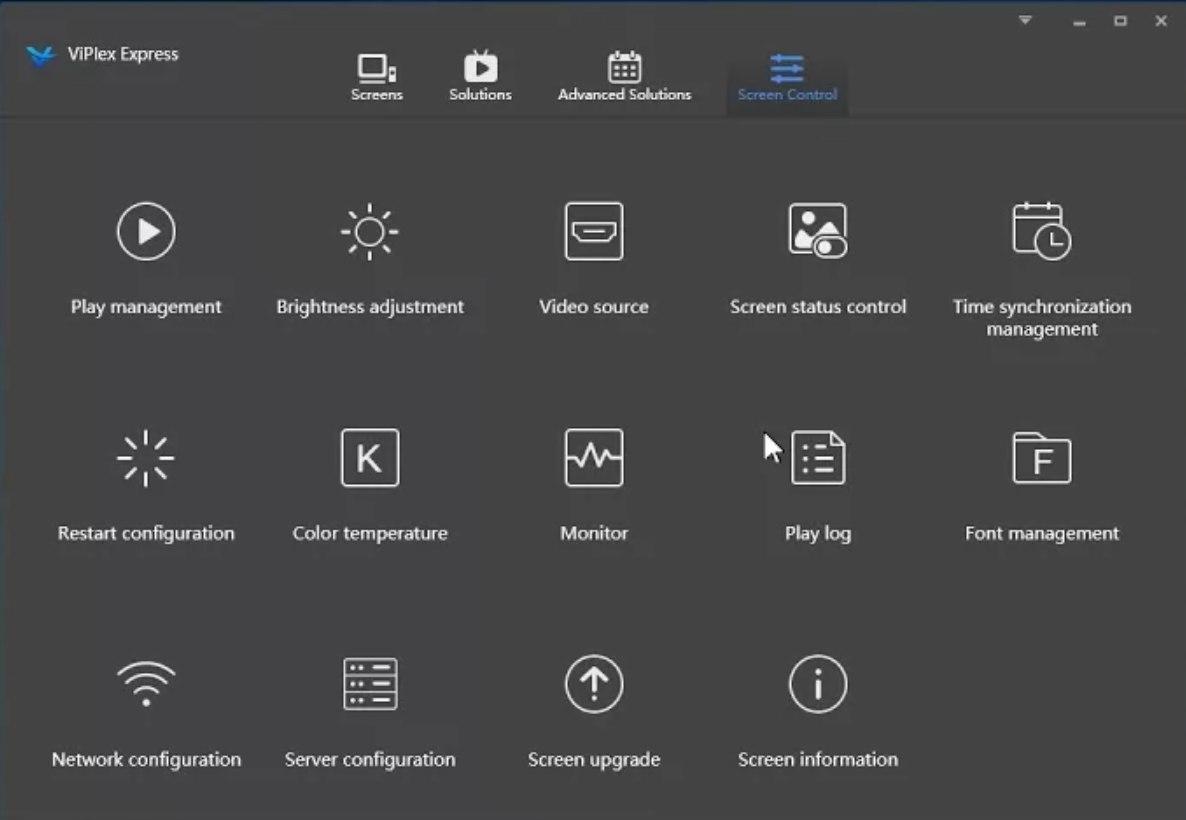
Инструкция Viplex Express на русском языке
Инструкция Viplex Express на русском языке предназначена для настройки конфигурациисветодиодного экрана на мультимедийных плеерах NovaStar серии Taurus и содержит все необходимые для этого сведения. Управление экранами может осуществляться через Wifi или удаленно через Интернет либо по прямому подключению через RJ45.
Руководство по настройке экрана ПК с ОС Windows с NOVA LCT
информация о продукте
Руководство по настройке экрана ПК с ОС Windows с Nova LCT представляет собой
подробное руководство с пошаговыми инструкциями по
настройка светодиодного дисплея. Он охватывает различные аспекты, такие как
проводка и подключение, загрузка и установка программного обеспечения,
конфигурация приемной карты, конфигурация подключения экрана и
больше.
Индекс
Руководство разделено на следующие разделы:
- Электропроводка и соединения
- Загрузка и установка программного обеспечения
- Получение конфигурации карты
- Конфигурация подключения экрана
1. Электропроводка и соединения
В этом разделе объясняется, как установить соединение между
светодиодный дисплей, проигрыватель контента и ПК. Есть два метода
доступны:
- 1.A – Сетевое подключение с помощью кабелей Ethernet
(Рекомендуется) - 1.B – Подключение к точке доступа Wi-Fi
2. Загрузка и установка программного обеспечения
Этот раздел проведет вас через процесс загрузки и
установка программного обеспечения NovaLCT, необходимого для настройки
ваш светодиодный дисплей. Программное обеспечение можно получить на сайте NovaStar.
webсайт.
3. Получение конфигурации карты
В этом разделе приведены инструкции о том, как прочитать значение по умолчанию.
конфигурация, загрузить новую конфигурацию file, и отправьте новый
конфигурации на экран с помощью принимающей карты.
4. Конфигурация подключения экрана
В этом разделе вы узнаете, как настроить экран
настройки подключения, установите количество кабинетов для вашего дисплея,
настроить соединения проводки данных и выполнить резервное копирование
подключение экрана.
Инструкции по использованию продукта
Проводка и соединения — сетевое соединение с Ethernet
Кабели
Для подключения светодиодного дисплея к проигрывателю контента и ПК с помощью
Кабели Ethernet, выполните следующие действия:
- Подключите стандартный сетевой кабель к выходному порту LED на
контроллер к первой рамке светодиодного дисплея. - Убедитесь, что между плеером и
экран. - Подключите стандартный сетевой кабель от ПК к
маршрутизатор. - Подключите стандартный сетевой кабель от маршрутизатора к
Ethernet-порт проигрывателя контента.
Проводка и соединения — подключение точки доступа Wi-Fi
Для подключения светодиодного дисплея к проигрывателю контента и ПК с помощью
точки доступа Wi-Fi, выполните следующие действия:
- Подключите стандартный сетевой кабель к выходному порту LED на
контроллер к первой рамке светодиодного дисплея. - Убедитесь, что между плеером и
экран. - Проверьте боковую наклейку на проигрывателе содержимого для Wi-Fi.
имя точки доступа и пароль. - На ПК щелкните значок беспроводных сетей в нижней части экрана.
правый угол вашего рабочего стола. - Нажмите кнопку для управления соединениями Wi-Fi.
- Отобразится список сетей Wi-Fi, обнаруженных вашим ПК.
Ищите сеть под названием APXXXXXXXX (точное название на наклейке)
и нажмите Подключиться. - Введите пароль Wi-Fi (по умолчанию 12345678) и нажмите
Далее.
Загрузка и установка программного обеспечения
Чтобы загрузить и установить программное обеспечение NovaLCT, выполните следующие действия.
действия:
- Посетите НоваСтар webсайте (https://www.novastar.tech) и перейдите на
раздел «Загрузки». - Загрузите последнюю версию NovaLCT из программного обеспечения.
меню. - Установите NovaLCT, следуя всем инструкциям по умолчанию.
- Во время установки может быть установлено дополнительное программное обеспечение и драйверы.
установлен для правильного обнаружения светодиодного дисплея. Разрешить каждый
шаг.
Конфигурация светодиодного экрана — вход в Content Player
Чтобы войти в проигрыватель контента из NovaLCT, выполните следующие действия.
действия:
- Запустите NovaLCT и разрешите любое разрешение на доступ к сети.
РУКОВОДСТВО ПО КОНФИГУРАЦИИ ЭКРАНА ПК WINDOWS С NOVA LCT
АНГЛИЙСКИЙ
РУКОВОДСТВО ПО КОНФИГУРАЦИИ
ИНДЕКС
УКАЗАТЕЛЬ – ЭТАПЫ НАСТРОЙКИ
ПРОЧИТАЙТЕ ЭТО РУКОВОДСТВО И ВЫПОЛНЯЙТЕ ДАННЫЕ ШАГИ ПО ПОРЯДКУ
ПРОВОДКА И СОЕДИНЕНИЯ
1
1. СЕТЕВОЕ СОЕДИНЕНИЕ С КАБЕЛЯМИ ETHERNET
1.B ПОДКЛЮЧЕНИЕ К ТОЧКЕ ДОСТУПА WI-FI
ЗАГРУЗКА И УСТАНОВКА ПРОГРАММНОГО ОБЕСПЕЧЕНИЯ
2
2.1 СКАЧАТЬ И УСТАНОВИТЬ NOVALCT
ВОЙТИ В ПРОИГРЫВАТЕЛЬ КОНТЕНТА ОТ NOVALCT
3
3.1 ВХОД В ПРОИГРЫВАТЕЛЬ КОНТЕНТА
3.2 ДОСТУП К КОНФИГУРАЦИИ ЭКРАНА
ПОЛУЧЕНИЕ КОНФИГУРАЦИИ КАРТЫ
4
4.1 ЧТЕНИЕ КОНФИГУРАЦИИ ПО УМОЛЧАНИЮ
4.2 ЗАГРУЗКА КОНФИГУРАЦИИ FILE
4.3 ОТПРАВКА НОВОЙ КОНФИГУРАЦИИ НА ЭКРАН
КОНФИГУРАЦИЯ ПОДКЛЮЧЕНИЯ ЭКРАНА
5
5.1 EXAMPLE НАСТРОЙКИ СОЕДИНЕНИЯ
5.2 УСТАНОВКА КОЛИЧЕСТВА ШКАФОВ ДЛЯ ВАШЕГО ДИСПЛЕЯ
5.3 НАСТРОЙКА ПРОВОДНЫХ СОЕДИНЕНИЙ ДЛЯ ДАННЫХ
5.4 ОТПРАВКА КОНФИГУРАЦИИ НА ЭКРАН
5.5 РЕЗЕРВНОЕ КОПИРОВАНИЕ FILE ПОДКЛЮЧЕНИЯ ЭКРАНА
РУКОВОДСТВО ПО КОНФИГУРАЦИИ
1. ПРОВОДКА И СОЕДИНЕНИЯ
ШАГ 1: ПРОВОДКА И СОЕДИНЕНИЯ
ЕСТЬ 2 СПОСОБА ПОДКЛЮЧЕНИЯ ВАШЕГО LED ДИСПЛЕЯ К ПРОИГРЫВАТЕЛЮ И ВАШЕМУ ПК. ВЫБЕРИТЕ ОДИН ИЗ СЛЕДУЮЩИХ СПОСОБОВ ПОДКЛЮЧЕНИЯ (A ИЛИ B).
ВИЗУАЛЬНЫЙ СВЕТОДИОДНЫЙ ДИСПЛЕЙ
1.A – СОЕДИНЕНИЕ С СЕТЬЮ
КАБЕЛИ ETHERNET (РЕКОМЕНДУЕТСЯ)
СТАНДАРТНЫЙ СЕТЕВОЙ КАБЕЛЬ, ПРЯМО ОТ ВЫХОДНОГО ПОРТА КОНТРОЛЛЕРА К ПЕРВОЙ РАМЕ СВЕТОДИОДНОГО ДИСПЛЕЯ
ПК с WINDOWS
10 ИЛИ ВЫШЕ
МЕЖДУ ПРОИГРЫВАТЕЛЕМ И ЭКРАНОМ НЕ ДОЛЖНО БЫТЬ ЛЮБОГО МАРШРУТИЗАТОРА ИЛИ ПЕРЕКЛЮЧАТЕЛЯ
СОДЕРЖАНИЕ ПРОИГРЫВАТЕЛЬ
СТАНДАРТНЫЙ СЕТЕВОЙ КАБЕЛЬ ОТ ПК К МАРШРУТИЗАТОРУ
СТАНДАРТНЫЙ СЕТЕВОЙ КАБЕЛЬ ОТ ВАШЕГО МАРШРУТИЗАТОРА К ETHERNET-ПОРТУ ПРОИГРЫВАТЕЛЯ КОНТЕНТА
РУКОВОДСТВО ПО КОНФИГУРАЦИИ
1.B – ПОДКЛЮЧЕНИЕ К ТОЧКЕ ДОСТУПА WI-FI
ВИЗУАЛЬНЫЙ СВЕТОДИОДНЫЙ ДИСПЛЕЙ
1. ПРОВОДКА И СОЕДИНЕНИЯ
СТАНДАРТНЫЙ СЕТЕВОЙ КАБЕЛЬ, ПРЯМО ОТ ВЫХОДНОГО ПОРТА КОНТРОЛЛЕРА К ПЕРВОЙ РАМЕ СВЕТОДИОДНОГО ДИСПЛЕЯ
МЕЖДУ ПРОИГРЫВАТЕЛЕМ И ЭКРАНОМ НЕ ДОЛЖНО БЫТЬ ЛЮБОГО МАРШРУТИЗАТОРА ИЛИ ПЕРЕКЛЮЧАТЕЛЯ
СОДЕРЖАНИЕ ПРОИГРЫВАТЕЛЬ
ПК С WINDOWS 10 ИЛИ ВЫШЕ
ПРОВЕРЬТЕ БОКОВУЮ НАКЛЕЙКУ НА ПРОИГРЫВАТЕЛЕ С КОНТЕНТОМ С НАЗВАНИЕМ ТОЧКИ ДОСТУПА WI-FI И ПАРОЛЕМ.
ПОДКЛЮЧИТЕ ВАШ КОМПЬЮТЕР К WI-FI ТОЧКЕ ДОСТУПА КОНТЕНТ-ПРОИГРЫВАТЕЛЯ
РУКОВОДСТВО ПО КОНФИГУРАЦИИ
1. ПРОВОДКА И СОЕДИНЕНИЯ
1: НАЖМИТЕ НА ЗНАЧОК БЕСПРОВОДНОЙ СЕТИ В НИЖНЕМ ПРАВОМ УГЛЕ РАБОТЫ ВАШЕГО ПК.
2: ВЫБЕРИТЕ КНОПКУ ДЛЯ УПРАВЛЕНИЯ СОЕДИНЕНИЯМИ WIFI
3: БУДЕТ ОТОБРАЖЕН СПИСОК WI-FI СЕТЕЙ, ОБНАРУЖЕННЫХ ВАШИМ ПК.
4: ПРОВЕРЬТЕ СЕТЬ С НАЗВАНИЕМ APXXXXXXXX (ТОЧНОЕ НАЗВАНИЕ УКАЗАНО НА НАКЛЕЙКЕ НА СТОРОНЕ ПРОИГРЫВАТЕЛЯ) И НАЖМИТЕ «ПОДКЛЮЧИТЬ»
5: ВВЕДИТЕ ПАРОЛЬ WI-FI (12345678 ПО УМОЛЧАНИЮ) И НАЖМИТЕ «ДАЛЕЕ».
6: ТЕПЕРЬ ВЫ НАПРЯМУЮ ПОДКЛЮЧЕНЫ К ПРОИГРЫВАТЕЛЮ КОНТЕНТА ВАШЕГО LED ДИСПЛЕЯ
РУКОВОДСТВО ПО КОНФИГУРАЦИИ
2. СКАЧАТЬ И УСТАНОВИТЬ ПРОГРАММНОЕ ОБЕСПЕЧЕНИЕ
ШАГ 2: ЗАГРУЗКА И УСТАНОВКА ПРОГРАММНОГО ОБЕСПЕЧЕНИЯ
2.1 СКАЧАТЬ И УСТАНОВИТЬ NOVALCT ПОСЕТИТЕ NOVASTAR’S WEBСАЙТ (HTTPS://WWW.NOVASTAR.TECH) И ПОПАДАТЬ В РАЗДЕЛ ЗАГРУЗКИ
ЗАГРУЗИТЕ ПОСЛЕДНЮЮ ВЕРСИЮ NOVALCT ИЗ ВКЛАДКИ «ПРОГРАММНОЕ ОБЕСПЕЧЕНИЕ» В РАЗДЕЛЕ ЗАГРУЗКИ.
УСТАНОВИТЕ NOVALCT, СЛЕДУЯ ВСЕМ ИНСТРУКЦИЯМ ПО УМОЛЧАНИЮ.
УСТАНОВКА NOVALCT МОЖЕТ ПРИВЕСТИ К УСТАНОВКЕ ДОПОЛНИТЕЛЬНОГО ПРОГРАММНОГО ОБЕСПЕЧЕНИЯ И ДРАЙВЕРОВ ДЛЯ ПРАВИЛЬНОГО ОБНАРУЖЕНИЯ СВЕТОДИОДНОГО ДИСПЛЕЯ. РАЗРЕШАЙТЕ КАЖДЫЙ ШАГ.
РУКОВОДСТВО ПО КОНФИГУРАЦИИ
3. КОНФИГУРАЦИЯ СВЕТОДИОДНОГО ЭКРАНА
ШАГ 3: ВХОД В ПРОИГРЫВАТЕЛЬ КОНТЕНТА ОТ NOVALCT
3.1 – ВХОД В ПРОИГРЫВАТЕЛЬ СОДЕРЖИМОГО ЗАПУСКАЕТ NOVALCT И РАЗРЕШАЕТ ЛЮБОЕ РАЗРЕШЕНИЕ ДОСТУПА К СЕТИ.
НАЖМИТЕ НА МЕНЮ «ПОЛЬЗОВАТЕЛЬ» И ВЫБЕРИТЕ «ВХОД В МЕДИАПЛЕЕР».
ПОЛЬЗОВАТЕЛЬ: admin ПАРОЛЬ: 123456
ВАШ ИГРОК ОТОБРАЗИТСЯ В СПИСКЕ ТЕРМИНАЛОВ КАК TAURUSXXXXXXXXX. ВЫБЕРИТЕ ПРОИГРЫВАТЕЛЬ И НАЖМИТЕ «ПОДКЛЮЧИТЬ СИСТЕМУ», ИСПОЛЬЗУЯ ЭТИ УЧЕТНЫЕ ДАННЫЕ: ADMIN / 123456 ЕСЛИ ПРОИГРЫВАТЕЛЬ НЕ ПОЯВЛЯЕТСЯ, ПОЖАЛУЙСТА, ОБРАТИТЕ ВНИМАНИЕ, ЧТО ПРОИГРЫВАТЕЛЬ МОЖЕТ ОБНАРУЖИТЬСЯ ПОСЛЕ ВКЛЮЧЕНИЯ 1 ИЛИ 2 МИНУТЫ. ЕСЛИ ОН ПО-прежнему НЕ ПОЯВЛЯЕТСЯ, ПРОВЕРЬТЕ ВСЕ СОЕДИНЕНИЯ, ОТКЛЮЧИТЕ ПРОИГРЫВАТЕЛЬ И СНОВА ПОДКЛЮЧИТЕ ЕГО. ПОДОЖДИТЕ 2 МИНУТЫ И НАЖМИТЕ «ОБНОВИТЬ», ЧТОБЫ ПРИНУДИТЕЛЬНО ОБНАРУЖИТЬ.
РУКОВОДСТВО ПО КОНФИГУРАЦИИ
3. КОНФИГУРАЦИЯ СВЕТОДИОДНОГО ЭКРАНА
ЕСЛИ ВХОД В ПРОИГРЫВАТЕЛЬ ПРАВИЛЬНЫЙ, ПРОГРАММА ПОКАЖЕТ НОВЫЕ КНОПКИ, ВЫГЛЯДЯЩИЕ НА ИЗОБРАЖЕНИИ НИЖЕ.
3.2 – ДОСТУП К КОНФИГУРАЦИИ ЭКРАНА
НАЖМИТЕ «КОНФИГУРАЦИЯ ЭКРАНА» И ВЫБЕРИТЕ ПОРТ СВЯЗИ, СООТВЕТСТВУЮЩИЙ ВАШЕМУ ПРОИГРЫВАТЕЛЮ, И ЗАТЕМ НАЖМИТЕ «ДАЛЕЕ».
РУКОВОДСТВО ПО КОНФИГУРАЦИИ
4. ПОЛУЧЕНИЕ КОНФИГУРАЦИИ КАРТЫ
ШАГ 4: ПОЛУЧЕНИЕ КОНФИГУРАЦИИ КАРТЫ
4.1 – ЧТЕНИЕ КОНФИГУРАЦИИ ЭКРАНА ПО УМОЛЧАНИЮ И СОХРАНЕНИЕ ЕГО В РЕЗЕРВНОЙ КОПИИ .RCFGX FILE
ВЫПОЛНИТЕ ЭТИ ШАГИ НА ВКЛАДКЕ ПОЛУЧЕНИЯ КАРТЫ ОКНА КОНФИГУРАЦИИ ЭКРАНА.
A: ВЫБЕРИТЕ ВАРИАНТ «ОБЫЧНЫЙ» В
ИНФОРМАЦИОННЫЙ РАЗДЕЛ КАБИНЕТА ЕСЛИ ЕСТЬ
A
НЕ ВЫБРАН ПО УМОЛЧАНИЮ.
B: НАЖМИТЕ НА «ЧИТАТЬ ИЗ
B
ПОЛУЧЕНИЕ КАРТЫ».
C: ПОЯВИТСЯ ОКНО ВЫБОРА КАРТЫ. ОСТАВЬТЕ ПАРАМЕТРЫ ПО УМОЛЧАНИЮ И НАЖМИТЕ ОК.
D: НАЖМИТЕ НА «СОХРАНИТЬ В FILEКНОПКА И СДЕЛАТЬ БЭКАП КОНФИГУРАЦИИ СВЕТОДИОДНЫХ ШКАФОВ.
E: НАЗВАЙТЕ ВАШУ РЕЗЕРВНУЮ КОПИИ FILE, СОЗДАЙТЕ ПАПКУ ДЛЯ СОХРАНЕНИЯ И НАЖМИТЕ СОХРАНИТЬ
компакт диск
E
РУКОВОДСТВО ПО КОНФИГУРАЦИИ
4.2 – ЗАГРУЗКА КОНФИГУРАЦИИ FILE
F: В НИЗУ ОКНА НАЖМИТЕ НА «ЗАГРУЗИТЬ ИЗ FILE» КНОПКА. ОКНО ДЛЯ ОТКРЫТИЯ RCFGX FILE БУДЕТ ПОЯВЛЯТЬСЯ.
4. ПОЛУЧЕНИЕ КОНФИГУРАЦИИ КАРТЫ
F
ВЫБЕРИТЕ RCFGX FILE ПОСТАВЛЯЕТСЯ ДЛЯ ВАШЕГО ЭКРАНА И НАЖМИТЕ ОТКРЫТЬ
ПОСЛЕ ЗАГРУЗКИ FILE РАЗРЕШЕНИЕ КАДРА В ПИКСЕЛЯХ ОТОБРАЖАЕТСЯ В РАЗДЕЛЕ ШИРИНА И ВЫСОТА
4.3 – ОТПРАВКА НОВОЙ КОНФИГУРАЦИИ НА ЭКРАН
G: ВНИЗУ НАЖМИТЕ КНОПКУ «ОТПРАВИТЬ НА ПОЛУЧАЮЩУЮ КАРТУ». ПОЯВИТСЯ ОКНО «ОТПРАВИТЬ ПАРАМЕТРЫ»
G
РУКОВОДСТВО ПО КОНФИГУРАЦИИ
4. ПОЛУЧЕНИЕ КОНФИГУРАЦИИ КАРТЫ
H: УСТАНОВИТЕ Флажок «СБРОС НАЧАЛЬНОЙ КООРДИНАТЫ…» И НАЖМИТЕ ОТПРАВИТЬ. ПОДОЖДИТЕ, ПОКА ВЫ ПОЛУЧИТЕ ПОДТВЕРЖДАЮЩЕЕ СООБЩЕНИЕ.
H
I: НАЖМИТЕ СОХРАНИТЬ, ЖДИТЕ ДРУГОГО ПОДТВЕРЖДАЮЩЕГО СООБЩЕНИЯ.
I
J: ПРИНЯТЬ РЕЗЕРВНУЮ КОПИИ
J
РУКОВОДСТВО ПО КОНФИГУРАЦИИ
5. ПОДКЛЮЧЕНИЕ ЭКРАНА
ШАГ 5: КОНФИГУРАЦИЯ ПОДКЛЮЧЕНИЯ ЭКРАНА
5.1 – ЭКСAMPLE НАСТРОЙКИ СОЕДИНЕНИЯ (ВКЛАДКА СОЕДИНЕНИЕ НА ДИСПЛЕЕ…)
В ЭТОМ РАЗДЕЛЕ МЫ НАСТРАИВАЕМ ПОЛОЖЕНИЕ ШКАФОВ И ПОДКЛЮЧЕНИЕ ДАННЫХ ЭКРАНА.
КАК БЫВШИЙAMPLE МЫ СОБИРАЕМСЯ НАСТРОИТЬ ЭКРАН С 8 ШКАФАМИ, РАСПОЛОЖЕННЫМИ В 2 РЯДА ПО 4.
ОДИН ШКАФ
НА ОСНОВЕ ЭТОГО БЫВШЕГОAMPLE ВЫ МОЖЕТЕ НАСТРОИТЬ КОЛИЧЕСТВО ШКАФОВ, СООТВЕТСТВУЮЩЕЕ РАЗМЕРУ ВАШЕГО ЭКРАНА.
РУКОВОДСТВО ПО КОНФИГУРАЦИИ
5. ПОДКЛЮЧЕНИЕ ЭКРАНА
5.2 – НАСТРОЙКА КОЛИЧЕСТВА ШКАФОВ ДЛЯ ВАШЕГО ЭКРАНА
НА ВКЛАДКЕ «ПОДКЛЮЧЕНИЕ ЭКРАНА» НАЖМИТЕ КНОПКУ «НАСТРОЙКА» В ВЕРХНЕМ ПРАВОМ УГЛЕ.
О: ВЫБЕРИТЕ ВАРИАНТ «СТАНДАРТНЫЙ ЭКРАН» В ВЕРХНЕЙ ЧАСТИ ЭКРАНА.
B: ПОЛУЧАЯ РАЗМЕР КАРТЫ, ПРОВЕРЬТЕ, ЧТО ШИРИНА
И ЦИФРЫ ВЫСОТЫ ТОЖЕ ТАКИЕ, ЧТО ПОКАЗЫВАЮТСЯ
B
НА ВКЛАДКЕ КАРТОЧКИ ОТПРАВКИ: ИНФОРМАЦИЯ О ШКАФЕ. ЕСЛИ
ОНИ НЕ ТИПЫ ПО ШИРИНЕ И ВЫСОТЕ ПИКСЕЛЕЙ
ЧТОБЫ СООТВЕТСТВОВАТЬ ЕМУ.
ЕСЛИ ОНИ НЕ СООТВЕТСТВУЮТ, ИЗМЕНИТЕ ЭТИ ЦИФРЫ И НАЖМИТЕ КНОПКИ «ПРИМЕНИТЬ К СТРОКЕ» И «ПРИМЕНИТЬ К СТОЛБЦУ».
РУКОВОДСТВО ПО КОНФИГУРАЦИИ
C: ПЕРЕЙДИТЕ В ОКНО «СТОЛБЦЫ» И ВВЕДИТЕ КОЛИЧЕСТВО СТОЛБЦОВ, СООТВЕТСТВУЮЩЕЕ НАСТРОЕНИЮ ВАШЕГО ЭКРАНА. ПО НАШЕМУ БЫВШЕМУAMPLE МЫ ВОЙДЕМ 4.
5. ПОДКЛЮЧЕНИЕ ЭКРАНА
C
D: ПЕРЕЙДИТЕ В ОКНО «СТРОКИ» И ВВЕДИТЕ КОЛИЧЕСТВО РЯДОВ, СООТВЕТСТВУЮЩЕЕ НАСТРОЕНИЮ ВАШЕГО ЭКРАНА. ПО НАШЕМУ БЫВШЕМУAMPLE МЫ ВОЙДЕМ 2.
D
ПОСЛЕ ВВОДА КОЛИЧЕСТВ СТОЛБЦОВ И РЯДОВ ПОЯВИТСЯ БЕЛЫЕ ПРЯМОУГОЛЬНИКИ, ПРЕДСТАВЛЯЮЩИЕ ШКАФЫ, СОСТАВЛЯЮЩИЕ НАШ ДИСПЛЕЙ. АДАПТИРУЙТЕ КОЛИЧЕСТВО РЯДОВ И КОЛОНН, СООТВЕТСТВУЮЩЕЕ ВАШЕМУ СВЕТОДИОДНОМУ ДИСПЛЕЮ.
РУКОВОДСТВО ПО КОНФИГУРАЦИИ
5. ПОДКЛЮЧЕНИЕ ЭКРАНА
5.3 – НАСТРОЙКА ПРОВОДНЫХ СОЕДИНЕНИЙ ДЛЯ ДАННЫХ
ПРЕЖДЕ ЧЕМ НАЧАТЬ, ДАВАЙТЕ ВЗГЛЯНИМ НА СЗАДИ VIEW ПРОВОДКИ ДАННЫХ НАШЕГО БЫВШЕГОAMPЛЕ ДИСПЛЕЙ. ДАННЫЕ ВХОДЯТ ЧЕРЕЗ НИЖНИЙ ЛЕВЫЙ ШКАФ.
REAR VIEW НАШИХ БЫВШИХAMPЛЕ ДИСПЛЕЙ
СОДЕРЖАНИЕ ПРОИГРЫВАТЕЛЬ
СЕТЕВОЙ КАБЕЛЬ
ВАЖНО: В NOVALCT МЫ ПОКАЗЫВАЕМ ПОДКЛЮЧЕНИЕ ДАННЫХ ОТ ДИСПЛЕЯ СПЕРЕДИ VIEW. ТАКИМ ОБРАЗОМ, ПРОВОДКА ДАННЫХ ВХОДИТ ИЗ НИЖНЕЙ ПРАВОЙ РАМКИ.
Передний VIEW НАШИХ БЫВШИХAMPЛЕ ДИСПЛЕЙ
СОДЕРЖАНИЕ ПРОИГРЫВАТЕЛЬ
СЕТЕВОЙ КАБЕЛЬ
РУКОВОДСТВО ПО КОНФИГУРАЦИИ
5. ПОДКЛЮЧЕНИЕ ЭКРАНА
СЕЙЧАС УСТАНОВИМ, КАК ПОДКЛЮЧЕН ЭКРАН. МЫ БУДЕМ РАБОТАТЬ МЫШЬЮ, НАЖИМАЯ НА БЕЛЫЕ РАМКИ, ЧТОБЫ УСТАНОВИТЬ ПУТЬ ПРОВОДОВ ДАННЫХ ЭКРАНА.
ВАЖНО: НА ЭТОМ ЭКРАНЕ КОНФИГУРАЦИИ ШКАФЫ ПРЕДСТАВЛЕНЫ СПЕРЕДИ VIEW.
ЕСЛИ ВО ВРЕМЯ ЭТОГО ПРОЦЕССА ДОПУСТИМ ОШИБКУ, МЫ МОЖЕМ ОТМЕНИТЬ ПОРЯДОК ПОДКЛЮЧЕНИЯ, НАЖИМАЯ НА РАМКИ ПРАВОЙ КНОПКОЙ МЫШИ. ТАКЖЕ ЕСТЬ КНОПКА «СБРОС» ДЛЯ ПЕРЕЗАПУСКА ПРОВОДКИ.
МЫ ВСЕГДА ДОЛЖНЫ НАЧАТЬ, НАЖИМАЯ НА ШКАФ, ГДЕ ДАННЫЕ ВХОДЯТ НА ЭКРАН С ПЕРЕДНЕЙ ЧАСТИ VIEW. В НАШЕМ БЫВШЕМAMPLE – ПРАВАЯ НИЖНЯЯ ЧАСТЬ ДИАГРАММЫ. ОН ЗАГОРЕЕТСЯ РОЗОВЫМ.
ЗАТЕМ НАЖИМАЕМ НА СЛЕДУЮЩИЙ ШКАФ В ТОМ ЖЕ РЯДУ, СЛЕДУЯ ПО ПУТИ КАБЕЛЕЙ ПЕРЕДАЧИ ДАННЫХ НА ЭКРАНЕ
ЭТО ТАКЖЕ ЗАГОРЕЕТСЯ РОЗОВЫМ И ПОЯВИТСЯ БУКВА E (КОНЕЦ), УКАЗЫВАЮЩАЯ, ЧТО ЭТО ПОСЛЕДНИЙ ШКАФ В ЦЕПИ В ЭТО ВРЕМЯ. НА ПЕРВОМ ШКАФЕ ПОЯВЛЯЕТСЯ БУКВА S (СТАРТ), УКАЗЫВАЮЩАЯ, ЧТО ЭТО ПЕРВЫЙ ШКАФ В ЦЕПИ.
РУКОВОДСТВО ПО КОНФИГУРАЦИИ
5. ПОДКЛЮЧЕНИЕ ЭКРАНА
ЗАМЕЧАНИЕ, ЧТО В ГОРИЗОНТАЛЬНО СОБРАННОМ ДИСПЛЕЕ ЦЕПЬ ПОДКЛЮЧЕНИЯ БУДЕТ ДРУГОЙ (ВОЗМОЖНО, В КОЛОННАХ ОН БУДЕТ ПРОХОДИТЬ С НИЗУ ВВЕРХ). НАЖИМАЕМ ПО ПОРЯДКУ НА ШКАФЫ НИЖНЕГО РЯДА ПО ПРОВОДКЕ.
Когда мы доходим до конца ряда, мы нажимаем на верхний шкаф, следуя пути сетевых кабелей на экране.
ПРОДОЛЖАЙТЕ НАЖИМАТЬ В ПОРЯДКЕ НА ШКАФАХ, ПОКА ВЕРХНИЙ РЯД НЕ ЗАВЕРШЕН.
РУКОВОДСТВО ПО КОНФИГУРАЦИИ
5. ПОДКЛЮЧЕНИЕ ЭКРАНА
5.4 – ОТПРАВКА КОНФИГУРАЦИИ НА ЭКРАН
ПОСЛЕ НАНЕСЕНИЯ ИНФОРМАЦИОННОЙ ПРОВОДКИ НА ШКАФЫ МЫ ОТПРАВИМ ЭТУ КОНФИГУРАЦИЮ НА ЭКРАН.
B: ПОЯВИТСЯ ОКНО ПОДТВЕРЖДЕНИЯ: НАЖМИТЕ OK
C
A
О: НАЖМИТЕ КНОПКУ «ОТПРАВИТЬ В HW».
B
C: КОГДА КАРТА СОЕДИНЕНИЙ ОТПРАВЛЕНА, ПОЯВЛЯЕТСЯ ПОДТВЕРЖДАЮЩЕЕ СООБЩЕНИЕ. НАЖМИТЕ ОК
D: НАЖМИТЕ КНОПКУ «СОХРАНИТЬ» И ЖДИТЕ ДРУГОГО ПОДТВЕРЖДАЮЩЕГО СООБЩЕНИЯ. ПРИМИТЕ СОЗДАНИЕ РЕЗЕРВНОЙ КОПИИ КОНФИГУРАЦИИ.
D
РУКОВОДСТВО ПО КОНФИГУРАЦИИ
5. ПОДКЛЮЧЕНИЕ ЭКРАНА
ПОСЛЕ ЭТОГО ШАГА ВЫ СМОЖЕТЕ ПРАВИЛЬНО VIEW СОДЕРЖИМОЕ ПО УМОЛЧАНИЮ, ЗАГРУЖАЕМОЕ В ПРОИГРЫВАТЕЛЕ NOVASTAR.
5.5 – РЕЗЕРВНОЕ КОПИРОВАНИЕ FILE КОНФИГУРАЦИИ ПОДКЛЮЧЕНИЯ ЭКРАНА
НАКОНЕЦ МЫ ВРУЧНУЮ СОХРАНИМ РЕЗЕРВНУЮ КОПИИ FILE КОНФИГУРАЦИИ ПРОВОДКИ ДАННЫХ
E
E: НАЖМИТЕ НА «СОХРАНИТЬ В FILE» КНОПКА. ОКНО ДЛЯ СОХРАНЕНИЯ РЕЗЕРВНОЙ КОПИИ ПРОВОДКИ FILE ПОЯВИТСЯ С РАСШИРЕНИЕМ .MAP. СОХРАНИТЕ ЕГО В ТОЙ ЖЕ ПАПКЕ, КАК ВАША ПОЛУЧАЮЩАЯ КАРТА FILE
ВЫ УСПЕШНО НАСТРОЙИЛИ ВАШ СВЕТОДИОДНЫЙ ДИСПЛЕЙ. ВЫ МОЖЕТЕ ЗАКРЫТЬ ЭТО ОКНО НАСТРОЙКИ И ПРОГРАММУ NOVALCT,
ЭТО ПРОГРАММНОЕ ОБЕСПЕЧЕНИЕ ИСПОЛЬЗУЕТСЯ ТОЛЬКО ДЛЯ КОНФИГУРАЦИИ ДИСПЛЕЯ. НЕ ВСЕ ФУНКЦИИ ЭТОГО ПРОГРАММНОГО ОБЕСПЕЧЕНИЯ СОВМЕСТИМЫ СО ВСЕМИ ДИСПЛЕЯМИ. ПОСЛЕ ПРАВИЛЬНОЙ НАСТРОЙКИ ВЫ МОЖЕТЕ УДАЛИТЬ ЕГО ИЗ СВОЕЙ СИСТЕМЫ.
Документы / Ресурсы
Рекомендации

Ведущее в мире решение для управления светодиодными дисплеями
Novastar NovaLCT Screen Configuration and Software Download – Step-by-Step Instruction!
Home » Novastar NovaLCT Screen Configuration and Software Download – Step-by-Step Instruction!
- November 5, 2021
How to configure LED display screen? How can we achieve the sending cards configuration, receiving card configuration, and LED screen connection? Today we will give the step-by-step instruction for you to enable you can master the screen configuration all by yourselves! We will use NovaLCT screen configuration as the example to help you to understand the principles laying behind the setting well and deeply.
Do not be worried, all the presentations and explanations will be very easy and straightforward to guarantee that even a novice can learn from 0 to 1.
Now, let’s begin! For the normal LED display configuration process, there will be four parts:
And in today, we will tell you the details and steps of them with detailed pictures and straightforward languages.
First, let us introduce to you what is Novastar NovaLCT.
1. What Is Novastar NovaLCT?
What is Novastar software? As a global leader in LED display solutions, NovaStar designs and develops LED display control solutions for a variety of market applications including entertainment, digital signage and rental. Novastar also supports you with the latest software and downloads to run your LED displays effectively.
NovaLCT is the LED display configuration tool for computers provided by Novastar. It can work with receiving cards, monitoring cards, and multi-function cards, and can achieve brightness adjustment, power supply control, error detection, and smart settings.
In a word, it is a powerful software for you to set and manage your LED screens, and make the images displayed on the screen show better.
Here are some preconditions for you to use this software:
(1) A PC with Windows system installed;
(2) Have obtained the installation package;
(3) Have disabled the antivirus software.
Now, you have a basic understanding of NovaLCT and the steps of screen configuration. Let us present the detailed operations for you to help you can learn them well and quickly!
1.1 How to Download Nova LCT Software?
How to install Nova LCT on your computer? Very simple:
(1) Go to Novastar download to download the latest version.
(2) Complete the full installation including add-on applications and drivers.
(3) When windows Firewall notification alarming, allow access.
2. Graphics Card Setting
Let’s us discuss how to set the graphics card, it is important for you to achieve the perfect final image effects. Not complex, only several steps.
2.1 Choose the display mode
If we connect to a LED display, here we will have different mode to choose.

We can switch our display mode between duplicate mode (shows the background and icons of desktop) or extended mode (only shows the background of the desktop).
It is recommended that the display mode should be the duplicate one as the icons displayed on the LED screen can help us to check whether the screen connection is correct or wrong.
2.2 Choose the display setting
Please right-click your mouse and then choose the display setting in the push-down list.
Then we will go to this interface, and please change the scale and layout settings to 100% without any scaling and stretch to make the display pixel by pixel to show the best image effect.

Now, after the graphics card settings, we can turn to the next step – NovaLCT software settings.
3. Sending Card Settings
We will begin the Novastar NovaLCT software setting with the sending card setting.
3.1 Basic steps
First, you need to Log in the software.
Just choose the “user” on the navigation bar, then we will have three options in the drop-down list.

The first option in the list “advanced synchronous system UserLogin” is for the synchronous control method; the second one is for demonstrating software functions without connecting a real LED screen, and the third one “media player” mode is for the asynchronous control way. In this case, we will discuss the first mode.
Please notice the password is “admin”.
After we log in, the main interface will be like this:

For further operation, please click “screen configuration”.
You can also click the “view details of device” to find out more details such as which kind of sending cards we are using now and the number of sending cards.
After you click the screen configuration, you can get a pop-up page like this. And here are three boxes to be filled.

For the “select communication port”, you do not need to select the communication port if you only connect one sending card. And this is a common situation.
In this case, we will just configure the screen so we do not need to select the loaded configuration file. Then we will jump to the sending card setting window.
3.2 Sending card setting? Choose the right video source, resolution and refresh rate!
First, we need to set up the source configuration. Just choose the corresponding video source such as HDMI or DVI, and then choose the right resolution.
Please make sure the chosen resolution is the same as the graphic card output resolution, and the refresh rate should be the same as the graphic card output, too.
Then we will click “set” to confirm the setting.
After this, please click the “refresh ” button in the top area that we marked to check whether the sending card resolution and graphic card output resolution are the same as we have to make sure the LED screen is displayed pixel by pixel.
Then, we can click “save” in the bottom area. You can do the setting following the sequence we mark in the screenshot.
Next, we will go to set the receiving card. Click the bottom to shift to the receiving card setting window.

4. Receiving Card Configuration
Here we get these parameters to set. This window has three parts like module information, cabinet information, and performance setting.
Please notice the “cabinet information” represents the receiving card loading information actually.

4.1 So many parameters? It is ok with the rcfg file.
In this window, there are many parameters to be set. However, you don’t need to adjust them by yourself.
Commonly, the LED screen provider will provide you with the corresponding receiving card configuration file so you just need to choose “load from file” to load the parameters on the window bottom.
After loading the rcfg file, please make step 2, which will send the parameters to the receiving card.

Here we get the pop-up option to let us choose from sending the data to all receiving card, specify receiving card or reset starting coordinate. If you just set the parameters at the first time, we need to send the data to all receiving cards directly.
So, what are the functions of the other two options?
For sending to specify receiving card, it mainly happens when changing a new receiving card or some parts of the screen showing different effects. And the latter one is mainly for troubleshooting.
Of course, do not forget to save the setting.
4.2 What if we do not have rcfg files? Just try to read back.
If you do not have the rcfg file, you can still read back the data from the receiving card if the LED display screen can show the normal images after lighting up and connecting to the LED control system.
That is because, when you light up the LED display, and it still can show the images normally, it means there are parameters set in the receiving card so you can just read back to get the file and save it. And next time when we need to change a new receiving card, we can just load the file we obtained and set it to the new receiving card.
Just achieve it like the picture shows.

After we finish the receiving card setting, we will turn to the next step – LED screen connection to let customers get the pictures they truly want.
5. LED Screen Connection
After we complete the receiving card configuration, the LED display still can not show the complete images of our controlling computer because of the lack of LED screen connection, and each cabinet will show the same image.

It will only show the top-left part of the desktop like the pictures above. And only after we finish the LED screen connection, we will get the whole entire images on the LED screen display.
So, how to do that? Let us turn to the screen connection interface.

5.1 Basic steps
Here we list these steps firstly, and we will explain the meanings of them then.
Step 1: Choose how many quantities of the LED screen. Normally, the quantity is one. And then click the “configure.”
Step 2: fill in area 2 with the number of LED display cabinets or receiving cards. In this case, we have 4 receiving cards in columns, and 2 receiving cards in rows.
Step 3: select the sending card number.
Step 4: choose the receiving card size according to the cabinet information on the former page of receiving card configuration interface.

Step 5: make the LED screen connection manually, or just choose the quick connection.
Step 6: send the data to HW, meaning sending the data to hardware, and it will be stored in the sending card automatically.
Of course, do not forget to save the setting.
You can also click “save to file” because when the sending cards are changed or advanced for some other functions, it will save you some time cause you will not need to send the screen connection again. And just click “load from file” you can achieve the setting again.
For the logic of how to arrange the screen connection, here are some knowledge points for you to learn. Please jump to the: LED Display Connection to know more!
5.2 “Enable Mapping” — what is the function?
This is a very useful function to help us know the screen connection well. Just click in, the software will tell you how the connection laying out.
For example, if there is a rental LED screen, and the technician on-site does not know the sequence of the connection, then the “enable mapping” can help him to know this quickly.

The “P” represents the serial number of the output port that each receiving card is connecting to, and the hashtag plus the numbers mean the orders of receiving cards.
Please be noticed that this function is not supported by all receiving card series, you can ask the staff online or read the product introduction to know it exactly.
5.3 “Detect Communication Status” — troubleshooting your connection
If you click the button on area 3 which is named “detect communication status”, there will be a pop-up window to tell you the connection status of all the receiving cards.

As you can see, if it shows green, meaning all the connection is good. But if we find some items showing red, then we should check the connection status such as the connection with the ethernet cables.
This function can help us do the troubleshooting easily. If you are doing the screen connection the first time, then you should try to use this function.
6. Conclusions of NovaLCT Screen Configuration
Now, we have already known the basic steps to configure LED screen, and these steps can help you to solve most regular LED screen projects.
We can make a simple conclusion of the four basic parts – graphics card setting, sending card setting, receiving card setting, and LED screen connection.
(1) For the graphics card configuration, there are displaying modes and display settings for you to choose from. Please make sure the steps that can enable your LED display boards displayed pixel-by-pixel.
(2) For the sending card setting, fill in the right video resolution, resolution and refresh rate.
(3) For the receiving card configuration, you can load in the parameters from the rcfg file. But if you do not have such file, try to read back the parameters.
(4) For the LED display connection, please fill in the right information such as the quantity of screen, columns and rows of receiving cards and so on. Please notify there are two very useful functions – “Enable Mapping” and “Detect Communication Status.”
If you want to know more basic knowledge of LED screen connection, which part you need to take some time to study and practice too, you can turn to our LED FAQ page to find the corresponding article.
Now, I believe you already have more insights of LED screen configuration and NovaLCT screen configuration. You can practice by yourself now to get the right setting because you are an expert already! Want more useful posts? Just click the pull-down list below to read!
NovaLCT V5.4.4.6 Update Log:
[Supported Devices]
1. Supported synchronous controllers
MCTRL300/MCTRL R5/MCTRL500/MCTRL600/MCTRL660/MCTRL700/MCTRL4K/MCTRL660 PRO
2. Supported video controllers
NovaPro UHD/NovaPro UHD Jr/VX4S-N/VX16s/Novastar VX1000/K4S-N/VX400S/VS1/VS2/VS3/VS7/H series/C1/N9/J6
3. Supported multimedia players
TB1/TB2/TB3/TB4/TB6/TB8/TB30/TB40/TB50/TB60/JT100/JT50/TCC70/JT200/JT20
[New Features]
None
[Improvements]
None
[Changes]
None
[Bug Fixes]
1. Fixed the problem that the fault diagnosis fails on the nodes outside of China.
[Notes]
1. NovaLCT is available only for Windows 7 and later.
2. When the receiving card firmware program does not support the chips of SHIXIN TECHNOLOGY, the content displayed in NovaLCT after the receiving card parameters are read back is unreliable. The receiving card firmware program must be updated to support those chips.
SmartLCT Download
8. FAQs
(1) What is NovaStar software?
LED display control solutions for entertainment, digital signage, and rental are the specialty of NovaStar, the worldwide leader in LED display solutions. Their innovative designs and developments make them a true standout in the industry.
Novastar offers a helpful LED display configuration tool called NovaLCT. This tool is specially designed to configure LED displays and can operate with several types of cards like monitoring, multi-function, and receiving cards.
NovaLCT allows you to make adjustments to the brightness, control the power supply, detect errors, and enable smart settings.
(2) What is the password for Novalct?
The password of NovaLCT: admin or 666).
If you still have problems,please check this video
More Useful Articles!
Latest news
- Categories: Energy saving LED display, FAQS, LED Control System FAQs, LED Poster Display News, New, Outdoor LED display news, Rental LED Display, Street light pole LED display news
- Tags: indoor led display screen, Novastar LED Training, Outdoor LED display screen
