-
Contents
-
Table of Contents
-
Troubleshooting
-
Bookmarks
Quick Links
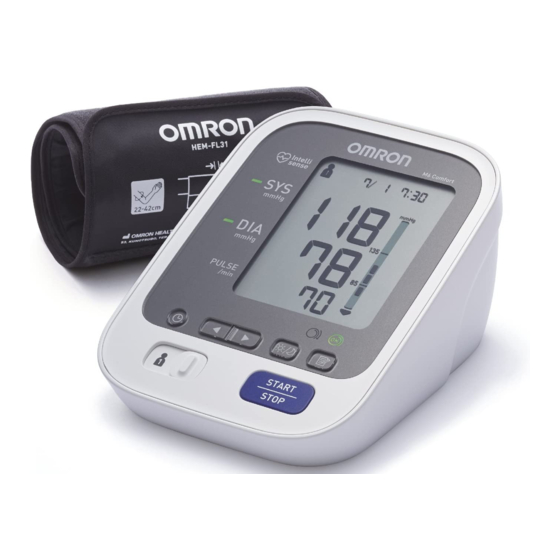
Digital Automatic Blood Pressure Monitor
Model M6 Comfort
• Instruction Manual
• Mode d’emploi
• Gebrauchsanweisung
• Manuale di istruzioni
• Manual de instrucciones
• Gebruiksaanwijzing
• РУКОВОДСТВО ПО ЭКСПЛУАТАЦИИ
IM-HEM-7000-E-01-05/06
EN
FR
DE
IT
ES
NL
RU
Related Manuals for Omron M6 Comfort
Summary of Contents for Omron M6 Comfort
-
Page 1
Digital Automatic Blood Pressure Monitor Model M6 Comfort • Instruction Manual • Mode d’emploi • Gebrauchsanweisung • Manuale di istruzioni • Manual de instrucciones • Gebruiksaanwijzing • РУКОВОДСТВО ПО ЭКСПЛУАТАЦИИ IM-HEM-7000-E-01-05/06… -
Page 2: Table Of Contents
Contents Introduction …………….3 Important Safety Information ……….4 1. Overview …………….5 2. Preparation …………….7 2.1 Installing/Replacing the Batteries……..7 2.2 Setting the Date and Time ……….8 3. Using the Unit…………..10 3.1 How to Sit Correctly When Taking a Measurement ..10 3.2 Applying the Arm Cuff …………12 3.3 Taking a Reading…………15 3.4 Instructions for Special Conditions………18 3.5 Using the Memory Function ………..19…
-
Page 3: Introduction
Introduction The OMRON M6 Comfort is a compact, fully automatic blood pressure monitor, operating on the oscillometric principle. It measures your blood pressure and pulse rate simply and quickly. For comfortable controlled inflation without the need of pressure pre-setting or re-inflation the devices uses its advanced “IntelliSense”…
-
Page 4: Important Safety Information
Important Safety Information • Blood pressure measurement is not suitable in cases of serious arteriosclerosis (hardening of the arteries). • The pulse display is not suitable for monitoring the frequency of cardiac pacemakers. • Pregnant women should only measure their own blood pressure in consultation with their doctor, since the readings can be changed by pregnancy.
-
Page 5: Overview
1.Overview 1. Overview Monitor A. Display E. Battery compartment B. O/I START button F. Air jack C. Memory ( ) buttons G. AC adapter jack (for optional AC adapter) D. Date/Time ( ) setting button…
-
Page 6: Package Contents
1.Overview Display H. Systolic blood pressure O. Heartbeat symbol I. Diastolic blood pressure 1. Flashes during measurement J. Memory symbol 2. If flashing after measurement complete indicates blood K. Average value symbol pressure out of recommended L. Movement error symbol range M.
-
Page 7: Preparation
2.Preparation 2. Preparation Installing/Replacing the Batteries Remove the battery cover. Insert four “AA” batteries as indicated in the battery compartment and then replace the battery cover. Notes: • If the battery low symbol ( ) appears on the display, replace all four batteries at the same time.
-
Page 8: Setting The Date And Time
2.Preparation Setting the Date and Time Your blood pressure monitor automatically stores up to 90 measurements values in its memory and calculates an average reading based on the measurements from the last three readings taken within 10 minutes. • Set the monitor to the correct date and time before taking a measurement for the first time.
-
Page 9
2.Preparation Repeat steps 2 and 3 to set the month and date (day). Repeat steps 2 and 3 to set the hour and minutes for the time. Press the O/I START button when you have finished setting the date and time. -
Page 10: Using The Unit
3.Using the Unit 3. Using the Unit How to Sit Correctly When Taking a Measurement You can take a measurement on either your left or right arm. Notes: • Measurements should be taken in a quiet place and you should be in a relaxed, seated position. Make sure that the room is not too hot or cold.
-
Page 11
3.Using the Unit Notes: • Correct posture during measurement is necessary to get accurate results. • You should also try to measure your blood pressure at the same time each day. (Within 1 hour after waking up is recommended.) Incorrect Posture •… -
Page 12: Applying The Arm Cuff
3.Using the Unit Applying the Arm Cuff You can wrap the cuff either on your right or left arm. • Remove tight-fitting clothing from your upper arm. • Do not place the cuff over thick clothes and do not roll up your sleeve if it is too tight.
-
Page 13
3.Using the Unit Hold the grip on the cuff securely with Grip your hand. Fabric fastener Turn the palm of your hand upward. Turn the palm of your hand upward. Bottom edge 1 to 2cm Blue strip Air tube Apply the cuff to your upper arm so that the blue strip is centred on the middle of your inner arm and points down the inside of the arm. -
Page 14
3.Using the Unit When the cuff is positioned correctly, close the fabric fastener FIRMLY. Notes: • Make certain the cuff fits snugly around your arm. • The cuff should make good contact with your skin. You should be able to fit your index finger between the cuff and your arm easily, so you can pull the cuff off and on. -
Page 15: Taking A Reading
3.Using the Unit Taking a Reading Press the O/I START button and remain still, the cuff will start to inflate automatically. As the cuff begins to inflate, the monitor automatically determines your ideal inflation level. Remain still and do not talk until measurement is completed.
-
Page 16
3.Using the Unit Press the O/I START button to turn the monitor off. Note: If you forget to turn the monitor off, it will automatically shut itself off after five minutes. Important: • Wait 2-3 minutes before taking another blood pressure measurement. -
Page 17
3.Using the Unit heart- or circulation-disease) a lower limit of blood pressure might be necessary and that it is recommended to consult the doctor in such cases. What is Irregular Heartbeat? An irregular heartbeat is a Normal Heartbeat heartbeat rhythm that varies Pulse by more than 25% from the average heartbeat rhythm… -
Page 18: Instructions For Special Conditions
3.Using the Unit Instructions for Special Conditions If your systolic pressure is known to be more than 220 mmHg, after the cuff starts to inflate, press and hold the O/I START button until the monitor inflates 30 to 40 mmHg higher than your suspected systolic pressure.
-
Page 19: Using The Memory Function
3.Using the Unit Using the Memory Function This monitor has a memory capable of storing 90 sets of readings. Every time you complete the measurement, the monitor automatically stores blood pressure and pulse rate with the date and time. The monitor also calculates an average reading based on the measurements from the last three readings taken within 10 minutes.
-
Page 20
3.Using the Unit To View Previous Readings Stored in Memory Press the button, while the average reading is displayed, to view reading stored in memory from the most recent to the oldest. Alternating display Press the button repeatedly to cycle through the previous measurement values button: from the most recent to the oldest, button: from the oldest to the most recent) -
Page 21: Quick Reference Guide
4.Quick Reference Guide 4. Quick Reference Guide To help ensure a reliable reading, avoid eating, smoking, or exercising for at least 30 minutes before taking a measurement. Note: Remove any tight-fitting clothing from your upper arm. Sit on a chair with your feet flat on the floor and place your arm on a table so that the arm cuff will be at the same level as your heart.
-
Page 22: Handling Errors And Problems
5.Handling Errors and Problems 5. Handling Errors and Problems Error Messages Error Display Cause Remedy Cuff is under inflated. Movement during Carefully read and repeat the steps measurement listed under section 3.3. Cuff over inflated. Remove the arm cuff. Wait 2-3 minutes and then take another This icon indicates irregular measurement.
-
Page 23: Troubleshooting
5.Handling Errors and Problems Troubleshooting Problem Cause Remedy No display appears when the O/I START The batteries are empty. Replace the batteries. button is pressed. Is the cuff wrapped firmly Attach the arm cuff around the arm? correctly. Cannot measure or The cuff pressure does Check that the air plug is readings are too high.
-
Page 24: Maintenance And Storage
• The OMRON M6 Comfort is a precision measuring device. It is important that the accuracy remains within the specifications. It is recommended that you have the monitor inspected every two years to ensure it is accurate and functioning correctly.
-
Page 25: Optional Parts
7.Optional Parts 7. Optional Parts AC Adapter (Q-adapter) Arm Cuff Order No. 1098336-8 Order No. 9956685-4 Using the Optional AC Adapter Insert batteries into the battery compartment even when using the AC adapter. Notes: • Never unplug the power cord with wet hands. •…
-
Page 26: Technical Data
8.Technical Data 8. Technical Data Product Description Digital Automatic Blood Pressure Monitor Model OMRON M6 Comfort (HEM-7000-E) Display LCD Digital Display Measurement Method Oscillometric method Pressure: 0 mmHg to 299 mmHg Measurement Range Pulse: 40 to 180/min. Pressure: ±3 mmHg Accuracy Pulse: ±…
-
Page 27: Correct Disposal Of This Product
Recommendation is to keep a minimum distance of 7 m. Verify correct operation of the device in case the distance is shorter. Further documentation in accordance with IEC60601-1-2:2001 is available at OMRON Healthcare Europe at the address mentioned in this instruction manual. Documentation is also available at www.omron-healthcare.com. Correct Disposal of This Product (Waste Electrical &…
-
Page 28: Some Useful Information About Blood Pressure
9.Some Useful Information about Blood Pressure 9. Some Useful Information about Blood Pressure What is Blood Pressure? Blood pressure is a measure of the force of blood flowing against the walls of the arteries. Arterial blood pressure is constantly changing during the course of the heart’s cycle. The highest pressure in the cycle is called the Systolic Blood Pressure;…
-
Page 29
9.Some Useful Information about Blood Pressure Upper curve: systolic blood pressure Lower curve: diastolic blood pressure Time of day Example: fluctuation within a day (male, 35 years old) Classification of Blood Pressure by the World Health Organization The World Health Organization (WHO) and the International Society of Hypertension (ISH) developed the Blood Pressure Classification shown in this figure. -
Page 30
9.Some Useful Information about Blood Pressure OMRON HEALTHCARE UK LTD. Subsidiary Opal Drive Fox Milne, Milton Keynes MK 15 0DG, United Kingdom OMRON Medizintechnik Handelsgesellschaft m.b.H. Subsidiary Windeckstraße 81a, D-68163 Mannheim, Germany www.omron-medizintechnik.de OMRON SANTÉ FRANCE Subsidiary 14, rue de Lisbonne, F-93561 Rosny-sous-Bois Cedex, France OMRON HEALTHCARE CO., LTD.
инструкцияOmron M6 Comfort

Instruction Manual
1
EN
FR
DE
IT
ES
NL
RU
TR
AR
Symbols
Automatic Upper Arm Blood Pressure Monitor
M6 Comfort (HEM-7360-E)
X6 Comfort (HEM-7360-EO)
Read Instruction manual
and
before use.
FR
Lire le mode d’emploi et avant l’utilisation.
DE
Lesen Sie vor der Verwendung Gebrauchsanweisung und .
IT
Leggere il manuale di istruzioni e prima dell’uso.
ES
Lea el manual de instrucciones y antes del uso.
NL
Lees gebruiksaanwijzing en voor gebruik.
RU
Прочтите руководства по эксплуатации и перед использованием.
TR
Kullanmadan önce, kullanım kılavuzu ve ‘yi okuyun.
.ϡΩΧΗγϻϝΑϗ ϭ ΕΩΎηέϹϝϳϟΩέϗ
AR
Symboles/ Symbole/ Simboli/ Símbolos/
Symbolen/ Символы/ Semboller/
ίϣέϟ
Посмотреть инструкция для Omron M6 Comfort бесплатно. Руководство относится к категории сфигмоманометры, 39 человек(а) дали ему среднюю оценку 8.5. Руководство доступно на следующих языках: русский, английский. У вас есть вопрос о Omron M6 Comfort или вам нужна помощь? Задайте свой вопрос здесь
Главная
| Omron | |
| M6 Comfort | M602 | |
| сфигмоманометр | |
| 4015672108325 | |
| русский, английский | |
| Руководство пользователя (PDF) |
Свойства
| Тип | Автоматический |
| Поддерживаемое размещение | Верхняя часть руки |
| Число пользователей | 2 пользов. |
| Отображение даты | Да |
| Среднее артериальное давление | Да |
| Измерение частоты пульса | Да |
| Диастолическое кровяное давление | Да |
| Систолическое кровяное давление | Да |
| Размер манжеты | 22 — 42 cm |
| Функции памяти | Да |
| Функция доклада | — |
| Слоты памяти | 200 |
Энергопитание
| Число поддерживаемых батарей | 4 |
| Тип батареек | AA |
Экран
Данные об упаковке
| Количество в упаковке | 1 шт |
Содержимое упаковки
| Футляр для транспортировки | Да |
| Батарейки в комплекте | Да |
показать больше
Не можете найти ответ на свой вопрос в руководстве? Вы можете найти ответ на свой вопрос ниже, в разделе часто задаваемых вопросов о Omron M6 Comfort.
Что такое систолическое давление?
Систолическое давление — это высший показатель тонометра. Систолическое давление означает давление в артериях во время сокращения сердечной мышцы.
Что означает диастолическое давление?
Диастолическое давление — это низший показатель тонометра. Диастолическое давление означает давление между ударами сердечной мышцы.
Какой показатель считается нормой артериального давления?
Нормой артериального давления считается показатель 120/80 мм ртутного столба.
Инструкция Omron M6 Comfort доступно в русский?
Да, руководствоOmron M6 Comfort доступно врусский .
Не нашли свой вопрос? Задайте свой вопрос здесь
- Manuals
- Brands
- Omron Manuals
- Blood Pressure Monitor
- M6 Comfort
- Instruction manual
-
Contents
-
Table of Contents
-
Troubleshooting
-
Bookmarks
Quick Links
English
Français
Deutsch
Italiano
Español
Nederlands
Automatic Blood Pressure Monitor
Model M6 Comfort
Türkçe
Instruction Manual
IM-HEM-7321-E-02-07/2015
2298869-1B
Related Manuals for Omron M6 Comfort
Summary of Contents for Omron M6 Comfort
-
Page 1
English Français Deutsch Italiano Español Nederlands Automatic Blood Pressure Monitor Model M6 Comfort Türkçe Instruction Manual IM-HEM-7321-E-02-07/2015 2298869-1B… -
Page 3
H AB H AC… -
Page 4: Table Of Contents
Thank you for purchasing the OMRON M6 Comfort Automatic Blood Pressure Monitor. The OMRON M6 Comfort is a compact, fully automatic blood pressure monitor, operating on the oscillometric principle. It measures your blood pressure and pulse rate simply and quickly.
-
Page 5: Important Safety Information
Important Safety Information Warning: Indicates a potentially hazardous situation which, if not avoided, could result in death or serious injury. (General Usage) Consult your physician before using the device in pregnancy including pre-eclampsia, or if diagnosed with arrhythmia or arteriosclerosis. Do not use the device on the injured arm or the arm under medical treatment.
-
Page 6
Important Safety Information If there are any abnormalities during the measurement, remove the arm cuff. Do not use this device on infants or persons who cannot express their intentions. Do not inflate the arm cuff more than necessary. Do not use the device for any purpose other than measuring blood pressure. Use only the approved arm cuff for this device. -
Page 7
Important Safety Information (Battery Usage) Do not insert the batteries with their polarities incorrectly aligned. Use only 4 “AA” alkaline or manganese batteries with this device. Do not use other types of batteries. Do not use new and used batteries together. Remove the batteries if the device will not be used for three months or more. -
Page 8: Know Your Device
1. Know Your Device Open the rear cover page to read the following: The alphabet in the rear cover page correspond to those in the body page. Monitor Display Display Memory symbol Cuff wrap guide lamp USER ID symbol Memory button Average value symbol Weekly average button Systolic blood pressure…
-
Page 9
1. Know Your Device Display Symbols Irregular Heartbeat Symbol ( Normal Heartbeat When the monitor detects an irregular rhythm two or more times during the Pulse measurement, the irregular heartbeat symbol ( ) will appear on the Blood pressure display with the measurement values. An irregular heartbeat rhythm is defined as a rhythm that is 25% less or 25% Irregular Heartbeat Short Long… -
Page 10
1. Know Your Device Blood Pressure Colour Indicator If your systolic or diastolic pressure is above the standard range (135 mmHg for the systolic blood pressure and/or 85 mmHg for the diastolic blood pressure), the blood pressure colour indicator will light in “orange” when the measurement result is displayed. If they are within the standard range, the blood pressure colour indicator will light in “green”. -
Page 11: Preparation
2. Preparation 2.1 Battery Installation Remove the battery cover. Insert 4 “AA” batteries as indicated in the battery compartment. Replace the battery cover. Notes: • When the low battery symbol ( ) appears on the display, turn the monitor off, then replace all batteries at the same time.
-
Page 12: Setting The Date And Time
2. Preparation Open the rear cover page to read the following: The letter identifiers on the rear cover page correspond to those in the body of this page. 2.2 Setting the Date and Time Set the monitor to the correct date and time before taking a measurement for the first time. Press the Date/Time setting ( ) button.
-
Page 13: Using The Device
• The blood pressure can differ between the right arm and the left arm, and therefore also the measured blood pressure values can be different. OMRON recommends to always use the same arm for measurement. If the values between both arms differ substantially, please check with your physician…
-
Page 14: How To Sit Correctly
3. Using the Device 3.2 How to Sit Correctly To take a measurement, you need to be relaxed and comfortably seated, under comfortable room temperature. Avoid bathing, drinking alcohol or caffeine, smoking, exercising or eating 30 minutes before taking a measurement. •…
-
Page 15: Taking A Measurement
3. Using the Device 3.3 Taking a Measurement Notes: • To cancel a measurement, press the START/STOP button to release the air in the arm cuff. • Remain still while taking a measurement. The monitor is designed to take measurements and store the measurement values in the memory for 2 people using USER ID 1 and USER ID 2.
-
Page 16
3. Using the Device Remove the arm cuff. Press the START/STOP button to turn the monitor off. The monitor automatically stores the measurement result in its memory. It will automatically turn off after 2 minutes. Note: Wait 2-3 minutes before taking another measurement. Waiting between measurements allows the arteries to return to the condition prior to taking a measurement. -
Page 17: Using The Memory Function
3. Using the Device 3.4 Using the Memory Function The monitor automatically stores the results up to 100 sets for each user (1 and 2). It can also calculate an average value based on the last 3 measurement values taken within 10 minutes.
-
Page 18
3. Using the Device To View the Average Value Select your USER ID (1 or 2). Press and hold the button for more than 3 seconds. Notes: • If the previous measurement was taken without setting the date and time, the average value is not calculated. -
Page 19
3. Using the Device To View the Weekly Average Value The monitor calculates and displays weekly averages for the measurements taken in the morning and evening within 8 weeks for each user. Note: The week begins Sunday at 2:00. Select your USER ID (1 or 2). Press the button. -
Page 20
3. Using the Device Note: If there are no measurement values stored in the memory, the screen to the right is displayed. Morning Weekly Average Measurements of the morning This is the average for the Sunday Monday Tuesday Wednesday Thursday Friday Saturday 4:00… -
Page 21
3. Using the Device To Delete All the Values Stored in Memory The values stored in the memory are deleted by USER ID. Select your USER ID (1 or 2). Press the Memory button, while the memory symbol ( ) appears. -
Page 22: Error Messages And Troubleshooting
4. Error Messages and Troubleshooting 4.1 Error Messages Display Cause Solution Remove the arm cuff. Wait 2-3 minutes and then take another measurement. Irregular heartbeats are detected. Repeat the steps in section 3.3. If this error continues to appear, contact your physician. Carefully read and repeat the steps in section Movement during measurement.
-
Page 23
Repeat measurement. Remain still and do not talk during measurement. Movement during measurement. Refer to section 3.3. Remove any clothing interfering with the arm cuff. Clothing is interfering with the arm cuff. Refer to section 3.1. Contact your OMRON retail outlet or Device error. distributor. -
Page 24: Troubleshooting
4. Error Messages and Troubleshooting 4.2 Troubleshooting Problem Cause Solution Apply the arm cuff tighter. Arm cuff is applied too loosely. Refer to section 3.1. Remain still and do not talk during Movement or talking during measurement. The measurement result is extremely measurement.
-
Page 25
The batteries have been inserted (+/-) polarity. incorrectly. Refer to section 2.1. • Press the START/STOP button and repeat measurement. • Replace the batteries with new ones. Other problems. If the problem continues, contact your OMRON retail outlet or distributor. -
Page 26: Maintenance And Storage
• Use a soft and dry cloth, or a soft and moistened cloth and neutral soap to clean on the monitor and the arm cuff. • Changes or modification not approved by the manufacturer will void the user warranty. Do not disassemble or attempt to repair the device or components. Consult your OMRON retail outlet or distributor. Calibration and Service •…
-
Page 27: Storage
5. Maintenance and Storage 5.2 Storage Keep the device in its storage case when not in use. Unplug the air plug from the air jack. Gently fold the air tube into the arm cuff. Note: Do not bend or crease the air tube excessively. Place the monitor and the arm cuff in the storage case.
-
Page 28: Optional Medical Accessories
5. Maintenance and Storage 5.3 Optional Medical Accessories (within the scope of EC Medical Device Directive 93/42/EEC) Arm cuff AC adapter Arm circumference 22-42 cm Adapter S-9515336-9 Intelli Cuff L-9911730-8 Adapter UK-9983666-5 (Model: HEM-FL31)
-
Page 29
5. Maintenance and Storage Using the Optional AC Adapter Insert the AC adapter plug into the AC adapter jack on the rear side of the monitor. Plug the AC adapter into an electrical outlet. To disconnect the AC adapter, unplug the AC adapter from the electrical outlet first and then remove the AC adapter plug from the monitor. -
Page 30: Specifications
6. Specifications Product description Automatic Blood Pressure Monitor Model OMRON M6 Comfort (HEM-7321-E) Display LCD digital display Measurement method Oscillometric method Measurement range Pressure: 0 to 299 mmHg Pulse: 40 to 180 beats / min. Pressure: ±3 mmHg Accuracy Pulse: ±5% of display reading…
-
Page 31
Part 1: General Requirements and Part 3: Supplementary requirements for electromechanical blood pressure measuring systems. • This OMRON device is produced under the strict quality system of OMRON HEALTHCARE Co. Ltd., Japan. The core component for OMRON devices, which is the Pressure Sensor, is produced in Japan. -
Page 32
EN60601-1-2:2007 standard has been implemented. This standard defines the levels of immunity to electromagnetic interferences as well as maximum levels of electromagnetic emissions for medical devices. This medical device manufactured by OMRON HEALTHCARE conforms to this EN60601-1-2:2007 standard for both immunity and emissions. -
Page 33: Warranty
This product is guaranteed by OMRON for a period of 3 years after the date of purchase. The proper construction, workmanship and materials of this product is guaranteed by OMRON. During this period of guarantee OMRON will, without charge for labour or parts, repair or replace the defect product or any defective parts.
-
Page 34: Some Useful Information About Blood Pressure
8. Some Useful Information about Blood Pressure What is Blood Pressure? Blood pressure is a measure of the force of blood flowing against the walls of the arteries. Arterial blood pressure is constantly changing during the course of the heart’s cycle. The highest pressure in the cycle is called the Systolic Blood Pressure;…
-
Page 36
Table des matières Merci d’avoir fait l’acquisition du tensiomètre automatique OMRON M6 Comfort. L’OMRON M6 Comfort est un tensiomètre compact entièrement automatique, qui fonctionne sur le principe de l’oscillométrie. Il mesure votre pression artérielle et votre pouls, simplement et rapidement. Pour un gonflage contrôlé confortable sans préréglage de la pression ou regonflage, l’appareil fait appel à… -
Page 37: Informations Importantes Sur La Sécurité
Informations importantes sur la sécurité Avertissement : indique une situation potentiellement dangereuse qui, si elle n’est pas évitée, peut entraîner la mort ou de graves lésions. (Utilisation générale) Consulter votre médecin avant d’utiliser l’appareil si vous êtes enceinte et que vous présentez un état de pré-éclampsie ou si un diagnostic d’arythmie ou d’artériosclérose a été…
-
Page 38
Informations importantes sur la sécurité (Utilisation générale) Toujours consulter un médecin. Il est dangereux d’effectuer un autodiagnostic et d’instaurer un traitement sur la seule base des résultats de la mesure. Les personnes présentant de graves problèmes de circulation artérielle ou des troubles artériels doivent consulter un médecin avant d’utiliser l’appareil, le gonflage du brassard pouvant entraîner une légère hémorragie interne entraînant la formation d’ecchymoses. -
Page 39
Informations importantes sur la sécurité Dépoussiérer la fiche d’alimentation. Débrancher la fiche d’alimentation si l’appareil ne doit pas être utilisé pendant une longue période. Débrancher la fiche d’alimentation avant tout travail de maintenance. Utiliser uniquement l’adaptateur secteur d’origine conçu pour cet appareil. L’utilisation de transformateurs inappro- priés peut s’avérer dangereuse pour l’appareil et/ou l’endommager. -
Page 40: Description De L’appareil
1. Description de l’appareil Ouvrir la page de garde arrière pour lire ce qui suit : La lettre sur la page de garde arrière correspond à celle de la page du corps de texte. Tensiomètre Affichage Affichage Symbole de la mémoire Témoin du guide d’enroulement Symbole ID UTILISATEUR du brassard…
-
Page 41
1. Description de l’appareil Symboles de l’affichage Symbole de pulsations cardiaques irrégulières ( Pulsation cardiaque normale Lorsque le tensiomètre détecte un rythme irrégulier au moins deux fois au Pouls cours de la mesure, le symbole de pulsations cardiaques irrégulières ( Pression s’affiche sur l’écran en même temps que les valeurs mesurées. -
Page 42
1. Description de l’appareil Indicateur couleur du niveau de pression artérielle Si la pression systolique ou diastolique se situe au-dessus de la plage standard (135 mmHg pour la pression artérielle systolique et/ou 85 mmHg pour la pression artérielle diastolique), l’indicateur couleur du niveau de pression artérielle s’allume en orange lors de l’affichage du résultat de mesure. -
Page 43: Préparation
2. Préparation 2.1 Installation des piles Retirer le couvercle des piles. Insérer 4 piles « AA » comme indiqué dans le compartiment des piles. Remettre le couvercle des piles. Remarques : • Si le symbole de faiblesse des piles ( ) s’affiche, arrêter l’appareil, puis remplacer toutes les piles simultanément.
-
Page 44: Réglage De La Date Et De L’heure
2. Préparation Ouvrir la page de garde arrière pour lire ce qui suit : La lettre sur la page de garde arrière correspond à celle de la page du corps de texte. 2.2 Réglage de la date et de l’heure Régler le tensiomètre sur la date et l’heure correctes avant de prendre une mesure pour la première fois.
-
Page 45: Utilisation De L’appareil
• La pression artérielle peut être différente entre le bras droit et le bras gauche et les valeurs mesurées de la pression artérielle pourront par conséquent être également différentes. OMRON recommande de toujours utiliser le même bras pour la mesure. Si les valeurs mesurées aux deux bras sont trop…
-
Page 46: Comment S’asseoir Correctement
3. Utilisation de l’appareil 3.2 Comment s’asseoir correctement Il est important d’être détendu et assis confortablement, à une température ambiante agréable, pour prendre une mesure. Ne pas manger, consommer de l’alcool ou de la caféine, fumer ou faire du sport 30 minutes avant la mesure. •…
-
Page 47: Réalisation D’une Mesure
3. Utilisation de l’appareil 3.3 Réalisation d’une mesure Remarques : • Pour annuler une mesure, appuyer sur le bouton START/STOP pour dégonfler le brassard. • Rester immobile pendant la mesure. Le tensiomètre est conçu pour prendre des mesures et stocker en mémoire les valeurs des mesures de deux personnes utilisant les ID D’UTILISATEUR 1 et 2.
-
Page 48
3. Utilisation de l’appareil Retirer le brassard. Appuyer sur le bouton START/STOP pour arrêter le tensiomètre. Le tensiomètre enregistre automatiquement la mesure en mémoire. Il s’arrête automatiquement après 2 minutes. Remarque : attendre 2-3 minutes avant d’effectuer une autre mesure. Ce temps d’attente entre les mesures permet aux artères de reprendre leur fonctionnement normal. -
Page 49: Utilisation De La Fonction De Mémoire
3. Utilisation de l’appareil 3.4 Utilisation de la fonction de mémoire Le tensiomètre enregistre automatiquement le résultat de 100 séries maximum pour chaque utilisateur (1 et 2). Il calcule également une moyenne d’après les 3 dernières mesures prises dans les 10 minutes. Remarques : •…
-
Page 50
3. Utilisation de l’appareil Pour afficher la valeur moyenne Sélectionner votre ID UTILISATEUR (1 ou 2). Appuyer sur le bouton et le maintenir enfoncé pendant plus de 3 secondes. Remarques : • Si la mesure précédente a été prise sans avoir réglé la date et l’heure, la valeur moyenne n’est pas calculée. -
Page 51
3. Utilisation de l’appareil Pour afficher la valeur moyenne hebdomadaire L’appareil calcule et affiche les moyennes hebdomadaires des mesures réalisées le matin et le soir sur 8 semaines pour chaque utilisateur. Remarque : la semaine commence le dimanche à 2:00. Sélectionner votre ID UTILISATEUR (1 ou 2). -
Page 52
3. Utilisation de l’appareil Remarque : si aucun résultat de mesure n’est enregistré dans la mémoire, l’écran de droite est affiché. Moyenne hebdomadaire du matin Mesures du matin Il s’agit de la moyenne des mesures réa- Dimanche Lundi Mardi Mercredi Jeudi Vendredi Samedi… -
Page 53
3. Utilisation de l’appareil Pour supprimer toutes les valeurs enregistrées dans la mémoire Les valeurs enregistrées en mémoire sont supprimées par ID D’UTILISATEUR. Sélectionner votre ID UTILISATEUR (1 ou 2). Appuyer sur le bouton Mémoire lorsque le symbole de mémoire ( ) s’affiche. Tout en le maintenant enfoncé, appuyer sur le bouton START/STOP pendant plus de 3 secondes. -
Page 54: Messages D’erreur Et Dépannage
4. Messages d’erreur et dépannage 4.1 Messages d’erreur Affichage Cause Solution Retirer le brassard. Attendre 2-3 minutes, puis prendre une autre mesure. Détection de pulsations cardiaques irrégulières. Répéter les étapes de la section 3.3. Si cette erreur persiste, contacter votre médecin. Lire attentivement et répéter les étapes de Mouvement lors d’une mesure.
-
Page 55
Mouvement lors d’une mesure. Se reporter à la section 3.3. Retirer tous les vêtements qui gênent le brassard. Les vêtements gênent le brassard. Se reporter à la section 3.1. Contacter votre détaillant ou votre Erreur du dispositif. revendeur OMRON. -
Page 56: Dépannage
4. Messages d’erreur et dépannage 4.2 Dépannage Problème Cause Solution Poser et serrer le brassard. Le brassard n’est pas suffisamment serré. Se reporter à la section 3.1. Rester immobile et ne pas parler Le patient a bougé ou parlé pendant la mesure. La mesure est extrêmement élevée pendant la mesure.
-
Page 57
Se reporter à la section 2.1. • Appuyer sur le bouton START/STOP et répéter la mesure. • Remplacer les piles usagées par des neuves. Autres problèmes. Si le problème persiste, contacter votre détaillant ou votre revendeur OMRON. -
Page 58: Maintenance Et Stockage
• Toute modification non autorisée par le fabricant annulera la garantie utilisateur. Ne pas démonter ou tenter de réparer l’appareil ou ses composants. Consulter un détaillant ou un revendeur OMRON. Étalonnage et entretien •…
-
Page 59: Stockage
5. Maintenance et stockage 5.2 Stockage Conserver l’appareil dans son étui de rangement lorsqu’il n’est pas utilisé. Débrancher la prise de gonflage de la prise à air. Plier délicatement le tuyau à air dans le brassard. Remarque : ne pas plier excessivement le tuyau à air. Placer le tensiomètre et le brassard dans l’étui de rangement.
-
Page 60: Accessoires Médicaux En Option
5. Maintenance et stockage 5.3 Accessoires médicaux en option (dans le cadre de la directive CE sur les dispositifs médicaux 93/42/CEE) Brassard Transformateur de courant alternatif Circonférence du bras comprise entre 22 et 42 cm Brassard Intelli L-9911730-8 Adaptateur S-9515336-9 Adaptateur Royaume-Uni 9983666-5 (Modèle : HEM-FL31)
-
Page 61
5. Maintenance et stockage Utilisation de l’adaptateur secteur optionnel Introduire la fiche de l’adapta- teur secteur dans la prise pour l’adaptateur secteur située à l’arrière de l’appareil. Brancher l’adaptateur secteur sur une prise électrique. Pour débrancher l’adaptateur secteur, le déconnecter d’abord de la prise électrique, puis retirer la fiche de l’adaptateur secteur de l’unité… -
Page 62: Spécifications
6. Spécifications Description du produit Tensiomètre automatique Modèle OMRON M6 Comfort (HEM-7321-E) Affichage Affichage numérique LCD Méthode de mesure Méthode oscillométrique Plage de mesure Pression : 0 à 299 mmHg Pouls : 40 à 180 pulsations/min. Pression : ± 3 mmHg Précision…
-
Page 63
Partie 1 : Exigences générales et Partie 3 : Exigences complémentaires concernant les systèmes électromécaniques de mesure de la pression artérielle. • Cet appareil OMRON est fabriqué selon le système de qualité strict d’OMRON HEALTHCARE Co. Ltd., Japon. Le composant-clé des appareils OMRON, c’est-à-dire… -
Page 64
électromagnétiques ainsi que les niveaux maximum d’émissions électromagné- tiques pour les dispositifs médicaux. Ce dispositif médical fabriqué par OMRON HEALTHCARE est conforme à cette norme EN60601-1-2:2007 tant pour l’immunité que pour les émissions. Il importe toutefois d’observer des précautions spéciales : •… -
Page 65: Garantie
Ce produit est garanti par OMRON pour une période de 3 ans après la date d’achat. La qualité de la fabrication, de la main d’œuvre et des matériaux est garantie par OMRON. Pendant cette période de garantie, OMRON réparera ou remplacera le produit défectueux ou tout pièce défectueuse sans facturer la main d’œuvre ni les pièces.
-
Page 66: Informations Utiles Sur La Pression Artérielle
8. Informations utiles sur la pression artérielle Qu’est-ce que la pression artérielle ? La pression artérielle est une mesure de la pression exercée par le sang sur les parois des artères. La pression artérielle change constamment tout au long du cycle cardiaque. La pression la plus élevée au cours du cycle est appelée pression artérielle systolique ;…
-
Page 68
Inhalt Vielen Dank, dass Sie sich für das automatische Blutdruckmessgerät OMRON M6 Comfort entschieden haben. Das OMRON M6 Comfort ist ein kompaktes, vollautomatisches Blutdruckmessgerät, das auf dem oszillometrischen Prinzip beruht. Es misst Ihren Blutdruck und die Pulsfrequenz einfach und schnell. -
Page 69: Wichtige Sicherheitsinformationen
Wichtige Sicherheitsinformationen Warnung: Zeigt eine möglicherweise gefährliche Situation an, die wenn sie nicht vermieden wird, zum Tod oder zu sehr schweren Verletzungen führen kann. (Allgemeine Verwendung) Schwangere, die an Präeklampsie leiden, und Patienten mit diagnostizierter Arrhythmie oder Arteriosklerose sollten vor der Anwendung des Geräts ärztlichen Rat einholen. Das Messgerät nicht an einem verletzten Arm oder an einem Arm, der behandelt wird, verwenden.
-
Page 70
Wichtige Sicherheitsinformationen Personen mit schweren Durchblutungsstörungen oder Blutkrankheiten sollten vor Verwendung des Geräts ärztlichen Rat einholen, da das Aufpumpen der Manschette eine leichte innere Blutung mit Bildung eines Hämatoms verursachen kann. Wenn während der Messung Anomalien auftreten, sofort die Manschette abnehmen. Das Messgerät nicht bei Neugeborenen, Kleinkindern oder Personen verwenden, die ihren Willen nicht kundtun können. -
Page 71
Wichtige Sicherheitsinformationen Wischen Sie Staub vom Netzstecker ab. Ziehen Sie den Netzstecker ab, wenn das Produkt für einen längeren Zeitraum nicht verwendet wird. Ziehen Sie den Netzstecker ab, bevor Sie mit Wartungsarbeiten beginnen. Verwenden Sie ausschließlich das originale, für dieses Gerät entwickelte Netzteil. Die Verwendung eines nicht dafür zugelassenen Netzteils kann das Gerät beschädigen und/oder zu Gefahren im Zusammenhang mit dem Gerät führen. -
Page 72: Übersicht Über Das Messgerät
1. Übersicht über das Messgerät Öffnen Sie die hintere Umschlagseite, um Folgendes zu lesen: Die Buchstaben in der hinteren Umschlagseite korrespondieren mit denen auf den Seiten des Innenteils. Messgerät Anzeige Anzeige Speichersymbol Leuchte der BENUTZER-ID-Symbol Manschettensitzkontrolle Mittelwertsymbol Speichertaste Systolischer Blutdruck Wochenmittelwert-Taste Diastolischer Blutdruck Taste START/STOP…
-
Page 73
1. Übersicht über das Messgerät Anzeigesymbole Symbol Unregelmäßiger Herzschlag ( Normaler Herzschlag Wenn das Messgerät während der Messung zwei Mal oder öfter einen Puls unregelmäßigen Herzschlag erkennt, erscheint das Symbol für Blutdruck unregelmäßigen Herzschlag ( ) auf der Anzeige mit den Messwerten. Ein unregelmäßiger Herzschlag ist definiert als ein Herzrhythmus, der Unregelmäßiger Herzschlag Kurz Lang… -
Page 74
1. Übersicht über das Messgerät Farbanzeige für Blutdruck Wenn Ihr systolischer oder diastolischer Blutdruck über dem Normalbereich liegt (135 mmHg für den systolischen Blutdruck und/oder 85 mmHg für den diastolischen Blutdruck), leuchtet die Farbanzeige für den Blutdruck orange, während das Messergebnis angezeigt wird. -
Page 75: Vorbereitung
2. Vorbereitung 2.1 Einlegen der Batterien Entfernen Sie die Batterieabdeckung. Legen Sie 4 „AA“-Batterien wie gezeigt in das Batteriefach ein. Anbringen der Batterieabdeckung. Hinweise: • Schalten Sie das Messgerät aus und tauschen Sie alle Batterien gleichzeitig aus, wenn das Symbol Batterieladestand ( ) auf der Anzeige erscheint.
-
Page 76: Datum Und Uhrzeit Einstellen
2. Vorbereitung Öffnen Sie die hintere Umschlagseite, um Folgendes zu lesen: Die Buchstaben in der hinteren Umschlagseite korrespondieren mit denen auf den Seiten des Innenteils. 2.2 Datum und Uhrzeit einstellen Bevor das Messgerät zum ersten Mal verwendet wird, das richtige Datum und die Uhrzeit einstellen. Drücken Sie die Taste zur Einstellung von Datum/Uhrzeit ( Das Jahr blinkt in der…
-
Page 77: Verwendung Des Messgerätes
• Der Blutdruck kann sich zwischen dem rechten und linken Arm unterscheiden, daher können auch die gemessenen Blutdruckwerte unterschiedlich sein. OMRON empfiehlt daher, immer denselben Arm für Messungen zu verwenden. Falls sich die Werte zwischen beiden Armen sehr deutlich unterscheiden,…
-
Page 78: So Sitzen Sie Richtig
3. Verwendung des Messgerätes 3.2 So sitzen Sie richtig Zur Messung müssen Sie entspannt und bequem sitzen, bei angenehmer Raumtemperatur. Die letzten 30 Minuten vor der Messung nicht baden, keinen Alkohol oder Kaffee trinken, nicht rauchen, keinen Sport treiben und keine Mahlzeit zu sich nehmen.
-
Page 79: Eine Messung Vornehmen
3. Verwendung des Messgerätes 3.3 Eine Messung vornehmen Hinweise: • Drücken Sie zum Abbrechen einer Messung die START/STOP-Taste, um die Luft in der Manschette abzulassen. • Halten Sie während der Messung still. Das Messgerät ist dafür konzipiert, Messungen durchzuführen und die Messwerte für 2 Personen, die die BENUTZER-ID 1 und 2 verwenden, im Speicher zu speichern.
-
Page 80
3. Verwendung des Messgerätes Nehmen Sie die Manschette ab. Drücken Sie die Taste START/STOP, um das Messgerät auszuschalten. Das Messgerät speichert das Messergebnis automatisch in seinem Speicher. Er schaltet sich automatisch nach 2 Minuten aus. Hinweis: Vor der nächsten Messung mindestens 2-3 Minuten warten. Dadurch können die Arterien wieder zum Zustand vor der Messung zurückkehren. -
Page 81: Benutzung Der Speicherfunktion
3. Verwendung des Messgerätes 3.4 Benutzung der Speicherfunktion Das Messgerät speichert automatisch bis zu 100 Messergebnisse für jeden Benutzer (1 und 2). Das Gerät kann auch einen Mittelwert berechnen, der auf den letzten 3 innerhalb von 10 Minuten gemessenen Werten basiert. Hinweise: •…
-
Page 82
3. Verwendung des Messgerätes Anzeige des Mittelwerts Wählen Sie Ihre BENUTZER-ID (1 oder 2). Drücken Sie die Taste , und halten Sie sie mindestens 3 Sekunden gedrückt. Hinweise: • Wenn der vorherige Messwert ohne Einstellung von Datum und Uhrzeit aufgenommen wurde, wird der Mittelwert nicht berechnet. •… -
Page 83
3. Verwendung des Messgerätes Anzeige der wöchentlichen Mittelwerte Das Messgerät berechnet für jeden Benutzer wöchentliche Mittelwerte aus den am Morgen und am Abend innerhalb der letzten 8 Wochen durchgeführten Messungen und zeigt diese an. Hinweis: Die Woche beginnt am Sonntag um 2:00 Uhr morgens. Wählen Sie Ihre BENUTZER-ID (1 oder 2). -
Page 84
3. Verwendung des Messgerätes Hinweis: Falls im Speicher keine Messwerte gespeichert sind, wird die Anzeige rechts angezeigt. Wöchentlicher Morgenmittelwert Messungen vom Morgen Das ist der Mittelwert für Messungen, Sonntag Montag Dienstag Mittwoch Donnerstag Freitag Samstag 04:00 die am Morgen (4:00 Uhr bis 11:59 Uhr) Erste Messung am Messung zwischen Sonntag und Samstag… -
Page 85
3. Verwendung des Messgerätes Löschen aller gespeicherten Werte Die gespeicherten Werte werden abhängig von der BENUTZER-ID gelöscht. Wählen Sie Ihre BENUTZER-ID (1 oder 2). Drücken Sie die Speichertaste, während das Speichersymbol ( ) angezeigt wird. Halten Sie diese gedrückt und drücken Sie dabei die Taste START/STOP mindestens 3 Sekunden lang. -
Page 86: Fehlermeldungen Und Fehlersuche Und -Behebung
4. Fehlermeldungen und Fehlersuche und -behebung 4.1 Fehlermeldungen und Störungsbehebung Anzeige Ursache Lösung Nehmen Sie die Manschette ab. Warten Sie 2-3 Minuten und wiederholen Sie dann die Messung. Unregelmäßige Herzschläge wurden erkannt. Wiederholen Sie die Schritte aus Abschnitt 3.3. Falls dieser Fehler weiterhin auftritt, so wenden Sie sich an Ihren Arzt.
-
Page 87
Bewegung bei der Messung. Details dazu finden Sie in Abschnitt 3.3. Entfernen Sie sämtliche Kleidung, die die Manschette behindert. Kleidung behindert die Manschette. Details dazu finden Sie in Abschnitt 3.1. Wenden Sie sich an Ihren OMRON- Gerätefehler. Einzelhändler oder Vertreter. -
Page 88: Fehlersuche Und -Behebung
4. Fehlermeldungen und Fehlersuche und -behebung 4.2 Fehlersuche und -behebung Problem Ursache Lösung Legen Sie die Manschette eng an. Die Manschette sitzt zu locker. Details dazu finden Sie in Abschnitt 3.1. Halten Sie still und sprechen Sie nicht Bewegung oder Sprechen bei während der Messung.
-
Page 89
Polarität einsetzen. eingesetzt worden. Details dazu finden Sie in Abschnitt 2.1. • Die Taste START/STOP drücken und die Messung wiederholen. • Die Batterien gegen neue auswechseln. Andere Probleme. Falls das Problem weiterhin besteht, wenden Sie sich an Ihren OMRON-Einzelhändler oder Vertreter. -
Page 90: Wartung Und Lagerung
• Durch Veränderungen oder Modifikationen, die vom Hersteller nicht genehmigt sind, wird die Benutzergarantie ungültig. Zerlegen Sie das Messgerät und seine Komponenten nicht und versuchen Sie nicht, diese selbst zu reparieren. Wenden Sie sich an Ihren OMRON-Einzelhändler oder Vertreter. Kalibrierung und Wartung •…
-
Page 91: Lagerung
5. Wartung und Lagerung 5.2 Lagerung Das Messgerät im Aufbewahrungsbehälter lassen, wenn es nicht verwendet wird. Ziehen Sie den Luftschlauchstecker aus der Luftanschlussbuchse heraus. Legen Sie den Luftschlauch vorsichtig gefaltet in die Manschette. Hinweis: Biegen Sie den Luftschlauch nicht übermäßig. Legen Sie das Messgerät und die Manschette in den Aufbewahrungsbehälter.
-
Page 92: Medizinisches Optionales Zubehör
5. Wartung und Lagerung 5.3 Medizinisches optionales Zubehör (im Rahmen der EG-Richtlinie für medizinische Geräte 93/42/EWG) Manschette Netzteil Armumfang 22 – 42 cm Netzteil S-9515336-9 Netzteil Vereinigtes Intelli Cuff L-9911730-8 (Modell: HEM-FL31) Königreich 9983666-5…
-
Page 93
5. Wartung und Lagerung Verwendung des optionalen Netzteils Den Netzteilstecker in den Netzteilanschluss auf der Rückseite des Messgerätes einstecken. Schließen Sie das Netzteil an einer Steckdose an. Zum Trennen des Netzteils sollte zuerst der Netzstecker des Netzteils aus der Steckdose und dann der Netzteilstecker vom Messgerät abgezogen werden. -
Page 94: Technische Daten
6. Technische Daten Produktbeschreibung Automatisches Blutdruckmessgerät Modell OMRON M6 Comfort (HEM-7321-E) Anzeige Digitale LCD-Anzeige Messmethode Oszillometrische Methode Messbereich Druck: 0 bis 299 mmHg Puls: 40 bis 180 Schläge/Min. Druck: ±3 mmHg Genauigkeit Puls: ±5 % des angezeigten Werts Aufpumpen Durch Elektro-Pumpe und das Fuzzy-Logik-Kontrollsystem…
-
Page 95
Blutdruckmessgeräte Teil 1: Allgemeine Anforderungen und Teil 3: Ergänzende Anforderungen für elektromechanische Blutdruckmessgeräte. • Dieses OMRON-Messgerät wurde unter Einhaltung des strengen Qualitätssystems von OMRON HEALTHCARE Co. Ltd., Japan, hergestellt. Das Herzstück für OMRON- Messgeräte, der Drucksensor, wird in Japan hergestellt. -
Page 96
Ziel, unsichere Produktsituationen zu vermeiden. Diese Norm regelt die Stufen der Immunität gegenüber elektromagnetischen Störungen und die maximalen elektromagnetischen Emissionswerte für medizinische Geräte. Dieses von OMRON HEALTHCARE hergestellte medizinische Gerät erfüllt die Norm EN60601-1-2:2007 sowohl in Bezug auf die Immunität als auch in Bezug auf Emissionen. -
Page 97: Gewährleistung
Sorgfalt hergestellt. Es wurde entwickelt, um Sie voll zufrieden zu stellen, insofern es korrekt betrieben und gewartet wird wie in der Gebrauchsanweisung beschrieben. OMRON übernimmt für dieses Produkt eine Garantie für die Zeitdauer von 3 Jahren nach dem Kauf. OMRON garantiert die korrekte Konstruktion, Fertigung und Materialien für dieses Produkt. Während dieser Garantiedauer übernimmt OMRON, ohne Gebühren für Arbeiten oder Teile zu erheben, die Reparatur bzw.
-
Page 98: Einige Nützliche Informationen Über Den Blutdruck
8. Einige nützliche Informationen über den Blutdruck Blutdruck — was ist das eigentlich? Der Blutdruck ist die Kraft, mit der der Blutstrom gegen die Arterienwände drückt. Der arterielle Druck ändert sich im Verlauf des Herzzyklus ständig. Der höchste Druckwert im Zyklus heißt systolischer Blutdruck; der niedrigste wird als diastolischer Blutdruck bezeichnet.
-
Page 100
Indice Grazie per aver acquistato il misuratore automatico della pressione arteriosa OMRON M6 Comfort. OMRON M6 Comfort è un misuratore di pressione compatto, completamente automatico, il cui funzionamento si basa sul principio oscillometrico. L’apparecchio misura in modo semplice e rapido la pressione arteriosa e la frequenza delle pulsazioni. Grazie alla tecnologia avanzata “IntelliSense”, il dispositivo consente il comodo gonfiaggio controllato,… -
Page 101: Informazioni Importanti Sulla Sicurezza
Informazioni importanti sulla sicurezza Avvertenza: indica una situazione potenzialmente pericolosa che, se non evitata, può causare lesioni gravi o la morte. (Utilizzo generale) Consultare il medico curante prima di utilizzare l’apparecchio in gravidanza (inclusi i casi di preeclampsia) o in presenza di una diagnosi di aritmia o arteriosclerosi.
-
Page 102
Informazioni importanti sulla sicurezza Le persone con gravi problemi o disturbi circolatori devono consultare un medico prima di utilizzare il dispositivo, in quanto il gonfiaggio del bracciale può causare lievi emorragie interne, con conseguente formazione di lividi. Se si dovessero riscontrare anomalie durante la misurazione, rimuovere il bracciale. Non usare il dispositivo su pazienti neonatali o persone che non sono in grado di esprimere le proprie intenzioni. -
Page 103
Informazioni importanti sulla sicurezza Spolverare la spina. Scollegare la spina se il prodotto non verrà utilizzato per un periodo di tempo prolungato. Scollegare la spina prima di iniziare le attività di manutenzione. Utilizzare esclusivamente l’alimentatore originale progettato per questo dispositivo. L’uso di alimentatori non supportati può… -
Page 104: Informazioni Sul Dispositivo
1. Informazioni sul dispositivo Aprire la quarta pagina di copertina per leggere quanto riportato di seguito: Le lettere dell’alfabeto riportate nella quarta pagina di copertina corrispondono a quelle della pagina interna. Misuratore Display Display ndicatore della memoria Spia della guida posizionamento Indicatore ID UTENTE bracciale Indicatore valore medio…
-
Page 105
1. Informazioni sul dispositivo Indicatori visualizzati sul display Indicatore di battito cardiaco irregolare ( Battito cardiaco normale Quando il misuratore rileva un ritmo irregolare per due o più volte durante la Pulsazione misurazione, sul display viene visualizzato l’indicatore di battito cardiaco Pressione irregolare ( ), insieme ai risultati della misurazione. -
Page 106
1. Informazioni sul dispositivo Indicatore colorato della pressione arteriosa Se la pressione sistolica o diastolica esula dall’intervallo standard (135 mmHg per la pressione sistolica e/o 85 mmHg per la pressione diastolica), l’indicatore colorato della pressione arteriosa si illumina in arancione quando viene visualizzato il risultato della misurazione. -
Page 107: Preparativi
2. Preparativi 2.1 Installazione della batteria Rimuovere il coperchio del vano batterie. Inserire nel vano batterie 4 batterie “AA” come indicato. Richiudere il coperchio del vano batterie. Note: • Se sul display viene visualizzato il simbolo di batteria in esaurimento ( ), spegnere il misuratore, quindi sostituire contemporaneamente tutte le batterie.
-
Page 108: Impostazione Di Data E Ora
2. Preparativi Aprire la quarta pagina di copertina per leggere quanto riportato di seguito: Le lettere dell’alfabeto riportate nella quarta pagina di copertina corrispondono a quelle della pagina interna. 2.2 Impostazione di data e ora Impostare l’ora e la data corrette sul misuratore prima di eseguire la prima misurazione. Premere il pulsante per l’impostazione di data e ora ( L’anno lampeggia sull’indicatore di data e ora…
-
Page 109: Uso Del Dispositivo
• La pressione arteriosa può risultare differente se misurata sul braccio destro o sinistro, pertanto anche i valori della misurazione possono risultare differenti. OMRON consiglia di utilizzare sempre lo stesso braccio per la misurazione. Se i valori presentano delle differenze sostanziali tra le due braccia, rivolgersi al medico curante…
-
Page 110: Come Sedersi Correttamente
3. Uso del dispositivo 3.2 Come sedersi correttamente Per eseguire la misurazione, è necessario stare seduti in posizione comoda e rilas- sata, a una temperatura ambiente confortevole. Non fare il bagno, non assumere bevande alcoliche o a base di caffeina, non fumare, svolgere attività fisica né man- giare nei 30 minuti che precedono la misurazione.
-
Page 111: Misurazione
3. Uso del dispositivo 3.3 Misurazione Note: • Per annullare una misurazione, premere il pulsante START/STOP per eliminare l’aria presente nel bracciale. • Durante la misurazione, rimanere fermi. Il misuratore è progettato per eseguire le misurazioni e conservare in memoria i risultati relativi a 2 persone che utilizzano rispettivamente l’ID UTENTE 1 e l’ID UTENTE 2.
-
Page 112
3. Uso del dispositivo Rimuovere il bracciale. Premere il pulsante START/STOP per spegnere il misuratore. Il misuratore conserva automaticamente in memoria il risultato della misurazione. L’apparecchio si spegne automaticamente dopo 2 minuti. Nota: attendere 2-3 minuti prima di eseguire una nuova misurazione. Tale attesa tra le misurazioni consente alle arterie di tornare alla condizione precedente la misurazione. -
Page 113: Uso Della Funzione Di Memoria
3. Uso del dispositivo 3.4 Uso della funzione di memoria Il misuratore conserva automaticamente in memoria un massimo di 100 set di risultati per ciascun utente (1 e 2). Inoltre, il dispositivo calcola un valore medio in base ai risultati delle ultime 3 misurazioni effettuate nell’arco di 10 minuti.
-
Page 114
3. Uso del dispositivo Visualizzazione del valore medio Selezionare il proprio ID UTENTE (1 o 2). Premere e mantenere premuto per più di 3 secondi il pulsante Note: • Se la misurazione precedente è stata effettuata senza che siano state impostate la data e l’ora, il valore medio non viene calcolato. -
Page 115
3. Uso del dispositivo Visualizzazione del valore settimanale medio Questo misuratore calcola e visualizza la media settimanale relativa alle misurazioni eseguite al mattino e alla sera, per un massimo di 8 settimane per ciascun utilizzatore. Nota: la settimana ha inizio di domenica alle 2:00 del mattino. Selezionare il proprio ID UTENTE (1 o 2). -
Page 116
3. Uso del dispositivo Nota: se la memoria non contiene alcun risultato di misurazione, viene visualizzata la schermata raffigurata sulla destra. Media settimanale mattutina Misurazioni mattutine Si tratta della media delle misurazioni Domenica Lunedì Martedì Mercoledì Giovedì Venerdì Sabato 4:00 effettuate di mattina (dalle ore 04:00 alle Prima misurazione Misurazione… -
Page 117
3. Uso del dispositivo Cancellazione di tutti i valori conservati in memoria I valori conservati in memoria si eliminano per ID UTENTE. Selezionare il proprio ID UTENTE (1 o 2). Premere il pulsante Memoria mentre viene visualizzato l’indicatore della memoria ( ). Continuando a tenere premuto il pulsante, premere il pulsante START/STOP per più… -
Page 118: Messaggi Di Errore E Risoluzione Dei Problemi
4. Messaggi di errore e risoluzione dei problemi 4.1 Messaggi di errore Display Causa Soluzione Rimuovere il bracciale. Attendere 2-3 minuti, quindi eseguire nuovamente la misurazione. Rilevato battito cardiaco irregolare. Ripetere le fasi descritte nella sezione 3.3. Se l’errore persiste, contattare il medico curante. Leggere attentamente e ripetere le fasi Movimenti durante la misurazione.
-
Page 119
Movimenti durante la misurazione. Fare riferimento alla sezione 3.3. Togliere gli indumenti che interferiscono con il bracciale. Gli indumenti interferiscono con il bracciale. Fare riferimento alla sezione 3.1. Contattare il rivenditore o il distributore Errore del dispositivo. OMRON. -
Page 120: Risoluzione Dei Problemi
4. Messaggi di errore e risoluzione dei problemi 4.2 Risoluzione dei problemi Problema Causa Soluzione Applicare il bracciale in modo da Il bracciale non è stato applicato in farlo aderire bene. modo sufficientemente aderente. Fare riferimento alla sezione 3.1. Rimanere fermi e non parlare Il risultato della misurazione è…
-
Page 121
Le batterie sono state inserite in (+/-) corretta. modo errato. Fare riferimento alla sezione 2.1. • Premere il pulsante START/STOP e ripetere la misurazione. • Sostituire le batterie con batterie nuove. Altri problemi. Se il problema persiste, contattare il rivenditore o il distributore OMRON. -
Page 122: Manutenzione E Conservazione
• La precisione di questo dispositivo è stata verificata con cura; l’apparecchio è progettato per durare a lungo. • Per garantirne la precisione e il funzionamento corretto, si consiglia di far controllare il dispositivo ogni 2 anni. Contattare il rivenditore o il distributore OMRON.
-
Page 123: Conservazione
5. Manutenzione e conservazione 5.2 Conservazione Quando non si usa il dispositivo, conservarlo nell’apposita custodia. Scollegare il tubo dell’aria dalla rispettiva presa. Piegare con attenzione il tubo dell’aria all’interno del bracciale. Nota: non piegare eccessivamente il tubo dell’aria. Conservare il misuratore e il bracciale nella custodia.
-
Page 124: Accessori Medicali Opzionali
5. Manutenzione e conservazione 5.3 Accessori medicali opzionali (secondo quanto previsto dalla Direttiva UE sui dispositivi medici 93/42/CEE) Bracciale Alimentatore Circonferenza braccio 22-42 cm Bracciale Intelli Cuff L-9911730-8 Alimentatore S-9515336-9 Alimentatore per il Regno Unito 9983666-5 (Modello: HEM-FL31)
-
Page 125
5. Manutenzione e conservazione Uso dell’alimentatore CA opzionale Inserire la spina per l’alimen- tatore CA nella presa per l’ali- mentatore posta sul retro del misuratore. Inserire l’alimentatore CA in una presa elettrica. Per scollegare l’alimentatore CA, estrarlo innanzitutto dalla presa elettrica, quindi rimuovere la spina dell’alimentatore dal misuratore. -
Page 126: Caratteristiche Tecniche
6. Caratteristiche tecniche Descrizione del prodotto Misuratore automatico della pressione arteriosa Modello OMRON M6 Comfort (HEM-7321-E) Display Display LCD digitale Metodo di misurazione Metodo oscillometrico Gamma di misurazione Pressione: da 0 a 299 mmHg Pulsazioni: da 40 a 180 battiti/min.
-
Page 127
EN 1060 sugli sfigmomanometri non invasivi, Parte 1: Requisiti generali e Parte 3: Requisiti supplementari per sistemi elettromeccanici di misurazione della pressione arteriosa. • Questo dispositivo OMRON è realizzato in base ai severi criteri di qualità adottati da OMRON HEALTHCARE Co. Ltd., Giappone. Il componente principale dei dispositivi… -
Page 128
Questo dispositivo medico prodotto da OMRON HEALTHCARE è conforme agli standard EN60601-1-2:2007 per quanto concerne sia l’immunità che le emissioni. -
Page 129: Garanzia
Il prodotto è garantito da OMRON per un periodo di 3 anni a partire dalla data di acquisto. La correttezza di realizzazione, la competenza tecnica e i materiali utilizzati per questo prodotto sono garantiti da OMRON. Nell’ambito del periodo di garanzia, OMRON riparerà…
-
Page 130: Informazioni Utili Sulla Pressione Arteriosa
8. Informazioni utili sulla pressione arteriosa Che cos’è la pressione arteriosa? La pressione arteriosa è una misura della forza esercitata dallo scorrimento del sangue contro le pareti delle arterie. La pressione arteriosa cambia costantemente nel corso del ciclo cardiaco. La pressione più elevata nel ciclo è detta Pressione sistolica, mentre quella più bassa è detta Pressione diastolica.
-
Page 131
Fra rança çais Deutsc tsch Ita tali liano Español Neder erland Monitor de presión arterial automático Automatic Blood Pressure Monitor Русск сский Modelo M6 Comfort Model M6 Comfort Tü Türkç rkçe Manual de instrucciones Instruction Manual IM-HEM-7321-E-01-08/2013 IM-HEM-7321-E-01-08/2013 2298869-1A 2298869-1A… -
Page 132
Gracias por comprar el Monitor de presión arterial automático OMRON M6 Comfort. El OMRON M6 Comfort es un monitor de presión arterial compacto y totalmente automático cuyo funcionamiento se basa en el principio oscilométrico. Mide la presión arterial y el pulso de manera sencilla y rápida. -
Page 133: Información Importante Sobre La Seguridad
Información importante sobre la seguridad Advertencia: Indica una posible situación de riesgo que, si no se evita, puede provocar la muerte o graves lesiones. (Uso general) Consulte a su médico antes de utilizar el dispositivo en caso de embarazo y de que padezca pre-eclampsia, o en caso de que le hayan diagnosticado arritmia o arteriosclerosis.
-
Page 134
Información importante sobre la seguridad (Uso general) Consulte siempre a su médico. Resulta peligroso realizar un autodiagnóstico y ponerse un tratamiento a partir de los resultados de la medición. Las personas con problemas graves de flujo sanguíneo o con enfermedades hematológicas deberían consultar a un médico antes de utilizar este dispositivo, ya que el inflado del manguito puede producir una pequeña hemorragia interna que puede tener como consecuencia la aparición de hematomas. -
Page 135
Información importante sobre la seguridad Limpie el polvo del enchufe. Desconecte el enchufe si el producto no va a utilizarse durante un periodo de tiempo prolongado. Desconecte el enchufe antes de realizar labores de mantenimiento. Utilice únicamente el adaptador de CA original diseñado para este dispositivo. El uso de otros adaptadores puede dañar el dispositivo o resultar peligroso. -
Page 136: Conozca Su Dispositivo
1. Conozca su dispositivo Abra la página de la cubierta trasera donde podrá leer la indicación siguiente: Las letras que aparecen en la página de la cubierta trasera corresponden a las letras de las páginas centrales. Monitor Pantalla Pantalla Símbolo de memoria Símbolo de ID DE USUARIO Luz de guía para el ajuste del Símbolo de valor promedio…
-
Page 137
1. Conozca su dispositivo Símbolos en pantalla Símbolo de latido cardíaco arrítmico ( Latido cardíaco normal Cuando el monitor detecta un ritmo irregular dos o más veces durante la Pulso medición, aparecerá en la pantalla el símbolo de latido cardíaco arrítmico Presión arterial ) junto a los valores de medición. -
Page 138
1. Conozca su dispositivo Indicador de color de presión arterial Si tanto su presión diastólica como sistólica están por encima del rango normal (135 mmHg para la presión arterial sistólica y/o 85 mmHg para la presión arterial diastólica), el indicador de color de presión arterial se iluminará en ámbar cuando el resultado aparezca en la pantalla. -
Page 139: Preparación
2. Preparación 2.1 Instalación de las pilas. Retire la tapa de las pilas. Introduzca 4 pilas “AA” tal como se indica en el compartimento de las pilas. Vuelva a colocar la tapa de las pilas. Notas: • Cuando aparezca el símbolo de pilas bajas ( ) en la pantalla, apague el monitor y sustituya todas las pilas a la vez.
-
Page 140: Ajuste De La Fecha Y La Hora
2. Preparación Abra la página de la cubierta trasera donde podrá leer la indicación siguiente: Las letras que aparecen en la página de la cubierta trasera corresponden a las letras de las páginas centrales. 2.2 Ajuste de la fecha y la hora Ajuste la fecha y la hora correctas en el monitor de presión arterial antes de utilizarlo por primera vez.
-
Page 141: Uso Del Dispositivo
• Es posible que la presión varíe del brazo derecho al izquierdo y, por lo tanto, también pueden ser diferentes los valores de presión arterial medidos. OMRON recomienda que siempre se utilice el mismo brazo para la medición. Si los valores entre los dos brazos varían sustancialmente, confirme con su…
-
Page 142: Cómo Sentarse Correctamente
3. Uso del dispositivo 3.2 Cómo sentarse correctamente Para realizar una medición, deberá estar relajado y sentado cómodamente a una temperatura ambiente agradable. No se bañe, beba alcohol o cafeína, fume, haga ejercicio o coma al menos 30 minutos antes de realizar la medición. •…
-
Page 143: Obtención De Una Lectura
3. Uso del dispositivo 3.3 Obtención de una lectura Notas: • Para cancelar una medición, pulse el botón START/STOP para soltar el aire del manguito. • Quédese quieto durante la medición. El monitor está diseñado para realizar mediciones y guardar en la memoria los valores medidos de 2 personas utilizando el ID de usuario 1 y el ID de usuario 2.
-
Page 144
3. Uso del dispositivo Retire el manguito. Pulse el botón START/STOP para apagar el monitor. El monitor guardará de forma automática el resultado de las mediciones en la memoria. Si olvida apagar el monitor, tras 2 minutos, se apagará automáticamente. Nota: conviene esperar entre 2 y 3 minutos antes de hacer una nueva medición. -
Page 145: Uso De La Función De Memoria
3. Uso del dispositivo 3.4 Uso de la función de memoria El monitor guarda automáticamente los resultados de 100 mediciones para cada usuario (1 y 2). También puede calcular un valor promedio en base a los 3 últimos valores de medición realizados en un intervalo de 10 minutos.
-
Page 146
3. Uso del dispositivo Para visualizar el valor promedio Seleccione su ID DE USUARIO (1 o 2). Pulse y mantenga pulsado el botón menos 3 segundos. Notas: • Si la medición anterior se realizó sin ajustar la fecha y la hora, no podrá calcularse el valor medio. -
Page 147
3. Uso del dispositivo Para visualizar el valor de promedio semanal El monitor calcula y muestra los promedios semanales de las mediciones realizadas por la mañana y por la noche durante 8 semanas para cada usuario. Nota: la semana comienza el domingo a las 2:00. Seleccione su ID DE USUARIO (1 o 2). -
Page 148
3. Uso del dispositivo Nota: si no hay resultados de valores de medición guardados en la memoria, aparecerá la pantalla de la derecha. Valor promedio semanal Mediciones matinales de mañana Domingo Lunes Martes Miércoles Jueves Viernes Sábado 4:00 Es el promedio de las mediciones Primera medición de Medición realizadas por las mañanas… -
Page 149
3. Uso del dispositivo Borrado de todos los valores guardados en la memoria Los valores guardados en la memoria se borran por ID de usuario. Seleccione su ID DE USUARIO (1 o 2). Pulse el botón Memoria mientras aparece el símbolo de memoria ( ). -
Page 150: Mensajes De Error Y Resolución De Problemas
4. Mensajes de error y resolución de problemas 4.1 Mensajes de error Pantalla Causa Solución Retire el manguito. Espere de 2 a 3 minutos y después realice una nueva medición. Detección de latidos arrítmicos. Repita los pasos de la sección 3.3. Si sigue apareciendo este error, consulte a su médico.
-
Page 151
Movimiento durante la medición. Consulte la sección 3.3. Aparte la ropa que interfiera con el manguito. La ropa interfiere con el manguito. Consulte la sección 3.1. Póngase en contacto con su tienda o Error del dispositivo. distribuidor OMRON. -
Page 152: Resolución De Problemas
4. Mensajes de error y resolución de problemas 4.2 Resolución de problemas Problema Causa Solución Coloque el manguito bien ajustado. El manguito está colocado con demasiada holgura. Consulte la sección 3.1. Quédese quieto y no hable durante Se ha movido o ha hablado la medición.
-
Page 153
(+/-) correcta. incorrecta. Consulte la sección 2.1. • Pulse el botón START/STOP y repita la medición. • Sustituya las pilas por otras nuevas. Otros problemas. Si el problema persiste, póngase en contacto con su tienda OMRON o con su distribuidor. -
Page 154: Mantenimiento Y Conservación
• Los cambios o las modificaciones no autorizadas por el fabricante anularán la garantía. No desmonte ni trate de reparar el dispositivo ni sus componentes. Consulte con su tienda o distribuidor OMRON. Calibración y servicio • La precisión de este dispositivo ha sido verificada cuidadosamente y está diseñado para tener una larga vida útil.
-
Page 155: Conservación
5. Mantenimiento y conservación 5.2 Conservación Guarde el dispositivo en su estuche cuando no lo use. Desconecte el tubo de aire de la toma de aire. Enrolle con cuidado el tubo de aire y colóquelo dentro del manguito. Nota: no doble el tubo de aire excesivamente. Guarde el monitor y el manguito en el estuche protector.
-
Page 156: Accesorios Médicos Opcionales
5. Mantenimiento y conservación 5.3 Accesorios médicos opcionales (dentro del marco de la directiva comunitaria 93/42/EEC [Directiva para Productos Sanitarios]) Manguito Adaptador de CA Perímetro de brazo 22-42 cm Manguito Intelli L-9911730-8 Adaptador S-9515336-9 Adaptador para el Reino Unido 9983666-5 (Modelo: HEM-FL31)
-
Page 157
5. Mantenimiento y conservación Uso del adaptador de CA opcional Introduzca la clavija del adaptador de CA en la toma del adaptador de CA de la parte posterior del monitor. Enchufe el adaptador de CA en una toma eléctrica. Para desconectar el adaptador de CA, desenchufe primero el adaptador de CA de la toma eléctrica y retire la clavija del adaptador de CA del monitor. -
Page 158: Especificaciones
6. Especificaciones Descripción del producto Monitor de presión arterial automático Modelo OMRON M6 Comfort (HEM-7321-E) Pantalla Pantalla digital LCD Método de medición Método oscilométrico Rango de medición Presión: de 0 a 299 mmHg Pulso: de 40 a 180 pulsaciones/min. Presión: ±3 mmHg Precisión…
-
Page 159
1: Requisitos generales, y parte 3: Requisitos adicionales para sistemas electromecánicos de medición de la presión arterial. • Este dispositivo OMRON está fabricado bajo el estricto sistema de calidad de OMRON HEALTHCARE Co. Ltd., Japón. El componente principal de los dispositivos… -
Page 160
EN60601-1-2:2007. Este estándar define los niveles de inmunidad a interferencias electromagnéticas, así como los niveles máximos de emisiones electromagnéticas para dispositivos médicos. Este dispositivo médico fabricado por OMRON HEALTHCARE cumple con este estándar EN60601-1-2:2007 tanto para inmunidad como para emisiones. -
Page 161: Garantía
7. Garantía Gracias por adquirir un producto OMRON. Este producto está fabricado con materiales de calidad y su fabricación se ha realizado con total escrupulosidad. Está diseñado para utilizarse en cualquier situación, suponiendo que se manipule correctamente y se realicen las labores de mantenimiento adecuadas como se describe en el manual de instrucciones.
-
Page 162: Informaciones Útiles Acerca De La Presión Arterial
8. Informaciones útiles acerca de la presión arterial ¿Qué es la presión arterial? La presión arterial es una medición de la fuerza ejercida por el flujo sanguíneo contra las paredes de las arterias. La presión arterial varía constantemente durante el transcurso del ciclo cardíaco. El valor máximo de la presión arterial durante el ciclo se denomina presión arterial sistólica;…
-
Page 163
Representante en la UE Scorpius 33, 2132 LR Hoofddorp, PAÍSES BAJOS www.omron-healthcare.com Planta de producción OMRON HEALTHCARE MANUFACTURING VIETNAM CO., LTD. No.28 VSIP II, Street 2, Vietnam-Singapore Industrial Park II, Binh Duong Industry-Services-Urban Complex, Hoa Phu Ward, Thu Dau Mot City,… -
Page 164
Inhoud Dank u voor uw aankoop van de OMRON M6 Comfort automatische bloeddrukmeter. De OMRON M6 Comfort is een compacte, volledig automatische bloeddrukmeter die werkt volgens het oscillometrische principe. De bloeddrukmeter meet de bloeddruk en de hartslag eenvoudig en snel. Het apparaat maakt voor het comfortabel, gecontroleerd oppompen gebruik van de vooruitstrevende “IntelliSense”-technologie, waardoor het vooraf instellen van… -
Page 165: Belangrijke Veiligheidsinformatie
Belangrijke veiligheidsinformatie Waarschuwing: geeft een mogelijk gevaarlijke situatie aan die, wanneer deze niet vermeden wordt, kan leiden tot de dood of tot ernstig letsel. (Algemeen gebruik) Raadpleeg uw arts voordat u het apparaat gebruikt tijdens zwangerschap, inclusief pre-eclampsie, of als de diagnose aritmie of arteriosclerose is gesteld.
-
Page 166
Belangrijke veiligheidsinformatie Mensen met ernstige stoornissen van de bloedsomloop of van het bloed moeten een arts raadplegen voordat zij het apparaat gaan gebruiken, omdat het oppompen van de armmanchet kleine inwendige bloedingen kan veroorzaken, wat kan leiden tot blauwe plekken. Als er iets afwijkends optreedt tijdens de meting, verwijdert u de armmanchet. -
Page 167
Belangrijke veiligheidsinformatie Houd de stekker stofvrij. Trek de stekker uit het stopcontact als u het product gedurende langere tijd niet gebruikt. Trek de stekker uit het stopcontact voordat u onderhoud pleegt. Gebruik uitsluitend de originele netadapter die voor dit apparaat is ontworpen. Gebruik van niet-ondersteunde adapters kan leiden tot schade en/of kan gevaarlijk zijn voor het apparaat. -
Page 168: Ken Uw Apparaat
1. Ken uw apparaat Open de achterkaft voor het volgende: De letters op de achterkaft komen overeen met die in de tekst. Meter Weergave Weergave Geheugensymbool Lampje (on)juist Gebruikerssymbool aangebrachte manchet Symbool gemiddelde waarde Geheugenknop Systolische bloeddruk Knop voor weekgemiddelde Diastolische bloeddruk Knop START/STOP Hartslagsymbool…
-
Page 169
1. Ken uw apparaat Weergavesymbolen Symbool voor onregelmatige hartslag ( Normale hartslag Wanneer de meter twee of meer keer tijdens de meting een onregelmatige Hartslag hartslag detecteert, wordt het symbool voor onregelmatige hartslag ( Bloeddruk weergegeven in de weergave met de meetwaarden. Onregelmatige hartslag is een hartritme dat meer dan 25% lager of hoger is Onregelmatige hartslag Kort Lang… -
Page 170
1. Ken uw apparaat Bloeddrukkleurindicator Als uw systolische of diastolische bloeddruk hoger is dan het standaardbereik (135 mmHg voor de systolische bloeddruk en/of 85 mmHg voor de diastolische bloeddruk), brandt de bloeddrukkleurindicator oranje wanneer het meetresultaat wordt weergegeven. Als de bloeddruk binnen het standaard bereik valt, brandt de bloeddruk kleurindicator groen. -
Page 171: Voorbereiding
2. Voorbereiding 2.1 Batterij plaatsen Verwijder het kapje van batterijvak. Plaats 4 “AA”-batterijen zoals aangegeven in het batterijvak. Plaats het kapje van batterijvak terug. Opmerkingen: • Wanneer het symbool voor laag batterijvermogen ( ) op de weergave wordt weergegeven, schakelt u de meter uit en vervangt u vervolgens beide batterijen tegelijk.
-
Page 172: Datum En Tijd Instellen
2. Voorbereiding Open de achterkaft voor het volgende: De letters op de achterkaft komen overeen met die in de tekst. 2.2 Datum en tijd instellen Stel de meter in op de juiste datum en tijd voordat u een eerste meting uitvoert. Druk op de instelknop datum/tijd ( Het jaar knippert in de…
-
Page 173: Het Apparaat Gebruiken
• De bloeddruk in uw linkerarm kan verschillen van die in uw rechterarm, waardoor ook de gemeten bloeddrukwaarden kunnen verschillen. OMRON raadt u aan altijd dezelfde arm te gebruiken voor het meten van de bloeddruk. Als de bloeddruk in beide armen substantieel verschilt, vraagt u aan uw arts…
-
Page 174: Juiste Houding
3. Het apparaat gebruiken 3.2 Juiste houding Om een meting te kunnen verrichten, moet u ontspannen en comfortabel zitten bij een aangename kamertemperatuur. U mag gedurende 30 minuten voor de meting niet baden, geen alcohol of cafeïne drinken, niet roken, eten of lichamelijke inspanning verrichten.
-
Page 175: Een Meting Verrichten
3. Het apparaat gebruiken 3.3 Een meting verrichten Opmerkingen: • Als u een meting wilt annuleren, drukt u op de knop START/STOP om de armmanchet te ontluchten. • Blijf stilzitten tijdens de meting. De meter is ontworpen voor het meten en opslaan van de bloeddrukwaarden van twee gebruikers (1 en 2).
-
Page 176
3. Het apparaat gebruiken Verwijder de armmanchet. Druk op de knop START/STOP om de meter uit te schakelen. Het meetresultaat wordt automatisch in het geheugen van de meter opgeslagen. Na 2 minuten wordt het apparaat automatisch uitgeschakeld. Opmerking: wacht 2-3 minuten en verricht dan nogmaals een meting. Deze wachttijd tussen metingen is nodig om de slagaderen terug te laten keren in dezelfde conditie als vóór een meting. -
Page 177: Gebruik Van De Geheugenfunctie
3. Het apparaat gebruiken 3.4 Gebruik van de geheugenfunctie Voor elk van beide gebruikers (1 en 2) worden automatisch de resultaten van maximaal 100 sets metingen opgeslagen. De meter berekent ook een gemiddelde waarde op basis van de resultaten van de laatste 3 meetwaarden die binnen 10 minuten zijn genomen.
-
Page 178
3. Het apparaat gebruiken De gemiddelde waarde bekijken Selecteer de gebruiker (1 of 2). Houd de knop langer dan 3 seconden ingedrukt. Opmerkingen: • Als de vorige meting werd verricht zonder ingestelde datum en tijd, wordt de gemiddelde waarde niet berekend. •… -
Page 179
3. Het apparaat gebruiken De gemiddelde waarde per week bekijken Deze meter berekent de weekgemiddelden van de metingen die ’s ochtends en de metingen die ’s avonds zijn verricht binnen 8 weken en geeft deze weer voor elke gebruiker. Opmerking: de week begint op zondag om 2:00 ’s ochtends. -
Page 180
3. Het apparaat gebruiken Opmerking: als er geen meetwaarden in het geheugen zijn opgeslagen, wordt het rechterscherm weergegeven. Ochtendweekgemiddelde Ochtendmetingen Dit is het gemiddelde van de metingen Zondag Maandag Dinsdag Woensdag Donderdag Vrijdag Zaterdag 4:00 die ’s ochtends zijn genomen Eerste ochtendmeting Meting (4:00 — 11:59) van zondag tot en met… -
Page 181
3. Het apparaat gebruiken Alle in het geheugen opgeslagen waarden wissen De in het geheugen opgeslagen waarden wist u per gebruiker. Selecteer de gebruiker (1 of 2). Druk op de geheugenknop terwijl het geheugensymbool ( ) wordt weergegeven. Houd de knop ingedrukt en druk tegelijkertijd gedurende meer dan 3 seconden op de knop START/STOP. -
Page 182: Foutmeldingen En Problemen Oplossen
4. Foutmeldingen en problemen oplossen 4.1 Foutmeldingen Weergave Oorzaak Oplossing Verwijder de armmanchet. Wacht 2-3 minuten en meet dan nogmaals de bloeddruk. Er worden onregelmatige hartslagen Herhaal de stappen in paragraaf 3.3. Neem waargenomen. contact op met uw arts als deze foutmelding blijft verschijnen.
-
Page 183
Herhaal de meting. Praat en beweeg niet tijdens de meting. Beweging tijdens de meting. Zie paragraaf 3.3. Trek kleding die de armmanchet in de weg zit uit. Kleding zit in de weg voor de armmanchet. Zie paragraaf 3.1. Apparaatfout. Raadpleeg uw OMRON-winkel of -distributeur. -
Page 184: Problemen Oplossen
4. Foutmeldingen en problemen oplossen 4.2 Problemen oplossen Probleem Oorzaak Oplossing Breng de armmanchet goed De armmanchet is te los sluitend aan. aangebracht. Zie paragraaf 3.1. Praat en beweeg niet tijdens de Het meetresultaat is extreem hoog Beweging of praten tijdens meting.
-
Page 185
De batterijen zijn verkeerd polariteitsrichting. geplaatst. Zie paragraaf 2.1. • Druk op de knop START/STOP en herhaal de meting. • Vervang de batterijen door nieuwe. Overige problemen. Als het probleem aanhoudt, neemt u contact op met uw OMRON-winkel of -distributeur. -
Page 186: Opslag En Onderhoud
• De nauwkeurigheid van dit apparaat is zorgvuldig getest en het is ontworpen voor een lange levensduur. • Het wordt algemeen aanbevolen het apparaat elke 2 jaar te laten controleren op juiste werking en nauwkeurigheid. Raadpleeg de OMRON-verkoper of -distributeur.
-
Page 187: Opslag
5. Opslag en onderhoud 5.2 Opslag Bewaar het apparaat in de opbergetui als het niet wordt gebruikt. Koppel de luchtslang los van de luchtslangaansluiting. Vouw de luchtslang voorzichtig in de armmanchet. Opmerking: buig de luchtslang niet te ver. Plaats de meter en de armmanchet in het opbergetui.
-
Page 188: Optionele Medische Accessoires
5. Opslag en onderhoud 5.3 Optionele medische accessoires (binnen het kader van EG-richtlijn voor medische apparatuur 93/42/EEG) Armmanchet Netadapter Armomtrek 22-42 cm Adapter S-9515336-9 Adapter Verenigd Koninkrijk Intelli Cuff L-9911730-8 (Model: HEM-FL31) 9983666-5…
-
Page 189
5. Opslag en onderhoud De optionele netadapter gebruiken Steek de plug van de netadapter in de netadapteraansluiting op de achterzijde van de meter. Steek de stekker van de netadapter in een stopcontact. Om de netadapter los te koppelen, trekt u eerst de stekker van de netadapter uit het stopcontact en direct daarna trekt u de plug van de netadapter uit de meter. -
Page 190: Specificaties
6. Specificaties Productbeschrijving Automatische bloeddrukmeter Model OMRON M6 Comfort (HEM-7321-E) Weergave Digitale LCD-weergave Meetmethode Oscillometrische methode Meetbereik Druk: 0 tot 299 mmHg Hartslag: 40 tot 180 slagen/min. Druk: ±3 mmHg Nauwkeurigheid Hartslag: ±5% van de weergegeven waarde Oppompen Fuzzy logic bestuurd door een elektrische pomp…
-
Page 191
• Dit apparaat is ontworpen volgens de Europese standaard EN1060, niet-invasieve sfingomanometer deel 1: Algemene vereisten en deel 3: Aanvullende vereisten voor elektromechanische bloeddrukmeetsystemen. • Dit OMRON-apparaat is vervaardigd conform het strenge kwaliteitssysteem van OMRON HEALTHCARE Co. Ltd., Japan. De hoofdcomponent voor OMRON-bloeddrukmeters, de druksensor, wordt geproduceerd in Japan. -
Page 192
EN 60601-1-2:2007 geïmplementeerd. Deze norm definieert de mate van immu- niteit voor elektromagnetische interferenties en de maximale elektromagnetische uitstralingen voor medische apparatuur. Dit medische apparaat dat is gefabriceerd door OMRON HEALTHCARE voldoet aan deze norm EN60601-1-2:2007, zowel voor immuniteit als voor uitstralingen. -
Page 193: Garantie
7. Garantie Dank u voor de aankoop van een OMRON-product. Dit product is vervaardigd van hoogwaardige materialen en er is veel zorg besteed bij de fabricage ervan. Het is ontworpen voor optimale gebruiksvriendelijkheid, mits het juist wordt gebruikt en onderhouden zoals beschreven in de gebruiksaanwijzing.
-
Page 194: Nuttige Informatie Over Bloeddruk
8. Nuttige informatie over bloeddruk Wat is bloeddruk? Bloeddruk is de druk van het bloed op de slagaderwand. Arteriële bloeddruk verandert voortdurend tijdens de hartcyclus. De hoogste bloeddruk in deze cyclus wordt de systolische bloeddruk genoemd; de laagste is de diastolische bloeddruk. Zowel de systolische als de diastolische druk zijn voor een arts noodzakelijk om de status van de bloeddruk van een patiënt te kunnen beoordelen.
-
Page 196
OMRON M6 Comfort. OMRON M6 Comfort — «IntelliSense», ……….193 ….210 …….. 196 ..210 ……199 .. 212 ….199 ……..214 ….200 …………214 …… 201 ……….215 ..201 ……..216 ..202 ….218 ……203 ……….221 ..205… -
Page 199
«AA». • • • • • • • « )» «6. » • « » «6. »… -
Page 200
START/STOP 22—42… -
Page 201
— 2—3… -
Page 202
(135 JNC7* 120—139 80—89 * JNC7 – 7: 2003 .) -
Page 203
«AA» • • •… -
Page 204
START/STOP, • • «-/ — -:—». -
Page 205
1—2 • . — • OMRON… -
Page 206
• • . — • • . —… -
Page 207
• START/STOP, • START/STOP. START/STOP 30—40 • •… -
Page 208
START/STOP, 2—3 START/STOP START/STOP,… -
Page 209
(1 2). • • • • «-/ — -:—». «1». -
Page 210
• •… -
Page 211
2:00 «THIS WEEK». 135/85 «THIS WEEK». -
Page 212
Измерения утром Воскресенье Понедельник Вторник Среда Четверг Пятница Суббота 4:00 Первое измерение Измерение утром До 3 измерений Измерение (4:00–11:59) Измерение В течение 10 минут Артериальное давление утром Измерение Измерение Измерение 11:59 Измерения вечером Вторник Среда Четверг Пятница Суббота Воскресенье Понедельник 19:00 Измерение… -
Page 213
( ). START/STOP… -
Page 214
3.3. 3.3. 3.1. 2.1. 2.1. -
Page 215
3.1. 3.1. 5.3. 3.3. «E2» 30—40 3.3. 3.3. 3.3. 3.1. OMRON. -
Page 216
3.1. 3.3. 3.1. 3.1. 5.3. 3.1. 30—40 3.3. -
Page 217
2.1. (+/-). 2.1. • START/STOP • OMRON. -
Page 218
• • • • • • OMRON. • • OMRON. -
Page 219
• • •… -
Page 220
93/42/EEC) : 22—42 S-9515336-9 UK-9983666-5 Intelli Cuff L-9911730-8 : HEM-FL31) -
Page 222
OMRON M6 Comfort (HEM-7321-E) : 0—299 : 40—180 : ±3 : ±5% «AA» 1,5 S-9515336-9, 100-240 50/60 0,12 ) UK-9983666-5, 100-240 50/60 15 · ) 1000 II ME ( +10°C +40°C; : • -20°C +60°C; ; 700—1060 , • , •… -
Page 223
• • • • 93/42/EEC ( • EN1060 « », 1 « » 3 « ». • OMRON OMRON HEALTHCARE Co. Ltd., – OMRON –… -
Page 224
EN60601-1-2:2007. OMRON HEALTHCARE, EN60601-1-2:2007 • EN60601-1-2:2007 OMRON HEALTHCARE EUROPE www.omron-healthcare.com. -
Page 225
OMRON. OMRON OMRON OMRON OMRON. OMRON, www.omron-healthcare.com… -
Page 226
— — — Верхняя кривая: систолическое артериальное давление Нижняя кривая: диастолическое артериальное давление Время дня Пример: колебания в течение дня (мужчина 35 лет) -
Page 228
OMRON M6 Comfort, osilometrik prensiple çal an kompakt ve tam otomatik bir kan bas nc ölçüm cihaz d r. Kan bas nc ve nab z oran n z kolay ve h zl bir ekilde ölçer. Bas nç ön ayar yapmadan rahat bir ekilde kontrollü… -
Page 229: Önemli Güvenlik Bilgileri
Önemli Güvenlik Bilgileri Uyar : Önlenmedi inde ölüme ya da ciddi yaralanmaya neden olabilecek potansiyel bir tehlike durumunu belirtir. (Genel Kullan m) Preeklampsi de dahil olmak üzere hamilelikte veya Aritmi ya da arteriyoskleroz te hisi konulmu sa, cihaz kullanmadan önce doktorunuzla görü ün. Cihaz , yaral kol ya da t bbi tedavi gören bir kol üzerinde kullanmay n.
-
Page 230
Önemli Güvenlik Bilgileri Ölçüm s ras nda bir anormallik varsa, kollu u ç kar n. Bu cihaz yenido an hastalar, bebekler ya da meram n anlatamayacak durumda olan ki iler üzerinde kullanmay n. Kollu u gerekenden fazla i irmeyin. Cihaz , kan bas nc n ölçmek d nda bir amaç… -
Page 231
Önemli Güvenlik Bilgileri (Pil Kullan m ) Pilleri, kutuplar hatal hizalanm ekilde takmay n. Bu cihazda yaln zca 4 adet “AA” alkalin veya manganez pil kullan n. Di er pil tiplerini kullanmay n. Biten pilleri ve yeni pilleri bir arada kullanmay n Cihaz üç… -
Page 232: Cihaz N Z Tan Y N
1. Cihaz n z Tan y n A a dakileri okumak için arka kapak sayfas n aç n: Arka kapak sayfas ndaki harfler, ana metin sayfas nda bulunanlara kar l k gelir. Ölçüm Cihaz Ekran Ekran Haf za simgesi Kolluk sarma k lavuz lambas KULANICI K ML sembolü…
-
Page 233
1. Cihaz n z Tan y n Ekran Sembolleri Düzensiz Kalp At Sembolü ( Normal Kalp At Ölçüm s ras nda ölçüm cihaz iki ya da daha fazla sefer düzensiz ritim Nab z alg larsa, düzensiz kalp ritmi sembolü ( ), ölçüm de erleri ile birlikte Kan bas nc ekranda gösterilecektir. -
Page 234
1. Cihaz n z Tan y n Kan Bas nc Renkli Göstergesi Sistolik ya da diyastolik kan bas nc n z standart aral n (sistolik kan bas nc için 135 mmHg ve/veya diyastolik kan bas nc için 85 mmHg) üstündeyse kan bas nc renkli göstergesi, ölçüm sonuçlar gösterilirken turuncu yanacakt r. -
Page 235: Haz Rl K
2. Haz rl k 2.1 Pilin Tak lmas Pil kapa n ç kar n. Pil bölmesinde gösterildi i gibi 4 adet “AA” pili tak n. Pil kapa n tak n. Notlar: • Ekranda pil zay f sembolü ( ) görüntülendi inde, ölçüm cihaz n kapat n ve pillerin hepsini ayn anda de i tirin.
-
Page 236: Tarih Ve Saatin Ayarlanmas
2. Haz rl k A a dakileri okumak için arka kapak sayfas n aç n: Arka kapak sayfas ndaki harfler, ana metin sayfas nda bulunanlara kar l k gelir. 2.2 Tarih ve Saatin Ayarlanmas lk defa ölçüm yapmadan önce ölçüm cihaz n n saat ve tarih ayar n do ru ekilde yap n. Tarih/Saat ayar ( ) dü…
-
Page 237: Cihaz N Kullan Lmas
• Kan bas nc sa kol ile sol kolda farkl olabilir; bu nedenle ölçülen kan bas nc de erleri de farkl olabilir. OMRON, ölçümü daima ayn kolunuzdan yapman z tavsiye etmektedir. ki kol aras ndaki de erler çok farkl l k gösterirse, ölçümünüz için hangi kolun kullan laca n lütfen doktorunuza dan…
-
Page 238: Do Ru Oturma Yöntemi
3. Cihaz n Kullan lmas 3.2 Do ru Oturma Yöntemi Bir ölçüm yapmak için, uygun oda s cakl nda rahat ve konforlu bir ekilde oturmu olman z gerekmektedir. Bir ölçüm yapmadan önceki 30 dakika içinde banyo yapmamak, alkol ya da kafein almamak, egzersiz yapmamak veya yemek yememek gerekir.
-
Page 239: Bir Ölçüm Yapma
3. Cihaz n Kullan lmas 3.3 Bir Ölçüm Yapma Notlar: • Bir ölçümü iptal etmek için, BA LAT/DURDUR dü mesine basarak kolluktaki havay sal n. • Ölçüm yaparken hareket etmeyin. Ölçüm cihaz ölçüm yapmak için tasarlanm t r ve KULLANICI K ML 1’i ve KULLANICI K ML 2’yi, kullanan 2 ki i için ölçüm de erlerini haf zada saklar.
-
Page 240
3. Cihaz n Kullan lmas Kollu u ç kar n. Ölçüm cihaz n kapatmak için BA LAT/DURDUR dü mesine bas n. Ölçüm cihaz ölçüm sonucunu otomatik olarak haf zas nda saklar. 2 dakika sonra otomatik olarak kapan r. Not: Ba ka bir ölçüm yapmadan önce 2-3 dakika bekleyin. Ölçümler aras nda beklemek atar damarlar n ölçüm al nmadan önceki durumlar na dönmelerini sa lar. -
Page 241: Haf Za Fonksiyonunun Kullan Lmas
3. Cihaz n Kullan lmas 3.4 Haf za Fonksiyonunun Kullan lmas Ölçüm aleti otomatik olarak her bir kullan c (1 ve 2) için maksimum 100 de ere kadar olan sonucu saklar. Ayr ca, 10 dakika içinde al nan son 3 ölçüm de erini temel alarak ortalama bir de er hesaplayabilir.
-
Page 242
3. Cihaz n Kullan lmas Ortalama De erin Görüntülenmesi Kullan c Kimli inizi (1 veya 2) seçin. dü mesini 3 saniyeden fazla bas l tutun. Notlar: • Önceki ölçüm, tarih ve saat ayar yap lmadan al nm sa ortalama de er hesaplanmaz. •… -
Page 243
3. Cihaz n Kullan lmas Haftal k Ortalama De erin Görüntülenmesi Bu ölçüm aleti, her kullan c için 8 hafta içinde yap lan sabah ve ak am ölçümlerinin haftal k ortalamas n hesaplar ve görüntüler. Not: Hafta, Pazar günü saat 2:00’de ba lat l r. Kullan c Kimli inizi (1 veya 2) seçin. -
Page 244
3. Cihaz n Kullan lmas Not: Haf zada saklanan ölçüm sonucu yoksa sa daki ekran görüntülenir. Haftal k Sabah Ortalamas Sabah yapılan ölçümler Pazar ile Cumartesi günleri aras nda Pazar Pazartesi Salı Çarşamba Perşembe Cuma Cumartesi 04:00 sabah (4:00 — 11:59) yap lan ölçümlerin Sabah yapılan Ölçüm ortalamas d r. -
Page 245
3. Cihaz n Kullan lmas Haf zada Saklanan Tüm De erlerin Silinmesi Haf zada kay tl de erler Kullan c Kimli i ile silinir. Kullan c Kimli inizi (1 veya 2) seçin. Haf za sembolü ( ) göründü ünde Haf za dü… -
Page 246: Hata Mesajlar Ve Sorun Giderme
4. Hata Mesajlar ve Sorun Giderme 4.1 Hata Mesajlar Ekran Neden Çözüm Kollu u ç kar n. 2-3 dakika bekleyin ve ba ka bir ölçüm yap n. Düzensiz kalp at alg lanm t r. 3.3 bölümündeki ad mlar tekrarlay n. Bu hata görüntülenmeye devam ederse doktorunuza ba vurun.
-
Page 247
Ölçüm s ras nda hareket. Bkz. bölüm 3.3. Kollu u engelleyen k yafetleri ç kar n. K yafet kollu u engelliyor. Bkz. bölüm 3.1. OMRON sat noktas ya da distribütörüyle Cihaz hatas . irtibata geçin. -
Page 248: Sorun Giderme
4. Hata Mesajlar ve Sorun Giderme 4.2 Sorun Giderme Sorun Neden Çözüm Kollu u güvenli ve rahat ekilde tak n. Kolluk çok gev ek tak lm . Bkz. bölüm 3.1. Ölçüm s ras nda hareket etmeyin Ölçüm sonucu oldukça yüksek Ölçüm s ras nda hareket etmek ve ve konu may n.
-
Page 249
Piller hatal ekilde tak lm . Bkz. bölüm 2.1. • BA LAT/DURDUR dü mesine bas n ve ölçümü tekrarlay n. • Pilleri yenileriyle de i tirin. Di er sorunlar. Sorun devam ederse, OMRON bayinize ya da distribütörünüze ba vurun. -
Page 250: Bak M Ve Saklama
• Üreticinin onaylamad de i iklikler ya da modifikasyonlar kullan c garantisini geçersiz k lacakt r. Cihaz ya da bile enleri parçalar na ay rmay n ya da onarmaya çal may n. OMRON sat noktas ya da distribütörüne ba vurun.
-
Page 251: Saklama
5. Bak m ve Saklama 5.2 Saklama Kullanmad n z zaman, cihaz saklama çantas nda tutun. Hava tapas n hava jak ndan ç kar n. Hava borusunu hafifçe katlayarak kollu un içine yerle tirin. Not: Hava borusunu fazla k v rmay n. Ölçüm aletini ve kollu u saklama çantas na yerle tirin.
-
Page 252: Opsiyonel T Bbi Aksesuarlar
5. Bak m ve Saklama 5.3 Opsiyonel T bbi Aksesuarlar (EC T bbi Cihaz Direktifi 93/42/EEC kapsam dahilinde) Kolluk AC adaptörü Kol çevresi 22-42 cm Adaptör S-9515336-9 ngiltere Adaptörü 9983666-5 Intelli Cuff L-9911730-8 (Model: HEM-FL31)
-
Page 253
5. Bak m ve Saklama ste e Ba l AC Adaptörünün Kullan lmas AC adaptörü fi ini ölçüm cihaz n n arkas ndaki AC adaptörü jak na tak n. AC adaptörü fi ini bir elektrik prizine tak n. AC adaptörünü ç karmak için önce AC adaptörünün fi ini elektrik prizinden, sonra AC adaptörünü… -
Page 254: Özellikler
6. Özellikler Ürün tan m Otomatik Kan Bas nc Ölçüm Aleti Model OMRON M6 Comfort (HEM-7321-E) Ekran LCD dijital ekran Ölçüm metodu Osilometrik metot Ölçüm aral Bas nç: 0 — 299 mmHg Nab z: 40 — 180 at / dak.
-
Page 255
Özellikler ve Bölüm 3: Elektromekanik kan bas nc ölçüm sistemleri için tamamlay c özellikler ko ullar na uygun olarak tasarlanm t r. • Bu OMRON cihaz s k OMRON HEALTHCARE Co. Ltd., Japonya kalite sistemi alt nda üretilmektedir. OMRON cihazlar n n temel bile eni olan Bas nç Sensörü Japonya’da üretilmi tir. -
Page 256
EN60601-1-2:2007 standard konulmu tur. Bu standart, t bbi cihazlar için elektromanyetik parazitlerden korunma seviyelerini ve maksimum elektromanyetik emisyon seviyelerini tan mlamaktad r. OMRON HEALTHCARE taraf ndan üretilen bu t bbi cihaz, korunma ve emisyon de erleri aç s ndan söz konusu EN60601-1-2:2007 standard na uymaktad r. -
Page 257: Garanti
Bu ürün OMRON taraf ndan sat n al nma tarihinden itibaren 3 y l garantilidir. Bu ürünün uygun ekilde imalat , i çili i ve malzemeleri OMRON garantisi alt ndad r. Bu garanti süresi boyunca, OMRON i çilik ve parça paras almadan ar zal ürünleri ya da hasarl parçalar onaracak ya da de i tirecektir.
-
Page 258: Kan Bas Nc Yla Ilgili Baz Yararl Bilgiler
8. Kan Bas nc yla ilgili Baz Yararl Bilgiler Kan Bas nc Nedir? Kan bas nc , arter duvarlar nda akan kan n ak gücünün ölçümüdür. Arteryal kan bas nc , kalp atarken sürekli olarak de i ir. Döngüdeki en yüksek bas nca Sistolik Kan Bas nc ; en dü ük bas nca ise Diyastolik Kan Bas nc denir.
-
Page 259
ﺍﻟﻤﻨﺤﻨﻰ ﺍﻟﻌﻠﻮﻱ: ﺿﻐﻂ ﺍﻟﺪﻡ ﺍﻻﻧﻘﺒﺎﺿﻲ ٢٠٠ ﺍﻟﻤﻨﺤﻨﻰ ﺍﻟﺴﻔﻠﻲ: ﺿﻐﻂ ﺍﻟﺪﻡ ﺍﻻﻧﺒﺴﺎﻃﻲ ١٥٠ ١٠٠ ٥٠ ٦ ١٢ ١٨ ٢٤ ﺍﻟﻮﻗﺖ ﻣﻦ ﺍﻟﻴﻮﻡ (ﻣﺜﺎﻝ: ﻣﺘﻘﻠﺐ ﺧﻼﻝ ﺍﻟﻴﻮﻡ )ﺭﺟﻞ ﻋﻤﺮﻩ ٥٣ ﻋﺎ ﻣ ًﺎ… -
Page 260
.OMRON OMRON OMRON — OMRON .USB OMRON OMRON www.omron-healthcare.com… -
Page 261
(EMC) ) EMC EN60601-1-2: 2007 EN60601-1-2: 2007 OMRON HEALTHCARE • OMRON HEALTHCARE EUROPE EN60601-1-2: 2007 .www.omron-healthcare.com… -
Page 262
• • • ) 93/42/EEC • EN1060 • OMRON HEALTHCARE Co. Ltd. OMRON • — OMRON… -
Page 263
OMRON M6 Comfort (HEM-7321-E) ± : ± : S-9515336-9 UK-9983666-5 ) ME IP 20 × × ×… -
Page 265
(93/42/EEC UK-9983666-5 S-9515336-9 Intelli Cuff L-9911730-8 (HEM-FL31 :… -
Page 266
• • •… -
Page 267
• • • • • • .OMRON • • .OMRON… -
Page 268
.(-/+) ) START/STOP • • .OMRON… -
Page 270
«E2» .OMRON… -
Page 272
.( ) ) START/STOP… -
Page 273
ﻋﻣﻠﻳﺎﺕ ﺍﻟﻘﻳﺎﺱ ﺍﻟﺻﺑﺎﺣﻳﺔ ﺍﻟﺳﺑﺕ ﺍﻟﺟﻣﻌﺔ ﺍﻟﺧﻣﻳﺱ ﺍﻷﺭﺑﻌﺎء ﺍﻟﺛﻼﺛﺎء ﺍﻻﺛﻧﻳﻥ ﺍﻷﺣﺩ ٤:۰۰ ﺃﻭﻝ ﻗﻳﺎﺱ ﻓﻲ ﺍﻟﺻﺑﺎﺡ ﻁﺭﻳﻘﺔ ﺍﻟﻘﻳﺎﺱ ﻁﺭﻳﻘﺔ ﺍﻟﻘﻳﺎﺱ ﺣﺗﻰ ۳ ﻗﻳﺎﺳﺎﺕ ﻁﺭﻳﻘﺔ ﺍﻟﻘﻳﺎﺱ ﻓﻲ ﻏﺿﻭﻥ ۰۱ ﺩﻗﺎﺋﻕ ﺿﻐﻁ ﺍﻟﺩﻡ ﻓﻲ ﺍﻟﺻﺑﺎﺡ ﻁﺭﻳﻘﺔ ﺍﻟﻘﻳﺎﺱ ﻁﺭﻳﻘﺔ ﺍﻟﻘﻳﺎﺱ ﻁﺭﻳﻘﺔ ﺍﻟﻘﻳﺎﺱ ۱۱:٥۹ ﻋﻣﻠﻳﺎﺕ ﺍﻟﻘﻳﺎﺱ ﺍﻟﻣﺳﺎﺋﻳﺔ ﺍﻟﺳﺑﺕ… -
Page 274
.» » .» «… -
Page 275
• •… -
Page 276
.( ) • • • «-/ — -:—» • .» «… -
Page 277
) START/STOP ) Guest Mode START/STOP ) START/STOP… -
Page 278
/ ) START/STOP • • ١ ٢ ) START/STOP / ) START/STOP • •… -
Page 279
• — . • • — . •… -
Page 280
— . • OMRON •… -
Page 281
) START/STOP • «-/ — -:—» •… -
Page 282
«AA» • • •… -
Page 283
JNC7* :JNC7 *… -
Page 285
) Memory ) START/STOP… -
Page 286
«AA» • • • • • • .» . » «(EMC) » • » . » » » •… -
Page 288
.(A-V) (CT) (MRI) (HF) -
Page 289
.OMRON M6 Comfort OMRON M6 Comfort «Intellisense» …………………………………………………………………………………………………………………………………………………… -
Page 293
Check following components! Vérifier les composants suivants ! Controleer de volgende onderdelen! Prüfen Sie folgende Teile des Lieferumfangs! Controllare i componenti indicati di seguito! A a daki bile enleri kontrol edin! ¡Compruebe los siguientes componentes! -
Page 294
Vertegenwoordiging in de EU Scorpius 33, 2132 LR Hoofddorp, THE NETHERLANDS EU-Repräsentant www.omron-healthcare.com Representante en la UE AB temsilcisi OMRON HEALTHCARE MANUFACTURING VIETNAM CO., LTD. Production facility Stabilimento di produzione No.28 VSIP II, Street 2, Vietnam-Singapore Industrial Park II, Site de production Productiefaciliteit Produktionsstätte…