- Manuals
- Brands
- OneTouch Manuals
- Blood Glucose Meter
- VERIOPRO +
- Operator’s manual
-
Contents
-
Table of Contents
-
Bookmarks
Quick Links
Yellow = 5mm margin, Red = 7mm margin
Blood glucose monitoring system
Meter Operator’s Guide
1
Yellow = 5mm margin, Red = 7mm margin
AW05948101B_OT_VerioPro+_OB_Insides_R1.indd 1
4/3/12 3:07 PM
Related Manuals for OneTouch VERIOPRO +
Summary of Contents for OneTouch VERIOPRO +
-
Page 1
Yellow = 5mm margin, Red = 7mm margin Blood glucose monitoring system Meter Operator’s Guide Yellow = 5mm margin, Red = 7mm margin AW05948101B_OT_VerioPro+_OB_Insides_R1.indd 1 4/3/12 3:07 PM… -
Page 2
Thank you for choosing OneTouch®. The OneTouch® Verio™Pro+ Blood Glucose Monitoring System is one of the latest product innovations from LifeScan®. Every OneTouch® meter is designed to make it easy to test your patient’s blood glucose and help you manage their diabetes. -
Page 3
Yellow = 5mm margin, Red = 7mm margin Symbols Cautions and Warnings. Refer to the Meter Operator’s Guide and inserts that came with the system for safety-related information. Direct current Consult instructions for use Battery low Number [Insert additional local symbols as required] Yellow = 5mm margin, Red = 7mm margin AW05948101B_OT_VerioPro+_OB_Insides_R1.indd 3 4/3/12 3:07 PM… -
Page 4: Table Of Contents
Yellow = 5mm margin, Red = 7mm margin Table of Contents Getting to know the system Setting up the meter Performing a control solution test Performing a blood glucose test Reviewing past results Performing a linearity test Care and maintenance Yellow = 5mm margin, Red = 7mm margin AW05948101B_OT_VerioPro+_OB_Insides_R1.indd 4 4/3/12 3:07 PM…
-
Page 5
Yellow = 5mm margin, Red = 7mm margin Batteries Troubleshooting Detailed information about the system Index Yellow = 5mm margin, Red = 7mm margin AW05948101B_OT_VerioPro+_OB_Insides_R1.indd 5 4/3/12 3:07 PM… -
Page 6: Before You Begin
Before you begin Before using this product to test a patient’s blood glucose, carefully read this Meter Operator’s Guide, and the inserts that come with the OneTouch® Verio™ Test Strips and OneTouch® Verio™ Control Solutions and OneTouch Verio™Pro+ Linearity Solutions.
-
Page 7: Test Principle
Yellow = 5mm margin, Red = 7mm margin Test principle Glucose in the whole blood sample mixes with chemicals in the test strip and a small electric current is produced. The strength of this current changes with the amount of glucose in the whole blood sample. The meter measures the current, calculates the patient’s blood glucose level, displays the blood glucose result, and stores it in its memory.
-
Page 8: Batteries
Yellow = 5mm margin, Red = 7mm margin The OneTouch® Verio™Pro+ Blood Glucose Monitoring System The OneTouch® Verio™Pro+ System Kit OneTouch® Verio™Pro+ Meter (batteries included) Meter Storage Case Yellow = 5mm margin, Red = 7mm margin AW05948101B_OT_VerioPro+_OB_Insides_R1.indd 8 4/3/12 3:07 PM…
-
Page 9
OneTouch® Verio™ High Control Solution (Red cap) OneTouch® Verio™ Test Strips The OneTouch® Verio™ Control Solutions and Test Strips are available separately. Follow your institution’s procedure for obtaining additional test strips and control solutions. Use only OneTouch® Verio™ Control Solutions and Test Strips with the OneTouch® Verio™Pro+ Meter. -
Page 10
OneTouch® Verio™Pro+ Linearity Solution Level 4 (Red cap) OneTouch® Verio™Pro+ Linearity Solution Level 5 (Purple cap) The OneTouch® Verio™Pro+ Linearity Solutions are available separately. Follow your institution’s procedure for obtaining additional linearity solutions. Use only OneTouch® Verio™Pro+ Linearity Solutions with the OneTouch® Verio™Pro+ Meter. -
Page 11: Yellow = 5Mm Margin, Red = 7Mm Margin
Yellow = 5mm margin, Red = 7mm margin Getting to know the system Getting to know the OneTouch® Verio™Pro+ Blood Glucose Monitoring System Meter Test strip port Insert test strip here to turn meter on Low battery icon Indicates time to change batteries…
-
Page 12: Test Strip
Yellow = 5mm margin, Red = 7mm margin Getting to know the system Test strip Front Back Channel to apply sample Silver prongs Silver prongs should face you when you insert test strip into test strip port Yellow = 5mm margin, Red = 7mm margin AW05948101B_OT_VerioPro+_OB_Insides_R1.indd 12 4/3/12 3:07 PM…
-
Page 13
Yellow = 5mm margin, Red = 7mm margin Getting to know the system Turning the meter on Press and hold until the start-up screen appears. Once the start-up screen is displayed, release VerioPro If the meter does not turn on, check the meter batteries. See pages 80-82. NOTE: When turning the meter on for the first time, it will automatically start at the Set Language screen to set the language, time and date (see pages 16-18). -
Page 14
Yellow = 5mm margin, Red = 7mm margin Getting to know the system A bar highlights the current selection on the Main Menu. 30 Apr 08:00 Example History (mmol/L) Main Menu with Settings History highlighted Last Result: 19:00 NOTE: • When History is highlighted, the result from the most 01 Apr 12:45 recent blood glucose test appears at the bottom of the… -
Page 15: Turning The Meter Off
Yellow = 5mm margin, Red = 7mm margin Getting to know the system Using the display backlight The backlight comes on automatically whenever the meter is turned on. After a few seconds of no activity, the backlight will dim. Pressing any button will turn the backlight back on without affecting the current screen.
-
Page 16
Yellow = 5mm margin, Red = 7mm margin Setting up the meter Setting the meter language, time and date When turning on the meter for the first time, it will automatically start at the Set Language screen. NOTE: You will not be able to perform a test when in the Settings mode. 1. -
Page 17: Setting Up The Meter
Yellow = 5mm margin, Red = 7mm margin Setting up the meter NOTE: The time and date formats are pre-set. These settings cannot be changed. Set Time 2. Set the time of day In the Set Time screen, press to set the hour and press .
-
Page 18
Yellow = 5mm margin, Red = 7mm margin Setting up the meter 4. Confirm the meter settings Settings If the settings are correct, press with Done highlighted. The settings will be Time: 12:45 saved. Date: 01 Apr 2011 Language: If a setting is not correct, press to highlight the incorrect setting and English press… -
Page 19
Yellow = 5mm margin, Red = 7mm margin Setting up the meter Adjusting settings after setting up the meter for the first time 01 Apr 12:45 Adjust the settings in the meter as needed. History (mmol/L) Highlight Settings on the Main Menu screen and press Settings Serial #: BCXFF2HK… -
Page 20
Yellow = 5mm margin, Red = 7mm margin Setting up the meter Viewing information about the meter Settings The meter serial number, software version, unit of measure and date of last data Time: 10:05 transfer are stored in the meter and can be viewed at any time. Date: Highlight Meter Care on the Settings screen and press 10 Dec 2011… -
Page 21
Yellow = 5mm margin, Red = 7mm margin Setting up the meter The information is displayed. Press and hold to return to the Main Menu. Meter Info Serial #: BCXFF2HK So ware: XX.YY.ZZ.AA Units: mmol/L Meter Care Last PC Transfer: 03 Mar 2011 Yellow = 5mm margin, Red = 7mm margin AW05948101B_OT_VerioPro+_OB_Insides_R1.indd 21… -
Page 22
Performing a control solution test Checking the meter with control solution OneTouch® Verio™ Control Solution is used to check that the meter and test strips are working together properly and the test is performed correctly. Control solution is available separately. Follow your institution’s procedure for obtaining control solution. -
Page 23: Performing A Control Solution Test
Yellow = 5mm margin, Red = 7mm margin Performing a control solution test • When opening a new vial of control solution, record the discard date (date opened plus 6 months) on the vial label. • When opening a new vial of test strips, record the discard date (date opened plus 6 months) on the label.
-
Page 24
Yellow = 5mm margin, Red = 7mm margin Performing a control solution test • Do Not return the used test strip to the vial after performing a test. • Do Not use a test strip with bent or broken silver prongs. •… -
Page 25: Do A Control Solution Test
Yellow = 5mm margin, Red = 7mm margin Performing a control solution test Do a control solution test • Whenever opening a new vial of test strips. • Whenever using a new batch or lot of test strips. • If you suspect that the meter or test strips are not working properly. •…
-
Page 26
Insert a test strip into the test strip port with the gold side of the test strip and the two silver prongs facing you. Unlike some blood glucose meters, no separate step to code the OneTouch® Verio™Pro+ Meter is required. Test strip port NOTE: Do Not press or the eject button during a test. -
Page 27
Yellow = 5mm margin, Red = 7mm margin Performing a control solution test 2. Prepare the control solution Remove the vial cap and place it on a flat surface with the top of the cap pointing up. Squeeze the vial to discard the first drop. Example Wipe both the tip of the control solution vial and the top of the cap with a clean, damp tissue or cloth. -
Page 28
Yellow = 5mm margin, Red = 7mm margin Performing a control solution test Squeeze a drop into the small well on the top of the cap or onto another clean, non-absorbent surface. 3. Apply the control solution Hold the meter so that the side edge of the test strip is at a slight angle to the drop of control solution. -
Page 29
Yellow = 5mm margin, Red = 7mm margin Performing a control solution test • Do Not apply more control solution to the test strip after you have moved the test strip away. • Do Not remove the test strip until the result is displayed or the meter will turn off. 4. -
Page 30
Yellow = 5mm margin, Red = 7mm margin Performing a control solution test If the Level selected does not match the result of the control solution test, you will be prompted to change the Level. If this screen appears, this means: Please verify. -
Page 31
Yellow = 5mm margin, Red = 7mm margin Performing a control solution test 5. Read the Result 30 Apr 19 : 00 Once a control solution level has been selected, the meter will display the control solution result along with the date, time, unit of measure and the level of control solution selected. -
Page 32
Yellow = 5mm margin, Red = 7mm margin Performing a control solution test Viewing control solution test results 01 Apr 12:45 1. From the Main Menu, press to select Settings and press History (mmol/L) Settings Serial #: BCXFF2HK 2. Next, press to choose Meter Care and press Settings Time:… -
Page 33
Yellow = 5mm margin, Red = 7mm margin Performing a control solution test 3. Select Control Results and press Meter Care Control Reminder Control Results Linearity Test Linearity Results Meter Info The meter can display up to 5 control solution test results at a time, starting with Control Results the most recent. -
Page 34
Yellow = 5mm margin, Red = 7mm margin Performing a control solution test NOTE: If the control solution result is shown without a level beside the , a level Control Results was not selected for this result. When completing a control solution test, if the mmol/L Mon, 29 Apr meter times out or the meter is turned off before a level is selected, the result will… -
Page 35
Yellow = 5mm margin, Red = 7mm margin Performing a control solution test Receiving reminders to perform a control solution test Settings The meter can be set to send a reminder when it is time to perform a control Time: solution test. -
Page 36
Yellow = 5mm margin, Red = 7mm margin Performing a control solution test 3. Press with Reminder highlighted Control Reminder Reminder: Off Reminder Settings No. of Days: Time: —:— 4. Press to select On or Off and press Reminder Of f Turn On to set and receive Control Solution… -
Page 37
Yellow = 5mm margin, Red = 7mm margin Performing a control solution test Set the number of days in between each control solution Control Reminder test, and the time of day the reminder will appear Reminder: NOTE: To set the number of days and time of day, the Control Reminder feature Reminder Settings must be turned on. -
Page 38
Yellow = 5mm margin, Red = 7mm margin Performing a control solution test 3. Next, highlight Time on the Control Reminder screen and Control Reminder press Reminder: Reminder Settings No. of Days: Time: 09:00 4. Press to set the hour and press Reminder Time When finished, press to return to the Control Reminder screen. -
Page 39
Yellow = 5mm margin, Red = 7mm margin Performing a control solution test Receiving reminders Reminder Whenever turning the meter on and it is time for a control solution test to be Perform a control solution performed, this Reminder screen will appear, within an 8-hour window of the test soon. -
Page 40: Performing A Blood Glucose Test
• Unlike some blood glucose meters, no separate step to code the OneTouch® Verio™Pro+ Meter is required. • Make sure the meter and test strips are at about the same temperature before testing. The OneTouch® Verio™Pro+ Blood Glucose Monitoring System cannot be used outside the operating temperature range (6°C-44°C).
-
Page 41
Yellow = 5mm margin, Red = 7mm margin Performing a blood glucose test • Do Not test if there is condensation (water build-up) on the meter. Move the meter and test strips to a cool, dry spot and wait for the meter surface to dry before testing. •… -
Page 42
Yellow = 5mm margin, Red = 7mm margin Performing a blood glucose test • Use clean, dry hands to remove a test strip from the vial. The test strip may be touched anywhere on its surface. Do Not bend, cut or modify the test strip in any way. •… -
Page 43
Yellow = 5mm margin, Red = 7mm margin Performing a blood glucose test Personal Protective Equipment Health care professionals should follow their institution’s policy and procedure guidelines for hand hygiene. In addition, follow the Centers for Disease Control recommendations regarding hand hygiene and the use of disposable gloves when performing glucose testing on patients. -
Page 44: Test Strips
Performing a blood glucose test Test Strips OneTouch® Verio™ Test Strips are intended for single use only. They should be disposed of in an appropriate biohazard container immediately after use. Test strips must be handled with dry hands. Handling test strips with wet hands may result in an Error 2 message.
-
Page 45
Yellow = 5mm margin, Red = 7mm margin Performing a blood glucose test When testing multiple patients, follow these guidelines for disease control: • Never reuse lancets. Restrict use of fingerstick capillary whole blood sampling devices to individual patients. Use only single-use lancets that permanently retract upon puncture. •… -
Page 46
CAUTION • The OneTouch® Verio™Pro+ Blood Glucose Monitoring System should not be used for patients within 24 hours of receiving a D-xylose absorption test, as it may cause inaccurately high results. • Do Not use test strips if the vial is damaged or left open to air. This could lead to error messages or inaccurate results. -
Page 47
Yellow = 5mm margin, Red = 7mm margin Performing a blood glucose test m CAUTION (continued) • If unable to test due to a problem with the testing supplies (see page 40), contact Customer Service and/or LifeScan® sales representative. Failure to test could delay patient treatment decisions and lead to a serious medical condition. -
Page 48
Insert a test strip into the test strip port with the gold side of the test strip and the two silver prongs facing you. Unlike some blood glucose meters, no separate step to code the OneTouch® Verio™Pro+ Meter is required. Test strip port NOTE: Do Not press or the eject button during a test. -
Page 49
Yellow = 5mm margin, Red = 7mm margin Performing a blood glucose test Getting a whole blood sample from the fingertip Follow your institution’s policy and procedure guidelines for whole blood collection and blood glucose monitoring. Prior to testing, the puncture site should be cleaned with warm, soapy water, rinsed and dried. -
Page 50
Yellow = 5mm margin, Red = 7mm margin Performing a blood glucose test Getting a venous or arterial blood sample Follow your institution’s policy and procedure guidelines for venous or arterial whole blood collection. Use only fresh whole blood when performing a blood glucose test using an arterial or venous blood sample. -
Page 51
Yellow = 5mm margin, Red = 7mm margin Performing a blood glucose test NOTE: When applying a whole blood sample from the finger, syringe or pipette, keep the meter pointed down to prevent blood from entering the test strip port. Fingerstick Holding the meter at a slight angle, guide the channel to the blood drop. -
Page 52
Yellow = 5mm margin, Red = 7mm margin Performing a blood glucose test Syringe Gently apply pressure to the plunger to expel a drop of blood. Touch the blood drop to the opening of the channel. Alternatively, dispense the blood from the syringe into a test tube, then apply blood to the test strip using a narrow bore pipette. -
Page 53
Yellow = 5mm margin, Red = 7mm margin Performing a blood glucose test 2. Wait for the channel to fill completely The blood drop will be drawn into the narrow channel. The channel should fill completely. The channel turns red and the meter will count down from 5 to 1. Blood should not be applied on the top of the test strip or to the top edge of the test strip. -
Page 54
Yellow = 5mm margin, Red = 7mm margin Performing a blood glucose test 3. Read the result on the meter The blood glucose result appears on the display, along with the unit of measure, and the date and time of the test. After a few seconds, View Previous will appear on the display. -
Page 55
Yellow = 5mm margin, Red = 7mm margin Performing a blood glucose test Interpreting unexpected test results Refer to the following cautions whenever blood glucose results are higher or lower than what you expect. m CAUTION Low blood glucose results This may require immediate treatment. -
Page 56
Yellow = 5mm margin, Red = 7mm margin Performing a blood glucose test m CAUTION (continued) High blood glucose results 30 Apr Re-test the blood glucose. If the result is EXTREME HIGH GLUCOSE again, this 19 : 00 indicates a severe problem with the patient’s blood glucose control. Follow your EXTREME institution’s policy regarding treatment of hyperglycemia. -
Page 57
Yellow = 5mm margin, Red = 7mm margin Performing a blood glucose test After getting a blood glucose result 30 Apr 19 : 00 Once you have a blood glucose result, you may: • Press to view the previous result, then press to hide the previous result. -
Page 58: Reviewing Past Results
Yellow = 5mm margin, Red = 7mm margin Reviewing past results The meter stores the most recent 980 patient blood glucose test results and displays them in several ways. If you have just completed a test, press to get to the Main Menu from the blood glucose result screen. If the meter is off, press and hold until the start-up screen appears.
-
Page 59
Yellow = 5mm margin, Red = 7mm margin Reviewing past results • When there are no results stored in History, (e.g., when no tests have been History performed or the results have been deleted after downloading, see pages 60-61) mmol/L No results No results is displayed. -
Page 60: Downloading Results To A Computer
Downloading results to a computer OneTouch® Diabetes Management Software (DMS) can be used to download and store all of the meter records. To learn more about OneTouch® DMS, visit www.OneTouchDiabetes.com. To order the software from LifeScan®, contact Customer Service and/or your LifeScan® sales representative.
-
Page 61
Yellow = 5mm margin, Red = 7mm margin Reviewing past results Once the command to start the download is sent from the computer to the meter, the meter display will show PC Connected indicating that the meter is in communication mode. Do Not perform a test while the meter is connected to a computer. -
Page 62
Perform evaluation of system linearity between the temperature ranges of 18°C-28°C at non-condensing relative humidity between 30% and 70%. • Use only OneTouch® Verio™Pro+ Linearity Solution (Levels 1 through 5) with the OneTouch® Verio™Pro+ Meter. Refer to the linearity solution vial label to determine the appropriate level for testing. -
Page 63: Performing A Linearity Test
Yellow = 5mm margin, Red = 7mm margin Performing a linearity test • When opening a new vial of linearity solution, record the discard date (date opened plus 6 months) on the vial label. • When opening a new vial of test strips, record the discard date (date opened plus 6 months) on the label.
-
Page 64
Yellow = 5mm margin, Red = 7mm margin Performing a linearity test • Do Not open the test strip vial until ready to remove a test strip and perform a test. Use the test strip immediately after removing it from the vial, especially in high humidity environments. A test strip left out of the vial in excess of two minutes before testing can lead to inaccurate results. -
Page 65
Yellow = 5mm margin, Red = 7mm margin Performing a linearity test m CAUTION • Do Not apply linearity solution to the skin or eyes as it may cause irritation. • Do Not use linearity solution after the expiration date (printed on the vial label) or the discard date (date opened plus 6 months), whichever comes first, or test results may be inaccurate. -
Page 66
Yellow = 5mm margin, Red = 7mm margin Performing a linearity test 2. Next, press to choose Meter Care and press Settings Time: 12:45 Date: 01 Apr 2011 Language: English Meter Care 3. Select Linearity Test and press Meter Care Control Reminder Control Results Linearity Test… -
Page 67
Silver prongs Unlike some blood glucose meters, no separate step to code the OneTouch® Verio™Pro+ Meter is required. Test strip port Yellow = 5mm margin, Red = 7mm margin AW05948101B_OT_VerioPro+_OB_Insides_R1.indd 67… -
Page 68
Yellow = 5mm margin, Red = 7mm margin Performing a linearity test Wait for the Apply Solution screen to appear on the meter display. NOTE: Do Not press or the eject button during a test. 6. Prepare the linearity solution Remove the vial cap and place it on a flat surface with the top of the cap pointing up. -
Page 69
Yellow = 5mm margin, Red = 7mm margin Performing a linearity test Wipe both the tip of the linearity solution vial and the top of the cap with a clean, damp tissue or cloth. NOTE: These steps are performed to reduce the risk of contamination which may lead to inaccurate linearity solution results. -
Page 70
Yellow = 5mm margin, Red = 7mm margin Performing a linearity test 7. Apply the linearity solution Hold the meter so that the side edge of the test strip is at a slight angle to the drop of linearity solution. Keep the meter pointed down to prevent linearity solution from entering the test strip port. -
Page 71
Yellow = 5mm margin, Red = 7mm margin Performing a linearity test 8. Read the result 30 Apr The meter will count down from 5 to 1. The result is displayed along with the date, 19 : 00 time, unit of measure and the linearity solution level. If mmol/L does not appear with the linearity test result, contact Customer Service and/or LifeScan®… -
Page 72
Yellow = 5mm margin, Red = 7mm margin Performing a linearity test 9. Press to continue the linearity test The Eject Strip screen appears on the meter display. Hold the meter pointed down. Press the eject button and the test strip will come out. Used test strips may be considered biohazardous waste in your area. -
Page 73
Yellow = 5mm margin, Red = 7mm margin Performing a linearity test 10. Select a level and insert a new test strip to continue the linearity solution test Return to Step 4 (see page 67). NOTE: If the linearity test is complete, press and hold to return to the Main Menu. -
Page 74
Yellow = 5mm margin, Red = 7mm margin Performing a linearity test Viewing linearity solution test results 01 Apr 12:45 1. From the Main Menu, press to select Settings and press History (mmol/L) Settings Serial #: BCXFF2HK 2. Next, press to choose Meter Care and press Settings Time:… -
Page 75
Yellow = 5mm margin, Red = 7mm margin Performing a linearity test 3. Select Linearity Results and press Meter Care NOTE: Follow your institutions policy and guidelines for interpreting linearity Control Reminder solution results. Control Results Linearity Test Linearity Results Meter Info For the current day, the number of tests performed using each level of linearity Linearity Results… -
Page 76
Yellow = 5mm margin, Red = 7mm margin Performing a linearity test To view the time of day and actual test result (mmol/L) for a specific level of Level 1 Results solution on any given day, highlight the level on the Linearity Results screen and mmol/L Tue, 30 Apr press… -
Page 77: Care And Maintenance
Yellow = 5mm margin, Red = 7mm margin Care and maintenance Storing the system Store the meter in the meter case. Keep in a dry place between 5°C and 30°C, with a relative humidity of less than 65%. Keep all items away from direct sunlight and heat. Store test strips under these same conditions.
-
Page 78
Yellow = 5mm margin, Red = 7mm margin Care and maintenance It is recommended that a 10% bleach solution or pre-saturated wipes, containing a minimum of 0.55% sodium hypochlorite, be used to disinfect the outer surfaces of the meter. Equivalent disinfecting agents may be used as specified by the local regulations or guidelines and must be effective against Hepatitis B, HIV and other blood borne pathogens as per the manufacturer’s labeling for the disinfectant. -
Page 79
Yellow = 5mm margin, Red = 7mm margin Care and maintenance Hold the meter with the test strip port pointed down. Use either a soft cloth dampened with the recommended disinfectant solution or a pre-saturated wipe to completely pre-clean the meter surface of all gross debris/contamination. Disinfect by using a new soft cloth dampened with the recommended disinfectant solution or pre-saturated wipe to dampen the outer surfaces of the meter. -
Page 80
Batteries Batteries The OneTouch® Verio™Pro+ Meter uses two AA alkaline batteries. See Troubleshooting, pages 92-93 for information on when to change the meter batteries. IMPORTANT: Use only new AA alkaline batteries with the meter. Do Not use rechargeable batteries. Use of an incorrect battery type may result in the meter providing fewer tests than normal from when the battery icon or the LOW BATTERY screen first appears. -
Page 81: Replacing The Batteries
Yellow = 5mm margin, Red = 7mm margin Batteries Replacing the batteries 1. Remove the old batteries Start with the meter turned off. Gently push down on the blue circle and slide the cover to remove. m WARNING To avoid a possible shock, Do Not change the batteries while the meter is connected to a computer.
-
Page 82
Yellow = 5mm margin, Red = 7mm margin Batteries 2. Insert the new batteries Insert two new AA alkaline batteries into the battery compartment. The icons in the battery compartment will guide you in placing the batteries. Lower cover onto the back of the meter, push down on the blue circle, and slide back into place. -
Page 83
Troubleshooting Troubleshooting The OneTouch® Verio™Pro+ Meter displays messages when there are problems with the test strip, or with the meter. Improper use may cause an inaccurate result without producing an error message. NOTE: If the meter is on but does not operate (locks-up), contact Customer Service and/or LifeScan®… -
Page 84
Yellow = 5mm margin, Red = 7mm margin Troubleshooting (continued) Warning What it means for Linearity Solution Testing Temperature Meter is too hot (above 28°C) to work correctly. too high. Out of operating range. What to do for Linearity Solution Testing See Meter Operator’s Guide. -
Page 85
Yellow = 5mm margin, Red = 7mm margin Troubleshooting What it means for Blood and Control Solution Testing Warning Meter is too cold (below 6°C) to work correctly. Temperature What to do for Blood and Control Solution Testing too low. Out of Move the meter and test strips to a warmer area. -
Page 86
Yellow = 5mm margin, Red = 7mm margin Troubleshooting (continued) Warning What it means for Linearity Solution Testing Meter is too cold (below 18°C) to work correctly. Temperature too low. Out of operating range. What to do for Linearity Solution Testing See Meter Move the meter and test strips to a warmer area. -
Page 87
Yellow = 5mm margin, Red = 7mm margin Troubleshooting What it means Warning The meter has detected an incorrect sample when doing a linearity test. Incorrect Sample What to do Detected. Repeat the linearity test with a new test strip, see linearity testing (pages 62-73). Retest with a new strip. -
Page 88
Yellow = 5mm margin, Red = 7mm margin Troubleshooting What it means 30 Apr The blood glucose level may be very low (severe hypoglycemia), below 1.1 mmol/L. 19 : 00 What to do EXTREME LOW GLUCOSE This may require immediate treatment. Although this message could be due to a (below 1.1 mmol/L) test error, it is safer to treat first and then do another test. -
Page 89
Yellow = 5mm margin, Red = 7mm margin Troubleshooting What it means ERROR 1 There is a problem with the meter. Meter problem. What to do Contact Customer Do Not use the meter. Contact Customer Service and/or LifeScan® sales Service. representative. -
Page 90
Yellow = 5mm margin, Red = 7mm margin Troubleshooting What it means ERROR 3 The sample was applied before the meter was ready. Meter was not What to do ready. Retest with a new strip. Repeat the test with a new test strip. Apply a whole blood sample, control, or linearity solution only after Apply Blood or Apply Solution appears on the display. -
Page 91
Yellow = 5mm margin, Red = 7mm margin Troubleshooting What it means ERROR 4 One of the following may apply: • Not enough whole blood, control, or linearity solution was applied or more was Strip f ill problem. Retest with a added after the meter began to count down. -
Page 92
Yellow = 5mm margin, Red = 7mm margin Troubleshooting What it means ERROR 5 The meter has detected a problem with the test strip. Possible cause is test strip damage. Strip problem. Retest with a What to do new strip. Repeat the test with a new test strip;… -
Page 93
Yellow = 5mm margin, Red = 7mm margin Troubleshooting What it means Battery power is low but there is still enough power to perform a test. What to do Press to continue but replace the batteries as soon as possible. Low Battery Replace soon. -
Page 94: Detailed Information About The System
Yellow = 5mm margin, Red = 7mm margin Detailed information about the system Technical Specifications Reported result range 1.1-33.3 mmol/L Calibration Plasma-equivalent Sample Fresh capillary, venous, and arterial whole blood Sample volume 0.4 µL Test time 5 seconds Assay method GDH-FAD glucose dehydrogenase Unit of measure mmol/L…
-
Page 95
Yellow = 5mm margin, Red = 7mm margin Detailed information about the system Technical Specifications (continued) Size 120 mm x 51 mm x 31 mm Weight Approximately 137 grams Operating ranges Temperature: 6°C to 44°C Relative humidity: non-condensing 10-90% Altitude: up to 3048 meters Hematocrit: 20-60% Battery type Two replaceable AA alkaline batteries… -
Page 96
4.2 mmol/L, and within 20% of a laboratory method when the glucose concentration is 4.2 mmol/L or higher. Samples from 100 patients were tested using both the OneTouch® Verio™Pro+ System and the YSI 2300 glucose analyzer laboratory instrument. System Accuracy Results for Glucose Concentrations <4.2 mmol/L Percent (and number) of meter results that match the laboratory test Within ±0.28 mmol/L… -
Page 97
Percent (and number) of meter results that match the laboratory test Within ±0.83 mmol/L or ±20% 99.7% (598/600) Therefore, 99.7% of the total results obtained with the OneTouch® Verio™Pro+ System achieved the goal suggested by the diabetes experts. Yellow = 5mm margin, Red = 7mm margin AW05948101B_OT_VerioPro+_OB_Insides_R1.indd 97… -
Page 98
Yellow = 5mm margin, Red = 7mm margin Detailed information about the system Regression Statistics Samples were tested in duplicate on three test strip lots. Results indicate that the OneTouch® Verio™Pro+ System compares well with a laboratory method. # of Subjects… -
Page 99
Yellow = 5mm margin, Red = 7mm margin Detailed information about the system Precision Within Run Precision (300 Venous Blood Tests) Target Glucose Mean Glucose Standard Deviation Coefficient of Variation (mmol/L) (mmol/L) (mmol/L) 0.06 2.55 0.10 1.88 0.14 1.90 11.1 10.8 0.22 2.01… -
Page 100
Yellow = 5mm margin, Red = 7mm margin Detailed information about the system Precision Total Precision (600 Control Solution Tests) Glucose Level Ranges Mean Glucose Standard Deviation Coefficient of Variation (mmol/L) (mmol/L) (mmol/L) Low (1.4-2.7) 2.11 0.04 2.11 Mid (5.7-7.7) 6.50 0.10 1.53… -
Page 101
Yellow = 5mm margin, Red = 7mm margin Detailed information about the system Fingertip Results for Glucose Concentrations <4.2 mmol/L Percent (and number) of meter results that match the laboratory test Within ±0.28 mmol/L Within ±0.56 mmol/L Within ±0.83 mmol/L 25% (2/8) 63% (5/8) 100% (8/8) -
Page 102
Yellow = 5mm margin, Red = 7mm margin Detailed information about the system Venous Results across the entire Glucose Range Percent (and number) of meter results that match the laboratory test Within ±0.83 mmol/L or ±20% 100% (177/177) Arterial Results across the entire Glucose Range Percent (and number) of meter results that match the laboratory test Within ±0.83 mmol/L or ±20% 99.5% (199/200) -
Page 103
Detailed information about the system Guarantee LifeScan® guarantees that the OneTouch® Verio™Pro+ Meter will be free of defects in material and workmanship for three years, valid from the date of purchase. The guarantee extends only to the original purchaser and is not transferable. -
Page 104: Index
Yellow = 5mm margin, Red = 7mm margin Index Backlight Batteries Battery Empty message Blood glucose test Buttons on meter Control solution, discard and expiration dates 23, 24 Control solution testing, reminder Control solution, testing Control solution test results, viewing Dehydration Date setting Disinfecting the meter…
-
Page 105
Yellow = 5mm margin, Red = 7mm margin Index Error messages History Hyperglycemia 56, 88 Hypoglycemia 55, 88 Guarantee Intended use Interfering substances Kit components 8, 9, 10 Lancing device 40, 43 Language, setting Linearity solution, discard and expiration dates 63, 65 Linearity solution, testing Linearity solution test results, viewing… -
Page 106
11, 31, 54, 71, 94 Mini USB cable Mini USB data port 11, 60 Plasma calibration Results, reviewing past Settings [DMS Available <Software, OneTouch® Diabetes Management>] Start-up screen 13, 58 Storing the system Symbols Technical specifications Temperature 22, 40, 62, 83, 84, 85, 86, 95… -
Page 107
Yellow = 5mm margin, Red = 7mm margin Index Turning meter off 15, 57 Turning meter on 13, 26, 48, 58 Unexpected blood glucose results 55, 56 Unit of measure 11, 31, 54, 71, 94 Unusual red blood cell count (hematocrit) Yellow = 5mm margin, Red = 7mm margin AW05948101B_OT_VerioPro+_OB_Insides_R1.indd 107 4/3/12 3:08 PM… -
Page 108
Yellow = 5mm margin, Red = 7mm margin Notes Yellow = 5mm margin, Red = 7mm margin AW05948101B_OT_VerioPro+_OB_Insides_R1.indd 108 4/3/12 3:08 PM… -
Page 109
GC AW Template Title: Rev. Date: Round Number: Template, OneTouch Lion, Owner’s Booklet 4/3/12 GC AW Template Number: AW 05948101B LifeScan Contact: Marcello Centofanti x4839 GC Document Number: Job No: LSGSUR4 GC 059481 ADS-03/LCB-03 ADS Reference Number: Number of Colors:…
Противопоказания
Система контроля уровня глюкозы в крови
предназначена для количественного определения уровня глюкозы (сахара) в цельной свежей капиллярной крови, взятой из кончика пальца. Медицинские работники могут использовать образцы венозной крови. Система контроля уровня глюкозы в крови OneTouch Verio IQ предназначена для самостоятельного использования вне организма (для диагностики in vitro) и помогает контролировать эффективность лечения сахарного диабета.
Система может использоваться людьми с сахарным диабетом в домашних условиях для самоконтроля и медицинскими работниками в клинических условиях.
Выполнение теста
Вставьте стерильный ланцет в ручку для прокалывания.
Выровняйте ланцет, как показано, чтобы он соответствовал держателю ланцета. Вставляйте ланцет в держатель до тех пор, пока он не встанет на место и полностью не войдет в держатель.
Снимите колпачок с ручки для прокалывания. Снимите колпачок, поворачивая его против часовой стрелки.
Наденьте колпачок на ручку для прокалывания.
Наденьте колпачок на устройство; поверните по часовой стрелке, чтобы зафиксировать колпачок.
Не закручивайте слишком сильно.
Поверните защитную крышку на один полный оборот, чтобы она отделилась от ланцета. Сохраните защитную крышку для последующей утилизации ланцета.
Настройте глубину прокола. У ручки для прокалывания имеется семь уровней глубины прокола, пронумерованных от 1 до 7. Чем меньше число, тем меньше будет глубина прокола, и чем больше число, тем глубже прокол.
Для детей и большинства взрослых нужно устанавливать небольшую глубину прокола. Глубокие проколы подходят людям с толстой или загрубевшей кожей. Поворачивайте регулятор глубины прокола, чтобы выбрать желаемую величину.
Менее глубокий прокол может быть менее болезненным. Сначала попробуйте сделать неглубокий прокол, а затем увеличивайте глубину прокола, Пока не определите ту глубину, которая позволяет получать образец крови надлежащего объема.
Взведите ручку для прокалывания. Отведите рычажок взвода назад до щелчка. Если щелчка нет, то ручка могла быть взведена, когда вставлялся ланцет.
Введите тест-полоску, чтобы включить глюкометр. Полоску в прибор нужно вставлять таким образом, чтобы золотистая сторона полоски и два серебристых зубца были обращены в вашу сторону.
Отдельного этапа для ввода какого-либо кода в глюкометр НЕ требуется.
При выполнении теста в условиях плохого освещения или в темноте, чтобы включить подсветку дисплея и освещение порта для ввода тест-полоски, нажмите и удерживайте кнопку до того, как вставить тест-полоску. Это дополнительное освещение может помочь вам вставить тест-полоску и выполнить тест.
Когда на дисплее появится экран нанесите кровь, можно нанести образец кровки на капилляр, расположенный по обеим сторонам тест-полоски.
Проколите кончик пальца. Плотно прижмите ручку для прокалывания к кончику пальца сбоку. Нажмите кнопку спуска. Затем отведите ручку для прокалывания от пальца.
Получите круглую каплю крови слегка сожмите и (или) помассируйте палец, пока на кончике пальца не появится круглая капля крови. Если кровь размазалась или растеклась, то не используйте этот образец.
Протрите место прокола и аккуратно выдавите еще одну каплю крови или сделайте прокол в другом месте.
Приблизительный размер
Нанесение крови на тест-полоску и считывание результатов. Нанесите образец на тест-полоску. Вы можете нанести кровь на любую сторону тест-полоски. Нанесите ваш образец крови на отверстие капилляра сбоку. Обязательно наносите образец крови сразу же после получения капли крови.
Придерживая глюкометр под небольшим углом, направьте отверстие капилляра к капле крови.
Когда капилляр коснется вашего образца крови, тест-полоска втянет кровь в капилляр.
Подождите, пока не заполнится весь капилляр. Капля крови будет втягиваться в узкий капилляр. При этом он должен весь заполниться. Капилляр станет красным, а глюкометр начнет обратный отсчет от 5 до 1.
Кровь не следует наносить на верхнюю часть или на верхний край тест-полоски. Не размазывайте образец крови и не соскабливайте его тест-полоской. Не прижимайте тест-полоску к месту прокола слишком плотно, иначе капилляр может оказаться перекрытым и не заполнится надлежащим образом.
Не наносите кровь на тест-полоску повторно после того, как вы отвели тест-полоску от капли. Не перемещайте тест-полоску в глюкометре во время теста, иначе вы можете получить сообщение об ошибке или глюкометр может выключиться.
Предлагаем ознакомиться: Как настроить глюкометр сателлит плюс
Не вынимайте тест-полоску, пока на дисплее не отобразится результат, иначе глюкометр отключится. Не производите тест во время зарядки аккумулятора. Прочитайте результат на глюкометре. На дисплее появятся результат измерения уровня глюкозы в вашей крови, единицы измерения, дата и время выполнения теста.
Если при проверке уровня глюкозы в крови на экране появляется текстовое сообщение Контрольный раствор, то повторите тест с новой тест-полоской.
• Если включена функция добавления меток, поставьте метку к этому результату (см. стр. 55–59). Или
• Нажмите и удерживайте кнопку для возврата в основное меню. Или
• Нажмите и удерживайте кнопку в течение нескольких секунд, пока глюкометр не выключится. Также глюкометр выключится автоматически через две минуты бездействия. Удаление использованного ланцета. Эта ручка для прокалывания обладает возможностью выброса, так что вам не нужно вытягивать использованный ланцет.
1. Снимите колпачок с ручки для прокалывания. Снимите колпачок, поворачивая его против часовой стрелки.
2. Вытолкните ланцет. Сдвигайте рычажок выброса вперед до тех пор, пока ланцет не выйдет из ручки для прокалывания. Верните рычажок выброса назад, в прежнее положение. Если ланцет не выталкивается надлежащим образом, снова взведите ручку, а затем сдвигайте рычажок выброса вперед до тех пор, пока ланцет не выйдет.
3. Закройте острие использованного ланцета. Перед тем как вынуть ланцет, закройте его острие защитной крышкой. Вставьте острие ланцета в чашеобразную сторону крышки и надавите.
4. Установите на место колпачок ручки для прокалывания. Наденьте колпачок на устройство; поверните по часовой стрелке, чтобы зафиксировать колпачок. Важно использовать новый ланцет каждый раз, когда вы получаете образец крови.
не должна применяться для пациентов, которые в последние 24 часа проходили тестирование на абсорбцию D-ксилозы, так как это может привести к ложно завышенным результатам.
Не используйте систему OneTouch Verio IQ, если точно известно или имеются основания подозревать, что в образце цельной крови пациента содержится ксилоза или пралидоксим (PAM).
Не используйте тест-полоски, если флакон поврежден или оставался на открытом воздухе. Это может привести к сообщениям об ошибке или к некорректным результатам.
Комплектация:- глюкометр- Ручка для прокалывания Delica и 10 ланцетов- тест-полоски: 10 шт.- кабель мини-USB и сетевое зарядное устройство- футляр для хранения и переноски- документы и инструкции
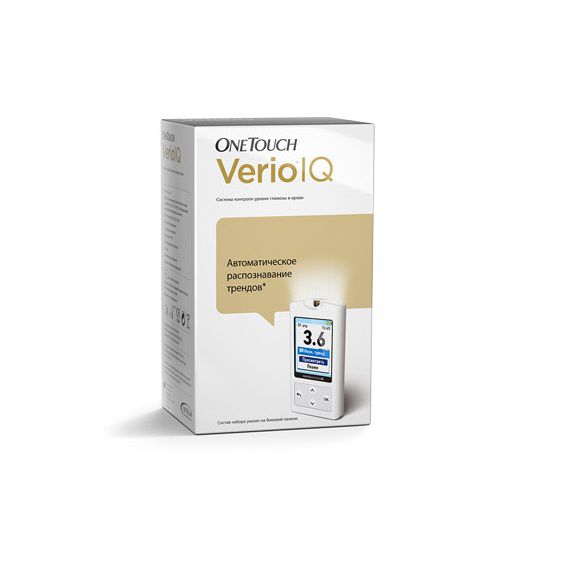
Встречайте новый умный глюкометр OneTouch Verio®IQ
Поможет Вам разобраться как инсулин, питание и образ жизни влияют на уровень глюкозы в крови
Благодаря технологии ColourSureTM при повторяющихся эпизодах высокого и низкого уровня глюкозы на экране появляется сообщение, кодированное цветом.
— Яркий цветной экран высокого разрешения
— Подсветка зоны ввода тест-полоски
— Автоматическое выявление низких и высоких трендов*
— Простая процедура добавления отметок о еде
— Аккумуляторная батарея
— Измерение в темноте
*Для выявления высокого тренда глюкометр использует результаты с отметкой «До еды». Для выявления низкого тренда отметки о еде не требуются.
В комплект входит:
- Глюкометр OneTouch Verio®IQ
- Футляр
- Тест-полоски OneTouch Verio®
- Ручка для прокалывания OneTouch® Delica®
- Стерильные ланцеты
- Зарядное устройство
- Мини USB кабель
- Руководство пользователя
- Краткое руководство пользователя
Глюкометр ВанТач Верио IQ (OneTouch VerioIQ) использует новую технологию измерения сахара в крови. За пять секунд проводиться несколько тысяч измерений. После этого все значения математически обрабатываются и на экран выводится результат повышенной точности.
Предлагаем ознакомиться: Норма гликированного гемоглобина у мужчин
Благодаря технологии ColourSureTM при повторяющихся эпизодах высокого и низкого уровня глюкозы на экране появляется сообщение, кодированное цветом.Интересно, что глюкометр OneTouch VerioIQ очень сильно похож на iPod.
У него сочный, яркий экран. Очень удобная навигация. Подсветка места ввода тест-полоски.У глюкометра ВанТач Верио IQ (OneTouch VerioIQ) нет батареек. Вернее есть, но аккумулятор. Заряжается анализатор через блок питания (идет в разъеме), либо от обычного USB порта в компьютере или в любом другом блоке питания.
Вход для зарядки в самом глюкометре выполнен в форм-факторе mini-USB.Ручка для прокалывания пальцев тоже новая. Называется Delica («Делика», от слова «деликатный»). У ручки есть выбор широкого диапазона глубин прокола. Свои ланцеты…
на треть тоньше любого из аналогов. Ручка очень легкая и она имеет пружинный стабилизатор, снижающий люфт движения ланцета, что сокращает микро-травматизм кожи, а получение капли крови с ее помощью полностью безболезненно.
Внутри футляра нет привычных «ушек» для баночки с тест-полосками, ручки, ланцет и глюкометра. Все крепежные элементы соединены между собой и их можно все вместе вытащить и замерить сахар. Это очень удобно!
Фактически, глюкометр «все-в-одном». Новый, современный, компактный, простой в использовании, с интуитивно понятным интерфейсом и цветным экраном. Для удобного введения тест-полоски предусмотрена подстветка порта, нанесение крови на тест-полоску может производиться с любой стороны (удобство для правшей и левшей).
Имеется функция отметок «ДО ЕДЫ» и «ПОСЛЕ ЕДЫ».Подсвечивается зона теста (в отличие от всех других глюкометров на Российском рынке) — это крайне важно для измерения глюкозы маленьким детям в ночное время.
Не нужно включать яркий верхний свет.Очень маленькая капля крови обеспечивает неизменно точный результат измерения — всего 0,4 мкл.В комплекте с прибором идёт замечательный, очень безболезненный прокалыватель Уан Тач Делика!
Система контроля уровня глюкозы в крови OneTouch Verio®IQ предназначена для количественного определения уровня глюкозы (сахара) в цельной свежей капиллярной крови, взятой из кончика пальца. Медицинские работники могут использовать образцы венозной крови.
Система контроля уровня глюкозы в крови OneTouch Verio®IQ предназначена для самостоятельного использования вне организма (для диагностики in vitro) и помогает контролировать эффективность сахарного диабета.
Перед получением образца крови промойте место взятия образца теплой водой с мылом, ополосните и высушите.
Ручка для прокалывания предназначена для индивидуального пользователя. Никогда не пользуйтесь одним ланцетом или ручкой для прокалывания вместе с кем-либо
Всегда используйте новый, стерильный ланцет при выполнении каждого теста.
Всегда содержите ваш глюкометр и ручку для прокалывания в чистоте
- Снимите колпачок с ручки для прокалывания. Снимите колпачок, поворачивая его против часовой стрелки.
- Вставьте стерильный ланцет в ручку для прокалывания. Выровняйте ланцет, как показано, чтобы он соответствовал держателю ланцета. Вставляйте ланцет в держатель до тех пор, пока он не встанет на место и полностью не войдет в держатель. Поверните защитную крышку на один полный оборот, чтобы она отделилась от ланцета. Сохраните защитную крышку для последующей утилизации ланцета.
- Наденьте колпачок на ручку для прокалывания. Наденьте колпачок на устройство; поверните по часовой стрелке, чтобы зафиксировать колпачок.
- Настройте глубину прокола. У ручки для прокалывания имеется семь уровней глубины прокола, пронумерованных от 1 до 7. Чем меньше число, тем меньше будет глубина прокола, и чем больше число, тем глубже прокол. Для детей и большинства взрослых нужно устанавливать небольшую глубину прокола. Глубокие проколы подходят людям с толстой или загрубевшей кожей. Поворачивайте регулятор глубины прокола, чтобы выбрать желаемую величину.
- Взведите ручку для прокалывания. Отведите рычажок взвода назад до щелчка. Если щелчка нет, то ручка могла быть взведена, когда вставлялся ланцет.
- Введите тест-полоску, чтобы включить глюкометр. Полоску в прибор нужно вставлять таким образом, чтобы золотистая сторона полоски и два серебристых зубца были обращены в вашу сторону. Отдельного этапа для ввода какого-либо кода в глюкометр не требуется. Когда на дисплее появится экран Нанесите кровь, можно нанести образец кровки на капилляр, расположенный по обеим сторонам тест-полоски.
- Проколите кончик пальца. Плотно прижмите ручку для прокалывания к кончику пальца сбоку. Нажмите кнопку спуска. Затем отведите ручку для прокалывания от пальца.
- Получите круглую каплю крови. Слегка сожмите и (или) помассируйте палец, пока на кончике пальца не появится круглая капля крови. Если кровь размазалась или растеклась, то не используйте этот образец. Протрите место прокола и аккуратно выдавите еще одну каплю крови или сделайте прокол в другом месте.
- Нанесите образец на тест-полоску Вы можете нанести кровь на любую сторону тест-полоски. Нанесите ваш образец крови на отверстие капилляра сбоку. Обязательно наносите образец крови сразу же после получения капли крови. Придерживая глюкометр под небольшим углом, направьте отверстие капилляра к капле крови. Когда капилляр коснется вашего образца крови, тест-полоска втянет кровь в капилляр. Подождите, пока не заполнится весь капилляр Капля крови будет втягиваться в узкий капилляр. При этом он должен весь заполниться. Капилляр станет красным, а глюкометр начнет обратный отсчет от 5 до 1. Кровь не следует наносить на верхнюю часть или на верхний край тест-полоски.
Не размазывайте образец крови и не соскабливайте его тест- полоской.
Не прижимайте тест-полоску к месту прокола слишком плотно, иначе капилляр может оказаться перекрытым и не заполнится надлежащим образом.
Предлагаем ознакомиться: Мильгамма Композитум: инструкция по применению таблеток, состав и аналоги
Не наносите кровь на тест-полоску повторно после того, как вы отвели тест-полоску от капли.
Не перемещайте тест-полоску в глюкометре во время теста, иначе вы можете получить сообщение об ошибке или глюкометр может выключиться.
Не вынимайте тест-полоску, пока на дисплее не отобразится результат, иначе глюкометр отключится
Не производите тест во время зарядки аккумулятора.
- Размер капли крови — 0,4мкл
- Время проведения анализа — 5 секунд
- Диапазон измерения — 1,0-33,3 ммоль/л
- Способ введения кода — Не требует кодирования
- Память — 750 результатов
- Подсчет среднего значения:7 дней ;14 дней ;30 дней ;90 дней.
Храните глюкометр, тест-полоски, контрольный раствор и другие компоненты в футляре. Хранить следует в сухом прохладном месте при температуре от 5 до 30 °C. Не помещать в холодильник. Беречь все компоненты от воздействия прямого солнечного света и высокой температуры.
Глюкометр one — это хороший выбор.
Качество товаров, в том числе Глюкометр one, проходят контроль качества нашими поставщиками.
Купить Глюкометр one Вы сможете на нашем сайте, нажав на кнопку «Добавить в корзину».
глюкометр, инструкция
- Manuals
- Brands
- OneTouch Manuals
- Blood Glucose Meter
- Verio Pro
- Owner’s booklet
-
Contents
-
Table of Contents
-
Troubleshooting
-
Bookmarks
Quick Links
Blood Glucose Monitoring System
Owner’s
Booklet.
Instructions for use.
Related Manuals for OneTouch Verio Pro
Summary of Contents for OneTouch Verio Pro
-
Page 1
Blood Glucose Monitoring System Owner’s Booklet. Instructions for use. -
Page 3
Blood Glucose Monitoring System Owner’s Booklet… -
Page 4
BG level. Clear instructions and visuals will help you get comfortable using the OneTouch® Verio™ Pro Meter, so you can expect to get reliable results every time you test. Please keep your Owner’s Booklet in a safe place;… -
Page 5
Symbols Cautions and Warnings. Refer to the Owner’s Booklet and inserts that came with your system for safety-related information. Consult instructions for use Contains sufficient for <n> tests Direct current Do not re-use Expiry Date In Vitro Diagnostic Medical Device Lot Number Low Battery Manufacturer… -
Page 6: Table Of Contents
Table of Contents Setting up your system Testing your blood glucose (BG) Attaching tags to your BG results Reviewing past results, averages and high/low pattern messages Control solution testing Care and maintenance…
-
Page 7
Batteries Troubleshooting Detailed information about your system Index… -
Page 8: Before You Begin
Before you begin Before using this product to test your blood glucose (BG), carefully read this Owner’s Booklet, and the inserts that come with the OneTouch® Verio™ Test Strips and OneTouch® Verio™ Control Solution. Intended use The OneTouch® Verio™ Pro Blood Glucose Monitoring…
-
Page 9: Test Principle
The OneTouch® Verio™ Pro Blood Glucose Monitoring System should not be used for: • The diagnosis of diabetes. • Testing newborns. • Patients within 24 hours of receiving a D-xylose absorption test as it may cause inaccurately high results. Test principle Glucose in the blood sample mixes with special chemicals in the test strip and a small electric current is produced.
-
Page 10: Blood Glucose Monitoring System
The OneTouch® Verio™ Pro Blood Glucose Monitoring System Included with your kit: Available separately:…
-
Page 11
If another type of lancing device was included, see the separate instructions for that lancing device. *OneTouch® Verio™ Control Solution is available separately. Ask for control solution where you obtain your test strips. **For availability of Clear Cap, contact Customer Care on 0800 121 200 (UK) or 1800 535 676 (Ireland). -
Page 12
Setting up your system Getting to know your OneTouch® Verio™ Pro Blood Glucose Monitoring System Meter Display Test strip port Insert test strip here to turn meter on mmol/L is the pre-set unit of measure and cannot be changed Data port… -
Page 13: Setting Up Your System
Setting up your system Test strip Channel to apply sample Silver prongs Insert into test strip port Turning your meter on Press and hold until the 9 Oct 12:45 start-up screen appears. Once the start-up screen is Last Result: 7.8 mmol/L My History displayed, release Pattern Log…
-
Page 14
Setting up your system Using the display backlight The backlight comes on automatically whenever the meter is turned on. After a few seconds of no activity, the backlight will dim. Pressing any button or inserting a test strip will turn the backlight back on. NOTE: •… -
Page 15: Basic Settings
Setting up your system Basic settings Setting the meter language, time and date Before using your meter for the first time, you should check these settings. When using the meter for the first time, you will automatically start at the Set Language screen. 1.
-
Page 16
Setting up your system 2. Set the time of day In the Set Time screen Set Time press to set the hour and press . Repeat : 45 this step to set the minutes. Please set with care. 3. Set the date Set Date In the Set Date screen, Oct 2010… -
Page 17
Setting up your system 4. Confirm your settings If your settings are correct Confirm Settings press to highlight Language: English Confirm and press Time: 12:45 If a setting is not correct, Date: 09 Oct 2010 Units: mmol/L highlight the setting and press to return to that Confirm… -
Page 18
Setting up your system After setting the date, this Your meter is now screen will appear on the ready for testing. Set meter display. up tools and other features? To customise other meter features, highlight Not Now OK and press To go to the Main Menu, highlight Not Now and press… -
Page 19
Setting up your system Tool settings The meter has several features that provide information to help you manage your diabetes. Tagging – BG results can Tool Settings be tagged to indicate tests Tagging: taken around mealtimes. High/Low Patterns: Off High/Low Patterns – Lets you know if your BG levels Menu are developing a high or… -
Page 20
Setting up your system Turn the Tagging feature on or off After testing, you can add tags to your BG results. See pages 57–61 for more information. Highlight Tagging on the Tool Settings Tool Settings screen and Tagging: High/Low Patterns: Off press Back Tagging… -
Page 21
Setting up your system Set the High/Low Patterns The meter can let you know whenever your BG results develop a pattern below the Low limit or above the Before Meal High limit you set in your meter. See pages 69–76 for more information. NOTE: •… -
Page 22
Setting up your system m CAUTION Be sure to talk to your healthcare professional about the High and Low pattern limits that are right for you. When selecting or changing your pattern limits, you should consider factors such as your lifestyle and diabetes therapy. Never make significant changes to your diabetes care plan without consulting your healthcare professional. -
Page 23
Setting up your system Next, highlight Receive Alerts High/Low Patterns and press Receive Alerts: My High/Low limits Back Receive Alerts To turn this feature on or off, press to highlight your selection and press If the feature is turned on, High/Low Patterns highlight My High/Low Limits Receive Alerts:… -
Page 24
Setting up your system NOTE: Low and Before Meal High pattern limits apply to every hour of the day. On the My High/Low Limits My High/Low Limits screen, highlight Low and mmol/L press Low: Before Meal High: Back The Low limit is highlighted. Press to select a mmol… -
Page 25
Setting up your system Next, on the My High/Low Before Meal High Limits screen, highlight Before Meal High and mmol press Tag BG result to The Before Meal High limit is detect High Patterns. highlighted. Press to select a value for your high limit and press My High/Low Limits On the My High/Low Limits… -
Page 26
Setting up your system Adjusting settings after setting up the meter for the first time At any time, you can adjust the settings in your meter. Highlight Settings on the 9 Oct 12:45 Main Menu screen and press Last Result: 7.8 mmol/L My History Pattern Log Settings… -
Page 27
Setting up your system NOTE: After changing any of your meter settings, you will not see the Confirm Settings screen (page 15) that appears when you set the meter up for the first time. Checking the meter serial number and software version The meter serial number and software version are stored in your meter and you can check this information at any time. -
Page 28
Setting up your system The information is displayed. Meter Info Press to return to the Serial #: Settings screen. XXXXXXXX Software: 00.00.00 Units: mmol/L Back Turning your meter off after set up There are two ways to turn your meter off: •… -
Page 29
• Use only OneTouch® Verio™ Test Strips. • Unlike some blood glucose meters, no separate step to code your OneTouch® Verio™ Pro System is required. • Make sure your meter and test strips are about the same temperature before you test. -
Page 30
Testing your blood glucose (BG) • Tightly close the cap on the vial immediately after use to avoid contamination and damage. • Store unused test strips only in their original vial. • Do Not open the test strip vial until you are ready to remove a test strip and perform a test. -
Page 31: Testing Your Blood Glucose (Bg)
Testing your blood glucose (BG) m CAUTION • Do Not use your test strips if your vial is damaged or left open to air. This could lead to error messages or inaccurate results. Contact Customer Care on 0800 121 200 (UK) or 1800 535 676 (Ireland) immediately if the test strip vial is damaged.
-
Page 32
Testing your blood glucose (BG) Lancing Device Cocking Release Control Button Lancing Depth Device Cap Indicator (For fingertip sampling) Lancet Point Clear Cap (For forearm and palm sampling) See Sterile Protective pages 48–56. Lancet Cover If the lancing device shown here is not included with your kit and/or you want to use it for alternative site testing, see the user instructions for that lancing device or contact Customer Care on 0800 121 200 (UK) -
Page 33
Testing your blood glucose (BG) m CAUTION To reduce the chance of infection: • Make sure to wash the sample site with soap and warm water, rinse and dry before sampling. • Never share a lancet or a lancing device with anyone. •… -
Page 34
Testing your blood glucose (BG) 2. Insert a sterile lancet Firmly push the lancet into the holder. 3. Twist off the protective cover and save it for later use Replace the lancing device cap. -
Page 35
Testing your blood glucose (BG) 4. Adjust the depth setting Twist the lancing device cap until the desired setting appears. Smaller numbers are for shallower punctures, which may be less painful. Shallower punctures work for children and most adults. Deeper punctures work well for people with thick or callused skin. -
Page 36
Testing your blood glucose (BG) 5. Cock the lancing device Slide the cocking control back until it clicks. If it does not click, that’s okay. It may have been cocked when you inserted the lancet. -
Page 37
Testing your blood glucose (BG) 6. Insert a test strip to turn the meter on Insert the test strip into the Silver prongs test strip port with the gold side of the test strip and the two silver prongs facing you. No separate step to code the meter is required. -
Page 38
Testing your blood glucose (BG) When the Apply Blood Apply Blood screen appears on the display, you can apply your blood sample. 7. Lance your finger Hold the lancing device firmly against the side of your finger. Press the release button. -
Page 39
Testing your blood glucose (BG) 8. Get a round drop of blood Gently squeeze your finger until you get a round drop of blood. Approximate size If the blood smears or runs, Do Not use that sample. Wipe the area and gently squeeze another drop of blood or puncture a new site. -
Page 40
Testing your blood glucose (BG) Applying blood and reading results 1. Apply the sample to the test strip You can apply blood to either side of the test strip. Apply your sample to the opening of the channel. Be sure to apply your sample immediately after you get a drop of blood. -
Page 41
Testing your blood glucose (BG) Holding the meter at a slight angle, guide the channel to the blood drop. Channel When it touches your sample, the test strip wicks blood into the channel. -
Page 42
Testing your blood glucose (BG) 2. Wait for the channel to fill completely The blood drop will be drawn into the narrow channel. The channel should fill completely. The channel turns red and the meter begins a 5 second countdown. Blood should not be applied on the top of the test strip or to the top edge of the test strip. -
Page 43
Testing your blood glucose (BG) • Do Not smear or scrape the sample with the test strip. • Do Not press the test strip too firmly against the puncture site or the channel may be blocked from filling properly. • Do Not apply more blood to the test strip after you have moved the drop of blood away. -
Page 44
Testing your blood glucose (BG) 3. Read your result on the meter Your BG result appears on the display, along with the unit of measure, and the date and time of the test. If mmol/L does not appear with the BG result, contact Customer Care on 0800 121 200 (UK) or 1800 535 676 (Ireland). -
Page 45
Testing your blood glucose (BG) After getting a BG result Once you have your BG result, you may: • Attach a Tag to this result if the Tagging feature is turned on (see pages 57–61). • Return to the Main Menu •… -
Page 46
Testing your blood glucose (BG) Removing the used lancet Remove the lancing device cap. Place the lancet protective cover on a hard surface and push the lancet tip into the cover. Remove the lancet and place it in a container for sharp objects. -
Page 47: Test Results
Testing your blood glucose (BG) Interpreting unexpected test results Refer to the following cautions whenever your BG results are higher or lower than what you expect. m CAUTION Low BG results If your BG result is below 3.8 mmol/L it may mean hypoglycaemia (low blood glucose).
-
Page 48
Testing your blood glucose (BG) m CAUTION High BG results If your BG result is above 10.0 mmol/L, it may mean hyperglycaemia (high blood glucose) and you should consider re-testing. Talk to your healthcare professional if you are concerned about hyperglycaemia. EXTREME HIGH BG is displayed when your BG result is over 33.3 mmol/L. -
Page 49
Testing your blood glucose (BG) m CAUTION Repeated unexpected BG results If you continue to get unexpected results, check your system with control solution. See Control solution testing, pages 79–89. If you are experiencing symptoms that are not consistent with your BG results and you have followed all instructions in this Owner’s Booklet, call your healthcare professional. -
Page 50
Testing your blood glucose (BG) Testing with a forearm or palm sample The OneTouch® Verio™ Pro Meter allows you to test with a blood sample from your forearm or palm. Getting a drop of blood from these “alternative sites” may be less painful than a fingertip sample. -
Page 51
Testing your blood glucose (BG) m CAUTION Do Not test on your forearm or palm when: • You think your blood glucose is rapidly falling, such as within two hours of exercise or a fast acting insulin injection or insulin pump bolus. Testing with a fingertip sample may identify hypoglycaemia or an insulin reaction sooner than testing with a forearm or palm sample. -
Page 52: Getting A Blood Sample
Testing your blood glucose (BG) Getting a blood sample Getting a blood sample from your forearm or palm is different than getting a sample from your fingertips. Follow these instructions to get a sufficient blood drop for testing. Before testing, wash the puncture site with warm, soapy water.
-
Page 53
Testing your blood glucose (BG) 2. Adjust the depth setting You may need a deeper setting to get a sufficient sample for testing. Twist the cap to increase the depth. Be sure to cock the lancing device. -
Page 54
Testing your blood glucose (BG) 3. Choose a sample site Choose a spot away from bone, veins, and hair. Massage the site to increase blood flow. Forearm Select a spot with no visible veins and avoid deep lines, which may cause your blood sample to smear. -
Page 55
Testing your blood glucose (BG) 4. Lance your forearm or palm • Firmly press and hold the lancing device against the sample site. • Looking through the clear cap, you should see the sample site change colour as blood collects under the skin. -
Page 56
Testing your blood glucose (BG) • Press the release button while continuing to apply pressure. Palm Forearm • Keep holding the lancing device against your skin until a round drop of blood forms under the cap. Do Not press on the site excessively. -
Page 57
Testing your blood glucose (BG) 5. Remove the lancing device Carefully lift the lancing device away from your skin. Do Not smear the blood sample. If the drop of blood runs or spreads due to contact with hair or a line in your palm, Do Not use the sample. Try lancing again in a smoother area. -
Page 58
Testing your blood glucose (BG) 6. Apply the sample to the test strip Keep your forearm or palm steady and use your other hand to bring the side of the test strip channel to the drop of blood. Palm Forearm •… -
Page 59
Attaching tags to your BG results Your OneTouch® Verio™ Pro Meter allows you to attach a before-meal, after-meal, fasting, or a bedtime tag to any BG result. • A before-meal BG test is taken just before the start of your meal. -
Page 60
Attaching tags to your BG results NOTE: • Before Meal and Fasting tags are used to determine if a BG result should trigger a high pattern message (see page 69). Use care when adding tags to your BG results. Incorrect tagging can cause the information displayed in averages and high pattern messages to be inaccurate and/or misinterpreted. -
Page 61: Attaching Tags To Your Bg Results
Attaching tags to your BG results Adding, changing or removing a tag To add tags, the Tagging feature must be turned on (see page 18). Adding a tag After testing, your BG result 10 Oct 7:45 is displayed and Add Tag? is mmol highlighted near the bottom of the meter display.
-
Page 62
Attaching tags to your BG results 2. Press to highlight the desired tag and press Available tags are: Add Tag Fasting Fasting Before Meal Before Meal After Meal Bedtime After Meal Bedtime No Tag No Tag 10 Oct 7:45 mmol Fasting Menu Your tag will appear here… -
Page 63
Attaching tags to your BG results Changing or removing a tag Choose Last Result from the Main Menu and press (see Reviewing past results, page 63). The Last Result screen will be displayed. Highlight the tag, press and follow step 2 on page 60 to change the tag. -
Page 64: Reviewing Past Results, Averages And High/Low Pattern Messages
Reviewing past results, averages and high/low pattern messages If your meter is off, press 10 Oct 7:45 and hold until the start-up screen appears. Last Result: 10.0 mmol/L My History Once the start-up screen is Pattern Log displayed release Settings (See Turning your meter on, page 11.) If you have just completed a test, select Menu…
-
Page 65
Reviewing past results, averages and high/low pattern messages From the Main Menu, choose: • Last Result to view your most recent result • My History to view: — Results Log — Averages • Pattern Log to view high or low pattern messages Press to highlight your selection and press Date/… -
Page 66
Reviewing past results, averages and high/low pattern messages My History From the My History menu, My History choose: Results Log — Results Log Averages — Averages Back Results Log Results Log mmol/L The meter will display four 12 Oct 8:03 results at a time, starting 10 Oct 7:45… -
Page 67
Reviewing past results, averages and high/low pattern messages The following symbols may also appear: HI if the BG result was above 33.3 mmol/L LO if the BG result was below 1.1 mmol/L C if the result is from a control solution test (see pages 79–89) if the BG result is tagged Fasting if the BG result is tagged Before Meal… -
Page 68
Reviewing past results, averages and high/low pattern messages To view details of an Review Result individual result, press 09 Oct to highlight the result, mmol 8:03 then press To return to the previous Before Meal Back screen, highlight Back and press… -
Page 69
Reviewing past results, averages and high/low pattern messages Averages Averages mmol/L For each of the 7-, 14-, 30-, 7 Days 10.3 and 90-day periods leading 14 Days 30 Days 10.6 up to the current date, 90 Days the meter will display the Back number of results (Num) and the average (Avg) -
Page 70
Reviewing past results, averages and high/low pattern messages NOTE: The meter calculates averages based on the 7-, 14-, 30-, and 90-day periods ending on the current date setting. If you change your date setting, your averages may change too. Result averages provide information from past results. Do Not use result averages to make immediate treatment decisions. -
Page 71
Reviewing past results, averages and high/low pattern messages Pattern Log (High/Low Pattern Messages) High and low pattern messages are displayed when glucose levels develop a pattern below the Low limit or above the Before Meal High limit set in your meter. Pattern messages appear based on the following: •… -
Page 72
Reviewing past results, averages and high/low pattern messages The next time a BG result is below the Low limit or above the Before Meal High limit, the meter reviews all BG results during the past 5 days to determine if a new low or high pattern message should be triggered. -
Page 73
Reviewing past results, averages and high/low pattern messages m CAUTION • High and low pattern messages are based on values you set in the meter (see pages 19–23). These Messages are different from EXTREME HIGH BG and EXTREME LOW BG Warnings that appear whenever your BG level is above 33.3 mmol/L or below 1.1 mmol/L. -
Page 74
Reviewing past results, averages and high/low pattern messages After a BG test, Low Pattern or High Pattern will appear with your test result whenever a pattern is detected. Low Pattern Message 10 Oct 9:30 To view a low pattern mmol message after a test, press to highlight… -
Page 75
Reviewing past results, averages and high/low pattern messages To view details about the individual BG results that resulted in the Low Pattern message, highlight Get Details and press To return to the previous Low Pattern Details mmol/L screen, highlight Back and 10 Oct 9:30 press… -
Page 76
Reviewing past results, averages and high/low pattern messages In this example, the High High Pattern 10 Oct Pattern message indicates Before Meal High that you had at least one BG Pattern detected. result on any 3 of the past 4 3 out of 4 days. -
Page 77
Reviewing past results, averages and high/low pattern messages When any High or Low 10 Oct 12:45 Pattern message has not been viewed, Pattern Log Last Result: 7.8 mmol/L My History appears on the Main Menu Pattern Log with a message icon ( Settings that blinks. -
Page 78
Reviewing past results, averages and high/low pattern messages NOTE: • When you have no unread High or Low Pattern messages, the blinking message icon will not appear on the Main Menu. • High and Low pattern messages are based on the High/ Low limits set in your meter. -
Page 79: Downloading Results To A Computer
To learn more about OneTouch® DMS and to order the software and USB cable from LifeScan, visit www.LifeScan.co.uk or Customer Care on 0800 121 200 (UK) or 1800 535 676 (Ireland).
-
Page 80
Reviewing past results, averages and high/low pattern messages Once the command to PC Connected start the download is sent from the computer to the meter, the meter display will show “PC Connected.” indicating that the meter is in communication mode. Do Not insert a test strip while the meter is connected to a computer. -
Page 81: Control Solution Testing
Control solution testing OneTouch® Verio™ Control Solution is used to check that the meter and test strips are working together properly and that you are performing the test correctly. (Control Solution is available separately). NOTE: • Use only OneTouch® Verio™ Control Solution with your…
-
Page 82
Control solution testing • When you first open a new vial of control solution, record the discard date on the vial label. Refer to the control solution insert or vial label for instructions on determining the discard date. • Tightly close the cap on the control solution vial immediately after use to avoid contamination or damage. -
Page 83: Do A Control Solution Test
Control solution testing Do a control solution test • Whenever you open a new vial of test strips. • If you suspect that the meter or test strips are not working properly. • If you have had repeated unexpected BG results. •…
-
Page 84: Performing A Control Solution Test
Control solution testing Performing a control solution test 1. Insert a test strip Silver prongs to turn the meter on Test strip port Apply Blood Wait for the Apply Blood screen to appear on the display.
-
Page 85
Control solution testing 2. Prepare the control solution Remove the vial cap and place it on a flat surface with the top of the cap pointing up. Squeeze the vial to discard the first drop. Wipe both the tip of the control solution vial and the top of the cap with a clean, damp tissue or cloth. -
Page 86
Control solution testing Then, squeeze a drop into the small well on the top of the cap or onto another clean, non-absorbent surface. 3. Apply the control solution Hold the meter so that the side edge of the test strip is at a slight angle to the drop of control solution. -
Page 87
Control solution testing Touch the channel on the side of the test strip to the control solution. Wait for the channel to fill completely. 4. Read your result The meter will begin a 5 second countdown. Your result is displayed along with the date, time, unit of measure, and the words Control Solution. -
Page 88
Control solution testing m CAUTION If the words Control Solution do not appear on the screen, repeat the test with a new test strip. If the problem persists, contact Customer Care on 0800 121 200 (UK) or 1800 535 676 (Ireland). NOTE: If the words Control Solution do not appear on the screen, the result will be included in your averages and your averages will change too. -
Page 89
5. Check if the result is in range Compare the result displayed on the meter to the range printed on your OneTouch® Verio™ Control Solution vial. If your control solution result falls outside the expected range, repeat the test with OneTouch®… -
Page 90
Control solution testing 6. Cleaning Clean the top of the control solution cap with a clean, damp tissue or cloth. Out-of-range results may be due to: • Not following the instructions detailed on pages 82–87. • Control solution is contaminated, expired, or past its discard date. -
Page 91
Control solution testing Control solution results can be seen when reviewing past results, but are not included in result averages. m CAUTION • If you continue to get control solution results that fall outside the range printed on the control solution vial, Do Not use the meter, test strips, or control solution. -
Page 92: Care And Maintenance
Care and maintenance Storing your system Store your meter, test strips, control solution and other items in your carrying case. Keep in a cool, dry place below 30°C, but Do Not refrigerate. Keep all items away from direct sunlight and heat. Cleaning and caring for your meter Wipe the outside with a soft cloth dampened with water and mild detergent.
-
Page 93
Care and maintenance Cleaning your lancing device and clear cap To clean these items, wipe them with a soft cloth dampened with water and mild detergent. Do Not immerse the lancing device in any liquid. To disinfect these items, prepare a solution of one part household bleach to nine parts water. -
Page 94: Batteries
Batteries Batteries Your OneTouch® Verio™ Pro Meter uses two AAA alkaline batteries. See Troubleshooting, pages 106–108 for information on when to change the meter batteries. If the meter does not turn on, check the batteries. IMPORTANT: Use only AAA alkaline batteries with your meter.
-
Page 95: Replacing The Batteries
Batteries Replacing the batteries 1. Remove the old batteries Start with the meter turned off. Remove the battery cover by lifting the tab located on the cover at the bottom of the meter. Pull up on the battery ribbon to lift both batteries out of the compartment.
-
Page 96
Batteries 2. Insert the new batteries Insert two AAA alkaline batteries on top of the battery ribbon. Plus (+) and minus (–) signs will guide you in placing the batteries. If the meter does not power on after you have replaced the meter batteries, check that the batteries are correctly installed. -
Page 97
Batteries 3. Check your meter settings Removing the meter batteries will not affect your stored results. However, you may need to re-set your meter settings. (See pages 13–15). 4. Dispose of batteries Dispose of batteries according to your local environmental regulations. -
Page 98: Troubleshooting
Troubleshooting Meter messages The OneTouch® Verio™ Pro Meter displays messages when there are problems with the test strip, with the meter, or when your BG levels are above 33.3 mmol/L or below 1.1 mmol/L. Improper use may cause an inaccurate result…
-
Page 99
Troubleshooting Warning EXTREME LOW BG (below 1.1 mmol/L) What it means You may have an extremely low BG level (severe hypoglycaemia), below 1.1 mmol/L. What to do This may require immediate treatment according to your healthcare professional’s recommendations. Although this message could be due to a test error, it is safer to treat first and then do another test. -
Page 100
Troubleshooting Warning EXTREME HIGH BG (above 33.3 mmol/L) What it means You may have an extremely high BG level (severe hyperglycaemia), over 33.3 mmol/L. What to do You may have severe hyperglycaemia (extremely high blood glucose). Re-test your BG level. If the result is EXTREME HIGH BG again, this indicates a severe problem with your blood glucose control. -
Page 101
Troubleshooting Warning Temperature too high. Out of operating range. See Owner’s Booklet. What it means Meter is too hot (above 44°C) to work correctly. What to do Move the meter and test strips to a cooler area. Insert a new test strip when the meter and test strips are within the operating range (6–44°C). -
Page 102
Troubleshooting Warning Temperature too low. Out of operating range. See Owner’s Booklet. What it means Meter is too cold (below 6°C) to work correctly. What to do Move the meter and test strips to a warmer area. Insert a new test strip when the meter and test strips are within the operating range (6–44°C). -
Page 103
Troubleshooting ERROR 1 Meter problem. Contact Customer Service. What it means There is a problem with the meter. What to do Do Not use the meter. Contact Customer Care on 0800 121 200 (UK) or 1800 535 676 (Ireland). -
Page 104
Troubleshooting ERROR 2 Meter or strip problem. Retest with a new strip. What it means Error message could be caused either by a used test strip or a problem with the meter. What to do Repeat the test with a new test strip; see blood application (pages 38–42) or control solution testing (pages 82–87). -
Page 105
Troubleshooting ERROR 3 Meter was not ready. Retest with a new strip. What it means The sample was applied before the meter was ready. What to do Repeat the test with a new test strip. Apply a blood or control solution sample only after Apply Blood appears on the display. -
Page 106
Troubleshooting ERROR 4 Strip fill problem. Retest with a new strip. What it means One of the following may apply: • Not enough blood or control solution was applied or more was added after the meter began to count down. •… -
Page 107
Troubleshooting ERROR 5 Strip problem. Retest with a new strip. What it means The meter has detected a problem with the test strip. Possible cause is test strip damage. What to do Repeat the test with a new test strip; see blood application (pages 38–42) or control solution testing (pages 82–87). -
Page 108
Troubleshooting Low Battery Replace battery. See Owner’s Booklet. What it means Meter battery is low but still has enough power to perform a test. What to do This message will appear when you turn the meter on and there is enough power for a minimum of 100 more tests. Press to continue, but replace the battery as soon as possible;… -
Page 109
Troubleshooting 10 Oct 10:13 mmol Add Tag? Menu What it means Meter battery is low but still has enough power to perform a test. What to do Once the Low Battery message is displayed, this symbol will continue to appear until you replace the battery. Test results will still be accurate, but replace the battery as soon as possible;… -
Page 110
Troubleshooting Warning Very low battery. Replace battery now. See Owner’s Booklet. What it means Meter battery does not have enough power to perform a test. What to do Replace the meter battery; see pages 93–95. -
Page 111
Troubleshooting Warning Result not available. What it means No result in memory, such as the first time use of the meter or after downloading all data to a computer. Your meter was unable to recall this result. This result will not be included in result averages. -
Page 112
Troubleshooting Results Log mmol/L — — — 10 Oct 7:45 10 Oct 7:35 09 Oct 20:03 Back What it means Your meter was unable to recall this result. This result will not be included in result averages. What to do You can still perform a BG test and get an accurate result, but contact Customer Care on 0800 121 200 (UK) or 1800 535 676 (Ireland) to report this occurrence. -
Page 113: About Your System
Comparing meter results to laboratory results Results obtained from the OneTouch® Verio™ Pro Meter and laboratory tests are reported in plasma-equivalent units. However, your meter result may differ from your lab result due to normal variation. A result from your OneTouch®…
-
Page 114
Detailed information about your system • Your haematocrit is above 60% or below 20%. • You are severely dehydrated. • For additional information, refer to the OneTouch® Verio™ Test Strip Insert. Guidelines for obtaining accurate meter to lab comparisons: Before going to the lab: •… -
Page 115
Detailed information about your system Testing with your OneTouch® Verio™ Pro Meter at the lab: • Test within 15 minutes of the lab test. • Use only a fresh, capillary blood sample from your fingertip. • Follow all instructions in this Owner’s Booklet for… -
Page 116: Technical Specifications
Detailed information about your system Technical Specifications Reported result range 1.1–33.3 mmol/L Calibration Plasma-equivalent Sample Fresh capillary whole blood Sample volume 0.4 µL Test time 5 seconds Assay method FAD-GDH glucose dehydrogenase Power source Two replaceable AAA alkaline batteries Expected meter Minimum six months at average battery life four tests per day…
-
Page 117
Detailed information about your system Technical Specifications Automatic shutoff Two minutes after last action Size 91 x 56 x 20 mm Weight Approximately 85.05 grammes, with batteries Operating ranges Temperature: 6–44°C Relative humidity: non-condensing 10–90% Altitude: up to 3048 metres Haematocrit: 20–60% Battery ratings 2 x 1.5 V d.c., 60 mA… -
Page 118
4.4 mmol/L, and within ±15% of the laboratory method for glucose concentrations 4.4 mmol/L or higher. Samples from 100 patients were tested using both the OneTouch® Verio™ Pro System and the YSI 2300 glucose analyser laboratory instrument. -
Page 119
Detailed information about your system System Accuracy Results for Glucose Concentrations <4.4 mmol/L Percent (and number) of meter results that match the laboratory test Within Within Within Within ±0.3 mmol/L ±0.6 mmol/L ±0.7 mmol/L ±0.8 mmol/L 78.3% 99.2% 99.2% 100% (94/120) (119/120) (119/120) -
Page 120
Within ±0.67 mmol/L or ±15% 99.0% (594/600) Regression Statistics Samples were tested in duplicate on each of three test strip lots. Results indicate that the OneTouch® Verio™ Pro System compares well with a laboratory method. # of # of Slope… -
Page 121
Detailed information about your system Precision Within Run Precision/Repeatability (300 Venous Blood Tests) Target Mean Standard Coefficient Glucose Glucose Deviation of Variation (mmol/L) (mmol/L) (mmol/L) 2.08 0.05 2.17 0.11 2.00 7.06 0.14 1.91 11.0 10.69 1.88 19.4 18.53 0.34 1.85 Results show that the greatest variability observed between test strips when tested with blood is 2.17% or less. -
Page 122
Detailed information about your system Total Precision (600 Control Solution Tests) Glucose Mean Standard Coefficient Level Glucose Deviation of Variation Ranges (mmol/L) (mmol/L) (mmol/L) Low (2.11–3.44) 2.77 0.07 2.59 Mid (5.67–7.67) 6.49 0.13 2.06 High 19.53 0.42 2.14 (16.56–22.39) -
Page 123
Detailed information about your system Guarantee LifeScan guarantees that the OneTouch® Verio™ Pro Meter will be free of defects in material and workmanship for three years, valid from the date of purchase. The guarantee extends only to the original purchaser and is not transferable. -
Page 124: Index
Index Averages Backlight 12, 35 Basic settings Batteries Buttons on meter Cleaning your meter and lancing device 90, 91 Clear cap 8, 30, 50 Comparing meter results to laboratory results Control solution, discard and expiry dates Control solution, testing Data port Date setting Dehydration Display check…
-
Page 125
Index Guarantee HIGH GLUCOSE message 46, 65, 98 High/Low pattern messages 19, 69 Hyperglycaemia 46, 98 Hypoglycaemia 45, 97 Infection, reduce the chance Intended use Kit components Lancing device 8, 30 Language, setting LOW BATTERY message LOW GLUCOSE message 45, 65, 97 Main Menu screen 11, 24, 62 mmol/L… -
Page 126
Index Software, OneTouch® Diabetes Management Start-up screen 11, 62 Storing your system Symbols Tags feature 18, 57 Technical specifications Temperature 27, 80, 99, 100, 115 Test strip, applying drop of blood Test strip, discard and expiry dates Test strip, silver prongs… -
Page 127
Notes… -
Page 128
Notes… -
Page 129
Notes… -
Page 130
Notes… -
Page 131
LifeScan self-test blood glucose monitoring devices conform to the following EU Directives: IVDD (98/79/EC): Blood Glucose Meter, Test Strips, and Control Solution MDD (93/42/EEC): Lancets Blood Sampler LifeScan Europe Division of Cilag GmbH International 6300 Zug Switzerland Distributed by: LifeScan UK/Ireland A div. -
Page 132
U.S. patents: 6,413,410, 6,890,421. Purchase of this device does not act to grant a use license under these patents. Such a license is granted only when the device is used with OneTouch® Verio™ Test Strip. No test strip supplier other than LifeScan is authorised to grant such a license.

₽9,210.00
Глюкометр OneTouch Verio Pro+ не подлежит кодированию. Он снабжен цветным дисплеем с подсветкой, на котором высвечиваются подсказки на русском языке и сообщения об легко понимаемых ошибках. Аппарат OneTouch VerioPro+, который можно купить в нашем магазине, занимает достойное место среди приборов аналогичного типа и заслуживает того, чтобы на него обратить внимание.
-
Описание
-
Отзывы (0)
Описание
Лишь 5 секунд понадобиться, чтобы определить уровень глюкозы в крови при помощи американского глюкометра OneTouch Verio Pro+. Это новый биохимический анализатор для медицинских учреждений, позволяющий контролировать сахар в большого количества пациентов.
Функциональные преимущества
Данная установка снабжена несколькими функциями, которые способствуют выполнению возложенных на нее задач:
- Обеспечивает инфекционный контроль – предусмотрено автоматическое (нажатием одной кнопки) удаление тест-полосок, а специально изготовленная конусообразная форма передней части прибора е дает возможности попадать крови в отсек, куда вводятся тест-полоски.
- Показывает точные измерения – независимо от того, откуда взяты образцы крови – из вены, артерии или капилляров. Причем тут предусмотрена функция «Умное сканирование», позволяющая поддавать проверки каждый образец до 500 раз.
- Обладает возможностью проводить большое количество тестов.