-
Contents
-
Table of Contents
-
Troubleshooting
-
Bookmarks
Quick Links
NOVA
NOVA
LASER POWER/ENERGY METER
USER MANUAL
OPHIR OPTRONICS
www.ophiropt.com/photonics
Related Manuals for OPHIR NOVA II
Summary of Contents for OPHIR NOVA II
-
Page 1
NOVA NOVA LASER POWER/ENERGY METER USER MANUAL OPHIR OPTRONICS www.ophiropt.com/photonics… -
Page 2: Table Of Contents
Chapter 4. Operation with Thermopile Absorber Sensors ………….. 32 4.1 Thermopile Absorber Sensors ……..32 4.2 Selecting Settings from the Nova II Screen … 33 4.3 Startup and Configuration of Defaults ….35 Power Measurement ……….36 4.5 Energy Measurement ……….45…
-
Page 3
5.2 Setting up the PD300 to display the user’s chosen wavelengths …………..55 5.3 Startup Defaults …………56 5.4 Selecting Settings from the Nova II Screen … 57 Chapter 6. Operation with Pyroelectric Sensors . 64 6.1 Pyroelectric & Photodiode Energy Sensors ..64 6.2 Selecting Settings from the Nova II Screen … -
Page 4
9.2 Calibration of Photodiode type Sensors ….91 9.3 Calibration of Pyroelectric type Sensors ….93 9.4 Error Messages …………97 9.5 Troubleshooting …………98 9.6 Maintenance …………… 99 Chapter 10. Nova II Specifications ….100 10.1 System/Meter Specifications ……100 10.2 Sensor Specifications ………. 101… -
Page 5: Chapter 1. Introduction: How To Use This Manual
This manual tells you what you need to know to make full use of the Nova II for all your laser measurement needs. It includes a «Quick Reference», (Chapter 2) to allow you to perform basic measurements immediately, without reading the whole manual.
-
Page 6: Chapter 2. Quick Reference
Chapter 2. Quick Reference 2.1 Getting Started The Nova II is equipped with «soft keys.» That is the functions of the keys change as indicated by the legend above each key. (See Figure 2.2). To connect sensor to the Nova II Meter Insert the 15 pin D type connector of the measuring sensor cable into the socket marked «Head Input»…
-
Page 7: Functions With No Sensor Connected
Figure 2.2 2.2 Functions with no Sensor Connected 2.2.1. Turning on and off. To switch the Nova II on: Briefly press the on/off/backlight switch. (Figure 2.2) The unit will switch on, and the display will appear. Note: The sensor must be plugged in before the unit is…
-
Page 8
To switch the Nova II off: Press the on/off/backlight switch and hold it for ~ 3 seconds until the display blanks. If you wish to save the current Nova II configuration, use the «configure» function. (See section 2.2.2). Display Options 2.2.2. -
Page 9
Japanese language as the Nova II startup language, the way to switch back to English is: a. Disconnect the sensor from the Nova II. b. Turn the Nova II off and on again. You will reach the instrument setup screen (titled “Head disconnected” in Japanese). -
Page 10: Thermal Sensors
10. The status will show a green V sign and state «finished». 11. Press «Done». 2.3 Thermal Sensors 2.3.1. Use of Nova II with thermal type sensors. Most Thermopile sensors have somewhat different absorption at different wavelengths. In order to compensate for this, each sensor has been calibrated by laser at several wavelengths.
-
Page 11
To set type of laser being used With sensors with fixed wavelengths: 1. While the Nova II is off, plug in the sensor then switch it on again. 2. Press the navigation keys until «laser» is highlighted. Press the enter key and select the appropriate laser wavelength. -
Page 12
2. To go from the energy measurement screen to power measurement, press “power”. 2.3.2. Setting and Saving the Startup Configuration 1. Turn on the Nova II with the sensor connected, select “menu” and enter. Select “configure” and enter. 2. Now, with the navigation keys select “Startup mode”, press the enter key and select “power”… -
Page 13
Nova II will start up from the screen selected for all sensors). 4. Now select “Power range”, press enter and choose the manual power range you wish to be the default or choose auto range. -
Page 14
«offset». 2. Press «offset» again to cancel. See Section 4.4.2.2 for full details. To use the Nova II to fine-tune Laser power: 1. From the main power measurement screen select “menu” and enter. Now select «tune» and enter. 2. Set the percentage range of the power scale to be displayed by repeatedly pressing the ±50% key. -
Page 15: Photodiode Sensors
2.2.2 above. 2.4 Photodiode Sensors 2.4.1. Selecting Wavelengths 1. While the Nova II is off, plug in the sensor then switch it on again. 2. From the main measurement screen, press «laser» to select the correct laser wavelength. If you want to save this new wavelength as the startup default, press “save”…
-
Page 16
wavelength selected as startup from the 6 default wavelengths 2.4.3. To choose manual or automatic ranging or dBm in power measurement Select «range» and enter. Using the navigation keys, select the appropriate manual range autorange or dBm (logarithmic scale). 2.4.4. Setting the Startup Configuration 1. -
Page 17: Pyroelectric Sensors
«offset». 2. Press «offset» again to cancel. See Section 5.4.5 for full details. To use the Nova II to fine-tune Laser power 1. From the main power measurement screen select “menu” and enter. Now select «tune» and enter. 2. Set the percentage range of the power scale to be displayed by repeatedly pressing the ±50% key.
-
Page 18
If you do not want to save this as the startup mode but only change for now, exit without save. (This choice is saved in the instrument and not the sensor so the Nova II will start up from the screen selected for all sensors). -
Page 19
4. Now select “energy range”, press enter and choose the manual energy range you wish to be the default. 5. Now select “average” to select what period you wish to average power over or select the default, «none». 6. If the sensor is a diffuser sensor, now select diffuser in or out. -
Page 20
«power». 2. To go from the main power measurement screen to energy measurement, press «energy». 2.5.5.2. To use the Nova II to measure Laser Energy and Frequency 1. In measurement mode, verify that the units are mJ, µJ etc. -
Page 21
“menu”, enter and select “exposure”. Enter. 2. Select the method of measurement with “mode”, “timeout” and “pulses” then press “start”. Press “start” again. The Nova II will start summing laser energy exposure. If you wish to stop before the chosen period, press” stop”. -
Page 22: Chapter 3. The Nova Ii Meter
You can also zero the Nova II at the touch of a button. The main instructions as well as full help files are clearly shown on the screen so you should not have to refer to this manual very often.
-
Page 23: Smart Connectors
See section 3.6.6 for details When no sensor is plugged in and the Nova II is turned on, the meter indicates “Head Disconnected» and gives the user the opportunity to change the baud rate, re- zero the instrument, set the real time clock or other features.
-
Page 24
Key Functions The Nova II has certain conventions as to the meaning of standard key strokes and these are as follows: Highlighted item: The highlighted item is the item presently active. These buttons move to the next active item leftwards, rightwards. These are the navigation buttons. -
Page 25: Power Up And Shut Down
3.4 Power Up and Shut Down Figure 3.1…
-
Page 26: Nova Ii Functions, Which Are Independent Of Sensor Type
3.5 Nova II Functions, which are independent of Sensor Type When no sensor is connected to the Nova II and it is turned on, the message “Head Disconnected» appears. In this mode, the user can adjust the startup screen, either the standard power/energy screens or other specialized screens.
-
Page 27
Needle Screen 3.5.2. RS232 Baud Rate If you are using the Nova II for RS232 communication with PC, the baud rate can be set by selecting «RS232 baud» and selecting the appropriate rate then pressing enter and save. Unless you need especially fast… -
Page 28
1. If a sensor is connected, disconnect the sensor, turn off the instrument then back on again so the Nova II can identify that no sensor is connected. “Head Disconnected» will be displayed. 2. Let the Nova II run for at least 30 seconds before performing zero adjustment. -
Page 29: Hardware Functions
The backlight illuminates the meter from the rear and is operated by the same switch as turns the instrument on and off (See Figure 3.1). The Nova II backlight consumes considerably less power than competing instruments and therefore it can operate from the…
-
Page 30
To operate the backlight, press the on/off/backlight switch briefly while the Nova II is on. To turn off the backlight, press again briefly. (If the switch is pressed for ~3s, the instrument will turn off). -
Page 31
PC. The Unit is supplied with two cables, each with a 7 pin DIN plug on one end mating with the Nova II and either a USB or 9 pin D RS232 connector on the other side. When you wish to operate… -
Page 32
If such an event happens, a warning screen will be displayed for 3 seconds, after which the Nova II will restart itself in its new configuration. Thus if a user wants to change sensors during his experiment he no longer needs to power down the Nova II to do so. -
Page 33: Chapter 4. Operation With Thermopile Absorber Sensors
Chapter 4. Operation with Thermopile Absorber Sensors Warning: Before using the sensor for power or energy measurement, check that your laser power, energy and energy density do not exceed the sensor ratings. See Table 5. and Table 6. in Chapter 10. If the sensor is a water-cooled type, ensure that the cooling water is flowing at an adequate rate;…
-
Page 34: Selecting Settings From The Nova Ii Screen
Nova II. Energy of a single pulse is measured on the Nova II by digitally integrating the pulse power over time.
-
Page 35
To choose auto range, select “Range”, enter, choose “AUTO” then enter again. If you wish the Nova II to be in manual mode when switched on, save this configuration before switching off See Section 4.3. -
Page 36: Startup And Configuration Of Defaults
4.3 Startup and Configuration of Defaults If you are planning to do measurements of the same type most of the time, you can set up the Nova II so that it automatically starts up in the measurement mode desired. Since these settings are saved in the sensor «smart connector», you can save different settings for…
-
Page 37: Power Measurement
Nova II is switched off only. 9. Switch the Nova II off then on by means of the on/off/backlight switch. (See Figure 3.1). The Nova II will enter the mode of operation last saved with the «configure»…
-
Page 38
In this case, the true power is 20.5 — 0.1 = 20.4 Watts. To subtract the background, press the “offset” button while the laser is blocked. The Nova II will now read zero, and the 0.1 Watt background will be subtracted from all subsequent readings. -
Page 39
Nova II settings. 4.4.2.3.1. To use the Nova II to fine tune laser power 1. From the main measurement screen, select “menu” and enter. Select “tune” and enter. -
Page 40
4.4.2.4. Average When a laser output is fluctuating or unstable, it is useful to measure the average power over a certain period. The Nova II gives you this exclusive feature, allowing averaging over periods varying from 1 s to 1 hour. -
Page 41
1 min, at 5 minutes, it is over the period from 4 to 5 minutes (1 minute back from the present etc.). To use the Nova II to display average: 1. From the main power screen, select “average” and enter. -
Page 42
Thermopile Normalize Screen 4.4.2.6. Power vs. Time Graph and Data Logging The Nova II in datalog mode has the option of graphing the laser power against time and storing the data in up to 10 permanent storage files with up to 5,400 data points in each file. -
Page 43
To use the Nova II to graph power vs. time: 1. From the main power measurement screen, select “menu” and enter. Select “data-log” and enter. 2. You are now in the setup screen. Under “Graph Settings”, select “Min:” and enter. -
Page 44
Sensor: 30A Range: 30W Laser: 248 Points Sampled: 300 Time Scale: 1min Minimum: 12.3W Average: 15.4W Maximum: 28.4W Std Dev: 6.43W Present: 27.2W Time: 11:24:23 Pause Reset Zoom Exit Figure 4.4 Laser Power VS Time Graph 4.4.2.6.1. Data Storage and Transmission When using thermal and photodiode sensors the data logging period is anywhere from 20 seconds to 600 hours. -
Page 45
Temp: 300 1340 Free Space: 58460 Sensor: 30A S/N: 104360 Points Logged: 1340 Average: 23.4W Minimum: 19.4W Std Dev: 2.43W Maximum: 27.3W Exit Save Delete Help Figure 4.5 Data Storage Screen 2. When the screen is entered, the data in the latest power graph will be stored temporarily in register “Temp”. -
Page 46: Energy Measurement
4.5 Energy Measurement 4.5.1. Setup Switch the Nova II on. If it is in power mode, press the left soft key “energy” to put it into energy mode. The energy mode is manual ranging: enter “range” and then use the navigation keys to get to the proper range then enter again.
-
Page 47
«ready» appears, the reading may be inaccurate or may not be displayed. 4.5.3. Minimum Energy Threshold If the Nova II is used in a noisy environment or where there is a high level of background thermal radiation, the instrument may trigger spuriously on the noise or background radiation. -
Page 48
designed not to respond to pulses below some preset minimum size. This «Minimum Energy Threshold» is typically set to 0.3% of full scale of the selected range. If this level is found to be too sensitive for the user’s particular environment, it may be altered by the user. The threshold should not, however, be raised higher than necessary. -
Page 49
Ophir pyroelectric sensors,as long as the pulse energies do not exceed the ratings of the pyroelectric absorbers. The pyroelectric sensors are compatible with the Nova II and just have to be plugged in to be used. For higher pulse energies, you can use the Ophir model RP to measure both average power and exact individual pulse energy of the rapidly repeating pulses. -
Page 50
4.5.6.1. To use the Nova II for graphical display of energy — regular mode 1. Make sure that the Nova II is in the correct energy measurement range. If not, enter “range”, adjust and enter again. 2. From the energy measurement screen enter “menu”… -
Page 51: Advanced Meter Screens
Sensor: 30A Range: 30J Laser: 248 Points Sampled: 25 Minimum: 22.3J Average: 23.4W Maximum: 25.4W Std Dev: 1.43W Present: 21.2W Time: 11:24:23 Pause Reset Zoom Exit Figure 4.7 Energy Log Screen 4.6 Advanced Meter Screens 4.6.1. Power and Energy Beam Splitter/Attenuator Screens If you have a measurement setup with a beam splitter or attenuator and wish to display the laser power or…
-
Page 52
4.6.2. Power and Energy Density Screens The Nova II gives you the option to measure in units of power and energy density instead of power and energy. You input the beam size and the meter then calculates… -
Page 53
«Height» box. 4.6.3. Power and Energy Limits Screens The Nova II gives you the option to set upper and lower limits of power and energy. If these limits have been set in the limit screen, then when the power or energy is above the maximum limit set the message “OVER”… -
Page 54
3. Do the same for the “high” limit. 4. If you want the limits screen to be the startup default of the Nova II, follow the instructions in section 3.5. Now when the power or energy is over or under the limits chosen, the error message will be shown as in Figure 4.9. -
Page 55: Chapter 5. Operation With Photodiode Type Sensors
The Nova II meter amplifies this signal and indicates the power level received by the sensor. Due to the superior circuitry of the Nova II, the noise level is very low, and the PD300 /3A-IS series sensors with the Nova II meter have a large dynamic range from nanowatts to hundreds of milliwatts.
-
Page 56: Setting Up The Pd300 To Display The User’s Chosen Wavelengths
been constructed with a built in filter so the basic sensor can measure to 30mW or more without saturation. When the additional filter is installed, the maximum power is on the order of 300mW (or 3W with model PD300-3W). The PD300 saturates when the output current exceeds 1.3mA so the exact maximum power depends on the sensitivity of the detector at the wavelength used.
-
Page 57: Startup Defaults
For details of filter in/out See Section 5.4.3. 3. Now select “display mode” and select the desired startup screen. Press save.(Note that this selection is saved in the Nova II and not the sensor so will be…
-
Page 58: Selecting Settings From The Nova Ii Screen
4. Now select “Power Range:” and in the same way choose the manual power range you wish to be the default or autorange or dBm. The Nova II will now be in the range selected when switched on with the sensor in question.
-
Page 59
See Section 5.3. dBm — The Nova II allows the measurement to be made in units of dBm that is a logarithmic scale. dBm units are defined as:… -
Page 60
Depending on what powers you wish to measure, you should choose whether or not to work with the removable filter installed or not. For this purpose, the Nova II has a «filter» setting and uses the proper correction curve depending on whether the filter is installed or not. -
Page 61
Section 5.2. In addition, the offset function can be used to subtract the residual background signal that remains if desired. If the Nova II shows a nonzero power reading even when there is no laser, you can subtract the background… -
Page 62
To subtract the background, press «offset» while the laser is blocked. The Nova II will now read zero (0.0), and the 0.1 mW background will be subtracted from all subsequent readings. The laser power reading will thus be 20.4 mW. -
Page 63
5.4.7. Average and Measuring Very Low Power Measurement If the laser power is fluctuating, the Nova II can display the average power readings with averaging periods varying from 1s to 1 hour. When measuring very low… -
Page 64
The Nova II also has the option of graphing the laser power vs. time, or successive energy points as long as the Nova II has not been turned off. While measurements are being taken, the Nova II will record data until the screen is full, or «reset»… -
Page 65: Chapter 6. Operation With Pyroelectric Sensors
They can measure low energies as well as high. They can also measure at higher repetition rates than was possible before. The Nova II meter amplifies this signal and indicates the energy received by the sensor as well as the…
-
Page 66: Selecting Settings From The Nova Ii Screen
6.2 Selecting Settings from the Nova II Screen The Nova II can conveniently be set to various chosen parameters from the screen. In addition, it can be set to startup defaults so it will be in the desired…
-
Page 67
PE05 10235 Range: 20mJ Menu: Energy Laser: 532 Average: 1 sec Threshold: 3% 12.34 142.37Hz TRIG 20mJ Power Help 50s Figure 6.1 Pyroelectric Energy Screen 6.2.1. Setting up the sensor to display the user’s chosen wavelengths. The absorption of the detector coating varies somewhat with wavelength. -
Page 68
As was mentioned before, the Ophir pyroelectric sensors can measure long as well as short pulses. In order to operate properly, the Nova II must be set to a maximum pulse width setting longer than the actual laser pulse width. Therefore the pulse width should be set to the shortest pulse width longer than the actual laser pulse width. -
Page 69
6.2.2.2. Setup for the Time Period to Average Over The Nova II has the ability to measure a number of pulses and display the average value of the energy of the pulses. This function is useful if the laser energy is not stable. -
Page 70: Startup And Configuration Of Defaults
“save”. 6.3 Startup and Configuration of Defaults If you are planning to do repetitive measurements most of the time, you can set up the Nova II so that it automatically goes into the measurement mode you want upon startup.
-
Page 71
8. Now press “save” if you want this to be the startup default and press “exit”. 9. Switch the Nova II off then on by means of the on/off/backlight switch. (See Figure 3.1). The Nova II will enter the mode of operation last… -
Page 72: Energy, Power Or Exposure Measurement
There is a slight variation of pyroelectric reading from meter to meter. Therefore, for most accurate pyroelectric energy measurements it is necessary to zero the pyroelectric sensor against the Nova II meter it will be used with. After this is done, the…
-
Page 73
“conditioned” to work with the particular Nova II the zeroing was done against. It is not necessary to do this procedure again unless the Nova II is used with a different sensor. If the procedure is not done, errors of 2% or so can occur. To zero the sensor… -
Page 74
If an averaging period is selected, the Nova II will collect pulses at up to 180Hz and will then display the average of those pulses. When a new pulse triggers the Nova II, “TRIG” will appear on the screen. -
Page 75
“save” before pressing “enter”. 6.4.2. Measuring Total Energy Exposure. The Nova II has the ability to sum the total energy of a number of pulses over a given time period or number of pulses. This gives the total energy «exposure» over that time period. -
Page 76
Reset Help Figure 6.2. Exposure Screen 3. Press “start”. The Nova II will start summing laser energy exposure. When you wish to stop measuring, press «stop» or wait for measurement to reach the “timeout» or the ”pulses” selected in the setup screen. -
Page 77
1.33. The screen will also show in small digits the energy at which the normalization was done and the present energy To use the Nova II to normalize the energy: 1. From the main measurement screen, enter “menu” and select “normalize”. -
Page 78: Measuring Repeating Pulses Of High Energy
3. Ophir has three sensors specifically designed for high energy density pulses. They are the PE50HD sensors with high damage threshold, the PE50-DIF model pyroelectric sensors with a diffuser and the RP thermal/photodiode sensors.
-
Page 79
In order to log data or transmit it to PC at rates >1000Hz, you must be in turbo mode. This will put you into a special mode where the Nova II can handle data at high speed while curtailing other functions. To log in… -
Page 80: Pyro Scope Adapter
Activate the scope adapter as follows: 1. Plug the adapter into the Nova II meter and then plug the sensor plug into the adapter. Plug the BNC connector into a standard 1M scope input.
-
Page 81
5. Press “OK” and “OUT” will appear on the main power / energy screen. Make sure to remove the diffuser from the sensor. 6. Press “laser” and select the correct wavelength. Note that only wavelengths compatible with the diffuser setting are visible. (All wavelengths for diffuser “IN”… -
Page 82: Chapter 7. Beamtrack Features
This chapter describes the Nova II’s position and size measurement functionality. For a full description of Thermopile functionality see…
-
Page 83: Menu Screen
7.2 Menu Screen To access the various other BeamTrack features, go to the Menu screen from the main Track Screen. Figure 7.2 BeamTrack Menu Screen 7.3 Stability Screen This screen tracks the position of the laser beam over time. This is useful for users that want to measure the pointing stability of their laser.
-
Page 84: Statistics Screen
7.5 Optimizing Measurements 7.5.1. Zeroing. When a BeamTrack sensor is attached, the zeroing function of the Nova II will zero the BeamTrack’s measurement circuitry as well. 7.5.2. Line Frequency. In order to filter out noise that may be introduced to the…
-
Page 85
Configuration Screen, set Line Frequency to 50Hz or 60Hz, depending on the country you’re in. Figure 7.5 Configuration Screen… -
Page 86: Chapter 8. Crcuit Description
Chapter 8. Circuit Description The NOVA II has two circuit boards: the lower board with analog circuit, digital processor and its support circuit, and power supplies; and the upper board with LCD and its driver. Analog Circuit: The signal from the detector sensor enters the analog circuit and passes through EMI protection components to a differential trans-impedance preamplifier.
-
Page 87
amounts of logged data permanently, even when the instrument is turned off. (See section 4.4.2.6.1 on data storage). The digital processor receives data from the A/D converter and translates it into a measurement of current in Amps. When used with thermopile sensors, the data is then processed by a sophisticated digital filter that speeds up the effective response time of the sensor and rejects noise. -
Page 88: Chapter 9. Calibration, Maintenance And Troubleshooting
9.1 Calibration of Thermopile or RP Sensors 9.1.1. Absorber types and Method of Calibration of Ophir Power Meters 9.1.1.1. Types of Ophir Laser Absorbers Two types of absorber surface are used in Ophir thermal measuring sensors. 1. Surface Absorbers: BB (broadband) absorber…
-
Page 89
lasers. It is calibrated for the spectral range 250 – 2200nm with some sensors also being calibrated for 2940nm. 2. Volume absorbers: P (pulse) type absorber The models with the P suffix, for use with pulsed lasers, have a special absorbing glass with an absorbance of 95+2% over the operating range. -
Page 90
The linearity of most Ophir thermal detectors is specified to be 1% over the specified power range of each particular instrument and is tested by Ophir from time to time. The linearity is generally tested against another sensor that has been NIST tested for linearity. -
Page 91
Absorption vs. Wavelength of Various Pyroelectric Sensor Absorbers 9.1.2.2. Method of Calibration The absorption of the various Ophir thermal absorbers can vary from disc to disc. Therefore, all Ophir absorbers are individually calibrated against NIST traceable standards. 9.1.2.3. Total Accuracy of Calibration… -
Page 92: Calibration Of Photodiode Type Sensors
These filters also have a transmission that depends on wavelength. Therefore, when the PD300 is being used with the Nova II, the Nova II has a built in calibration adjustment for wavelength which is described in the next paragraph.
-
Page 93
EEROM and this information is used to set the gain to the proper value at wavelengths other than the wavelength the instrument was calibrated. When the user selects his wavelength on the Nova II, the correction factor for that wavelength is applied. 9.2.2. Accuracy of Calibration Since the instruments are calibrated against NIST standards, the accuracy is generally ±2% at the… -
Page 94: Calibration Of Pyroelectric Type Sensors
Note: More exact specifications will be found in the latest Ophir Laser Measurement Instruments Catalog. 9.2.3. Recalibration at a specific wavelength from a Known Source of Laser Power 1. From the main measurement screen select “menu” and enter. Select “calibrate” and enter.
-
Page 95
PD300 power sensors and therefore the sensors have a high accuracy at any wavelength in the range. This is an exclusive feature with Ophir energy sensors. Absorption(%) vs. Wavelength (µm) BB — Broadband Metallic Coating Graph 3. -
Page 96
9.3.2. Calibration The sensitivity of the various Ophir pyroelectric sensors can vary from one to another as well as with wavelengths. Therefore, Ophir pyroelectric detectors are individually calibrated against NIST traceable standards. In addition, there is a wavelength sensitivity correction curve in the Meter. -
Page 97
The exact accuracy of each type of sensor is specified in the latest edition of the Ophir catalog. For more details on calibration accuracy, see the Ophir website at http://www.ophiropt.com/laser-… -
Page 98: Error Messages
Low Battery: When the battery is almost discharged, the Battery icon will have only 1 segment left. This means the battery is ¾ empty. At this stage, the Nova II should be connected to the charger. It will operate normally and charge slowly while connected to the charger.
-
Page 99: Troubleshooting
Nova II alone. turned off for 18-21 hours. If the Nova II still doesn’t work with battery, then the NiMH battery is probably dead. Replace battery (see section 9.6.1.4). 9.5.2. Thermal Sensors, Energy Measurements…
-
Page 100: Maintenance
2. Move sensor/display further away from EMI. 9.6 Maintenance 9.6.1. Battery Replacement If the Nova II battery is defective and does not hold a charge, a replacement can be ordered from your agent (Ophir part number 7E14007). The new battery is installed as follows: 1.
-
Page 101: Chapter 10. Nova Ii Specifications
Chapter 10. Nova II Specifications 10.1 System/Meter Specifications Input Specifications Thermal, Photodiode Input Ranges 15nA — 1.5mA full scale in 16 ranges A to D Sampling rate 15Hz A to D resolution and linearity Resolution: 23 bits plus sign. (0.00001%);…
-
Page 102: Sensor Specifications
10.2 Sensor Specifications Sensor Max Avg. Absorber Power Power Type (WATTS) Density at Max Power PD300/UV/IR 300mW 50W/cm² PD300-3W 100W/cm² 3A-IS 200W/cm² Int Sph PD 1000W/cm² 3A-P 50W/cm² 3A-FS 200W/cm² 28KW/cm² 25KW/cm² 12A-P 50W/cm² 20C-SH 4(20)W 23KW/cm² 30A-BB-18 20KW/cm² 30A-P-17 50W/cm²…
-
Page 103
BF — very high damage threshold, long pulses FS — Fused silica window close to detector for divergent beams Note: For more detailed and exact specifications, see the latest Ophir Laser Measurement Instruments Catalog. Absorber Max Energy Density J/cm² Type… -
Page 104
6.4.1.2. In chapter 9 added PF took out HL, clarified linearity and redid «Total Accuracy of Calibration» section. Corrected «head» to «sensor». Rev 2.19-2/22.03.12/be new Ophir-Newport logo Rev 2.37-1/09.1.14/ykp+bae BeamTrack Statistics Screen and Analog Hold/Release. Also corrected chapter 9 (Calibration, Maintenance and Troubleshooting) , charging info, power table and PD300 table, updated tables 1,2 &…
-
Page 1
NOVA NOVA LASER POWER/ENERGY METER USER MANUAL OPHIR OPTRONICS www.ophiropt.com/photonics… -
Page 2: Table Of Contents
Chapter 4. Operation with Thermopile Absorber Sensors ………….. 32 4.1 Thermopile Absorber Sensors ……..32 4.2 Selecting Settings from the Nova II Screen … 33 4.3 Startup and Configuration of Defaults ….35 Power Measurement ……….36 4.5 Energy Measurement ……….45…
-
Page 3
5.2 Setting up the PD300 to display the user’s chosen wavelengths …………..55 5.3 Startup Defaults …………56 5.4 Selecting Settings from the Nova II Screen … 57 Chapter 6. Operation with Pyroelectric Sensors . 64 6.1 Pyroelectric & Photodiode Energy Sensors ..64 6.2 Selecting Settings from the Nova II Screen … -
Page 4
9.2 Calibration of Photodiode type Sensors ….91 9.3 Calibration of Pyroelectric type Sensors ….93 9.4 Error Messages …………97 9.5 Troubleshooting …………98 9.6 Maintenance …………… 99 Chapter 10. Nova II Specifications ….100 10.1 System/Meter Specifications ……100 10.2 Sensor Specifications ………. 101… -
Page 5: Chapter 1. Introduction: How To Use This Manual
This manual tells you what you need to know to make full use of the Nova II for all your laser measurement needs. It includes a «Quick Reference», (Chapter 2) to allow you to perform basic measurements immediately, without reading the whole manual.
-
Page 6: Chapter 2. Quick Reference
Chapter 2. Quick Reference 2.1 Getting Started The Nova II is equipped with «soft keys.» That is the functions of the keys change as indicated by the legend above each key. (See Figure 2.2). To connect sensor to the Nova II Meter Insert the 15 pin D type connector of the measuring sensor cable into the socket marked «Head Input»…
-
Page 7: Functions With No Sensor Connected
Figure 2.2 2.2 Functions with no Sensor Connected 2.2.1. Turning on and off. To switch the Nova II on: Briefly press the on/off/backlight switch. (Figure 2.2) The unit will switch on, and the display will appear. Note: The sensor must be plugged in before the unit is…
-
Page 8
To switch the Nova II off: Press the on/off/backlight switch and hold it for ~ 3 seconds until the display blanks. If you wish to save the current Nova II configuration, use the «configure» function. (See section 2.2.2). Display Options 2.2.2. -
Page 9
Japanese language as the Nova II startup language, the way to switch back to English is: a. Disconnect the sensor from the Nova II. b. Turn the Nova II off and on again. You will reach the instrument setup screen (titled “Head disconnected” in Japanese). -
Page 10: Thermal Sensors
10. The status will show a green V sign and state «finished». 11. Press «Done». 2.3 Thermal Sensors 2.3.1. Use of Nova II with thermal type sensors. Most Thermopile sensors have somewhat different absorption at different wavelengths. In order to compensate for this, each sensor has been calibrated by laser at several wavelengths.
-
Page 11
To set type of laser being used With sensors with fixed wavelengths: 1. While the Nova II is off, plug in the sensor then switch it on again. 2. Press the navigation keys until «laser» is highlighted. Press the enter key and select the appropriate laser wavelength. -
Page 12
2. To go from the energy measurement screen to power measurement, press “power”. 2.3.2. Setting and Saving the Startup Configuration 1. Turn on the Nova II with the sensor connected, select “menu” and enter. Select “configure” and enter. 2. Now, with the navigation keys select “Startup mode”, press the enter key and select “power”… -
Page 13
Nova II will start up from the screen selected for all sensors). 4. Now select “Power range”, press enter and choose the manual power range you wish to be the default or choose auto range. -
Page 14
«offset». 2. Press «offset» again to cancel. See Section 4.4.2.2 for full details. To use the Nova II to fine-tune Laser power: 1. From the main power measurement screen select “menu” and enter. Now select «tune» and enter. 2. Set the percentage range of the power scale to be displayed by repeatedly pressing the ±50% key. -
Page 15: Photodiode Sensors
2.2.2 above. 2.4 Photodiode Sensors 2.4.1. Selecting Wavelengths 1. While the Nova II is off, plug in the sensor then switch it on again. 2. From the main measurement screen, press «laser» to select the correct laser wavelength. If you want to save this new wavelength as the startup default, press “save”…
-
Page 16
wavelength selected as startup from the 6 default wavelengths 2.4.3. To choose manual or automatic ranging or dBm in power measurement Select «range» and enter. Using the navigation keys, select the appropriate manual range autorange or dBm (logarithmic scale). 2.4.4. Setting the Startup Configuration 1. -
Page 17: Pyroelectric Sensors
«offset». 2. Press «offset» again to cancel. See Section 5.4.5 for full details. To use the Nova II to fine-tune Laser power 1. From the main power measurement screen select “menu” and enter. Now select «tune» and enter. 2. Set the percentage range of the power scale to be displayed by repeatedly pressing the ±50% key.
-
Page 18
If you do not want to save this as the startup mode but only change for now, exit without save. (This choice is saved in the instrument and not the sensor so the Nova II will start up from the screen selected for all sensors). -
Page 19
4. Now select “energy range”, press enter and choose the manual energy range you wish to be the default. 5. Now select “average” to select what period you wish to average power over or select the default, «none». 6. If the sensor is a diffuser sensor, now select diffuser in or out. -
Page 20
«power». 2. To go from the main power measurement screen to energy measurement, press «energy». 2.5.5.2. To use the Nova II to measure Laser Energy and Frequency 1. In measurement mode, verify that the units are mJ, µJ etc. -
Page 21
“menu”, enter and select “exposure”. Enter. 2. Select the method of measurement with “mode”, “timeout” and “pulses” then press “start”. Press “start” again. The Nova II will start summing laser energy exposure. If you wish to stop before the chosen period, press” stop”. -
Page 22: Chapter 3. The Nova Ii Meter
You can also zero the Nova II at the touch of a button. The main instructions as well as full help files are clearly shown on the screen so you should not have to refer to this manual very often.
-
Page 23: Smart Connectors
See section 3.6.6 for details When no sensor is plugged in and the Nova II is turned on, the meter indicates “Head Disconnected» and gives the user the opportunity to change the baud rate, re- zero the instrument, set the real time clock or other features.
-
Page 24
Key Functions The Nova II has certain conventions as to the meaning of standard key strokes and these are as follows: Highlighted item: The highlighted item is the item presently active. These buttons move to the next active item leftwards, rightwards. These are the navigation buttons. -
Page 25: Power Up And Shut Down
3.4 Power Up and Shut Down Figure 3.1…
-
Page 26: Nova Ii Functions, Which Are Independent Of Sensor Type
3.5 Nova II Functions, which are independent of Sensor Type When no sensor is connected to the Nova II and it is turned on, the message “Head Disconnected» appears. In this mode, the user can adjust the startup screen, either the standard power/energy screens or other specialized screens.
-
Page 27
Needle Screen 3.5.2. RS232 Baud Rate If you are using the Nova II for RS232 communication with PC, the baud rate can be set by selecting «RS232 baud» and selecting the appropriate rate then pressing enter and save. Unless you need especially fast… -
Page 28
1. If a sensor is connected, disconnect the sensor, turn off the instrument then back on again so the Nova II can identify that no sensor is connected. “Head Disconnected» will be displayed. 2. Let the Nova II run for at least 30 seconds before performing zero adjustment. -
Page 29: Hardware Functions
The backlight illuminates the meter from the rear and is operated by the same switch as turns the instrument on and off (See Figure 3.1). The Nova II backlight consumes considerably less power than competing instruments and therefore it can operate from the…
-
Page 30
To operate the backlight, press the on/off/backlight switch briefly while the Nova II is on. To turn off the backlight, press again briefly. (If the switch is pressed for ~3s, the instrument will turn off). -
Page 31
PC. The Unit is supplied with two cables, each with a 7 pin DIN plug on one end mating with the Nova II and either a USB or 9 pin D RS232 connector on the other side. When you wish to operate… -
Page 32
If such an event happens, a warning screen will be displayed for 3 seconds, after which the Nova II will restart itself in its new configuration. Thus if a user wants to change sensors during his experiment he no longer needs to power down the Nova II to do so. -
Page 33: Chapter 4. Operation With Thermopile Absorber Sensors
Chapter 4. Operation with Thermopile Absorber Sensors Warning: Before using the sensor for power or energy measurement, check that your laser power, energy and energy density do not exceed the sensor ratings. See Table 5. and Table 6. in Chapter 10. If the sensor is a water-cooled type, ensure that the cooling water is flowing at an adequate rate;…
-
Page 34: Selecting Settings From The Nova Ii Screen
Nova II. Energy of a single pulse is measured on the Nova II by digitally integrating the pulse power over time.
-
Page 35
To choose auto range, select “Range”, enter, choose “AUTO” then enter again. If you wish the Nova II to be in manual mode when switched on, save this configuration before switching off See Section 4.3. -
Page 36: Startup And Configuration Of Defaults
4.3 Startup and Configuration of Defaults If you are planning to do measurements of the same type most of the time, you can set up the Nova II so that it automatically starts up in the measurement mode desired. Since these settings are saved in the sensor «smart connector», you can save different settings for…
-
Page 37: Power Measurement
Nova II is switched off only. 9. Switch the Nova II off then on by means of the on/off/backlight switch. (See Figure 3.1). The Nova II will enter the mode of operation last saved with the «configure»…
-
Page 38
In this case, the true power is 20.5 — 0.1 = 20.4 Watts. To subtract the background, press the “offset” button while the laser is blocked. The Nova II will now read zero, and the 0.1 Watt background will be subtracted from all subsequent readings. -
Page 39
Nova II settings. 4.4.2.3.1. To use the Nova II to fine tune laser power 1. From the main measurement screen, select “menu” and enter. Select “tune” and enter. -
Page 40
4.4.2.4. Average When a laser output is fluctuating or unstable, it is useful to measure the average power over a certain period. The Nova II gives you this exclusive feature, allowing averaging over periods varying from 1 s to 1 hour. -
Page 41
1 min, at 5 minutes, it is over the period from 4 to 5 minutes (1 minute back from the present etc.). To use the Nova II to display average: 1. From the main power screen, select “average” and enter. -
Page 42
Thermopile Normalize Screen 4.4.2.6. Power vs. Time Graph and Data Logging The Nova II in datalog mode has the option of graphing the laser power against time and storing the data in up to 10 permanent storage files with up to 5,400 data points in each file. -
Page 43
To use the Nova II to graph power vs. time: 1. From the main power measurement screen, select “menu” and enter. Select “data-log” and enter. 2. You are now in the setup screen. Under “Graph Settings”, select “Min:” and enter. -
Page 44
Sensor: 30A Range: 30W Laser: 248 Points Sampled: 300 Time Scale: 1min Minimum: 12.3W Average: 15.4W Maximum: 28.4W Std Dev: 6.43W Present: 27.2W Time: 11:24:23 Pause Reset Zoom Exit Figure 4.4 Laser Power VS Time Graph 4.4.2.6.1. Data Storage and Transmission When using thermal and photodiode sensors the data logging period is anywhere from 20 seconds to 600 hours. -
Page 45
Temp: 300 1340 Free Space: 58460 Sensor: 30A S/N: 104360 Points Logged: 1340 Average: 23.4W Minimum: 19.4W Std Dev: 2.43W Maximum: 27.3W Exit Save Delete Help Figure 4.5 Data Storage Screen 2. When the screen is entered, the data in the latest power graph will be stored temporarily in register “Temp”. -
Page 46: Energy Measurement
4.5 Energy Measurement 4.5.1. Setup Switch the Nova II on. If it is in power mode, press the left soft key “energy” to put it into energy mode. The energy mode is manual ranging: enter “range” and then use the navigation keys to get to the proper range then enter again.
-
Page 47
«ready» appears, the reading may be inaccurate or may not be displayed. 4.5.3. Minimum Energy Threshold If the Nova II is used in a noisy environment or where there is a high level of background thermal radiation, the instrument may trigger spuriously on the noise or background radiation. -
Page 48
designed not to respond to pulses below some preset minimum size. This «Minimum Energy Threshold» is typically set to 0.3% of full scale of the selected range. If this level is found to be too sensitive for the user’s particular environment, it may be altered by the user. The threshold should not, however, be raised higher than necessary. -
Page 49
Ophir pyroelectric sensors,as long as the pulse energies do not exceed the ratings of the pyroelectric absorbers. The pyroelectric sensors are compatible with the Nova II and just have to be plugged in to be used. For higher pulse energies, you can use the Ophir model RP to measure both average power and exact individual pulse energy of the rapidly repeating pulses. -
Page 50
4.5.6.1. To use the Nova II for graphical display of energy — regular mode 1. Make sure that the Nova II is in the correct energy measurement range. If not, enter “range”, adjust and enter again. 2. From the energy measurement screen enter “menu”… -
Page 51: Advanced Meter Screens
Sensor: 30A Range: 30J Laser: 248 Points Sampled: 25 Minimum: 22.3J Average: 23.4W Maximum: 25.4W Std Dev: 1.43W Present: 21.2W Time: 11:24:23 Pause Reset Zoom Exit Figure 4.7 Energy Log Screen 4.6 Advanced Meter Screens 4.6.1. Power and Energy Beam Splitter/Attenuator Screens If you have a measurement setup with a beam splitter or attenuator and wish to display the laser power or…
-
Page 52
4.6.2. Power and Energy Density Screens The Nova II gives you the option to measure in units of power and energy density instead of power and energy. You input the beam size and the meter then calculates… -
Page 53
«Height» box. 4.6.3. Power and Energy Limits Screens The Nova II gives you the option to set upper and lower limits of power and energy. If these limits have been set in the limit screen, then when the power or energy is above the maximum limit set the message “OVER”… -
Page 54
3. Do the same for the “high” limit. 4. If you want the limits screen to be the startup default of the Nova II, follow the instructions in section 3.5. Now when the power or energy is over or under the limits chosen, the error message will be shown as in Figure 4.9. -
Page 55: Chapter 5. Operation With Photodiode Type Sensors
The Nova II meter amplifies this signal and indicates the power level received by the sensor. Due to the superior circuitry of the Nova II, the noise level is very low, and the PD300 /3A-IS series sensors with the Nova II meter have a large dynamic range from nanowatts to hundreds of milliwatts.
-
Page 56: Setting Up The Pd300 To Display The User’s Chosen Wavelengths
been constructed with a built in filter so the basic sensor can measure to 30mW or more without saturation. When the additional filter is installed, the maximum power is on the order of 300mW (or 3W with model PD300-3W). The PD300 saturates when the output current exceeds 1.3mA so the exact maximum power depends on the sensitivity of the detector at the wavelength used.
-
Page 57: Startup Defaults
For details of filter in/out See Section 5.4.3. 3. Now select “display mode” and select the desired startup screen. Press save.(Note that this selection is saved in the Nova II and not the sensor so will be…
-
Page 58: Selecting Settings From The Nova Ii Screen
4. Now select “Power Range:” and in the same way choose the manual power range you wish to be the default or autorange or dBm. The Nova II will now be in the range selected when switched on with the sensor in question.
-
Page 59
See Section 5.3. dBm — The Nova II allows the measurement to be made in units of dBm that is a logarithmic scale. dBm units are defined as:… -
Page 60
Depending on what powers you wish to measure, you should choose whether or not to work with the removable filter installed or not. For this purpose, the Nova II has a «filter» setting and uses the proper correction curve depending on whether the filter is installed or not. -
Page 61
Section 5.2. In addition, the offset function can be used to subtract the residual background signal that remains if desired. If the Nova II shows a nonzero power reading even when there is no laser, you can subtract the background… -
Page 62
To subtract the background, press «offset» while the laser is blocked. The Nova II will now read zero (0.0), and the 0.1 mW background will be subtracted from all subsequent readings. The laser power reading will thus be 20.4 mW. -
Page 63
5.4.7. Average and Measuring Very Low Power Measurement If the laser power is fluctuating, the Nova II can display the average power readings with averaging periods varying from 1s to 1 hour. When measuring very low… -
Page 64
The Nova II also has the option of graphing the laser power vs. time, or successive energy points as long as the Nova II has not been turned off. While measurements are being taken, the Nova II will record data until the screen is full, or «reset»… -
Page 65: Chapter 6. Operation With Pyroelectric Sensors
They can measure low energies as well as high. They can also measure at higher repetition rates than was possible before. The Nova II meter amplifies this signal and indicates the energy received by the sensor as well as the…
-
Page 66: Selecting Settings From The Nova Ii Screen
6.2 Selecting Settings from the Nova II Screen The Nova II can conveniently be set to various chosen parameters from the screen. In addition, it can be set to startup defaults so it will be in the desired…
-
Page 67
PE05 10235 Range: 20mJ Menu: Energy Laser: 532 Average: 1 sec Threshold: 3% 12.34 142.37Hz TRIG 20mJ Power Help 50s Figure 6.1 Pyroelectric Energy Screen 6.2.1. Setting up the sensor to display the user’s chosen wavelengths. The absorption of the detector coating varies somewhat with wavelength. -
Page 68
As was mentioned before, the Ophir pyroelectric sensors can measure long as well as short pulses. In order to operate properly, the Nova II must be set to a maximum pulse width setting longer than the actual laser pulse width. Therefore the pulse width should be set to the shortest pulse width longer than the actual laser pulse width. -
Page 69
6.2.2.2. Setup for the Time Period to Average Over The Nova II has the ability to measure a number of pulses and display the average value of the energy of the pulses. This function is useful if the laser energy is not stable. -
Page 70: Startup And Configuration Of Defaults
“save”. 6.3 Startup and Configuration of Defaults If you are planning to do repetitive measurements most of the time, you can set up the Nova II so that it automatically goes into the measurement mode you want upon startup.
-
Page 71
8. Now press “save” if you want this to be the startup default and press “exit”. 9. Switch the Nova II off then on by means of the on/off/backlight switch. (See Figure 3.1). The Nova II will enter the mode of operation last… -
Page 72: Energy, Power Or Exposure Measurement
There is a slight variation of pyroelectric reading from meter to meter. Therefore, for most accurate pyroelectric energy measurements it is necessary to zero the pyroelectric sensor against the Nova II meter it will be used with. After this is done, the…
-
Page 73
“conditioned” to work with the particular Nova II the zeroing was done against. It is not necessary to do this procedure again unless the Nova II is used with a different sensor. If the procedure is not done, errors of 2% or so can occur. To zero the sensor… -
Page 74
If an averaging period is selected, the Nova II will collect pulses at up to 180Hz and will then display the average of those pulses. When a new pulse triggers the Nova II, “TRIG” will appear on the screen. -
Page 75
“save” before pressing “enter”. 6.4.2. Measuring Total Energy Exposure. The Nova II has the ability to sum the total energy of a number of pulses over a given time period or number of pulses. This gives the total energy «exposure» over that time period. -
Page 76
Reset Help Figure 6.2. Exposure Screen 3. Press “start”. The Nova II will start summing laser energy exposure. When you wish to stop measuring, press «stop» or wait for measurement to reach the “timeout» or the ”pulses” selected in the setup screen. -
Page 77
1.33. The screen will also show in small digits the energy at which the normalization was done and the present energy To use the Nova II to normalize the energy: 1. From the main measurement screen, enter “menu” and select “normalize”. -
Page 78: Measuring Repeating Pulses Of High Energy
3. Ophir has three sensors specifically designed for high energy density pulses. They are the PE50HD sensors with high damage threshold, the PE50-DIF model pyroelectric sensors with a diffuser and the RP thermal/photodiode sensors.
-
Page 79
In order to log data or transmit it to PC at rates >1000Hz, you must be in turbo mode. This will put you into a special mode where the Nova II can handle data at high speed while curtailing other functions. To log in… -
Page 80: Pyro Scope Adapter
Activate the scope adapter as follows: 1. Plug the adapter into the Nova II meter and then plug the sensor plug into the adapter. Plug the BNC connector into a standard 1M scope input.
-
Page 81
5. Press “OK” and “OUT” will appear on the main power / energy screen. Make sure to remove the diffuser from the sensor. 6. Press “laser” and select the correct wavelength. Note that only wavelengths compatible with the diffuser setting are visible. (All wavelengths for diffuser “IN”… -
Page 82: Chapter 7. Beamtrack Features
This chapter describes the Nova II’s position and size measurement functionality. For a full description of Thermopile functionality see…
-
Page 83: Menu Screen
7.2 Menu Screen To access the various other BeamTrack features, go to the Menu screen from the main Track Screen. Figure 7.2 BeamTrack Menu Screen 7.3 Stability Screen This screen tracks the position of the laser beam over time. This is useful for users that want to measure the pointing stability of their laser.
-
Page 84: Statistics Screen
7.5 Optimizing Measurements 7.5.1. Zeroing. When a BeamTrack sensor is attached, the zeroing function of the Nova II will zero the BeamTrack’s measurement circuitry as well. 7.5.2. Line Frequency. In order to filter out noise that may be introduced to the…
-
Page 85
Configuration Screen, set Line Frequency to 50Hz or 60Hz, depending on the country you’re in. Figure 7.5 Configuration Screen… -
Page 86: Chapter 8. Crcuit Description
Chapter 8. Circuit Description The NOVA II has two circuit boards: the lower board with analog circuit, digital processor and its support circuit, and power supplies; and the upper board with LCD and its driver. Analog Circuit: The signal from the detector sensor enters the analog circuit and passes through EMI protection components to a differential trans-impedance preamplifier.
-
Page 87
amounts of logged data permanently, even when the instrument is turned off. (See section 4.4.2.6.1 on data storage). The digital processor receives data from the A/D converter and translates it into a measurement of current in Amps. When used with thermopile sensors, the data is then processed by a sophisticated digital filter that speeds up the effective response time of the sensor and rejects noise. -
Page 88: Chapter 9. Calibration, Maintenance And Troubleshooting
9.1 Calibration of Thermopile or RP Sensors 9.1.1. Absorber types and Method of Calibration of Ophir Power Meters 9.1.1.1. Types of Ophir Laser Absorbers Two types of absorber surface are used in Ophir thermal measuring sensors. 1. Surface Absorbers: BB (broadband) absorber…
-
Page 89
lasers. It is calibrated for the spectral range 250 – 2200nm with some sensors also being calibrated for 2940nm. 2. Volume absorbers: P (pulse) type absorber The models with the P suffix, for use with pulsed lasers, have a special absorbing glass with an absorbance of 95+2% over the operating range. -
Page 90
The linearity of most Ophir thermal detectors is specified to be 1% over the specified power range of each particular instrument and is tested by Ophir from time to time. The linearity is generally tested against another sensor that has been NIST tested for linearity. -
Page 91
Absorption vs. Wavelength of Various Pyroelectric Sensor Absorbers 9.1.2.2. Method of Calibration The absorption of the various Ophir thermal absorbers can vary from disc to disc. Therefore, all Ophir absorbers are individually calibrated against NIST traceable standards. 9.1.2.3. Total Accuracy of Calibration… -
Page 92: Calibration Of Photodiode Type Sensors
These filters also have a transmission that depends on wavelength. Therefore, when the PD300 is being used with the Nova II, the Nova II has a built in calibration adjustment for wavelength which is described in the next paragraph.
-
Page 93
EEROM and this information is used to set the gain to the proper value at wavelengths other than the wavelength the instrument was calibrated. When the user selects his wavelength on the Nova II, the correction factor for that wavelength is applied. 9.2.2. Accuracy of Calibration Since the instruments are calibrated against NIST standards, the accuracy is generally ±2% at the… -
Page 94: Calibration Of Pyroelectric Type Sensors
Note: More exact specifications will be found in the latest Ophir Laser Measurement Instruments Catalog. 9.2.3. Recalibration at a specific wavelength from a Known Source of Laser Power 1. From the main measurement screen select “menu” and enter. Select “calibrate” and enter.
-
Page 95
PD300 power sensors and therefore the sensors have a high accuracy at any wavelength in the range. This is an exclusive feature with Ophir energy sensors. Absorption(%) vs. Wavelength (µm) BB — Broadband Metallic Coating Graph 3. -
Page 96
9.3.2. Calibration The sensitivity of the various Ophir pyroelectric sensors can vary from one to another as well as with wavelengths. Therefore, Ophir pyroelectric detectors are individually calibrated against NIST traceable standards. In addition, there is a wavelength sensitivity correction curve in the Meter. -
Page 97
The exact accuracy of each type of sensor is specified in the latest edition of the Ophir catalog. For more details on calibration accuracy, see the Ophir website at http://www.ophiropt.com/laser-… -
Page 98: Error Messages
Low Battery: When the battery is almost discharged, the Battery icon will have only 1 segment left. This means the battery is ¾ empty. At this stage, the Nova II should be connected to the charger. It will operate normally and charge slowly while connected to the charger.
-
Page 99: Troubleshooting
Nova II alone. turned off for 18-21 hours. If the Nova II still doesn’t work with battery, then the NiMH battery is probably dead. Replace battery (see section 9.6.1.4). 9.5.2. Thermal Sensors, Energy Measurements…
-
Page 100: Maintenance
2. Move sensor/display further away from EMI. 9.6 Maintenance 9.6.1. Battery Replacement If the Nova II battery is defective and does not hold a charge, a replacement can be ordered from your agent (Ophir part number 7E14007). The new battery is installed as follows: 1.
-
Page 101: Chapter 10. Nova Ii Specifications
Chapter 10. Nova II Specifications 10.1 System/Meter Specifications Input Specifications Thermal, Photodiode Input Ranges 15nA — 1.5mA full scale in 16 ranges A to D Sampling rate 15Hz A to D resolution and linearity Resolution: 23 bits plus sign. (0.00001%);…
-
Page 102: Sensor Specifications
10.2 Sensor Specifications Sensor Max Avg. Absorber Power Power Type (WATTS) Density at Max Power PD300/UV/IR 300mW 50W/cm² PD300-3W 100W/cm² 3A-IS 200W/cm² Int Sph PD 1000W/cm² 3A-P 50W/cm² 3A-FS 200W/cm² 28KW/cm² 25KW/cm² 12A-P 50W/cm² 20C-SH 4(20)W 23KW/cm² 30A-BB-18 20KW/cm² 30A-P-17 50W/cm²…
-
Page 103
BF — very high damage threshold, long pulses FS — Fused silica window close to detector for divergent beams Note: For more detailed and exact specifications, see the latest Ophir Laser Measurement Instruments Catalog. Absorber Max Energy Density J/cm² Type… -
Page 104
6.4.1.2. In chapter 9 added PF took out HL, clarified linearity and redid «Total Accuracy of Calibration» section. Corrected «head» to «sensor». Rev 2.19-2/22.03.12/be new Ophir-Newport logo Rev 2.37-1/09.1.14/ykp+bae BeamTrack Statistics Screen and Analog Hold/Release. Also corrected chapter 9 (Calibration, Maintenance and Troubleshooting) , charging info, power table and PD300 table, updated tables 1,2 &…
Nova II Monochrome LCD Laser Power & Energy Meter
Nova II Monochrome LCD Laser Power & Energy Meter
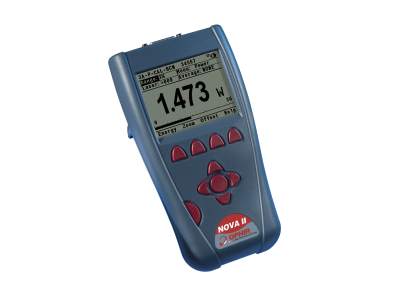
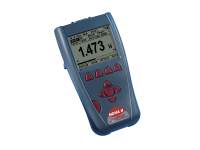
Overview
The Nova II is a very versatile and sophisticated handheld laser power/energy meter. Just plug in one of the many Ophir sensors and you have a whole measurement laboratory at your fingertips.
- Large high definition LCD display
- Compatible with standard Ophir thermal, BeamTrack, pyroelectric & photodiode sensors
- Choice of digital or analog needle display
- Backlighting and rechargeable battery
- Soft keys and menu driven functions with on line help
- Non-volatile data storage up to 59,400 points
See All Features
Products
| Compare | Model | Compatibility | sortOrder | rankScore | ranking | Drawings, CAD & Specs | Statistics | Analog Out | RS232 | USB | GPIB | Availability | Featured Item | Price | Brand | ||||
|---|---|---|---|---|---|---|---|---|---|---|---|---|---|---|---|---|---|---|---|

|
7Z01550
Contact Us |
Nova II Laser Power & Energy Meter, 320×240 B&W LCD Display |
UNIVERSAL | 0.0 | 1.0 | 0.0 |
|
0.0 | Yes | 1, 2 ,5 ,10 V | Yes | Yes | No |
Contact Us |
Ophir |
Software
PC Software & Drivers
This section describes various ways to interface the Ophir meter to your PC as well as the software options available. Check out the datasheet for more details.
StarLab
The StarLab application together with an Ophir meter turns your PC or laptop into a full-fledged laser power/energy meter. Supports most Ophir laser power/energy sensors. Up to 8 sensors can be displayed at once on one PC. By using the Ophir COM Object, you can control the device from your own application. Supports the Ariel, Centauri, StarBright, StarLite, Juno, Juno+, Nova II, Vega, Pulsar-1/2/4, Quasar, EA-1 and Ariel devices.
StarCom
The StarCom application together with the Ophir meters that utilize the RS232 protocol turns your PC or laptop into a full-fledged Ophir laser power/energy meter. StarCom supports all major Ophir sensors. Supports the Nova, LaserStar, Nova-II, and Vega meters.
LabVIEW
Library supplied for a complete measurement interface with most of our USB speaking devices (Centauri, StarBright, StarLite, Juno, Juno+, Nova-II, Pulsar, Vega). Makes use of our new COM object.
Firmware — Vega / Nova II (latest version 2.55)
Embedded s/w for Vega & Nova II Laser Power / Energy Meters
Use StarLab to upgrade the firmware of your device. Follow the step-by-step instructions (see link above).
Specifications
-
Thermal Sensor Compatibility
Yes
-
Photodiode Sensor Compatibility
Yes
-
Pyroelectric Sensor Compatibility
Yes
-
BeamTrack Sensor Compatibility
Yes
-
Statistics
Yes
-
Analog Out
1, 2, 5, 10 V
-
RS232
30 Hz
-
USB
2000 Hz
-
Trigger Input/Output
No
-
On-Board Data Storage
59.4k
-
Automation Interface
Yes for USB
-
Labview VI’s
Yes
-
CE Compliance
Yes
-
UKCA Compliance
Yes
-
China RoHS Compliance
Yes
Features
Setting Your Laser Power Meter To a Custom Wavelength
Learn how to set the correct wavelength for your measurement, even when the wavelength you need is not one of the default wavelengths offered by the meter.
Introduction to the StarLab Laser Measurement Application
This video gives an overview of the StarLab application and its various functions. Part 1 of a series of video segments teaching you how to use StarLab.
Frequently Asked Questions
-
How does an energy meter measure above the maximum frequency at which it can record every pulse?
-
Answer
The energy meters will then sample at close to its maximum frequency. For instance measuring 10 KHz with a PD10 Sensor and Nova II where the maximum frequency for every pulse on the Nova II is 4 KHz: in this case, the Nova II will pick out pulses at a rate of close to 4 KHz and sample them, i.e. the Nova II will record 40% of the pulses.
-
What is the Ophir meter zeroing and how often should I zero my power meter?
-
Answer
In all Ophir instruments, all adjustments, including zeroing internal circuits, are done from the software. This ensures simple and accurate realignment. The zeroing process helps eliminate internal biases in the unit which could affect accuracy and repeatablity of measurements. It is recommended to re-zero the instrument every month or two for best performance. Specific instructions for doing this can be found in the User Guide/Manual for each instrument.
-
Can I use a third party sensor with the Ophir power/energy meters?
-
Answer
No, only Ophir power/energy sensors with the Smart Head connection will work with the Ophir power/energy meters.
-
I have multiple sensors. Do I need a specific meter for each sensor or can I use one meter for all of my sensors?
-
Answer
With Ophir’s Smart Head technology sensors can be interchanged between different meters easily. The calibration and setting information is stored in the sensors Smart Head connector so it moves with the sensor to the new meter. It is recommended that you power off your Nova meter before removing the sensor, but the new Nova II and Vega meters detect that a sensor has been removed or attached and will power cycle themselves when doing this.
-
Can I upgrade my Nova-II or Vega software by myself or do I have to send it in to an Ophir distributor?
-
Answer
The Power and Energy Meter’s software can be upgraded by the customer using Ophir’s StarLab PC application available for download from the Ophir website.
- Attach the Power and Energy Meters to your PC with the USB cable provided with the Power and Energy Meters.
- Go to the bottom of the StarLab page and download the firmware for your Power and Energy Meters
- Run the StarLab application
- Select your Power and Energy Meters device and press Diagnostics
- Select your meter and press the Upgrade button
- Follow all the on-screen instructions to successfully reprogram the display.
These instructions, including screen captures, can be found at Upgrading Instrument Fireware tutorial.
If the field-upgrade process fails (example, unplug of the USB cable during the upgrade), the Power and Energy Meters will not function properly. Therefore, when turning on the Power and Energy Meters the user gets a blank screen. Note: The Power and Energy Meters can still communicate with the PC. Try to reinstall the Power and Energy Meters software as described above.
-
I’ve upgraded to the latest version of StarLab and my meter no longer is supported. What happened?
-
Answer
Whenever we release a new version of StarLab we add support or deal with various other meter-specific issues. This may necessitate upgrading the meter firmware to the latest release. This release is included in the StarLab package and simply enter the Field Upgrade dialog in order to upgrade your meter to be up to date.
-
How do I use the Analog Output of a meter to get a reading of power? And how accurate is it?
-
Answer
The analog output of the meter — using the mating connector provided – gives a voltage signal proportional to the actual reading (it is in fact just a D/A translation of what is being displayed), so it represents a fully calibrated reading. The full scale value is a function of the meter being used and the power range it is on. With the StarBright, Vega and Nova II, for example, the user can select full scale analog output voltage ranges of 1, 2, 5 or 10 V, and the 100% level of the chosen power scale is scaled to the full scale voltage. For example: if you choose 5V full scale analog voltage range, and your sensor is set to a 50 W full scale power range, then you will have 5 V = 50 W or 0.1 V/W. It will vary according to the chosen power range and chosen full scale voltage range. The electrical accuracy is stated in the specification (see the User manual) as ±0.2% (of reading) ±0.3% of full scale volts (in addition to the calibration accuracy of the sensor’s reading itself).
-
Do you want to see some of the functionality of a power meter with different sensor types?
-
Answer
You can try our Nova II demo online. It can be found here. You can use this demo to connect to different sensor styles and check the meter’s and sensor’s functionality. You can also simulate a laser by imputing exposure levels. This simulator does not allow you to try every sensor, but it can give you an idea how the meters work and how sensors interface with the meter.
-
Do I need to recalibrate my instrument? How often must it be recalibrated?
-
Answer
Unless otherwise indicated, Ophir sensors and meters should be recalibrated within 18 months after initial purchase, and then once a year after that.
-
Can I buy a universal power adapter/charger for my Ophir display?
-
Answer
Yes. We now offer a switchable universal power adapter/charger P/N 7E05029 for the Ophir displays.
-
My meter seems to be charging normally, but it lasts for less than an hour on battery power. Does the battery need to be replaced?
-
Answer
Yes, the battery needs to be replaced. A new battery should last 8 hours per charge. We recommend that you send the meter back for battery replacement and recalibration. User battery replacement is possible. For battery part numbers and ordering information, check out the Spare Parts.
-
Why wasn’t the firmware upgraded to the latest version when the meter was sent in for recalibration?
-
Answer
Our recalibration process is to not automatically upgrade the firmware in meters when they are sent in for recalibration, unless specifically requested to upgrade it. The reason for this is that we support many companies, such as medical companies, that have equipment validation processes that don’t allow changing the firmware version from the currently validated version. If you do want the latest firmware version installed, we will do that at no additional charge (for meters which are upgraded electronically) if it is specifically requested on the RMA request checklist form. For older meters (such as the Nova) that are upgraded through changing the EEPROM, a nominal fee is added, if firmware upgrade is requested. Note that upgrading the firmware does not affect the calibration.
-
Why doesn’t the StarLab software recognize the Nova II or Vega meter when a RS232 to USB adapter cable is used with the supplied RS232 cable for an interface?
-
Answer
Unfortunately the interface described above is not sufficient to establish the correct communication protocol for the computer USB to interface to the Nova II or Vega meter. The original USB cable (one is provided with each Nova II and Vega meter) is required for the StarLab software to communicate OK. The USB cable is P/N 7E01205 and is available to order.
-
What is Ophir Statement of Volatility of Memory for Nova II
-
Answer
See attached

-
Page 1
NOVA NOVA LASER POWER/ENERGY METER USER MANUAL OPHIR OPTRONICS www.ophiropt.com/photonics… -
Page 2: Table Of Contents
Chapter 4. Operation with Thermopile Absorber Sensors ………….. 32 4.1 Thermopile Absorber Sensors ……..32 4.2 Selecting Settings from the Nova II Screen … 33 4.3 Startup and Configuration of Defaults ….35 Power Measurement ……….36 4.5 Energy Measurement ……….45…
-
Page 3
5.2 Setting up the PD300 to display the user’s chosen wavelengths …………..55 5.3 Startup Defaults …………56 5.4 Selecting Settings from the Nova II Screen … 57 Chapter 6. Operation with Pyroelectric Sensors . 64 6.1 Pyroelectric & Photodiode Energy Sensors ..64 6.2 Selecting Settings from the Nova II Screen … -
Page 4
9.2 Calibration of Photodiode type Sensors ….91 9.3 Calibration of Pyroelectric type Sensors ….93 9.4 Error Messages …………97 9.5 Troubleshooting …………98 9.6 Maintenance …………… 99 Chapter 10. Nova II Specifications ….100 10.1 System/Meter Specifications ……100 10.2 Sensor Specifications ………. 101… -
Page 5: Chapter 1. Introduction: How To Use This Manual
This manual tells you what you need to know to make full use of the Nova II for all your laser measurement needs. It includes a «Quick Reference», (Chapter 2) to allow you to perform basic measurements immediately, without reading the whole manual.
-
Page 6: Chapter 2. Quick Reference
Chapter 2. Quick Reference 2.1 Getting Started The Nova II is equipped with «soft keys.» That is the functions of the keys change as indicated by the legend above each key. (See Figure 2.2). To connect sensor to the Nova II Meter Insert the 15 pin D type connector of the measuring sensor cable into the socket marked «Head Input»…
-
Page 7: Functions With No Sensor Connected
Figure 2.2 2.2 Functions with no Sensor Connected 2.2.1. Turning on and off. To switch the Nova II on: Briefly press the on/off/backlight switch. (Figure 2.2) The unit will switch on, and the display will appear. Note: The sensor must be plugged in before the unit is…
-
Page 8
To switch the Nova II off: Press the on/off/backlight switch and hold it for ~ 3 seconds until the display blanks. If you wish to save the current Nova II configuration, use the «configure» function. (See section 2.2.2). Display Options 2.2.2. -
Page 9
Japanese language as the Nova II startup language, the way to switch back to English is: a. Disconnect the sensor from the Nova II. b. Turn the Nova II off and on again. You will reach the instrument setup screen (titled “Head disconnected” in Japanese). -
Page 10: Thermal Sensors
10. The status will show a green V sign and state «finished». 11. Press «Done». 2.3 Thermal Sensors 2.3.1. Use of Nova II with thermal type sensors. Most Thermopile sensors have somewhat different absorption at different wavelengths. In order to compensate for this, each sensor has been calibrated by laser at several wavelengths.
-
Page 11
To set type of laser being used With sensors with fixed wavelengths: 1. While the Nova II is off, plug in the sensor then switch it on again. 2. Press the navigation keys until «laser» is highlighted. Press the enter key and select the appropriate laser wavelength. -
Page 12
2. To go from the energy measurement screen to power measurement, press “power”. 2.3.2. Setting and Saving the Startup Configuration 1. Turn on the Nova II with the sensor connected, select “menu” and enter. Select “configure” and enter. 2. Now, with the navigation keys select “Startup mode”, press the enter key and select “power”… -
Page 13
Nova II will start up from the screen selected for all sensors). 4. Now select “Power range”, press enter and choose the manual power range you wish to be the default or choose auto range. -
Page 14
«offset». 2. Press «offset» again to cancel. See Section 4.4.2.2 for full details. To use the Nova II to fine-tune Laser power: 1. From the main power measurement screen select “menu” and enter. Now select «tune» and enter. 2. Set the percentage range of the power scale to be displayed by repeatedly pressing the ±50% key. -
Page 15: Photodiode Sensors
2.2.2 above. 2.4 Photodiode Sensors 2.4.1. Selecting Wavelengths 1. While the Nova II is off, plug in the sensor then switch it on again. 2. From the main measurement screen, press «laser» to select the correct laser wavelength. If you want to save this new wavelength as the startup default, press “save”…
-
Page 16
wavelength selected as startup from the 6 default wavelengths 2.4.3. To choose manual or automatic ranging or dBm in power measurement Select «range» and enter. Using the navigation keys, select the appropriate manual range autorange or dBm (logarithmic scale). 2.4.4. Setting the Startup Configuration 1. -
Page 17: Pyroelectric Sensors
«offset». 2. Press «offset» again to cancel. See Section 5.4.5 for full details. To use the Nova II to fine-tune Laser power 1. From the main power measurement screen select “menu” and enter. Now select «tune» and enter. 2. Set the percentage range of the power scale to be displayed by repeatedly pressing the ±50% key.
-
Page 18
If you do not want to save this as the startup mode but only change for now, exit without save. (This choice is saved in the instrument and not the sensor so the Nova II will start up from the screen selected for all sensors). -
Page 19
4. Now select “energy range”, press enter and choose the manual energy range you wish to be the default. 5. Now select “average” to select what period you wish to average power over or select the default, «none». 6. If the sensor is a diffuser sensor, now select diffuser in or out. -
Page 20
«power». 2. To go from the main power measurement screen to energy measurement, press «energy». 2.5.5.2. To use the Nova II to measure Laser Energy and Frequency 1. In measurement mode, verify that the units are mJ, µJ etc. -
Page 21
“menu”, enter and select “exposure”. Enter. 2. Select the method of measurement with “mode”, “timeout” and “pulses” then press “start”. Press “start” again. The Nova II will start summing laser energy exposure. If you wish to stop before the chosen period, press” stop”. -
Page 22: Chapter 3. The Nova Ii Meter
You can also zero the Nova II at the touch of a button. The main instructions as well as full help files are clearly shown on the screen so you should not have to refer to this manual very often.
-
Page 23: Smart Connectors
See section 3.6.6 for details When no sensor is plugged in and the Nova II is turned on, the meter indicates “Head Disconnected» and gives the user the opportunity to change the baud rate, re- zero the instrument, set the real time clock or other features.
-
Page 24
Key Functions The Nova II has certain conventions as to the meaning of standard key strokes and these are as follows: Highlighted item: The highlighted item is the item presently active. These buttons move to the next active item leftwards, rightwards. These are the navigation buttons. -
Page 25: Power Up And Shut Down
3.4 Power Up and Shut Down Figure 3.1…
-
Page 26: Nova Ii Functions, Which Are Independent Of Sensor Type
3.5 Nova II Functions, which are independent of Sensor Type When no sensor is connected to the Nova II and it is turned on, the message “Head Disconnected» appears. In this mode, the user can adjust the startup screen, either the standard power/energy screens or other specialized screens.
-
Page 27
Needle Screen 3.5.2. RS232 Baud Rate If you are using the Nova II for RS232 communication with PC, the baud rate can be set by selecting «RS232 baud» and selecting the appropriate rate then pressing enter and save. Unless you need especially fast… -
Page 28
1. If a sensor is connected, disconnect the sensor, turn off the instrument then back on again so the Nova II can identify that no sensor is connected. “Head Disconnected» will be displayed. 2. Let the Nova II run for at least 30 seconds before performing zero adjustment. -
Page 29: Hardware Functions
The backlight illuminates the meter from the rear and is operated by the same switch as turns the instrument on and off (See Figure 3.1). The Nova II backlight consumes considerably less power than competing instruments and therefore it can operate from the…
-
Page 30
To operate the backlight, press the on/off/backlight switch briefly while the Nova II is on. To turn off the backlight, press again briefly. (If the switch is pressed for ~3s, the instrument will turn off). -
Page 31
PC. The Unit is supplied with two cables, each with a 7 pin DIN plug on one end mating with the Nova II and either a USB or 9 pin D RS232 connector on the other side. When you wish to operate… -
Page 32
If such an event happens, a warning screen will be displayed for 3 seconds, after which the Nova II will restart itself in its new configuration. Thus if a user wants to change sensors during his experiment he no longer needs to power down the Nova II to do so. -
Page 33: Chapter 4. Operation With Thermopile Absorber Sensors
Chapter 4. Operation with Thermopile Absorber Sensors Warning: Before using the sensor for power or energy measurement, check that your laser power, energy and energy density do not exceed the sensor ratings. See Table 5. and Table 6. in Chapter 10. If the sensor is a water-cooled type, ensure that the cooling water is flowing at an adequate rate;…
-
Page 34: Selecting Settings From The Nova Ii Screen
Nova II. Energy of a single pulse is measured on the Nova II by digitally integrating the pulse power over time.
-
Page 35
To choose auto range, select “Range”, enter, choose “AUTO” then enter again. If you wish the Nova II to be in manual mode when switched on, save this configuration before switching off See Section 4.3. -
Page 36: Startup And Configuration Of Defaults
4.3 Startup and Configuration of Defaults If you are planning to do measurements of the same type most of the time, you can set up the Nova II so that it automatically starts up in the measurement mode desired. Since these settings are saved in the sensor «smart connector», you can save different settings for…
-
Page 37: Power Measurement
Nova II is switched off only. 9. Switch the Nova II off then on by means of the on/off/backlight switch. (See Figure 3.1). The Nova II will enter the mode of operation last saved with the «configure»…
-
Page 38
In this case, the true power is 20.5 — 0.1 = 20.4 Watts. To subtract the background, press the “offset” button while the laser is blocked. The Nova II will now read zero, and the 0.1 Watt background will be subtracted from all subsequent readings. -
Page 39
Nova II settings. 4.4.2.3.1. To use the Nova II to fine tune laser power 1. From the main measurement screen, select “menu” and enter. Select “tune” and enter. -
Page 40
4.4.2.4. Average When a laser output is fluctuating or unstable, it is useful to measure the average power over a certain period. The Nova II gives you this exclusive feature, allowing averaging over periods varying from 1 s to 1 hour. -
Page 41
1 min, at 5 minutes, it is over the period from 4 to 5 minutes (1 minute back from the present etc.). To use the Nova II to display average: 1. From the main power screen, select “average” and enter. -
Page 42
Thermopile Normalize Screen 4.4.2.6. Power vs. Time Graph and Data Logging The Nova II in datalog mode has the option of graphing the laser power against time and storing the data in up to 10 permanent storage files with up to 5,400 data points in each file. -
Page 43
To use the Nova II to graph power vs. time: 1. From the main power measurement screen, select “menu” and enter. Select “data-log” and enter. 2. You are now in the setup screen. Under “Graph Settings”, select “Min:” and enter. -
Page 44
Sensor: 30A Range: 30W Laser: 248 Points Sampled: 300 Time Scale: 1min Minimum: 12.3W Average: 15.4W Maximum: 28.4W Std Dev: 6.43W Present: 27.2W Time: 11:24:23 Pause Reset Zoom Exit Figure 4.4 Laser Power VS Time Graph 4.4.2.6.1. Data Storage and Transmission When using thermal and photodiode sensors the data logging period is anywhere from 20 seconds to 600 hours. -
Page 45
Temp: 300 1340 Free Space: 58460 Sensor: 30A S/N: 104360 Points Logged: 1340 Average: 23.4W Minimum: 19.4W Std Dev: 2.43W Maximum: 27.3W Exit Save Delete Help Figure 4.5 Data Storage Screen 2. When the screen is entered, the data in the latest power graph will be stored temporarily in register “Temp”. -
Page 46: Energy Measurement
4.5 Energy Measurement 4.5.1. Setup Switch the Nova II on. If it is in power mode, press the left soft key “energy” to put it into energy mode. The energy mode is manual ranging: enter “range” and then use the navigation keys to get to the proper range then enter again.
-
Page 47
«ready» appears, the reading may be inaccurate or may not be displayed. 4.5.3. Minimum Energy Threshold If the Nova II is used in a noisy environment or where there is a high level of background thermal radiation, the instrument may trigger spuriously on the noise or background radiation. -
Page 48
designed not to respond to pulses below some preset minimum size. This «Minimum Energy Threshold» is typically set to 0.3% of full scale of the selected range. If this level is found to be too sensitive for the user’s particular environment, it may be altered by the user. The threshold should not, however, be raised higher than necessary. -
Page 49
Ophir pyroelectric sensors,as long as the pulse energies do not exceed the ratings of the pyroelectric absorbers. The pyroelectric sensors are compatible with the Nova II and just have to be plugged in to be used. For higher pulse energies, you can use the Ophir model RP to measure both average power and exact individual pulse energy of the rapidly repeating pulses. -
Page 50
4.5.6.1. To use the Nova II for graphical display of energy — regular mode 1. Make sure that the Nova II is in the correct energy measurement range. If not, enter “range”, adjust and enter again. 2. From the energy measurement screen enter “menu”… -
Page 51: Advanced Meter Screens
Sensor: 30A Range: 30J Laser: 248 Points Sampled: 25 Minimum: 22.3J Average: 23.4W Maximum: 25.4W Std Dev: 1.43W Present: 21.2W Time: 11:24:23 Pause Reset Zoom Exit Figure 4.7 Energy Log Screen 4.6 Advanced Meter Screens 4.6.1. Power and Energy Beam Splitter/Attenuator Screens If you have a measurement setup with a beam splitter or attenuator and wish to display the laser power or…
-
Page 52
4.6.2. Power and Energy Density Screens The Nova II gives you the option to measure in units of power and energy density instead of power and energy. You input the beam size and the meter then calculates… -
Page 53
«Height» box. 4.6.3. Power and Energy Limits Screens The Nova II gives you the option to set upper and lower limits of power and energy. If these limits have been set in the limit screen, then when the power or energy is above the maximum limit set the message “OVER”… -
Page 54
3. Do the same for the “high” limit. 4. If you want the limits screen to be the startup default of the Nova II, follow the instructions in section 3.5. Now when the power or energy is over or under the limits chosen, the error message will be shown as in Figure 4.9. -
Page 55: Chapter 5. Operation With Photodiode Type Sensors
The Nova II meter amplifies this signal and indicates the power level received by the sensor. Due to the superior circuitry of the Nova II, the noise level is very low, and the PD300 /3A-IS series sensors with the Nova II meter have a large dynamic range from nanowatts to hundreds of milliwatts.
-
Page 56: Setting Up The Pd300 To Display The User’s Chosen Wavelengths
been constructed with a built in filter so the basic sensor can measure to 30mW or more without saturation. When the additional filter is installed, the maximum power is on the order of 300mW (or 3W with model PD300-3W). The PD300 saturates when the output current exceeds 1.3mA so the exact maximum power depends on the sensitivity of the detector at the wavelength used.
-
Page 57: Startup Defaults
For details of filter in/out See Section 5.4.3. 3. Now select “display mode” and select the desired startup screen. Press save.(Note that this selection is saved in the Nova II and not the sensor so will be…
-
Page 58: Selecting Settings From The Nova Ii Screen
4. Now select “Power Range:” and in the same way choose the manual power range you wish to be the default or autorange or dBm. The Nova II will now be in the range selected when switched on with the sensor in question.
-
Page 59
See Section 5.3. dBm — The Nova II allows the measurement to be made in units of dBm that is a logarithmic scale. dBm units are defined as:… -
Page 60
Depending on what powers you wish to measure, you should choose whether or not to work with the removable filter installed or not. For this purpose, the Nova II has a «filter» setting and uses the proper correction curve depending on whether the filter is installed or not. -
Page 61
Section 5.2. In addition, the offset function can be used to subtract the residual background signal that remains if desired. If the Nova II shows a nonzero power reading even when there is no laser, you can subtract the background… -
Page 62
To subtract the background, press «offset» while the laser is blocked. The Nova II will now read zero (0.0), and the 0.1 mW background will be subtracted from all subsequent readings. The laser power reading will thus be 20.4 mW. -
Page 63
5.4.7. Average and Measuring Very Low Power Measurement If the laser power is fluctuating, the Nova II can display the average power readings with averaging periods varying from 1s to 1 hour. When measuring very low… -
Page 64
The Nova II also has the option of graphing the laser power vs. time, or successive energy points as long as the Nova II has not been turned off. While measurements are being taken, the Nova II will record data until the screen is full, or «reset»… -
Page 65: Chapter 6. Operation With Pyroelectric Sensors
They can measure low energies as well as high. They can also measure at higher repetition rates than was possible before. The Nova II meter amplifies this signal and indicates the energy received by the sensor as well as the…
-
Page 66: Selecting Settings From The Nova Ii Screen
6.2 Selecting Settings from the Nova II Screen The Nova II can conveniently be set to various chosen parameters from the screen. In addition, it can be set to startup defaults so it will be in the desired…
-
Page 67
PE05 10235 Range: 20mJ Menu: Energy Laser: 532 Average: 1 sec Threshold: 3% 12.34 142.37Hz TRIG 20mJ Power Help 50s Figure 6.1 Pyroelectric Energy Screen 6.2.1. Setting up the sensor to display the user’s chosen wavelengths. The absorption of the detector coating varies somewhat with wavelength. -
Page 68
As was mentioned before, the Ophir pyroelectric sensors can measure long as well as short pulses. In order to operate properly, the Nova II must be set to a maximum pulse width setting longer than the actual laser pulse width. Therefore the pulse width should be set to the shortest pulse width longer than the actual laser pulse width. -
Page 69
6.2.2.2. Setup for the Time Period to Average Over The Nova II has the ability to measure a number of pulses and display the average value of the energy of the pulses. This function is useful if the laser energy is not stable. -
Page 70: Startup And Configuration Of Defaults
“save”. 6.3 Startup and Configuration of Defaults If you are planning to do repetitive measurements most of the time, you can set up the Nova II so that it automatically goes into the measurement mode you want upon startup.
-
Page 71
8. Now press “save” if you want this to be the startup default and press “exit”. 9. Switch the Nova II off then on by means of the on/off/backlight switch. (See Figure 3.1). The Nova II will enter the mode of operation last… -
Page 72: Energy, Power Or Exposure Measurement
There is a slight variation of pyroelectric reading from meter to meter. Therefore, for most accurate pyroelectric energy measurements it is necessary to zero the pyroelectric sensor against the Nova II meter it will be used with. After this is done, the…
-
Page 73
“conditioned” to work with the particular Nova II the zeroing was done against. It is not necessary to do this procedure again unless the Nova II is used with a different sensor. If the procedure is not done, errors of 2% or so can occur. To zero the sensor… -
Page 74
If an averaging period is selected, the Nova II will collect pulses at up to 180Hz and will then display the average of those pulses. When a new pulse triggers the Nova II, “TRIG” will appear on the screen. -
Page 75
“save” before pressing “enter”. 6.4.2. Measuring Total Energy Exposure. The Nova II has the ability to sum the total energy of a number of pulses over a given time period or number of pulses. This gives the total energy «exposure» over that time period. -
Page 76
Reset Help Figure 6.2. Exposure Screen 3. Press “start”. The Nova II will start summing laser energy exposure. When you wish to stop measuring, press «stop» or wait for measurement to reach the “timeout» or the ”pulses” selected in the setup screen. -
Page 77
1.33. The screen will also show in small digits the energy at which the normalization was done and the present energy To use the Nova II to normalize the energy: 1. From the main measurement screen, enter “menu” and select “normalize”. -
Page 78: Measuring Repeating Pulses Of High Energy
3. Ophir has three sensors specifically designed for high energy density pulses. They are the PE50HD sensors with high damage threshold, the PE50-DIF model pyroelectric sensors with a diffuser and the RP thermal/photodiode sensors.
-
Page 79
In order to log data or transmit it to PC at rates >1000Hz, you must be in turbo mode. This will put you into a special mode where the Nova II can handle data at high speed while curtailing other functions. To log in… -
Page 80: Pyro Scope Adapter
Activate the scope adapter as follows: 1. Plug the adapter into the Nova II meter and then plug the sensor plug into the adapter. Plug the BNC connector into a standard 1M scope input.
-
Page 81
5. Press “OK” and “OUT” will appear on the main power / energy screen. Make sure to remove the diffuser from the sensor. 6. Press “laser” and select the correct wavelength. Note that only wavelengths compatible with the diffuser setting are visible. (All wavelengths for diffuser “IN”… -
Page 82: Chapter 7. Beamtrack Features
This chapter describes the Nova II’s position and size measurement functionality. For a full description of Thermopile functionality see…
-
Page 83: Menu Screen
7.2 Menu Screen To access the various other BeamTrack features, go to the Menu screen from the main Track Screen. Figure 7.2 BeamTrack Menu Screen 7.3 Stability Screen This screen tracks the position of the laser beam over time. This is useful for users that want to measure the pointing stability of their laser.
-
Page 84: Statistics Screen
7.5 Optimizing Measurements 7.5.1. Zeroing. When a BeamTrack sensor is attached, the zeroing function of the Nova II will zero the BeamTrack’s measurement circuitry as well. 7.5.2. Line Frequency. In order to filter out noise that may be introduced to the…
-
Page 85
Configuration Screen, set Line Frequency to 50Hz or 60Hz, depending on the country you’re in. Figure 7.5 Configuration Screen… -
Page 86: Chapter 8. Crcuit Description
Chapter 8. Circuit Description The NOVA II has two circuit boards: the lower board with analog circuit, digital processor and its support circuit, and power supplies; and the upper board with LCD and its driver. Analog Circuit: The signal from the detector sensor enters the analog circuit and passes through EMI protection components to a differential trans-impedance preamplifier.
-
Page 87
amounts of logged data permanently, even when the instrument is turned off. (See section 4.4.2.6.1 on data storage). The digital processor receives data from the A/D converter and translates it into a measurement of current in Amps. When used with thermopile sensors, the data is then processed by a sophisticated digital filter that speeds up the effective response time of the sensor and rejects noise. -
Page 88: Chapter 9. Calibration, Maintenance And Troubleshooting
9.1 Calibration of Thermopile or RP Sensors 9.1.1. Absorber types and Method of Calibration of Ophir Power Meters 9.1.1.1. Types of Ophir Laser Absorbers Two types of absorber surface are used in Ophir thermal measuring sensors. 1. Surface Absorbers: BB (broadband) absorber…
-
Page 89
lasers. It is calibrated for the spectral range 250 – 2200nm with some sensors also being calibrated for 2940nm. 2. Volume absorbers: P (pulse) type absorber The models with the P suffix, for use with pulsed lasers, have a special absorbing glass with an absorbance of 95+2% over the operating range. -
Page 90
The linearity of most Ophir thermal detectors is specified to be 1% over the specified power range of each particular instrument and is tested by Ophir from time to time. The linearity is generally tested against another sensor that has been NIST tested for linearity. -
Page 91
Absorption vs. Wavelength of Various Pyroelectric Sensor Absorbers 9.1.2.2. Method of Calibration The absorption of the various Ophir thermal absorbers can vary from disc to disc. Therefore, all Ophir absorbers are individually calibrated against NIST traceable standards. 9.1.2.3. Total Accuracy of Calibration… -
Page 92: Calibration Of Photodiode Type Sensors
These filters also have a transmission that depends on wavelength. Therefore, when the PD300 is being used with the Nova II, the Nova II has a built in calibration adjustment for wavelength which is described in the next paragraph.
-
Page 93
EEROM and this information is used to set the gain to the proper value at wavelengths other than the wavelength the instrument was calibrated. When the user selects his wavelength on the Nova II, the correction factor for that wavelength is applied. 9.2.2. Accuracy of Calibration Since the instruments are calibrated against NIST standards, the accuracy is generally ±2% at the… -
Page 94: Calibration Of Pyroelectric Type Sensors
Note: More exact specifications will be found in the latest Ophir Laser Measurement Instruments Catalog. 9.2.3. Recalibration at a specific wavelength from a Known Source of Laser Power 1. From the main measurement screen select “menu” and enter. Select “calibrate” and enter.
-
Page 95
PD300 power sensors and therefore the sensors have a high accuracy at any wavelength in the range. This is an exclusive feature with Ophir energy sensors. Absorption(%) vs. Wavelength (µm) BB — Broadband Metallic Coating Graph 3. -
Page 96
9.3.2. Calibration The sensitivity of the various Ophir pyroelectric sensors can vary from one to another as well as with wavelengths. Therefore, Ophir pyroelectric detectors are individually calibrated against NIST traceable standards. In addition, there is a wavelength sensitivity correction curve in the Meter. -
Page 97
The exact accuracy of each type of sensor is specified in the latest edition of the Ophir catalog. For more details on calibration accuracy, see the Ophir website at http://www.ophiropt.com/laser-… -
Page 98: Error Messages
Low Battery: When the battery is almost discharged, the Battery icon will have only 1 segment left. This means the battery is ¾ empty. At this stage, the Nova II should be connected to the charger. It will operate normally and charge slowly while connected to the charger.
-
Page 99: Troubleshooting
Nova II alone. turned off for 18-21 hours. If the Nova II still doesn’t work with battery, then the NiMH battery is probably dead. Replace battery (see section 9.6.1.4). 9.5.2. Thermal Sensors, Energy Measurements…
-
Page 100: Maintenance
2. Move sensor/display further away from EMI. 9.6 Maintenance 9.6.1. Battery Replacement If the Nova II battery is defective and does not hold a charge, a replacement can be ordered from your agent (Ophir part number 7E14007). The new battery is installed as follows: 1.
-
Page 101: Chapter 10. Nova Ii Specifications
Chapter 10. Nova II Specifications 10.1 System/Meter Specifications Input Specifications Thermal, Photodiode Input Ranges 15nA — 1.5mA full scale in 16 ranges A to D Sampling rate 15Hz A to D resolution and linearity Resolution: 23 bits plus sign. (0.00001%);…
-
Page 102: Sensor Specifications
10.2 Sensor Specifications Sensor Max Avg. Absorber Power Power Type (WATTS) Density at Max Power PD300/UV/IR 300mW 50W/cm² PD300-3W 100W/cm² 3A-IS 200W/cm² Int Sph PD 1000W/cm² 3A-P 50W/cm² 3A-FS 200W/cm² 28KW/cm² 25KW/cm² 12A-P 50W/cm² 20C-SH 4(20)W 23KW/cm² 30A-BB-18 20KW/cm² 30A-P-17 50W/cm²…
-
Page 103
BF — very high damage threshold, long pulses FS — Fused silica window close to detector for divergent beams Note: For more detailed and exact specifications, see the latest Ophir Laser Measurement Instruments Catalog. Absorber Max Energy Density J/cm² Type… -
Page 104
6.4.1.2. In chapter 9 added PF took out HL, clarified linearity and redid «Total Accuracy of Calibration» section. Corrected «head» to «sensor». Rev 2.19-2/22.03.12/be new Ophir-Newport logo Rev 2.37-1/09.1.14/ykp+bae BeamTrack Statistics Screen and Analog Hold/Release. Also corrected chapter 9 (Calibration, Maintenance and Troubleshooting) , charging info, power table and PD300 table, updated tables 1,2 &…
Описание
Nova IIР/N7Z01550
Портативный лазерный измеритель мощности и энергии
Попробуйте онлайн-демонстрацию Nova II Совместим со всеми стандартными термопилами Ophir, BeamTrack, пироэлектрическими и фотододиодными датчиками. Большой ЖК-дисплей высокой четкости. Как цифровой, так и аналоговый дисплей иглы. USB и RS232 выход на ПК со статой посылка. Аналоговый выход. Мягкие клавиши и функции управления меню с помощью on line help. Зарегистрируйте каждую точку данных на частоте до 4000 Гц с помощью пироэлектрических датчиков. Энергонезависимое хранение данных до 59400 точек. Экран Лазерной настройки и блок питания. 2 положения подставки. В комплект входят инструменты системного интегратора: LabVIEW VIs, COM Object interface, ActiveX
Кроме их использования в качестве автономных, полнофункциональные лазерные измерители мощности/энергии, устройства Ophir легко включены в большие приложения конечного пользователя. Это позволяет системным интеграторам использовать превосходство Ophir в измерительных способностях с традиционными пакетами анализа.
RS232
RS232 связь является самым простым для интеграции в ваше OEM приложение. Интегрированные среды разработки (IDE), такие как microsoft vivial Studio, обеспечивают функции и методы доступа к com-порту ПК.
Ниже Вы найдете все, что вам нужно для запуска и запуска приложений RS232
Пользовательские командыСодержит алфавитный список и подробное описание всех команд, доступных с устройствами Juno, USBI, Pulsar, Nova-II, Vega, StarLite и StarBright. Кабель Nova II/Vega RS232 (P/N 7E01206) для использования с устройствами Nova-II и Vega (входит в комплект Nova II/Vega).
USB
Ophir предоставляет общий интерфейс для связи и управления всеми нашими usb-говорящими устройствами. Ophrlmmeasurement-это com-объект, который входит в состав установки StarLab (StarLab 2,10 и выше), что позволяет системному интегратору взять под контроль Juno, Nova-II, Pulsar, USBI, vega, StarBright и StarLite устройства; интегрировать их в его дома измерения и анализа посылка.
Параметры
|
Термальность датчики |
Да |
RS232 |
30 Гц |
|
Светодиодные сенсоры |
Да |
GPIB |
N/A |
|
Пироэлектрический датчики |
Да |
USB |
2000 Гц |
|
BeamTrack датчики |
Да |
Bluetooth |
N/A |
|
Статистика |
Да |
Бортовое хранилище данных |
59,4 K |
|
Аналоговый выход |
1 V, 2В, 5В, алюминиевая крышка, 10В |
Автоматизации Интерфейс |
Да для USB |
|
Триггер вход и выход |
Нет |
Labview VI |
Да |
Термальность датчикиДа Светодиодные сенсорыДа Пироэлектрический датчикиДа BeamTrack датчикиДа СтатистикаДа Аналоговый выход1 V, 2В, 5В, алюминиевая крышка, 10В СвязьRS232, USB Триггер Вход & ВыходНет EthernetN/A
RS23230 Гц GPIBN/A USB2000 Гц BluetoothN/A Бортовое хранилище данных59,4 K Автоматизации ИнтерфейсДа для USB Labview VIДа СоответствиеСертификат Европейского соответствия, сертификат независимого Испытательного и сертификационного Китая по ограничению на использование опасных материалов в производстве
