-
Contents
-
Table of Contents
-
Troubleshooting
-
Bookmarks
Quick Links
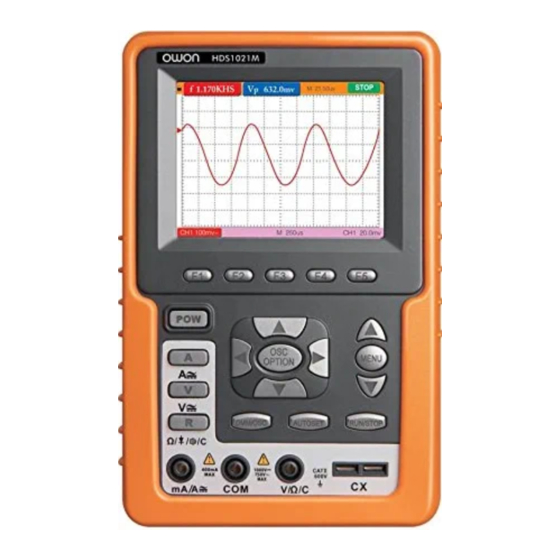
HDS1021M Handheld Digital Storage
Oscilloscope & Multimeter
User Manual
www.owon.com.hk
Related Manuals for Owon HDS1021M
Summary of Contents for Owon HDS1021M
-
Page 1
HDS1021M Handheld Digital Storage Oscilloscope & Multimeter User Manual www.owon.com.hk… -
Page 2
The information in this manual will replace all that in the materials published originally. The information in this manual was correct at the time of printing. However, OWON will continue to improve products and reserves the rights to changes specification at any time without notice. -
Page 3
Please contact the nearest Lilliput’s Sales and Service Offices for services or a complete copy of the warranty statement. For better after-sales service, please visit www.owon.com.hk and register the purchased product online. Excepting the after-sales services provided in this summary or the applicable warranty… -
Page 4: Table Of Contents
HDS1021M Handheld DSO & DMM Contents OWON Table of Contents Chapter Page 1.DECLARATION OF CONFORMITY·················································· 1 1.1 Declaration of Conformity ·······································································································1 1.2 Package Contents ······················································································································2 2.SAFETY INFORMATION ····································································· 3 2.1.1 Safety Symbols···············································································································3 2.1.2 Safety Terms.··················································································································3 2.2 General Safety Information ·····································································································3 3.
-
Page 5
HDS1021M Handheld DSO & DMM Contents OWON 6.4 Navigating a Menu ··················································································································13 6.5 Manually Setting the Vertical System, Horizontal System and Trigger Position ·············13 6.6 Resetting the Oscilloscope ······································································································15 6.7 Input Connections ···················································································································16 6.8 Displaying an Unknown Signal with Auto Set······································································16 6.9 Automatic Zero-returning of Trigger Horizontal Position and 50% setting of Trigger… -
Page 6
HDS1021M Handheld DSO & DMM Contents OWON 7.6 Taking a Relative Measurement·····························································································32 7.7 Selecting Automatic/Manual Range Adjustment ·································································33 8.ADVANCED FUNCTION OF OSCILLOSCOPE ·······················34 8.1 About this Chapter··············································································································34 8.2 Setting the Channel·············································································································34 8.2.1 Setting the Channel Coupling ·················································································35 8.2.2 Make Open and Close Settings on Channel·························································36… -
Page 7
HDS1021M Handheld DSO & DMM Contents OWON 10.APPENDIX·························································································· 52 10.1 Appendix A: Specifications···································································································52 10.1.1 Oscilloscope ···············································································································52 10.1.2 Meter ···························································································································54 10.1.3 General Specifications·······························································································55 10.2 Appendix B: Maintenance and Cleaning ············································································56 10.2.1 Common Maintenance ······························································································56 10.2.2 Storage of Oscilloscope·····························································································57 10.2.3 Replacing the Lithium Battery Unit···········································································57… -
Page 8: Declaration Of Conformity
1-Declaration of Conformity 1.Declaration of Conformity 1.1 Declaration of Conformity HDS1021M Handheld Digital Storage Oscilloscope & Multimeter Manufacturer: Fujian Lilliput Optoelectronic Technology Co., Ltd. Statement of Conformity Base on the result using appropriate standards, the product is in conformity with…
-
Page 9: Package Contents
OWON HDS1021M Handheld DSO & DMM 1-Declaration of Conformity 1.2 Package Contents See the picture below. This picture is only for your reference. If any discrepancy found between certain picture and product, please look the actual product. Description Standard Optional Oscilloscope and Battery ●…
-
Page 10: Safety Information
OWON HDS1021M Handheld DSO & DMM 2-Safety Information 2.Safety Information In order to ensure the correct using and the best efficient service, please carefully read this user’s manual. 2.1.1 Safety Symbols These symbols may appear in this manual or on the instrument.
-
Page 11
● Use only insulated voltage probes, test leads and adapter supplied with the test tool, or indicated by OWON as suitable for the Oscilloscope & Multimeter. ● Before use, inspect voltage probes, test leads and accessories for mechanical damage and replace when damaged. -
Page 12
OWON HDS1021M Handheld DSO & DMM 2-Safety Information ● Voltage ratings that are mentioned in the warning are giver as limits for “working voltage”. The represent V ac rms (50-60Hz) for AC sine wave applications and as V dc for DC applications. Overvoltage Category Ⅱ refers to local level , which is applicable for appliances and portable equipment . -
Page 13: General Characteristics
OWON HDS1021M Handheld DSO & DMM 3-General Characteristics 3. General Characteristics Oscilloscope Record length of 6,000 points; Reading-out with the cursor; Eighteen automatic measurement functions; Autoscale function; Color liquid crystal display of high resolution and high contrast; Storage and call-out of waveforms;…
-
Page 14: Performing The General Inspection
4. Performing the General Inspection 4.1 Performing the General Inspection When you have got a new HDS1021M series oscilloscope, it is suggested that you should perform a general inspection on the instrument according to the following steps. 4.1.1 Check whether there is any Damage on it Due to Transportation If the packing boxes or foam cushions are found in serous damage, keep them in a proper place till the complete instrument and accessories have passed the electrical and mechanical tests.
-
Page 15: Input Connections
OWON HDS1021M Handheld DSO & DMM 5-Input connections 5. Input Connections 5.1 Input Connections See the following figure 2: Figure 2 Description: 1. The power adapter is supplied for AC power supply and battery recharging. 2. Multimeter test lead. 3. Multimeter input jacks, including three circular banana jacks and two square jacks.
-
Page 16: Description For Front Panel And Keys
OWON HDS1021M Handheld DSO & DMM 5-Input connections 5.2 Description for Front Panel and Keys See the following figure 3: figure 3 Description: 1. Power adapter jack. 2. USB jack. The output port of 1KHz/5V square-wave test signal. : Power switch.
-
Page 17
OWON HDS1021M Handheld DSO & DMM 5-Input connections With the combination application of the four keys OSC ◄, OSC ►, OSC ▲ and OSC ▼, the users can make the following settings circularly by pressing OSC OPTION. The settings include: Voltage Unit Scale of Channel; Primary Time base (TIME BASE), zero point position of channel, trigger horizontal position (TIME) and trigger level position (TRIG). -
Page 18: Using The Scope
OWON HDS1021M Handheld DSO & DMM 6-Using the scope 6. Using the Scope 6.1 About this Chapter This chapter provides a step-by-step introduction to the scope functions. The introduction does not cover all of the capabilities of the scope functions but gives basic examples to show how to use the menus and perform basic operations.
-
Page 19
OWON HDS1021M Handheld DSO & DMM 6-Using the scope Battery electric quantity indicating symbols, including , Auto measurement window 1, in which “f ”means frequency, “T” means cycle, “V” means the average value, “Vp” the peak-peak value ,“Vk” the root-mean-square value,. “Ma” the maximum amplitude value, “Mi”… -
Page 20: Navigating A Menu
OWON HDS1021M Handheld DSO & DMM 6-Using the scope 16. Waveform of the input signal. 17. Waveform display area. 6.4 Navigating a Menu The following example shows how to use the tool’s menus to select a function, as shown in the following figure.
-
Page 21
OWON HDS1021M Handheld DSO & DMM 6-Using the scope ▲/▼ – Volts/Div See the following figure 6: figure 6: Voltage Unit Scale Press the key OSC ▲ or OSC ▼ to adjust the vertical scale and press OSC ◄or OSC ►… -
Page 22: Resetting The Oscilloscope
OWON HDS1021M Handheld DSO & DMM 6-Using the scope screen, shown as the following figure. ◄/► – Time ▲/▼ – Trig See the following figure 8: figure 8: Trigger Level Position Press the OSC ▲ or OSC ▼ key to adjust the trigger position and press OSC ◄ or OSC ►…
-
Page 23: Input Connections
OWON HDS1021M Handheld DSO & DMM 6-Using the scope 1. Press MENU key and the function menu appears on the right side of the screen 2. Press the MENU ▲ or MENU ▼ key to select FUNCTION setting and three options are visible at the bottom of the screen.
-
Page 24: Level Position
OWON HDS1021M Handheld DSO & DMM 6-Using the scope 6.9 Automatic Zero-returning of Trigger Horizontal Position and 50% setting of Trigger Level Position When we adjust the trigger horizontal position and trigger level position to be maximal to make it off the screen center remotely, then we perform the following steps to make trigger horizontal position return to zero and trigger level position set to 50% automatically.
-
Page 25: Freezing The Screen
OWON HDS1021M Handheld DSO & DMM 6-Using the scope figure 10: Automatic Scope Measurements 6.11 Freezing the Screen You can freeze the screen (all readings and waveforms) 1. Press the RUN/STOP key to freeze the screen and STOP appears at top right side of the screen.
-
Page 26: Using Persistence To Display Waveforms
OWON HDS1021M Handheld DSO & DMM 6-Using the scope displayed at the bottom of the screen. Press the F3 key to select Average, then, press F4 key to jump to Averaging 16 item. This averages the outcomes of 16 acquisitions and shows the final averaging result on the screen, shown as the following figures.
-
Page 27: Using Peak Detection To Display Glitches
OWON HDS1021M Handheld DSO & DMM 6-Using the scope figure 13: Persistence to Observe Dynamic Signals 6.14 Using Peak Detection to Display Glitches You can use this function to display events (glitches or other asynchronous waveforms) of 50 ns or wider.
-
Page 28: Selecting Ac-Coupling
OWON HDS1021M Handheld DSO & DMM 6-Using the scope they are gathered in the following three different modes, such as sampling, peak value detection and averaging values. Sampling: The oscilloscope takes samples from the signal at a equal time interval to reconstruct…
-
Page 29: Reversing The Polarity Of The Displayed Waveform
OWON HDS1021M Handheld DSO & DMM 6-Using the scope figure 15: AC-Coupling 6.16 Reversing the Polarity of the Displayed Waveform To invert the input signal waveform, do the following: Press the MENU key and the function menu appears at the right side of the screen.
-
Page 30: Using The Multimeter
OWON HDS1021M Handheld DSO & DMM 7-Using the Multimeter 7. Using the Multimeter 7.1 About this Chapter This chapter provides a step-by-step introduction to the multi-meter functions of the test tool hereafter. The introduction gives basic examples to show how to use the menus and perform basic operations.
-
Page 31: Making Multimeter Measurements
OWON HDS1021M Handheld DSO & DMM 7-Using the Multimeter operation mode and Auto refers to the measuring range in automatic operation mode. Measurement mode indicators: DCV: Direct voltage measurement ACV: Alternating voltage measurement DCA: Direct current measurement ACA: Alternating current measurement…
-
Page 32: Measuring Resistance Values
OWON HDS1021M Handheld DSO & DMM 7-Using the Multimeter 7.4.1 Measuring Resistance Values To measure a resistance, do the following: Press the R key and R appear at the top of the screen. Insert the black lead into the COM banana jack input and the red lead into the V/Ω banana jack input.
-
Page 33: On-Off Test
OWON HDS1021M Handheld DSO & DMM 7-Using the Multimeter figure 19: Diode Measurement 7.4.3 On-off Test To perform an On-off test, do the following: Press the R key and R appears on the top of the screen. Press the AUTO SET key till the following is shown on the screen.
-
Page 34: Making A Capacitance Measurement
OWON HDS1021M Handheld DSO & DMM 7-Using the Multimeter 7.4.4 Making a Capacitance Measurement To measure a capacitance, do the following: Press the R key and R appears on the top of the screen Press the AUTO SET key till C appears at the top of the screen.
-
Page 35: Making A Ac Voltage Measurement
OWON HDS1021M Handheld DSO & DMM 7-Using the Multimeter figure 22: DC Voltage Measurement 7.4.6 Making a AC Voltage Measurement To measure the AC voltage, do the following: Press the V key and DCV appears at the top of the screen.
-
Page 36: Making A Dc Current Measurement
OWON HDS1021M Handheld DSO & DMM 7-Using the Multimeter 7.4.7 Making a DC Current Measurement To measure a DC current which is less than 400 mA, do the following: Press the A key and DCA appears at the top of the screen. The unit on the main reading screen is mA.
-
Page 37: Making An Ac Current Measurement
OWON HDS1021M Handheld DSO & DMM 7-Using the Multimeter figure 25: DC Current Measurement for 20A 7.4.8 Making an AC Current Measurement To measure an AC current which is less than 400 mA, do the following: Press the A key and DCA appears at the top of the screen. The unit on the main reading screen is mA.
-
Page 38: Freezing The Readings
OWON HDS1021M Handheld DSO & DMM 7-Using the Multimeter To measure an AC current which is larger than 400 mA, do the following: Press the A key once and DCA is visible on the top of the screen. Press F5 to select 20A measure, the unit of main reading window is A.
-
Page 39: Taking A Relative Measurement
OWON HDS1021M Handheld DSO & DMM 7-Using the Multimeter figure 28: Freezing the Readings 7.6 Taking a Relative Measurement A currently measured result relative to the defined reference value is displayed in a relative measurement. The following example shows how to take a relative measurement. At first, it is required to acquire a reference value.
-
Page 40: Selecting Automatic/Manual Range Adjustment
OWON HDS1021M Handheld DSO & DMM 7-Using the Multimeter 7.7 Selecting Automatic/Manual Range Adjustment The defaulted range mode of the instrument is automatic range. To switch to the manual range, perform the following steps: Press F1 key and MANUAL is displayed on the top left side of the screen to enter the manual range mode.
-
Page 41: Advanced Function Of Oscilloscope
OWON HDS1021M Handheld DSO & DMM 8-Advanced Function of Oscilloscope 8.Advanced Function of Oscilloscope 8.1 About this Chapter This chapter will detail the oscilloscope function of the test tool. 8.2 Setting the Channel Each channel has its own independent vertical menu and each item can be set respectively based on the specific channel.
-
Page 42: Setting The Channel Coupling
OWON HDS1021M Handheld DSO & DMM 8-Advanced Function of Oscilloscope Select one according the probe attenuation factor to ensure a Probe 100X correct vertical scale reading. 1000X Waveform is displayed normally. Inverted Open the Invert function of the waveform setting.
-
Page 43: Make Open And Close Settings On Channel
OWON HDS1021M Handheld DSO & DMM 8-Advanced Function of Oscilloscope 8.2.2 Make Open and Close Settings on Channel Press F2 Channel key first, then select OFF to make a Close setting on channel. Press F2 Channel key first, then select ON to make an Open setting on channel.
-
Page 44: Triggering Control
OWON HDS1021M Handheld DSO & DMM 8-Advanced Function of Oscilloscope Press the OSC OPTION key and the following is shown on the screen: ◄/► – Time ▲/▼ – Trig Press the OSC ▲ or OSC ▼ key to adjust the trigger level position.
-
Page 45: Video Triggering
OWON HDS1021M Handheld DSO & DMM 8-Advanced Function of Oscilloscope triggering condition detected. Normal Acquisition of waveforms can only be done when the triggering condition is satisfied. Single The sampling is performed on a waveform when one trigger is detected, then stop sampling.
-
Page 46
OWON HDS1021M Handheld DSO & DMM 8-Advanced Function of Oscilloscope Odd Field Make a video odd field trigger synchronization setting. Even Field Make a video even field trigger synchronization setting. NTSC MODU Video format setting PAL/SECAM Holdoff Go to the holdoff menu. -
Page 47: Acquiring Mode Setting
OWON HDS1021M Handheld DSO & DMM 8-Advanced Function of Oscilloscope decrease Set the off time to decrease. Reset Reset Holdoff time to100ns. Off Time Back Back up to previous menu. Note: Trigger Holdoff can stabilize complex waveform, such as the pulse range. Holdoff time is the oscilloscope’s waiting period before starting a new trigger.
-
Page 48: Display Style
OWON HDS1021M Handheld DSO & DMM 8-Advanced Function of Oscilloscope Function menu Settings Description Vectors The vector is filled up spaces between neighboring sampling Type points in the display. Dots Only sampling points are displayed. Persist Setting persistence time for each sampling point.
-
Page 49: Waveform Saving Setups
OWON HDS1021M Handheld DSO & DMM 8-Advanced Function of Oscilloscope Press MENU, the function menu will appear on the right of the screen. Press MENU ▲ or MENU ▼ and select DISP SET, four options will show at the bottom of the screen.
-
Page 50: Function Setting Menu
OWON HDS1021M Handheld DSO & DMM 8-Advanced Function of Oscilloscope Now, you can see a screen that looks like the following figure 43. figure 43: Waveform Saving 8.8 Function Setting Menu The function setting menu is described in the following list.
-
Page 51
OWON HDS1021M Handheld DSO & DMM 8-Advanced Function of Oscilloscope Freq Measure the frequency of the signal. Period Measure the Period of the signal. Mean Measure the average value of the signal. Peak-Peak Measure the peak-to-peak value of the signal. -
Page 52: Setting The Cursor Measurements
OWON HDS1021M Handheld DSO & DMM 8-Advanced Function of Oscilloscope Term interpretation Vpp: Peak-to-Peak Voltage. Vmax: The maximum amplitude. The most positive peak voltage measured over the entire waveform. Vmin: The minimum amplitude. The most negative peak voltage measured over the entire waveform.
-
Page 53
OWON HDS1021M Handheld DSO & DMM 8-Advanced Function of Oscilloscope Press the MENU key and the function menus are displayed at the right of the screen. Press the MENU ▲ or MENU ▼ key to select CURS MEAS. Four options are shown at the bottom of the screen. -
Page 54: Autoscale
OWON HDS1021M Handheld DSO & DMM 8-Advanced Function of Oscilloscope screen. Then, adjust the OSC ▲ or OSC ▼ and you can find that the dashed line T2 is moving right and left while the time value of T1 relative to the screen middle point position appears on the Curs2 item at the bottom of the screen.
-
Page 55: System State Menu
OWON HDS1021M Handheld DSO & DMM 8-Advanced Function of Oscilloscope 3. Press F2 Mode to select Horizontal- Vertical. 4. Press F3 to choose Now, you can see a screen that looks like the following figure 47. figure 47: Autoscale Horizontal- Vertical multi-period waveforms Note: Things you should be ware when turning on Autoscale.
-
Page 56: Setting Of Time Base Mode
OWON HDS1021M Handheld DSO & DMM 8-Advanced Function of Oscilloscope Press the MENU ▲ or MENU ▼ key to select the SYS STAT. Four options appear at the bottom of the screen. Sequentially press key F1 through F4 key and the corresponding state information will be shown on the screen.
-
Page 57: Data Transmission
Press F4 key, and select the Bitmap or Vectors for data transmission. Use a data line to connect the oscilloscope and the PC . Open the OWON software that had been installed completely. Setting the parameter under the use’s manual, and then starts data transmission.
-
Page 58: Trouble Shooting
Firstly, charge the battery and supply the oscilloscope with power through the battery charger. However, don’t switch on the oscilloscope till waiting for 15 minutes. If the oscilloscope still cannot start, please contact OWON for service. 2. The oscilloscope stops working only after operating for several seconds.
-
Page 59: Appendix
Only if another instructions are provided, are all technical specifications applicable to the probe with the 10X attenuation switch setting and the HDS1021M digital oscilloscope. In order to be up to these specifications, the oscilloscope should meet the following requirement.
-
Page 60
OWON HDS1021M Handheld DSO & DMM 10-Appendix Vertical Analog digital converter(A/D) the resolution of 8 bits Sensitivity range (V/div) 5mV/div~5V/div(at the input BNC) Displacement range ±10div(5mV/div~2V/div), ±6div(5V/div) Analog bandwidth Single bandwidth Full bandwidth Low frequency response ( AD ≥10Hz(at the BNC )… -
Page 61: Meter
OWON HDS1021M Handheld DSO & DMM 10-Appendix Probe 1X position 10X position Bandwidth Up to 6 MHz (DC) Up to full bandwidth (DC) Attenuation rate 1: 1 10: 1 Compensation range 15pf~35pf Input resistance 1MΩ±2% 10MΩ±2% Input impendence 85pf~115pf 14.5pf~17.5pf Input voltage <200 V DC+Peak AC…
-
Page 62: General Specifications
OWON HDS1021M Handheld DSO & DMM 10-Appendix Alternating Current (AC) Range Accuracy Resolution 40.00mA ±1.5%±3 digit 10uA 400.0mA ±2%±1 digit 100uA ±5%±3 10mA digits Resistance Range Accuracy Resolution 400.0 Ω ±1%±3 digits 0.1Ω 4.000KΩ 1Ω 40.00KΩ 10Ω ±1%±1 digit 400.0KΩ…
-
Page 63: Appendix B: Maintenance And Cleaning
OWON HDS1021M Handheld DSO & DMM 10-Appendix Power Adapter 100-240 V AC 50/60Hz Power supply Power output 8.5 VDC Current output 1500 mA Battery:7.4V built-in Li-ion Battery Working environment Temperature Operation Used battery 0 to 50 °C(32 to 122 °F) Power adapter 0 to 40 °C(32 to 104 °F)
-
Page 64: Storage Of Oscilloscope
OWON HDS1021M Handheld DSO & DMM 10-Appendix allowed to be cleaned by soft detergent or fresh water. Do not use any abrasive chemical detergent to avoid the instrument or the probe being damaged. Warning: Before repowering and reuse, please confirm that the instrument has been dried out so as to avoid electrical short circuit and personal injury caused by moisture.
Просмотр
Доступно к просмотру 64 страницы. Рекомендуем вам скачать файл инструкции, поскольку онлайн просмотр документа может сильно отличаться от оригинала.
-
HDS1021M  Handheld Digital Storage
Oscilloscope & Multimeter
User Manual
www.owon.com.cn
www.owon.com.hk
-
Mar. 2012 edition Ver1.1
Copy Right in this Manual © Lilliput Company. All rights have been reserved.
The Lilliput’s products are under the protection of the patent rights in America and other countries,
including ones which have already obtained the patent rights and those which are applying for. The
information in this manual will replace all that in the materials published originally.
The information in this manual was correct at the time of printing. However, OWON will continue to
improve products and reserves the rights to changes specification at any time without notice.
OWON is the registered trademark of the Lilliput Company.
Headquarter:  Fujian Lilliput Optoelectronics Technology Co.,Ltd.:  The mansion of
optoelectronics hengsan road, Lantian industrial zone ,Zhangzhou,Fujian,China
Tel:+86-596-2130430                      Fax:+86-596-2109272
Web: www.owon.com.hk.             Mail: Business Consulting: sales@owon.com.hk
Sale service: service@owon.com.hk
Branch: Xiamen Lilliput Technology Co.,Ltd.: the 5th floor, B Area, Chuangxin Mansion, Software
Park, ZhenZhuWan, Huandao RD, Xiamen, Fujian, China
Tel:+86-592-2575666                     Fax:+86-592-2575669
Web: www.owon.com.cn                  Mail: sales@owon.com.cn
-
General Warranty
The Lilliput warrants that the product will be free from defects in materials and
workmanship for a period of three years from the date of purchase of the product by
the original purchaser from the Lilliput company. And the warranty period of
accessories such as probe, battery, adapter is one year. This warranty only applies to
the original purchaser and is not transferable to the third party. If the product proves
defective during the warranty period, Lilliput either will repair the defective product
without charge for parts and labor, or will provide a replacement in exchange for the
defective product. Parts, modules and replacement products used by Lilliput for
warranty work may be new or reconditioned to like new performance. All replaced
parts, modules and products become the property of Lilliput.
In order to obtain service under this warranty, Customer must notify Lilliput of the
defect before the expiration of the warranty period. Customer shall be responsible for
packaging and shipping the defective product to the service center designated by
Lilliput, and with a copy of customer proof of purchase.
This warranty shall not apply to any defect, failure or damage caused by improper use
or improper or inadequate maintenance and  care. Lilliput shall not be obligated to
furnish service under this warranty a) to repair damage resulting from attempts by
personnel other than Lilliput representatives to install, repair or service the product; b)
to repair damage resulting from improper use or connection to incompatible
equipment; c) to repair any damage or malfunction caused by the use of non-Lilliput
supplies; or d) to service a product that has been modified or integrated with other
products when the effect of such modification or integration increases the time or
difficulty of servicing the product.
Please contact the nearest Lilliput’s Sales and Service Offices for services or a
complete copy of the warranty statement.
Excepting the after-sales  services provided in this summary  or the applicable warranty
statements,  Lilliput will  not offer any  guarantee  for maintenance definitely declared  or
hinted, including but not limited to the implied guarantee for marketability and
special-purpose acceptability. Lilliput should not take any responsibilities for any indirect,
special or consequent damages.
- 1
- 2
- 3
- 4
- 64
Предложите, как улучшить StudyLib
(Для жалоб на нарушения авторских прав, используйте
другую форму
)
Ваш е-мэйл
Заполните, если хотите получить ответ
Оцените наш проект
1
2
3
4
5
Перед вами файл pdf, где представлена инструкция (руководство) на русском для OWON HDS1021M. Вы можете скачать ее либо изучить в онлайн режиме.
Подробные сведения об инструкции:
Устройство из раздела: портативный цветной осциллограф
Бренд-производитель: OWON
Наименование модели: OWON HDS1021M
Язык: Руководство на русском языке
Файл: pdf
Размер файла: 1,63 MB

Скачать инструкцию к HARPER HDT2-1110
ЗАГРУЗИТЬ
Просмотр инструкции онлайн
Поддержка
| Язык | Версия | Дата | Размер и тип | ||
|
Инструкция на осциллографы OWON серии SDS SDS6062(V), SDS7072(V), SDS7102(V), SDS8102(V), SDS8202(V), SDS8302(V), SDS9302(V) |
Английский | 1.7.4 | 19.03.2019 | 2.21 Мб, PDF | Скачать |
|
Инструкция на генераторы сигналов OWON серии AG4000 AG4081, AG4101, AG4121, AG4151 |
Английский | 2.2.1 | 19.03.2019 | 1.23 Мб, PDF | Скачать |
|
Инструкция на генераторы сигналов OWON серии AG1000 AG1022, AG1012 |
Английский | 2.6.1 | 19.03.2019 | 690.01 Кб, PDF | Скачать |
|
Инструкция на генераторы сигналов OWON серии AG-F AG1012F, AG1022F, AG2052F, AG2062F |
Английский | 3.2.0 | 19.03.2019 | 817.35 Кб, PDF | Скачать |
|
Инструкция на осциллографы OWON серии MSO MSO7062TD, MSO7102TD, MSO8102T, MSO8202T |
Английский | 1.3.8 | 19.03.2019 | 2.44 Мб, PDF | Скачать |
|
Инструкция на скопметры OWON серии HDS-N HDS1022M-N, HDS1022M-I, HDS2062M-N, HDS3102M-N, HDS4202M-N |
Английский | 1.6.3 | 19.03.2019 | 1.48 Мб, PDF | Скачать |
|
Инструкция на скопметры OWON серии HDS HDS1022M, HDS2062M |
Английский | 1.4 | 19.03.2019 | 1.10 Мб, PDF | Скачать |
|
Инструкция на скопметр OWON HDS1021M HDS1021M |
Английский | 1.4 | 19.03.2019 | 1.56 Мб, PDF | Скачать |
|
Инструкция на осциллографы OWON серии SDS-E SDS5032E(V), SDS5052E(V), SDS6062E(V), SDS7072E(V), SDS7102E(V), SDS7122E(V) |
Английский | 1.6.5 | 19.03.2019 | 2.04 Мб, PDF | Скачать |
|
Инструкция на осциллографы OWON серии PDS PDS5022S, PDS6042S, PDS6062S, PDS6062T, PDS7062T, PDS7102T |
Английский | 1.4 | 19.03.2019 | 2.32 Мб, PDF | Скачать |
|
Инструкция на осциллографы OWON серии MSO MSO5022T, MSO7102T |
Английский | 1.1.3 | 19.03.2019 | 2.93 Мб, PDF | Скачать |
|
Инструкция на цифровые осциллографы OWON серии XDS3000 XDS3062A, XDS3102A, XDS3102, XDS3202A, XDS3202, XDS3302 |
Английский | 1.5.1 | 19.03.2019 | 3.27 Мб, PDF | Скачать |
|
Инструкция на одноканальные генераторы сигналов OWON серии AG AG051, AG051F, AG1011, AG1011F |
Английский | 1.3.1 | 19.03.2019 | 726.59 Кб, PDF | Скачать |
|
Инструкция на цифровые осциллографы OWON серии XDS3000 (4 канала) XDS3064E, XDS3064AE, XDS3104E, XDS3104AE, XDS3104, XDS3104A, XDS3204E, XDS3204AE |
Английский | 1.2.1 | 19.03.2019 | 3.57 Мб, PDF | Скачать |
|
SCPI команды для анализаторов спектра OWON серии XSA1000 XSA1015, XSA1015-TG, XSA1036, XSA1036-TG |
Английский | 1.0.0 | 19.03.2019 | 228.63 Кб, PDF | Скачать |