- Manuals
- Brands
- Rational Manuals
- Oven
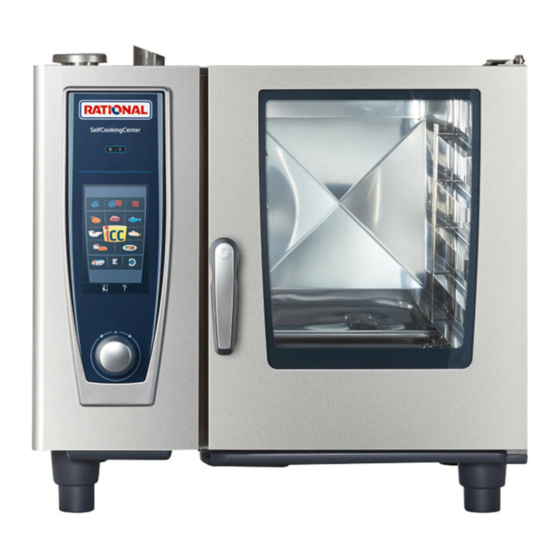
- SCC WE 61G
- Installation manual
-
Contents
-
Table of Contents
-
Bookmarks
Quick Links
Related Manuals for Rational SCC WE 61G
Summary of Contents for Rational SCC WE 61G
-
Page 1
Installation Manual… -
Page 2: Safety Instructions
Safety instructions WARNING Wrong installation, service, maintenance or cleaning as well as unauthorized changes on the unit can cause damages, injuries or even death. Read the installation manual carefully before installing the unit. This unit may only be used for preparing food in commercial kitchens. Every other usage is against definition and therefore dangerous.
-
Page 3: Safety Instructions
Safety instructions Explanations of the icon’s Danger! Warning! Attention! Immediate dangerous situation, Possibly dangerous situation, that Possibly dangerous situation, that that can endanger and cause possibly can endanger and cause can endanger and cause minor severe injury or death severe injury or death. injury.
-
Page 4: Dear Customer
The warranty excludes glass damage, light bulbs and gasket as well as damage caused by improper use, installation, maintenance, repair or descaling © 2011 Rational Technical Services. All rights reserved. Please note that any technical information concer- ning Rational products must NOT be forwarded to any third party.
-
Page 5: Installation Instructions / Changing Air Filter
Installation instructions / Changing air filter Attention: Follow the local standards and valid instructions. Damages based on installation not complying with the direc- tives given hereunder are not covered by warranty terms. The required connections (water, drain, electric and gas) as well as maintenance and servicing may only be carried out by trained/qualified personal in accordance with the local regulations.
-
Page 6: First Time Commissioning
First time commissioning When commissioning your new unit for the first time, you will be asked to start an automatic self test. The duration of the self test is approximately 45 minutes and is necessary to adapt the unit to the specific envi- ronmental conditions.
-
Page 7: Table Of Contents
Table of content Safety instructions Safety instructions Dear customer Installation instructions / Changing air filter First time commissioning Table of content Transport of units Recommended minimum clearance Installation type 6×1/1, 6×2/1, 10×1/1, 10×2/1 GN Installation Type 20×1/1 GN, 20×2/1 GN Levelling mobile oven racks 20×1/1 and 20×2/1 GN Electrical connection Water connection…
-
Page 8: Transport Of Units
Transport of units Transport of units Transport of units using a pallet pic. 1,2 6×1/1 GN: Transport of units without a pallet, 20×1/1 GN and 920mm/36 1/4″ 6×2/1 GN: 20×2/1 GN units only. Put a piece of wood between 1120mm/44 1/8″ pallet jack and left guide rail of the trolley 10×1/1 GN: 920mm/36 1/4″…
-
Page 9: Recommended Minimum Clearance
Recommended minimum clearance Minimum clearance left/ right/ rear 2” (50 mm) (except floor models). If on castered stand with flexi- 50mm/2″ ble connections, that allow unit to be moved forward while still connected to gas/ele. water 50mm/2″ 50mm/2″ pic. 1 On floor models (20×1/1 GN and 20×2/1 GN) there must be a minimum clearance of approx 20”…
-
Page 10: Installation Type 6X1/1, 6X2/1, 10X1/1, 10X2/1 Gn
Installation type 6×1/1, 6×2/1, 10×1/1, 10×2/1 GN Because of safety reasons table units shall only be installed on original stands of the manufacturer. In this case the maximum rack height is 1600 mm (63″) If Gas units are installed on a table or on the kitchen floor (combi duo) then: a) press the retaining plates (ET-No.:12.00.519) into the lower part of the pedestal and fasten with the…
-
Page 11
Installation type 6×1/1, 6×2/1, 10×1/1, 10×2/1 GN Attention: Electric or gas units If the unit is mounted on a mobile stand or base cabinet, the unit must be additionally secured against slipping by a chain or cable in order to pre- vent damage to the electricity, water or gas supply line pic. -
Page 12: Installation Type 20X1/1 Gn, 20X2/1 Gn
Installation Type 20×1/1 GN, 20×2/1 GN Ensure that the unit is level pic. 1 Fix the floor locks, of the supplied fixing set, to the floor with either screws and pins or with the special adhesive. pic. 2 + _ 10mm Next slide the unit into the floor locks pic.
-
Page 13: Levelling Mobile Oven Racks 20X1/1 And 20X2/1 Gn
Levelling mobile oven racks 20×1/1 and 20×2/1 GN If the floor is not level, an access ramp (not sup- plied) will be required. The incline must not exceed 4°. pic. 1,2 WARNING Hot cooking liquid Risk of scalding If the incline exceeds 4°, hot cooking liquid can slop out of the cooking containers Attention: An incorrect levelled trolley can cause malfunction…
-
Page 14: Electrical Connection
Electrical connection 5 mm DANGER High voltage Danger to life Observe local regulations and standards during installation Common information see next page Electrical units • Each appliance requires an independent fused power supply line (common phase circuit braker) • A permanent electrical connection must be pro- vided for the units.
-
Page 15
Electrical connection WARNING Wrong connection can cause electric shock Danger to life Observe colour coding of the wires 208 V 440 V Attention: Wrong connection can cause damages (e. g. fan 480 V 240 V motor) S 13 Voltage Conversion: 208/240V units All electric units and 62/102/202 gas units are set to 208 V ex works, but can be converted to 240 V. -
Page 16
Electrical connection Common information Power cable : • During installation check all electrical connections • The exchange of the power cable may only be especially the power terminals for tight fit. carried out by the service agents, qualified electri- • Follow the installation instructions and the infor- cians or similar qualified personal mation on the rating plate when connecting the Electrical units… -
Page 17: Water Connection
Water connection 6×1/1GN — 10×2/1GN E/G The appliance must be connected to water with drinking water quality. We recommend a maximum water temperature of 86°F. The appliance is to be installed with adequate back- flow protection to comply with applicable federal, state, and local plumbing codes.
-
Page 18: Water Connection / Selection Of Water Filter
Water connection / Selection of water filter Note: The manufacturer recommends especially on model Combi Master® Plus a preventive check of your equipment 6 months after installation to determine 30°C/86°F actual scale build up. 300 kPa 43,5 psi This should be done by a trained technician. •…
-
Page 19
Selection of water filter C) Complete De-Ionization pic. 1/2 Filter capacity: When the water has a chloride Cl- concentration Average treated water consumption is as follows above 4.68 gr/gal (= 80 ppm), a complete (values excluding usage of hand shower) deionization system should be installed to avoid 6×1/1 6×2/1 10×1/1 10×2/1 20×1/1 20×2/1 corrosion. -
Page 20: Gas Connection
6×1/1 GN: 3/4″ WARNING 6×2/1 GN: 3/4″ Incorrect connection can engender fire hazard! 10×1/1 GN: 3/4″ RATIONAL 10×2/1 GN: 3/4″ Danger to life Observe local regulation Comply with all local gas authority regulations! Follow installation instructions! • Check that the gas type supplied is suitable for the unit.
-
Page 21: Flue Gas Connection /Gas Consumption
Flue gas connection /gas consumption DANGER Gaseous combustion product (CO and CO 2 ) Suffocation hazard The rooms in which these appliances are installed must be well ventilated, in order to prevent an unaccept- able build-up of harmful combustion products. For gas unit exhaust unit must be placed under an exhaust hood externally vented (observe your local regulations).
-
Page 22: Drain Connection
• Consult local and state codes regarding drain con- nection. An indirect drain is recommended pic. 1,2, RATIONAL includes an internal overflow and venti- lated drain integrated in the units min. 3° / 5% • Where there is an existing floor drain without air trap, a clear outflow of 1”…
-
Page 23: Ventilation, Technical Data, Heat Emission
Ventilation, technical data, heat emission Ventilation: • Gas units must be installed under hood in accordance; electric units depends on product cooked and local and on state jurisdictions • Comply with all local regulations and standards (NFPA 96; Gas combi or electric combi where applicable) •…
-
Page 24: Option
Option Heat shield left and right If the minimum required distance to heat sources on the left or right side (right side only 6×1/1 GN and 10×1/1 GN) can not be maintained a heat shield will help to reduce the heat stress to the unit pic 1.
-
Page 25
Option Foot extension for floor units Should the distance be too low between floor and bottom of floor units , foot exten sions for floor units can be used pic 1 Attention: In this case the height of the upper rail exceeds 63”… -
Page 26
SelfCookingCenter® 5Senses are equipped with an Ethernet interface as a standard. Show mode units (operator panel active, heating and fan motor are continuously off) For converting units into show mode units a modification instruction is available at RATIONAL V-09 05/2014 — 26 -… -
Page 27: Connection Data Usa/Canada
Connection data USA/Canada Electric units: SCC_WE, CM_P Power kW Running Amps 6×1/1 6×2/1 10×1/1 10×2/1 20×1/1 20×2/1 6×1/1 6×2/1 10×1/1 10×2/1 20×1/1 20×2/1 2 AC 208V 11,1 53,4 2 AC 240V 11,1 61,5 3 AC 208V 11,1 22,1 30,8 61,4 52,8 102,7 105,6 3 AC 240V…
-
Page 28: Connection Data Europe
Connection data Europe SCC_WE, CM_P Electric units: Power kW Electricity consumption A 6×1/1 6×2/1 10×1/1 10×2/1 20×1/1 20×2/1 6×1/1 6×2/1 10×1/1 10×2/1 20×1/1 20×2/1 3 AC 200V 10,1 20,7 17,2 34,3 62,3 29,8 59,1 49,5 97,6 3 AC 230V 11,2 22,3 18,6 36,7…
-
Page 29: Conversion Tables
Conversion tables °dH °f °e mmol/l gr/gal(US) mval/kg 1 °dH 1,79 1,25 17,9 0,1783 1,044 0,357 1 °f 0,56 0,70 10,0 0,584 1 °e 1,43 14,32 0,14 0,84 0,286 1 ppm 0,056 0,07 0,01 0,0584 0,02 1 mmol/l 0,001 0,0007 0,00058 1 gr/gal (US) 0,96…
-
Page 30: Schematic Drawing 6X1/1 Gn
Schematic drawing 6×1/1 GN V-09 05/2014 — 30 -…
-
Page 31: Schematic Drawing 6X1/1 Gn Gas
Schematic drawing 6×1/1 GN Gas — 31 — V-09 05/2014…
-
Page 32: Schematic Drawing 6X2/1 Gn
Schematic drawing 6×2/1 GN V-09 05/2014 — 32 -…
-
Page 33: Schematic Drawing 6X2/1 Gn Gas
Schematic drawing 6×2/1 GN Gas — 33 — V-09 05/2014…
-
Page 34: Schematic Drawing 10X1/1 Gn
Schematic drawing 10×1/1 GN V-09 05/2014 — 34 -…
-
Page 35: Schematic Drawing 10X1/1 Gn Gas
Schematic drawing 10×1/1 GN Gas — 35 — V-09 05/2014…
-
Page 36: Schematic Drawing 10X2/1 Gn
Schematic drawing 10×2/1 GN V-09 05/2014 — 36 -…
-
Page 37: Schematic Drawing 10X2/1 Gn Gas
Schematic drawing 10×2/1 GN Gas — 37 — V-09 05/2014…
-
Page 38: Schematic Drawing 20X1/1 Gn
Schematic drawing 20×1/1 GN V-09 05/2014 — 38 -…
-
Page 39: Schematic Drawing 20X1/1 Gn Gas
Schematic drawing 20×1/1 GN Gas — 39 — V-09 05/2014…
-
Page 40: Schematic Drawing 20X2/1 Gn
Schematic drawing 20×2/1 GN V-09 05/2014 — 40 -…
-
Page 41: Schematic Drawing 20X2/1 Gn Gas
Schematic drawing 20×2/1 GN Gas — 41 — V-09 05/2014…
-
Page 42
V-09 05/2014 — 42 -… -
Page 43
— 43 — V-09 05/2014… -
Page 44
80.05.082 · V-09 · Technical Services · Md · 05/2014…
- О компании
- Оплата и доставка
- Статьи
- Контакты
- Кабинет дилера
- Regions
UAH
- USD
- EUR
- UAH
Язык:
|
РУС
УКР
Личный кабинет
![]()
![]()
- (067) 540-02-50
- (067) 225-80-20
- (099) 370-35-98
- (063) 391-20-90
- Новинки
- Акции
- Распродажа
Меню
Найти
Аккаунт
Корзина пуста
Последние товары в заказе ×
Ваша корзина покупок пуста.
Оформить заказ
Перезвоните мне
- Моя учётная запись
- Обзоры
- Оформить заказ
- Зарегистрируйтесь
- Войти
Язык:
|
РУС
УКР
-
Главная
-
Оборудование
-
Тепловое оборудование
-
Печи и пароконвектоматы
-
Пароконвектоматы
-
Пароконвектоматы Rational
-
Пароконвектомат Rational SCC 61
- Пароконвектомат Rational SCC 61 инструкция
Пароконвектомат Rational SCC 61

367 280 ₴
Купить
Хочу скидку!
- Узнать о снижении цены
- Добавить в сравнение
Пароконвектомат Rational SCC 61 инструкция
![]()
- (063) 391-20-90
- (044) 594-64-57, 58
- (099) 370-35-98
- (067) 225-80-20
Выставочный зал:
г.Киев, ул.Гарматная, 3
Режим работы:
пн-пт с 9:00 до 17:00Перезвоните мне
- О компании
- Оплата и доставка
- Гарантия и сервис
- Контакты
- Статьи
- Личный кабинет
- Новинки
- Акции
- Распродажа
- Каталог производителей
-
Следите за нами
в социальных сетях
Оборудование
- Тепловое оборудование
- Кейтеринг
- Электромеханическое оборудование
- Барное оборудование
- Холодильное оборудование
- Упаковочное оборудование
- Посудомоечные машины
- Торговое оборудование
- Прачечное оборудование
- Другоее оборудование
- Оборудование б/у
- Еще
Мебель из нержавеющей стали
- Дизайнерские кухни из нержавеющей стали
- Производственные столы из нержавейки
- Столы-тумбы из нержавеющей стали
- Столы с ваннами моечными
- Ванны моечные
- Вытяжные зонты
- Навесные шкафы и полки
- Стеллажи
- Шкафы
- Баки для пищевых отходов
- Подставки под пароконвектомат
- Тележки
- Колоды для рубки мяса
- Подтоварники
- Смесители педальные
- Еще
Посуда и инвентарь
- Наплитная посуда
- Гастроемкости
- Противни
- Кухонные принадлежности
- Инвентарь для пиццерии
- Кондитерский инвентарь
- Сервировка стола
ЗИП и аксессуары
- Запчасти для оборудования КИЙ-В
- Запчасти КИЙ-В Трейд
- Запчасти Besser vacuum
- Запчасти Uret
- Запчасти Ersoz
- Запчасти Remta
- Запчасти GoodFood
- Насадки для тестораскаток
- Запчасти для молочного миксера
- Запчасти для блендера
- Запчасти для фритюрниц
- Запчасти для шаурмы
- Запчасти для электрокипятильников
- ТЭНы и конфорки
- Запчасти для мясорубок
- Еще
Упаковка
- Вакуумные пакеты для продуктов
- Бумажная упаковка для фаст фуда
- Вафельные полуфабрикаты
- Бумажные стаканчики
© 2013 ТОВ «КИЙ-В».

Разработка интернет магазина
- Manuals
- Brands
- Rational Manuals
- Oven
- SCC WE 61G
Manuals and User Guides for Rational SCC WE 61G. We have 1 Rational SCC WE 61G manual available for free PDF download: Installation Manual
Rational SCC WE 61G Installation Manual (44 pages)
Brand: Rational
|
Category: Oven
|
Size: 8.23 MB
Table of Contents
-
Safety Instructions
2
-
Safety Instructions
3
-
Dear Customer
4
-
Installation Instructions / Changing Air Filter
5
-
First Time Commissioning
6
-
Table of Contents
7
-
Table of Content
7
-
Transport of Units
8
-
Recommended Minimum Clearance
9
-
Installation Type 6X1/1, 6X2/1, 10X1/1, 10X2/1 GN
10
-
Installation Type 20X1/1 GN, 20X2/1 GN
12
-
Levelling Mobile Oven Racks 20X1/1 and 20X2/1 GN
13
-
Electrical Connection
14
-
Water Connection
17
-
Water Connection / Selection of Water Filter
18
-
Gas Connection
20
-
Flue Gas Connection /Gas Consumption
21
-
Drain Connection
22
-
Ventilation, Technical Data, Heat Emission
23
-
Option
24
-
Connection Data Usa/Canada
27
-
Connection Data Europe
28
-
Conversion Tables
29
-
Schematic Drawing 6X1/1 GN
30
-
Schematic Drawing 6X1/1 GN Gas
31
-
Schematic Drawing 6X2/1 GN
32
-
Schematic Drawing 6X2/1 GN Gas
33
-
Schematic Drawing 10X1/1 GN
34
-
Schematic Drawing 10X1/1 GN Gas
35
-
Schematic Drawing 10X2/1 GN
36
-
Schematic Drawing 10X2/1 GN Gas
37
-
Schematic Drawing 20X1/1 GN
38
-
Schematic Drawing 20X1/1 GN Gas
39
-
Schematic Drawing 20X2/1 GN
40
-
Schematic Drawing 20X2/1 GN Gas
41
Advertisement
Advertisement
Related Products
-
Rational SCC WE 61E
-
Rational SCC WE 62E
-
Rational SCC WE 62G
-
Rational SCC WE 101G
-
Rational SCC WE 101E
-
Rational SCC WE 102G
-
Rational SCC WE 102E
-
Rational SCC WE 201E
-
Rational SCC WE 201G
-
Rational SCC WE 202G
Rational Categories
Commercial Food Equipment
![]()
Oven
Kitchen Appliances
Convection Oven
Smokers
More Rational Manuals
Личный кабинет
Авторизация
Регистрация
RUB, руб.
- EUR, €
- RUB, руб.
Сервис-партнёр RATIONAL
Запчасти Rational, аксессуары. Гарантийный ремонт. Проддажа пароконвектоматов по специальным программам.
Рады общению с 10 до 19 часов в рабочие дни
+79049845111
0
Корзина
Пустая
Главная страница » Инструкции pdf
Инструкции pdf

Руководство по эксплуатации пароконвектомата RATIONAL iCombi Pro с 2020 года.

Руководство по эксплуатации пароконвектомата RATIONAL iCombi Classic с 2020 года.

Руководство по эксплуатации пароконвектомата RATIONAL SelfCooking Center whitefficiency/ 5Senses 2011-2017

Руководство по эксплуатации пароконвектомата RATIONAL Combi Master Plus 2011-2017

Руководство по эксплуатации пароконвектомата RATIONAL SelfCooking Center 2004-2011

Руководство по эксплуатации пароконвектомата RATIONAL Combi Master 2004-2011

Книга рецептов для ручной эксплуатации
Воспользуйтесь уникальным опытом лучших шеф паворов.

Руководство по применению. Ночное приготовление, смешанная загрузка, вакуумная упаковка.
Коллектив отдыхает а оборудование работает

Руководство по применению. Finishing
Уникальные алгоритмы оптимизации процессов подготовки и подачи блюд.
Подготовка к банкету без стресса.

Моющие средства RATIONAL
Использование оригинальных моющих средств защитит ваше оборудование от вредных воздействий и обеспечит бесперебойную работу в течении всего срока эксплуатации.
Table of Contents for Rational SCC WE 61G:
-
— 43 — V-09 05/2014
-
V-09 05/2014 — 24 — Heat shield left and right If the minimum required distance to heat sources on the left or right side (right side only 6×1/1 GN and 10×1/1 GN) can not be maintained a heat shield will help to reduce the heat stress to the unit pic 1. Unit size: 6×1/1GN Art.-Nr.: 60.70.390 left 6×1/1GN Art.-Nr.: 60.70.736 right 10×1/1GN Art.-Nr.: 60.70.391 left 10×1/1GN Art.-Nr.: 60.70.743 right 6×2/1GN Art.-No.: 60.70.392 10×2/1GN Art.-No.: 60.70.393 20×1/1GN Art.-No.: 60.70.394 20×2/1GN Art.-No.: 60.70.395 He
-
— 13 — V-09 05/2014 Levelling mobile oven racks 20×1/1 and 20×2/1 GN If the floor is not level, an access ramp (not sup- plied) will be required. The incline must not exceed 4°. pic. 1,2 Attention: An incorrect levelled trolley can cause malfunction during operating the unit (e. g. during Cleanjet) Set unit legs that a height of 200 mm (7 7/8″) is reached pic. 2 «A» Valid for SCC_WE units: Check unit door for tightness by activating cleaning program «rinse without tabs» Option: Access ramp see page 25 If there is
-
V-09 05/2014 — 4 — Dear customer The warranty excludes glass damage, light bulbs and gasket as well as damage caused by improper use, installation, maintenance, repair or descaling © 2011 Rational Technical Services. All rights reserved. Please note that any technical information concer- ning Rational products must NOT be forwarded to any third party. We reserve the right to make technical changes in the inter
-
80.05.082 · V-09 · Technical Services · Md · 05/2014 USA
-
V-09 05/2014 — 28 — Connection data Europe SCC_WE, CM_P Electric units: Power kW Electricity consumption A 6×1/1 6×2/1 10×1/1 10×2/1 20×1/1 20×2/1 6×1/1 6×2/1 10×1/1 10×2/1 20×1/1 20×2/1 3 AC 200V 10,1 20,7 17,2 34 34,3 62,3 29,8 59,1 49,5 97,6 99 182 3 AC 230V 11,2 22,3 18,6 36,7 37 67,3 27,9 55,5 46,5 91,6 92,9 168 3 NAC 400V 11 22,3 18,6 36,7 37 65,5 16 32,2 26,7 52,7 53,4 95,5 3 AC 400V 11 22,3 18,6 36,7 37 65,5 16 32,2 26,7 52,7 53,4 95,5 3 NAC
-
V-09 05/2014 — 36 — Schematic drawing 10×2/1 GN n 88 [ 3-1/2 ] 110 ~ R 737 [ 29 ] 1042 [ 41 ] 125 [ 4-7/8 ] 50 [ 2 ] 1067 [ 42 ] 970 [ 38-1/4 ] 72 [2-7/8] 84 [3-3/8] 67 [ 2-5/8 ] 893 [ 35-1/8 ] 87 [ 3-3/8 ] 761-1/8 [ 30 ] 129 [ 5-1/8 ] 475 [ 18-3/4 ] 385 [15-1/8] 445 [ 17-1/2 ] 260 [ 10-1/4 ] 265 [10-1/2] 764 [ 30-1/8 ] 75 [ 3 ] 915 [ 36 ] 76 [ 3 ] 120 ~ R 737 [ 29 ] 749 [ 29-1/2 ] 87 [ 3-3/8 ] n 50 [ 2 ] n 50 [ 2 ] n 50 [ 2 ] 202 [ 8 ] 46 [ 1-3/4 ] 685 [2-3/4] n 70 [ 2-3/4 ] 4
-
— 23 — V-09 05/2014 Ventilation, technical data, heat emission Ventilation: • Gas units must be installed under hood in accordance; electric units depends on product cooked and local and on state jurisdictions • Comply with all local regulations and standards (NFPA 96; Gas combi or electric combi where applicable) • The hood should project 1-1,6 ft (300-500 mm) in front of the appliance; • An exhaust hood is available as an option for 6×1/1, 10×1/1 and
-
V-09 05/2014 — 2 — Safety instructions FOR YOUR SAFETY Do not store or use gasoline or other flammable vapors or liquids in the vicinity of this or any other appliance WARNING: Improper installation, adjustment, alteration, service or maintenance can cause property damage, injury or death. Read the installation, operating and maintenance instructions thoroughly before installing or servicing this equip- ment. WARNING Wrong installation, service, maintenance or cleaning as well as unauthorized changes on the unit can cause damages, injuries or even death. Re
-
V-09 05/2014 — 38 — Schematic drawing 20×1/1 GN o 40 [ 1-5/8 ] 1782 [ 70-1/8 ] 190 [ 7-1/2 ] 55 [ 2-1/8 ] 877 [ 34-1/2 ] 790 [ 31-1/8 ] 136,5 [5-3/8] 71 [2-3/4] 67 [ 2-5/8 ] 798 [ 31-3/8 ] 27 [ 1-1/8 ] 752 [ 29-5/8 ] 158 [6-1/4] 152 [ 6 ] 162,5 [6-3/8] 102,5 [ 4 ] 629 [ 24-3/4 ] 52 [ 2 ] 715 [ 28-1/8 ] 34 [ 1-3/8 ] 120 565 [ 22 ] 577 [ 22-3/4 ] 52 [
-
— 35 — V-09 05/2014 Schematic drawing 10×1/1 GN Gas n 88 [ 3-1/2 ] 110 ~ R 531 [ 21 ] 1042 [ 41 ] 125 [ 4-7/8 ] 50 [ 2 ] 845 [ 33-1/4 ] 770 [ 30-3/8 ] 72 [2-7/8] 88 [3-1/2] 7 [ 2-5/8 ] 711 [ 28 ] 7 [ 2-5/8 ] 530 [ 21 ] 120 [ 4-3/4 ] 370 [ 14-5/8 ] 340 [13-3/8] 400 [ 15-3/4 ] 2515 [-7/8] 25 [ 10 ] 120 ~ R 531 [ 21 ] 544 [ 21-3/8 ] 7 [ 2-5/8 ] n 50 [ 2 ] n 50 [ 2 ] n 50 [ 2 ] 2015 [ 8 ] 43 [ 1-3/4 ] 77 [ 3 ] n 03 [2-
-
— 3 — V-09 05/2014 Danger! Immediate dangerous situation, that can endanger and cause severe injury or death Corrosive substances Attention: Not following the instruction can cause material damages. Warning! Possibly dangerous situation, that possibly can endanger and cause severe injury or death. Fire hazard! Tips and tricks for installation Attention! Possibly dangerous situation, that can endanger and cause minor injury. Danger of burning! Danger! High voltage. Caution danger of life Not followi
Questions, Opinions and Exploitation Impressions:
You can ask a question, express your opinion or share our experience of Rational SCC WE 61G device using right now.