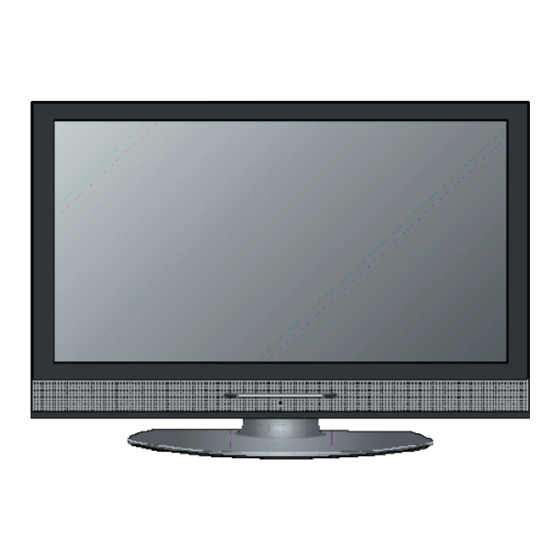
Фотография телевизора Daewoo Electronics DPP-32A2

Основные характеристики Daewoo Electronics DPP-32A2
- Тип
- плазменная панель
- Диагональ
- 32″ (81 см)
- Формат экрана
- 16:9
- Разрешение
- 852×480
- Стереозвук
- есть
Изображение Daewoo Electronics DPP-32A2
- Яркость
- 550 кд/м2
- Контрастность
- 1800:1
- Угол обзора
- 178°
- Прогрессивная развертка
- есть
Прием сигнала Daewoo Electronics DPP-32A2
- Поддержка стереозвука NICAM
- есть
- Поддержка телевизионных стандартов
- PAL, SECAM, NTSC
- Телетекст
- с памятью на 1000 стр.
- Поддерживаемые форматы входного сигнала
- 480i, 480p, 576i, 576p, 720p
- Доступные разрешения при подключении к ПК
- 640×480
800×600
1024×768
Звук Daewoo Electronics DPP-32A2
- Мощность звука
- 20 Вт (2×10 Вт)
- Акустическая система
- два динамика
- Объемное звучание
- есть
Интерфейсы Daewoo Electronics DPP-32A2
- Входы
- AV, аудио x3, S-Video, компонентный, SCART x2, RGB, VGA, HDMI
- Выходы
- AV, аудио (стерео)
- Поддержка Wi-Fi
- нет
Функции Daewoo Electronics DPP-32A2
- Количество независимых TV-тюнеров
- 2
- Таймер сна
- есть
- Защита от детей
- есть
Дополнительно Daewoo Electronics DPP-32A2
- Цвет
- черный
- Размеры с подставкой (ШxВxГ)
- 825x603x234 мм
- Вес
- 24 кг
Отзыв о телевизоре Daewoo Electronics DPP-32A2
отличная модельОпыт использования: несколько месяцев
- Достоинства телевизора
- Отличный телевизор, идеальный размер для комнаты, хорошее качество картинки
- Недостатки телевизора
- 1.залипает яркое статичное изображение (при застое некотрое время)
2.часы барохлят
Комментарий о телевизорах:
желательно модифицировать функцию вертикального увеличения экрана, т.к. при просмотре фильмов (широкоформатных), черные полосы (сверху и снизу до конца не убрать)
отличная модельОпыт использования: несколько месяцев
- Достоинства телевизора
- Изображение — супер! Среди всех этих самсунгов,панасоников с расплывчатыми жк выбрали плазму от daewoo: аналог, цифра, хдтв — выглядит потрясающе! прием сигнала с общей аналоговой антенны — отличный! нашел на 10 каналов больше чем 2 телевизора и тв тюнер, которые есть в квартире… В общем — прелесть! обошелся в 15к на радиорынке около 3 Китов. Все настройки присутствуют, всё есть и ничего лишнего для домашнего телевизора.
- Недостатки телевизора
- не замечал таких
Комментарий о телевизорах:
отличный выбор для такого качества и весьма невысокой цены!
Инструкция к телевизору Daewoo Electronics DPP-32A2
Инструкцию к телевизору Daewoo Electronics DPP-32A2 скачать бесплатно. Читать инструкцию к телевизору Daewoo Electronics DPP-32A2 Изучать инструкцию к телевизору Daewoo Electronics DPP-32A2
Цена телевизора Daewoo Electronics DPP-32A2
Цена по рынку , на момент создания страницы
нет в продаже…
Отзыв взят с сайта market.yandex.ru
Друзья!!! Мы работаем для Вас, чтобы у Вас была информация!
Мы будем Вам очень благодарны, если вы оцените наш труд, и поделитесь ссылкой в соцсетях!
Это самое малое, что Вы можете сделать для нас!
Заранее спасибо!
Оставить комментарий:
Не нажали на рекламное объявление!?
Ничего страшного!
Вы ещё можете помочь проекту!
Да не оскудеет рука дающего!
-
Contents
-
Table of Contents
-
Bookmarks
Quick Links
PLASMA DISPLAY
USER’S MANUAL
DPP-42A2(GDBD)
DPP-42A2(GJBD)
D P P — 4 2 A 2 ( G M B )
DPP-42A2(GMBD)
DPP-42A2(GWBD)
DPP-42A2(LDBD)
D P P — 4 2 A 2 ( L M B )
DPP-42A2(LMBD)
D P P — 4 2 A 2 ( L J B D )
DPP-42A2(LWBD)
Proper use guarantees
product life.
Before using the product, be advised
that you read this owner’s manual well
and try to operate it.
Related Manuals for Daewoo DPP-42A2(GDBD)
Summary of Contents for Daewoo DPP-42A2(GDBD)
-
Page 1: Plasma Display
PLASMA DISPLAY USER’S MANUAL DPP-42A2(GDBD) DPP-42A2(GJBD) D P P — 4 2 A 2 ( G M B ) DPP-42A2(GMBD) DPP-42A2(GWBD) DPP-42A2(LDBD) D P P — 4 2 A 2 ( L M B ) DPP-42A2(LMBD) D P P — 4 2 A 2 ( L J B D ) DPP-42A2(LWBD) Proper use guarantees product life.
-
Page 2
PC, DVD player, and so on over a single cable. • MGDI Plus (Meta Genuine Digital Image) Engine MGDI Plus is the image enhancement technology designed by Daewoo Electronics, which provides more clear, realistic, and delicate images. -
Page 3: Safety Precautions
Safety Precautions Power Always obey all During a lightning storm, or when it is left When unplugging your TV, always grip unattended and unused for a long period the plug firmly and pull straight out from safety messages. of time, unplug it from the wall outlet. the socket.
-
Page 4: During Use
During Use Do not open the cover (or back) Never push any kind of objects into because high voltage is present this product through openings at the within the TV enclosure. back of TV. It may cause electric shock. It may cause fire or electric shock. The apparatus shall not be exposed to Do not allow children to play or hang Do not place a candle or lighted…
-
Page 5
Safety Precautions Power Always obey all When moving your TV, remove the power Do not touch the power plug with wet plug, antenna, and cables, and be sure to hands when plugging or unplugging it safety messages. move it by using two people.. into the wall socket. -
Page 6
During Use Do not wipe the TV using a cloth Do not place heavy objects or heat damped with chemicals (benzene, sources on the power cord. thinners, etc.). The TV appearance may be marred. It may damage the power cord, causing fire (Unplug the power plug and wipe with soft or electric shock. -
Page 7: Checking Accessories
Scart to RCA Jack (Option) 1 UNIT AC Cable 1 UNIT Note The following items are optional accessories. Optional Accessories Refer purchasing optional accessories from Daewoo Electronics Local Retailers or the retailer from where you purchased the unit. Wall Mounting Unit Stand Unit…
-
Page 8
How to install Cable Holder Cable Holder Installing Position The method of wire arrangement 1 Assemble the cable holder enclosed on the back of TV. (PICTURE 1) (ASSEMBLY METHOD: After you push the «A»(prominence part of cable holder) in the hole, rotate the cable holder clockwise as an angle of 90°. -
Page 9
How to use Scart to RCA Jack Scart to RCA Jack is provided with the specific models for changing Scart signal to RCA signal or RCA signal to Scart signal. Scart to RCA Jack has a ‘INPUT / OUTPUT’ selecting switch. While Scart to RCA Jack is connected to AV1, you can select ‘INPUT’ or ‘OUTPUT’ with the switch. -
Page 10: Table Of Contents
CONTENTS PREPARATION 4 • Safety Precautions 8 • Checking Accessories 12 • Panel Controls 14 • Remote Control CONNECTION 16 • Antenna Connection 18 • To Watch TV 20 • Install Program 26 • Watching Digital Broadcasts 28 • Watching Cable Broadcasts 30 •…
-
Page 11: Panel Controls
Panel Controls Front Panel, Rear Panel Items having the same name on the plasma display and the remote control would function in exactly the same way. Front / Side STAND-BY/OPERATE ON/OFF MENU Select when adjusting volume or Power Standby: select/adjust Red — Standby “MENU.”…
-
Page 12
Rear INPUT COMPONENT HDMI PC AUDIO SERVICE DIGITAL AUDIO OPTICAL PC AUDIO INPUT PC INPUT (15 pin D-sub) HDMI INPUT COMPONENT A/V jacks SCART, A/V INPUT/OUTPUT. -
Page 13: Remote Control
Remote Control Note • Use two “AAA” batteries. • Be sure to use replacement batteries of the The number in ( ) indicates the page in which same type as the original ones. the function of each button is explained in detail. •…
-
Page 14: When Using Remote Control
RECALL button Indicates the current state and resolution. Screen Size button STILL button Adjusts the size of the screen. Press this button to freeze the picture. Sleep button Each time you press this button, a EDIT button different input mode appears. The sequence is as follows: 15Min.
-
Page 15: Antenna Connection
Antenna Connection CTV Antenna Connection TV antenna installation may be found in most. When a coaxial cable is used Plug the coaxial cable to the antenna socket, and fix it firmly. ANT/CABLE Coaxial cable When a feeder cable is used ANT/CABLE…
-
Page 16
Outdoor Antenna Connection Outdoor antenna connection-such as VHF or/and UHF-may be necessary for installation at private houses Single Antenna Connection. VHF Antenna UHF Antenna ANT/CABLE Separate Antenna Connection. VHF-Antenna In case of coaxial cable In case of feeder cable ANT/CABLE UHF-Antenna Antenna combining adapter… -
Page 17: To Watch Tv
To Watch TV To Watch TV — The buttons on the keypad in the PDP unit, which have the same name as those on the remote control, perform the same function as the remote control. Press the “POWER” button of the PDP unit. •The “…
-
Page 18
Press the “POWER” button. • Connect the AC power cord to PDP unit. • The LED of the PDP unit turns red colour when power cord connect AC power. • Press the “+PR- ” or “POWER” button of the remote control or keypad of the PDP unit. -
Page 19: Install Program
Install Program Auto Setup — This is the function for the TV to memorize the broadcasting channels. If the Auto Setup is done, you can simply find programs with “+PR- ” buttons and so need not select programs by pressing each program number. — Up to 100 TV stations can be stored in this set by programme numbers (0 to 99).
-
Page 20
Select the “Auto Setup”. • Select the “Auto Setup” with the “°Â°„ ” button. Auto Setup • Then press the “¢∏ ¢ ∫ ” button. Edit Picture Manual Setup Sound Screen Feature Install Move Select Exit MENU Select the “Country”. •… -
Page 21: Edit Menu
Edit EDIT MENU. • EDIT menu appears as on the right if the Auto search is completed, or press the “EDIT” button on the remote control in order to see EDIT menu. Edit BBC1 —— —— —— —— —— —— —— —— ——…
-
Page 22: Manual Setup
Manual Setup Press the Number Buttons(0~9) or the “ ” Button to Select a Program Number You Want. Manual Setup Program Picture Channel Sound Fine Tune Name Screen Video Audio Feature Search Memory Install Move Adjust Exit MENU Adjust 0 ~ 9 Find the Desired Channel.
-
Page 23
Manual Setup Name the program • Using “¢∏ ¢ ∫ ” button, move the position where you want to write the character. • Select the desired character with the “PR” button. • There are A-Z, +, ., /, and 0-9 characters. •… -
Page 24
Find the Desired Channel with ‘Search’. • By selecting the Search function, you can find the desired channel, but it searches only one channel unlike Auto Setup. • If the nearest channel is found, the searching would be stopped automatically. Manual Setup Program Picture… -
Page 25: Watching Digital Broadcasts
Watching Digital Broadcasts Connect a Digital Broadcasting Receiver to the Watching Digital • Prepare A/V cables. Broadcasts • Connect the cables from the digital TV Receiver output terminal to the PDP(Component ) input terminal. • To watch digital • When connecting the cables, be sure to match the cable colours. broadcasts: — Purchase a separate Digital Broadcasting…
-
Page 26: Input Select
Input Select • Select [Component] by pressing the «MULTIMEDIA» button of the remote control or using the “INPUT SELECT” button of the PDP unit. • Each time you press the “MULTIMEDIA” button, different input modes appear. The sequence is as follows: Component HDMI Select the Desired Channel and Function…
-
Page 27: Watching Cable Broadcasts
Watching Cable Broadcasts Connect a Cable Broadcasting Receiver to the PDP. Watching Cable • Prepare the A/V cable. Broadcasts • Connect the receiver(Output) to PDP(Video Input) as shown below. • To watch cable broadcasts, subscribe to your local cable TV broadcasting, and then connect a cable Broadcasting…
-
Page 28
Input Select • Select [AV 1(Scart), AV 2(Scart) or AV3(S-Video)] by pressing the [AV] button of the remote control or the «INPUT SELECT» in keypad of the PDP unit. • Each time you press the [AV] button, different input modes appear. The sequence is as follows: AV(S)3 Select the Desired Program and Function… -
Page 29: Watching Satellite Broadcasts
Watching Satellite Broadcasts Connect a Satellite Broadcasting Receiver to the PDP. Watching Satellite • Prepare the A/V cable. Broadcasts • Connect the receiver(Output) to PDP(Video Input) as shown below. • When connecting to an external AV source, be sure to match the colours. •…
-
Page 30
Input Select • Select [AV 1(Scart), AV 2(Scart) or AV3(S-Video)] by pressing the [AV] button of the remote control or the «INPUT SELECT» in keypad of the PDP unit. • Each time you press the [AV] button, different input modes appear. The sequence is as follows: AV(S)3 Select the Desired Program and Function… -
Page 31: Watching A Dvd Image
Watching a DVD Image Connect a DVD Player to the PDP. Watching a DVD • Prepare the AV cable. Image • Connect the DVD(Output) to the PDP(Component or Video Input) as shown below. • When connecting to an external AV source, be sure to match the colours. •…
-
Page 32
Input Select • Select [Component, AV1(Scart), AV2(Scart) or AV3(S-Video)] by pressing the [MULTIMEDIA] or [AV] button of the remote control or the «INPUT SELECT» in keypad of the PDP unit. • Each time you press the [MULTIMEDIA] or [AV] button, a different input mode appears. The sequence is as follows: •… -
Page 33: Watching A Vcr Image
Watching a VCR Image Connect a VCR to the PDP. Watching a • Prepare the AV cable. VCR Image • Connect the Video(Output) to PDP(Video Input) as shown below. • Video can use either the video terminal or the S-video terminal. INPUT COMPONENT HDMI…
-
Page 34
Input Select • Select [AV 1(Scart), AV 2(Scart) or AV 3(S-Video)] by pressing the [AV] button of the remote control or the «INPUT SELECT» in keypad of the PDP unit. • Each time you press the [AV] button, different input modes appear. The sequence is as follows: AV(S)3 Select the Desired Title and Function… -
Page 35: Watching A Camcorder/Game Console Image
Watching a Camcorder/Game Console Image Connect a Camcorder/Game Console to the PDP. Watching a Camcorder/Game • Prepare the AV cable. Console Image • Connect the Video(Output) to the PDP(Video Input) as shown below. • When connecting to an external AV source, be sure to match the colours. •…
-
Page 36
Input Select • Select [AV 1(Scart), AV 2(Scart) or AV 3] by pressing the [AV] button of the Remote Control or the «INPUT SELECT» in keypad of the PDP unit. • Each time you press the [AV] button, different input modes appear. The sequence is as follows: AV(S)3 Select Function… -
Page 37: Connecting Pc(15Pin D-Sub
Connecting PC(15pin D-sub) Before Connecting to the PDP, Set the Resolution of the PC. Connecting PC • Go to SETUP-CONTROL PANEL-DISPLAY PROPERTIES in Window Screen of the PC. • Choose the SETTINGS tab in the DISPLAY menu. • This product •…
-
Page 38
Press the Power Buttons. • Turn on the PDP and the PC. Input Select • Select [PC] by pressing the [MULIMEDIA] button of the remote control or PDP unit. • Each time you press the [MULIMEDIA] button, a different input mode appears. The sequence is as follows: COMPONENT HDMI… -
Page 39: Connecting Hdmi
Connecting HDMI Connect the HDMI to the PDP. Connecting HDMI • Prepare the HDMI cable. • Connect the HDMI(Output) to the PDP(Input) as • This product supports shown below. resolution of VGA, SVGA, XGA, SXGA, UXGA. • Before connecting a PC to the PDP, be sure to adjust the resolution of PC.
-
Page 40
Press the Power Buttons. • Turn on the PDP and DVD or Game console. Input Select • Select [HDMI] by pressing the [MULTIMEDIA] button of the remote control or the Input button on the PDP unit. • Each time you press the [MULTIMEDIA] button, a different input mode appears. -
Page 41: Connect With The Dolby Digital Amp
Connect with the Dolby Digital AMP. If you connect the optical output to a Dolby digital AMP, you can listen to better sound. Optical output Dolby Digital AMP Woofer Center Surround L Surround R…
-
Page 42
PC and HDMI Input Resolution Available in PDP • Depending on graphic card, problems like no signal detected or line noises can happen. If these problems happen, contact the graphic card company for help. Resolution H Freq. (KHz) V Freq. (Hz) Remark HDMI 31.469… -
Page 43: Selecting Picture Mode
Selecting Picture Mode Selecting Picture Mode Selecting Picture • Press the [P.MODE] on the remote control. Mode • While pressing the [P.MODE] for the first time, the current picture mode will be • Select the Picture mode displayed. that is appropriate depending on the kinds of pictures, you enjoy.
-
Page 44: Customising Picture
Customising Picture Press the MENU Button. Customising • The MENU shown below will display on the screen. Picture Mode Normal • You can adjust the Brightness Picture colour tone and Contrast brightness to your Sound Sharpness preference. Colour Screen Colour Temp. Normal N.R.
-
Page 45: Picture Condition Adjustments
Select User Mode Adjustments • While you are in [Picture Mode – User], press the buttons to select a specific adjustment item. “ ” Mode User Brightness Picture Contrast Sound Sharpness Colour Screen Colour Temp. Normal N.R. Feature Install Move Adjust Exit MENU…
-
Page 46
Press the “COLOUR TEMP” button on the remote control. • Pressing the “COLOUR TEMP” button first time will display the current setting for COLOUR TEMP. • Each time you press the button, a different colour temp appears. The sequence used is as follows : Normal Dynamic Cinema… -
Page 47: Adjusting Screen
Adjusting Screen Press the SCREEN SIZE Button. Adjusting with Screen Size button • The current screen size will be displayed on the screen. • Each time you press the SCREEN SIZE button on the • You can adjust remote control, a different screen size appears. The screen size or sequence used is as follows in case of AV and TV modes : aspect ratio as…
-
Page 48
Adjusting Screen in the MENU Press the MENU Button. Adjusting Screen • The MENU screen as shown below will appear. Mode Normal • You can adjust the Brightness Picture screen in the menu. Contrast Sound Sharpness Colour Screen Colour Temp. Normal N.R. -
Page 49: Screen Mode
Adjusting Screen in the MENU Screen Mode Function This function is same to the [Screen Size] of Press the Volume “ ” Buttons. remote controller. • Press the Volume “ ” buttons to enter the sub menu “Screen”. • While you are in ‘Screen’ menu, press the “ ”…
-
Page 50: Watching A Still Image
Watching a STILL Image Press the “STILL” Button. Watching a • If you wish to freeze a picture, press the “STILL” button. Still Image You can still hear the sound. • Press “STILL” button again to cancel the “STILL” function. •…
-
Page 51: Watching Two Pictures Simultaneously
Watching Two Pictures Simultaneously • PIP (Picture-in-Picture) and P-by-P(Picture-by-Picture) modes allow users to watch two pictures simultaneously. Engaging PIP mode Screen Adjustment • Press the ‘PIP’ button once on the remote control to engage of the Sub-picture the Picture-in-Picture mode. •…
-
Page 52: Watching Two Pictures Simultaneously
Watching Two Pictures Simultaneously Select the program • Using program Up/Down buttons , you may select the desired channels for sub-pictures. • The PR Up/Down buttons select the TV channels. Select the Input Source • Various signal sources can be displayed within the sub-picture under PIP mode.
-
Page 53: Selecting Sound Mode
Selecting Sound Mode Select “SOUND MODE”. Selecting • Press the “S.MODE” on the remote Sound Mode control. • While pressing the “S.MODE” for the • Enjoy various sound first time, the current sound mode will modes by selecting be displayed. your favourite Sound Mode depending on the kinds of moving…
-
Page 54: Customising Sound Mode
Customising Sound Mode Press the MENU Button. Customising • The MENU screen as below will be displayed. Sound Mode Mode Normal • This feature allows Brightness Picture the user to adjust for Contrast their preference. Sound Sharpness Colour Screen Colour Temp. Normal N.R.
-
Page 55: Language Selection
Language selection for dual language Select the Effect Mode. broadcast • Select [Effect] by pressing the buttons, “ ” • If a programme is then select the desire sound effect by pressing received in two the “ ” button. languages (dual •…
-
Page 56
Customising Sound Mode Select the Sound Mode. • Select the Sound Mode by pressing the buttons, then “ ” adjust it by pressing the “ ” buttons. Balance Effect Picture Mode Normal Sound Equalizer Screen Feature Install Move Adjust Exit MENU Normal Movie… -
Page 57: Selecting Input Signal
Selecting INPUT SIGNAL Press the Input Signal Selecting Button. INPUT SIGNAL • Press the “TV”, “AV” or “MULTIMEDIA” button on the remote control, or select the desire input signal using • Used to select INPUT signal of Keypad of the PDP unit. external device •…
-
Page 58: Checking The Current Input Signal
Checking the Current Input Signal — Press the [RECALL] button on the remote control, then displays basic informations of the current input signal, Under this state, pressing the [RECALL] button once more, additional informations about the current input signal will be displayed on the OSD. Checking the Current Input Signal Press the RECALL Button.
-
Page 59
MENU Background, Language and Child Lock Setting Press the MENU Button. Selecting • The MENU screen will be displayed as below. Languages Normal Mode • Used to select the Brightness Picture translucent level of Contrast MENU background Sound Sharpness Colour and language used Screen Colour Temp. -
Page 60
MENU Background, Language and Child Lock Setting “ ” Select LANGUAGE by using the Button. • Select [Language] by using the button. “ ” • Every press of the “ ” button while you are in the [Language] mode would cycle through the different languages. -
Page 61: Mgdi Plus (Meta Genuine Digital Image)
MGDI Plus (Meta Genuine Digital Image) MGDI Plus is the image enhancement technology of Daewoo Electronics, which provides more clear, realistic, and delicate images. Press the MENU Button. MGDI Plus • The MENU screen will be displayed as below. Mode…
-
Page 62
Press the MGDI button on the remote control. • Pressing the “MGDI” button first time will display the current setting for MGDI Plus. • To cancel the MGDI Plus, press the “MGDI” button to select ‘Off’. Background Language English Picture Child Lock MGDI Plus Sound… -
Page 63: Auto Power Setting
Auto Power Setting Auto Power Setting POWER/STANDBY button • Select the [Auto Power] by pressing the “ ” Indicator from [Feature]. • You can select [Auto Power] ON and OFF mode by using Front panel LED lights the “ ” button. •…
-
Page 64: Time Setting
Time Setting Press the MENU Button. • The MENU screen will be displayed as below. Mode Normal Brightness Picture Contrast Sound Sharpness Colour Screen Colour Temp. Normal N.R. Feature Install Move Select Exit MENU Select Feature • Select [Feature] by the button.
-
Page 65
Time Setting Off-Time and Wake time setting Time Setting • Select Functions by pressing the “ ” button. First, set [Clock]- current time, and then You can • The “Current time” setup off-time and wake time. must be set up ahead •… -
Page 66: Image Sticking Minimisation(Ism)
Image Sticking Minimisation(ISM) Press the MENU Button. • The MENU screen will be displayed as below. Mode Normal Brightness Picture Contrast • Image sticking Minimisation Sound Sharpness • Displaying a still image for a Colour long time causes part image Screen Colour Temp.
-
Page 67
Image Sticking Minimisation(ISM) Select Functions. • Every press of the “ ” button after select function by the button would switch between ON/OFF. “ ” Pixel Shift Picture Low Bright Image Invert Sound Screen Feature Install Move Adjust Exit MENU NOTES: Pixel Shift : The whole screen shifts up/down, left/right at 15 sec interval to… -
Page 68: Initialize Setting
Initialize Setting Press the MENU Button. Back to Initialization • The MENU screen will be displayed as below. Mode Normal • You can restore the Brightness Picture values of the adjustment Contrast setting made in the Sound Sharpness MENU back to factory Colour Screen settings.
-
Page 69
Initialize Setting INITIALIZATION • Enter the sub Menu by using the “ ” button. • Select the [Initialize] by pressing the “ ” button, then press the “ ” button. • A confirmation message will be displayed. • To perform initialization, press the “ ” button after selecting [YES] by the “… -
Page 70: Setting Sleep Timer
Setting Sleep Timer Press the “SLEEP” Button. Setting • Press the “SLEEP” button on the Remote Control. • Pressing the “SLEEP” button first time will display the Sleep Timer current setting for Sleep Timer. • To cancel the Sleep Timer, press the “SLEEP” button to •…
-
Page 71
Teletext Switching Teletext ON/OFF • Press the Text button ( ) The index page or the page viewed last will appear. Press the Text button again to return to the TV mode. Colour buttons in TOP/FLOF Teletext • A red, green, yellow and cyan field is shown at the bottom of the screen. -
Page 72
Calling Up Subpage Directly • Pressing the Subpage( ) button. The subpage number is displayed at the bottom of the screen. To change the subpage, press the subpage number, for example, the 2nd page, sequence 02. The desired subpage will eventually be displayed on the screen and holds it there. -
Page 73: Before Requesting Service
Before Requesting Service Before requesting for service, check the following points once again. • Remote control does not • The Display makes a snapping • There are empty spots at the top function properly. sound. and the bottom area of the screen. •…
-
Page 74: Specifications
SPECIFICATIONS DISPLAY UNIT Diagonal Size 106cm (42 ) Screen Aspect Ratio 16 : 9 System PAL B/G, I/I, SECAM B/G, D/K, L/L’ Display Resolution SD Panel : 852(H) 480(V) dots HD Panel : 1024(H) 768(V) dots Pixel Pitch SD Panel : 1.08(H) 1.08(V) mm HD Panel : 0.90(H) 0.676(V) mm…
-
Page 75
48586900E10U-R0…
-
Contents
-
Table of Contents
-
Troubleshooting
-
Bookmarks
Quick Links
Service Manual
32″ PLASMA PDP TV
CHASSIS :
Model :
DPP-32F1BMB
Caution
: In this Manual, some parts can be changed for improving. their
performance without notice in the parts list. So, if you need the
latest parts information, please refer to PPL(Parts Price List)in
Service Information Center.
S/M NO. : TSP900PEF0
SP-900PF
Related Manuals for Daewoo DPP-32F1BMB
Summary of Contents for Daewoo DPP-32F1BMB
-
Page 1
32″ PLASMA PDP TV CHASSIS : SP-900PF Model : DPP-32F1BMB Caution : In this Manual, some parts can be changed for improving. their performance without notice in the parts list. So, if you need the latest parts information, please refer to PPL(Parts Price List)in… -
Page 2: Table Of Contents
Contents I. Parts with the exception of MODULE 1. Safety Precautions …………………….3 2. Product Specification ………………….4 2-1. SPECIFICATION ………………….4 2-2. Available Input Signal …………………6 3. The Feature of Inside ………………….7 3-1. Main PCB’s Connection Diagram ……………….7 3-2. Main PCB’s Block Diagram…………………7 3-3.
-
Page 3: Parts With The Exception Of Module
I. Parts with the exception of MODULE 1. Safety Precautions (1) When moving or laying down a PDP Set, at least two people must work together. Avoid any impact towards the PDP Set. (2) Do not leave a broken PDP Set on for a long time. To prevent any further damages, after checking the condition of the broken Set, make sure to turn the power(AC) off.
-
Page 4: Product Specification
2. Product Specification 2-1. SPECIFICATION ITEM SPECIFICATION REMARK 1. GENERAL 1-1. MODEL NO DPP-32F1BMB 1-2. CHASSIS NO SP-900PF 1-3. SCREEN SIZE 42”(16:9) 1-4. COUNTRY Europe, CIS, Middle east Asia 1-5. RESOLUTION 852(H) X 480(V) 1-6. REMOCON TYPE R-55E05 1-7. SAFETY STANDARD…
-
Page 5
Product Specification ITEM SPECIFICATION REMARK 3-7. SPEAKER OUTPUT 10W(R) + 10W(L) 3-8. POWER REQUIREMENT AC 100V~240V, 50/60Hz 3-9. POWER CONSUMPTION 200 W 3-10.Phone Jack(Upgrade) S/W Upgrade 3-11. AV OUTPUT SCART(CVBS, SOUND R/L) 1 Port 3-12. FUNCTION 1) SCALING HDMI : Screen Mode(16:9, 4:3) PC : Screen Mode(16:9, 4:3), H/V Position, Auto TV / AV : Screen Mode(16:9, 4:3, LB(16:9), LBS(16:9), 14:9, LB(14:9), LBS(14:9), Auto) -
Page 6: Available Input Signal
Product Specification 2-2. Available Input Singnal 1) PC&HDMI Resolution H.Freq.(kHz) V.Freq.(Hz) Remar HDMI 31.469 59.940 640 x 480 37.861 72.809 VESA 37.500 75.000 VESA 720 x 400 31.469 70.087 35.156 56.250 VESA 800 x 600 37.879 60.317 VESA 1024 x 768 48.363 60.004 VESA…
-
Page 7: The Feature Of Inside
3. The Feature of Inside 3-1. Main PCB’s Connection Diagram Fig.1 Main PCBs Block Diagram 3-2. Main PCB’s Block Diagram Fig.2 Signal Block Diagram : DPP-42A2…
-
Page 8: Power Specification
The Feature of Inside 3-3. Power Specification 1) Input and Environmental Requirement Input Requirement Description Nominal Input Voltage AC100V to AC240V Input Voltage Variation Range AC90V to AC264V Nominal Frequency 50 /60 Hz Frequency Variation Range 47Hz to 63Hz Inrush Current 50A peak MAX.
-
Page 9: Default Setting In User Menu Osd
4. Default Setting in User Menu OSD 4-1. Picture 1) Mode Normal Dynamic Cinema User Brightness Undefined Contrast Undefined Sharpness Undefined Colour Undefined Tint Undefined * HDMI & PC Input — Only brihgtness and contrast are available. 2) Default Value of Other Functions Function Default Value Colour Temp…
-
Page 10
Default Setting in User Menu OSD 4-3. Screen 1) Mode 16 : 9 4 : 3 LB (16:9) LBS (16:9) 14 : 9 LB (14:9) LBS (14:9) Component HDMI * H. Position, V. Position, and Auto screen size is available in only PC mode. 4-4. -
Page 11: Service Mode
5. Service Mode To enter SERVICE MODE, A. Press “ VOL” -> “MUTE ” -> “RECALL” -> “MUTE” button of remote controller (R-55E05) B. Press “S9” button of SERVICE REMOTE CONTROLLER. [Note] In the first line, there is the model name and the version of the upgraded program on the PDP set.
-
Page 12
Service Mode The automatically set offset values may different from the default value depend on B/D. However, the main B/D should be replaced or contact Kunpo R&D center in Korea if the OFFSET values differ more than ±20 from default value. 5-3. -
Page 13
Service Mode 5-6. Misc Function Tst Ptrn AT Tst Ptrn MA TV Auto Off Search Mode Default Value Undefined Undefined 60Hz Tst Ptrn AT shows five cycled patterns (white, black, red, green, blue) every 1 minute automatically Tst Ptrn MA shows five cycled patterns manually by pressing volume up key. 5-7. -
Page 14: Adjusting Method
6. Adjusting Method 6-1. MODULE POWER Adjustments and Test Point Locations • Video pattern condition : 100 IRE Full White Pattern • Adjust voltages (Vadd, Vsus) to the values that module maker labeled on the PDP panel. If there are some problems in picture after adjusting, you should classify that PDP module as a fault and contact to PDP module maker.
-
Page 15
Adjusting Method 4) Attach a sensor of White Balance Meter (CA-100) to 80% of white level on the screen. 5) Adjust White Balance by varying Gain of R, G, B • Gain of R, G, B should be adjusted to DP ±10, if out of these range then classify as a fault. •… -
Page 16: Noticeable Points While Assembling
7. Noticeable Point While Assembling A. DPP-32F1BMB Inside Feature B. LVDS connect (Module) C. Inlet Power Cable Fixing Fixation LVDS Cable Ground D. Inlet Ground contact E. AV3 Cable Arrangement AV3 & L Speaker Filter EMI Inlet GND contact point…
-
Page 17
Noticeable Point While Assembling F. Side Key Cable Arrangement G. Main B/D Cable Arrangement LVDS EMI Filter KEY & R Speaker Filter EMI -17-… -
Page 18: Software Upgrade Methord
8. Software Upgrade Methord 8-1. Pic upgrade PICkit 2 Micro Controller Programmer PICkit 2 Connector Pinout -18-…
-
Page 19
Software Upgrade Methord 1) Main pcb Power off 2) Connecting the Pic upgrade board to Main pcb as shown below -19-… -
Page 20
Software Upgrade Methord 3) Run PICkit 2 Microcontroller Programmer 4) Please confirm if pickit 2 microcontroller programmer deteced device(PIC16F690) appropriately or not -20-… -
Page 21
Software Upgrade Methord 5) Importing HEX file for upgrade -21-… -
Page 22
Software Upgrade Methord 6) Write Click. 7) Plese remove Pickit2 upgrade board when complet massage is come out -22-… -
Page 23: Flash Upgrade
Software Upgrade Methord 8-2. Flash Upgrade Flash Upgrade JIG 1) Installing CDM Driver • Download the latest available CDM drivers from the FTDI web site and unzip them to a location. • Connect the device to a spare USB port on your PC. Once the composite driver has been installed Windows Found New Hardware Wizard will launch.
-
Page 24
Software Upgrade Methord • Select “Search for the best driver in these locations” and enter the file path in the combo-box (ex.“E: CDM 2.00.00”in the example below) or browse to it by clicking the browse button. Once the file path has been entered in the box, click next to proceed. •… -
Page 25
Software Upgrade Methord • The Found New Hardware Wizard will launch automatically to install the COM port emulation drivers. As above, select “No, not this time” from the options and click “Next” to proceed with the installation. • Select “Install from a list or specific location (Advanced)” as shown below and then click “Next”. -
Page 26
Software Upgrade Methord • The following screen will be displayed as Windows XP copies the required driver files. • Windows should then display a message indicating that the installation was successful. Click Finish to complete the installation for the first port of the device. •… -
Page 27
Software Upgrade Methord • Connect USB cable to the USB port of the computer. • Connect the phone jack cable the phone jack port of main PCB. • Run Flashupgrader.exe in the PC to excute the program as shown below. •… -
Page 28
Software Upgrade Methord • Select correct COM Port and Baud Rate(115200) as shown below. Then press Flash button to finish setup • Turn on the power and then upgrade program will start the download as shown below. • When the upgrading is complete, a window (below) will be opened. Press “Finish”… -
Page 29: Trouble Shooting
9. Trouble Shooting Before starting Trouble Shooting — Trouble diagnosing and repairing of set mean find out which PCBs or blocks are not working and replace them with new PCBs. Repairing the broken PCBs are not necessary. Keep the broken PCBs and return them to service center or R&D center. — This Trouble Shooting list only contains representative and simple PCB trouble diagnosis and Module Exchange method.
-
Page 30
Trouble Shooting — Caution 1 !! When disconnecting / connecting connectors, you MUST disconnect the AC Power. And check the direction and position of the connectors before working. — Caution 2 !! Whenever you reassemble connectors connecting High Voltage Board and POWER PCB, remaining voltage still exists in the POWER PCB could cause electric shock and damage the set. -
Page 31
Trouble Shooting 9-1. No Signal or No Raster Check Start Check AC connection Is a weak discharge Does «No Signal» Check P812, P814 detected in the screen? screen appear? connectors Check LVDS connection Is LVDS connection Check the connection of Is the signal input Jack between Digital B/D and correctly connected? -
Page 32
Trouble Shooting 9-2. No Sound Check start Is an image Go to the section of Display on ‘No image’ Screen? Connect the jack and Is the sound jack of external check the sound device properly connected? again Cancel the mute and Is mute key check the sound pressed? -
Page 33
Trouble Shooting 9-3. Shut Down Check Start Disconnect AC power Open BACK COVER Disconnect P812 and P814 of Power PCB Connect AC power (Stand By) Turn on the set (Green LED) Is ’SHUT DOWN’ occurred? Disconnect AC power Replace POWER PCB Connect P814 Connect AC power (Stand By) Turn on the set(Green LED) -
Page 34
Trouble Shooting A) Low Voltage Shut Down Check Start Disconnect AC power Disconnect P814 & Connect P812 Disconnect P1, P2 in Ysus B/D and P10 in Zsus B/D Is ’SHUT DOWN’ occurred? Disconnect AC power Replace Y sus & Z sus B/d Connect P1 in Y sus B/D Done Turn on the set after… -
Page 35
Trouble Shooting 9-4. No Key Operation Check Start Connect AC power Does LED turn on to Check the AC connection red light? Turn on the set using remote control Does LED turn on to Replce the Main B/D blue light? Check the connector of Key PCB Replace the Key PCB Check if the Key is… -
Page 36
Trouble Shooting 9-5. No Remote Control Operation Check Start Connect AC power Does LED turn on to red light? Check the AC connection Turn on the set using remote control Check the other button of Does LED turn on to blue light? remote control Are all buttons Check the battery of… -
Page 37
Trouble Shooting 9-6. No Key and Remote Control Operation Check Start Check the battery of remote control Replace the LED PCB Connect AC power Try to turn on the set using remote control Is the remote control Replace the Key PCB working? Replace the Main B/D Done… -
Page 38
Trouble Shooting 9-7. Abnormal Discharge Check Start Check the Vs and Va of Power PCB Are they normal? Set the values to typical voltages Do you still see the weak Replace the Y-SUS discharge or abnormal discharge on the screen? Do you still see the weak Done discharge or abnormal discharge… -
Page 39
Trouble Shooting 9-8. Not Even Weak Discharge Check Start Is Power B/D working? Does it Replace the Power B/D make normal sound? Replace Y-SUS, Z-SUS, Is the set correctly working? and Scan B/D Done 9-9. Particular Input Signal(Video, PC, TV or Component) Does Not Work heck Start Is the Jack correctly onnect the input correctly… -
Page 40: Assembly List
10. Assembly list No. PCB ASS’Y CODE ASS’Y NAME ASS’Y DESCRIPTION 48B5655E05 TRANSMITTER REMOCON R-55E05 (AAA) PTACPWG405 ACCESSORY AS DPP-32F1BMB 4850Q00910 BATTERY R03/NN 5PZCA2009A FILTER EMI ZCAT2035-0930A PTBCSHG388 COVER BACK AS DPX-32F1BMB PTCACAG405 CABINET AS DPP-32F1BMB 485A102780 GLASS FILTER DFM3203PFN…
-
Page 41
Assembly list 32F1B Panel 4850M006PD MODULE PDP PDP32F1X374(32F1T374) 485AS00090 CTRL ASSY 485AS00091 XRLT ASSY Data LEFT BOARD 485AS00092 XRRT ASSY Data RIGHT BOARD 485AS00093 YSUS ASSY Y-SUS BOARD 485AS00094 ZSUS ASSY Z-SUS BOARD 485AS00033 AC Noisefilter 485AS00034 32F1 Lite-On PSU 485AS00035 32F1 LGIT PSU -41-… -
Page 42: Structure Of Pdp Set
11. Structure of PDP SET -42-…
-
Page 43: Exploded View
12. Exploded View -43-…
-
Page 44
DAEWOO ELECTRONICS CORP. 686, AHYEON-DONG, MAPO-GU, SEOUL, KOREA. C.P.O. BOX 8003 SEOUL KOREA PRINTED DATE : May. 2007 -44-…
Не Включается
Мигает
Нет Звука
Полоса В Середине Экрана
Хрипит Звук
Не Держит Каналы
После Автопоиска И Редакции Каналов Через Некоторое Время Все Возвращается Кзаводским Настройкам
Ч/Белое Слабое Изобр.а На Нём Косые Линии
Ч/Белое Слабое Изобр.а На Нём Косые Линии+Слабый Звук
Трансформатор Высокого Напряжения
Прострел Высокого Напряжения
Выключается
Выключается Индикатор Тоже Не Горит Потом Загорается Эндикатор Крассным
Нет Зеленого Цвета
Не Показывает,Нет Звука
Влючается И Не Показывает
Написание Звука
Кадровая Развёртка
Изображение Сместилось В Левую Сторону
Пропало Изображение
Слабое Изображения Толком Не Видать
Helix Htv-324L
Не Включаеца Что Бы Включить Нужно Раз Несколько Включить И Выключить С Розетки
Синхронизация Мониторов
Второй Монитор Не Показывает Изображение От Первого (Двд) Монитора
Нет 8 Вольт
Не Включается
Не Работает Режим Медиа
Забыл, Потерял Пароль
Голубой Экран, Запрос Пароля
Нет Звука
Вообще Нет Звука
Намагнитился Экран
По Средине Экрана Красное Пятно А Вокруг Оранжевое И Синее, А По Углам Зелёные.
Цветность
Изображение Есть Вот Только Цветовая Гамма Все Как То Размыто,В Чем Проблема И Как Устранить.спасибо
Не Ловоит Сигналы Dvt T2
Включение Выключение По Циклу
После Нажатия Кнопки Вкл Телевизор Включается И Через 5 Секунд Выключается. Через 5 Секунд Опять Включается И Через 5 Секунд Опять Выключается. Так Продолжается Постоянно.
Нет Изображения Экран Чуть Светится
Привключении В Розетку Загорается Индикатор Красного Цвета От Пульта Нажимаю Включение Загорается Зеленого Цвета При Нажатии На Любую Кнопку Индикатор Чередуется С Зеленого На Красный И Ничего Горит Только Зеленый Индикатор
Номер Транзистора Строчной Развертки
Bravis 29F45X
В Картинка В Картинке(Pip) Частота Тюнера Ходит По Кругу.
В Pip Картинка Как Настройка Каналов Ходит По Кругу, Настраивается На Какнал И Далее На Друогой И По Кругу
В Меню Тв Нет Русского Перевода
Екран Белый
Нет Звука Экран Не Показывает
Нет Звука , На Экране Как На Диске Квадратики , Как Зависли
Тв Dexp 40А7000
При Включении Экран Светится Слабым Синим Светом Светодиод Горит Красным Постоянно При Нажатии Кнопок Управления И Пульта Мигает
Пишет Нет Сигнала
Пишет Нет Сигнала
Плохое Изображение
Изображение Переламывается, Зеленые Косые Линии
Нет Изображения Темный Экран
Включается Название Мигнет И Все Звук Есть
Не Реагирут На Пульт(Пульт Исправен)
Постепенно Уменшалось Расстояние Реагирования
Потеря Пульта
Как Включить Без Пульта
Заблокировались Кнопки
Не Всегда Принемает Антену
Не Всегда Показывает Каналы.может Месяц Работать,А Потом Неделю Не Показывает.телевизор Живет Своей Жизнью
Экран После Выключения Светится
Выключаю. После Выключения Экран Светится Синим. Приходится Заново Включать И Ещё Раз Выключать
Не Размагничевается Экран
Развертка
Изменяется Размер По Вертикали И Горизонтали
Хаотичная Пеезагрузка
Вкличается И Тутже Перезагружается. Иногда Видно Эмблему На Экране <Grundig>. Прошивку Пробовал’ Не Помогло. Куда Копать?
При Включении Перегорает Предохранитель
Не Показывает 1 Канал
Зависает При Включении На Заставке
Шнур Подключения
Где Приобрести Шнур Подключения Challenger Re-1043D
Нет Изображения Тёмный Экран
Не Включается Исправным Пультом
Не Включается Исправным Пультом
Не Включается Исправным Пультом
Висит На Заставке Андроид Когда Включаю Андроид
Мистери 4028
Supra S14Us30, Шасси 3Р68
Вошёл В Сервисное Меню, А Выйти Не Получается.как Это Сделать?
Показывает Видео Но Как Включить Тв
Есть Ав1 Ав2 Как Перейти Втв
Гаснут Диоды
При Включении Через 5 Секунд Гаснет Диодная Подсветка Экрана
Не Настроить Системное Время
В Меню Настроек Строка Настройки Системного Времени Не Активна — Невозможно Изменить Время ( Зато Активны Строки Изменения Часового Пояса И Перехода На Летнее Время)
Асфокусиовано
Проблемы С Цветом
В Телевизоре Erisson 21Sf10 По Центру Экрана Зелёный Круг, По Краям Другие Цвета. При Переключении Программ На Лицах Людей Аватаровский Цвет.
Проблемы С Цветом
Пропал Белый Цвет(Изображение Имеет Желтый Оттенок)
Большой Размер По Горизонтали
Очевидно, После Случайного Набора На Пульте Увеличился Размер По Горизонтали. Как Быть?
Не Вллючаются Каналы. Нетзвука
При Нажатии Кнопки (Пуск) Светится Экран Голубым Цветом. В Правом Верхнем Углу Высвечивается Цифра 3. Звука Нет, Каналы Не Переключаются.
Пишет Нет Синхронзации
Черный Экран И Полоса Посреди Экрана
Пульт Рабочий А Телевизор Невключаутся
Не Включается Диод Светится
Rainford Tfs-5595C.
Строчная Развертка Не Работает;-Вышел Из Строя Переход, Эмитер-База Транзистора D1555,-Чем Его Заменить????,,,,,,
Экран
При Включении Появляется Синий Экран Надпись «Отсутствие Средств» И Делее Не Реагирует Ни На Что
Звук Есть, Изображение Пропадает
Звук Есть, Изображение Пропадает
Полосы На Экране
Тёмные Полосы В Верху И В Низу Экрана
Бледнеет Экран
При Включении Экран Светится Нормально, Но Через Некоторое Время Экран Бледнеет Пропадает Контрастность
Занижены Напряжения
При Включении Тв Слышно Тонкий Писк
Звук Есть Екран Белый
Исчезла Цветность
Исчезла Цветность, Показывает Ч/Белым Изображением
Пулть Сломался
Как Включить Телевизор Без Кнопки И Пультах
Tle16H103B Izumi
Дежурка Горит.экран Тёмный И Звука Нет.
Отсутствует Фокусировка
При Включении Есть Звук И Размытое Изображение, Четкости Нет. Остальное Работает Нормально.
Smart Hab Не Работает
При Включении Smart Hab Телевизор Выключается,А Потом Может Включится Или Нет
Ключ
Запрашивает Какой То Ключ При Включении Телевизора
Кадровая Развёртка
Прыгает Изображение При Этом По Всему Экрану Полоски
Затемнения Нижней Половины Растра
Сероватые Размытые Пятна Поверх Нормального Изображения
Развёртка
Очень Мал Размер Развёртки По Вертикали И По Горизонтали
Забыли Пороль
Экран Показывает Чёрно Бело Нет Цветовой Гаммы
Как Его Исправить Экрас Сразу Не Включилсяпо Тихонько Начало Появляться Изображение Но Только В Чёрно Белом Виде Могу Фото Скинуть Вам Чтобы Точно Увидеть Причину Можно Ваш Номер Телефона Куда Можно Отправить Фото Поломки На Вацап И Т.д
Включился С Пульта,На Экране Просто Мозаика Из Всех Цветов
Включился С Пульта,На Экране Просто Мозаика Из Всех Цветов,После
Замена Светодиодной Понели На Телевизоре Луксион
На Нижней Части Экран Пояс Из Прореженных Строк
На Нижней Части Экрана Поверх Картинки Пояс Из Прореженных Строк. Появляются И Исчезают Каждые 2-3 Секнлрмальная Картинка Сменяется С Полосами
Нет Три Д
Два Одинаковых Изображения
Включается Подсветка Работает Нет Изображения.
При Включении Работает Подсветка Нет Изображения, T Con Исправен, Флеш Исправна, Перед Поломкой Вышел Из Строя Диод Шотки Sr5100 Скорее Всего От Выработки Ресурса, После Замены Тв Запустился Отработал 15 Минут И Случилась Данная Поломка. Прошивка Флешь Па
Включается И Выключается Lg 47Lb670V
После Включения Телевизор Может Самостоятельно Выключиться И Не Горит Светодиод Контроля. Через Короткое Время А Иногда И Сразу Самостоятельно Загорается Светодиод И Включается Как Ни В Чем Не Бывало Включается Телевизор. Каждый День Периодичность И Колли
Не Включается Двд
Пробит Стабилитрон На Плате Обзначен Д808 Что За Зверь
Случайно Нажали На Замок Теперь Не Включается Вообще
Нет Сигнала
Vestel V32-Le1983Fhd
Самопроизвольное Сканирование Входов По Кругу
Ergo Le32 Ct1000 Au
Не Светится Экран Звук Есть , Каналы Переключаются
Кадрова Розгортка
Зважений Екран По Горизонталі В Морі І В Низу Мертві Пологи По Центрі Присвячується Пряма Біла Полосу Мікросхема La48041
Не Включается
Когда Включаю В Сеть, Слышен Звук «Тук-Тук-Тук …», И Больше Ничего Не Происходит И Ни На Что Не Реагирует
Фотография телевизора Daewoo Electronics DPP-32A2

Основные характеристики Daewoo Electronics DPP-32A2
- Тип
- плазменная панель
- Диагональ
- 32″ (81 см)
- Формат экрана
- 16:9
- Разрешение
- 852×480
- Стереозвук
- есть
Изображение Daewoo Electronics DPP-32A2
- Яркость
- 550 кд/м2
- Контрастность
- 1800:1
- Угол обзора
- 178°
- Прогрессивная развертка
- есть
Прием сигнала Daewoo Electronics DPP-32A2
- Поддержка стереозвука NICAM
- есть
- Поддержка телевизионных стандартов
- PAL, SECAM, NTSC
- Телетекст
- с памятью на 1000 стр.
- Поддерживаемые форматы входного сигнала
- 480i, 480p, 576i, 576p, 720p
- Доступные разрешения при подключении к ПК
- 640×480
800×600
1024×768
Звук Daewoo Electronics DPP-32A2
- Мощность звука
- 20 Вт (2×10 Вт)
- Акустическая система
- два динамика
- Объемное звучание
- есть
Интерфейсы Daewoo Electronics DPP-32A2
- Входы
- AV, аудио x3, S-Video, компонентный, SCART x2, RGB, VGA, HDMI
- Выходы
- AV, аудио (стерео)
- Поддержка Wi-Fi
- нет
Функции Daewoo Electronics DPP-32A2
- Количество независимых TV-тюнеров
- 2
- Таймер сна
- есть
- Защита от детей
- есть
Дополнительно Daewoo Electronics DPP-32A2
- Цвет
- черный
- Размеры с подставкой (ШxВxГ)
- 825x603x234 мм
- Вес
- 24 кг
Отзыв о телевизоре Daewoo Electronics DPP-32A2
отличная модельОпыт использования: несколько месяцев
- Достоинства телевизора
- Отличный телевизор, идеальный размер для комнаты, хорошее качество картинки
- Недостатки телевизора
- 1.залипает яркое статичное изображение (при застое некотрое время)
2.часы барохлят
Комментарий о телевизорах:
желательно модифицировать функцию вертикального увеличения экрана, т.к. при просмотре фильмов (широкоформатных), черные полосы (сверху и снизу до конца не убрать)
отличная модельОпыт использования: несколько месяцев
- Достоинства телевизора
- Изображение — супер! Среди всех этих самсунгов,панасоников с расплывчатыми жк выбрали плазму от daewoo: аналог, цифра, хдтв — выглядит потрясающе! прием сигнала с общей аналоговой антенны — отличный! нашел на 10 каналов больше чем 2 телевизора и тв тюнер, которые есть в квартире… В общем — прелесть! обошелся в 15к на радиорынке около 3 Китов. Все настройки присутствуют, всё есть и ничего лишнего для домашнего телевизора.
- Недостатки телевизора
- не замечал таких
Комментарий о телевизорах:
отличный выбор для такого качества и весьма невысокой цены!
Инструкция к телевизору Daewoo Electronics DPP-32A2
Инструкцию к телевизору Daewoo Electronics DPP-32A2 скачать бесплатно. Читать инструкцию к телевизору Daewoo Electronics DPP-32A2 Изучать инструкцию к телевизору Daewoo Electronics DPP-32A2
Цена телевизора Daewoo Electronics DPP-32A2
Цена по рынку , на момент создания страницы
нет в продаже…
Отзыв взят с сайта market.yandex.ru
Друзья!!! Мы работаем для Вас, чтобы у Вас была информация!
Мы будем Вам очень благодарны, если вы оцените наш труд, и поделитесь ссылкой в соцсетях!
Это самое малое, что Вы можете сделать для нас!
Заранее спасибо!
Оставить комментарий:
Не нажали на рекламное объявление!?
Ничего страшного!
Вы ещё можете помочь проекту!
Да не оскудеет рука дающего!

Для того, чтобы скачать инструкцию по ремонту для телевизоров Daewoo, выберете модель, соответствующую Вашему устройству.
Список моделей для телевизоров Daewoo Вы можете увидеть ниже. Когда Вы найдете необходимый Вам файл, кликните напротив
него кнопку «Скачать», чтобы перейти на конечную страницу для загрузки сервис мануала для телевизоров Daewoo. Обратите внимание,
представленные в нашем каталоге руководства по ремонту, схемы для телевизоров Daewoo находятся в PDF формате и всегда доступны
для бесплатной загрузки.
Если Вы не сможете найти необходимый Вам файл, свяжитесь с нами. Просто оставьте свой запрос на отсутствующий файл через нашу
контактную форму, и мы постараемся Вам помочь.
Сервис мануалов найдено (1395 результаты)
| Продавец | Модель | Комментарии | Скачать | +CD |
|---|---|---|---|---|
| Daewoo | 14A5 | Сервис мануал Daewoo 14A5, 14A5T, 14Q1, 14Q1T, 14Q2, 14Q2T, 20A5, 20A5T, 20Q1T, 21A5, 21A7T, 21Q1T | Скачать | |
| Daewoo | 14A5 | Сервис мануал Daewoo | Скачать | |
| Daewoo | 14A5T | Сервис мануал Daewoo 14A5, 14A5T, 14Q1, 14Q1T, 14Q2, 14Q2T, 20A5, 20A5T, 20Q1T, 21A5, 21A7T, 21Q1T | Скачать | |
| Daewoo | 14A5T | Сервис мануал Daewoo | Скачать | |
| Daewoo | 14Q1 | Сервис мануал Daewoo 14A5, 14A5T, 14Q1, 14Q1T, 14Q2, 14Q2T, 20A5, 20A5T, 20Q1T, 21A5, 21A7T, 21Q1T | Скачать | |
| Daewoo | 14Q1 | Сервис мануал Daewoo | Скачать | |
| Daewoo | 14Q1T | Сервис мануал Daewoo 14A5, 14A5T, 14Q1, 14Q1T, 14Q2, 14Q2T, 20A5, 20A5T, 20Q1T, 21A5, 21A7T, 21Q1T | Скачать | |
| Daewoo | 14Q1T | Сервис мануал Daewoo | Скачать | |
| Daewoo | 14Q2 | Сервис мануал Daewoo 14A5, 14A5T, 14Q1, 14Q1T, 14Q2, 14Q2T, 20A5, 20A5T, 20Q1T, 21A5, 21A7T, 21Q1T | Скачать | |
| Daewoo | 14Q2 | Сервис мануал Daewoo | Скачать | |
| Daewoo | 14Q2T | Сервис мануал Daewoo | Скачать | |
| Daewoo | 14Q2T | Сервис мануал Daewoo 14A5, 14A5T, 14Q1, 14Q1T, 14Q2, 14Q2T, 20A5, 20A5T, 20Q1T, 21A5, 21A7T, 21Q1T | Скачать | |
| Daewoo | 20A5 | Сервис мануал Daewoo 14A5, 14A5T, 14Q1, 14Q1T, 14Q2, 14Q2T, 20A5, 20A5T, 20Q1T, 21A5, 21A7T, 21Q1T | Скачать | |
| Daewoo | 20A5 | Сервис мануал Daewoo | Скачать | |
| Daewoo | 20A5T | Сервис мануал Daewoo | Скачать | |
| Daewoo | 20A5T | Сервис мануал Daewoo 14A5, 14A5T, 14Q1, 14Q1T, 14Q2, 14Q2T, 20A5, 20A5T, 20Q1T, 21A5, 21A7T, 21Q1T | Скачать | |
| Daewoo | 20Q1T | Сервис мануал Daewoo | Скачать | |
| Daewoo | 20Q1T | Сервис мануал Daewoo 14A5, 14A5T, 14Q1, 14Q1T, 14Q2, 14Q2T, 20A5, 20A5T, 20Q1T, 21A5, 21A7T, 21Q1T | Скачать | |
| Daewoo | 21A5 | Сервис мануал Daewoo 14A5, 14A5T, 14Q1, 14Q1T, 14Q2, 14Q2T, 20A5, 20A5T, 20Q1T, 21A5, 21A7T, 21Q1T | Скачать | |
| Daewoo | 21A5 | Сервис мануал Daewoo | Скачать |
Отзывы пользователей о Daewoo Electronics DPP-32A2
Плюсы и минусы:
- Хорошее качество звука
- Хорошо и долго работает
- Отличный чистый звук
- Хорошее качество картинки
- Качественный встроенный тюнер
- Низкая цена
- Можно использовать как монитор для ПК
- Плохой интерфейс
- Проблема с включением
- Черные полосы не убираются полностью
- У плазменных телевизоров низкая эффективность ячеек
- Залипает изображение после простоя в течение нескольких минут
- Нелогичное расположение кнопок на пульте
отличный телевизор для своего времени, но уже устарел. Хороший звук и четкое изображение, но плохой интерфейс и периодические глюки. Отличный телевизор для просмотра кабельного телевидения и DVD, но ему не хватает эффективности при отображении градаций яркости. Хороший выбор для небольшого телевизора, но есть и лучшие варианты по цене. Отлично подходит для использования в качестве монитора ПК и просмотра фильмов без записи на диск. Отличный прием сигнала с аналоговой антенны. В целом, достойное устройство по цене, но есть и лучшие варианты, если вы готовы потратить больше.
3 года назад
яндекс маркет
Абсолютно один из лучших телевизоров! К сожалению, лучший по меркам 2008-12 года.
Достоинства: Удобный, хороший звук и пульт управдения
Недостатки: Убогий интерфейс
Халиг Мамедов10 лет назад
яндекс маркет
Работает у нас уже более 5-и лет, но в последнее время проблема с включением появилась: чтобы включить приходится вытащить раза 2 из разетки.
Достоинства: Нормальный телевизор, нормальное качество изображения, работает хорошо, долго работает, отличный чистый звук.
Недостатки: Покупали примерно за 15000 тысяч рублей, за такие деньги сейчас можно купить и получше телевизоры.
Андрей А.11 лет назад
яндекс маркет
За свои деньги превосходный выбор. Если у Вас не самая хорошая антенна в доме, эта плазма Ваш выбор. Ну а dvd и hd-tv смотреть одно удовольствие — такой глубокий уровень чёрного редко в каком LCD встретишь. Плазма 32″ в то время когда покупал была редкостью и обычно начиналась от 42″. Поэтому если Вам нужен небольшой телевизор для просмотра ТВ передач, берите 32″, их вполне хватит. А для просмотра кино, купите лучше проектор. Фильм даже на 60-ти дюймовых экранах (которые кстати стоят нереално дорого) не принесёт Вам столько удовольствия, сколько фильм на проекторе. Это совершенно другие ощущения.
Достоинства: Отличная плазма. Про воспроизведение dvd и прочих цифровых сигналов говорить не буду, т.к. у всех качество в этом поле примерно одинаково. А вот с ТВ приёмом начинается цирк. У родственника стоит LCD Philips с подсветкой. Антенна в доме нормальная, но тв каналы на этом ящике смотреть не возможно, одна рябь и белые мухи. Более менее картинку можно смотреть с расстояния нескольких метров. На этой плазме от дэу приём ТВ каналов такой же как и в ЭЛТ телевизорах, он отличный. Что говорит о качественном встроенном тюнере.
Недостатки: После нескольких лет использования иногда подглючивает — выключаешь телевизор, а он переходит в какой-то режим ожидания. Экран становится не мёртвенно чёрным, а серым. При этом зелёным цветом мигает лампочка питания. После того как его включишь (долгим нажатием на кнопку Power на пульте), можно уже выключить нормально. Лампа так же может мигать и при работе ТВ, что говорит о том факте, что при выключении ждите тот самый глюк. Впринципе мелочь, но иногда раздражает. Появляется такой глюк раз в месяц-два.
Геннадий Ш.13 лет назад
яндекс маркет
В целом цена/качество весьма адекватное отношение. ТВ у нас кабельное, показывает очень хорошо. Фильмы смотрим с компа по кабелю HDMI 5м, шикарно! Видео 8500GT, фильмы с разрешением до 1920*1080 идут, правда сигнал интерполируется видеокартой до 852*480. Цветопередача, контраст супер!
Достоинства: Качество картинки с эфира, и по кабелю.
Недостатки: При большой площади заливки белого цвета на экране уменьшается общая яркость. Недостаток плазмы. КПД ячеек маленькое, поэтому для показа картинки с правильными градациями яркости потребовался бы БП 1000 Вт, а так потребление 150-180 Вт. Терпимо…)
Алекс К.14 лет назад
яндекс маркет
желательно модифицировать функцию вертикального увеличения экрана, т.к. при просмотре фильмов (широкоформатных), черные полосы (сверху и снизу до конца не убрать)
Достоинства: Отличный телевизор, идеальный размер для комнаты, хорошее качество картинки
Недостатки: 1.залипает яркое статичное изображение (при застое некотрое время)
2.часы барохлят
Светлана к.14 лет назад
яндекс маркет
ну если учесть что купил я его за 10 тыс,практически новый и еще на гарантии,то за эти деньги вполне приличный аппарат,а вообще если бы брал новый лучше бы добавил тысяч 5 и купил что-нибудь получше..
Достоинства: Не вижу совершенно никаких достоинств кроме приятного внешнего вида и неплохого качества картинки…плюс понравилась возможность использования в качестве монитора к пк,очень удобно смотреть фильмы без записи на диск..
Недостатки: Залипает картинка после того как несколько минут неподвижна,в инструкции пишут что это присутствует у всех плазменных телевизоров,но сколько я их не видел это есть только в моем)расположение кнопок на пульте ду вообще лишено всякой логики,до сих пор не могу привыкнуть что на месте кнопок переключения каналов(у нормальных телевизоров)расположены кнопки управления меню и тд…
Дэн П.14 лет назад
яндекс маркет
отличный выбор для такого качества и весьма невысокой цены!
Достоинства: Изображение — супер! Среди всех этих самсунгов,панасоников с расплывчатыми жк выбрали плазму от daewoo: аналог, цифра, хдтв — выглядит потрясающе! прием сигнала с общей аналоговой антенны — отличный! нашел на 10 каналов больше чем 2 телевизора и тв тюнер, которые есть в квартире… В общем — прелесть! обошелся в 15к на радиорынке около 3 Китов. Все настройки присутствуют, всё есть и ничего лишнего для домашнего телевизора.
Недостатки: не замечал таких