- Manuals
- Brands
- Beko Manuals
- Dishwasher
- DIS26010
- Instruction manual
-
Bookmarks
Quick Links
Dishwasher
Instruction Manual
DIS26010
EN
Document Number :
15 0498 0100_EN_(EN)/ 28-01-16.(11:24)
Related Manuals for Beko DIS26010
Summary of Contents for Beko DIS26010
-
Page 1
Dishwasher Instruction Manual DIS26010 Document Number : 15 0498 0100_EN_(EN)/ 28-01-16.(11:24) -
Page 2
Please read this user manual first! Dear Customer, We hope that you get the best results from the product which has been manufactured in state-of-the-art plants and passed through a strict quality control procedure. Therefore, please read the entire user manual carefully before using the product and keep it as a reference for future use. -
Page 3
Dishwasher Instruction Manual DIS26010 Document Number : 15 0498 0100_EN_(EN)/ 28-01-16.(11:24) -
Page 4
Please read this user manual first! Dear Customer, We hope that you get the best results from the product which has been manufactured in state-of-the-art plants and passed through a strict quality control procedure. Therefore, please read the entire user manual carefully before using the product and keep it as a reference for future use. -
Page 5
CONTENTS 1. Dishwasher 5. Operating the product Technical specifications Keys Preparing the machine 2. Important safety instructions 5 Programme selection General safety Auxiliary functions Intended use InnerClean Children’s safety Scheduling the washing time 3. Installation Starting the programme Cancelling the programme Appropriate installation location Salt indicator ( Connecting water supply… -
Page 6
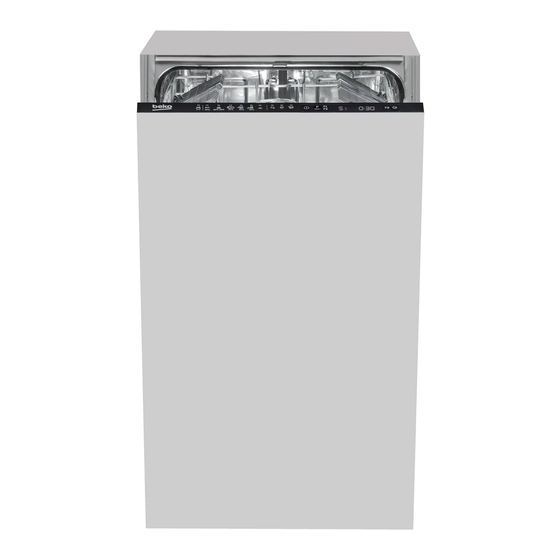
Dishwasher Overview 1. Upper dish basket with shelf 2. Guide rail for the upper dish basket 3. Salt container 4. Cutlery basket 5. Detergent dispenser 6. Door 7. Control panel 8. Filters 9. Lower sprayer arm 10. Lower basket 11. Upper sprayer arm 12. -
Page 7
Technical specifications This product complies with the following EU directives: Development, production and sales stages of this product comply with the safety rules included in all pertaining European Community regulations. 2006/95/EC, 2004/108/EC, 93/68/EEC, IEC 60436, EN 50242 Power input 220-240 V, 50 Hz Total power consumption 1800-2100 W Heater power… -
Page 8
Important safety instructions This section contains safety draining hoses must be instructions that will help to securely fastened and get protected from risk of remain undamaged. personal injury or property Unplug the product when • damage Failure to follow not in use. these instructions shall void Never wash the product •… -
Page 9
baskets. Do not put This product should • other loads on the door; not be used by persons otherwise, the product with physical, sensory may tilt. or mental disorders Never leave the door or unlearned or • of the product open inexperienced people apart from loading and (including children) -
Page 10
Installation Appropriate installation Refer to the nearest Authorised Service Agent for installation of your location product. To make the product ready · Place the product on a solid and for use, make sure that the electricity, flat floor that has sufficient load tap water supply and water drainage carrying capacity! The product systems are appropriate before… -
Page 11
Connection to the drain sludge accumulation at the end of washing. Water discharge hose can directly be connected to the drain hole or Permitted water temperature: up sink’s drainage. The length of this to 25°C connection must be min. 50 cm and The dishwasher may not be max. -
Page 12
Adjusting the feet • Connection must comply with national regulations. If the door of the product cannot • Power cable plug must be within be closed properly or if the product easy reach after installation. swings when you push it slightly, Unplug the product after the then you need to adjust the feet washing programme is over. -
Page 13
Disposing of packaging and other wastes at the end of its service life. Take it to the collection material center for the recycling of electrical Packaging materials are dangerous to and electronic equipment. Please children. Keep packaging materials in consult your local authorities to learn a safe place away from reach of the about these collection centers. -
Page 14
Prewashing Tips for energy saving Following information will help you use the product in an ecological and energy-efficient manner. • Wipe away any coarse food remnants on the dishes before putting them in the product. • Operate the product after filling it completely. -
Page 15
Adding salt Water softening system needs to be regenerated in order for the product operates with the same performance continuously. Dishwasher salt is used for this purpose. Use in your product only the special softening salts produced particularly for use in dishwashers. -
Page 16
5. If you will not start a washing 1. Push the latch to right to open the programme immediately after detergent dispenser lid (A). adding the salt, run the machine empty in the shortest programme to dissolve and wash away the scattered salt in the machine. -
Page 17
“click” will be heard when the lid is Information about suitable closed. places (detergent dispenser, basket etc.) in the dishwasher In programmes with prewash and to place the tablet can be found at high temperature, in which you amongst the usage instructions use tablet detergents, make sure on the packages of the tablet that the detergent dispenser lid is… -
Page 18
Rinse aid 4. Turn the rinse aid amount adjuster manually to a position The rinse aid used in dishwashers between 1 and 6 (4). If there are is a special combination used to stains on tableware items after increase drying efficiency and washing, level must be increased prevent water or limescale stains and if there is a blue trace after… -
Page 19
as well. Some delicate glass types and crystals may become dull in time. We strongly recommend you to check if the tableware you are going to purchase is suitable for washing especially in the dishwasher. Placing the dishes into the dishwasher You can use your dishwasher in the optimum way with respect to energy… -
Page 20
Suggestions for loading the Improper Loading Of Dishware dishwasher Lower basket Upper basket 17 EN… -
Page 21
Silverware basket Collapsable lower basket wires (2 pieces) (depends on the model) Silverware basket is designed to wash (depends on the model) your dishes such as fork, spoon and The two piece foldable wires located etc. in a cleaner manner. at the lower basket of the machine are designed for an easier placement of large pieces such as pans, bowls,… -
Page 22
Collapsable lower basket wires (2 & 4 pieces) (depends on the model) The foldable wires (A) located at the lower basket of the machine are designed for an easier placement of large pieces such as pans, bowls, etc. You can create larger spaces by folding each wire individually or all them at once. -
Page 23
Adjusting the height of loaded upper basket (depends on the model) Basket adjustment mechanism on the upper basket of the machine is designed to allow you create wider areas in the upper or lover section of the machine based on your requirements by adjusting the height of the loaded basket in up or down directions without removing it from… -
Page 24
Adjusting the height of loaded upper basket (depends on the model) Basket adjustment mechanism on the upper basket of the machine is designed to allow you create wider areas in the upper or lover section of the machine based on your requirements by adjusting the height of the loaded basket in up or down directions without removing it from… -
Page 25
Adjusting the height of empty upper basket (depends on the model) You can adjust the height of the upper basket according to the size of the dish to be washed. Use basket rollers to change the basket height. 1. Turn the stoppers on the ends of the upper basket rails by turning them aside (A). -
Page 26
Operating the product 1. On/Off key 2. Programme Selection / Programme Cancel (3 seconds) key 3. Function keys Half Load Function Super Rinse Function SteamGloss function 4. Programme indicator 5. Salt indicator (Not in use) 7. Start / Cancel indicator 8. -
Page 27
Keys Programme selection On/Off key 1. Press the On/Off button to turn on When you press On / Off key, indicator your machine. lights illuminate on the display for 2. Check the Salt and Rinse Aid ON position. The lights turn off in OFF indicators and add salt and/or position. -
Page 28
25 EN… -
Page 29
Auxiliary functions Super Rinse Function Depending on the type of the Washing programmes of your detergent used, if a detergent dishwasher are designed to obtain dissolving issue is encountered it the best cleaning effect, considering will remove the resulting stains from the type of the soiling, soiling degree the dishes and enables the optimum and properties of the dishes to be… -
Page 30
Changing Warning Sound Volume Changing the interior lighting 1. After turning on the machine, setting 1. After turning on the machine, press Time Delay and P / P+ press Time Delay and P/P+ keys keys simultaneously. Keep them simultaneously. Continue to press pressed until the countdown 3, 2, until the countdown 3, 2, 1 is 1 is completed on the display. -
Page 31
Once the delay time is over, the Pay attention not to open the door selected programme will start of the machine when it is running. automatically. There may be a rush of vapour when you open the door of your Changing the settings while Time machine;… -
Page 32
is adequate amount of rinse aid in the washing programme is paused and dishwasher or not. You need to refill the water inlet is checked regularly the rinse aid reservoir with rinse aid by the machine; when the water is whenever rinse aid indicator appears restored E:02 icon will disappear after on the display of your machine. -
Page 33
Maintenance and cleaning Service life of the product extends left on the filters. If there are food and frequently faced problems residues on filters, take them out and decrease if it is cleaned at regular clean well under running water. intervals. -
Page 34
3. Press the two pawls on the coarse 4. Install the hose to tap. filter inwards and separate the (depends on the model) coarse filter from the assembly (C). Cleaning the impellers Clean the impellers at least once a week in order for the machine operates efficiently. -
Page 35
Upper impeller Check if the holes on the upper impeller (2) are clogged. If they are clogged, remove and clean the impeller. Turn its nut to left to remove the upper impeller (C, D). Make sure that the nut is tightened well when installing the upper impeller. -
Page 36
Troubleshooting Machine does not start. • Power cable is unplugged. >>> Check if the power cable is plugged in. • Fuse is blown. >>> Check the fuses in your house. • Water is cut. >>> Make sure that the water inlet tap is open. •… -
Page 37
• Detergent dispenser lid is left open. >>> Make sure that the detergent dispenser lid is closed tightly after adding detergent. Dishes are not dry at the end of cycle • Dishes are not placed orderly in the machine. >>> Place your dishes in a way that no water will accumulate in them. -
Page 38
Lime traces remain on dishes and glassware gains a misty appearance • Rinse aid is not sufficient. >>> Check the rinse aid indicator and add rinse aid if necessary. Increase the rinse aid setting if there is enough amount of rinse aid in the machine. -
Page 39
• Intensive cleansers such as bleaches are used. >>> Protective cover on metal surfaces gets damaged and looses its efficiency in time when it gets in contact with cleansers such as bleach. Do not wash your dishes with bleach. • Metal items particularly such as knives are used for purposes other then their intended uses. -
Page 40
Dishes are scratched. Kitchen utensils that contains or are made of aluminum should not be washed in dishwasher. • Salt leakage exists. >>> Pay attention not to spill salt around the salt filling hole while adding salt. Spilled salt can cause scratches. Make sure that the salt reservoir lid is tightly closed after finishing the filling process. -
Page 41
Kitchen utensils are broken. • Dishes are not placed orderly in the machine. >>> Load the dishes as described in the user manual. • Baskets are overloaded. >>> Do not overload the baskets in excess of their capacity. Water remains in the dishwasher at the end of the programme. •…
Скачать
tüm siyah yazılar matbaaya giderken
gönderilmiyor.
Atılım firması basıyor
Посyдoмoeчнaя
мaшинa
Инcтpyкция по
зкcплyaтaции
DIS26010


Drag image left & right to rotate.
Класс энергоэффективности
![]()
Вместимость (количество комплектов посуды)
Вместимость (количество комплектов посуды)
0
Технология LedSpot
Луч на полу
Технология LedSpot — это специальный световой индикатор состояния программы, который проецируется на пол возле машины и показывает ее статус работы. Световой индикатор гаснет, когда все этапы мытья завершены.

Тип установки
Полностью интегрируемая
Количество комплектов посуды
10
Класс энергоэффективности
На 10% эффективнее, чем A
Потребление воды за цикл
11 Л
Регулировка верхней корзины
Регулируемая при полной загрузке
Нижний ящик- количество складываемых зубцов
2
Отсрочка старта
Да с установкой вручную до 24 ч
Программа 2
Автопрограмма
Программа 3
Интенсивная 70 °C
Программа 4
Quick & Clean™
Программа 6
Предварительная мойка
Функция 1
Половинная загрузка
Функция 2
Супер ополаскивание
Функция 3
Дополнительная сушка
Отсрочка старта
Да с установкой вручную до 24 ч
Уход за стеклом
GlassShield®
Дизайн корзины и стандартные аксессуары
Регулировка верхней корзины
Регулируемая при полной загрузке
Нижний ящик- количество складываемых зубцов
2
Тип корзины для столовых приборов
Корзина для столовых приборов Slim-size
Количество полок для чашек
4
Бак
Бак из нержавеющей стали
Дизайн опрыскивателя
Стандартный
Индикация хода программы
LedSpot™
Производительность и потребление
Количество комплектов посуды
10
Класс энергоэффективности
На 10% эффективнее, чем A
Энергопотребление
0.8 кВт*ч
Потребление воды за цикл
11 Л
Количество уровней опрыскивания
3
Высота в упаковке
85.9 см
Ширина в упаковке
49.4 см
Глубина в упаковке
66.1 см
Система защиты от протечек
Aquasafe+
Табличка с характеристиками
Показатель энергоэффективности