-
Contents
-
Table of Contents
-
Troubleshooting
-
Bookmarks
Quick Links
Laser Beam Printer
User’s Guide
ENG
Related Manuals for Canon Laser Shot LBP-1120
Summary of Contents for Canon Laser Shot LBP-1120
-
Page 1
Laser Beam Printer User’s Guide… -
Page 2
LBP-1120 Laser Printer User’s Guide… -
Page 3
Manuals for the Printer The manuals for this printer are divided as follows. Please refer to them for detailed information. Guides with this symbol are book manuals. • Installing and Setting Up the Printer • Connecting the Printer to a PC •… -
Page 4: How This Manual Is Organized
Some of the data contained herein may not exactly reflect the current model of the particular product with which this manual has been included. If you have a need for an exact specification, please contact Canon for the current specification. • No part of this document may be photocopied, reproduced, or translated into another language without prior written consent of Canon Inc.
-
Page 5: Table Of Contents
Turning the Printer ON/OFF ……..
-
Page 6
Connecting to the LBP-1120 Already on Your Network ….3-42 Canon LASER SHOT LBP-1120 Group ……3-43 Uninstalling the CAPT. -
Page 7
Storing Toner Cartridges ……..4-13 Cleaning and Handling the Printer ……..4-14 Cleaning the Printer . -
Page 8: Preface
Thank you for purchasing the Canon LBP-1120. Please read this manual thoroughly before operating the printer in order to familiarize yourself with its capabilities, and to make the most of its many functions. After reading this manual, store it in a safe place for future reference.
-
Page 9: Legal Notices
Connect the equipment into an outlet on a different circuit than the one to which the receiver is connected. • Consult your local authorized Canon dealer or an experienced radio/TV technician for help. Use of shielded cable is required to comply with class B limits in Subpart B of Part 15 of FCC Rules.
-
Page 10: Emc Directive (220 — 240 V Model)
This equipment has been tested and found to comply with the limits for a Class A digital device, pursuant to Part 15 of the FCC Rules. These limits are designed to provide reasonable protection against harmful interference when the equipment is operated in a commercial environment.
-
Page 11: Laser Safety (100 — 127 V/220 — 240 V Models)
No radiation can leak from the printer in the normal operation of the product by the user. This printer is classified as a Class 1 laser product under EN 60825-1: 1994, and as for the U.S.A., it is classified as Class 1 under the Code of Federal Regulations, 1040.10 of Title 21.
-
Page 12: International Energy Star-Program
Their standards and logos are uniform among participating nations. Trademarks LBP, Canon, LASER SHOT, and the Canon Logo are trademarks of Canon Inc. ® Microsoft , Windows Corporation in the United States and/or in other countries.
-
Page 13: Disclaimers
Disclaimers The information in this document is subject to change without notice. CANON INC. MAKES NO WARRANTY OF ANY KIND WITH REGARD TO THIS MATERIAL, EITHER EXPRESS OR IMPLIED, EXCEPT AS PROVIDED HEREIN, INCLUDING WITHOUT LIMITATION, THEREOF, WARRANTIES AS TO MARKETABILITY, MERCHANTABILITY, FITNESS FOR A PARTICULAR PURPOSE OF USE OR AGAINST INFRINGEMENT OF ANY PATENT.
-
Page 14: Important Safety Instructions
fire or electrical shock. • Do not place the following items on the printer. If these items come into contact with a high-voltage area inside the printer, it may result in a fire or electrical shock.
-
Page 15: Power Supply
Do not insert or unplug the power plug with wet hands, as this may result in electrical shock. • Do not plug the printer into a multi-plug power strip, as this may cause a fire or electrical shock. • Do not bundle up or tie the power cord in a knot, as this may result in a fire or electrical shock.
-
Page 16: Handling
If the printer makes strange noises, or gives off smoke, heat or unusual smells, immediately turn OFF the power switch, and unplug the power plug from the outlet. Then, contact your local authorized Canon dealer. Continued use of the printer in this condition may result in a fire or electrical shock.
-
Page 17: Maintenance And Inspections
CAUTION • Do not place heavy objects on the printer, as they may tip over or fall resulting in personal injury. • Turn OFF the main power switch for safety when the printer will not be used for a long period of time, such as overnight. Also, turn OFF the main power switch…
-
Page 18: Consumables
• Never attempt to service this printer yourself, except as explained in this manual. There are no user serviceable parts inside the printer. Adjust only those controls that are covered in the operating instructions. Improper adjustment could result in personal injury and/or damage requiring extensive repair that may not be covered under your Limited Warranty.
-
Page 19
• Do not store toner cartridges or copy paper in places exposed to open flames, as this may cause the toner or paper to ignite, resulting in burns or a fire. CAUTION Keep toner and other consumables out of the reach of small children. If these items are ingested, consult a physician immediately. -
Page 20: Before You Start Using This Printer
Turning the Printer ON/OFF ……..
-
Page 21: Features And Benefits
Features and Benefits The LBP-1120 combines the following features to form a versatile printing system: Quick startup The printer is ready to print soon after it is turned on (no start-up time), and has a first print time of less than 17 seconds. This means that you can print documents quickly and efficiently.
-
Page 22
Delivery can be face down (for plain paper) or face up (for all paper types). Network Connection You can connect to the LBP-1120 over a network, going through a server. Features and Benefits… -
Page 23: Parts And Their Functions
Parts and Their Functions The following section describes the parts of the printer, and their various functions, so that you can make full use of all the features of your printer. Parts of the Printer Front View a a a a Multi-Purpose Tray…
-
Page 24: Rear View
Rating Label The serial number is indicated to identify the printer. Refer to this number when calling a service technician. This label also shows the current and average power consumption. c c c c USB Port Interface Connector Connects to a USB interface cable.
-
Page 25: Inside The Front Cover
Inside the Front Cover a a a a Transfer Roller This delicate roller should be kept free of fingerprints and oil to prevent print quality deterioration. Parts and Their Functions b b b b Fixing Unit Fixes the toner onto print media.
-
Page 26: Turning The Printer On/Off
Turn the power switch to ON («I» side). The power switch is located on the back side of the printer. NOTE If the power does not turn on even when the printer is plugged into an AC outlet, check the following items: — Close the front cover if open.
-
Page 27: Turning The Printer Off
Follow the procedure to turn the printer OFF. IMPORTANT • If the printer is connected to a network, make sure that the printer is not printing data from another personal computer before turning OFF the power. • Do not turn OFF the power to the printer while it is printing.
-
Page 28: Paper Input And Output
Paper Input and Output This chapter explains the types of paper available for this printer, and how to load and print out paper. Paper Requirements……….. . . 2-2 Printable Paper.
-
Page 29: Paper Requirements
Paper Requirements This section describes the size and type of paper you can use with this printer. Printable Paper You can use the following types of paper with this printer. To ensure optimum performance, only use paper that falls within the specifications listed below.
-
Page 30: Paper Capacity Of Paper Sources
Type of Paper Plain Paper 64 g/m IMPORTANT The printer is not equipped with a face-up delivery tray. Remove each sheet from the face-up delivery slot manually after it has been printed. Abbreviations of Paper Sizes The size indicators for the paper guides on the multi-purpose tray uses the following…
-
Page 31: Plain Paper
(374°F). • Do not use thermal or carbon paper, or paper with glue, staples, clips, or ribbons. For colored paper, use colors that are not damaged by the heat of the printer’s fixing unit (about 190°C or 374°F). Transparencies The acceptable sizes are Letter or A4. The transparencies must be able to withstand the heat generated by the fixing unit (about 190°C or 374°F) without…
-
Page 32
Label Sheets Label sheets are paper with pressure-sensitive adhesive. Acceptable sizes are Letter and A4. Follow these guidelines when choosing a label sheet: IMPORTANT • The label print face (top, or face sheet) must be made of ordinary, matte-finish paper similar to copy paper. -
Page 33: Paper You Cannot Use
— Adhesive labels with the base easily peeled. — Paper that has been used once by the printer, copy machine or other laser printers. (The back side of this paper is also unusable. However, note that you can use the manual feed slot to perform manual duplex printing on the reverse side of a sheet of paper that has already been printed on using this printer.
-
Page 34: Storing Paper
If paper is moved between locations that differ widely in temperature or humidity, it may curl. If this situation cannot be avoided, store the paper in the work area by the printer for at least one day to give the paper time to adjust to the new conditions.
-
Page 35: Paper Delivery
Paper Delivery This printer delivers the printed pages in two delivery methods, face-up delivery and face-down delivery. This section describes how to select the paper delivery methods. I Paper Type and Paper Delivery Refer to the list below to select the proper paper delivery method depending on the type of paper.
-
Page 36: Face-Down Delivery
Face-Down Delivery Use face-down delivery for plain paper only. Printouts are stacked in order in the face-down delivery slot (which can hold up to 50 sheets of plain paper 64 g/m Move the paper delivery selector up to the face-down mark. IMPORTANT •…
-
Page 37
Do not pull out the printout while it is still emerging from the face-up delivery slot. • Make sure that there is enough room at the front of the printer for paper to exit. NOTE The printer is not equipped with a face-up delivery tray. The delivered paper must be removed manually. -
Page 38: Printing From The Multi-Purpose Tray
The maximum number of sheets of paper that can be loaded into the multi-purpose tray may vary depending on the type of paper. (See «Printable Paper,» on p. 2-2.) IMPORTANT Make sure that the input paper support is inserted into its slot in the printer. Input Paper Support Face-Down Output…
-
Page 39
Load the stack of paper into the multi-purpose tray as illustration below. IMPORTANT • Do not force the paper into the printer. • Do not load more than 125 sheets of 64 g/m 12.5 mm. 2-12… -
Page 40
Adjust the paper guides to the width of the paper stack. For A4-size or Letter/Legal-size paper, align the paper guides with the icons inside the multi-purpose tray. IMPORTANT • Be sure to match the paper guides to the paper width. Misfeeds or paper jams may occur if the paper guides are too loose or too tight. -
Page 41: Printing Envelopes From The Multi-Purpose Tray
Printing Envelopes from the Multi-Purpose Tray Preparing Envelopes Before you load envelopes in the multi-purpose tray, the following precautions should be observed. Fan the stack of envelopes to make sure none of the envelopes stick together. Place the envelopes on a clean, flat surface © press down on all of the corners to flatten the envelopes.
-
Page 42
Flex the stack on all four sides to remove any stiffness. Check all corners. If the corners are curled, straighten them. IMPORTANT Be sure to flatten out the leading edges of the envelopes if they are curled down. This may cause a paper jam to occur. Correct any curled corners ©… -
Page 43: Loading Envelopes
Align the stack of envelopes so that the side to be printed on faces the front of the printer. Slide the stack in until it stops. Adjust the paper guides to the width of the stack of envelopes.
-
Page 44
When using C5-size envelopes, remove any stiffness by lightly flexing both edges of the envelope. Insert the envelopes one at a time into the multi-purpose tray, in the direction shown in the illustration. If the flap is along the long edge of the envelope, insert each envelope with the flap at the back and on the right. -
Page 45
NOTE After you have loaded the envelopes into the multi-purpose tray, please check the following items to avoid paper jams or misfeeds before printing. — Is the stack of envelopes bending? The stack may bend if the paper guides are too tight. -
Page 46: Printing From The Manual Feed Slot
Delivery,» on p. 2-8.) Align the sheet of paper so that the side to be printed on faces the front of the printer and the top of the paper is inserted first. Slide the sheet of paper into the manual feeding slot until it stops.
-
Page 47
• If a postcard is not fed smoothly into the printer, gently push the top of the postcard downwards until the roller inside the printer takes the card and feeds it into the printer. -
Page 48: Using The Canon Advanced Printing Technology
Connecting the LBP-1120 as a Network Printer……..3-38 Connecting to the LBP-1120 Already on Your Network …….3-42 Canon LASER SHOT LBP-1120 Group .
-
Page 49
Network Printer Status…….. -
Page 50: Installing The Capt
LBP-1120 is already on your network, and you want to start using it, see «Connecting to the LBP-1120 Already on Your Network,» on p. 3-42. If you want to install the LBP-1120 as a network printer, see «Connecting the LBP-1120 as a Network Printer,»…
-
Page 51
Click [Canon LBP-1120 Install]. The [Canon LBP-1120 Install] dialog box appears. Click [Yes] to install the CAPT in the language displayed. The setup for the installation completes, and then installation of the CAPT (Canon Advanced Printing Technology) starts. Installing the CAPT… -
Page 52
The [Welcome] screen appears. Click [Next]. The [Software License Agreement] screen appears. Check the contents of [Software License Agreement], and then click [Yes]. The [Select printer connection port] dialog box appears. Installing the CAPT… -
Page 53
Setup]. When the USB port can be found in the port list, go to step 13. Click [Yes] to continue the setting up of the LBP-1120. Connect the USB cable to the printer and your computer and turn on the printer. -
Page 54
Click [Cancel] when the [Add New Hardware Wizard] dialog box appears. Unless you cancel, see the procedure for «Plug & Play,» on p. 3-9. Click [Canon LBP-1120 Install]. Repeat the procedure from step 5 to step 7. Select a USB port, such as [USBPRN01] for Windows 98 or [USB001] for Windows Me from the port list, and then click [Next]. -
Page 55
A dialog box asking you to proceed with the installation appears. Press [Yes]. When the installation is complete, the following dialog box appears. Click [Finish] to close the dialog box. Installation of the USB driver and the printer driver is complete. Installing the CAPT… -
Page 56
Before you install the software, make sure that you do the following: — Connect the printer to your computer. (See the Getting Started Guide.) — Turn on the printer. (See «Turning the Printer ON/OFF,» on p. 1-7.) Turn on your computer and start up Windows 98/Me. -
Page 57
Select [Search for the best driver for your device. (Recommended)] in the [Add New Hardware Wizard] dialog box and click [Next]. For Windows Me, select [Specify the location of the driver (Advanced)] and click [Next] in the [Add New Hardware Wizard] dialog box. The dialog box to specify the location of the driver appears. -
Page 58
Check only the [Specify a location] check box, and then click [Browse] to select the driver in the language that you want to install. For example, if your CD-ROM drive is drive [D], browse to [D:\English\Win98], then click [OK]. For Windows Me, check only the [Specify the location] check box, and then click [Browse] to select the driver in the language that you want to install. -
Page 59
Click [Next]. Installation of the USB driver starts. Click [Finish]. The [Add New Hardware Wizard (Canon LASER SHOT LBP-1120)] dialog box appears. 3-12 Installing the CAPT… -
Page 60
Click [Next]. Repeat the procedure from step 2 to step 5. Click [Next]. Installation of the printer driver starts. Installing the CAPT 3-13… -
Page 61
Click [Finish] to accept the default printer name, or enter the name you wish to use, then click [Finish]. When the installation is complete, the following dialog box appears. Click [OK] to close the dialog box. 3-14 Installing the CAPT… -
Page 62
Click [Finish] in the [Add New Hardware Wizard] dialog box. Installation of the USB driver and the printer driver is complete. Add Printer Wizard The screens shown in the instructions below are from Windows 98. Click [Start], point to [Settings], and then click [Printers]. -
Page 63
Double-click [Add Printer]. The [Add Printer Wizard] dialog box appears. Click [Next]. Select [Local printer] and click [Next]. 3-16 Installing the CAPT… -
Page 64
Click [Have Disk] in the [Manufacturers/Printers] dialog box. The [Install From Disk] dialog box appears. Use [Browse] to select the directory or enter the path name that contains the CAPT, then click [OK]. For example, if you are using the CD-ROM to install the CAPT, and your CD-ROM drive is drive [D], the path name would be [D:\English\Win98]. -
Page 65
Select your printer model from the list of printers displayed, then click [Next]. Select the printer port you want to use, and then click [Next]. NOTE Always select the USB port. If you select any other port, you cannot print. -
Page 66: For Windows 2000
When the installation is complete, the following dialog box appears. Click [OK] to close the dialog box. Windows creates the [Canon LASER SHOT LBP-1120] group folder on the Desktop, and the [Canon LASER SHOT LBP-1120] icon is added to the [Printers] folder. For Windows 2000 Plug &…
-
Page 67
Turn on your computer and start Windows 2000. Plug & Play is being carried out and the USB driver, [USB Printing Support] is automatically detected and installed. Log on as the Administrator. NOTE Full access rights are necessary for the installation of the CAPT. The [Found New Hardware Wizard] dialog box appears. -
Page 68
Select [Search for a suitable driver for my device (recommended)] in the [Found New Hardware Wizard] dialog box and click [Next]. NOTE [Unknown] may be displayed as the name of the device. Check only the [Specify a location] check box and click [Next]. -
Page 69
Insert the User Software CD-ROM into the CD-ROM drive and click [Browse] to select the driver in the language that you want to install. For example, if your CD-ROM drive is drive [D], browse to [D:\English\Win2000], then click [OK]. Click [Next] on [Driver Files Search Results]. Click [Yes] if the [Digital Signature Not Found] dialog box appears. -
Page 70
Click [Finish] on the [Found New Hardware Wizard] dialog box. Installation of the USB driver and the printer driver is complete. Add Printer Wizard Log on as the Administrator. NOTE Full control access rights are necessary for the installation of the CAPT. -
Page 71
Double-click [Add Printer]. The [Add Printer Wizard] dialog box appears. Click [Next]. Select [Local printer] and click [Next]. NOTE Placing a check in the [Automatically detect and install my Plug and Play printer] check box is not recommended. 3-24 Installing the CAPT… -
Page 72
Select the printer port you want to use, then click [Next]. NOTE Always select the USB port. If you select any other port, you cannot print. Click [Have Disk] in the [Manufacturers/Printers] dialog box. The [Install From Disk] dialog box appears. -
Page 73
CAPT, then click [OK]. For example, if you are using the CD-ROM to install the CAPT, and your CD-ROM drive is drive [D], the path name would be [D:\English\Win2000]. Select your printer model from the list of printers displayed, then click [Next]. 3-26… -
Page 74
Click [Next] to accept the default printer name, or enter the name you wish to use, then click [Next]. Select whether this printer is shared or not shared with other computers. Click [Next]. Click [Yes] if you want to print a test page, or [No] if you do not want to print a test page, then click [Next]. -
Page 75
Click [OK] to close the dialog box. Windows creates the [Canon LASER SHOT LBP-1120] group folder on the Desktop, and the [Canon LASER SHOT LBP-1120] icon is added to the [Printers] folder. If you opted to print a test page, the page prints after installation completes, and the following dialog box appears. -
Page 76: For Windows Xp
Before you install the software, make sure you do the following: — Connect the printer to your computer. (See the Getting Started Guide.) — Turn on the printer. (See «Turning the Printer ON/OFF,» on p. 1-7.) Turn on your computer and start Windows XP.
-
Page 77
NOTE [Unknown] may be displayed as the name of the device. Uncheck [Search removable media (floppy, CD-ROM)]. Select [Include this location in the search], and click [Browse] to select the driver in the language that you want to install. For example, if your CD-ROM drive is drive [D], browse to [D:\English\WinXP], then click [Next]. -
Page 78
Click [Finish] on the [Found New Hardware Wizard] dialog box. Installation of the USB class driver and the printer driver is complete. Add Printer Wizard Log on as the Administrator. NOTE Full access rights are necessary for the installation of the CAPT. -
Page 79
Double-click [Add a printer]. The [Add Printer Wizard] dialog box appears. Click [Next]. Select [Local printer attached to this computer], then click [Next]. NOTE Placing a check in the [Automatically detect and install my Plug and Play printer] check box is not recommended. 3-32 Installing the CAPT… -
Page 80
Confirm that [Use the following port] is selected and select the printer port you want to use, then click [Next]. NOTE Always select the USB port. If you select any other port, you cannot print. Click [Have Disk] in the [Manufacturer/Printers] dialog box. -
Page 81
CAPT, then click [OK]. For example, if you are using the CD-ROM to install the CAPT, and your CD-ROM drive is drive [D], the path name would be [D:\English\WinXP]. Select your printer model from the list of printers displayed, then click [Next]. 3-34… -
Page 82
Click [Next] to accept the default printer name, or enter the name you wish to use, then click [Next]. Select whether this printer is shared or not shared with other computers. Click [Next]. Installing the CAPT 3-35… -
Page 83
Click [Finish]. Click [Continue Anyway] if the [Hardware Installation] dialog box appears. Windows creates the [Canon LASER SHOT LBP-1120] group folder on the Desktop, and the [Canon LASER SHOT LBP-1120] icon is added to the [Printers and Faxes] folder. 3-36… -
Page 84
When the installation is complete, the following dialog box appears. Click [OK] to close the dialog box. If you opted to print a test page, the page prints after installation completes, and the following dialog box appears. If the page printed correctly, click [OK]. Installing the CAPT 3-37… -
Page 85: Using The Printer On Your Network
The display is shown on the client. Connecting the LBP-1120 as a Network Printer If you plan to share the LBP-1120 on a network, install the print server locally, then make the following settings. For detailed information, see you print server system documentation.
-
Page 86
Select the [Configuration] tab, and then click [Add]. Select [Service], and then click [Add]. Select [Microsoft] in the [Manufacturers] list box. Select [File and printer sharing for Microsoft Networks] in the [Network Services] box, and then click [OK]. Click [File and Print Sharing]. -
Page 87: Printer Settings
I Printer Settings I Share-level Access Control Open the [Canon LASER SHOT LBP-1120 Properties] dialog box, then check [Shared As] in the [Sharing] tab. Enter [Share Name], [Comment], and [Password] as needed. Click [OK]. I User-level Access Control Open the [Canon LASER SHOT LBP-1120 Properties] dialog box, then check [Shared As] in the [Sharing] tab.
-
Page 88
Right-click [Local Area Connection], then select [Properties] from the menu. The [Local Area Connection Properties] dialog box appears. If [File and Printer Sharing for Microsoft Networks] exists in the list, click [OK]. Otherwise, click [Install]. Select [Service], then click [Add]. -
Page 89: Connecting To The Lbp-1120 Already On Your Network
Sharing settings may also be made during installation. Connecting to the LBP-1120 Already on Your Network If the LBP-1120 is already on your network, you can install it in two different ways. The easiest way is using automatic network download. If network download is not available, you can use the Add Printer Wizard.
-
Page 90: Canon Laser Shot Lbp-1120 Group
Canon LASER SHOT LBP-1120 Group When you install the CAPT, the [Canon LASER SHOT LBP-1120] icon is created in the [Printers] folder, and the [Canon LASER SHOT LBP-1120] group folder is created on the Desktop. The [Canon LASER SHOT LBP-1120] group is also added in [Programs] of the [Start] menu.
-
Page 91
Starts the Trouble Shooter program for the CAPT. It helps you solve printing problems in Windows 98/Me or 2000/XP. (See «Using the Trouble Shooter,» on p. 5-21.) I Canon LASER SHOT LBP-1120 Help Selects the Canon LBP-1120 Help file for the CAPT. 3-44 Canon LASER SHOT LBP-1120 Group… -
Page 92: Uninstalling The Capt
IMPORTANT Before uninstalling the CAPT, all running applications must be closed. Make sure that you close all running applications. Open the [Canon LASER SHOT LBP-1120] folder on the Desktop, and then double-click [Canon LASER SHOT LBP-1120 Uninstallation]. The [Canon LASER SHOT LBP-1120 Uninstallation] dialog box appears.
-
Page 93
Click [OK]. Windows is restarted. NOTE • To remove the USB port, see the Getting Started Guide. • When the software is not installed correctly and you need to reinstall it, uninstall first, and then install it again. • In Windows 2000/XP, you cannot uninstall the CAPT unless you have administrative privileges. -
Page 94: Printing A Document
To print a document, follow the procedure below. In the application, with the document open, select [Print] to print your document. In the [Print] dialog box, select your printer name from [Name], and then click [Properties]. The Properties dialog box opens.
-
Page 95: Cancel The Print Job
Cancel the Print Job You can cancel the current print job on the Canon LBP-1120 Status Window. To cancel the print job, follow the procedure below. Start printing. The Status Window appears. Click the You can perform other print job operations on the Status Window.
-
Page 96: Accessing The Properties Dialog Box
Accessing the Properties Dialog Box The Properties dialog box of the printer driver contains several sheets that enable you to set up and control your printer. To access the Properties dialog box, follow the procedure below for your version of Windows.
-
Page 97
NOTE To access the [Printing Preferences] dialog box from the [Printers] folder, you need full access rights for the printer. If you cannot access the [Printing Preferences] dialog box from the [Printers] folder, access it from the application. Click [Start], point to [Settings], and then click [Printers]. -
Page 98: Using The Printing Options
Using the Printing Options You can specify a variety of printer settings in the Properties dialog box. When you open the Properties dialog box, you will find several tabs. You can switch between sheets by clicking the tabs, and then specify the settings inside the displayed sheet.
-
Page 99
Details Tab Specifies the printer port and time-out settings. Refer to your operating system documentation for further instructions. 3-52 Using the Printing Options… -
Page 100
Sharing Tab Specifies the printer sharing-settings. This tab is available only when file and printer sharing is turned on. Refer to your operating system documentation for further instructions. Page Setup Tab Specifies the printer settings described below. Using the Printing Options… -
Page 101
Profile Lets you select the printer driver settings saved as profiles. (See «Using Profiles for Printing,» on p. 3-77.) Page Size Lets you select the paper size you are working with in your application. (Letter, Legal, A4, B5, Executive, Envelope DL, Envelope #10, Envelope C5, Envelope Monarch, Index Card, and 3 custom paper sizes. -
Page 102: Finishing Tab
[Heavy Paper High], even when [Plain Paper] or [Heavy Paper] is specified. View Settings Displays the list of your current printer settings. (See «Viewing the Printer Settings,» on p. 3-80.) Custom Paper Size Allows you to define custom paper sizes (forms) for quick selection.
-
Page 103: Quality Tab
Quality Tab Specifies the resolution, halftoning method, brightness, and contrast settings. Resolution Lets you specify the printer’s resolution in dots per inch (600, 300). (See «Specifying the Print Quality,» on p. 3-73.) Halftoning Lets you specify the halftoning methods (Pattern 1, Pattern 2, and Smooth). (See «Specifying the Print Quality,»…
-
Page 104: For Windows 2000/Xp
Screens examples are Windows 2000. General Tab Lets you print a test page, or display the [Printing Preferences] dialog box to specify the printer driver settings. Refer to your operating system documentation for further instructions. Using the Printing Options 3-57…
-
Page 105
Sharing Tab Specifies the printer sharing-settings. Refer to your operating system documentation for further instructions. Ports Tab Specifies the port to which the printer is attached. Refer to your operating system documentation for further instructions. 3-58 Using the Printing Options… -
Page 106
Advanced Tab Lets you define print spool settings. Refer to your operating system documentation for further instructions. Security Tab Lets you specify security settings. Refer to your operating system documentation for further instructions. Using the Printing Options 3-59… -
Page 107
7.62 — 21.59 cm) that were set in the [Forms] tab in the print server’s Properties dialog box. Only forms that conform to the printer’s specifications are listed as available. When you choose a form in the list and then click [OK], the form information is copied to the selected form in the [Selected Forms] list on the [Select Forms] sheet. -
Page 108
Page Setup Tab Specifies the printer settings described below. Profile Lets you select the printer driver settings saved as profiles. (See «Using Profiles for Printing,» on p. 3-77.) Page Size Lets you select the paper size you are working with in your application. (Letter, Legal, A4, B5, Executive, Envelope DL, Envelope #10, Envelope C5, Envelope Monarch, Index Card, and 3 custom paper sizes. -
Page 109
[Heavy Paper High], even when [Plain Paper] or [Heavy Paper] is specified. View Settings Displays the list of your current printer settings. (See «Viewing the Printer Settings,» on p. 3-80.) Overlay Allows you to add data you use often, such as a logo, to the print data from an application. -
Page 110
If there is no check in the check box, it is spooled in RAW format. If you have the printer set up as a network printer, it is set to spool in RAW format. Using the Printing Options… -
Page 111
Quality Tab Specifies the resolution, halftoning method, brightness, and contrast settings. Resolution Lets you specify the printer’s resolution in dots per inch (600, 300). (See «Specifying the Print Quality,» on p. 3-73.) Halftoning Lets you specify the halftoning methods (Pattern 1, Pattern 2, and Smooth). (See «Specifying the Print Quality,»… -
Page 112: Printing Multiple Pages On One Sheet
Printing Multiple Pages on One Sheet Multiple pages can be printed on one sheet of paper. The number of document pages which can be printed on one sheet of paper is 2, 4, 8, or 9. Display the [Page Setup] sheet. Using the Printing Options 3-65…
-
Page 113
Select the required page layout from [Page Layout]. Select the required page order from [Page Order]. Click [OK]. 3-66 Using the Printing Options… -
Page 114: Scaling A Document
Display the [Page Setup] sheet. Select the page size from [Page Size]. If this driver setting is inaccessible from the application, click [Printer Settings] or [Page Settings] (depending on the application) on the [File] menu to specify the page size.
-
Page 115
Display the [Page Setup] sheet. Select the page size from [Page Size]. If this driver setting is inaccessible from the application, click [Printer Settings] or [Page Settings] (depending on the application) on the [File] menu to specify the page size. -
Page 116: Selecting The Custom Paper Size Setting
Selecting the Custom Paper Size Setting To define the custom paper sizes, follow the procedure below. Display the [Page Setup] sheet, and then click [Custom Paper Size]. The [Custom Paper Size Setting] dialog box appears. Select a paper size form from [Custom Paper List], and then specify the height and width of the paper to be used.
-
Page 117: Using The Overlay Printing
If you wish, enter a custom paper name in [Name]. [Form1], [Form 2], and [Form 3] have been set as default. Click [OK]. The display returns to the [Page Setup] sheet. The name for the custom form you have defined is displayed in the list of [Page Size] and [Output Size]. Using the Overlay Printing An overlay allows you to add data you use often, such as a logo, to the print data from an application.
-
Page 118
Printing with an Overlay To perform overlay printing using a form file stored in your computer, follow the procedure below. In the application, select [Print], and then click [Properties] in the [Print] dialog box. Display the [Page Setup] sheet, and then click [Overlay]. The [Overlay] dialog box appears Using the Printing Options 3-71… -
Page 119
Click [Browse], and then select the name of a form file, and then click [OK]. The name of a form file is displayed in [File Name]. Specify the overlay settings as needed. You can specify the following items for overlay printing. Overlay Placement: Background If you want the overlay to appear in back of the application data, check the [Background] check box. -
Page 120: Specifying The Print Quality
Click [OK] in the [Overlay] dialog box. Click [OK] in the [Page Setup] sheet. Click [OK] in the [Print] dialog box. The document is printed with the selected form file overlaid. Specifying the Print Quality The [Quality] sheet enable you to specify print quality settings. Follow the procedure below to specify the print quality settings.
-
Page 121: Specifying The Toner Density
Specify the required resolution in [Resolution]. Specify the halftoning method that is suitable for the image you print in [Halftoning]. The halftoning methods you can specify are as follows: Pattern 1 (Default) Suitable for printing general document. Pattern 2 Images with distinct outlines, such as letters and figures, are printed with a higher resolution.
-
Page 122
In the application, select [Print], and then click [Properties] in the [Print] dialog box. Display the [Quality] sheet, and then click [More Options]. The [More Options] dialog box appears. Move the slide bar left and right to change the toner density. If you check the [Toner Save] check box, you can print only alternate data bits so that toner consumption is reduced. -
Page 123: Using The Automatic Image Refinement
The document is printed under the toner density setting you have specified. Using the Automatic Image Refinement Automatic Image Refinement is a printer technology from Canon, with which the printer automatically senses and refines the jagged edges and ragged curves of characters and graphics.
-
Page 124: Using Profiles For Printing
What Is a Profile? Various printer driver settings are saved as profiles. You can also save printer driver settings that you frequently use as profiles. When you select a profile, the document is printed under the saved settings. You can save up to 50 profiles.
-
Page 125
Display either the [Page Setup], [Finishing], or [Quality] sheet. Select the profile you want from [Profile]. Click [OK]. 3-78 Using the Printing Options… -
Page 126
For detailed information on adding or editing a profile, right-click the item of interest to display the pop-up help. NOTE • If you change the name assigned to your printer, you cannot retrieve any profiles saved for that printer. To retrieve the profiles, rename the printer to its original name. •… -
Page 127: Viewing The Printer Settings/Restoring The Default Settings
Viewing the Printer Settings/Restoring the Default Settings Viewing the Printer Settings When you want to check the current printer settings, follow the procedure below. Display either the [Page Setup], [Finishing], or [Quality] sheet. Click [View Settings]. The [View Settings] dialog box appears.
-
Page 128: Checking The Status Of A Print Job
Checking the Status of a Print Job You can track and control your print jobs using the Canon LASER SHOT LBP-1120 Status Window. The Status Window tells you the current printing job status and the printer’s status by animations, sounds and icons.
-
Page 129: Other Functions
• Status Bar — Displays the name of the printer port and describes menu options as you move your mouse over them. NOTE If you want to hear the sound messages, you need to have a sound card and install the sound card driver.
-
Page 130: Opening The Status Window
You can open the Status Window by clicking on the Status Window icon in the Windows taskbar and selecting [Canon LASER SHOT LBP-1120]. If multiple LBP-1120 printers are connected, select a printer from the list. The Status Window opens and displays information for the selected printer.
-
Page 131: Status Options
Status Options This dialog box lets you define when and how you want the LBP-1120 Status Window to display. You can also set up sounds that play when there are errors. I Status Window • Display Printer Status Window while printing — The Status Window opens automatically each time you print.
-
Page 132
— The Status Window is continually monitoring the printer. • Watches over the status only while status window is displaying — The Status Window is monitoring the printer status only while the Status Window is being displayed. • Watches over the status only while printing — The Status Window is monitoring the printer only when printing a job. -
Page 133: Network Printer Status
Network Printer Status The status of a network printer can be viewed on the print server as well as the client. If you open the Status Window when the print server is not running, it will connect automatically when the print server is running.
-
Page 134: Maintenance
Cleaning and Handling the Printer ……..
-
Page 135: Replacing The Toner Cartridge
When you find such a print quality problem, try the following procedure. Then replace the toner cartridge with a new one. When you replace the toner cartridges, be sure to use the right one for this printer: a Canon EP-22 cartridge. WARNING The fixing assembly inside the printer gets extremely hot.
-
Page 136: Before Replacing The Toner Cartridge
Grasp the top of the front cover on both sides, then gently pull the cover until it is fully open. Grasp the cartridge by its handle and lift it out of the printer. IMPORTANT •…
-
Page 137
• Do not open the drum’s protective shutter on the cartridge. • Do not touch the drum’s protective shutter. Avoid holding the cartridge in such a way that your hand is touching the drum’s protective shutter. Hold the cartridge, then gently rock it from side to side five or six times to distribute the toner evenly inside the cartridge. -
Page 138
IMPORTANT If the toner is not evenly distributed inside the cartridge, it can cause streaking or fading on the printed page. Insert the toner cartridge back into the printer. Close the front cover immediately after inserting a cartridge. IMPORTANT •… -
Page 139: Replacing The Toner Cartridge
• Do not put your hand inside the front cover immediately after the printer has been used as the fixing assembly inside the printer gets extremely hot. Be careful not to touch any of the parts inside the cover except those specified in this manual.
-
Page 140
Before you install the cartridge, ensure it has adjusted to room temperature especially if the toner cartridge has been moved from a cold to a warm location. If a cold cartridge is installed in the printer, condensation may form inside the cartridge and cause a reduction in print quality. -
Page 141
Place the cartridge on a sturdy surface. Snap the tab at the end of the cartridge backwards and fold it back and forth until it is loose. While holding the cartridge firmly with one hand, pull the sealing tape in the direction indicated in the illustration below. IMPORTANT •… -
Page 142
Replacement of the toner cartridge is complete. After you install a new toner cartridge, you must clean the printer by using the cleaning function of the CAPT. Refer to the procedure in the next section to use the cleaning function. -
Page 143: Cleaning
Toner cartridge recycling cannot succeed without your help. We would like to encourage you to support the Canon Cartridge Recycling Program and bring your used cartridge to the CANON distributor from where you have purchased the cartridge, or to your nearest CANON…
-
Page 144: Handling Toner Cartridges
When printing starts, the Status Windows message area displays [Cleaning] and when printing completes, it returns to normal. IMPORTANT While cleaning is in progress, you cannot pause the printing or changing paper setting. Handling Toner Cartridges Toner cartridges consist of light-sensitive parts and precision parts. Rough handling of the toner cartridge can cause the cartridge to break or reduce the print quality.
-
Page 145
• Do not open the drum’s protective shutter on the cartridge. • Do not touch the drum’s protective shutter. Avoid holding the cartridge in such a way that your hand is touching the drum’s protective shutter. • Do not leave or place the cartridge where it is exposed to direct sunlight. •… -
Page 146: Storing Toner Cartridges
Storing Toner Cartridges Follow the instructions below to store replacement toner cartridges or cartridges removed from the printer for repair, or cartridges that have been taken out of the printer for moving purposes. IMPORTANT • Store the toner cartridge in its protective bag. Do not open the bag until you are ready to install the new toner cartridge in the printer.
-
Page 147: Cleaning And Handling The Printer
Cleaning and Handling the Printer This section describes how to care for and maintain your printer. Regular care and maintenance helps keep your printer in good working order. Cleaning the Printer Follow the instructions below to regularly clean the printer, so it remains in top operating condition, and continues to deliver high quality performance.
-
Page 148
If you use a neutral detergent for cleaning, wipe off the neutral detergent remaining on the printer with a soft cloth, moistened with water. After removing stains, wipe the printer with a soft, dry cloth to remove the remaining moisture. -
Page 149: Handling The Printer
After unplugging it from the AC outlet, wait until the printer has cooled off completely before covering it with a dust cover. • If you are not going to use the printer for an extended period of time, unplug it from the AC outlet. •…
-
Page 150: Troubleshooting
Before Removing Paper Jams Inside the Printer ……..
-
Page 151: When You Have Trouble Printing
When You Have Trouble Printing If your printer is unable to print or you have problems with the printer or print quality, use this map to find the appropriate page for help. Printer is unable to print Error message displayed on the…
-
Page 152
Shooter,» on p. 5-21.) The printer is not connected to the USB port. (See the Getting Started Guide .) The printer driver is not installed correctly. (See «Uninstalling the CAPT,» on p. 3-45.) (See «Installing the CAPT,» on p. 3-3.) The USB class driver is not installed correctly. -
Page 153: Problems And Solutions Without Messages
five or six times to evenly distribute the toner inside, and then insert it back into the printer. If the problem persists, replace the toner cartridge with a new one. (See «Replacing the Toner Cartridge,» on p. 4-6.) Printout has black specks.
-
Page 154: Printer Problems
Cause 2 There is a strong light source near the printer. Remedy Make sure that there is no strong light source near the printer. If there is, move the printer or the light source. Printer Problems Printer does not print.
-
Page 155
No power is supplied. Cause 1 Power code may not be plugged in. Remedy Make sure that the power cord is securely plugged in to both the printer and the AC outlet. Cause 2 AC outlet may not be supplying power. -
Page 156: Capt Problems
Try a different cable. CAPT Problems CAPT is not working properly. Cause 1 The CAPT for LBP-1120 is not selected as the default printer driver. Remedy Specify the CAPT for the LBP-1120 as the default driver. Cause 2 The software may not be installed properly.
-
Page 157
CD-ROM Menu does not appear automatically. Cause 1 [Autorun CD-ROM Menu] is unchecked in the CD-ROM menu. Remedy Start CD-ROM menu manually, and check the [Autorun CD-ROM Menu] check box. Cause 2 [Auto insert notification] is unchecked. Remedy From [Device Manager] make sure that [Auto insert notification] is checked in the CD-ROM drive propperties dialog box. -
Page 158: Clearing Paper Jams
In this case, check various sections of the printer again to remove all pieces of the paper from inside the printer.
-
Page 159
If you get loose toner powder on your hands or clothing, wash it off with cold water immediately. • To avoid possible damage to the printer, do not touch the pins near the right end of the transfer roller. •… -
Page 160: Before Removing Paper Jams Inside The Printer
CAUTION Remove watches and any bracelets or rings when touching the inside of the printer. These items may be damaged if they come into contact with parts inside the printer. IMPORTANT To avoid damaging the printer, check that the pressure release levers (black) were released when the front cover was opened.
-
Page 161
Open the front cover with both hands until it stops. Remove the cartridge by grasping the cartridge’s handle and lifting it out of the printer. IMPORTANT Do not expose the cartridge to light for more than 5 minutes. If necessary, put the cartridge in its original protective bag or wrap it with a thick cloth to prevent exposure to light. -
Page 162: Paper Jam In The Paper Feed Area
Paper Jam in the Paper Feed Area I If only a small portion of the paper has moved into the printer Use both hands to carefully pull the jammed paper straight up and out from the multi-purpose tray. IMPORTANT •…
-
Page 163
Roll the edge of the paper inwards so that the printed surface is on the inside of the roll. Gently pull the rolled up paper out of the printer. If the leading edge of the paper is visible but has not entered the imaging area, pull the paper forwards and roll it inwards. -
Page 164: Paper Jams Near The Imaging Area
IMPORTANT Do not remove jammed paper at a sharp upwards angle. The toner on the paper will stain the printer and cause a permanent reduction in print quality. Replace the cartridge and close the front cover. The paper release levers automatically return to their original positions.
-
Page 165
Carefully pull the jammed paper forwards and out of the printer. IMPORTANT Use both hands to remove jammed paper from the printer. Replace the cartridge and close the front cover. The paper release levers automatically return to their original positions. -
Page 166: Paper Jam In The Face-Down Delivery Area
Carefully pull the jammed paper through the rollers and out of the printer. IMPORTANT Never pull the paper out of the printer by pulling it forwards if the paper is behind the face-down delivery rollers. This could result in damage to the face-down delivery rollers.
-
Page 167: Paper Jam In The Face-Up Delivery Area
Use both hands to remove jammed paper from the printer. If the jammed paper is badly folded, similar to the folds of an accordion, ease the jammed paper loose and then pull it out of the printer. 5-18 Clearing Paper Jams…
-
Page 168
IMPORTANT If the paper does not come out of the printer easily, check that the pressure release levers (black) have been released. (See «Before Removing Paper Jams Inside the Printer,» on p. 5-11.) Remove the toner cartridge from the printer. -
Page 169
NOTE • After you replace the cartridge and close the front cover, the printer should be ready for printing. If the printer returns to the ready state for printing, troubleshooting has been successful. If the printer does not return to the ready state for printing, paper may still be jammed in the printer. -
Page 170: Using The Trouble Shooter
LASER SHOT LBP-1120 Trouble Shooter]. The [Trouble Shooter] dialog box appears. The Trouble Shooter can be launched by double-clicking [Canon LASER SHOT LBP-1120 Trouble Shooter] in the [Canon LASER SHOT LBP-1120] group folder on the Desktop. Using the Trouble Shooter…
-
Page 171
Select the printer that troubleshooting will be carried out for © click [Yes]. The Trouble Shooter checks your file. If a problem is found, messages are displayed on the screen. Follow the instructions on the screen to solve the problem. -
Page 172
When the Trouble Shooter is done checking your files, a dialog box as shown below appears. Click [OK]. The [Windows Restart] dialog box appears. If a problem is not found, the display returns to Windows. NOTE Check the [Save Result] check box, if you want to save the results as a text file. Click [Windows Restart]. -
Page 173: Responding To Error Messages
<Printer Ready> automatically. Change paper to… Cause The paper in the printer and the specified paper are not the same size. Remedy Replace the paper so that it matches the specified paper size, or use the [Resume Job] menu option in the Status Window to start printing on the paper in the printer.
-
Page 174
Port Busy Cause The printer port is being used by other equipment. Remedy Wait a while until the printer port being used becomes available. Printing Failed Cause The print job was too complex for available memory. Remedy 1 Try reprinting the job with a lower resolution, such as 300 dpi. -
Page 175
Service Error Cause The Canon Advanced Printing Technology has detected an internal problem in the LBP-1120 engine. Remedy Follow the procedure described below to solve the problem: 1. Turn off and unplug the printer. 2. Open the front cover and remove the toner cartridge. -
Page 176: Appendix
This chapter summarizes and contains the index and glossary for this manual, and the specifications of the printer. Specifications …………6-2 Glossary .
-
Page 177: Specifications
Desktop page printer Electrophotographic printing using laser beam scanning 10 pages per minute (A4-size paper) 0 second (Less than 8 seconds when the printer is turned on) Face-down delivery: Less than 18 seconds* Face-up delivery: Less than 17 seconds* *Note: printing on A4-size paper using the multi-purpose tray at 20°C (68°F)
-
Page 178
Mass EP-22 cartridge: I Software Specifications Printing Software CAPT (Canon Advanced Printing Technology) Data cannot be printed inside a 5 mm wide border around the paper. Printable Area (Data cannot be printed inside a 10 mm wide border around the envelopes.) -
Page 179: Glossary
Alert A message displayed in the Printer Status Window when a problem or condition caused the Canon Advanced Printing Technology to pause printing. You must follow the on-screen instructions before printing resumes. Attributes The characteristics of a font. These include symbol set, orientation, pitch, point size, spacing, weight, and height.
-
Page 180
Canon Advanced Printing Technology (CAPT) Software that extends the power of the Windows operating system to a printer to speed up and simplify printing. The Canon Advanced Printing Technology provides more printing control and bi-directional communication between the printer and a computer running a Windows application. -
Page 181
A program that controls how the computer and an external device interact. The printer driver supplies Windows with information such as descriptions of the fonts and features of the installed printer. When you print with the Canon Advanced Printing Technology, you are using its printer driver. -
Page 182
The cable, with bi-directional capability, used to create the interface between a printer and a computer. Interface port The port through which the printer communicates with the computer. The LBP-1120 has a USB port located on the back of the printer. See also USB interface. Italic A font style distinguished by slanted characters (the upright strokes of the characters are at an angle to the vertical axis). -
Page 183
PDF documents can be read or printed out with Adobe’s Acrobat Reader program. Peer-to-peer connection A network connection between a computer and a printer (or other device) that does not go through a server. See also Server, Client. Physical RAM Random access memory (RAM) that is physically present in the computer in the form of memory chips, as opposed to virtual memory. -
Page 184
A program that controls how the computer and printer interact. The printer driver supplies Windows with information such as descriptions of fonts and features of the installed printer. When you print with the Canon Advanced Printing Technology, you are using its printer driver. -
Page 185
Enlarging or reducing the printed image. SCoA ScoA is an original Canon print data compressor and forwarding technology, which utilizes the full potential of your computer to make CAPT high speed printing a reality. Further, as compression and forwarding are efficient, only a small amount of memory is used, and regardless of how much data you send, you do not need to increase RAM. -
Page 186
You need to use a high-quality shielded interface cable with this printer. Sound file A file containing audio information that can be played by a sound driver. The Canon Advanced Printing Technology includes sound files that play to indicate printing conditions. -
Page 187
Toolbar In the Status Window, the area in the tab window that includes buttons for pausing, resuming, and deleting the current print job. Transfer roller Presses the paper against the drum, to aid the transfer of toner to the paper. Trouble Shooter A program that helps you solve printing problems. -
Page 188
WYSIWYG Pronounced wizzy-wig, an acronym for «what you see is what you get.» For example, when you format a paragraph, the line breaks that appear on the printed page are exactly the same as they are on the screen. Glossary 6-13… -
Page 189: Index
Add Printer Wizard For Windows 2000, 3-23 For Windows 98/Me, 3-15 For Windows XP, 3-31 Automatic Image Refinement Using, 3-76 Canon LASER SHOT LBP-1120 Group Described, 3-43 Help, 3-44 Status Window, 3-43 Trouble Shooter, 3-44 Uninstallation, 3-43 CAPT(Canon Advanced Printing Technology)
-
Page 190
Described, 1-4 Printing from, 2-19 Messages List of, 5-24 Multi-Purpose Tray Described, 1-4 Loading, 2-11 Network Connecting to, 3-38 Network Printer Connecting through print server, 3-42 Status, 3-86 Options Menu Described, 3-81 Overlay Overview, 3-70 Printing with, 3-71 Page Setup Tab… -
Page 191
Cleaning, 4-14 Handling, 4-16 Turning OFF, 1-8 6-16 Index Turning ON, 1-7 Using on network, 3-38 Printer Properties Accessing for Windows 2000/XP, 3-49 Accessing for Windows 98/Me, 3-49 Advanced Tab, 3-59 Details Tab, 3-52 Finishing Tab, 3-55 General Tab, 3-51, 3-57… -
Page 192
Animation Area, 3-82 Closing, 3-83 Error Message Area, 3-82 Job Information Area, 3-82 Menu bar, 3-81 Opening, 3-83 Printer Icon, 3-82 Printer Status Message Area, 3-82 Progress Bar, 3-82 Status Bar, 3-82 Tab Window, 3-82 Toolbar, 3-82 Terminology Glossary, 6-4… -
Page 193
6-18 Index… -
Page 194
CANON INC. 30-2, Shimomaruko 3-chome, Ohta-ku, Tokyo 146-8501, Japan CANON U.S.A., INC. One Canon Plaza, Lake Success, NY 11042, U.S.A. CANON CANADA INC. 6390 Dixie Road Mississauga, Ontario L5T 1P7, Canada CANON EUROPA N.V. Bovenkerkerweg 59-61 P.O. Box 2262, 1180 EG Amstelveen, The Netherlands CANON COMMUNICATION &…
Раздел: Офисная Техника
Тип: Лазерный Принтер
Инструкция к Лазерному Принтеру Canon LBP-1120
RUS
LBP-1120
Лазерный принтер
Руководство
пользователя
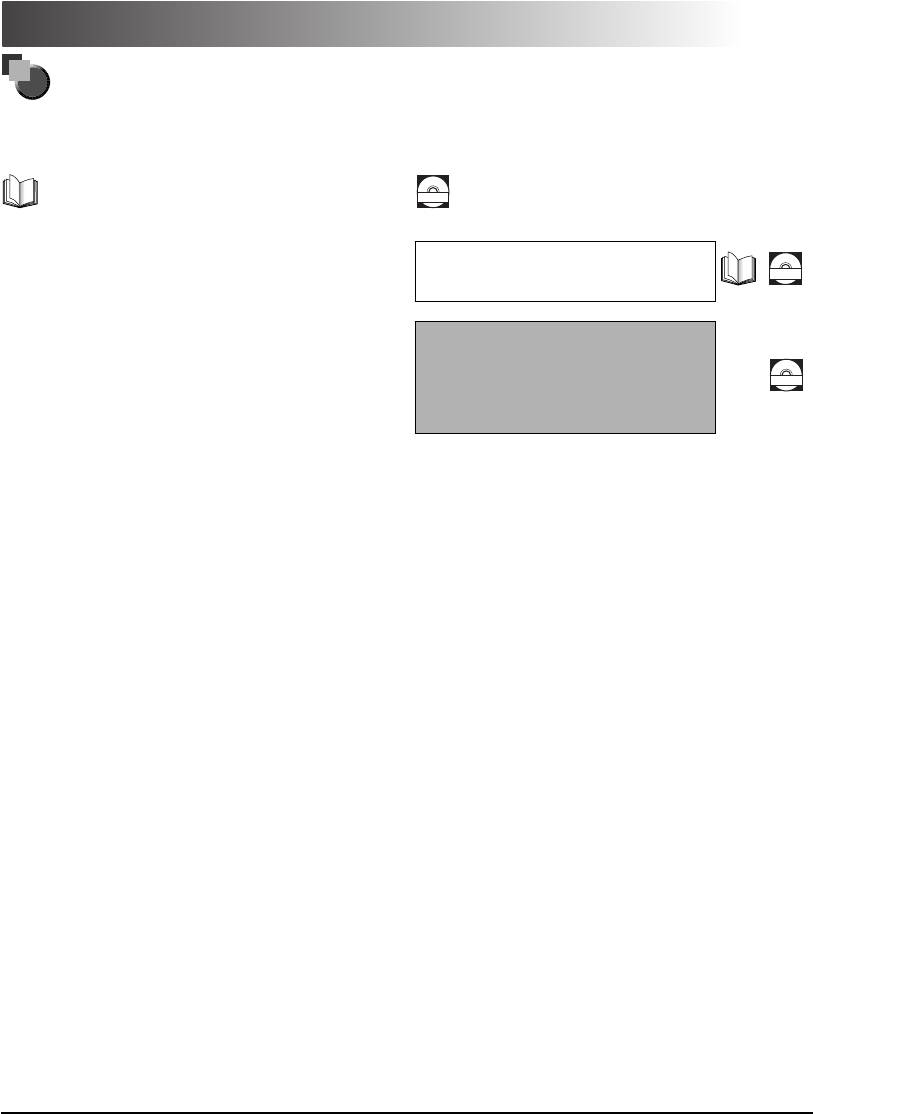
Руководства к принтеру
Для настоящего принтера подготовлены нижеуказанные руководства. Подробная информация
приведена в них.
Руководства, отмеченные этой пиктограммой, составлены в
Руководства, отмеченные этой пиктограммой, составлены в
виде PDF-файла, запомненного на прилагаемом к принтеру
виде книги.
CD-ROM
CD-ROM.
•
Установка принтера
Руководство по
•
Подключение принтера к компьютеру
CD-ROM
•
Установка драйвера принтера
начапу работы
•
Использование принтера
Руководство
•
Настройка принтера
•
Техобслуживание и способы устранения
пользователя
CD-ROM
неисправностей
(Настоящее
руководство)
Иллюстрация на обложке настоящего руководства может отличаться от принтера, приобретенного вами, незначительно.

Структура руководства
Глава 1
Перед приступлением к работе с принтером
Глава 2
Подача и вывод бумаги
Глава 3
Использование системы печати САРТ
Глава 4
Техническое обслуживание
Глава 5
Устранение неполадок
Глава 6
Приложение
Технические характеристики, глоссарий и предметный указатель
•
Некоторые данные, указанные в настоящем руководстве, могут не соответствовать полностью данным последней модели продукции,
охватываемой настоящим руководством. В случае, если вам нужны точные технические характеристики, то обращайтесь, пожалуйста, к
фирме Canon.
•
Никакая часть настоящего руководства не должна быть фотокопирована, воспроизведена или переведена на какой-либо язык, если на то
нет письменного разрешения фирмы Canon Inc.

СОДЕРЖАНИЕ
Введение . . . . . . . . . . . . . . . . . . . . . . . . . . . . . . . . . . . . . . . . . . . . . . . . . . . . . . . vii
Как пользоваться настоящим руководством . . . . . . . . . . . . . . . . . . . . . . . vii
Пиктограммы, примененные в настоящем руководстве . . . . . . . . . . . . . . .vii
Аббревиатуры, примененные в настоящем руководстве. . . . . . . . . . . . . . viii
Правовая информация . . . . . . . . . . . . . . . . . . . . . . . . . . . . . . . . . . . . . . . . . . . .ix
По правилам FCC (Federal Communications Commission) . . . . . . . . . . . . . . . ix
По директиве по электромагинтной совместимости (ЕМС)
(Для модели на 220 — 240 В) . . . . . . . . . . . . . . . . . . . . . . . . . . . . . . . . . . . . . . x
По правилам безопасности по работе лазерной аппаратуры
(Для моделей на 100 — 127 В/220 — 240 В) . . . . . . . . . . . . . . . . . . . . . . . . . . . . xi
Международная программа Energy Star . . . . . . . . . . . . . . . . . . . . . . . . . . . .xii
Торговые марки . . . . . . . . . . . . . . . . . . . . . . . . . . . . . . . . . . . . . . . . . . . . . . . .xii
Авторское право . . . . . . . . . . . . . . . . . . . . . . . . . . . . . . . . . . . . . . . . . . . . . . .xii
Освобождение от ответственности . . . . . . . . . . . . . . . . . . . . . . . . . . . . . . . xiii
Правовое ограничение по использованию вашего устройства и
изображений. . . . . . . . . . . . . . . . . . . . . . . . . . . . . . . . . . . . . . . . . . . . . . . . . . xiii
Важные инструкции по обеспечению безопасности . . . . . . . . . . . . . . . . . xv
Установка принтера. . . . . . . . . . . . . . . . . . . . . . . . . . . . . . . . . . . . . . . . . . . . xv
Электропитание . . . . . . . . . . . . . . . . . . . . . . . . . . . . . . . . . . . . . . . . . . . . . . . xvi
Обращение с принтером . . . . . . . . . . . . . . . . . . . . . . . . . . . . . . . . . . . . . . . .xvii
Техобслуживание принтера. . . . . . . . . . . . . . . . . . . . . . . . . . . . . . . . . . . . . . xix
Расходные детали . . . . . . . . . . . . . . . . . . . . . . . . . . . . . . . . . . . . . . . . . . . . . xx
Глава 1 Перед приступлением к работе с принтером
Отличительные особенности . . . . . . . . . . . . . . . . . . . . . . . . . . . . . . . . . . . . . 1-2
Онструкция принтера и функции составных деталей . . . . . . . . . . . . . . . . 1-4
Конструкция принтера. . . . . . . . . . . . . . . . . . . . . . . . . . . . . . . . . . . . . . . . . . 1-4
Внутри передней крышки . . . . . . . . . . . . . . . . . . . . . . . . . . . . . . . . . . . . . . . 1-6
Включение/выключение питания принтера. . . . . . . . . . . . . . . . . . . . . . . . . 1-7
Включение питания принтера. . . . . . . . . . . . . . . . . . . . . . . . . . . . . . . . . . . . 1-7
Выключение питания принтера . . . . . . . . . . . . . . . . . . . . . . . . . . . . . . . . . . 1-8
Глава 2 Подача и вывод бумаги
Требования к бумаге. . . . . . . . . . . . . . . . . . . . . . . . . . . . . . . . . . . . . . . . . . . . .2-2
Виды используемой бумаги . . . . . . . . . . . . . . . . . . . . . . . . . . . . . . . . . . . . . .2-2
Неиспользуемая бумага. . . . . . . . . . . . . . . . . . . . . . . . . . . . . . . . . . . . . . . . .2-5
Хранение бумаги . . . . . . . . . . . . . . . . . . . . . . . . . . . . . . . . . . . . . . . . . . . . . .2-6
iv

Обращение с бумагой . . . . . . . . . . . . . . . . . . . . . . . . . . . . . . . . . . . . . . . . . . 2-7
Вывод бумаги. . . . . . . . . . . . . . . . . . . . . . . . . . . . . . . . . . . . . . . . . . . . . . . . . . . 2-8
Выбор направления вывода бумаги. . . . . . . . . . . . . . . . . . . . . . . . . . . . . . . 2-8
Вывод бумаги печатью вниз . . . . . . . . . . . . . . . . . . . . . . . . . . . . . . . . . . . . . 2-9
Вывод бумаги печатью вверх . . . . . . . . . . . . . . . . . . . . . . . . . . . . . . . . . . . 2-10
Загрузка бумаги в универсальный лоток . . . . . . . . . . . . . . . . . . . . . . . . . 2-11
Загрузка бумаги . . . . . . . . . . . . . . . . . . . . . . . . . . . . . . . . . . . . . . . . . . . . . . 2-11
Загрузка конвертов в универсальный лоток . . . . . . . . . . . . . . . . . . . . . . 2-14
Подготовка конвертов . . . . . . . . . . . . . . . . . . . . . . . . . . . . . . . . . . . . . . . . 2-14
Загрузка конвертов . . . . . . . . . . . . . . . . . . . . . . . . . . . . . . . . . . . . . . . . . . . 2-15
Подача бумаги в лоток ручной подачи . . . . . . . . . . . . . . . . . . . . . . . . . . . . 2-19
Глава 3 Использование системы печати САРТ
Установка САРТ. . . . . . . . . . . . . . . . . . . . . . . . . . . . . . . . . . . . . . . . . . . . . . . . . 3-3
Для Windows 98/Me . . . . . . . . . . . . . . . . . . . . . . . . . . . . . . . . . . . . . . . . . . . . 3-3
Для Windows 2000 . . . . . . . . . . . . . . . . . . . . . . . . . . . . . . . . . . . . . . . . . . . . 3-19
Для Windows XP . . . . . . . . . . . . . . . . . . . . . . . . . . . . . . . . . . . . . . . . . . . . . . 3-29
Использование принтера в сети. . . . . . . . . . . . . . . . . . . . . . . . . . . . . . . . . . 3-39
Подсоединение LBP-1120 в качестве сетевого принтера . . . . . . . . . . . . 3-39
Соединение с LBP-1120, который уже подключен к сети . . . . . . . . . . . . 3-44
Группа Canon LASER SHOT LBP-1120. . . . . . . . . . . . . . . . . . . . . . . . . . . . . . 3-45
Удаление CAPT . . . . . . . . . . . . . . . . . . . . . . . . . . . . . . . . . . . . . . . . . . . . . . . . 3-47
Печать документа . . . . . . . . . . . . . . . . . . . . . . . . . . . . . . . . . . . . . . . . . . . . . . 3-49
Отмена задания на печать . . . . . . . . . . . . . . . . . . . . . . . . . . . . . . . . . . . . . . . 3-50
Доступ к диалоговому окну Свойства . . . . . . . . . . . . . . . . . . . . . . . . . . . . 3-51
Для Windows 98/Me . . . . . . . . . . . . . . . . . . . . . . . . . . . . . . . . . . . . . . . . . . . 3-51
Для Windows 2000/XP . . . . . . . . . . . . . . . . . . . . . . . . . . . . . . . . . . . . . . . . . 3-52
Использование опций печати . . . . . . . . . . . . . . . . . . . . . . . . . . . . . . . . . . . . 3-54
Для Windows 98/Me . . . . . . . . . . . . . . . . . . . . . . . . . . . . . . . . . . . . . . . . . . . 3-54
Для Windows 2000/XP . . . . . . . . . . . . . . . . . . . . . . . . . . . . . . . . . . . . . . . . . 3-61
Печать множества страниц на одном листе . . . . . . . . . . . . . . . . . . . . . . . 3-69
Масштабирование документа. . . . . . . . . . . . . . . . . . . . . . . . . . . . . . . . . . . 3-71
Выбор пользовательского размера бумаги . . . . . . . . . . . . . . . . . . . . . . . . 3-73
Печать с наложением . . . . . . . . . . . . . . . . . . . . . . . . . . . . . . . . . . . . . . . . . 3-74
Задание параметров качества печати . . . . . . . . . . . . . . . . . . . . . . . . . . . 3-78
Задание плотности тонера . . . . . . . . . . . . . . . . . . . . . . . . . . . . . . . . . . . . . 3-79
Использование технологии Автоматического улучшения
изображения . . . . . . . . . . . . . . . . . . . . . . . . . . . . . . . . . . . . . . . . . . . . . . . . 3-81
Использование конфигураций для печати . . . . . . . . . . . . . . . . . . . . . . . . 3-82
Просмотр параметров принтера/Восстановление параметров
по умолчанию . . . . . . . . . . . . . . . . . . . . . . . . . . . . . . . . . . . . . . . . . . . . . . . . 3-84
Проверка состояния задания на печать. . . . . . . . . . . . . . . . . . . . . . . . . . . 3-86
Использование окна состояния . . . . . . . . . . . . . . . . . . . . . . . . . . . . . . . . . 3-86
v

Открывание окна состояния. . . . . . . . . . . . . . . . . . . . . . . . . . . . . . . . . . . .3-88
Закрывание окна состояния. . . . . . . . . . . . . . . . . . . . . . . . . . . . . . . . . . . .3-88
Параметры состояния . . . . . . . . . . . . . . . . . . . . . . . . . . . . . . . . . . . . . . . . .3-88
Состояние сетевого принтера . . . . . . . . . . . . . . . . . . . . . . . . . . . . . . . . . .3-90
Глава 4 Техническое обслуживание
Замена тонерного картриджа . . . . . . . . . . . . . . . . . . . . . . . . . . . . . . . . . . . . .4-2
Перед заменой тонерного картриджа . . . . . . . . . . . . . . . . . . . . . . . . . . . . .4-3
Замена тонерного картриджа. . . . . . . . . . . . . . . . . . . . . . . . . . . . . . . . . . . .4-6
Функция очистки . . . . . . . . . . . . . . . . . . . . . . . . . . . . . . . . . . . . . . . . . . . . . 4-11
Правила обращения с картриджем . . . . . . . . . . . . . . . . . . . . . . . . . . . . . .4-12
Правила хранения картриджа . . . . . . . . . . . . . . . . . . . . . . . . . . . . . . . . . .4-14
Очистка и обращение с принтером . . . . . . . . . . . . . . . . . . . . . . . . . . . . . . .4-16
Очистка принтера . . . . . . . . . . . . . . . . . . . . . . . . . . . . . . . . . . . . . . . . . . . .4-16
Обращение с принтером . . . . . . . . . . . . . . . . . . . . . . . . . . . . . . . . . . . . . . . 4-18
Глава 5 Устранение неполадок
При возникновении неисправностей . . . . . . . . . . . . . . . . . . . . . . . . . . . . . .5-2
Неисправности и их устранения без сообщений. . . . . . . . . . . . . . . . . . . . .5-4
Неисправности по качеству печати . . . . . . . . . . . . . . . . . . . . . . . . . . . . . . .5-4
Неисправности собственно принтера . . . . . . . . . . . . . . . . . . . . . . . . . . . . .5-6
Неисправности системы САРТ . . . . . . . . . . . . . . . . . . . . . . . . . . . . . . . . . . .5-8
Устранение замятия бумаги. . . . . . . . . . . . . . . . . . . . . . . . . . . . . . . . . . . . . . 5-10
Перед устранением замятия бумаги в принтере. . . . . . . . . . . . . . . . . . . . 5-13
Замятие бумаги в зоне подачи бумаги . . . . . . . . . . . . . . . . . . . . . . . . . . . .5-14
Замятие бумаги около зоны формирования изображений . . . . . . . . . . .5-17
Замятие бумаги в зоне вывода лицевой стороной вниз . . . . . . . . . . . . .5-18
Замятие бумаги в зоне вывода лицевой стороной вверх . . . . . . . . . . . .5-19
Использование программы устранения неполадок. . . . . . . . . . . . . . . . .5-21
Особенности программы . . . . . . . . . . . . . . . . . . . . . . . . . . . . . . . . . . . . . . .5-21
Запуск программы . . . . . . . . . . . . . . . . . . . . . . . . . . . . . . . . . . . . . . . . . . . .5-22
Принимаемые меры к сообщениям об ошибке . . . . . . . . . . . . . . . . . . . . .5-25
Глава 6 Приложение
Технические характеристики. . . . . . . . . . . . . . . . . . . . . . . . . . . . . . . . . . . . . .6-2
Глоссарий. . . . . . . . . . . . . . . . . . . . . . . . . . . . . . . . . . . . . . . . . . . . . . . . . . . . . . .6-4
Предметный указатель. . . . . . . . . . . . . . . . . . . . . . . . . . . . . . . . . . . . . . . . . . 6-14
vi
Введение
Благодарим вас за покупку лазерного принтера LBP-1120 фирмы Canon. Прочитайте,
пожалуйста, настоящее руководство перед приступлением к работе с принтером для
знакомства с его обширными функциями и другими техническими возможностями.
После чтения сохраняйте руководство на случай необходимости советоваться с ним в
будущем.
Как пользоваться настоящим
руководством
Пиктограммы, примененные в настоящем
руководстве
В настоящем руководстве применены нижеуказанные пиктограммы,
которыми отмечены пояснения процедур, ограничения, предупреждения по
обращению с принтером, а также инструкции, которые должны быть
соблюдены для обеспечения безопасности.
ПРЕДУПРЕЖДЕНИЕ
Этой пиктограммой отмечены предупреждения по операциям,
неправильное выполнение которых может привести к смерти
или получению травмы. Всегда надо обращать внимание на эти
предупреждения для обеспечения безопасности работы с
принтером.
ВНИМАНИЕ
Этой пиктограммой отмечены предупреждения по операциям,
неправильное выполнение которых может привести к
получению травмы или повреждению оборудования. Всегда
надо обращать внимание на эти предупреждения для
обеспечения безопасности работы с принтером.
ВАЖНО
Этой пиктограммой отмечены требования и ограничения по
операциям. Обязательно надо прочитать их внимательно для
того, чтобы принтер работал правильно без повреждения.
ПРИМЕЧАНИЕ
Этой пиктограммой отмечены дополнительные пояснения и
информация об операциях и процедурах. Убедительно
рекомендуется прочитать эти примечания.
vii

Аббревиатуры, примененные в настоящем
руководстве
В настоящем руководстве названия изделий и моделей обозначены, как
ниже указано.
®
®
Операционная система Windows
фирмы Microsoft
обозначена как Windows.
Лазерный принтер LASER SHOT LBP-1120 фирмы Canon обозначен как
LBP-1120.
viii

Правовая информация
По правилам FCC (Federal Communications
Commission)
■
Модель на 110 — 127 В
Лазерный принтер модели L10577
Настоящее устройство было тестировано и в результате было
подтверждено, что оно находится в пределах, предусмотренных для
цифровой аппаратуры класса В в соответствии с Правилами FCC, часть 15.
Эти пределы установлены для обеспечения разумной защиты против
вредных помех, когда устройство работает в жилых кварталах. Устройство
генерирует, использует и может излучать радиочастотную энергию, которая
может служить вредными помехами радиосвязи, если оно не установлено и
не работает согласно Руководству оператора. Вместе с тем, нет никаких
гарантий того, что устройство не создает вредных помех в особых условиях
установки. В случае, если оно создает вредные помехи радио- или
телеприему, определяемые за счет включения и выключения устройства, то
пользователь должен пытаться устранять их, принимая нижеуказанные
меры.
•
Изменить направление приемной антенны или установить ее в другом
месте.
•
Увеличить расстояние между устройством и ресивером.
•
Подключить устройство к сети, иной чем у ресивера.
•
Посоветоваться с местным официальным дилером фирмы Canon или
опытным радио-/телетехником.
Использование экранированного кабеля требуется для приведения в
соответствие с пределами класса В, предусмотренными в разделе В части
15 Правил FCС.
Никакая переделка или модификация устройства не разрешается, если
иначе не указано в настоящем руководстве. Если осуществляется такая
переделка или модификация, вам может быть потребовано прекращение
работы устройства.
ix

Canon U.S.A. Inc.
One Canon Plaza, Lake Success, NY 11042, U.S.A.
Tel No. (516)328-5600
■
Модель на 220 — 240 В
Настоящее устройство было тестировано и в результате было
подтверждено, что оно находится в пределах, предусмотренных для
цифровой аппаратуры класса А в соответствии с Правилами FCC, часть 15.
Эти пределы установлены для обеспечения разумной защиты против
вредных помех, когда устройство работает в коммерческих условиях.
Устройство генерирует, использует и может излучать радиочастотную
энергию, которая может служить вредными помехами радиосвязи, если оно
не установлено и не работает согласно Руководству по эксплуатации.
Применение устройства в жилых кварталах может вызывать вредные
помехи и в этом случае пользователю будет потребовано устранение помех
за его счет.
Использование экранированного кабеля требуется для того, чтобы
соответствовать пределам, предусмотренным для класса А по Правилам
FCC, часть 15, раздел В.
Никакая переделка или модификация устройства не разрешается, если
иначе не указано в настоящем руководстве. Если осуществляется такая
переделка или модификация, вам может быть потребовано прекращение
работы устройства.
По директиве по электромагинтной
совместимости (ЕМС) (Для модели на 220 — 240 В)
«Настоящее устройство было тестировано в типовой системе и, в
результате, было подтверждено, что оно соответствует техническим
требованиям директивы по ЕМС.»
•
Использование экранированного кабеля требуется для удовлетворения
технических требований Директивы по ЕМС.
x
По правилам безопасности по работе лазерной
аппаратуры (Для моделей на 100 — 127 В/220 — 240 В)
Лазерное излучение может быть опасным для организма человека. По этой
причине лазерное излучение, испускающееся внутри принтера, закрывается
в его защитном корпусе и наружной панелью. Никакое излучение не может
проникать из принтера в условиях, когда пользователь работает с принтером
нормально.
Настоящий принтер относится к классу 1 лазерной аппаратуры по
IEC60825-1:1993, EN60825-1:1994, а в США — к классу 1 по правилам Code of
Federal Regulations, 1040.10 of Title 21.
DANGER
— Invisble laser radiation when open.
AVOID DIRECT EXPOSURE TO BEAM.
CAUTION
— INVISIBLE LASER RADIATION WHEN OPEN.
AVOID EXPOSURE TO BEAM.
ATTENTION
— RAYONNEMENT LASER INVISIBLE EN CAS D’OUVERTURE.
EXPOSITION DANGEREUSE AU FAISCEAU.
VORSICHT
—
UNSICHTBARE LASERSTRAHLUNG, WENN ABDECKUNG GEÖFNET.
NICHT DEM STRAHL AUSSETZEN.
ATTENZIONE
— RADIAZIONE LASER INVISIBLE IN CASO DI APERTURA.
EVITARE L’ESPOSIZIONE AL FASCIO.
PRECAUTION
— RADICION LASER INVISIBLE CUANDO SE ABRE.
EVITAR EXPONERSE AL RAYO.
VARO!
— AAVATTAESSA OLET ALTTIINA NÄKYMÄTTÖMÄLLE
LASERSÄTEILYLLE. ÄLÄ KATSO SÄTEESEEN.
VARNING!
— OSYNLIG LASERSTRÅLNING NÄR DENNA DEL ÄR ÖPPNAD.
BETRAKTA EJ STRÅLEN.
ADVARSEL!
— USYNLIG LASER STRÅLING, NÅR DENNE ER ÅBEN.
UNDGÅ BESTRÅLING.
ADVARSEL
— USYNLIG LASERSTRÅLING, NÅR DEKSEL ÅPNES.
UNNGÅ EKSPONERING FOR STRÅLEN.
RS5-8169
Настоящий принтер классифицирован по IEC60825-1:1993, EN60825-1:1994 и
относится к следующему классу:
Лазерная аппаратура класса 1
LASER KLASSE 1
APPAREIL A RAYONNEMENT LASER DE CLASSE 1
APPARECCHIO LASER DI CLASSE 1
PRODUCTO LASER DE CLASE 1
APARELHO A LASER DE CLASSE 1
(Для для модели на 220 — 240 В)
ПРЕДУПРЕЖДЕНИЕ
Работа в процедурах, иных чем указанные в настоящем руководстве
может привести к опасной диффузии излучения.
xi

Международная программа Energy Star
Фирма Canon USA, Inc., являясь партнером по программе
®
ENERGY STAR
, подтверждает, что данное изделие
®
соответствует программе ENERGY STAR
по эффективному
использованию энергии.
®
Международная программа ENERGY STAR
по офисному
оборудованию — это программа, содействующая
энергосбережению при использовании компьютеров и
другого офисного оборудования. Программа содействует
развитию и распространению изделий, оснащенных
функциями, обеспечивающими эффективное снижение
энергопотребления. Она представляет собой открытую
систему, в которой добровольно могут участвовать
предприниматели. К охватываемым программой изделиям
относятся компьютеры, мониторы, принтеры, факсимильные
аппараты, копировальные машины и другое офисное
оборудование. Стандарты и логотипы применяются единые
в странах-участниках.
Торговые марки
LBP, Canon, LASER SHOT и логотип Canon являются торговыми марками
фирмы Canon Inc.
®
®
Microsoft
и Windows
являются зарегистрированными торговыми марками
или торговыми марками фирмы Microsoft Corporation в США и/или в других
странах.
Другие марки и названия изделий являются торговыми марками или
зарегистрированными торговыми марками соответствующих фирм.
Авторское право
®
Авторское право
2002 by Canon Inc. Все права защищены.
Никакая часть настоящего издания не может быть воспроизведена или
передана в какой то ни было форме и какими то ни было средствами, будь то
электронные или механические, включая фотокопирование и запись, а
также системы хранения или поиска информации, если на то нет
письменного разрешения фирмы Canon Inc.
xii

Освобождение от ответственности
Информация, приведенная в настоящем документе, может изменяться без
извещения.
ФИРМА CANON INC. НЕ ДАЕТ НИКАКИХ ГАРАНТИЙ ОТНОСИТЕЛЬНО
НАСТОЯЩЕГО МАТЕРИАЛА, БУДЬ ТО ВЫРАЖЕННО ИЛИ КОСВЕННО, ЗА
ПРЕДЕЛАМИ ПРЕДУСМОТРЕННЫХ ЗДЕСЬ, ВКЛЮЧАЯ БЕЗ ОГРАНИЧЕНИЯ
ГАРАНТИЯ ОТНОСИТЕЛЬНО ПРИГОДНОСТИ ДЛЯ ПРОДАЖИ,
ЦЕЛЕСООБРАЗНОСТИ ПРИМЕНЕНИЯ, ИЛИ ПРОТИВ НАРУШЕНИЯ
КАКОГО-ЛИБО ПАТЕНТА. ФИРМА CANON INC. НЕ НЕСЕТ
ОТВЕТСТВЕННОСТИ ЗА КАКИЕ-ЛИБО ПРЯМЫЕ, СЛУЧАЙНЫЕ ИЛИ
КОСВЕННЫЕ ПОТЕРИ, ВОЗНИКШИЕ В СВЯЗИ С ИСПОЛЬЗОВАНИЕМ
НАСТОЯЩЕГО МАТЕРИАЛА.
Правовое ограничение по использованию
вашего устройства и изображений
Использование вашего устройства для воспроизведения некоторых
документов сканированием, печатинием или другими методами и
использование изображений, воспроизведенных сканированием, печатанием
и другими методами на вашем устройстве, могут запрещаться по закону и
могут привести к привлечению к уголовоной и/или гражданской
ответственности. Ниже приведен неисчерпываемый перечень таких
документов. Этот перечень служит только для справок. Если вам не
известна законность использования вашего устройства для
воспроизведения сканированием, печатанием и другими методами и/или
использования изображений, воспроизведенных сканированием, печатанием
и другими методами, то вы должны обратиться к советнику по юридическим
вопросам.
•
Банкноты
•
Дорожные чеки
•
Платежные поручения
•
Талоны на льготную покупку
продуктов
•
Депозитарные сертификаты
•
Паспорта
•
Почтовые марки
• Иммиграционные документы
(погашенные и непогашенные)
• Идентификационные знаки или
• Гербовые марки (погашенные и
знаки различия
непогашенные)
• Билеты по военной службе • Облигации и другие сертификаты
задолженности
xiii

• Чеки или вексели, выданные
• Сертификаты о праве
государственным агентством
собственности на акции
• Водительские права и
• Произведения/Произведения
сертификаты должностей
искусства, на которые
распространено авторское право,
при отсутствии разрешения
авторов
xiv
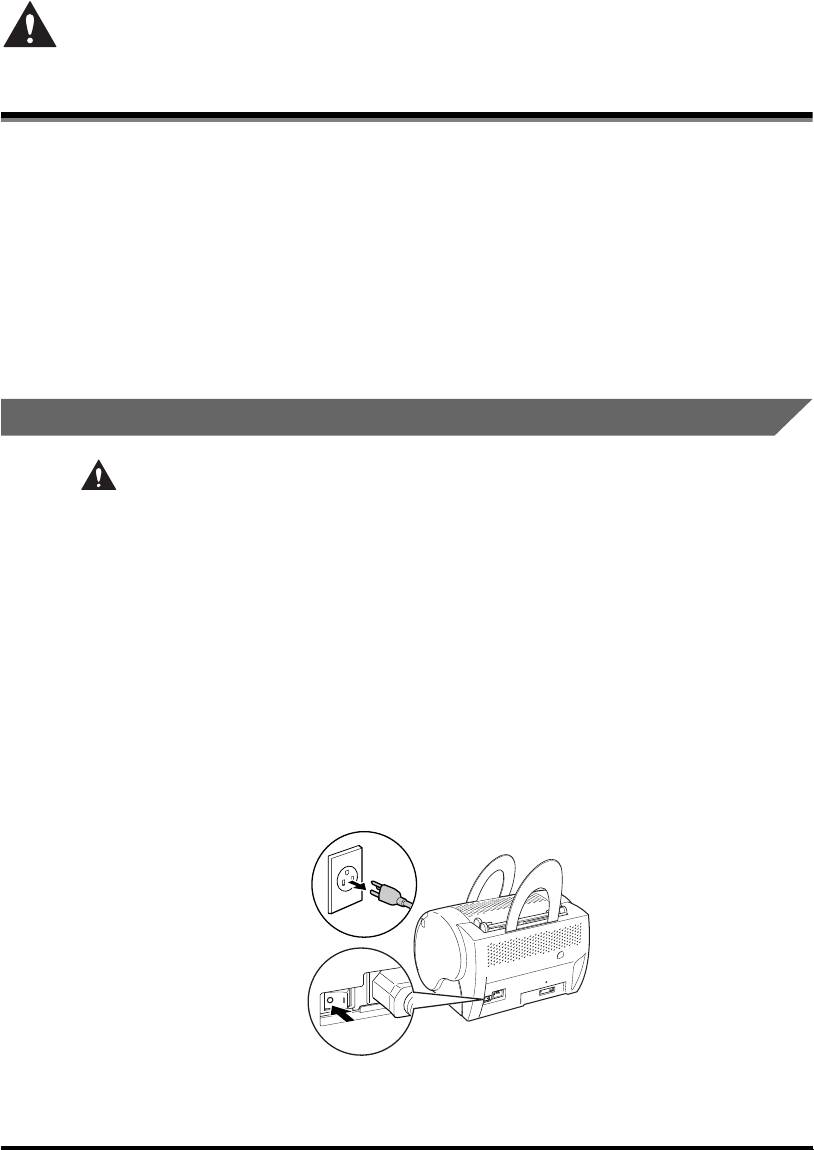
Важные инструкции по обеспечению
безопасности
Перед приступлением к работе с принтером прочитайте, пожалуйства,
«Важные инструкции по обеспечению безопасности» тщательно. Всегда
надо учитывать эти инструкции, поскольку они составлены для защиты
пользователя и других людей от получения травмы, а также во избежание
разрушения имущества. Нельзя выполнять какие-либо операции, не
указанные в настоящем руководстве, поскольку это может привести к
непредсказуемой аварии или получению травмы. Неправильные операции
или неправильное использование принтера может привести к получению
травмы и/или повреждению, требующему крупного ремонта, не
охватываемого полученной вами ограниченной гарантией.
Установка принтера
ПРЕДУПРЕЖДЕНИЕ
• Запрещается устанавливать принтер вблизи от места со спиртом,
растворителем и другими воспламеняемыми веществами.
Соприкосновение воспламеняемых веществ с электрическими деталями
внутри принтера может привести к пожару или поражению электрическим
током.
• Нельзя класть нижеуказанные предметы на принтер. Если они
соприкасаются с высоковольтной зоной внутри принтера, то это может
привести к пожару или поражению электрическим током.
• В случае, если они попадают в принтер, следует выключить выключатель
питания незамедлительно и вынуть штепсель шнура питания из сетевой
розетки, а затем обратиться к официальному дилеру фирмы Canon.
— Цепочка и другие металлические изделия
— Чашки, вазы, цветочные горшки и другие емкости, заполненные водой
или другими жидкостями
xv
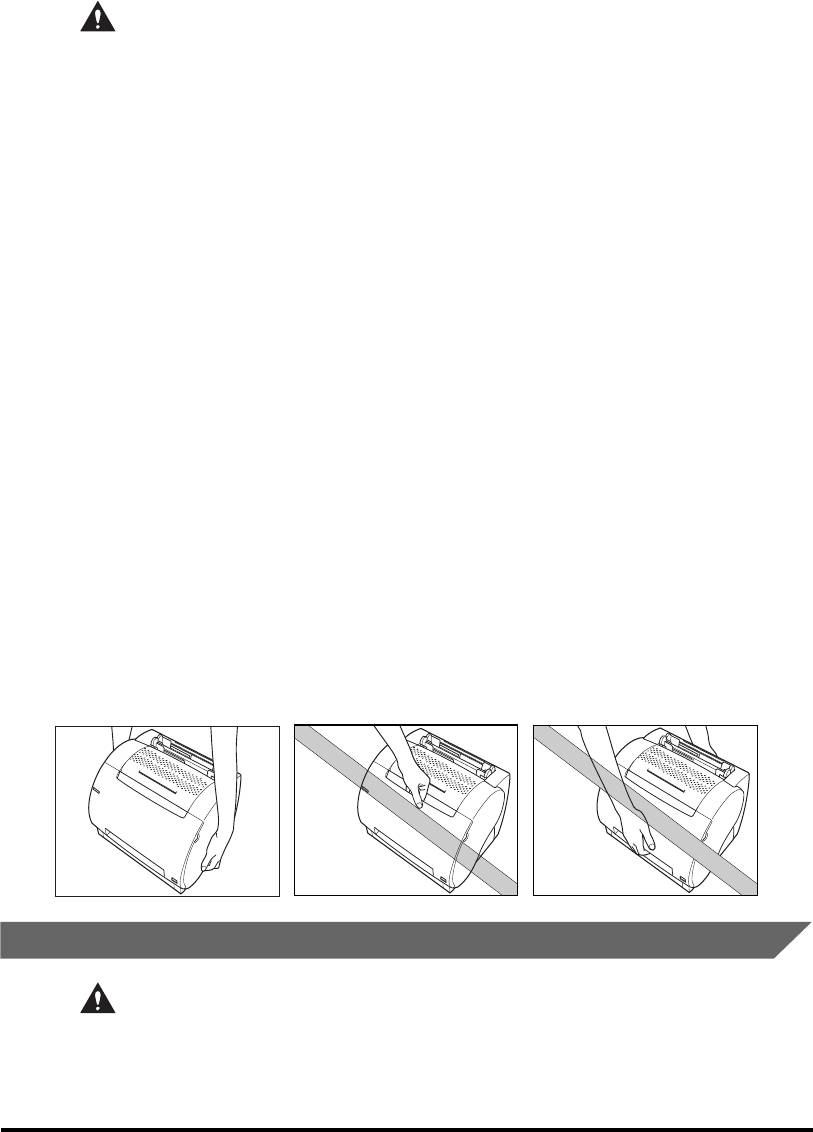
ВНИМАНИЕ
• Не следует устанавливать принтер на неустойчивой поверхности, в том
числе и на неустойчивой платформе и наклонном полу, а также в месте с
интенсивной вибрацией, в противном случае может возникнуть падение
или опрокидывание принтера и, в результате, получение травмы.
• Не следует закрывать вентиляционные отверстия и жалюзи принтера,
предусмотренные для обеспечения вентилируемости работающих
деталей внутри принтера. В противном случае может возникнуть
перегрев принтера. Не следует устанавливать принтер на мягкую
поврехность, в том числе и диван и толстый коврик.
• Не следует устанавливать принтер в месте:
— с высокой влажностью и запыленностью;
— где вблизи имеется источник дыма или пара, в том числе и печка и
увлажнитель;
— где принтер подвергается воздействию дождя или снега;
— близком от водопроводного крана или воды;
— где принтер подвергается воздействию непосредственных солнечных
излучений;
— с высокой температурой;
— с открытым пламенем.
• Во избежание повреждения принтера и получения травмы переноску
принтера следует осуществлять, как указано на нижеприведенном
рисунке. Держите принтер с боковых сторон надежно в обеих руках.
• Соединительный кабель следует соединять правильно в соответствии с
рисунком, приведенным в настоящем руководстве. В противном случае
может возникнуть неполадка принтера или поражение электрическим
током.
• При переноске принтера следует держать его правильно, соблюдая
инструкции, данные в настоящем руководстве. В противном случае может
возникнуть падение принтера и, в результате, получение травмы..
Электропитание
ПРЕДУПРЕЖДЕНИЕ
• Не следует повреждать или модифицировать шнур питания. А также не
следует класть тяжеловесный предмет на шнур, натягивать или изгибать
его излишно, в противном случае может возникнуть электрическое
повреждение и, в результате, пожар или поражение электрическим током.
xvi

• Шнур питания должен находиться вдали от источника теплоты, в
противном случае может возникнуть расплавление покрытия шнура и, в
результате, пожар или поражение электрическим током.
• Не следует вставлять или вынимать штепсель шнура питания из сетевой
розетки мокрой рукой, в противном случае может возникнуть пожар или
поражение электрическим током.
• Не следует подключать принтер к электросети через многоштепсельное
разветвление, в противном случае может возникнуть пожар или
поражение электрическим током.
• Не следует образовывать пучок или узел на шнуре, в противном случае
может возникнуть пожар или поражение электрическим током.
• Следует вставлять шнур питания до отказа в сетевую розетку, в
противном случае может возникнуть пожар или поражение
электрическим током.
• В принципе, не следует использовать удлинительный шнур. Его
использование может привести к пожару или поражению электрическим
током. Однако, при непременной необходимости следует использовать
шнур на 230 В или больше, снять обвязочную ленточку с пучка шнура и
вставить штепсель шнура в розетку удлинительного шнура полностью
для обеспечения надежного соединения между ними.
ВНИМАНИЕ
• Напряжение электросети должно соответствовать указанному в
настоящем руководстве, иначе может возникнуть пожар или поражение
электрическим током.
• При отсоединении шнура питания всегда следует держать его за
штепсель. Если притягивать сам шнур, может возникнуть обнажение или
обрыв жилы, а также другие повреждения шнура. Повреждение шнура
может привести к утечке тока и, в результате, к пожару или поражению
электрическим током.
• Следует оставлять достаточное пространство вокруг штепселя шнура и
гнезда питания так, чтобы легко можно было вынимать его. Если
установлены предметы вокруг штепселя, вы не можете вынуть его в
аварийном случае.
Обращение с принтером
ПРЕДУПРЕЖДЕНИЕ
• Не следует пытаться разбирать или модифицировать принтер. Внутри
него установлены высокотемпературные и высоковольтные детали,
которые могли бы вызывать пожар или поражение электрическим током..
• Электрические аппараты могут создавать опасность, если они не
используются правильно. Во избежание получения травмы нельзя
позволять детям иметь доступ к внутренности электрических аппаратов,
а также соприкасаться с их электрическими контактами и зубчатыми
передачами, находящимися в обнаженном состоянии.
xvii

• При ненормалном уровне шума и наличии дыма, теплоты или
ненормального запаха следует выключить питание и отсоединить шнур
питания незамедлительно, а затем обратиться к вашему местному
официальному дилеру фирмы Canon. Продолжительная работа в этом
состоянии может привести к пожару или поражению электрическим
током.
• Нельзя использовать легковоспламеняемые распылители вблизи от
принтера. Если газ из этих распылителей попадают на электрические
детали внутри принтера, то может возникнуть пожар или поражение
электрическим током.
• Во избежание повреждения шнура питания и создания пожароопасности
обязательно следует выключать главный выключатель питания и
отсоединять соединительный кабель при переноске принтера. В
противном случае может возникнуть повреждение шнура питания и
соединительного кабеля и, в результате, пожар или поражение
электрическим током.
• Нельзя ронять канцелярские скрепки, скобки или другие металлические
предметы в принтер. А также нельзя проливать воду или другие
жидкости, в том числе и воспламеняемые (спирт, бензин, растворитель и
т.д.) в принтер. Попадание их в высоковольтный участок принтера может
привести к пожару или поражению электрическим током. В случае их
попадания в принтер следует выключить главный выкллючатель питания
и отсоединить шнур питания от сети незамедлительно, а затем обратиться
к вашему местному официальному дилеру фирмы Canon.
• При отсоединении USB-кабеля при включенном выключателе питания не
следует соприкасаться с разъемами. В противном случае может
возникнуть поражение электрическим током.
ВНИМАНИЕ
• Нельзя класть тяжеловесные предмены на принтер, в противном случае
могут возникнуть опрокидывание или падение принтера и, в результате,
получение травмы.
• Следует выключать главный выключатель питания, установленный на
задней поверхности принтера, при неиспользовании его на длительное
время, в том числе на ночь. А при неиспользовании на длительнее время,
например, на последовательные выходные дни, помимо выключения
главного выключателя питания следует отсоединять шнур питания для
обеспечения безопасности.
• Лазерное излучение может быть вредным для организма человека.
Поскольку излучение, испускающееся внутри принтера, закрывается
полностью в защитных корпусах и наружными панелями, оно не может
проникать из принтера на любых этапах работы пользователя. Тем не
менее следует читать нижеуказанные примечания и инструкции для
обеспечения безопасности.
• Не следует открывать панели за исключением указанных в настоящем
руководстве.
• Не следует удалять табличку с предупредительными указаниями,
наклеенную на узел сканирования внутри принтера.
xviii
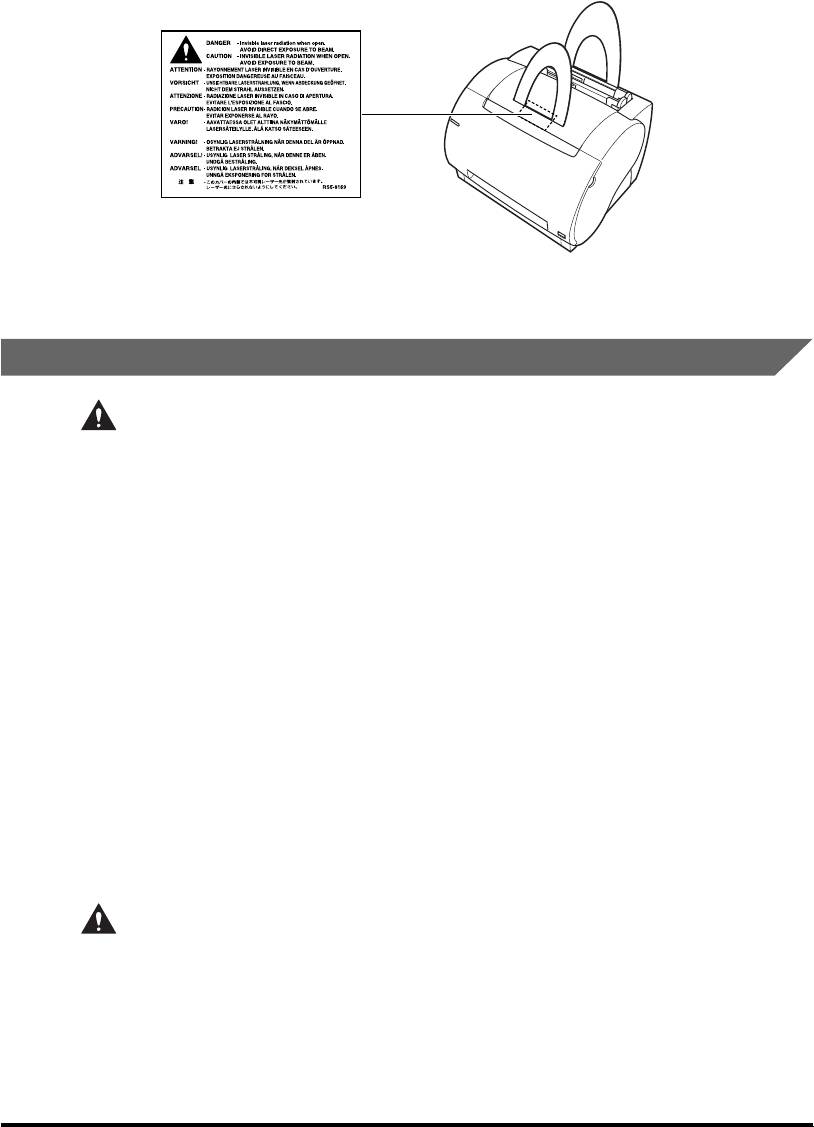
• В случае проникновения лазерного излучения из принтера и подвергания
его воздействию может вызвать серьезный травматизм глаз.
Техобслуживание принтера
ПРЕДУПРЕЖДЕНИЕ
• Для очистки принтера прежде всего следует выключать главный
выключатель питания, а затем отсоединять шнур питания. В случае
несоблюдения этого может возникнуть пожар или поражение
электрическим током.
• Следует вынимать штепсель шнура питания из гнезда питания
периодически и очищать участок вокруг основания под штыри и гнездо
питания сухой ветощью для полного удаления пыли и грязи. В случае,
когда принтер установлен в подключенном к сети состоянии в влажном,
пыльном или дымном месте в течение длительного времени, пыль,
накопленная вокруг штепселя, может увлажняться, что может привести к
короткому замыканию и, в результате, пожару.
• Внутри принтера имеются участки, к которым прилагается высокое
напряжение. При удалении застрявшей бумаги или проверке внутри
принтера не следует давать цепочке, браслету и другим металлическим
предметам соприкасаться с внутренними деталями принтера. В
противном случае может возникнуть получение ожога или поражение
электрическим током.
• Не следует выбрасывать отработанные картриджи тонера в прямой огонь.
Оставшееся в них тонер зажигается, что может привести к получению
ожога или пожару.
ВНИМАНИЕ
• Пользователю самому нельзя пытаться обслуживать принтер за
исключением случаев, указанных в настоящем руководстве. Внутри
принтера установлены детали, не обслуживаежмые пользователем.
Разрешается только регулировка органов управления, охватываемых
инструкциями по операциям. Неправильная регулировка может привести
к получению травмы и/или повреждению, требующему крупного ремента,
не охватываемого данной вам ограниченной гарантией.
xix
Аннотации для Лазерного Принтера Canon LBP-1120 в формате PDF
Топ 10 инструкций
Другие инструкции
- Topics
- controller, fixing, printer, chapter, engine, laser, paper, interface, cartridge, roller, fixing heater, photosensitive drum, engine controller, transfer charging, controller pcb, charging roller, error message, fixing film, interface controller, paper top
- Collection
- printer-manuals-canon; printer-manuals; manuals; additional_collections
- Language
- English
- Addeddate
- 2012-10-08 20:05:53
- Identifier
- printermanual-canon-lbp-1120-service-manual
- Identifier-ark
- ark:/13960/t22c08n4h
- Ocr
- ABBYY FineReader 8.0
- Ppi
- 300
comment
Reviews
There are no reviews yet. Be the first one to
write a review.
2,082
Views
DOWNLOAD OPTIONS
Uploaded by
Jason Scott
on
Canon Driver Downloads is for the support of Canon Products SOLD IN AUSTRALIA AND NEW ZEALAND ONLY. It includes drivers and demonstration software for Canon brand printers, scanners, cameras and other Canon products.
DISCLAIMER: CANON AUSTRALIA PTY LTD MAKES NO GUARANTEES OF ANY KIND WITH REGARD TO ANY PROGRAMS, FILES, DRIVERS OR ANY OTHER MATERIALS CONTAINED ON OR DOWNLOADED FROM THIS, OR ANY OTHER, CANON SOFTWARE SITE. ALL SUCH PROGRAMS, FILES, DRIVERS AND OTHER MATERIALS ARE SUPPLIED «AS IS.» CANON DISCLAIMS ALL WARRANTIES, EXPRESS OR IMPLIED, INCLUDING, WITHOUT LIMITATION, IMPLIED WARRANTIES OF MERCHANTABILITY, FITNESS FOR A PARTICULAR PURPOSE AND NON-INFRINGEMENT. CANON AUSTRALIA PTY LTD SHALL NOT BE HELD LIABLE FOR ERRORS CONTAINED HEREIN, OR FOR LOST PROFITS, LOST OPPORTUNITIES, CONSEQUENTIAL OR INCIDENTAL DAMAGES INCURRED AS A RESULT OF ACTING ON INFORMATION, OR THE OPERATION OF ANY SOFTWARE, INCLUDED IN THIS SOFTWARE SITE.
Export: Some of the software is subject to export controls under the U.S. Export Administration Regulations (EAR), and anyone receiving the software cannot export the software without a license or other authorisation of the U.S. Canon will not be liable for any loss of whatsoever nature incurred as a result of this prohibition.
Applicable software includes;
— Software using OS created by US companies
— Driver software (printer driver, fax driver),
— Utility software (Network ScanGear),
— Application software (imageWARE products),
— Support tool (SST, NAVI, etc)
— Firmware of the device (main body)
and any further software that may from time to time be added to this list.