- Manuals
- Brands
- Canon Manuals
- All in One Printer
- PIXMA K10339
Manuals and User Guides for Canon PIXMA K10339. We have 2 Canon PIXMA K10339 manuals available for free PDF download: Getting Started
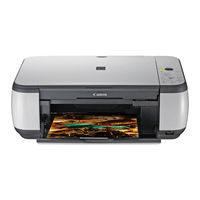
Canon PIXMA K10339 Getting Started (32 pages)
Cannon All in One Printer Owner’s Start Manual
Brand: Canon
|
Category: All in One Printer
|
Size: 3.68 MB
Table of Contents
-
Getting Started
1
-
Symbols Used in this Document
2
-
Contents
3
-
Preparation
4
-
Check the Included Items
4
-
Choosing a Location
4
-
Remove the Protective Material
5
-
Turn the Power on
6
-
Install the FINE Cartridges
7
-
Install the Software
11
-
Loading Paper
19
-
After Installing the Machine
21
-
Solution Menu
22
-
Copying
24
-
Print Photos from a Computer
26
-
Maintenance
28
-
Specifications
29
-
Getting Help from Canon
31
-
Ordering Information
31
Advertisement
Canon PIXMA K10339 Getting Started (36 pages)
Brand: Canon
|
Category: Printer
|
Size: 5.29 MB
Table of Contents
-
Symbols Used in this Document
2
-
Symboles Utilisés Dans Ce Document
2
-
Símbolos Utilizados en Este Documento
2
-
Windows Vista
17
-
Troubleshooting
24
-
Solución de Problemas
24
-
Click Print
30
-
Specifications Are Subject to Change Without Notice
32
Advertisement
Related Products
-
Canon K10266
-
Canon K10550
-
Canon K10549
-
Canon Kit-H1
-
Canon Multi-PDL Printer Kit-E1
-
Canon Color Network UFR Printer Kit-C1
-
Canon iR Security Kit-A2
-
Canon PIXMA MP495 Series
-
Canon PIXMA MP640
-
Canon PIXMA MX420 Series
Canon Categories
![]()
Printer
![]()
Digital Camera
![]()
All in One Printer
![]()
Camcorder
![]()
Scanner
More Canon Manuals
Если у вас отсутствует техническая возможность для скачивания Инструкция по эксплуатации для Canon PIXMA K10339
вы можете прочесть документ прямо на нашем сайте или
Скачать Canon PIXMA K10339 Инструкция по эксплуатации

- 1
- 2
- 3
- 4
- 5
- 6
- 7
- 8
- 9
- 10
- 11
- 12
- 13
- 14
- 15
- 16
- 17
- 18
- 19
- 20
- 21
- 22
- 23
- 24
- 25
- 26
- 27
- 28
- 29
- 30
- 31
- 32
Инструкции для прочих Canon МФУ
Инструкции для прочих Canon
Краткое содержание страницы № 1
ENGLISH
ESPAÑOL
Photo All-In-One
Equipo multifunción fotográfico
series
series
Getting Started
Read Me First
Guía de inicio
Léame en primer lugar
Make sure to read this manual before using the machine. Please keep it in hand for future reference.
Asegúrese de leer este manual antes de usar el equipo. Consérvelo a mano para utilizarlo como referencia en el futuro.
Краткое содержание страницы № 2
■ ■ Symbols Used in This Document Símbolos utilizados en este documento Instructions including important information. Instrucciones que incluyen información importante. Be sure to read these indications. Asegúrese de leer estas indicaciones. Instructions as notes for operation or additional explanations. Instrucciones en forma de notas sobre el funcionamiento o explicaciones adicionales. Descriptions for operations that take some time to complete. Descripciones de operaciones que llevan cierto
Краткое содержание страницы № 3
■ About This Manual ■ Acerca de este manual This manual describes about MP270 series and MP250 series. Preparation The illustrations and screens are based on MP270 series. Preparación 1 The instructions are the same unless otherwise specified. You may not be able to purchase some models in certain regions. Remove the Protective Material Este manual describe los modelos MP270 series y MP250 Retirada del material protector series. 2 Las ilustraciones y capturas de pantalla se basan en el mo
Краткое содержание страницы № 4
■ Check the Included Items ■ Compruebe los elementos que se incluyen Before turning on the machine, remove all orange tape, protective sheets and □ Choosing a Location 1 protective material from the inside and outside of the machine. □ Elección del emplazamiento Antes de encender el equipo, retire todas las cintas naranjas y las hojas y el material protectores del interior y el exterior del mismo. • Do not install the machine where an object may fall on it. The object may fall inside the machi
Краткое содержание страницы № 5
E 1 2 3 4 B 2 C A D Open the Paper Output Lift the Scanning Unit (Cover) (B) and fix it with Pull the orange protective Lift the Scanning Unit (Cover) Tray (A). the Scanning Unit Support (C). tape (D) and remove the slightly and fold the Scanning protective material (E). Unit Support, then gently close Abra la bandeja de salida the Scanning Unit (Cover). del papel (A). Levante la unidad de escaneado (cubierta) (B) y sujétela con el soporte de la unidad Tire de la cinta protectora de escane
Краткое содержание страницы № 6
B B 1 2 3 MP270 3 MP270 series series A B B MP250 MP250 series series Plug the power cord into the left side of the Turn on the machine (B). Make sure that the POWER lamp (B) lights machine, then connect the other end to the green. wall outlet. Encienda el equipo (B). Asegúrese de que la lámpara de ENCENDIDO (POWER) (B) se ilumina en verde. Conecte el cable de alimentación en la parte izquierda del equipo y enchufe el otro extremo a la toma de corriente. • Do NOT connect the USB cabl
Краткое содержание страницы № 7
D 1 A E E 4 F Lift the Scanning Unit (Cover) (A) and fix it with the Scanning Unit Support (D). Close the Document Cover (E) and lift it with the Scanning Unit (Cover). The FINE Cartridge Holder (F) moves to the installation position. Levante la unidad de escaneado (cubierta) (A) y sujétela con el soporte de la unidad de escaneado (D). Cierre la cubierta de documentos (E) y levántela con la unidad de escaneado (cubierta). El contenedor del cartucho FINE (F) se desplazará a la posición de instal
Краткое содержание страницы № 8
J I 2 3 4 H G Open the Ink Cartridge Locking Cover on the right side. Remove the Black FINE Pull the orange protective tape (H) in the direction of the Cartridge from its package. arrow and remove it gently. Pinch (G) firmly and pull up the cover. Tire de la cinta naranja protectora (H) en la dirección de la flecha y extráigala suavemente. Extraiga el cartucho FINE del Abra la cubierta de bloqueo del cartucho de tinta del lado derecho. paquete. Sujete (G) firmemente y levante la cubierta.
Краткое содержание страницы № 9
5 6 Place the Black FINE Cartridge into the right slot . Push down of the Ink Cartridge Locking Cover until you hear a click to close it completely. View the Ink Cartridge Locking Cover straight on and check that it is locked correctly (not at an angle). Coloque el cartucho FINE negro en la ranura derecha . Empuje de la cubierta de bloqueo del cartucho de tinta hacia abajo hasta que oiga un clic y quede totalmente cerrada. Compruebe que la cubierta de bloqueo del cartucho de tinta esté d
Краткое содержание страницы № 10
7 8 K L Insert the Color FINE Cartridge into Lift the Scanning Unit (Cover) slightly and fold the Scanning Unit Support, then gently close the Scanning Unit (Cover). the left FINE Cartridge Holder in the same way as . • Wait until «1» appears on the LED (K) (about 1-2 minutes) and go to the next step. Introduzca el cartucho FINE de color Levante la unidad de escaneado (cubierta) ligeramente y pliegue el soporte de la unidad de escaneado para luego cerrar en el contenedor de cartucho FINE
Краткое содержание страницы № 11
To use the machine by connecting it to a computer, software including the drivers needs □ For Spanish Users in the U.S.A.: to be copied (installed) to the computer’s hard disk. The installation process takes about 20 minutes. (The installation time varies depending on the computer environment or the □ Para los usuarios de habla hispana number of applications to be installed.) de EE UU: The screens below are based on Windows Vista operating system Ultimate Edition 5 (hereafter referred to
Краткое содержание страницы № 12
□ If the Found New Hardware or Found New Hardware Wizard dialog box appears: □ Si aparece el cuadro de diálogo Nuevo hardware encontrado (Found New Hardware) o Asistente para hardware nuevo encontrado (Found New Hardware Wizard): If you connect a USB cable to the machine before installation of the drivers, this screen appears. Si conecta un cable USB al equipo antes de instalar los controladores, aparecerá esta pantalla. Remove the USB cable connected to your computer. 1 The dialog box may clos
Краткое содержание страницы № 13
□ For Windows Vista/XP 1 If you are using Internet Explorer 7 or later, you can use the Web print software Easy-WebPrint EX. An internet connection is required for installation. (It is also possible to install this software later.) TURN OFF THE MACHINE (A). APAGUE EL EQUIPO (A). □ Para Windows Vista/XP Si utiliza Internet Explorer 7 o posterior, puede utilizar el software de impresión A para web Easy-WebPrint EX. Para instalarlo, es necesario estar conectado MP270 a Internet. (Este software
Краткое содержание страницы № 14
2 Turn on the computer, then insert the Setup CD-ROM into the CD-ROM drive. The setup program will start automatically. Encienda el ordenador y, a continuación, introduzca el CD-ROM de instalación (Setup CD-ROM) en la unidad de CD-ROM. Comenzará automáticamente el programa de instalación. • If the program does not start automatically, double-click the CD-ROM icon in Computer or My Computer. When the CD-ROM contents appear, double-click MSETUP4.EXE. • Si el programa no se inicia automáticamente,
Краткое содержание страницы № 15
Windows Vista 3 Windows XP/2000 Click Run Msetup4.exe on the AutoPlay screen, then click Continue on the User Account Control dialog box. If the User Account Control dialog box reappears in following steps, click Continue. Haga clic en Ejecutar Msetup4.exe (Run Msetup4.exe) de la pantalla Reproducción automática (AutoPlay) y, a continuación, haga clic en Continuar (Continue) en el cuadro de diálogo Control de cuentas de usuario (User Account Control). Si vuelve a aparecer el cuadro de diálogo
Краткое содержание страницы № 16
4 5 Click Easy Install. Click Install. The drivers, application software, and on-screen manuals are Follow any on-screen instructions to proceed with the software installation. installed all together. Haga clic en Instalar (Install). Haga clic en Instalación simple (Easy Install). Siga cualquier instrucción en pantalla para llevar a cabo la instalación del software. Los controladores, las aplicaciones de software y los manuales en pantalla se instalan todos a la vez. For Windows Vista/XP • If y
Краткое содержание страницы № 17
□ □ Necessary Information for the User Registration About Extended Survey Program □ Acerca de Extended Survey Program □ Información necesaria para el registro de usuario (User Registration) B Serial No. * * * * * * * * * The product serial number is required when registering the product. The serial number is located If you can agree to Extended Survey Program, click Agree. inside the machine (as shown in the illustration). If you click Do not agree, the Extended Survey Program will not be insta
Краткое содержание страницы № 18
6 Click Exit to complete the installation. If Restart is displayed, follow the instruction to restart the computer. After restarting the computer, remove the Setup CD-ROM and keep it in a safe place. When using Macintosh, it is necessary to restart the computer before scanning using the Operation Panel on the machine for the first time. Haga clic en Salir (Exit) para finalizar la instalación. Si aparece Reiniciar (Restart), siga las instrucciones para reiniciar el ordenador. Después de reiniciar
Краткое содержание страницы № 19
1 2 3 2 6 A 1 B Open the Paper Support (A) and pull it straight up, then slant it back. Move the Paper Guides (B) to both edges. Desplace las guías de papel (B) hacia ambos bordes. Abra el soporte del papel (A), tire de él derecho hacia arriba y luego échelo hacia atrás. Loading Paper Carga del papel
Краткое содержание страницы № 20
3 4 C Load paper in the center. Slide the left and right Paper Guides against both edges of the paper. Load paper in portrait orientation with the printing side facing up. Make sure that the paper stack does not exceed the line (C). Cargue el papel en el centro. Deslice las guías de papel izquierda y derecha hacia ambos bordes del papel. Cargue el papel con orientación vertical con la superficie de impresión hacia arriba. Compruebe que la pila de papel no supere la línea (C). • For details on me
2
3
3
1
A
B
B
B
B
MP270
series
MP250
series
MP270
series
MP250
series
En
ce
nd
id
o
de
l e
qu
ip
o
Encienda el equipo (B).
Asegúrese de que la lámpara de
ENCENDIDO
(POWER) (B) se ilumina en verde.
Conecte el cable de alimentación en la parte
izquierda del equipo y enchufe el otro extremo
a la toma de corriente.
NO conecte el cable USB en este momento.
•
Asegúrese de que la cubierta de documentos (A) esté cerrada.
•
Tu
rn
th
e
Po
w
er
O
n
Turn on the machine (B).
Make sure that the
POWER lamp (B) lights
green.
Plug the power cord into the left side of the
machine, then connect the other end to the
wall outlet.
Do NOT connect the USB cable at this stage.
•
Make sure that the Document Cover (A) is closed.
•
Если у вас отсутствует техническая возможность для скачивания Инструкция по эксплуатации для Canon PIXMA K10339
вы можете прочесть документ прямо на нашем сайте или
Скачать Canon PIXMA K10339 Инструкция по эксплуатации
- 1
- 2
- 3
- 4
- 5
- 6
- 7
- 8
- 9
- 10
- 11
- 12
- 13
- 14
- 15
- 16
- 17
- 18
- 19
- 20
- 21
- 22
- 23
- 24
- 25
- 26
- 27
- 28
- 29
- 30
- 31
- 32
Инструкции для прочих Canon
Загрузите драйверы, программное обеспечение, встроенное ПО и инструкции по эксплуатации, а также получите доступ к онлайн-ресурсам технической поддержки и советам по устранению неисправностей
Ниже выберите ваш принтер или устройство «Все в одном» PIXMA для получения доступа к последним загрузкам, включая программное обеспечение, инструкции по эксплуатации, драйверы и встроенное ПО. Также вы можете просмотреть Часто задаваемые вопросы (FAQ) и важную информацию о вашей камере PIXMA.
На странице устройства используйте вкладки для переключения между различными типами контента.
Вам также может понадобиться…

Свяжитесь с нами
Свяжитесь со службой поддержки продукции для дома по телефону или электронной почте

Canon ID
Регистрация продукта и управление аккаунтом Canon ID

Ремонт
Поиск центров по ремонту оборудования, полезная информация по процессу ремонта

- Регистрация
- Войти
Инструкции » Принтеры / Сканеры / МФУ / Факс » CANON
|
Всего инструкций в разделе: 658 |
|
|
Отсортировать по: Названию 

| инструкция | устройство | размер |
| CANON i-Sensys Colour MF744Cdw (3101C031) A4 Duplex WiFi | принтер | 6.15 MB |
| CANON i-Sensys Colour MF645Cx (3102C032) A4 Duplex WiFi | принтер | 6.15 MB |
| CANON i-Sensys LBP228x (3516C006) A4 Duplex WiFi | принтер | 4.10 MB |
| CANON i-Sensys LBP6030B (8468B006) A4 | принтер | 4.03 MB |
| CANON Pixma TS704 (3109C007) A4 Duplex WiFi USB RJ-45 | принтер | 10.20 MB |
| CANON Selphy 1300 (2234C002) | фотопринтер | 3.15 MB |
| CANON Selphy 1300 (2235C002) | фотопринтер | 3.15 MB |
| CANON i-Sensys Colour MF641Cw (3102C015) A4 WiFi | принтер | 27.98 MB |
| CANON Pixma G5040 | струйный принтер | 8.03 MB |
| CANON PIXMA G2040 | струйный принтер | 7.78 MB |
| CANON imageFORMULA DR-M260 | сканер | 4.36 MB |
| CANON imageFORMULA DR-C225W | сканер | 2.91 MB |
| CANON Zoemini Rose (3204C004) | принтер | 1.85 MB |
| CANON Pixma GM2040 (3110C009) | принтер | 7.68 MB |
| CANON Pixma G5040 (3112C009) | принтер | 9.31 MB |
| CANON Pixma G1411 (2314C025) | принтер | 5.25 MB |
| CANON iPF TM-200 (3062C003) | принтер | 3.29 MB |
| CANON i-SENSYS MF449x | мфу лазерное | 14.77 MB |
| CANON i-Sensys Colour MF746Cx | мфу лазерное | 7.42 MB |
| CANON imageRUNNER C3125i | мфу лазерное | 1.85 MB |
| CANON imageRUNNER 2206 | мфу лазерное | 2.65 MB |
| CANON Pixma TS8340 (3775C007) | мфу | 3.00 MB |
| CANON Pixma TR4540 (2984C007) | мфу | 13.61 MB |
| CANON Pixma G4411 (2316C025) WiFi | мфу | 166.17 kB |
| CANON Pixma G3411 (2315C025) | мфу | 6.71 MB |
| CANON Pixma G2411 (2313C025) | мфу | 6.29 MB |
| CANON MAXIFY MB 2140 (0959C007) | мфу | 1.34 MB |
| CANON i-Sensys MF269dw (2925C028) | мфу | 4.62 MB |
| CANON i-SENSYS FAX-L 170 (5258B046) | мфу | 14.43 MB |
| CANON imageRUNNER C 1225 iF (9548B007) | мфу | 1.74 MB |
| CANON imageRUNNER 2206iF (3029C004) | мфу | 7.00 MB |
| CANON i-SENSYS LBP712Cx | лазерный принтер | 12.70 MB |
| CANON i-SENSYS LBP710Cx | лазерный принтер | 12.70 MB |
| CANON i-SENSYS LBP352x | лазерный принтер | 7.94 MB |
| CANON i-SENSYS LBP325x | лазерный принтер | 8.14 MB |
| CANON i-Sensys LBP223dw | лазерный принтер | 4.89 MB |
| CANON i-Sensys Colour LBP664Cx | лазерный принтер | 5.42 MB |
| CANON I-SENSYS LBP312X (0864C003) | принтер | 9.09 MB |
| CANON COLOUR I-SENSYS LBP623CDW (3104C001) | принтер | 4.54 MB |
| CANON COLOUR I-SENSYS LBP621CW (3104C007) | принтер | 4.54 MB |
| CANON Zoemini | портативный принтер | 1.82 MB |
| CANON Zoemini PV123 WHS EXP | портативный принтер | 1.82 MB |
| CANON Selphy CP1200 | компактный фотопринтер | 2.40 MB |
| CANON Pixma PRO-100S (9984B009) | принтер струйный | 8.75 MB |
| CANON Pixma MG3640 (0515C007) | мфу струйный | 11.95 MB |
| CANON Pixma iP7240 (6219B007) | принтер струйный | 2.14 MB |
| CANON Pixma iP2840 (8745B007) | принтер струйный | 4.27 MB |
| CANON Pixma G1400 (0629C009) | принтер струйный | 5.70 MB |
| CANON MAXIFY MB5340 | мфу струйное цветное | 17.10 MB |
| CANON i-Sensys MF421dw (2222C008) | мфу лазерное | 6.07 MB |
«— 1 2 3 … 12 13 14 —»
Что удобнее для чтения книг?
Планшет
Электронная книга
Смартфон
Книга в бумажном переплёте
Не читаю книг
Отсортировать по: Названию
| инструкция | устройство | размер |
| CANON i-Sensys Colour MF744Cdw (3101C031) A4 Duplex WiFi | принтер | 6.15 MB |
| CANON i-Sensys Colour MF645Cx (3102C032) A4 Duplex WiFi | принтер | 6.15 MB |
| CANON i-Sensys LBP228x (3516C006) A4 Duplex WiFi | принтер | 4.10 MB |
| CANON i-Sensys LBP6030B (8468B006) A4 | принтер | 4.03 MB |
| CANON Pixma TS704 (3109C007) A4 Duplex WiFi USB RJ-45 | принтер | 10.20 MB |
| CANON Selphy 1300 (2234C002) | фотопринтер | 3.15 MB |
| CANON Selphy 1300 (2235C002) | фотопринтер | 3.15 MB |
| CANON i-Sensys Colour MF641Cw (3102C015) A4 WiFi | принтер | 27.98 MB |
| CANON Pixma G5040 | струйный принтер | 8.03 MB |
| CANON PIXMA G2040 | струйный принтер | 7.78 MB |
| CANON imageFORMULA DR-M260 | сканер | 4.36 MB |
| CANON imageFORMULA DR-C225W | сканер | 2.91 MB |
| CANON Zoemini Rose (3204C004) | принтер | 1.85 MB |
| CANON Pixma GM2040 (3110C009) | принтер | 7.68 MB |
| CANON Pixma G5040 (3112C009) | принтер | 9.31 MB |
| CANON Pixma G1411 (2314C025) | принтер | 5.25 MB |
| CANON iPF TM-200 (3062C003) | принтер | 3.29 MB |
| CANON i-SENSYS MF449x | мфу лазерное | 14.77 MB |
| CANON i-Sensys Colour MF746Cx | мфу лазерное | 7.42 MB |
| CANON imageRUNNER C3125i | мфу лазерное | 1.85 MB |
| CANON imageRUNNER 2206 | мфу лазерное | 2.65 MB |
| CANON Pixma TS8340 (3775C007) | мфу | 3.00 MB |
| CANON Pixma TR4540 (2984C007) | мфу | 13.61 MB |
| CANON Pixma G4411 (2316C025) WiFi | мфу | 166.17 kB |
| CANON Pixma G3411 (2315C025) | мфу | 6.71 MB |
| CANON Pixma G2411 (2313C025) | мфу | 6.29 MB |
| CANON MAXIFY MB 2140 (0959C007) | мфу | 1.34 MB |
| CANON i-Sensys MF269dw (2925C028) | мфу | 4.62 MB |
| CANON i-SENSYS FAX-L 170 (5258B046) | мфу | 14.43 MB |
| CANON imageRUNNER C 1225 iF (9548B007) | мфу | 1.74 MB |
| CANON imageRUNNER 2206iF (3029C004) | мфу | 7.00 MB |
| CANON i-SENSYS LBP712Cx | лазерный принтер | 12.70 MB |
| CANON i-SENSYS LBP710Cx | лазерный принтер | 12.70 MB |
| CANON i-SENSYS LBP352x | лазерный принтер | 7.94 MB |
| CANON i-SENSYS LBP325x | лазерный принтер | 8.14 MB |
| CANON i-Sensys LBP223dw | лазерный принтер | 4.89 MB |
| CANON i-Sensys Colour LBP664Cx | лазерный принтер | 5.42 MB |
| CANON I-SENSYS LBP312X (0864C003) | принтер | 9.09 MB |
| CANON COLOUR I-SENSYS LBP623CDW (3104C001) | принтер | 4.54 MB |
| CANON COLOUR I-SENSYS LBP621CW (3104C007) | принтер | 4.54 MB |
| CANON Zoemini | портативный принтер | 1.82 MB |
| CANON Zoemini PV123 WHS EXP | портативный принтер | 1.82 MB |
| CANON Selphy CP1200 | компактный фотопринтер | 2.40 MB |
| CANON Pixma PRO-100S (9984B009) | принтер струйный | 8.75 MB |
| CANON Pixma MG3640 (0515C007) | мфу струйный | 11.95 MB |
| CANON Pixma iP7240 (6219B007) | принтер струйный | 2.14 MB |
| CANON Pixma iP2840 (8745B007) | принтер струйный | 4.27 MB |
| CANON Pixma G1400 (0629C009) | принтер струйный | 5.70 MB |
| CANON MAXIFY MB5340 | мфу струйное цветное | 17.10 MB |
| CANON i-Sensys MF421dw (2222C008) | мфу лазерное | 6.07 MB |
«— 1 2 3 … 12 13 14 —»
Что удобнее для чтения книг?
Планшет
Электронная книга
Смартфон
Книга в бумажном переплёте
Не читаю книг

© 2010- ManualBase.ru
- Статьи
- О сайте
- Помощь
- Контакты
- Пользовательское соглашение
- Политика обработки персональных данных
© 2010- ManualBase.ru