- Manuals
- Brands
- Razer Manuals
- Computer Accessories
- Chroma Addressable RGB Controller
- Master manual
-
Contents
Table of Contents -
Bookmarks
Quick Links
.
RAZER CHROMA ADDRESSABLE
RGB CONTROLLER
MASTER GUIDE
Related Manuals for Razer Chroma Addressable RGB Controller
Summary of Contents for Razer Chroma Addressable RGB Controller
-
Page 1
RAZER CHROMA ADDRESSABLE RGB CONTROLLER MASTER GUIDE… -
Page 2
Realize your ultimate RGB vision with the Razer Chroma Addressable RGB Controller, as you sync your ARGB components with your Razer Chroma peripherals and devices via Razer Synapse 3—software designed for the world’s largest lighting ecosystem for gaming devices. ™… -
Page 3: Table Of Contents
2. LET’S GET YOU COVERED ……………………5 3. TECHNICAL SPECIFICATIONS ……………………6 4. SETTING UP THE ARGB CONTROLLER ………………..7 5. CONFIGURING YOUR RAZER CHROMA ARGB CONTROLLER …………..10 6. SAFETY AND MAINTENANCE …………………… 22 7. LEGALESE ………………………… 23 ™…
-
Page 4: What’s Inside / What’s Needed
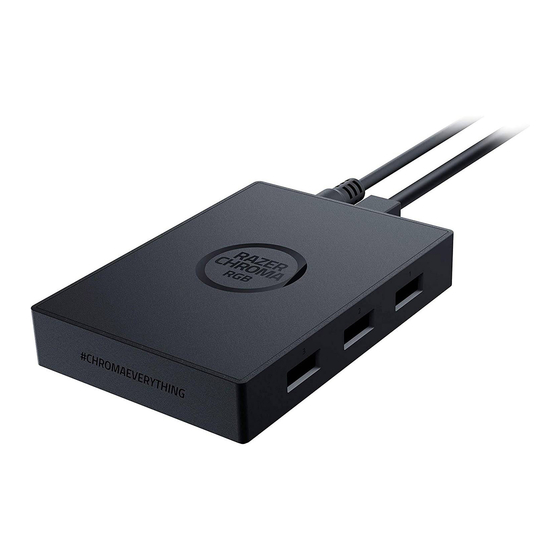
1. WHAT’S INSIDE / WHAT’S NEEDED WHAT’S INSIDE ▪ Razer Chroma Addressable RGB Controller Power port 3-pin 5V ports (4-6) Micro-USB port 3-pin 5V ports (1-3) ▪ Molex to DC Cable ™ F O R G A M E R S . B Y G A M E R S .
-
Page 5
▪ Addressable RGB (ARGB) strips / devices* using WS2812B LEDs (or equivalent) ▪ Power Supply Unit (PSU) with a free Molex socket ▪ Motherboard with a free USB 2.0 9-pin header Razer Synapse requirements ▪ Windows® 10 64-bit (or higher) ▪ Internet connection for software installation *For more information, visit support.razer.com… -
Page 6: Let’s Get You Covered
2. LET’S GET YOU COVERED You’ve got a great device in your hands, complete with a 1-year limited warranty coverage. Now maximize its potential and score exclusive Razer benefits by registering at razerid.razer.com Your product’s serial number can be found here.
-
Page 7: Technical Specifications
▪ Razer Chroma Addressable RGB Controller Module ▪ 6 Addressable RGB (ARGB) headers ▪ Internal USB header to Micro-USB cable for Razer Chroma support ▪ Molex to DC power adapter for internal case lighting ▪ Double sided adhesive tape for mounting ▪…
-
Page 8: Setting Up The Argb Controller
4. SETTING UP THE ARGB CONTROLLER Before plugging an ARGB connector to any of the 3-pin 5V ports of the ARGB controller, make sure that its pins are properly aligned to the chosen port. 1. Plug your ARGB LED strips* or devices* to any of the 3-pin 5V ports of the ARGB controller. *Not included.
-
Page 9
Molex to DC cable 3. Connect the ARGB controller to the internal USB header on the motherboard using the included Micro-USB to USB pin header cable. Micro-USB to USB pin header cable 4. You may use the included double-sided adhesive tapes to fasten the ARGB controller on any clean, dry and flat surface inside the chassis. -
Page 10
PC’s empty SSD mounting plates using M3 screws (not included). 5. Use the Razer Synapse* app to access in-depth lighting customization options and integrate games and applications across your ARGB and Razer Chroma-enabled devices for a truly immersive experience. -
Page 11: Configuring Your Razer Chroma Argb Controller
SYNAPSE TAB The Synapse tab is your default tab when you first launch Razer Synapse. This tab allows you to navigate the Dashboard subtab. Dashboard The Dashboard subtab is an overview of your Razer Synapse where you can access all your Razer devices, modules, and online services.
-
Page 12
Modules The Modules subtab displays all installed and available modules for installation. ™ F O R G A M E R S . B Y G A M E R S . -
Page 13
Global Shortcuts Bind operations or Razer Synapse functions to custom key-combinations from any Razer Synapse- enabled device inputs which apply across all device profiles. Learn more about Profiles Only Razer Synapse-enabled device inputs will be recognized. ™ F O R G A M E R S . B Y G A M E R S . -
Page 14
ACCESSORY TAB The Accessory tab is the main tab for your Razer Chroma ARGB Controller. From here, you’d be able to configure the properties of connected ARGB strips or devices, customize ARGB LED strip bends (if applicable) and the lighting effect of any or all connected devices. Changes made under this tab are automatically saved to your system and cloud storage. -
Page 15
▪ Device Type. Determines the type of device connected to a corresponding port. ▪ No. of LEDs. Sets the number of LEDs a connected device will have. By default, Razer Synapse detects the number of LEDs each connected strip or device has. -
Page 16
Profile A Profile is a data storage for keeping all your Razer devices’ settings. By default, the profile name is based on your system’s name. To add, import, rename, duplicate, export, or delete a profile, simply press the profile’s corresponding Miscellaneous button (… -
Page 17
Select a wave direction direction selected If you have other supported Razer Chroma-enabled devices, you can synchronize their quick effects with your Razer device by clicking the Chroma Sync button ( Only devices that support the selected lighting effect will synchronize. -
Page 18
Advanced Effects The Advanced Effects option allows you to choose a Chroma Effect you want to use on your Razer Chroma-enabled device. To start making your own Chroma Effect, simply press the Chroma Studio button ( Switch Off Lighting This is a power saving tool which allows you to disable all lighting in response to your system’s display turning off. -
Page 19
PROFILES TAB The Profiles tab is a convenient way of managing all your profiles and linking them to your games and applications. Devices View which games are linked to each device’s profiles or which Chroma Effect is linked to specific games using the Devices subtab. -
Page 20
You can also sort games based on alphabetical order, last played, or most played. Added games will still be listed here even if it is not linked to a Razer device. To link games to connected Razer devices or Chroma Effects, simply click on any game from the list, and then click Select a device and its profile to launch automatically during gameplay to select the Razer device or Chroma Effect it will link with. -
Page 21
Reset tab The Reset tab allows you to perform a factory reset on all connected Razer devices with on-board memory and/or reset Razer Synapse tutorials to acquaint yourself again with Razer Synapse’s new features on its next launch. -
Page 22
The About tab displays brief software information, copyright statement and provides relevant links for its terms of use. You may also use this tab to check for software updates, or as a quick access to Razer’s social communities. ™ F O R G A M E R S . B Y G A M E R S . -
Page 23: Safety And Maintenance
6. SAFETY AND MAINTENANCE SAFETY GUIDELINES In order to achieve maximum safety while using your Razer Chroma Addressable RGB Controller, we suggest that you adopt the following guidelines: ▪ Should you have trouble operating the device properly and troubleshooting does not work, unplug the device and contact the Razer hotline or go to support.razer.com…
-
Page 24: Legalese
Product. In no event shall Razer’s liability exceed the retail purchase price of the Product.
перейти к содержанию
Поддержка контроллера Razer Chroma Addressable RGB

FAQ
Краткий обзор: адресный контроллер RGB Razer Chroma
Воплотите в жизнь свое идеальное видение RGB с помощью адресуемого контроллера RGB Razer Chroma, синхронизируя компоненты ARGB с периферийными устройствами и устройствами Razer Chroma с помощью Razer Synapse 3 — программного обеспечения, разработанного для крупнейшей в мире экосистемы освещения для игровых устройств.
Схема устройства

Полные технические характеристики
| Питания | Molex в DC |
| Связь | Контактный разъем Micro-USB для USB |
| Заголовки | 6 заголовков ARGB |
| Совместимость с Razer Chroma | Да |
| Включен Razer Synapse 3 | Да |
Что такое адресный контроллер RGB Razer Chroma?
Контроллер Razer Chroma ARGB дает вам доступ к надежному инструменту настройки, который позволяет полностью персонализировать вашу установку. Razer Chroma ™ RGB — это крупнейшая в мире экосистема освещения для игровых устройств, включая базовые световые эффекты, Chroma Studio и более 150 игровых интеграций, поддерживающая более 500 устройств от более чем 50 партнеров. Нажмите здесь чтобы узнать больше.
Требуется ли мне подключение к Интернету для настройки Razer Chroma ARGB Controller?
Нет, для настройки контроллера подключение к Интернету не требуется. Однако для работы с контроллером Razer Chroma ARGB во время установки программного обеспечения требуется подключение к Интернету.
Какой тип подключения использует контроллер Razer Chroma ARGB?
Контроллер Razer Chroma ARGB использует контактный разъем Micro-USB — USB для подключения к материнской плате ПК.
Каковы требования для настройки контроллера Razer Chroma ARGB?
Для успешной установки контроллера Razer Chroma ARGB вам потребуется следующее:
- Адресные полосы RGB (ARGB) * или устройства *, использующие светодиоды WS2812B (или аналогичные)
- Блок питания (БП) со свободной розеткой Molex
- Материнская плата со свободным 9-контактным разъемом USB
- 7-разрядная версия Windows® 64 (или выше)
- Интернет-соединение для установки программного обеспечения
* При появлении запроса установите Razer Synapse
Что входит в коробку с контроллером Razer Chroma ARGB?
Контроллер Razer Chroma ARGB поставляется со следующим:
- Кабель Molex на постоянный ток
- Кабель с разъемом Micro-USB на USB
- 2 x Двусторонние клейкие ленты
- Важное информационное руководство по продукту
Как
Как настроить контроллер Razer Chroma ARGB?
Как я могу изменить или разобрать Razer Chroma ARGB Controller?
Мы не можем помочь вам изменить или разобрать продукт Razer, поскольку это приведет к аннулированию гарантии производителя на устройство.
Как настроить контроллер Razer Chroma ARGB?
Программное обеспечение и загрузки
Какое программное обеспечение мне нужно загрузить для настройки контроллера Razer Chroma ARGB?
Вам необходимо скачать и установить Razer Synapse чтобы получить доступ к подробным параметрам настройки освещения и интегрировать игры и приложения на свои устройства с поддержкой ARGB и Razer Chroma для действительно полного погружения. Узнайте больше на razer.com/хрома.
Скачать
Основное руководство по адресуемому контроллеру RGB Razer Chroma (традиционный китайский) — Скачать
Основное руководство по адресуемому контроллеру RGB Razer Chroma (упрощенный китайский) — Скачать
Основное руководство по адресуемому RGB-контроллеру Razer Chroma (на русском языке) — Скачать
Основное руководство по адресуемому контроллеру RGB Razer Chroma (португальско-бразильский) — Скачать
Основное руководство по адресуемому контроллеру RGB Razer Chroma (корейский) — Скачать
Основное руководство по адресуемому контроллеру RGB Razer Chroma (на японском языке) — Скачать
Основное руководство по адресуемому контроллеру RGB Razer Chroma (на французском языке) — Скачать
Основное руководство по адресуемому контроллеру RGB Razer Chroma (испанский) — Скачать
Основное руководство по адресуемому контроллеру RGB Razer Chroma (на немецком языке) — Скачать
Основное руководство по адресуемому RGB-контроллеру Razer Chroma (на английском языке) — Скачать
Посмотреть инструкция для Razer Chroma Addressable RGB Controller бесплатно. Руководство относится к категории контроллеры, 1 человек(а) дали ему среднюю оценку 9.7. Руководство доступно на следующих языках: русский. У вас есть вопрос о Razer Chroma Addressable RGB Controller или вам нужна помощь? Задайте свой вопрос здесь
Не можете найти ответ на свой вопрос в руководстве? Вы можете найти ответ на свой вопрос ниже, в разделе часто задаваемых вопросов о Razer Chroma Addressable RGB Controller.
Аккумулятор в моем устройстве контроллер начал ржаветь. Безопасно ли пользоваться устройством?
Продукт безопасен для использования после надлежащей очистки. Извлеките аккумулятор, надев перчатки, и очистите аккумуляторный отсек зубной щеткой, смоченной уксусом. После высыхания установите в устройство новые аккумуляторы.
Инструкция Razer Chroma Addressable RGB Controller доступно в русский?
Да, руководствоRazer Chroma Addressable RGB Controller доступно врусский .
Не нашли свой вопрос? Задайте свой вопрос здесь
To properly configure the Razer Chroma Addressable RGB Controller, you need to download and install Razer Synapse. This will allow you to access in-depth lighting customization options and integrate games and applications across your ARGB and Razer Chroma-enabled devices.
This article shows the different tabs in Synapse to guide you on how to properly configure your Razer Chroma ARGB Controller.
Once successfully installed, launch Razer Synapse.
SYNAPSE TAB
The SYNAPSE tab is your default tab after launching Razer Synapse. This tab shows the DASHBOARD, MODULES, and GLOBAL SHORTCUTS subtab.

ACCESSORY TAB
The ACCESSORY tab is the main tab for your Razer Chroma ARGB Controller. From here, you’d be able to configure the properties of connected ARGB strips or devices, customize ARGB LED strip bends (if applicable) and the lighting effect of any or all connected devices. Changes made under this tab are automatically saved to your system and cloud storage.
CUSTOMIZE
The CUSTOMIZE subtab displays all ports with connected ARGB strips or devices. This shows the type of ARGB strip or device connected to each port and identifying the number of LEDs on each connected ARGB device.

Auto-Detect / Manual Detection
By default, the ARGB controller is set to Auto-detect (  ). This allows Razer Synapse to automatically detect all ports with connected ARGB devices on startup.
When a device is connected or disconnect from any port, click on the Refresh button (  ) to manually trigger device detection on all ports. Active ports will then be re-displayed while all inactive ports will be removed.
Port
Active ports will automatically be displayed together with the estimated LED count of its corresponding strip or device.

On each active Port, the following settings can be modified:
- Device Type — Determines the type of device connected to a corresponding port.
- No. of LEDs — Sets the number of LEDs a connected device will have. By default, Razer Synapse detects the number of LEDs each connected strip or device has.
- Add 90o bend (for LED Strips only) — Allows you to strategically mimic how an LED strip is bent on your physical setup. Each LED strip can be bent up to four (4) times.
Note: These bends are essential if you want to customize specific sections on any LED strip separately. However, LED-specific customizations can only be made using the Chroma Studio module.
LIGHTING
The Lighting subtab enables you to customize the lighting of any or all connected ARGB strips or devices.

PROFILE
A Profile is a data storage for keeping all your Razer devices’ settings. By default, the profile name is based on your system’s name. To add, import, rename, duplicate, export, or delete a profile, simply press the profile’s corresponding Miscellaneous button (  ).
).
BRIGHTNESS
You can turn off the lighting of each connected ARGB strip or device by toggling the BRIGHTNESS option or increase/decrease the luminance on any port by adjusting its corresponding slider. Alternatively, you can enable Global Brightness if you want to adjust a single brightness setting for all ports.
QUICK EFFECTS
A number of effects can be selected and applied to all connected LED strips and/or devices, as listed here:

If you have other supported Razer Chroma-enabled devices, you can synchronize their quick effects with your Razer device by clicking the Chroma Sync button (  ).
).
Note: Only devices that support the selected lighting effect will synchronize.
ADVANCED EFFECTS
The Advanced Effects option allows you to choose a Chroma Effect you want to use on your Razer Chroma-enabled device. To start making your own Chroma Effect, simply press the Chroma Studio button (
SWITCH OFF LIGHTING
This is a power-saving tool that allows you to disable all lighting in response to your system’s display turning off.
PROFILES TAB
The Profiles tab is a convenient way of managing all your profiles and linking them to your games and applications.
DEVICES
View which games are linked to each device’s profiles or which Chroma Effect is linked to specific games using the DEVICES subtab.

You can import Profiles from your computer or from the cloud through the import button (  ) or create new profiles within the selected device using the add button (
  ). To rename, duplicate, export, or delete a profile, simply press the Miscellaneous button (
  ). Each profile can be set to automatically activate when you run an application using the Linked Games option.
LINKED GAMES
The LINKED GAMES subtab gives you the flexibility to add games, view devices that are linked to games, or search for added games. You can also sort games based on alphabetical order, last played, or most played. Added games will still be listed here even if it is not linked to a Razer device.

To link games to connected Razer devices or Chroma Effects, simply click on any game from the list, and then click Select a device and its profile to launch automatically during gameplay to select the Razer device or Chroma Effect it will link with. Once linked, you can click on the Miscellaneous button (  ) of the corresponding Chroma Effect or device to select a specific Chroma Effect or profile.
SETTINGS WINDOW
The SETTINGS window, accessible by clicking the ( ) button on Razer Synapse, enables you to configure the startup behavior and display language of Razer Synapse, view the master guides of each connected Razer device, or perform a factory reset on any connected Razer device.

|
Related Devices:
|
Types of Manuals:
The main types of Razer Chroma Addressable RGB Controller instructions:
- User guide — rules of useing and characteristics
- Service manual — repair, diagnostics, maintenance
- Operation manual — description of the main functions of equipment
Computer Accessories Instructions by Razer:
-
Acnodes KDC 81932
20957 Currier Road Suite #DWalnut, CA 91789tel: 909.598.7388, fax: 909.598.0218© Copyright 2005 Acnodes, Inc.All rights reserved. Product description and product specificationsare subject to change without notice. For latest product information,please visit Acnodes’ web site at www.acnodes.com.KDC 8193219” 1280 x …
KDC 81932 Computer Accessories, 1
-
HP Pavilion dv6
http://www.laptopking.com/manuals/servicemanualtemplete.htm[3/6/2010 9:27:19 PM]Keyboard Removal GuideHP Pavilion DV6 Series NotebookRemoval may vary slightly from model to modelexcelcomputerinc.com / laptopking.comRemoving the keyboard from the HP Pavilion DV6 series notebook requires several steps. The only tool need …
Pavilion dv6 Laptop, 5
-
Olympus EU-ME2
VIDEO SOURCE key Image on monitor LCD touch panelQUICK-REFERENCE GUIDE – BASIC CONTROLSInsert mechanical scanning scopes in the left socket (SOCKET1) or electronic scanning scopes in the right socket (SOCKET2) and turn the lever clockwise to tighten the endoscope connector.Press the power switch and confirm that the …
EU-ME2 Computer Accessories, 2
-
Sony CDL1100
1SUPPLEMENT-2File this supplement with the service manual.SUBJECT :1. ADDITION CDL1100-40 SERIES(ENG-99001)CDL1100SERVICE MANUALFor Technical ServiceThe 40 series has been added to the CDL1100. Use this manual together with the service manual already distributed (SUPPLEMENT-1).MODEL IDENTIFICATION— SPECIFICATION LABE …
CDL1100 Computer Accessories, 54
-
Heckler Design H506
Assembly & InstallationH506WindFall® CHECKOUT STAND Point-of-Sale Stand for iPad miniLimited WarrantyHeckler Design warrants your product to be free from defect in material and workmanship for a period of two years from the original date of purchase. Electronic components are warranted to be free from defect for a …
H506 Computer Accessories, 17
-
Manta SSSnake MM729
SSSnakeMODEL: MM729Aby zapewnić prawidłową obsługę sprzętu zapoznaj się dokładnie z instrukcją i zachowaj ją na przyszłośćTo ensure proper use of this productplease read this User Manual carefullyand keep for future referenceInstrukcja obsługi User’s manual …
SSSnake MM729 Computer Accessories, 4