
Раздел 3:
• Входной источник также можно выбрать с помощью
кнопок INPUT SELECT на пульте ДУ или с
03
03
Основные операции
помощью регулятора на передней панели INPUT
SELECTOR. В так
ом случае, с
помощью пульта ДУ
воспроизведения
невозможно переключать рабочие режимы.
Если выбран нужный источник входа, но отсутствует звук,
выберите входной аудиосигнал для воспроизведения (см.
Выбор входного аудиосигнала ниж).
Отмена режима демонстрации дисплея
Когда ресивер не работает, дисплей на передней панели
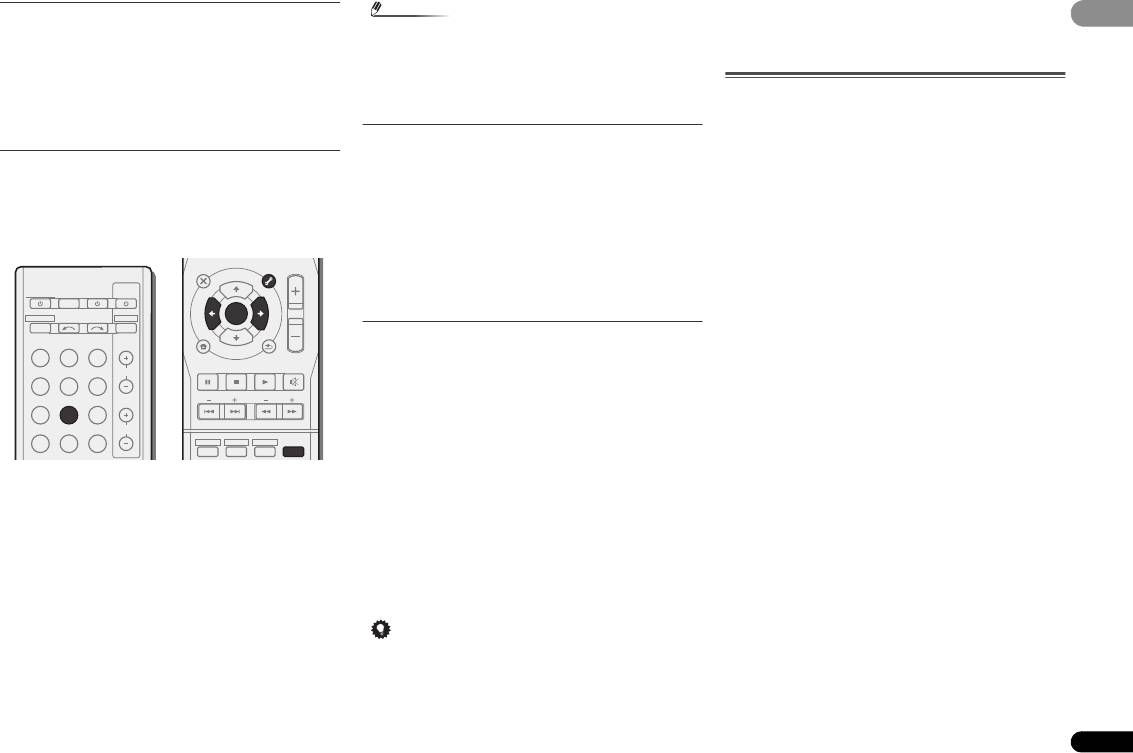
4 Нажмите
AUTO/DIRECT
для выбора пункта «
AUTO
показывает различную информацию (режим демонстрации
SURROUND
» и начните воспроизведение источника.
дисплея).
Если воспроизводится диск DVD с объемным звучанием в
формате Dolby Digital или DTS, с подключением цифрового
Вы можете отключить режим демонстрации дисплея.
Подробнее, см. Меню FL Demo Mode (режим демонстрации)
аудио, звучание должно быть объемным. Если
на стр. 26.
воспроизводится стереофонический источник, или если
выполняется подключение аналогового аудио, в режиме
прослушивания по умолчанию звучание будет
Воспроизведение источника
воспроизводиться через передние правый и левый
В данном разделе приведены основные инструкции по
громкоговорители.
воспроизведению источника (например, диска DVD) с
На дисплее передней панели можно проверить, правильно ли
помощью системы домашнего кинотеатра.
выполняется воспроизведение объемног
о звучан
ия.
При использовании заднего громкоговорителя объемного
звучания, при воспроизведении сигналов Dolby Digital
отображается 2D+PLIIx, и при воспроизведении 5.1-
канальных сигналов DTS отображается DTS+NEO:6.
Если задний громкоговоритель объемного звучания не
используется, при воспроизведении сигналов Dolby Digital
отображается 2D.
Если информация на дисплее не соответствует входному
сигналу и режиму прослушивания, проверьте подключения и
настройки.
1 Включите компоненты системы и ресивер.
Сначала включите аппаратуру для воспроизведения
(например, проигрыватель DVD), используемый телевизор и
низкочастотный громкоговоритель (если имеется), затем —
ресивер (нажмите RECEIVER).
2 Переключите вход телевизора на вход для
подключения к данному ресиверу.
Например, при подключении данного ресивера к гнездам
VIDEO на телевизоре, убедитесь, что выбран вход VIDEO.
3 Нажмите кнопки функций входа для выбора
функции входа, которую требуется воспроизвести.
• Вход ресивера будет переключаться, и можно будет
работать с другими компонентами с помощью пульта ДУ.
Для управления ресивером, сначала нажмите
на пульте ДУ, затем нажмите соответствующую кнопку
для управления.
17
Ru
Примечание
Выключите звук громкоговорителей телевизора, чтобы все
звуковые сигналы выводились через громкоговорители,
подключенные к данному ресиверу.
Выбор входного аудиосигнала
Входной аудиосигнал можно выбрать для каждого входного
источника. Как только он установлен, будет использоваться
выбранный аудиовход каждый раз, когда выбирается входной
источник с помощью кнопок функций входа.
Нажмите кнопку
SIGNAL SEL
, чтобы выбрать
входной аудиосигнал, соответствующий сигналу
компонента—источника.
При каждом нажатии параметры выбираются в следующем
порядке:
• H – Выбирается сигнал HDMI. Значение H можно выбрать
для входа BD, DVD, DVR/BDR и CD/SAT. Для других
входов выбрать H невозможно.
—
Если параметр HDMI в Настройка параметров звука на
стр. 23 установлен как THRU, звук будет
воспроизводиться через телевизор, а не через ресивер.
• C1/O1 – выбирается цифровой вход. Для C1 выбирается
вход коаксиальный 1, а для O1 выбирается аудиовход
оптический 1.
• A – выбираются аналоговые входы.
• Возможно, потребуется проверить настройки цифрового
Когда выбрано значение H (HDMI) или C1/O1 (цифровой), а
аудиовыхода на проигрывателе DVD или цифровом
вы
бранный аудиовход отсутствует, автомат
ически
спутниковом ресивере. Он должен быть установлен на
выбирается значение A (аналоговый). (За исключением входа
вывод аудиосигнала в формате Dolby Digital, DTS и
BD, DVR/BDR.)
88,2 кГц / 96 кГц PCM (2-канальный), а если имеется
параметр MPEG audio, выберите конвертирование
сигнала MPEG audio в формат PCM.
• В зависимости от проигрывателя DVD или
воспроизводимых дисков может выводиться только 2-
канальный цифровой стереофонический и аналоговый
звук. В этом случае, если требует
ся получить
многоканаль
ный объёмный звук, ресивер необходимо
установить в режим многоканального прослушивания.
5 Для регулировки уровня громкости используйте
регулятор
MASTER VOLUME
.
Примечание
• Для входа TV, можно выбрать только A (аналоговый) или
C1/O1 (цифровой). Однако, если параметр ARC в HDMI
SET (Настройка HDMI) установлен на ON, вход
устанавливается на H (HDMI) и не может быть изменен.
• При установке на H (HDMI) или C1/O1 (цифровой), при
входном сигнале в формате Dolby Digital загорается
индикатор 2, а при входном сигнале DTS загорается
индик
атор DTS.
• Если выбран параметр H (HDMI), не
работают
индикаторы A и DIGITAL (см. стр.7).
AUTO/
ALC/
BD MENU
DIRECT
STEREO
STANDARD
ADV SURR
RECEIVER
SOURCESLEEP
CONTROL
TV
AUDIO
TUNER EDIT
MASTER
RECEIVER
PARAMETER
TOOLS
VOLUME
INPUT SELECT
DTV/TV
TOP
T
U
N
E
MENU
INPUT
MENU
BD DVD TV
T
P
E
R
S
ENTER
E
E
E
S
R
P
T
DVR/BDR
CD
CD-R
CH
HOME
MENU
T
U
N
E
ADAPTER
TUNER
PORTABLE
SETUP
BAND
PTY SEARCH
RETURN
MUTE
DVR/BDR
CD
CD-R
CH
ADAPTER
TUNER
PORTABLE
PHASE
SIGNAL SELS.RETRIEVER
VOL
RECEIVER

• Если выбран цифровой вход (оптический или
• При воспроизведении аналогового сигнала с помощью
• Это устро
йство не совместимо с декодированием DSD.
03
03
коаксиальный), данный ресивер может воспроизводить
проигрывателей ла
зерных или компакт—дисков,
Установите
выход проигрывателя на PCM при
только цифровые сигналы форматов Dolby Digital, PCM
поддерживающих систему DTS, могут возникать
воспроизведении SACD на проигрывателе, совместимом
(от 32 кГц до 96 кГц) и DTS (включая 24-битный DTS
цифровые помехи. Для предотвращения возникновения
с SACD. Подробнее см. в инструкции по эксплуатации
96 кГц). Совместимыми сигналами через терминалы
помех выполните соответствующие цифровые
проигрывателя.
HDMI являются: Dolby Digital, DTS, PCM (от 32 кГц до
подключения (стр. 13) и установите в качестве входного
192 кГц), Dolby TrueHD, Dolby Digital Plus, DTS-
сигнала значение C1/O1 (цифровой).
EXPRESS, DTS-HD Master Audio и DVD Audio (включая
• На некоторых проигрывателях DVD сигналы DTS не
Прослушивание радиопередач
192 кГц). Для других форматов цифрового сигнала
выводятся. Для получения подробных сведений см.
В приведенных ниже пунктах описывается процедура
установите на A (аналоговый).
инструкцию по эксплуатации, прилагаемую к
настройки на радиостанции диапазона FM и AM с
проигрывателю DVD.
использованием функций автоматической (поиск) или
ручной (пошаговой) настройки. Выполнив настройку на
радиостанцию, ее частоту можно сохранить в памяти для
последующего вызова. Более подробно об этом см. раздел
Сохранение запрограммированных радиостанций на стр. 19.
DVR/BDR
CD
CD-R
CH
ADAPTER
TUNER
PORTABLE
ENTER
PHASE
SIGNAL SELS.RETRIEVER
VOL
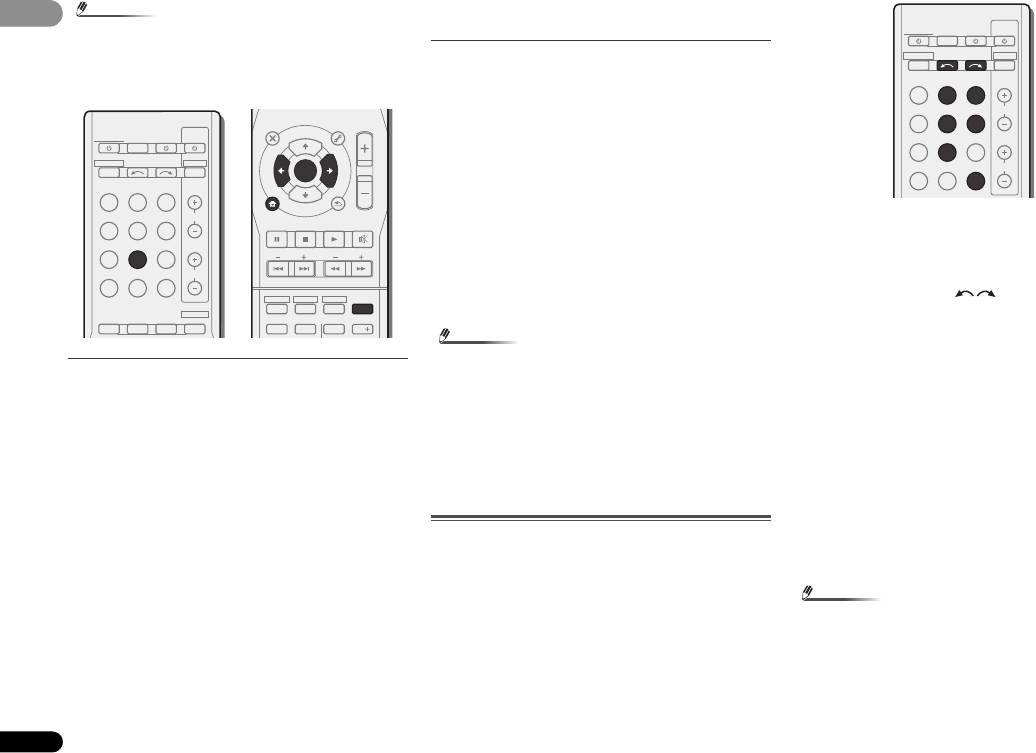
1 Нажмите
TUNER
для выбора тюнера.
2 При необходимости с помощью
BAND
выберите
диапазон (FM или AM).
При каждом нажатии диапазон переключается между FM
(стерео или моно) и AM.
3 Выполните настройку на радиостанцию.
Это можно сделать тремя способами, описанными ниже.
Автоматическая настройка
Для поиска радиостанции в текущем выбранном
диапазоне нажмите кнопку TUNE / и удерживайте
нажатой примерно секунду. Ресивер начнет поиск
следующей радиостанции и прекратит его, когда она
будет обнаружена. Повторите эти действия для поиска
других радиостанций.
Ручная настройка
Для пошагового изменения частоты нажимайте кнопки
TUNE /
.
Ускоренная настройка
Нажмите и удерживайте TUNE / для
высокоскоростного тюнинга. Отпустите кнопку на
нужной частоте.
18
Ru
MUTE
AUDIO
TUNER EDIT
MASTER
PARAMETER
TOOLS
VOLUME
TOP
T
U
N
E
MENU
MENU
T
P
E
R
S
E
E
S
P
R
E
T
HOME
MENU
T
U
N
E
SETUP
BAND
PTY SEARCH
RETURN
Совет
• Чтобы получить изображение и/или звук от устройств, подключенных к каждому терминалу, выберите вход, выполнив
следующие действия.
1.
CD-R
1.
TV
DVR/BDR
DVD BD CD
2.
2.
SIGNAL SEL
SIGNAL SEL
C1
O1
HDMI
DVR/BDR IN DVD IN BD IN CD/SAT IN
OUT
COAXIAL
OPTICAL
IN
1
IN
1
ASSIGNABLE
(
CD-R / TAPE
)
(
TV
)
AUDIO
CD-R/TAPE SURR BACK
PRE OUT
L
CD-R CD
(
Single
)
OUT
SIGNAL SEL
DVDTV
A
R
VIDEO
L
FRONT
IN CD/SAT
A
ANTENNA
RL
SPEAKERS
IN
CENTER
SURROUND
CD/SAT
R
AM LOOP
RL
CD
TUNER
IN
DVD
L
DVD
IN
IN
R
MONITOR
SUBWOOFER
FM UNBAL
OUT
PRE OUT
TV
DVD
75
Аудио
Аудио
(CD-R/TAPE вход)
(TV вход)
Видео/Аудио
Кроме входа
CD-R/TAPE
Кроме входа TV
(HDMI)
Аудио
Видео
Улучшение звучания в диапазоне FM
03
03
Если при настройке на FM-радиостанцию индикаторы TUNE
или ST не горят из—за слабого сигнала, переключите ресивер
в режим монофонического приема.
Нажмите кнопку
BAND
, чтобы выбрать режим
FM
MONO
.
При этом качество звука должно повыситься, и вы сможете
получать удовольствие от прослушивания.
Сохранение запрограммированных радиостанций
Если Вы хотите слушать конкретную радиостанцию, то
удобно, чтобы ресивер сохранил частоту для быстрого поиска
в любое необходимое время. Это экономит усилия, устраняя
необходимость периодической ручной настройки. Данное
устройство может запоминать до 30 станций.
1 Выполните настройку на радиостанцию, которую
требуется занести в память.
Подробнее см. раздел Прослушивание радиопередач на
стр. 18.
2 Нажмите кнопку
TUNER EDIT
.
На дисплее появится надпись PRESET, затем мигающая
надпись MEM и запрограммированное значение для
радиостанции.
3 Нажимайте кнопки
PRESET /
для выбора
нужной запрограммированной радиостанции.
Также можно использовать цифровые кнопки.
4 Нажмите кнопку
ENTER
.
Запрограммированный номер перестает мигать, и ресивер
сохраняет данные радиостанции.
19
Ru
Примечание
• Если ресивер будет в течении более месяца отключен от
розетки переменного тока, содержимое памяти будет
утеряно, и потребуется повторное программирование.
• Радиостанции сохраняются в памяти в режиме стерео.
Если радиостанция сохраняется в памяти в режиме FM
MONO, при вызове она отображается как ST.
Прослушивание запрограммированных
радиостанций
Для этого в ресивере должно быть сохранено несколько
запрограммированных станций. Если таких станций еще нет,
обратитесь к разделу Сохранение запрограммированных
радиостанций вышe.
Нажимайте кнопки
PRESET /
для выбора
нужной запрограммированной радиостанции.
• Для вызова запрограммированной радиостанции можно
также использовать номерные кнопки на пульте
дистанционного управления.
Присваивание названий запрограммированным
радиостанциям
Для облегчения работы всем запрограммированным
радиостанциям можно присвоить названия.
1 Выберите запрограммированную станцию, которой
необходимо присвоить имя.
Для этого, см. Прослушивание запрограммированных
радиостанций вышe.
2 Нажмите
TUNER EDIT
дважды.
При этом на дисплее замигает курсор на позиции первого
символа.
3 Введите нужное имя.
Выберите название длиной до восьми символов.
• Используйте кнопки PRESET / для выбора позиции
символа.
• Используйте кнопки TUNE / для выбора символов.
• Название сохраняется при нажатии кнопки ENTER.
Совет
• Когда запрограммированной станции присвоено
название, нажмите DISP для отображения названия. Если
вы хотите вернуться к отображению частот, нажмите
DISP несколько раз для отображения частоты.
Введение в систему радиоданных RDS
Система радиоданных (RDS) – это система, которая
используется большинством радиостанций в диапазоне FM
для предоставления слушателям различной информации –
например, названия радиостанции или транслируемой
программы.
Одной из функций системы RDS является возможность
поиска станции, транслирующей требуемый тип программы.
Например, можно осуществлять поиск станции, которая
транслирует программы в жанре JAZZ (джаз).
Можно вести поиск программ следующих типов:
AUDIO
TUNER EDIT
MASTER
PARAMETER
TOOLS
VOLUME
NEWS – новости
FINANCE – биржевые сводки,
TOP
T
U
N
E
MENU
MENU
AFFAIRS – текущие события
коммерческая, торговая
RECEIVER
SOURCESLEEP
CONTROL
TV
T
P
R
INFO – информация
информация и т.д.
S
E
DTV/TV
E
ENTER
E
S
RECEIVER
INPUT SELECT
R
T
E
SPORT – спорт
CHILDREN – программы для
P
INPUT
детей
EDUCATE – oбразовательная
BD DVD TV
HOME
MENU
T
U
N
E
BAND
информаци
SOCIAL – общественная
PTY SEARCH
SETUP
RETURN
жизнь
DRAMA – pадиоспектакли и
DVR/BDR
CD
CD-R
CH
MUTE
т.д.
RELIGION – программы о
религии
CULTURE – национальная и
ADAPTER
TUNER
PORTABLE
BASS
TRE
местная культурная жизнь,
PHONE IN – программы,
театр и т.д.
предусматривающие
PHASE
SIGNAL SELS.RETRIEVER
VOL
обсуждение какой—либо темы и
HDD DVD VCR
SCIENCE – наука и техника
1
2
3
DISP
общение со слушателями по
VARIED – программы,
телефону
построенные на беседе или
TRAVEL – путешествия и
общении, например викторины
отдых
или интервью.
LEISURE – свободное время,
POP M – поп—музыка
интересы и хобби
ROCK M – рок—музыка
JAZZ – джазовая музыка
EASY M – легкая музыка
COUNTRY – музыка
LIGHT M – легкая
«кантри»
классическая музыка
NATION M – Популярная
CLASSICS – cерьезная
музыка не на английском языке
классическая музыка
OLDIES – популярная музыка
OTHER M – музыка, не
1950-х и 1960-х годов
соответствующая
FOLK M – народная музыка
• Чтобы стереть название станции, выполните пункты 1 и 2,
перечисленным категориям
DOCUMENT –
а затем нажмите ENTER при пустом дисплее. Чтобы
WEATHER – сводки и
публицистические программы
сохранить предыдущее название, нажмите TUNER EDIT
прогнозы погоды
при пустом дисплее.
03
03
20
Ru
Примечание
надпись NO PTY. Индикация FINISH означает, что поиск
закончен.
• Существуют также три дополнительных типа программ:
ALARM, ALARMTST и NO TYPE. ALARM и
ALARMTST используются для объявления о
Отображение информации RDS
чрезвычайных ситуациях. NO TYPE отображается, если
Используйте кнопку DISP для отображения разных типов
программы данного типа не обнаруживаются.
информации RDS.
Нажмите кнопку
DISP
для получения информации
RDS.
При каждом нажатии кнопки дисплей изменяется следующим
образом:
• Режим звучания
• Регулирование громкости
• Радиотекст (RT) – Сообщения, передаваемые
радиостанцией. Например, радиостанция, передающая
ток—шоу, может передавать номер телефона в виде
радиотекста.
• Имя программной услуги (PS) – Название радиостанции.
• Тип программы (PTY) – Отображает вид программы,
транслируемой в данный момент.
• Текущая частота тюнера (FREQ)
Поиск программ RDS
Можно осуществить поиск типов программ, перечисленных
выше.
1 Нажмите
TUNER
, а затем нажмите
BAND
для
выбора диапазона FM.
• Система RDS доступна только в диапазоне FM.
2 Нажмите кнопку
PTY SEARCH
.
На дисплее отображается SEARCH.
3 Нажмите
PRESET /
для выбора типа
программы, которую хотите прослушать.
4 Нажмите кнопку
ENTER
для поиска программы
заданного типа.
Система начинает поиск запрограммированных станций с
выбранным типом программы и прекратит его, когда она
будет обнаружена. Повторите эти действия для поиска других
радиостанций.
Если отображается индикация NO PTY, значит, тюнеру в
процессе поиска не удалось обнаружить программы
заданного типа.
• Поиск сигналов системы RDS выполняется только по
запрограммированным станциям. Если не
запрограммировано ни одной станции ил
и среди них не
удается найти тип
программы, на дисплее появится
Примечание
1 Нажмите кнопки функций входа, чтобы выбрать
функцию входа, которую требуется записать.
Вход ресивера будет переключаться, и можно будет работать
с другими компонентами с помощью пульта ДУ.
• Входной источник также можно выбрать с помощью
кнопок INPUT SELECT на пульте ДУ или с
помощью регулятора на передней панели INPUT
SELECTOR.
2 Выберите входной аудиосигнал (если необходимо).
• При возникновении помех некоторые символы на дисплее
Нажмите кнопку SIGNAL SEL и выберите аналоговые входы
RT могут отображаться неправильно.
(A) для компонента—источника, который требуется
• Если на дисплее RT отобразится сообщение NO TEXT,
использовать для записи (подробнее, см. стр. 17).
значит, радиостанция не передает данных радиотекста.
3 Подготовьте источник, который требуется
Дисплей автоматически переключается в режим
использовать для записи.
информации службы программ (если нет данных
Выполните настройку на нужную радиостанцию, вставьте
запрограммированной станции, появится сообщение NO
компакт—диск и т.д.
NAME).
• На дисплее PTY (тип программы) может отобразиться
4 Подготовьте рекордер/магнитофон.
надпись NO PTY.
Вставьте чистую кассету, мини—диск и т.д. в записывающее
устройство и установите уровни записи.
Если вы не знаете, как это делается, см. инструкции,
Выполнение аудиозаписи
прилагаемые к записывающему устройству.
Аудиозапись можно выполнить либо с помощью встроенного
5 Начните запись, затем начните воспроизведение на
тюнера, либо с помощью аудиоисточника, подключенного к
компоненте—источнике.
ресиверу (например, проигрывателя компакт—дисков или
телевизора).
Можно записывать только аудиосигналы, введенные в
данный ресивер через аналоговые аудиовходы. Нельзя
записать сигналы, введенные через кабель HDMI или
цифровой аудиокабель (оптический /коаксиальный)
(подробнее по подключениям см. Подключение других
аудиокомпонентов на стр.
15).
Примечание
• Настройки громкости, баланса, тембра (низкие частоты,
высокие частоты, тонкомпенсация) и эффектов объемного
звучания ресивера не влияют на записываемый сигнал.
AUDIO
TUNER EDIT
MASTER
PARAMETER
TOOLS
VOLUME
RECEIVER
CONTROL
T
U
N
E
MENU
SOURCESLEEP
TV
MENU
TOP
RECEIVER
INPUT SELECT
DTV/TV
E
T
R
P
E
INPUT
R
E
S
ENTER
S
E
P
T
BD DVD TV
HOME
MENU
T
U
N
E
BAND
DVR/BDR
CD
CD-R
CH
PTY SEARCH
SETUP
RETURN
MUTE
ADAPTER
TUNER
PORTABLE
BASS
TRE
PHASE
SIGNAL SELS.RETRIEVER
VOL
HDD DVD VCR
AUTO/
ALC/
BD MENU
1
2
3
DISP
DIRECT
STEREO
STANDARD
ADV SURR
TEST TONE
SB CH
CH SELECT
4
5
6
CH
RECEIVER
SOURCESLEEP
CONTROL
TV
RECEIVER
INPUT SELECT
DTV/TV
INPUT
BD DVD TV
DVR/BDR
CD
CD-R
CH
ADAPTER
TUNER
PORTABLE
PHASE
SIGNAL SELS.RETRIEVER
VOL
- Manuals
- Brands
- Pioneer Manuals
- Stereo Receiver
- VSX-322-K
- Operating instructions manual
-
Contents
-
Table of Contents
-
Troubleshooting
-
Bookmarks
Quick Links
VSX-322
-K
AV Receiver
http://www.pioneer.co.uk
(or http://www.pioneer.eu).
Discover the benefits of registering your product online at
Operating Instructions
Related Manuals for Pioneer VSX-322-K
Summary of Contents for Pioneer VSX-322-K
-
Page 1
VSX-322 AV Receiver http://www.pioneer.co.uk (or http://www.pioneer.eu). Discover the benefits of registering your product online at Operating Instructions… -
Page 2
IMPORTANT This product is for general household purposes. Any failure due to use for other than household purposes CAUTION (such as long-term use for business purposes in a restaurant or use in a car or ship) and which requires RISK OF ELECTRIC SHOCK repair will be charged for even during the warranty DO NOT OPEN period. -
Page 3
If the AC plug of this unit does not match the AC Information for users on collection and disposal of old equipment and used batteries outlet you want to use, the plug must be removed Symbol for These symbols on the products, packaging, and/or accompanying documents mean and appropriate one fitted. -
Page 4: Table Of Contents
Thank you for buying this Pioneer product. Please read through these operating instructions so you will know how to operate your model properly. After you have finished reading the instructions, put them away in a safe place for future reference.
-
Page 5: Before You Start
Before you start Flow of settings on the The FL Demo Mode menu (page 26) (When you don’t want the demo display to show on the receiver front panel display.) Checking what’s in the box The unit is a full-fledged AV receiver equipped with an Using the Audio Return Channel function (page 27) abundance of functions and terminals.
-
Page 6: Controls And Displays
Controls and displays Chapter 1: Controls and displays Front panel VSX-322 AV RECEIVER HDMI SPEAKERS DIMMER DISPLAY BAND TUNER EDIT TUNE PRESET ENTER AUTO SURROUND/ ALC/ ADVANCED SOUND STREAM DIRECT STANDARD SURR SURROUND STEREO RETRIEVER INPUT MASTER SELECTOR VOLUME STANDBY / ON PHONES TUNER EDIT –…
-
Page 7: Display
Controls and displays 96/24 – Lights when a source with DTS 96/24 encoded 11 SOUND RETRIEVER Press to restore CD quality sound to compressed audio audio signals is detected. sources (page 22). NEO:6 – When one of the NEO:6 modes of the receiver is on, this lights to indicate NEO:6 processing (page 21).
-
Page 8: Remote Control
Use to select the input source to this receiver (page 17). This MENU Press TUNER first to access: will enable you to control other Pioneer components with the MENU remote control. TUNER EDIT – Memorizes stations for recall (page 18), also used to change the name (page 19).
-
Page 9: Loading The Batteries
12 SOURCE Insert the plus and minus sides of the batteries properly Turns on or off the power of the Pioneer DVD/DVR units when according to the marks in the battery case. BD, DVD, DVR/BDR or CD is selected using the input Batteries with the same shape may have different function buttons.
-
Page 10: Connecting Your Equipment
Connecting your equipment Chapter 2: a. This layout is available only when the additional amplifier is connected to the unit and the surround back speakers are connected to the amplifier. For details, see Connect the surround back Connecting your equipment speakers on page 11.
-
Page 11: Connecting The Speakers
Connecting your equipment Front right Front left Connecting the speakers Subwoofer Center The receiver will work with just two stereo speakers (the front speakers in the diagram) but using at least three speakers is recommended, and a complete setup is best for surround LINE LEVEL INPUT sound.
-
Page 12: Making Cable Connections
Connecting your equipment Note About HDMI Making cable connections ® • Use a High Speed HDMI cable. If HDMI cable other than The HDMI connection transfers uncompressed digital video, Make sure not to bend the cables over the top of this unit. If ®…
-
Page 13: Analog Audio Cables
Connecting your equipment Analog audio cables Video cables About video outputs connection Use stereo RCA phono cables to connect analog audio This receiver is not loaded with a video converter. When you Standard RCA video cables components. These cables are typically red and white, and use HDMI cables for connecting to the input device, the These cables are the most common type of video connection you should connect the red plugs to R (right) terminals and…
-
Page 14: Connecting A Tv And Playback Components
Connecting your equipment Connecting your component with no HDMI terminal Connecting a TV and playback components This diagram shows connections of a TV and DVD player (or other playback component) with no HDMI terminal to the receiver. Connecting using HDMI If you have an HDMI or DVI (with HDCP) equipped component (Blu-ray Disc player, etc.), you can connect it to this receiver using a commercially available HDMI cable.
-
Page 15: Connecting A Satellite Receiver Or Other Digital Set-Top Box
Connecting your equipment Connecting a satellite receiver or other digital Connecting other audio components Connecting antennas set-top box The number and kind of connections depends on the kind of Connect the AM loop antenna and the FM wire antenna as component you’re connecting.
-
Page 16: Using External Antennas
Check the power cord once in a while. If you find it FM UNBAL damaged, ask your nearest Pioneer authorized 75 Ω coaxial cable independent service company for a replacement.
-
Page 17: Basic Playback
Basic playback Chapter 3: • The input source can also be selected by using INPUT Selecting the audio input signal buttons on the remote control, or by Basic playback SELECT The audio input signal can be selected for each input source. using the front panel INPUT SELECTOR dial.
-
Page 18: Listening To The Radio
Basic playback • When digital input (optical or coaxial) is selected, this • You may get digital noise when a LD or CD player Listening to the radio receiver can only play back Dolby Digital, PCM (32 kHz to compatible with DTS is playing an analog signal. To 96 kHz) and DTS (including DTS 96 kHz/24 bit) digital prevent noise, make the proper digital connections The following steps show you how to tune in to FM and AM…
-
Page 19: Saving Station Presets
Basic playback Saving station presets Listening to station presets An introduction to RDS If you often listen to a particular radio station, it’s convenient You will need to have some presets stored to do this. See Radio Data System (RDS) is a system used by most FM radio to have the receiver store the frequency for easy recall Saving station presets above if you haven’t done this already.
-
Page 20: Searching For Rds Programs
Basic playback Displaying RDS information AUDIO TUNER EDIT MASTER PARAMETER VOLUME TOOLS MENU Use the DISP button to display the different types of RDS RECEIVER RECEIVER SLEEP SOURCE CONTROL SLEEP SOURCE CONTROL MENU information available. RECEIVER INPUT SELECT DTV/TV RECEIVER INPUT SELECT DTV/TV ENTER…
-
Page 21: Listening To Your System
Listening to your system Chapter 4: Note Surround Listening to your system Type of surround • Stereo surround (matrix) formats are decoded Suitable sources back modes accordingly using NEO:6 CINEMA or DOLBY PLIIx speaker(s) MOVIE (see Listening in surround sound below for more Movie –…
-
Page 22: Using The Advanced Surround
Listening to your system Better sound using Phase Control Using Stream Direct ADVANCED AUTO SURROUND/ Using the Advanced surround BD MENU AUTO/ SURROUND STREAM DIRECT ADV SURR DIRECT This receiver’s Phase Control feature uses phase correction The Advanced surround feature creates a variety of surround Use the Stream Direct modes when you want to hear the measures to make sure your sound source arrives at the effects.
-
Page 23: Using Surround Back Channel Processing
Listening to your system Using surround back channel processing Setting the Up Mix function Setting the Audio options You can have the receiver automatically use 6.1 or 7.1 In a 7.1-channel surround system with surround speakers There are a number of additional sound settings you can decoding for 6.1 encoded sources (for example, Dolby Digital placed directly at the sides of the listening position, the make using the AUDIO PARAMETER menu.
-
Page 24
Listening to your system Setting/What it does Option(s) Setting/What it does Option(s) Setting/What it does Option(s) LFE ATT (LFE Attenuate) 0 (0 dB) 0 to 10 S.RTV (Sound Retriever) C.IMG (Center Image) Default: 3 Some Dolby Digital and DTS audio sources When audio data is removed during the (Applicable only when using a center speaker) 5 (–5 dB) -
Page 25: The System Setup Menu
The System Setup menu Chapter 5: • APD – Sets to automatically turn off the power when the • SB (Surround Back) – Select the number of surround receiver has not operated for several hours (see The Auto back speakers you have (one (X1), two (X2) or none). The System Setup menu Power Down menu on page 26).
-
Page 26: X.over
The System Setup menu 5 Use / to adjust the level of each channel. X.Over The Auto Power Down menu If you selected T. TONE M, use / to switch speakers. The • Default setting: 100Hz T. TONE A setup outputs test tones in the following order Set to automatically turn off the receiver after a specified time (depends on speaker settings): This setting decides the cutoff between bass sounds playing…
-
Page 27: Arc (Audio Return Channel) Function
ARC (Audio Return Channel) function Chapter 6: Before starting ARC operation ARC Setup ARC (Audio Return When starting ARC operation, put the TV and this unit in 1 Press RECEIVER to switch the receiver on. STANDBY mode after connecting this unit with the TV. Next, Channel) function turn ON the power of this unit and then the TV, in this order.
-
Page 28: Additional Information
Broadcast stations cannot be selected automatically. No image is output when an input function is selected. ask your nearest Pioneer authorized independent service Connect an outdoor antenna (refer to page 16). Make sure the component is connected correctly (refer to company to carry out repair work.
-
Page 29: Hdmi
Additional information HDMI Important information regarding the HDMI Resetting the main unit connection Use this procedure to reset all the receiver’s settings to the No picture or sound. If the problem still persists when connecting your HDMI There are cases where you may not be able to route HDMI factory default.
-
Page 30: Specifications
Additional information Miscellaneous Specifications Power Requirements ..AC 220 V to 230 V, 50 Hz/60 Hz Power Consumption ……180 W Audio section In standby .
-
Page 31
253 Alexandra Road, #04-01, Singapore 159936 TEL: 65-6472-7555 PIONEER ELECTRONICS AUSTRALIA PTY. LTD. 5 Arco Lane, Heatherton, Victoria, 3202, Australia, TEL: (03) 9586-6300 PIONEER ELECTRONICS DE MEXICO S.A. DE C.V. Blvd.Manuel Avila Camacho 138 10 piso Col.Lomas de Chapultepec, Mexico, D.F. 11000 TEL: 55-9178-4270 K002_B3_En…
Хорошее руководство по эксплуатации
Законодательство обязывает продавца передать покупателю, вместе с товаром, руководство по эксплуатации Pioneer VSX-322. Отсутствие инструкции либо неправильная информация, переданная потребителю, составляют основание для рекламации в связи с несоответствием устройства с договором. В законодательстве допускается предоставлении руководства в другой, чем бумажная форме, что, в последнее время, часто используется, предоставляя графическую или электронную форму инструкции Pioneer VSX-322 или обучающее видео для пользователей. Условием остается четкая и понятная форма.
Что такое руководство?
Слово происходит от латинского «instructio», тоесть привести в порядок. Следовательно в инструкции Pioneer VSX-322 можно найти описание этапов поведения. Цель инструкции заключается в облегчении запуска, использования оборудования либо выполнения определенной деятельности. Инструкция является набором информации о предмете/услуге, подсказкой.
К сожалению немного пользователей находит время для чтения инструкций Pioneer VSX-322, и хорошая инструкция позволяет не только узнать ряд дополнительных функций приобретенного устройства, но и позволяет избежать возникновения большинства поломок.
Из чего должно состоять идеальное руководство по эксплуатации?
Прежде всего в инструкции Pioneer VSX-322 должна находится:
— информация относительно технических данных устройства Pioneer VSX-322
— название производителя и год производства оборудования Pioneer VSX-322
— правила обслуживания, настройки и ухода за оборудованием Pioneer VSX-322
— знаки безопасности и сертификаты, подтверждающие соответствие стандартам
Почему мы не читаем инструкций?
Как правило из-за нехватки времени и уверенности в отдельных функциональностях приобретенных устройств. К сожалению само подсоединение и запуск Pioneer VSX-322 это слишком мало. Инструкция заключает ряд отдельных указаний, касающихся функциональности, принципов безопасности, способов ухода (даже то, какие средства стоит использовать), возможных поломок Pioneer VSX-322 и способов решения проблем, возникающих во время использования. И наконец то, в инструкции можно найти адресные данные сайта Pioneer, в случае отсутствия эффективности предлагаемых решений. Сейчас очень большой популярностью пользуются инструкции в форме интересных анимаций или видео материалов, которое лучше, чем брошюра воспринимаются пользователем. Такой вид инструкции позволяет пользователю просмотреть весь фильм, не пропуская спецификацию и сложные технические описания Pioneer VSX-322, как это часто бывает в случае бумажной версии.
Почему стоит читать инструкции?
Прежде всего здесь мы найдем ответы касательно конструкции, возможностей устройства Pioneer VSX-322, использования отдельных аксессуаров и ряд информации, позволяющей вполне использовать все функции и упрощения.
После удачной покупки оборудования/устройства стоит посвятить несколько минут для ознакомления с каждой частью инструкции Pioneer VSX-322. Сейчас их старательно готовят или переводят, чтобы они были не только понятными для пользователя, но и чтобы выполняли свою основную информационно-поддерживающую функцию.
![]()
Discover the benefits of registering your product online at http://www.pioneer.co.uk (or http://www.pioneer.eu).
Operating Instructions
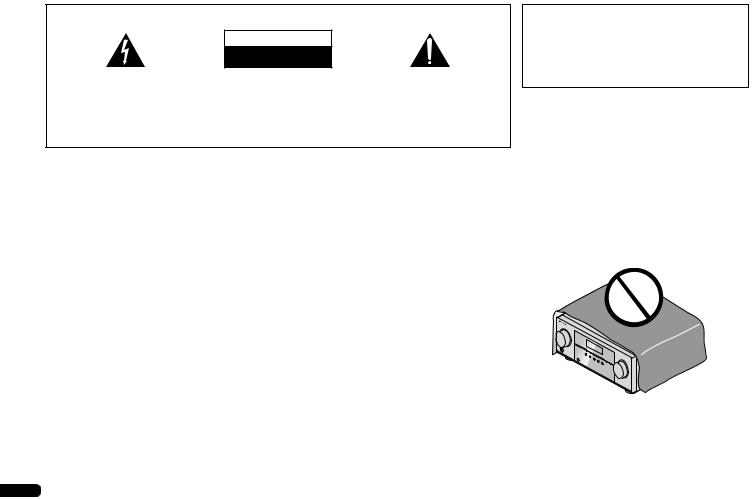
IMPORTANT
The lightning flash with arrowhead symbol, within an equilateral triangle, is intended to alert the user to the presence of uninsulated “dangerous voltage” within the product’s enclosure that may be of sufficient magnitude to constitute a risk of electric shock to persons.
CAUTION
RISK OF ELECTRIC SHOCK
DO NOT OPEN
CAUTION:
TO PREVENT THE RISK OF ELECTRIC SHOCK, DO NOT REMOVE COVER (OR BACK). NO USER-SERVICEABLE PARTS INSIDE. REFER SERVICING TO QUALIFIED SERVICE PERSONNEL.
The exclamation point within an equilateral triangle is intended to alert the user to the presence of important operating and maintenance (servicing) instructions in the literature accompanying the appliance.
D3-4-2-1-1_A1_En
WARNING
This equipment is not waterproof. To prevent a fire or shock hazard, do not place any container filled with liquid near this equipment (such as a vase or flower pot) or expose it to dripping, splashing, rain or moisture.
D3-4-2-1-3_A1_En
WARNING
Before plugging in for the first time, read the following section carefully.
The voltage of the available power supply differs according to country or region. Be sure that the power supply voltage of the area where this unit will be used meets the required voltage (e.g., 230 V or 120 V) written on the rear panel.
D3-4-2-1-4*_A1_En
WARNING
To prevent a fire hazard, do not place any naked flame sources (such as a lighted candle) on the equipment.
D3-4-2-1-7a_A1_En
Operating Environment
Operating environment temperature and humidity: +5 °C to +35 °C (+41 °F to +95 °F); less than 85 %RH (cooling vents not blocked)
Do not install this unit in a poorly ventilated area, or in locations exposed to high humidity or direct sunlight (or strong artificial light)
D3-4-2-1-7c*_A1_En
2
This product is for general household purposes. Any failure due to use for other than household purposes (such as long-term use for business purposes in a restaurant or use in a car or ship) and which requires repair will be charged for even during the warranty period.
K041_A1_En
Ankixxx
VENTILATION CAUTION
When installing this unit, make sure to leave space around the unit for ventilation to improve heat radiation (at least 40 cm at top, 20 cm at rear, and 20 cm at each side).
WARNING
Slots and openings in the cabinet are provided for ventilation to ensure reliable operation of the product, and to protect it from overheating. To prevent fire hazard, the openings should never be blocked or covered with items (such as newspapers, table-cloths, curtains) or by operating the equipment on thick carpet or a bed.
D3-4-2-1-7b*_A1_En
En
Information for users on collection and disposal of old equipment and used batteries
|
Symbol for |
These symbols on the products, packaging, and/or accompanying documents mean |
||||||||
|
equipment |
that used electrical and electronic products and batteries should not be mixed with |
||||||||
|
general household waste. |
|||||||||
|
For proper treatment, recovery and recycling of old products and used batteries, |
|||||||||
|
please take them to applicable collection points in accordance with your national |
|||||||||
|
legislation. |
|||||||||
|
By disposing of these products and batteries correctly, you will help to save valuable |
|||||||||
|
Symbol examples |
resources and prevent any potential negative effects on human health and the |
||||||||
|
for batteries |
environment which could otherwise arise from inappropriate waste handling. |
||||||||
|
For more information about collection and recycling of old products and batteries, |
|||||||||
|
please contact your local municipality, your waste disposal service or the point of sale |
|||||||||
|
where you purchased the items. |
|||||||||
|
These symbols are only valid in the European Union. |
|||||||||
|
For countries outside the European Union: |
|||||||||
|
If you wish to discard these items, please contact your local authorities or dealer and |
|||||||||
|
ask for the correct method of disposal. |
Pb
K058a_A1_En
If the AC plug of this unit does not match the AC outlet you want to use, the plug must be removed and appropriate one fitted. Replacement and mounting of an AC plug on the power supply cord of this unit should be performed only by qualified service personnel. If connected to an AC outlet, the cut-off plug can cause severe electrical shock. Make sure it is properly disposed of after removal.
The equipment should be disconnected by removing the mains plug from the wall socket when left unused for a long period of time (for example, when on vacation).
D3-4-2-2-1a_A1_En
CAUTION
The STANDBY/ON switch on this unit will not completely shut off all power from the AC outlet. Since the power cord serves as the main disconnect device for the unit, you will need to unplug it from the AC outlet to shut down all power. Therefore, make sure the unit has been installed so that the power cord can be easily unplugged from the AC outlet in case of an accident. To avoid fire hazard, the power cord should also be unplugged from the AC outlet when left unused for a long period of time (for example, when on vacation).
D3-4-2-2-2a*_A1_En
3
En

Thank you for buying this Pioneer product. Please read through these operating instructions so you will know how to operate your model properly. After you have finished reading the instructions, put them away in a safe place for future reference.
Contents
Before you start . . . . . . . . . . . . . . . . . . . . . . . . . . . . 5
Checking what’s in the box . . . . . . . . . . . . . . . . . . . . . . . . 5 Installing the receiver . . . . . . . . . . . . . . . . . . . . . . . . . . . . 5
Flow of settings on the receiver. . . . . . . . . . . . . . 5
01 Controls and displays
Front panel . . . . . . . . . . . . . . . . . . . . . . . . . . . . . . . . . . . . 6 Display . . . . . . . . . . . . . . . . . . . . . . . . . . . . . . . . . . . . . . 7 Remote control . . . . . . . . . . . . . . . . . . . . . . . . . . . . . . . . . 8 Loading the batteries . . . . . . . . . . . . . . . . . . . . . . . . . . . 9
Operating range of remote control . . . . . . . . . . . . . . . . . 9
02 Connecting your equipment
Placing the speakers. . . . . . . . . . . . . . . . . . . . . . . . . . . . 10
Hints on the speaker placement. . . . . . . . . . . . . . . . . . 10
Connecting the speakers. . . . . . . . . . . . . . . . . . . . . . . . . 11
Connect the surround back speakers. . . . . . . . . . . . . . 11
Making cable connections . . . . . . . . . . . . . . . . . . . . . . . 12 HDMI cables . . . . . . . . . . . . . . . . . . . . . . . . . . . . . . . . 12 About HDMI. . . . . . . . . . . . . . . . . . . . . . . . . . . . . . . . . 12 Analog audio cables. . . . . . . . . . . . . . . . . . . . . . . . . . . 13 Digital audio cables . . . . . . . . . . . . . . . . . . . . . . . . . . . 13 Video cables. . . . . . . . . . . . . . . . . . . . . . . . . . . . . . . . . 13
About video outputs connection . . . . . . . . . . . . . . . . . . . 13 Connecting a TV and playback components . . . . . . . . . . 14
Connecting using HDMI . . . . . . . . . . . . . . . . . . . . . . . 14
Connecting your component with no
HDMI terminal . . . . . . . . . . . . . . . . . . . . . . . . . . . . . . . 14
Connecting a satellite receiver or other digital
set-top box. . . . . . . . . . . . . . . . . . . . . . . . . . . . . . . . . . . . 15
Connecting other audio components . . . . . . . . . . . . . . . 15
Connecting antennas . . . . . . . . . . . . . . . . . . . . . . . . . . . 15 Using external antennas . . . . . . . . . . . . . . . . . . . . . . . 16 Plugging in the receiver . . . . . . . . . . . . . . . . . . . . . . . . . 16
03 Basic playback
Canceling the demo display . . . . . . . . . . . . . . . . . . . . . . 17 Playing a source . . . . . . . . . . . . . . . . . . . . . . . . . . . . . . . 17
Selecting the audio input signal . . . . . . . . . . . . . . . . . 17
Listening to the radio . . . . . . . . . . . . . . . . . . . . . . . . . . . 18 Improving FM sound . . . . . . . . . . . . . . . . . . . . . . . . . . 18 Saving station presets . . . . . . . . . . . . . . . . . . . . . . . . . 19
Listening to station presets . . . . . . . . . . . . . . . . . . . . . 19
Naming preset stations . . . . . . . . . . . . . . . . . . . . . . . . 19 An introduction to RDS . . . . . . . . . . . . . . . . . . . . . . . . . 19
Searching for RDS programs . . . . . . . . . . . . . . . . . . . 20 Displaying RDS information . . . . . . . . . . . . . . . . . . . . 20
Making an audio recording. . . . . . . . . . . . . . . . . . . . . . . 20
04 Listening to your system
Choosing the listening mode . . . . . . . . . . . . . . . . . . . . . 21
Auto playback . . . . . . . . . . . . . . . . . . . . . . . . . . . . . . . 21
Listening in surround sound . . . . . . . . . . . . . . . . . . . . 21 Using the Advanced surround . . . . . . . . . . . . . . . . . . 22
Using Stream Direct . . . . . . . . . . . . . . . . . . . . . . . . . . 22 Using the Sound Retriever . . . . . . . . . . . . . . . . . . . . . . . 22
Better sound using Phase Control . . . . . . . . . . . . . . . . . 22 Using surround back channel processing . . . . . . . . . . . 23
Setting the Up Mix function . . . . . . . . . . . . . . . . . . . . . . 23 Setting the Audio options . . . . . . . . . . . . . . . . . . . . . . . . 23
05 The System Setup menu
Using the System Setup menu . . . . . . . . . . . . . . . . . . . . 25
The Speaker Setup menu . . . . . . . . . . . . . . . . . . . . . . . . 25 Speaker Setting . . . . . . . . . . . . . . . . . . . . . . . . . . . . . . 25 X.Over . . . . . . . . . . . . . . . . . . . . . . . . . . . . . . . . . . . . . 26 Channel Level . . . . . . . . . . . . . . . . . . . . . . . . . . . . . . . 26 Speaker Distance . . . . . . . . . . . . . . . . . . . . . . . . . . . . 26
The Auto Power Down menu . . . . . . . . . . . . . . . . . . . . . 26 The FL Demo Mode menu. . . . . . . . . . . . . . . . . . . . . . . . 26
06 ARC (Audio Return Channel) function
ARC Setup . . . . . . . . . . . . . . . . . . . . . . . . . . . . . . . . . . . 27
Before starting ARC operation . . . . . . . . . . . . . . . . . . 27
07 Additional information
Troubleshooting . . . . . . . . . . . . . . . . . . . . . . . . . . . . . . . 28 General . . . . . . . . . . . . . . . . . . . . . . . . . . . . . . . . . . . . 28 HDMI . . . . . . . . . . . . . . . . . . . . . . . . . . . . . . . . . . . . . 29
Important information regarding the HDMI
connection . . . . . . . . . . . . . . . . . . . . . . . . . . . . . . . . . 29 Resetting the main unit . . . . . . . . . . . . . . . . . . . . . . . . . 29 Cleaning the unit . . . . . . . . . . . . . . . . . . . . . . . . . . . . . . 29 Specifications . . . . . . . . . . . . . . . . . . . . . . . . . . . . . . . . 30
4
En

Before you start
Checking what’s in the box
Please check that you’ve received the following supplied accessories:
•Remote control
•AAA size IEC R03 dry cell batteries (to confirm system operation) x2
•AM loop antenna
•FM wire antenna
•Power cord
•Warranty card
•Quick start guide
•These operating instructions (CD-ROM)
Installing the receiver
•When installing this unit, make sure to put it on a level and stable surface.
Don’t install it on the following places:
–on a color TV (the screen may distort)
–near a cassette deck (or close to a device that gives off a magnetic field). This may interfere with the sound.
–in direct sunlight
–in damp or wet areas
–in extremely hot or cold areas
–in places where there is vibration or other movement
–in places that are very dusty
–in places that have hot fumes or oils (such as a kitchen)
Flow of settings on the receiver
The unit is a full-fledged AV receiver equipped with an abundance of functions and terminals. It can be used easily after following the procedure below to make the connections and settings.
The colors of the steps indicate the following:
Required setting item
Setting to be made as necessary
1 Connecting the speakers
Where you place the speakers will have a big effect on the sound.
•Placing the speakers (page 10)
•Connecting the speakers (page 11)
2 Connecting the components
For surround sound, you’ll want to hook up using a digital connection from the Blu-ray Disc/DVD player to the receiver.
•About video outputs connection (page 13)
•Connecting a TV and playback components (page 14)
•Connecting antennas (page 15)
•Plugging in the receiver (page 16)
3 Power On
Make sure you’ve set the video input on your TV to this receiver. Check the manual that came with the TV if you don’t know how to do this.
4 Specify the size and number of speakers you’ve
connected
• Speaker Setting (page 25)
5The FL Demo Mode menu (page 26)
(When you don’t want the demo display to show on the front panel display.)
Using the Audio Return Channel function (page 27)
(When the connected TV supports the HDMI Audio Return Channel function.)
6Playing a source (page 17)
•Selecting the audio input signal (page 17)
•Choosing the listening mode (page 21)
7Adjusting the sound as desired
•Using the Sound Retriever (page 22)
•Better sound using Phase Control (page 22)
•Using surround back channel processing (page 23)
•Setting the Up Mix function (page 23)
•Setting the Audio options (page 23)
•The Speaker Setup menu (page 25)
5
En

01 Controls and displays
Chapter 1:
Controls and displays
Front panel
|
1 |
2 |
3 |
4 |
5 |
6 |
7 |
||||||||
|
AV RECEIVER VSX-322 |
||||||||||||||
|
HDMI |
12 |
13 |
14 |
15 |
16 |
14 |
17 |
|||||||
|
SPEAKERS |
DIMMER DISPLAY BAND |
TUNER EDIT |
TUNE |
PRESET |
ENTER |
|||||||||
|
AUTO SURROUND/ |
ALC/ |
ADVANCED |
SOUND |
|||||||||||
|
STREAM DIRECT STANDARD SURR |
SURROUND |
STEREO |
RETRIEVER |
|||||||||||
|
INPUT |
MASTER |
|||||||||||||
|
SELECTOR |
VOLUME |
|||||||||||||
|
STANDBY/ON |
||||||||||||||
|
PHONES |
19 |
20 |
21 |
22 |
23 22 |
24 |
||||||||
|
18 |
1 INPUT SELECTOR dial
Selects an input source (page 17).
2Receiver control buttons
SPEAKERS – Use to change the speaker system on or off. When the SP OFF is selected, no sound is output from the speakers connected to this receiver.
DIMMER – Dims or brightens the display. The brightness can be controlled in four steps.
DISPLAY – Switches the display of this unit. The listening mode, sound volume or input name can be checked by selecting an input source.
3Character display
See Display on page 7.
4Tuner control buttons
BAND – Switches between AM, FM ST (stereo) and FM MONO radio bands (page 18).
11
TUNER EDIT – Use with TUNE /, PRESET / and
ENTER to memorize and name stations for recall (page 18).
TUNE / – Used to find radio frequencies (page 18).
PRESET / – Use to select preset radio stations (page 19).
5 Remote sensor
Receives the signals from the remote control (see Operating range of remote control on page 9).
6 HDMI indicator
Blinks when connecting an HDMI-equipped component; lights when the component is connected (page 14).
7MASTER VOLUME dial
8STANDBY/ON
9 PHONES jack
Use to connect headphones. When the headphones are connected, there is no sound output from the speakers. The listening mode when the sound is heard from the headphone can be selected only from PHONES SURR, STEREO or
STEREO ALC mode.
10Listening mode buttons
AUTO SURROUND/STREAM DIRECT – Switches between Auto surround mode (page 21) and Stream Direct playback (page 22).
ALC/STANDARD SURR – Press for standard decoding and to switch between the modes of 2Pro Logic II, 2 Pro Logic IIx and NEO:6, and the Auto level control stereo mode (page 21).
ADVANCED SURROUND – Switches between the various surround modes (page 22).
STEREO – Press to select stereo playback (page 21).
6
En

Controls and displays
11 SOUND RETRIEVER
Press to restore CD quality sound to compressed audio sources (page 22).
Display
12 PHASE
Lights when the Phase Control is switched on (page 22).
13 AUTO
Lights when the Auto Surround feature is switched on (page 21).
14Tuner indicators
RDS – Lights when an RDS broadcast is received (page 19).
ST – Lights when a stereo FM broadcast is being received in auto stereo mode (page 18).
TUNE – Lights when a normal broadcast channel.
PRESET – Shows when a preset radio station is registered or called.
MEM – Blinks when a radio station is registered.
kHz/MHz – Lights when the character display is showing the currently received AM/FM broadcast frequency.
15Speaker indicators
Shows if the speaker system is on or not (page 6). SP A means the speakers are switched on.
SP means the speakers are switched off.
16 Sleep timer indicator
Lights when the receiver is in sleep mode (page 8).
17PRESET information or input signal indicator
Shows the preset number of the tuner or the input signal type, etc.
18Character display
Displays various system information.
19DTS indicators
DTS – Lights when a source with DTS encoded audio signals is detected.
HD – Lights when a source with DTS-EXPRESS or DTSHD encoded audio signals is detected.
ES – Lights to indicate DTS-ES decoding.
01
96/24 – Lights when a source with DTS 96/24 encoded audio signals is detected.
NEO:6 – When one of the NEO:6 modes of the receiver is on, this lights to indicate NEO:6 processing (page 21).
20Dolby Digital indicators
2D – Lights when a Dolby Digital encoded signal is detected.
2D+ – Lights when a source with Dolby Digital Plus encoded audio signals is detected.
2HD – Lights when a source with Dolby TrueHD encoded audio signals is detected.
EX – Lights to indicate Dolby Digital EX decoding.
2PLII(x) – Lights to indicate 2Pro Logic II/2Pro Logic IIx decoding (see Listening in surround sound on page 21 for more on this).
21ADV.S.
Lights when one of the Advanced Surround modes has been selected (see Using the Advanced surround on page 22 for more on this).
22SIGNAL SELECT indicators
DIGITAL – Lights when a digital audio signal is selected. Blinks when a digital audio signal is selected and selected audio input is not provided.
HDMI – Lights when an HDMI signal is selected. Blinks when an HDMI signal is selected and selected HDMI input is not provided.
23Up Mix/DIMMER indicator
Lights when the Up Mix function is set to ON (page 23). Also, lights when DIMMER is set to off.
24 DIR.
Lights when the DIRECT or PURE DIRECT mode is switched on (page 22).
7
En
01 Controls and displays
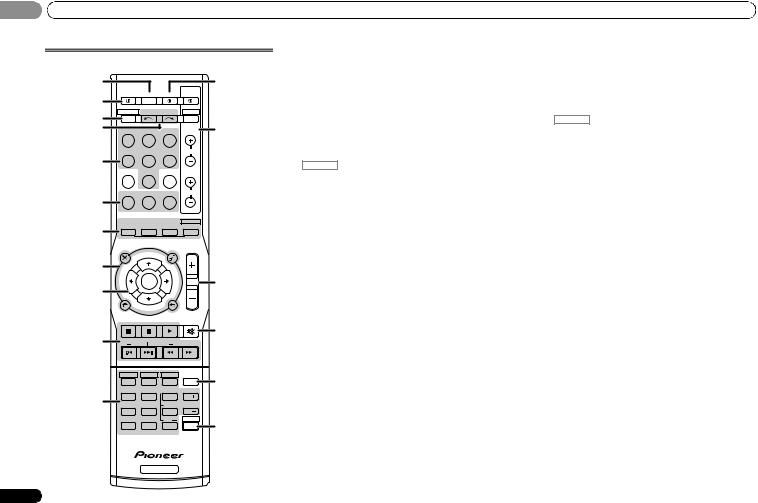
Remote control
|
1 |
12 |
|||
|
RECEIVER SLEEP |
SOURCE |
TV |
||
|
2 |
CONTROL |
|||
|
3 |
RECEIVER |
INPUT SELECT |
DTV/TV |
|
|
INPUT |
||||
|
4 |
BD |
DVD |
TV |
13 |
|
DVR/BDR |
CD |
CD-R |
CH |
|
|
5 |
||||
|
ADAPTER |
TUNER |
PORTABLE |
||
|
PHASE |
S.RETRIEVER |
SIGNAL SEL |
VOL |
|
|
6 |
||||
|
AUTO/ |
ALC/ |
BD MENU |
||
|
7 |
DIRECT |
STEREO |
STANDARD |
ADV SURR |
|
AUDIO |
TUNER EDIT |
MASTER |
|||
|
PARAMETER |
TOOLS |
VOLUME |
|||
|
TOP |
TUNE |
MENU |
|||
|
8 |
MENU |
||||
|
T |
P |
||||
|
E |
R |
14 |
|||
|
S |
ENTER |
E |
|||
|
E |
S |
||||
|
9 |
R |
E |
|||
|
P |
|||||
|
T |
|||||
|
HOME |
|||||
|
MENU |
TUNE |
BAND |
|||
|
SETUP |
RETURN |
||||
|
PTY SEARCH |
MUTE |
||||
|
15 |
|||||
|
10 |
|||||
|
BASS |
TRE |
||||
|
HDD |
DVD |
VCR |
16 |
||
|
1 |
2 |
3 |
DISP |
||
|
TEST TONE |
SB CH |
CH SELECT |
|||
|
11 |
4 |
5 |
6 |
CH |
|
|
MIDNIGHT SPEAKERS |
LEV |
||||
|
7 |
8 |
9 |
CH |
||
|
DIMMER |
0 |
LEV |
SHIFT |
17 |
|
|
CLR |
ENTER |
||||
|
+10 |
|||||
|
RECEIVER |
8
As for operating other devices, the remote control codes for the Pioneer products are preset. The settings cannot be changed.
1 SLEEP
Press to change the amount of time before the receiver switches into standby (30 min – 60 min – 90 min – Off). You can check the remaining sleep time at any time by pressing
SLEEP once.
2 RECEIVER
Switches the receiver between standby and on.
3 RECEIVER
Switches the remote to control the receiver (used to select the white commands above the number buttons (MIDNIGHT, etc)). Also use this button to set up surround sound (page 25) or Audio parameters (page 23).
4 INPUT SELECT 
Use to select the input source (page 17).
5 Input function buttons
Use to select the input source to this receiver (page 17). This will enable you to control other Pioneer components with the remote control.
•ADAPTER, PORTABLE button is not used with this receiver.
6Receiver control buttons
PHASE – Press to switch on/off Phase Control (page 22).
S.RETRIEVER – Press to restore CD quality sound to compressed audio sources (page 22).
SIGNAL SEL – Press to select the audio input signal of the component to play back (page 17).
7Listening mode buttons
AUTO/DIRECT – Switches between Auto surround mode (page 21) and Stream Direct playback (page 22). STEREO – Press to select stereo playback (page 21).
ALC/STANDARD – Press for standard decoding and to switch between the modes of 2Pro Logic II, 2Pro Logic IIx and NEO:6, and the Auto level control stereo mode (page 21).
ADV SURR – Switches between the various surround modes (page 22).
Press BD first to access:
BD MENU* – Displays the disc menu of Blu-ray Discs.
8 System Setup and component control buttons
The following button controls can be accessed after you have selected the corresponding input function button (BD, DVD, etc.).
Press RECEIVER first to access:
AUDIO PARAMETER – Use to access the Audio options (page 23).
SETUP – Press to access the System Setup menu (page 25).
RETURN – Confirm and exit the current menu screen. Press BD, DVD or DVR/BDR first to access:
TOP MENU – Displays the disc ‘top’ menu of a Blu-ray Disc/DVD.
HOME MENU – Displays the HOME MENU screen. RETURN – Confirm and exit the current menu screen. MENU – Displays the TOOLS menu of Blu-ray Disc player.
Press TUNER first to access:
TUNER EDIT – Memorizes stations for recall (page 18), also used to change the name (page 19).
BAND – Switches between AM, FM ST (stereo) and FM MONO radio bands (page 18).
PTY SEARCH – Use to search for RDS program types (page 19).
9 / / / (TUNE /, PRESET /), ENTER
Use the arrow buttons when setting up your surround sound system (page 25). Also used to control Blu-ray Disc/DVD menus/options.
Use TUNE / can be used to find radio frequencies and PRESET / can be used to select preset radio stations (page 19).
10 Component control buttons
The main buttons ( , , etc.) are used to control a component after you have selected it using the input function buttons.
The controls above these buttons can be accessed after you have selected the corresponding input function button (BD, DVD, DVR/BDR and CD). These buttons also function as described below.
En
Press RECEIVER first to access:
BASS –/+, TRE –/+ – Use to adjust Bass or Treble.
•These controls are disabled when the listening mode is set to DIRECT or PURE DIRECT.
•When the front speaker is set at SMALL in the Speaker Setting and the X.OVER is set above 150 Hz, the subwoofer channel level will be adjusted by pressing BASS –/+ (page 26).
11 Number buttons and other component controls
Use the number buttons to directly select a radio frequency (page 18) or the tracks on a CD, etc. There are other buttons that can be accessed after RECEIVER is pressed. (For example MIDNIGHT, etc.)
HDD*, DVD*, VCR* – These buttons switch between the hard disk, DVD and VCR controls for HDD/DVD/VCR recorders.
SB CH – Press to select ON, AUTO or OFF the surround back channel (page 23).
CH SELECT – Press repeatedly to select a channel, then use LEV +/– to adjust the level (page 26).
LEV +/– – Use to adjust the channel level.
MIDNIGHT – Switches to Midnight or Loudness listening (page 23).
SPEAKERS – Use to change the speaker system on or off. When the SP OFF is selected, no sound is output from the speakers connected to this receiver.
DIMMER – Dims or brightens the display. The brightness can be controlled in four steps.
12 SOURCE
Turns on or off the power of the Pioneer DVD/DVR units when BD, DVD, DVR/BDR or CD is selected using the input function buttons.
13 TV CONTROL buttons
These buttons can control only be used with Pioneer TVs.– Use to turn on/off the power of the TV.
INPUT – Use to select the TV input signal. CH +/– – Use to select channels.
VOL +/– – Use to adjust the volume on your TV.
DTV/TV* – Switches between the DTV and analog TV input modes for Pioneer TVs.
14 MASTER VOLUME +/–
Use to set the listening volume.
15 MUTE
Mutes/unmutes the sound.
16 DISP
Switches the display of this unit. The listening mode, sound volume or input name can be checked by selecting an input source.
17 SHIFT
Press to access the ‘boxed’ commands (above the buttons) on the remote. These buttons are marked with an asterisk (*) in this section.
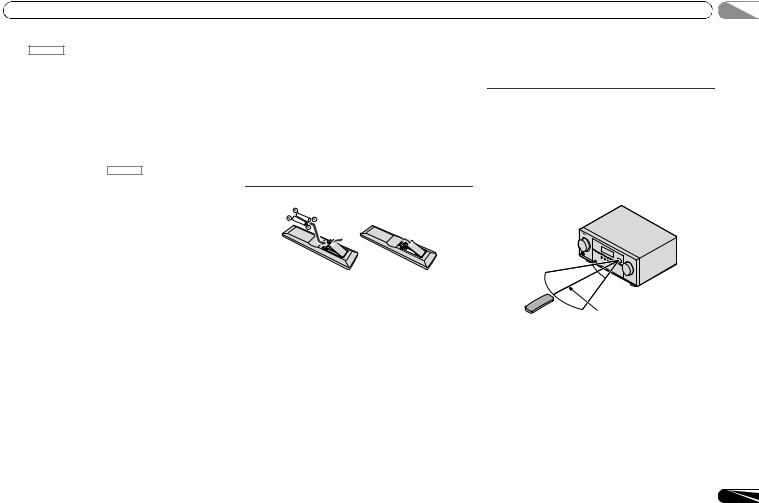
Loading the batteries
The batteries included with the unit are to check initial operations; they may not last over a long period. We recommend using alkaline batteries that have a longer life.
 CAUTION
•Incorrect use of batteries may result in such hazards as leakage and bursting. Observe the following precautions: —Never use new and old batteries together.
—Insert the plus and minus sides of the batteries properly according to the marks in the battery case.
—Batteries with the same shape may have different voltages. Do not use different batteries together.
—When disposing of used batteries, please comply with governmental regulations or environmental public institution’s rules that apply in your country or area.
—Do not use or store batteries in direct sunlight or other excessively hot place, such as inside a car or near a heater. This can cause batteries to leak, overheat, explode or catch fire. It can also reduce the life or performance of batteries.
WARNING
Store the batteries out of the reach of children and infants. If accidentally swallowed, contact a doctor immediately.
Operating range of remote control
The remote control may not work properly if:
•There are obstacles between the remote control and the receiver’s remote sensor.
•Direct sunlight or fluorescent light is shining onto the remote sensor.
•The receiver is located near a device that is emitting infrared rays.
•The receiver is operated simultaneously with another infrared remote control unit.
30°  30°
30° 
7 m
9
En
02 Connecting your equipment
Chapter 2:
Connecting your equipment
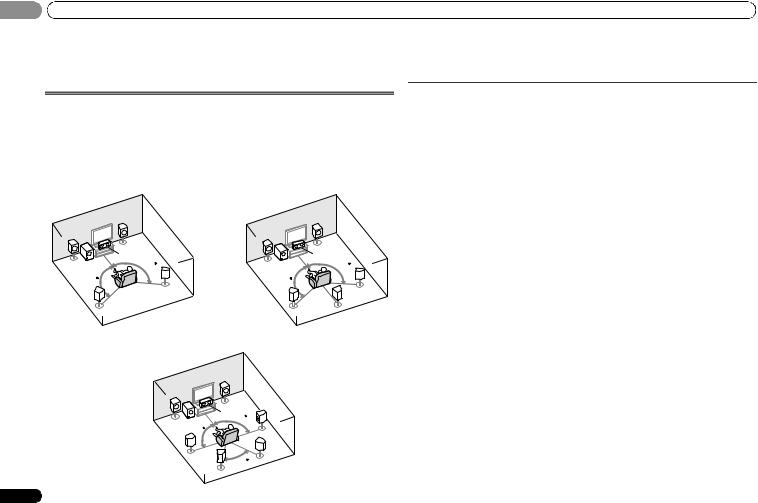
Placing the speakers
By connecting the left and right front speakers (L/R), the center speaker (C), the left and right surround speakers (SL/SR), and the subwoofer (SW), a 5.1 ch surround system can be enjoyed.
Further, by using an external amplifier, you can connect the left and right surround back speakers (SBL/SBR) to boost your system up to a 7.1 ch surround system.
• You can also connect one surround back speaker (SB) and enjoy a 6.1 ch surround system. To achieve the best possible surround sound, install your speakers as shown below.
|
5.1 channel surround system: |
6.1 channel surround system: a |
|||||
|
R |
R |
|||||
|
L |
L |
|||||
|
C |
C |
|||||
|
SW |
120 |
SW |
120 |
|||
|
120 |
120 |
|||||
|
SR |
SR |
|||||
|
SL |
SL |
SB |
||||
|
7.1 channel surround system: a |
||||||
|
R |
||||||
|
L |
||||||
|
C |
90 |
SR |
||||
|
SW |
||||||
|
90 |
||||||
|
SL |
SBR |
|||||
|
60 |
||||||
|
SBL |
||||||
10
a.This layout is available only when the additional amplifier is connected to the unit and the surround back speakers are connected to the amplifier. For details, see Connect the surround back speakers on page 11.
Hints on the speaker placement
Where you put your speakers in the room has a big effect on the quality of the sound. The following guidelines should help you to get the best sound from your system.
•The subwoofer can be placed on the floor. Ideally, the other speakers should be at about ear-level when you’re listening to them. Putting the speakers on the floor (except the subwoofer), or mounting them very high on a wall is not recommended.
•For the best stereo effect, place the front speakers 2 m to 3 m apart, at equal distance from the TV.
•If you’re going to place speakers around your CRT TV, use shielded speakers or place the speakers at a sufficient distance from your CRT TV.
•If you’re using a center speaker, place the front speakers at a wider angle. If not, place them at a narrower angle.
•Place the center speaker above or below the TV so that the sound of the center channel is localized at the TV screen. Also, make sure the center speaker does not cross the line formed by the leading edge of the front left and right speakers.
•It is best to angle the speakers towards the listening position. The angle depends on the size of the room. Use less of an angle for bigger rooms.
•Surround and surround back speakers should be positioned 60 cm to 90 cm higher than your ears and titled slight downward. Make sure the speakers don’t face each other. For DVD-Audio, the speakers should be more directly behind the listener than for home theater playback.
•If the surround speakers cannot be set directly to the side of the listening position with a 7.1-channel system, the surround effect can be enhanced by turning off the Up Mix function (see Setting the Up Mix function on page 23).
•Try not to place the surround speakers farther away from the listening position than the front and center speakers. Doing so can weaken the surround sound effect.
 CAUTION
•Make sure that all speakers are securely installed. This not only improves sound quality, but also reduces the risk of damage or injury resulting from speakers being knocked over or falling in the event of external shocks such as earthquakes.
 Important
•To connect the surround back speakers, an additional amplifier is required. Connect the additional amplifier to the SURR BACK PRE OUT outputs of this unit and connect the surround back speakers to the additional amplifier (see Connect the surround back speakers on page 11).
En
 Loading…
-
Pioneer VSX-322 — page 1
…
-
Pioneer VSX-322 — page 2
…
-
Pioneer VSX-322 — page 3
…
-
Pioneer VSX-322 — page 4
…
-
Pioneer VSX-322 — page 5
…
-
Pioneer VSX-322 — page 6
…
-
Pioneer VSX-322 — page 7
…
-
Pioneer VSX-322 — page 8
…
-
Pioneer VSX-322 — page 9
…
-
Pioneer VSX-322 — page 10
…
-
Pioneer VSX-322 — page 11
…
-
Pioneer VSX-322 — page 12
…
-
Pioneer VSX-322 — page 13
…
-
Pioneer VSX-322 — page 14
…
-
Pioneer VSX-322 — page 15
…
-
Pioneer VSX-322 — page 16
…
-
Pioneer VSX-322 — page 17
…
-
Pioneer VSX-322 — page 18
…
-
Pioneer VSX-322 — page 19
…
-
Pioneer VSX-322 — page 20
…
-
Pioneer VSX-322 — page 21
…
-
Pioneer VSX-322 — page 22
…
-
Pioneer VSX-322 — page 23
…
-
Pioneer VSX-322 — page 24
…
-
Pioneer VSX-322 — page 25
…
-
Pioneer VSX-322 — page 26
…
-
Pioneer VSX-322 — page 27
…
-
Pioneer VSX-322 — page 28
…
-
Pioneer VSX-322 — page 29
…
-
Pioneer VSX-322 — page 30
…
-
Pioneer VSX-322 — page 31
…
-
Pioneer VSX-322 — page 32
…
-
Pioneer VSX-322 — page 33
…
-
Pioneer VSX-322 — page 34
…
-
Pioneer VSX-322 — page 35
…
-
Pioneer VSX-322 — page 36
…
-
Pioneer VSX-322 — page 37
…
-
Pioneer VSX-322 — page 38
…
-
Pioneer VSX-322 — page 39
…
-
Pioneer VSX-322 — page 40
…
-
Pioneer VSX-322 — page 41
…
-
Pioneer VSX-322 — page 42
…
-
Pioneer VSX-322 — page 43
…
-
Pioneer VSX-322 — page 44
…
-
Pioneer VSX-322 — page 45
…
-
Pioneer VSX-322 — page 46
…
-
Pioneer VSX-322 — page 47
…
-
Pioneer VSX-322 — page 48
…
-
Pioneer VSX-322 — page 49
…
-
Pioneer VSX-322 — page 50
…
-
Pioneer VSX-322 — page 51
…
-
Pioneer VSX-322 — page 52
…
-
Pioneer VSX-322 — page 53
…
-
Pioneer VSX-322 — page 54
…
-
Pioneer VSX-322 — page 55
…
-
Pioneer VSX-322 — page 56
…
-
Pioneer VSX-322 — page 57
…
-
Pioneer VSX-322 — page 58
…
-
Pioneer VSX-322 — page 59
…
-
Pioneer VSX-322 — page 60
…
-
Pioneer VSX-322 — page 61
…
-
Pioneer VSX-322 — page 62
…
-
Pioneer VSX-322 — page 63
…
-
Pioneer VSX-322 — page 64
…
-
Pioneer VSX-322 — page 65
…
-
Pioneer VSX-322 — page 66
…
-
Pioneer VSX-322 — page 67
…
-
Pioneer VSX-322 — page 68
…
-
Pioneer VSX-322 — page 69
…
-
Pioneer VSX-322 — page 70
…
-
Pioneer VSX-322 — page 71
…
-
Pioneer VSX-322 — page 72
…
-
Pioneer VSX-322 — page 73
…
-
Pioneer VSX-322 — page 74
…
-
Pioneer VSX-322 — page 75
…
-
Pioneer VSX-322 — page 76
…
-
Pioneer VSX-322 — page 77
…
-
Pioneer VSX-322 — page 78
…
-
Pioneer VSX-322 — page 79
…
-
Pioneer VSX-322 — page 80
…
-
Pioneer VSX-322 — page 81
…
-
Pioneer VSX-322 — page 82
…
-
Pioneer VSX-322 — page 83
…
-
Pioneer VSX-322 — page 84
…
-
Pioneer VSX-322 — page 85
…
-
Pioneer VSX-322 — page 86
…
-
Pioneer VSX-322 — page 87
…
-
Pioneer VSX-322 — page 88
…
-
Pioneer VSX-322 — page 89
…
-
Pioneer VSX-322 — page 90
…
-
Pioneer VSX-322 — page 91
…
-
Pioneer VSX-322 — page 92
…
-
Pioneer VSX-322 — page 93
…
-
Pioneer VSX-322 — page 94
…
-
Pioneer VSX-322 — page 95
…
-
Pioneer VSX-322 — page 96
…
-
Pioneer VSX-322 — page 97
…
-
Pioneer VSX-322 — page 98
…
-
Pioneer VSX-322 — page 99
…
-
Pioneer VSX-322 — page 100
…
-
Pioneer VSX-322 — page 101
…
-
Pioneer VSX-322 — page 102
…
-
Pioneer VSX-322 — page 103
…
-
Pioneer VSX-322 — page 104
…
-
Pioneer VSX-322 — page 105
…
-
Pioneer VSX-322 — page 106
…
-
Pioneer VSX-322 — page 107
…
-
Pioneer VSX-322 — page 108
…
-
Pioneer VSX-322 — page 109
…
-
Pioneer VSX-322 — page 110
…
-
Pioneer VSX-322 — page 111
…
-
Pioneer VSX-322 — page 112
…
-
Pioneer VSX-322 — page 113
…
-
Pioneer VSX-322 — page 114
…
-
Pioneer VSX-322 — page 115
…
-
Pioneer VSX-322 — page 116
…
-
Pioneer VSX-322 — page 117
…
-
Pioneer VSX-322 — page 118
…
-
Pioneer VSX-322 — page 119
…
-
Pioneer VSX-322 — page 120
…
-
Pioneer VSX-322 — page 121
…
-
Pioneer VSX-322 — page 122
…
-
Pioneer VSX-322 — page 123
…
-
Pioneer VSX-322 — page 124
…
-
Pioneer VSX-322 — page 125
…
-
Pioneer VSX-322 — page 126
…
-
Pioneer VSX-322 — page 127
…
-
Pioneer VSX-322 — page 128
…
-
Pioneer VSX-322 — page 129
…
-
Pioneer VSX-322 — page 130
…
-
Pioneer VSX-322 — page 131
…
-
Pioneer VSX-322 — page 132
…
-
Pioneer VSX-322 — page 133
…
-
Pioneer VSX-322 — page 134
…
-
Pioneer VSX-322 — page 135
…
-
Pioneer VSX-322 — page 136
…
-
Pioneer VSX-322 — page 137
…
-
Pioneer VSX-322 — page 138
…
-
Pioneer VSX-322 — page 139
…
-
Pioneer VSX-322 — page 140
…
-
Pioneer VSX-322 — page 141
…
-
Pioneer VSX-322 — page 142
…
-
Pioneer VSX-322 — page 143
…
-
Pioneer VSX-322 — page 144
…
-
Pioneer VSX-322 — page 145
…
-
Pioneer VSX-322 — page 146
…
-
Pioneer VSX-322 — page 147
…
-
Pioneer VSX-322 — page 148
…
-
Pioneer VSX-322 — page 149
…
-
Pioneer VSX-322 — page 150
…
-
Pioneer VSX-322 — page 151
…
-
Pioneer VSX-322 — page 152
…
-
Pioneer VSX-322 — page 153
…
-
Pioneer VSX-322 — page 154
…
-
Pioneer VSX-322 — page 155
…
-
Pioneer VSX-322 — page 156
…
-
Pioneer VSX-322 — page 157
…
-
Pioneer VSX-322 — page 158
…
-
Pioneer VSX-322 — page 159
…
-
Pioneer VSX-322 — page 160
…
-
Pioneer VSX-322 — page 161
…
-
Pioneer VSX-322 — page 162
…
-
Pioneer VSX-322 — page 163
…
-
Pioneer VSX-322 — page 164
…
-
Pioneer VSX-322 — page 165
…
-
Pioneer VSX-322 — page 166
…
-
Pioneer VSX-322 — page 167
…
-
Pioneer VSX-322 — page 168
…
-
Pioneer VSX-322 — page 169
…
-
Pioneer VSX-322 — page 170
…
-
Pioneer VSX-322 — page 171
…
-
Pioneer VSX-322 — page 172
…
-
Pioneer VSX-322 — page 173
…
-
Pioneer VSX-322 — page 174
…
-
Pioneer VSX-322 — page 175
…
-
Pioneer VSX-322 — page 176
…
-
Pioneer VSX-322 — page 177
…
-
Pioneer VSX-322 — page 178
…
-
Pioneer VSX-322 — page 179
…
-
Pioneer VSX-322 — page 180
…
-
Pioneer VSX-322 — page 181
…
-
Pioneer VSX-322 — page 182
…
-
Pioneer VSX-322 — page 183
…
-
Pioneer VSX-322 — page 184
…
-
Pioneer VSX-322 — page 185
…
-
Pioneer VSX-322 — page 186
…
-
Pioneer VSX-322 — page 187
…
-
Pioneer VSX-322 — page 188
…
-
Pioneer VSX-322 — page 189
…
-
Pioneer VSX-322 — page 190
…
-
Pioneer VSX-322 — page 191
…
-
Pioneer VSX-322 — page 192
…
-
Pioneer VSX-322 — page 193
…
-
Pioneer VSX-322 — page 194
…
-
Pioneer VSX-322 — page 195
…
-
Pioneer VSX-322 — page 196
…
-
Pioneer VSX-322 — page 197
…
-
Pioneer VSX-322 — page 198
…
-
Pioneer VSX-322 — page 199
…
-
Pioneer VSX-322 — page 200
…
-
Pioneer VSX-322 — page 201
…
-
Pioneer VSX-322 — page 202
…
-
Pioneer VSX-322 — page 203
…
-
Pioneer VSX-322 — page 204
…
-
Pioneer VSX-322 — page 205
…
-
Pioneer VSX-322 — page 206
…
-
Pioneer VSX-322 — page 207
…
-
Pioneer VSX-322 — page 208
…
-
Pioneer VSX-322 — page 209
…
-
Pioneer VSX-322 — page 210
…
-
Pioneer VSX-322 — page 211
…
-
Pioneer VSX-322 — page 212
…
-
Pioneer VSX-322 — page 213
…
-
Pioneer VSX-322 — page 214
…