-
Инструкции по эксплуатации
1

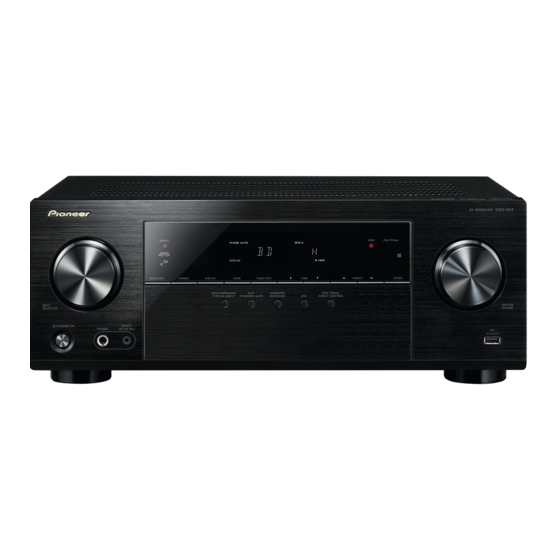
Pioneer VSX-424 инструкция по эксплуатации
(42 страницы)
- Языки:Русский
-
Тип:
PDF -
Размер:
11.71 MB -
Описание:
5.1 канальный AV ресивер с HD Audio
Просмотр
На NoDevice можно скачать инструкцию по эксплуатации для Pioneer VSX-424. Руководство пользователя необходимо для ознакомления с правилами установки и эксплуатации Pioneer VSX-424. Инструкции по использованию помогут правильно настроить Pioneer VSX-424, исправить ошибки и выявить неполадки.
- Manuals
- Brands
- Pioneer Manuals
- Av receiver
- VSX-424-K
- Operating instructions manual
-
Contents
-
Table of Contents
-
Troubleshooting
-
Bookmarks
Quick Links
VSX-424
VSX-329
Discover the benefits of registering your product online at
Operating Instructions
-K
AV Receiver
-K
http://www.pioneer.co.uk
(or http://www.pioneer.eu).
Related Manuals for Pioneer VSX-424-K
Summary of Contents for Pioneer VSX-424-K
-
Page 1
VSX-424 AV Receiver VSX-329 http://www.pioneer.co.uk (or http://www.pioneer.eu). Discover the benefits of registering your product online at Operating Instructions… -
Page 2
CAUTION This product is for general household purposes. Any TO PREVENT THE RISK OF ELECTRIC SHOCK, DO NOT failure due to use for other than household purposes REMOVE COVER (OR BACK). NO USER-SERVICEABLE (such as long-term use for business purposes in a PARTS INSIDE. -
Page 3
Information for users on collection and disposal of old equipment and used batteries Symbol for These symbols on the products, packaging, and/or accompanying documents mean equipment that used electrical and electronic products and batteries should not be mixed with general household waste. For proper treatment, recovery and recycling of old products and used batteries, please take them to applicable collection points in accordance with your national legislation. -
Page 4: Table Of Contents
Contents Thank you for buying this Pioneer product. Please read 03 Basic Setup (VSX-424 only) 06 Home Menu through these operating instructions so you will know how to Before setting up (For Australia) ….19 Using the Home Menu .
-
Page 5: Before You Start
Before you start Flow of settings on the receiver The unit is a full-fledged AV receiver equipped with an Checking what’s in the box abundance of functions and terminals. It can be used easily after following the procedure below to make the connections Please check that you’ve received the following supplied Use the on-screen automatic MCACC setup to set up and settings.
-
Page 6: Controls And Displays
Chapter Controls and displays Front panel VSX-424 11 12 – Use with /, PRESET / INPUT SELECTOR dial TUNER EDIT TUNE PHONES jack Selects an input source (page 22). to memorize and name stations for recall Use to connect headphones. When the headphones are ENTER (page 26).
-
Page 7: Display
Controls and displays iPod iPhone DIRECT CONTROL DTS indicators Change the receiver’s input to the iPod and enable iPod DTS – Lights when a source with DTS encoded audio operations on the iPod (page 24). signals is detected. HD – Lights when a source with DTS-EXPRESS or DTS-HD iPod/iPhone terminal Use to connect your Apple iPod or USB mass storage device encoded audio signals is detected.
-
Page 8: Remote Control
Use to select the input source to this receiver (page 22). This MENU PARAMETER MENU will enable you to control other Pioneer components with the Press first to access: TUNER MENU remote control. – Memorizes stations for recall, also used to…
-
Page 9: Loading The Batteries
Never use new and old batteries together. SOURCE Insert the plus and minus sides of the batteries properly Turns on or off the power of the Pioneer DVD/DVR units when according to the marks in the battery case. is selected using the input function buttons.
-
Page 10: Connecting Your Equipment
Chapter Connecting your equipment Hints on the speaker placement Placing the speakers Where you put your speakers in the room has a big effect on the quality of the sound. The By connecting the left and right front speakers (L/R), the center speaker (C), the left and right following guidelines should help you to get the best sound from your system.
-
Page 11: Connecting The Speakers
Connecting your equipment Subwoofer Front right Front left Connecting the speakers Center The receiver will work with just two stereo speakers (the front speakers in the diagram) but using at least three speakers is recommended, and a complete setup is best for surround LINE LEVEL sound.
-
Page 12: Making Cable Connections
Connecting your equipment • If the video signal does not appear on your TV, try adjusting Note Making cable connections the resolution settings on your component or display. Note ®/ • Use a High Speed HDMI ™ Cable. If HDMI cable other that some components (such as video game units) have Make sure not to bend the cables over the top of this unit (as ®/…
-
Page 13: Analog Audio Cables
Connecting your equipment Analog audio cables Standard RCA video cables About video outputs connection Use stereo RCA phono cables to connect analog audio These cables are the most common type of video connection This receiver is not loaded with a video converter. When you components.
-
Page 14: Connecting A Tv And Playback Components
Connecting your equipment Game console HDMI/DVI-compatible components Connecting a TV and playback components DVD player, Blu-ray Disc player, Set-top box HDD/DVD recorder Blu-ray Disc recorder Connecting using HDMI If you have an HDMI or DVI (with HDCP) equipped component (Blu-ray Disc player, etc.), you can connect it to this receiver using a commercially available HDMI cable.
-
Page 15: Connecting Your Component With No Hdmi Terminal
Connecting your equipment Connecting your component with no HDMI terminal DVD player Set-top box This diagram shows connections of a TV and DVD player (or other playback component) with no HDMI terminal to the Select one Select one receiver. VIDEO OUT VIDEO OUT ANALOG AUDIO OUT DIGITAL AUDIO OUT…
-
Page 16: Connecting Antennas
Connecting your equipment Place the AM antenna on a flat surface and in a direction To improve AM reception Connecting antennas Connect a 5 m to 6 m length of vinyl-coated wire to the AM giving the best reception. antenna terminal without disconnecting the supplied AM Connect the AM loop antenna and the FM wire antenna as Connect the FM wire antenna into the FM antenna loop antenna.
-
Page 17: Connecting An Ipod
Connecting your equipment Connecting an iPod Connecting a USB device This receiver has a dedicated iPod/iPhone terminal that will It is possible to listen to two-channel audio using the USB allow you to control playback of audio content from your iPod interface on the front of this receiver.
-
Page 18: Plugging In The Receiver
A damaged power cord can cause a fire or give you an electrical shock. Check the power cord once in a while. When you find it damaged, ask your nearest PIONEER authorized service center or your dealer for a replacement.
-
Page 19: Basic Setup (Vsx-424 Only)
Chapter Basic Setup (VSX-424 only) Switch on the receiver and your TV. Before setting up (For Australia) Canceling the Auto Power Down (For Europe, This receiver allows you to adjust the system setup, using the Russia and U.K.) Switch the TV input to the input that connects this on-screen display (OSD) that is shown on the TV screen.
-
Page 20
Basic Setup (VSX-424 only) Press RECEIVER on the remote control, then press the Wait for the test tones to finish. Make sure ‘OK’ is selected, then press ENTER. HOME MENU button. A progress report is displayed on-screen while the If the screen in step 8 is left untouched for 10 seconds ///… -
Page 21: Other Problems When Using The Auto Mcacc Setup
Basic Setup (VSX-424 only) Other problems when using the Auto MCACC setup If the room environment is not optimal for the Auto MCACC setup (too much background noise, echo off the walls, obstacles blocking the speakers from the microphone) the final settings may be incorrect.
-
Page 22: Basic Playback
Chapter Basic playback Press AUTO/DIRECT to select ‘AUTO SURROUND’ and Press SIGNAL SEL to select the audio input signal Playing a source start playback of the source. corresponding to the source component. Here are the basic instructions for playing a source (such as If you’re playing a Dolby Digital or DTS surround sound Each press cycles through the following: a DVD disc) with your home theater system.
-
Page 23
Basic playback • Some DVD players don’t output DTS signals. For more details, refer to the instruction manual supplied with your DVD player. • In order to enjoy the picture and/or sound from devices connected to each terminal, select the input by doing the following. Audio (TV input) Other than TV input… -
Page 24: Playing An Ipod
When your iPod is connected to this receiver, you can browse website of Pioneer to your iPod/iPhone may result in songs stored on your iPod by playlist, artist, album name, This allows you to switch between performing iPod operations incompatibility with this receiver.
-
Page 25: Playing A Usb Device
• MP3 (MPEG-1/2/2.5 Audio Layer 3) – Sampling rates: • Pioneer cannot guarantee compatibility (operation and/or 32 kHz/44.1 kHz/48 kHz; Bit rates: 32 kbps to 320 kbps bus power) with all USB mass storage devices and Basic playback controls (128 kbps or higher recommended);…
-
Page 26: Listening To The Radio
Basic playback Saving station presets Listening to station presets Listening to the radio If you often listen to a particular radio station, it’s convenient You will need to have some presets stored to do this. See The following steps show you how to tune in to FM and AM to have the receiver store the frequency for easy recall Saving station presets above if you haven’t done this already.
-
Page 27: Changing The Radio Frequency Step (For Australia)
Basic playback You can search the following program types: Changing the radio frequency step (For Australia) Searching for RDS programs NEWS – News FINANCE – Stock market If you find that you can’t tune into stations successfully, the You can search for a program type listed above. reports, commerce, trading, AFFAIRS –…
-
Page 28: Displaying Rds Information
Basic playback Displaying RDS information Use the DISP button to display the different types of RDS information available. Press DISP for RDS information. Each press changes the display as follows: • Listening mode • Master volume • Radio Text (RT) – Messages sent by the radio station. •…
-
Page 29: Listening To Your System
Chapter Listening to your system Note Type of surround modes Suitable sources Choosing the listening mode • Stereo surround (matrix) formats are decoded accordingly This receiver offers a variety of listening modes to Two channel sources using NEO:6 CINEMA (see Listening in surround sound accommodate playback of various audio formats.
-
Page 30: Using The Advanced Surround
Listening to your system Note Press S.RETRIEVER to switch the S.RTV (Sound ADVANCED Using the Advanced surround SURROUND • During ECO mode, the brightness switches between 2 ADV SURR Retriever) ON or OFF. levels. If the dimmest level is selected, DIMMER will be The Advanced surround feature creates a variety of surround Note shown on the display.
-
Page 31: Better Sound Using Phase Control
Listening to your system Setting/What it does Option(s) Better sound using Phase Control Setting the Audio options EQ (Acoustic Calibration EQ) (VSX-424 only) This receiver’s Phase Control feature uses phase correction There are a number of additional sound settings you can Switches on/off the effect of Acoustic measures to make sure your sound source arrives at the make using the AUDIO PARAMETER menu.
-
Page 32
Listening to your system Setting/What it does Option(s) Setting/What it does Option(s) DRC (Dynamic Range Control) –3 to +3 DIMEN (Dimension) AUTO Adjusts the level of dynamic range for movie Default: 0 Adjusts the surround sound balance from soundtracks optimized for Dolby Digital, DTS, front to back, making the sound more distant Dolby Digital Plus, Dolby TrueHD, DTS-HD (minus settings), or more forward (positive… -
Page 33: Home Menu
Chapter Home Menu Select the setting you want to adjust. Using the Home Menu Manual speaker setup The following section shows you how to make detailed This receiver allows you to make detailed settings to optimize Ho me Me nu H ome Me nu settings to specify how you’re using the receiver, and also the surround sound performance.
-
Page 34: X.over
Home Menu • Surr – Select LARGE if your surround speakers reproduce X.Over Select ‘Manual SP Setup’ from the Home Menu. bass frequencies effectively. Select SMALL to send bass • Default setting: 100Hz frequencies to the other speakers or subwoofer. If you Select ‘Channel Level’…
-
Page 35: Speaker Distance
Home Menu Adjust the level of each speaker as the test tone is Adjust the distance of each speaker using /. emitted. The Auto Power Down menu You can adjust the distance of each speaker in 0.1 m Set to automatically turn off the receiver after a specified time Note increments.
-
Page 36: The Hdmi Setup Menu
Home Menu When you’re finished, press RETURN. The HDMI Setup menu You return to the Home Menu. If your TV supports an audio return channel (ARC) function, connect your TV and this unit with an HDMI cable and the TV Before starting ARC operation audio will be inputted into this unit via the HDMI terminal When starting ARC operation, put the TV and this unit in…
-
Page 37: Additional Information
Switch the subwoofer setting in Speaker Setting on page 33 power and call a Pioneer authorized independent service YES or PLUS. After using the Auto MCACC setup, the speaker size company.
-
Page 38: Hdmi
Additional information compatible). In this case, connect using the composite video Can’t operate the remote control. Note jacks between source and receiver. Replace the batteries (page • Depending on the component, audio output may be limited If video images do not appear on your TV, try adjusting the …
-
Page 39: About Ipod/Iphone
Additional information Tuner Section Important About iPod/iPhone Frequency Range (FM) ….87.5 MHz to 108 MHz • If the ARC function is ON, you may not be able to initialize Antenna Input (FM) .
-
Page 40: Specifications (Vsx-329)
Additional information Furnished Parts Specifications (VSX-329) Remote control ……..1 Dry cell batteries (AAA size IEC R03).
-
Page 41
253 Alexandra Road, #04-01, Singapore 159936 TEL: 65-6472-7555 PIONEER ELECTRONICS AUSTRALIA PTY. LTD. 5 Arco Lane, Heatherton, Victoria, 3202, Australia, TEL: (03) 9586-6300 PIONEER ELECTRONICS DE MEXICO S.A. DE C.V. Blvd.Manuel Avila Camacho 138 10 piso Col.Lomas de Chapultepec, Mexico, D.F. 11000 TEL: 55-9178-4270 K002_B3_En…
-
Страница 1
AV Receiver Operating Instructions Discov er the benefits of registering your product online at http://www .pioneer .co.uk (or http://www .pioneer .eu ). VSX-424 -K VSX-329 -K[…]
-
Страница 2
2 . CAUTION TO PREVENT THE RISK OF ELECTRIC SHOCK, DO NOT REMOVE COVER (OR BACK). NO USER-SERVICEABLE P ARTS INSIDE. REFER SERVICING TO QUALIFIED SERVICE PERSONNEL. D3-4-2-1-1_B1_En WARNING This equipment is not waterproof . T o prevent a fire or shock hazard, do not place any container filled with liquid near this equipment (such as a vase or flow[…]
-
Страница 3
3 Information for users on collection and disposal of old equipment and used batteries These symbols on the products, packaging, and/or accompanying documents mean that used electrical and electronic products and batteries should not be mixed with general household waste. For proper treatment, recovery and recycling of old products and used batteri[…]
-
Страница 4
4 Thank you for buying this Pioneer product. Please read through these operating instructions so you will know how to operate your model properly. Before you start . . . . . . . . . . . . . . . . . . . . . . . . . . . . . 5 Checking what’s in the box . . . . . . . . . . . . . . . . . . . . . . . . . 5 Installing the receiver . . . . . . . . . . .[…]
-
Страница 5
5 Before you start Checking what’s in the box Please check that you’ve received the following supplied accessories: • Setup microphone (VSX-424 only) • Remote control • AAA size IEC R03 dry cell batteries (to confirm system operation) x2 • AM loop antenna • FM wire antenna • Power cord • Warrant y card • Quick start guide • Sa[…]
-
Страница 6
1 1 6 Chapter 4 37 6 Controls and displays Front panel 1 INPUT SEL ECTOR dial Selects an input source ( page 22 ). 2 MCACC indicator (VSX-424 o nly) Lights when Acoustic Calibration EQ ( page 30 ) is on (Acoustic Calibration EQ is automatically set to on after the Auto MCACC setup ( pa ge 19 )). 3 Receiver control buttons SPEAKERS – Use to change[…]
-
Страница 7
Controls and displays 1 1 7 4 37 6 15 iPod iPhone DIRECT CONTROL Change the receiver’s input to the iPod and enable iPod operations on the iPod ( page 2 4 ). 16 iPod/iPhone terminal Use to connect your Apple iPod or USB mass storage d evice as an audio source ( page 17 ). Display 17 PHASE Lights when the Phase Control is switched on ( page 31 ). […]
-
Страница 8
Controls and displays 1 1 8 4 37 6 Remote control As for operating other devices, the remote contro l codes for the Pioneer products are pres et. The settings cannot be chang ed. 1 SLEEP Press to change the amount of time before the receiver switches into standby ( 30 min – 60 min – 90 min – Off ). You can check the remaining sleep time at an[…]
-
Страница 9
Controls and displays 1 1 9 4 37 6 11 Component c ontrol buttons The main buttons ( , , etc.) are used to control a component after you have s elected it using the input function buttons. The controls above these buttons can be accessed after you have selected the corresponding input function button ( BD , DVD and CD ). These buttons also f[…]
-
Страница 10
2 2 10 Chapter 4 37 6 Connecting your equipment Placing the speakers By connecting the left and right front speakers ( L / R ), the center speaker ( C ), the left and right surround speakers ( SL / SR ), and the subwoofer ( SW ), a 5.1 ch surround system can be enjoyed. To achieve the best possible surro und so und, install your speakers as shown b[…]
-
Страница 11
Connecting your equipment 2 2 11 4 37 6 Connecting the speakers The receiver will work with just two stereo sp eakers (the front speakers in the diagram) but using at least three speakers is recommended, and a complete setup is best for surround sound. Make sure you connect the speaker on the right to the right ( R ) terminal and the speaker on the[…]
-
Страница 12
Connecting your equipment 2 2 12 4 37 6 Making cable connections Make sure not to bend the cables over the top of this unit (as shown in the illustration). If th is happens, the magnetic field produced by the transformers in this unit may cause a humming noise from the speakers. Important • Before making or changing connections, switch off the po[…]
-
Страница 13
Connecting your equipment 2 2 13 4 37 6 Analog audio cables Use stereo RCA phono cables to connect analog a udio components. These cables are typically red and white, and you should connect the red plugs to R (right) terminals and white plugs to L (left) terminals. Digital audio cables Commercially available coaxial di gital audio cables or optical[…]
-
Страница 14
Connecting your equipment 2 2 14 4 37 6 Connecting a TV and playback components Connecting using HDMI If you have an HDMI or DVI (with HDCP) equipped component (Blu-ray Disc play er, etc.), you can connect it to this re ceiver using a commercially av ailable HDMI cable. • The following connection/setting is required to listen to the sound of the […]
-
Страница 15
Connecting your equipment 2 2 15 4 37 6 Connecting your component with no HDMI terminal This diagram shows connections of a TV and DVD player (or other playback component) with no HDMI terminal to the receiver. Note • In order to listen to the audio from the TV that is connect ed to this receiver using a analog audio cables, set-up for analog aud[…]
-
Страница 16
Connecting your equipment 2 2 16 4 37 6 Connecting antennas Connect the AM loop antenna and the FM wire antenna as shown below. To improve re ception and sound quality, connect external antennas (see Using external antennas below ). 1 Push open the tabs, then insert on e wire fully into each terminal, then release t he tabs to secure the AM antenna[…]
-
Страница 17
Connecting your equipment 2 2 17 4 37 6 Connecting an iPod This receiver has a dedicated iPod/iPhon e terminal that will allow you to control playback of audio content from your i Pod using the controls of this receiver. Note • An iPod/iPhone can be connected to the receiver. For details on supported models and versions of the respective products[…]
-
Страница 18
Connecting your equipment 2 2 18 4 37 6 Plugging in the receiver Only plug in after you have connected all your components to this receiver, including the speakers. 1 Plug the supplied power cord into the AC IN so cket on the back of the rec eiver. 2 Plug the other end into a power outlet. CAUTION • Handle the power cord by the plug. Do not pull […]
-
Страница 19
3 3 19 Chapter 4 37 6 Basic Setup (VSX-424 only) Before setting up (For Australia) This receiver allows you to adjust the system setup , using the on-screen display (OSD) that is shown on the TV screen. • The OSD will not appear if you have connected using the HDMI output to your TV. Us e composite connections for system setup. First, follow the […]
-
Страница 20
Basic Setup (VSX-424 only) 3 3 20 4 37 6 4 Press on the remote control, then press the HOME MENU button. The Home Menu appears on your TV. Use /// and ENTER on the remote control to navigate through the screens and select menu items. Press RETURN to exit the current menu. • Press HOME MENU at any time to exit the Home Menu. If you can[…]
-
Страница 21
Basic Setup (VSX-424 only) 3 3 21 4 37 6 Other problems when using the Auto MCACC setup If the room environment is not optimal for the Auto MCACC setup (too much background noise, echo off the walls, obstacles blocking the speakers from the microphone) the final settings may be incorrect. Check for household appliances (air conditioner, fr idge, fa[…]
-
Страница 22
4 4 22 Chapter 4 37 6 Basic playback Playing a source Here are the basic instructions for playing a source (such as a DVD disc) with your home theater system. 1 Switch on your system components and receiver. Start by switching on the playback component (for example a DVD player), your TV and subwoofer (if you have one), then the receiver (press […]
-
Страница 23
Basic playback 4 4 23 4 37 6 • Some DVD players don’t output DTS signals. For more details, refer to the instruction manual supplied with your DVD player . Tip • In order to enjoy the picture and/or sound from devices connect ed to each terminal, select the input by doing the following. DVD BD CD TUNER SAT/CBL DVD SAT/CBL DVD SAT/CBL GAME DVD[…]
-
Страница 24
Basic playback 4 4 24 4 37 6 Playing an iPod This receiver has a dedicated iPod terminal that will allow you to control playback of audio c ontent from your iPod using the controls of this receiver. Important • Pioneer cannot under any circumstances accept responsibility for any direct or indirect loss arising from any inconvenience or loss of re[…]
-
Страница 25
Basic playback 4 4 25 4 37 6 Playing a USB device It is possible to listen to two-channel audio using the USB interface on the front of this receiver. Important • Pioneer cannot guarantee comp atibility (operation and/or bus power) with all USB mass sto rage devices and assumes no responsibility for any loss of data that may occur when connected […]
-
Страница 26
Basic playback 4 4 26 4 37 6 Listening to the r adio The following steps show yo u ho w to tune in to FM and AM radio broadcasts using the au tomatic (search) and manual (step) tuning functions. Once you are tuned to a station you can memorize the frequency for r ecall later—see Saving station presets below for more on how to do this. 1 Press TUN[…]
-
Страница 27
Basic playback 4 4 27 4 37 6 Changing the radio frequency step (Fo r Australia) If you find that you can’t t une into stations successfully, the frequency step may not be suit able for your country/region. Here’s how to switch the setting : 1 Switch the receiver into standby. 2 While holding dow n TUNE button, press and hold STANDBY/ON […]
-
Страница 28
Basic playback 4 4 28 4 37 6 Displaying RDS information Use the DISP button to display the different types of RDS information available. Press DISP for RDS inform ation. Each press changes the display as follows: • Listening mode • Master volume • Radio Text ( RT ) – Messages sent by the radio stat ion. • For example, a talk radio sta[…]
-
Страница 29
5 5 29 Chapter 4 37 6 Listening to your system Choosing the listening mode This receiver offers a vari ety of listening modes to accommodate playback of variou s audio formats. C hoose one according to your speaker environment or the source. While listening to a source, pres s the listening mode button repeatedly to select a listening mode you […]
-
Страница 30
Listening to your system 5 5 30 4 37 6 Using the Adva nced surround The Advanced surround feature creates a variety of surround effects. Try different modes with various soundtracks to see which you like. Note • During ECO mode, the brightness switches between 2 levels. If the dimmest level is selected, DIMMER will be shown on the display. (Mode […]
-
Страница 31
Listening to your system 5 5 31 4 37 6 Better sound using Phase Control This receiver’s Phase Control feature uses phase correction measures to make sure your sound source arrives at the listening position in phase, preventing unwanted distortion and/or coloring of the sound. Phase Control technology provides coherent sound reproduction through t[…]
-
Страница 32
Listening to your system 5 5 32 4 37 6 a. You can change th e MIDNIGHT/LOUDNESS options at any time by usin g MIDNIGHT button. b. You ca n change the Sound Retriever fe ature at any time by using S.RETRIEVER button. c. The default sett ing when the iPod/USB inpu t is selected is ON . d. This setting works only with dual mono encoded Dolby Digital a[…]
-
Страница 33
6 6 33 Chapter 4 37 6 Home Menu Using the Home Menu The following section show s you how to make detailed settings to specify how you’re using th e receiver, and also explains how to fine-tune indivi dual speaker system sett ings to your liking. Important • The OSD will not appear if you have connected using the HDMI output to your TV. Us e com[…]
-
Страница 34
Home Menu 6 6 34 4 37 6 • Surr – Select LARGE if your surround speakers reproduce bass frequencies effe ctively. Select SMALL to send bass frequencies to the other spea kers or subwoofer. If you didn’t connect surround speakers choose NO (the sound of the surround channels is sent to the other speakers). • Subwoofer – LFE signals and bass[…]
-
Страница 35
Home Menu 6 6 35 4 37 6 Adjust the level of each speaker as t he test tone is emitted. Note • If you are using a Sound Pressure Level (SPL) meter, take the readings from your main listening position and adjust the level of each speaker to 75 dB SPL (C-weighting/slow reading). • The subwoofer test tone is ou tput at low volumes. You may need to […]
-
Страница 36
Home Menu 6 6 36 4 37 6 The HDMI Setup menu If your TV supports an audio return channel (ARC) function, connect your TV and this unit with an HDMI cable and the TV audio will be inputted into this unit via the HDMI terminal without the need for an audio cable to be connected. It is possible to transfer signals from an HDMI connected player to the T[…]
-
Страница 37
7 7 37 Chapter 4 37 6 Additional information Troubleshooting Incorrect operations are often mistaken for trouble and malfunctions. If you think that there is something wrong with this component, check the points below. Take a look at the other components and electrical appliances being used, because sometimes the problem may lie there. If the troub[…]
-
Страница 38
Additional information 7 7 38 4 37 6 Can’t operate the remote control. Replace the b atteries ( page 9 ). Operate within 7 m, 30º of the remote sensor ( page 9 ). Remove the obstacle o r operate fro m another posi tion. Avoid exposing the remote sensor on the front panel to direct light. Press th e remote control’s butt[…]
-
Страница 39
Additional information 7 7 39 4 37 6 About iPod/iPhone USB works with iPhone 5s, iPho ne 5c, iPhone 5, iPhone 4s, iPhone 4, iPhone 3GS, iPhone 3G, iPod touch (1st through 5th generation), iPod classic and iPod nano (3rd through 7th generation). “Made for iPod” and “Made for iPhone” mean that an electronic accessory has been designed to c on[…]
-
Страница 40
Additional information 7 7 40 4 37 6 Specifications (VSX-329) Audio section Rated power outp ut Front, Center, Surround . . . . . . . . . . . . . . . . . 100 W per channel (1 kHz, 6 , 0.7 %) . . . . . . . . . . . . . . . . . . . 105 W p er channel (1 kHz, 6 , 1 %) For Oceania Model Maximum power output (Front, Center, Surround) . . . . . . […]
-
Страница 41
<ARB7549-A> © 2014 PIONEER CORPORA TION. All r ights reserved. http://www .pioneer .co.uk http://www .pioneer .eu PIONEER CORPORA TION 1-1, Shin-ogura, Saiwai-ku, Ka wasaki-shi, Kanagaw a 212-0031, Japan PIONEER ELECTRONICS (USA) INC. P .O . BOX 1540, Long Beach, Calif ornia 90801-1540, U.S .A. TEL: (800) 421-1404 PIONEER ELECTRONICS OF CANA[…]