
-
Contents
-
Table of Contents
-
Troubleshooting
-
Bookmarks
Quick Links
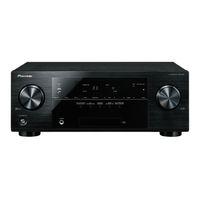
VSX-422
-K /-S
AV Receiver
http://www.pioneer.co.uk
Discover the benefits of registering your product online at
(or http://www.pioneer.eu).
Operating Instructions
Related Manuals for Pioneer VSX-422-K
Summary of Contents for Pioneer VSX-422-K
-
Page 1
VSX-422 -K /-S AV Receiver http://www.pioneer.co.uk Discover the benefits of registering your product online at (or http://www.pioneer.eu). Operating Instructions… -
Page 2: Operating Environment
IMPORTANT This product is for general household purposes. Any failure due to use for other than household purposes CAUTION (such as long-term use for business purposes in a restaurant or use in a car or ship) and which requires RISK OF ELECTRIC SHOCK repair will be charged for even during the warranty DO NOT OPEN period.
-
Page 3
If the AC plug of this unit does not match the AC Information for users on collection and disposal of old equipment and used batteries outlet you want to use, the plug must be removed These symbols on the products, packaging, and/or accompanying documents mean Symbol for and appropriate one fitted. -
Page 4: Table Of Contents
Contents Thank you for buying this Pioneer product. Please read 04 Basic playback 07 Additional information through these operating instructions so you will know how to Playing a source ……. . 19 Troubleshooting .
-
Page 5: Before You Start
Before you start Flow of settings on the receiver The unit is a full-fledged AV receiver equipped with an The Pre Out Setting (page Checking what’s in the box abundance of functions and terminals. It can be used easily (When connecting the front height speakers.) after following the procedure below to make the connections Please check that you’ve received the following supplied The Input Assign menu…
-
Page 6: Controls And Displays
Chapter Controls and displays Front panel VSX-422 AV RECEIVER MCACC HDMI SPEAKERS DIMMER DISPLAY BAND TUNER EDIT TUNE PRESET ENTER AUTO SURROUND/ ALC/ ADVANCED SOUND STREAM DIRECT STANDARD SURR SURROUND STEREO RETRIEVER MASTER INPUT SELECTOR VOLUME STANDBY/ ON PHONES MCACC SETUP MIC INPUT SELECTOR dial…
-
Page 7: Display
Controls and displays MCACC SETUP MIC jack DTS indicators Use to connect a microphone when performing Auto MCACC DTS – Lights when a source with DTS encoded audio setup (page 17). signals is detected. HD – Lights when a source with DTS-EXPRESS or DTS-HD Display encoded audio signals is detected.
-
Page 8: Remote Control
Use to select the input source to this receiver (page 19). This TOOLS change the name (page 21). ENTER will enable you to control other Pioneer components with the remote control. – Switches between AM, FM ST (stereo) and FM BAND HOME MONO radio bands (page 21).
-
Page 9: Loading The Batteries
SOURCE instruction’s rules that apply in your country or area. Turns on or off the power of the Pioneer DVD/DVR units when Do not use or store batteries in direct sunlight or other is selected using the input function buttons.
-
Page 10: Connecting Your Equipment
Chapter Connecting your equipment Hints on the speaker placement Placing the speakers Where you put your speakers in the room has a big effect on the quality of the sound. The By connecting the left and right front speakers (L/R), the center speaker (C), the left and right following guidelines should help you to get the best sound from your system.
-
Page 11: Connecting The Speakers
Connecting your equipment Subwoofer Front right Front left Connecting the speakers Center The receiver will work with just two stereo speakers (the front speakers in the diagram) but using at least three speakers is recommended, and a complete setup is best for surround LINE LEVEL sound.
-
Page 12: Making Cable Connections
Connecting your equipment • If the video signal does not appear on your TV, try adjusting Note Making cable connections the resolution settings on your component or display. Note ® • Use a High Speed HDMI cable. If HDMI cable other than that some components (such as video game units) have Make sure not to bend the cables over the top of this unit (as ®…
-
Page 13: Analog Audio Cables
Connecting your equipment Analog audio cables Standard RCA video cables About video outputs connection Use stereo RCA phono cables to connect analog audio These cables are the most common type of video connection This receiver is not loaded with a video converter. When you components.
-
Page 14: Connecting A Tv And Playback Components
Connecting your equipment Game console HDMI/DVI-compatible components Connecting a TV and playback components DVD player, Blu-ray Disc player, Set-top box HDD/DVD recorder Blu-ray Disc recorder Connecting using HDMI If you have an HDMI or DVI (with HDCP) equipped component (Blu-ray Disc player, etc.), you can connect it to this receiver using a commercially available HDMI cable.
-
Page 15: Connecting Your Component With No Hdmi Terminal
Connecting your equipment Connecting your component with no HDMI terminal DVD player Set-top box This diagram shows connections of a TV and DVD player (or other playback component) with no HDMI terminal to the Select one Select one receiver. VIDEO OUT VIDEO OUT ANALOG AUDIO OUT DIGITAL AUDIO OUT…
-
Page 16: Connecting Antennas
ANTENNA the power cord once in a while. If you find it damaged, ask FM UNBAL 75 Ω coaxial cable your nearest Pioneer authorized independent service AM LOOP company for a replacement. • Do not use any power cord other than the one supplied with this unit.
-
Page 17: Basic Setup
Chapter Basic Setup Important Canceling the Auto Power Down VSX-422 AV RECEIVER • The OSD will not appear if you have connected using the When this receiver is not used over a period of several hours, HDMI output to your TV. Use composite connections for it will power down automatically.
-
Page 18: Other Problems When Using The Auto Mcacc Setup
Basic Setup Select ‘Auto MCACC’ from the Home Menu, then press Confirm the speaker configuration. The Auto MCACC setup has finished! You return to the The configuration shown on-screen should reflect the ENTER. Home Menu. actual speakers you have. The settings made in the Auto MCACC setup should give Home Me nu you excellent surround sound from your system, but it is also possible to adjust these settings manually using the…
-
Page 19: Basic Playback
Chapter Basic playback Selecting the audio input signal Press AUTO/DIRECT to select ‘AUTO SURROUND’ and Playing a source start playback of the source. The audio input signal can be selected for each input source. Here are the basic instructions for playing a source (such as If you’re playing a Dolby Digital or DTS surround sound Once it is set, the audio input that was selected will be applied a DVD disc) with your home theater system.
-
Page 20
Basic playback • When digital input (optical or coaxial) is selected, this receiver can only play back Dolby Digital, PCM (32 kHz to 96 kHz) and DTS (including DTS 96 kHz/24 bit) digital signal • In order to enjoy the picture and/or sound from devices connected to each terminal, select the input by doing the following. formats. -
Page 21: Listening To The Radio
Basic playback Note Improving FM sound Listening to the radio • If the receiver is left disconnected from the AC power outlet If the TUNE or ST indicators don’t light when tuning to an FM The following steps show you how to tune in to FM and AM for over a month, the station memories will be lost and will station because the signal is weak, set the receiver to the radio broadcasts using the automatic (search) and manual…
-
Page 22: An Introduction To Rds
Basic playback Displaying RDS information An introduction to RDS Use the DISP button to display the different types of RDS Radio Data System (RDS) is a system used by most FM radio information available. stations to provide listeners with various kinds of …
-
Page 23: Listening To Your System
Chapter Listening to your system Note Choosing the listening mode • Stereo surround (matrix) formats are decoded accordingly This receiver offers a variety of listening modes to using NEO:6 CINEMA or DOLBY PLIIx MOVIE (see Type of surround Suitable sources accommodate playback of various audio formats.
-
Page 24: Using The Advanced Surround
Listening to your system You can also adjust the C.WIDTH, DIMEN., and PNRM. effect Allows you to create natural surround F.S.S.ADVANCE (see Setting the Audio options on page 26). Using the Sound Retriever (Front Stage sound effects using just the front speakers You can also adjust the H.GAIN effect (see Setting the Audio Surround…
-
Page 25: Better Sound Using Phase Control
Listening to your system Better sound using Phase Control Using surround back channel processing Setting the Up Mix function This receiver’s Phase Control feature uses phase correction You can have the receiver automatically use 6.1 or 7.1 In a 7.1-channel surround system with surround speakers measures to make sure your sound source arrives at the decoding for 6.1 encoded sources (for example, Dolby Digital placed directly at the sides of the listening position, the…
-
Page 26: Setting The Audio Options
Listening to your system Setting/What it does Option(s) Setting/What it does Option(s) Setting the Audio options EQ (Acoustic Calibration EQ) DRC (Dynamic Range Control) There are a number of additional sound settings you can AUTO Switches on/off the effect of Acoustic Adjusts the level of dynamic range for movie make using the AUDIO PARAMETER menu.
-
Page 27
Listening to your system Setting/What it does Option(s) –3 to +3 DIMEN (Dimension) Default: 0 Adjusts the surround sound balance from front to back, making the sound more distant (minus settings), or more forward (positive settings). PNRM. (Panorama) Extends the front stereo image to include surround speakers for a ‘wraparound’… -
Page 28: Home Menu
Chapter Home Menu Select the setting you want to adjust. Using the Home Menu Manual speaker setup The following section shows you how to make detailed This receiver allows you to make detailed settings to optimize Ho me Me nu settings to specify how you’re using the receiver, and also the surround sound performance.
-
Page 29: X.over
Home Menu • Center – Select LARGE if your center speaker reproduces Note Choose the frequency cutoff point. bass frequencies effectively, or select SMALL to send bass • If you select SMALL for the front speakers, the subwoofer Frequencies below the cutoff point will be sent to the frequencies to the other speakers or subwoofer.
-
Page 30: Speaker Distance
Home Menu Confirm your selected setup option. The Input Assign menu The test tones will start after you press ENTER. After the • You can change the channel levels at any time by press ANALOG IN1 audio input terminal is assigned to CD under volume increases to the reference level, test tones will be , then press on the…
-
Page 31: The Pre Out Setting
Home Menu Specify the amount of time to allow before the power The Pre Out Setting The HDMI Setup menu is turned off (when there has been no operation). Specify either using the surround back speaker or the front If your TV supports an audio return channel (ARC) function, •…
-
Page 32
Home Menu Before starting ARC operation When starting ARC operation, put the TV and this unit in STANDBY mode after connecting this unit with the TV. Next, turn ON the power of this unit and then the TV, in this order. In order to start ARC operation, after connecting this unit to a TV with an HDMI cable, you will need to switch the input on the TV to the input mode required to connect to this unit. -
Page 33: Additional Information
Press on the remote control to turn muting off. MUTE and secure to a wall (or connect an outdoor FM antenna). ask your nearest Pioneer authorized independent service Set the to H (HDMI), C1/O1 (digital) or A (analog) SIGNAL SEL …
-
Page 34: Hdmi
Additional information occur when switching between audio formats or beginning The front panel display switches over for no apparent playback. Resetting the main unit reason to various different displays. This happens because the demo display is in operation. To turn …
-
Page 35: Specifications
Additional information Furnished Parts Specifications Microphone (for Auto MCACC setup) ….1 Remote control ……..1 Audio section Dry cell batteries (AAA size IEC R03).
-
Page 36
253 Alexandra Road, #04-01, Singapore 159936 TEL: 65-6472-7555 PIONEER ELECTRONICS AUSTRALIA PTY. LTD. 5 Arco Lane, Heatherton, Victoria, 3202, Australia, TEL: (03) 9586-6300 PIONEER ELECTRONICS DE MEXICO S.A. DE C.V. Blvd.Manuel Avila Camacho 138 10 piso Col.Lomas de Chapultepec, Mexico, D.F. 11000 TEL: 55-9178-4270 K002_B3_En…
-
Инструкции по эксплуатации
1

Pioneer VSX-422 инструкция по эксплуатации
(36 страниц)
- Языки:Русский
-
Тип:
PDF -
Размер:
7.63 MB -
Описание:
Ресивер
Просмотр
На NoDevice можно скачать инструкцию по эксплуатации для Pioneer VSX-422. Руководство пользователя необходимо для ознакомления с правилами установки и эксплуатации Pioneer VSX-422. Инструкции по использованию помогут правильно настроить Pioneer VSX-422, исправить ошибки и выявить неполадки.
- Manuals
- Brands
- Pioneer Manuals
- Receiver
- VSX-422-K
Manuals and User Guides for Pioneer VSX-422-K. We have 2 Pioneer VSX-422-K manuals available for free PDF download: Quick Start Manual, Operating Instructions Manual

Pioneer VSX-422-K Operating Instructions Manual (36 pages)
Pioneer AV receiver Operating Instructions
Brand: Pioneer
|
Category: Receiver
|
Size: 6.66 MB
Table of Contents
-
Operating Environment
2
-
Table of Contents
4
-
Before You Start
5
-
Checking What’s in the Box
5
-
-
Flow of Settings on the Receiver
5
-
Installing the Receiver
5
-
-
1 Controls and Displays
6
-
Front Panel
6
-
Display
7
-
-
Remote Control
8
-
Loading the Batteries
9
-
Operating Range of Remote Control
9
-
-
-
2 Connecting Your Equipment
10
-
Placing the Speakers
10
-
Hints on the Speaker Placement
10
-
-
Connecting the Speakers
11
-
Connect the Surround Back or Front Height Speakers
11
-
-
Making Cable Connections
12
-
HDMI Cables
12
-
About HDMI
12
-
Analog Audio Cables
13
-
Digital Audio Cables
13
-
Standard RCA Video Cables
13
-
-
About Video Outputs Connection
13
-
Connecting a TV and Playback Components
14
-
Connecting Using HDMI
14
-
Connecting Your Component with no HDMI Terminal
15
-
-
Connecting Antennas
16
-
Using External Antennas
16
-
-
Plugging in the Receiver
16
-
-
3 Basic Setup
17
-
Canceling the Auto Power down
17
-
Canceling the Demo Display
17
-
Automatically Setting up for Surround Sound (MCACC)
17
-
Other Problems When Using the Auto MCACC Setup
18
-
-
-
4 Basic Playback
19
-
Playing a Source
19
-
Selecting the Audio Input Signal
19
-
-
Listening to the Radio
21
-
Improving FM Sound
21
-
Saving Station Presets
21
-
Listening to Station Presets
21
-
Naming Preset Stations
21
-
-
An Introduction to RDS
22
-
Searching for RDS Programs
22
-
Displaying RDS Information
22
-
-
-
5 Listening to Your System
23
-
Choosing the Listening Mode
23
-
Auto Playback
23
-
Listening in Surround Sound
23
-
Using the Advanced Surround
24
-
Using Stream Direct
24
-
-
Using the Sound Retriever
24
-
Listening with Acoustic Calibration EQ
24
-
Better Sound Using Phase Control
25
-
Using Surround Back Channel Processing
25
-
Setting the up MIX Function
25
-
Setting the Audio Options
26
-
-
6 Home Menu
28
-
Using the Home Menu
28
-
Manual Speaker Setup
28
-
Speaker Setting
28
-
X.over
29
-
Channel Level
29
-
Speaker Distance
30
-
-
The Input Assign Menu
30
-
The Pre out Setting
31
-
The Auto Power down Menu
31
-
The FL Demo Mode Menu
31
-
The HDMI Setup Menu
31
-
-
7 Additional Information
33
-
Troubleshooting
33
-
General
33
-
Hdmi
34
-
Important Information Regarding the HDMI Connection
34
-
-
Resetting the Main Unit
34
-
Cleaning the Unit
34
-
Specifications
35
-
Advertisement
Pioneer VSX-422-K Quick Start Manual (45 pages)
Brand: Pioneer
|
Category: Receiver
|
Size: 15.99 MB
Table of Contents
-
Connecting the Speaker Cables
2
-
Connecting a TV and Playback Components
3
-
Connecting Antennas
3
-
Connecting to the Network through LAN Interface
3
-
Initial Setup
4
-
Basic Playback
5
-
Multichannel Playback
5
-
Listening to the Radio
5
-
Playing an Ipod
6
-
Listening to Internet Radio Stations
6
-
Raccordement des Enceintes
8
-
Raccordement Au Réseau Par L’interface LAN
9
-
Lecture de Base
11
-
Lecture À Partir D’un Ipod
12
-
Guide de Dépannage
12
-
Anschluss der Lautsprecher
14
-
Anschließen der Lautsprecherkabel
14
-
Herstellen der Verbindung zum Netzwerk über die LAN-Schnittstelle
15
-
Grundlegende Wiedergabe
17
-
Abspielen eines Ipod
18
-
Collegamento Degli Altoparlanti
20
-
Prima DI Cominciare
22
-
Annullare la Schermata Demo
22
-
Impostazione Automatica del Suono Surround (MCACC)
22
-
Riproduzione DI Base
23
-
Ascolto Della Radio
23
-
Riproduzione con un Ipod
24
-
Risoluzione Dei Problemi
24
-
De Luidsprekers Aansluiten
26
-
Aansluiting Van Uw TV en Weerga- Ve-Apparatuur
27
-
Antennes Aansluiten
27
-
Basisbediening Voor Afspelen
29
-
Naar de Radio Luisteren
29
-
Een Ipod Afspelen
30
-
Conexión de Los Cables de Altavoces
32
-
Conexión de Componentes de Reproducción y de un TV
33
-
Conexión de Antenas
33
-
Antes de Comenzar
34
-
Cancelación de la Pantalla Demo
34
-
Confi Guración Automática para Sonido Envolvente (MCACC)
34
-
Reproducción Básica
35
-
Reproducción Multicanal
35
-
Escucha de la Radio
35
-
Reproducción de un Ipod
36
-
Recepción de Emisoras de Radio de Internet
36
Advertisement
Related Products
-
Pioneer VSX-42 ELITE
-
PIONEER VSX-420-S
-
Pioneer VSX-422-S
-
Pioneer VSX-424-K
-
Pioneer VSX-423-K
-
Pioneer VSX-423-S
-
Pioneer VSX-425
-
Pioneer VSX-423
-
Pioneer VSX-420-K
-
Pioneer VSX-420
Pioneer Categories
Car Receiver
Receiver
Stereo Receiver
Amplifier
![]()
DVD Player
More Pioneer Manuals
Download Operating instructions manual of Pioneer VSX-422-K Receiver for Free or View it Online on All-Guides.com.

1

2

3

4

5

6

7

8

9

10

11

12

13

14

15

16

17

18

19

20

21

22

23

24

25

26

27

28

29

30

31

32

33

34

35

36

-
Страница 1
AV Receiver Operating Instructions Discov er the benefits of registering your product online at http://www .pioneer .co.uk (or http://www .pioneer .eu ). VSX-422 -K /-S[…]
-
Страница 2
2 The exclamation point within an equilateral triangle is intended to alert the user to the presence of important operating and maintenance (servicing) instructions in the literature accompanying the appliance. The lightning flash with arrowhead symbol, within an equilateral triangle, is intended to alert the user to the presence of uninsulated “[…]
-
Страница 3
3 If the AC plug of this unit does not match the AC outlet you want to use, the plug must be removed and appropriate one fitted. Replacement and mounting of an AC plug on the power supply cord of this unit should be performed only by qualified ser vice personnel. If connected to an AC outlet, the cut-off plug can cause severe electrical shock. Make[…]
-
Страница 4
4 Thank you for buying this Pioneer product. Please read through these operating instructions so you will know how to operate your model properly. Before you start . . . . . . . . . . . . . . . . . . . . . . . . . . . . . 5 Checking what’s in the box . . . . . . . . . . . . . . . . . . . . . . . . . 5 Installing the receiver . . . . . . . . . . .[…]
-
Страница 5
5 Before you start Checking what’s in the box Please check that you’ve received the following supplied accessories: • Setup microphone • Remote control • AAA size IEC R03 dry cell batteries (to conf irm system operation) x2 • AM loop antenna • FM wire antenna • Power cord • Warrant y card • Quick start guide • Safety Brochure […]
-
Страница 6
1 1 6 Chapter Controls and displays Front panel 1 INPUT SEL ECTOR dial Selects an input source ( page 19 ). 2 MCACC indicator Lights when Acoustic Calibration EQ ( page 24 ) is on (Acoustic Calibration EQ is automatically set to on after the Auto MCACC setup ( page 17 )). 3 Receiver control buttons SPEAKERS – Use to change the speaker system on o[…]
-
Страница 7
Controls and displays 1 1 7 13 MCACC SETUP MIC jack Use to connect a microphone when performing Auto MCACC setup ( page 17 ). Display 14 PHASE Lights when the Phase Control is switched on ( page 25 ). 15 AUTO Lights when the Auto Surround feature is switched on ( page 23 ). 16 Tuner indicators RDS – Lights when an RDS broadcast is received ( page[…]
-
Страница 8
Controls and displays 1 1 8 Remote control • As for operating other devices, the remote control co des for the Pioneer products are preset. The settings cannot be changed. • The following buttons are not used wit h this receiver: — iPod/USB , iPod CTRL , , 1 SLEEP Press to change the amount of time before the receiver switches into standby ( 30[…]
-
Страница 9
Controls and displays 1 1 9 11 Component c ontrol buttons The main buttons ( , , etc.) are used to control a component after you have selected it us ing the input function buttons. The controls above these buttons can be accessed after you have selected the corresponding input function button ( BD , DVD and CD ). These buttons also function[…]
-
Страница 10
2 2 10 Chapter Connecting your equipment Placing the speakers By connecting the left and right front speakers ( L / R ), the center speaker ( C ), the left and right surround speakers ( SL / SR ), and the subwoofer ( SW ), a 5.1 ch surround system can be enjoyed. Further, by using an external amplifier, you can connect the left and right surround b[…]
-
Страница 11
Connecting your equipment 2 2 11 Connecting the speakers The receiver will work with just two stereo sp eakers (the front speakers in the diagram) but using at least three speakers is recommended, and a complete setup is best for surround sound. Make sure you connect the speaker on the right to the right ( R ) terminal and the speaker on the left t[…]
-
Страница 12
Connecting your equipment 2 2 12 Making cable connections Make sure not to bend the cables over the top of this unit (as shown in the illustration). If th is happens, the magnetic field produced by the transformers in this unit may cause a humming noise from the speakers. Important • Before making or changing connections, switch off the power and[…]
-
Страница 13
Connecting your equipment 2 2 13 Analog audio cables Use stereo RCA phono cables to connect analog a udio components. These cables are typically red and white, and you should connect the red plugs to R (right) terminals and white plugs to L (left) terminals. Digital audio cables Commercially available coaxial di gital audio cables or optical cables[…]
-
Страница 14
Connecting your equipment 2 2 14 Connecting a TV and playback components Connecting using HDMI If you have an HDMI or DVI (with HDCP) equipped component (Blu-ray Disc play er, etc.), you can connect it to this re ceiver using a commercially av ailable HDMI cable. • The following connection/setting is required to listen to the sound of the TV over[…]
-
Страница 15
Connecting your equipment 2 2 15 Connecting your component with no HDMI terminal This diagram shows connections of a TV and DVD player (or other playback component) with no HDMI terminal to the receiver. Note • In o r d er t o l is t e n to t h e au d i o fr o m t he T V t ha t i s c on n e ct e d to this receiver using a analog audio cables, set[…]
-
Страница 16
Connecting your equipment 2 2 16 Connecting antennas Connect the AM loop antenna and the FM wire antenna as shown below. To improve re ception and sound quality, connect external antennas (see Using external antennas below ). 1 Push open the tabs, then insert on e wire fully into each terminal, then releas e the tabs to secure the AM antenna wires.[…]
-
Страница 17
3 3 17 Chapter Basic Setup Canceling the Auto Power Down When this receiver is not used over a period of seve ral hours, it will power down automatica lly. The automatic power-off timer is set to six hours under factory settings, and the timing can be changed or the power- off function switched of f altogether. For details, see The Auto Power Down […]
-
Страница 18
Basic Setup 3 3 18 5 Select ‘Auto MCACC’ fro m the Home Menu, then press ENTER . • Mic In! blinks when the microphone is not connected to MCACC SETU P MIC jack . Try to be as quiet as possible after pressing ENTER . The system outputs a se ries of test tones to establish the ambient noise level. 6 Follow the instructio ns on-screen. • Make […]
-
Страница 19
4 4 19 Chapter Basic playback Playing a s ource Here are the basic instructions for playing a source (such as a DVD disc) with your home theater system. 1 Switch on your system components and receiver. Start by switching on the playback component (for example a DVD player), your TV and subwoofer (if you have one), then the receiver (press RECEI[…]
-
Страница 20
Basic playback 4 4 20 • When digital input (optical or coaxial) is selected, this receiver can only play back Dolby Digital, PCM (32 kHz t o 96 kHz) and DTS (including DTS 96 kHz/24 bit) digital signal formats. The compatible signals via the HDMI terminals are: Dolby Digital, DTS, SA CD ( DSD 2 ch only), PCM (32 kHz to 192 kHz sampling frequencie[…]
-
Страница 21
Basic playback 4 4 21 Listening to the radio The following steps show yo u ho w to tune in to FM and AM radio broadcasts using the au tomatic (search) and manual (step) tuning functions. Once you are tuned to a station you can memorize the frequency for r ecall later—see Saving station presets below for more on how to do this. 1 Press TUNER to se[…]
-
Страница 22
Basic playback 4 4 22 An introduction to RDS Radio Data System (RDS) is a sy stem used by most FM radio stations to provide listeners with various kinds of information—the name of the station and the kind of show they’re broadcasting, for example. One feature of RDS is that you ca n s e a r c h b y t y p e o f p r o g r a m . For example, you c[…]
-
Страница 23
5 5 23 Chapter Listening to your system Choosing the listening mode This receiver off ers a vari ety of listening modes to accommodate playback of variou s audio formats. C hoose one according to your speaker environment or the source. While listening to a sourc e, press the listening mode button repeatedly to select a listening mode you want. […]
-
Страница 24
Listening to your system 5 5 24 b. You can also adj ust the C.WIDTH , DIMEN. , and PNRM. effect (see Setting the Audi o options on page 26 ). c. You can also adj ust the H.GAIN effect (see Setting the Audio options on pa ge 26 ). d. You can also adj ust the C.IMG effect (see Setting the Aud io options on pa ge 26 ). e. Cannot be selected when the P[…]
-
Страница 25
Listening to your system 5 5 25 Better sound using Phase Control This receiver’s Phase Control feature uses phase correction measures to make sure your sound source arrives at the listening position in phase, preventing unwanted distortion and/or coloring of the sound. Phase Control technology provides coherent sound reproduction through the use […]
-
Страница 26
Listening to your system 5 5 26 Setting the Audio options There are a number of additional sound sett ings you can make using the AUDIO PARAMETER menu. The defaults, if not stated, are listed in bold. Important • Note that if a set ting doesn’t appear in the AUDIO PARAMETER menu, it is unavailable due to the current source, settings and status […]
-
Страница 27
Listening to your system 5 5 27 a. You can change th e MIDNIGHT/LOUDNESS options at any time by using MIDNIGHT button. b. You can change the Soun d Retriever feature at any time by using S.RETRIEVER button. c. This setting works only with dual mono encoded Dolby Digital and DTS sound tracks. d. The initial set AUTO is only available for Dolby TrueH[…]
-
Страница 28
6 6 28 Chapter Home Menu Using the Home Menu The following section show s you how to make detailed settings to specify how you’re using th e receiver, and also explains how to fine-tune individual speaker sy stem settings to your liking. Important • The OSD will not appear if yo u have connected using the HDMI output to yo ur TV. Us e composite[…]
-
Страница 29
Home Menu 6 6 29 • Center – Select LARGE if your center speaker reproduces bass frequencies effectively, or select SMALL to send bass frequencies to the other spea kers or subwoofer. If you didn’t connect a center speaker, choose NO (the center channel is sent to the other speakers). • Front Height – Select LARGE if your front height spea[…]
-
Страница 30
Home Menu 6 6 30 4 Confirm your select ed setup option. The test tones will start after you press ENTER . After the volume increases to the reference level, test tones will be output. 5 Adjust the level of each channel using / . If you selected Manual , use / to switch speakers. The Auto setup will output test t ones in the order shown […]
-
Страница 31
Home Menu 6 6 31 The Pre Out Setting Specify either using the surround back speaker or the front height speaker connection with the PRE OUT SURR BACK/ FRONT HEIGHT outputs. An additional amplifier is required for the speaker connection. • Default setting: Surr. Back 1 Select ‘Pre Out Setting’ from the Home Menu . 2 Select which speaker to con[…]
-
Страница 32
Home Menu 6 6 32 Before starting A RC operation When starting ARC operation, put the TV and this unit in STANDBY mode after connecting this unit with the TV. Next, turn ON the p ower of this unit and the n the TV, in this orde r. In order to start ARC operation, after connecting this unit to a TV with an HDMI cable, you will need to switch the inpu[…]
-
Страница 33
7 7 33 Chapter Additional information Troubleshooting Incorrect operations are often mistaken for trouble and malfunctions. If you think that there is something wrong with this component, check the points below. Take a look at the other components and electrical appliances being used, because sometimes the problem may lie there. If the trouble isn?[…]
-
Страница 34
Additional information 7 7 34 The front panel display switches over for no apparent reason to various different displays. This happens because the demo disp lay is in operation . T o turn off the demo display , press any button to go back to the original display , or set the FL Demo Mode to OFF (see The FL Demo Mode menu on page 31 ). HDMI […]
-
Страница 35
Additional information 7 7 35 Specifications Audio section Rated power outp ut Front, Center, Surround . . . . . . . . . . . . . . . . . . . 130 W per channel (1 kHz, 6 Ω , 1 %) . . . . . . . . 100 W per channel (20 Hz to 20 kHz, 8 Ω , 0.09 %) Total Harmonic Distortion . . . . . . . . . . . . . . . . . 0.06 % (20 Hz to 20 kHz, 8 Ω , 50 W/ch) Fre[…]
-
Страница 36
<ARB7469-A> © 2012 PIONEER CORPORA TION. All rights reser ved. http://www .pioneer .co.uk http://www .pioneer .eu PIONEER CORPORA TION 1-1, Shin-ogura, Saiwai-ku, Ka wasaki-shi, Kanagaw a 212-0031, Japan PIONEER ELECTRONICS (USA) INC. P .O . BOX 1540, Long Beach, Calif ornia 90801-1540, U.S .A. TEL: (800) 421-1404 PIONEER ELECTRONICS OF CANA[…]