-
Contents
-
Table of Contents
-
Troubleshooting
-
Bookmarks
Quick Links
02
USER MANUAL
Type HD8769
Read carefully before using the machine.
Register your product and get support at
www.philips.com/welcome
Related Manuals for Saeco Moltio
Summary of Contents for Saeco Moltio
-
Page 1: User Manual
USER MANUAL Type HD8769 Read carefully before using the machine. Register your product and get support at www.philips.com/welcome…
-
Page 2: Important Safeguards
IMPORTANT SAFEGUARDS When using electrical appliances, basic safety precautions should always be followed, including the following: 1. Read all instructions. 2. Do not touch hot surfaces. Use handles or knobs. 3. To protect against fire, electric shock and injury to persons do not immerse cord, plugs, or appliance in water or other liquid.
-
Page 3
CAUTION This appliance is for household use only. Any servicing, other than cleaning and user maintenance, should be performed by an authorized service center. Do not immerse machine in water. To reduce the risk of fire or electric shock, do not disassemble the machine. There are no parts inside the machine serviceable by the user. -
Page 4: Table Of Contents
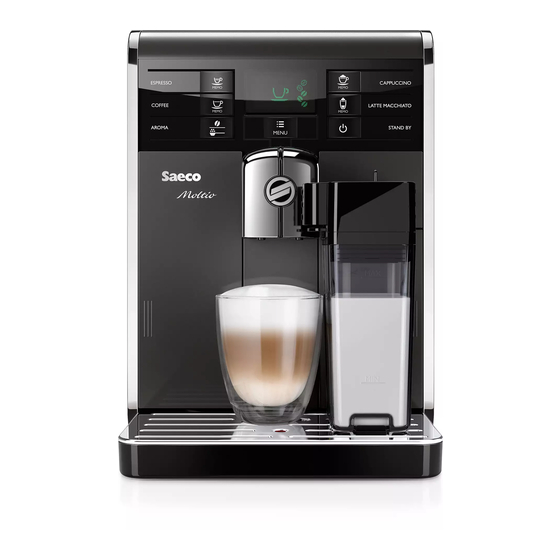
ENGLISH Congratulations on your purchase of a Saeco Moltio One Touch Cappuccino full automatic coff ee machine! To fully benefi t from the support that Saeco off ers, please register your product at www.philips.com/welcome. This user manual applies to HD8769.
-
Page 5
ENGLISH MILK CARAFE………………..33 Filling the Milk Carafe ……………………..33 Inserting the Milk Carafe …………………….34 Removing the Milk Carafe ……………………34 Emptying the Milk Carafe ……………………35 CAPPUCCINO BREWING ……………….36 Adjusting the cappuccino length ………………….38 LATTE MACCHIATO BREWING …………….39 Adjusting the Latte Macchiato length …………………41 MAKING FROTHED MILK ………………42 Adjusting the frothed milk length ………………….44 HOT WATER DISPENSING ……………..45… -
Page 6: Important
ENGLISH IMPORTANT Safety instructions This machine is equipped with safety features. Nevertheless read the safety instructions carefully and only use the ma- chine as described in these instructions to avoid accidental injury or damage. Keep this user manual for future reference. The term WARNING and this sign warn against possible severe injuries, danger to life and/or damage to the machine.
-
Page 7: Caution
ENGLISH • Remove the mains plug from the wall socket: — If a disturbance occurs. — If the machine will not be used for a long time. — Before cleaning the machine. Pull on the plug, not on the mains cord. Do not touch the mains plug with wet hands.
-
Page 8
ENGLISH • Do not place the machine on a hot plate, directly next to a hot oven, heater or similar source of heat. • Only put coff ee beans into the coff ee bean hopper. If ground coff ee, instant coff ee or any other substance is put in, it may damage the machine. -
Page 9: Compliance With Standards
ENGLISH Compliance with standards The machine complies with art.13 of the Italian Legislative Decree dated 25 July 2005, no. 151 “Implementation of the directives 2005/95/EC, 2002/96/EC and 2003/108/EC on the restriction of the use of certain hazardous substances in electri- cal and electronic equipment, as well as waste disposal”.
-
Page 10: Installation
INSTALLATION Product overview 12 13…
-
Page 11: General Description
ENGLISH General description 1. Coff ee bean hopper locking/removal selector switch 2. Pre-ground coff ee compartment 3. Storage area for cups 4a. Coff ee bean hopper 4b. Coff ee bean hopper tray 4c. Coff ee bean hopper lid 5. Control Panel 6.
-
Page 12: Preparing For Use
ENGLISH PREPARING FOR USE Machine Packaging The original packaging has been designed and constructed to protect the machine during transport. We recommend keeping the packaging material for possible future transport. Machine Installation Remove the drip tray with grill from the packaging. Remove the machine from the packaging.
-
Page 13
ENGLISH Push gently on the edge of the water tank door to release the hand- grip. Remove the water tank by pulling the handgrip. Rinse the water tank with fresh water. Fill the water tank with fresh water up to the MAX level and reinsert it back into the machine. -
Page 14
ENGLISH Remove the coff ee bean hopper lid. Slowly pour the coff ee beans into the coff ee bean hopper. Note: The coff ee bean hopper contains a tray which vibrates during grinding. This supports the fl ow of beans into the grinder. Caution: Only coff ee beans must be put into the coff ee bean hopper. -
Page 15: Using The Machine For The First Time
ENGLISH USING THE MACHINE FOR THE FIRST TIME When using the machine for the fi rst time, the following activities need to happen: 1) You need to prime the circuit; 2) The machine will perform an automatic rinse/ self-cleaning cycle; 3) You need to initiate a manual rinse cycle.
-
Page 16: Automatic Rinse/Self-Cleaning Cycle
ENGLISH Automatic rinse/self-cleaning cycle When warm-up is completed, the machine automatically performs a rinse/ self- cleaning cycle of the internal circuit with fresh water. This takes less than a minute. Place a container under the coff ee dispensing spout to catch the small amount of water which will be dispensed.
-
Page 17
ENGLISH Select the pre-ground coff ee brewing function by pressing the “ ” button. The machine shows this display. Note: Do not add pre-ground coff ee into the compartment. Press the “ ” button. The machine starts dispensing water. When the dispensing has fi nished, empty the container. Repeat the operations from step 1 to step 4 twice, then continue with step 6. -
Page 18
ENGLISH The following icon is displayed. Press the “ ” button to start dispensing hot water. This icon is displayed. The machine reminds you to install the water dispensing spout. Check that the water dispensing spout is correctly installed. Press “ ”… -
Page 19
ENGLISH At the end, fi ll the water tank again up to the MAX level. Now the ma- chine is ready for brewing coff ee. You will see the display as shown at the left. Note: When you haven’t used the machine for 2 or more weeks, the machine will automatically perform an automatic rinse/self-cleaning cycle after you switch it on. -
Page 20: Measuring And Programming Water Hardness
ENGLISH Measuring and Programming Water Hardness Measuring water hardness is very important for defi ning the frequency in which the machine has to be descaled and to install the “INTENZA+” water fi lter (for more detail on the water fi lter see next chapter). To measure the water hardness follow the steps below: Immerse the water hardness test strip (supplied with the machine) in water for 1 second.
-
Page 21: Intenza+» Water Fi Lter Installation
ENGLISH Press the “ ” button to access the programming menu. Scroll the pages by pressing the “ ” button until the following icon is displayed. Note: The machine is supplied with standard water hardness setting, suitable for most types of water. Press the “…
-
Page 22
ENGLISH Remove the “INTENZA+” water fi lter from its packaging, immerse it ver- tically (with the opening positioned upwards) in cold water and gently press the sides so as to let the air bubbles out. Set the “INTENZA+” water fi lter according to the measurements per- formed (see previous chapter) and indicated on the base of the fi lter: A = soft water –… -
Page 23: Replacing The «Intenza+» Water Fi Lter
ENGLISH Press the “ ” button to select “ON” and press the “ ” button to con- fi rm. To exit, press the “ ” button. Now the machine is ready to brew. In this way the machine has been programmed to inform the user of the need to replace the “INTENZA+”…
-
Page 24: Changing Coffee Beans
ENGLISH To exit, press the “ ” button. Now the machine is ready to brew. The machine is now programmed to manage a new fi lter. Note: If the “INTENZA+” water fi lter is already installed and you want to remove but not replace it, select the “OFF”…
-
Page 25: Inserting The Coff Ee Bean Hopper
ENGLISH Lift the sides of the coff ee bean hopper with both hands as shown in the image. Caution: Do not remove the bean hopper in a diff erent way to avoid spilling coff ee beans. After removal put the protection cover on the machine to prevent dust.
-
Page 26
ENGLISH Remove any beans from the coff ee bean hopper compartment. Insert the coff ee bean hopper into the compartment as shown on the image. Switch the selector to the “ ” position. Warning: Please be aware that when you change coff ee blend and switch to decaff einated coff ee, still some caff eine traces might be present even after having run the emptying cycle. -
Page 27: Coff Ee Bean Selection
ENGLISH Coff ee bean selection This function allows you to optimize the grinding for selected type of cof- fee beans. Press the “ ” MENU button. The machine shows this display Press the “ ” button to access the programming menu. Scroll the pages by pressing the “…
-
Page 28: Coff Ee Emptying Cycle
ENGLISH Coff ee emptying cycle If you want to change coff ee beans, we recommend that you empty the coff ee duct and grinder. In this way you will taste the full aroma of the new coff ee beans. For this follow the steps below. Insert the coff ee bean hopper with the new coff ee beans.
-
Page 29: Adjustments
The machine allows for certain adjustments so that you can brew the best tasting coff ee possible. Saeco Adapting System Coff ee is a natural product and its characteristics may change according to its origin, blend and roast. The machine is equipped with a self-adjusting system that allows the use of all types of coff ee beans available on the market apart from caramelized and fl avored coff ee beans.
-
Page 30: Adjusting The Aroma (Coff Ee Strength)
ENGLISH Press and turn the grinder adjustment knob under the coff ee bean hopper one notch at a time. Use the coff ee grinder adjustment key provided with the machine. You will taste the diff erence after brewing 2-3 cups of coff ee. Warning: Do not turn the grinder more than 1 notch at the time to prevent dam- age.
-
Page 31: Adjusting The Coff Ee Dispensing Spout
ENGLISH Adjusting the coff ee dispensing spout The height of the dispensing spout can be adjusted to better fi t the dimen- sions of the cups that you wish to use. Move the dispensing spout up or down with your fi ngers to adjust its height as shown in the image.
-
Page 32: Adjusting The Coff Ee Length
ENGLISH Adjusting the Coff ee Length The machine allows you to adjust the amount of brewed coff ee according to your taste and/or the size of your cups. Each time the “ ” or “ ” button is pressed, the machine brews a pre-set amount of coff ee.
-
Page 33: Espresso And Coffee Brewing
ENGLISH ESPRESSO AND COFFEE BREWING Before brewing the coff ee, make sure that there are no warnings shown on the control panel, and that the water tank and coff ee bean hopper are fi lled. Espresso and coff ee brewing using coff ee beans Place 1 or 2 cups under the dispensing spout.
-
Page 34: Espresso And Coff Ee Brewing Using Pre-Ground Coff Ee
ENGLISH Espresso and coff ee brewing using pre-ground coff ee This function allows you to use pre-ground and decaff einated coff ee. With the pre-ground coff ee function you can only brew one coff ee at a time. Press the “ ”…
-
Page 35: Milk Carafe
ENGLISH MILK CARAFE This chapter explains how to use the milk carafe to prepare a cappuccino or frothed milk. Note: Before using the milk carafe, clean it thoroughly as described in the “Clean- ing and Maintenance” chapter. We recommend fi lling it with cold milk (approx. 5°C). Warning: Do not pour any other liquids than water for cleaning or milk.
-
Page 36: Inserting The Milk Carafe
ENGLISH Inserting the Milk Carafe If installed, remove the water dispensing spout as shown in the fi gure: Press the two buttons on the side to unlock it and lift it slightly; Pull the water dispensing spout to remove it. Slightly tilt the milk carafe.
-
Page 37: Emptying The Milk Carafe
ENGLISH Emptying the Milk Carafe Press the release buttons to allow the removal of the top of the carafe. Lift the top of the carafe. Empty the milk carafe and clean it properly. Note: After each use, clean the milk carafe as described in the “Cleaning and Maintenance”…
-
Page 38: Cappuccino Brewing
ENGLISH CAPPUCCINO BREWING Warning: Danger of scalding! Dispensing may be preceded by short sprays of milk and steam. Danger of burns! Wait until the end of the cycle before removing the milk carafe. Fill the milk carafe with milk. The level must be between the minimum (MIN) and maximum (MAX) indication on the milk carafe.
-
Page 39
ENGLISH Press the » «button to start the dispensing. The machine reminds you to insert the carafe and pull out the milk carafe dispenser. The following icon is displayed during pre-heating time required by the machine. When the machine shows the following icon, the machine pours the milk. -
Page 40: Adjusting The Cappuccino Length
ENGLISH Adjusting the cappuccino length Each time the “ ” button is pressed, the machine pours a pre-set quantity of cappuccino into the cup. The machine allows you to adjust the amount of brewed cappuccino ac- cording to your taste and the size of your cups. Fill the milk carafe with milk and install it into the machine.
-
Page 41: Latte Macchiato Brewing
ENGLISH LATTE MACCHIATO BREWING Warning: Danger of scalding! Dispensing may be preceded by short sprays of milk and steam. Danger of burns! Wait until the end of the cycle before removing the milk carafe. Fill the milk carafe with milk. The level must be between the minimum (MIN) and maximum (MAX) indication on the milk carafe.
-
Page 42
ENGLISH Press the “ ” button to select Latte Macchiato brewing. The machine reminds you to insert the carafe and pull out the milk carafe dispenser. The following icon is displayed during pre-heating time required by the machine. When the machine shows the following icon, the machine pours the milk. -
Page 43: Adjusting The Latte Macchiato Length
ENGLISH Adjusting the Latte Macchiato length Each time the “ ” button is pressed, the machine pours a pre-set quantity of Latte Macchiato into the cup. The machine allows you to adjust the amount of brewed Latte Macchiato according to your taste and the size of your cups. Fill the milk carafe with milk and install it into the machine.
-
Page 44: Making Frothed Milk
ENGLISH MAKING FROTHED MILK Warning: Danger of scalding! Dispensing may be preceded by short sprays of milk and steam. Danger of burns! Wait until the end of the cycle before removing the milk carafe. Fill the milk carafe with milk. The level must be between the minimum (MIN) and maximum (MAX) indication on the milk carafe.
-
Page 45
ENGLISH Press the “ ” MENU button. The following icon is displayed. Press the “ ” button. The following icon is displayed. Press the “ ” button to select frothed milk. The machine reminds you to insert the carafe and pull out the milk carafe dispenser. -
Page 46: Adjusting The Frothed Milk Length
ENGLISH Adjusting the frothed milk length Each time this function is selected, the machine pours a pre-set amount of frothed milk into the cup. The machine allows you to adjust the amount of frothed milk according to your taste and the size of your cups. Fill the milk carafe with milk and install it into the machine.
-
Page 47: Hot Water Dispensing
ENGLISH The machine reminds you to insert the carafe and pull out the milk carafe dispenser. The following icon is displayed during pre-heating time required by the machine. When the desired amount of frothed milk is reached, press the “ ”…
-
Page 48
ENGLISH Place a container under the hot water dispensing spout. Press the “ ” MENU button. The following icon is displayed. Press the “ ” button. The following icon is displayed. Press the » «button to start the dispensing. This icon is displayed. The machine reminds you to install the water dispensing spout. -
Page 49: Cleaning And Maintenance
ENGLISH The following icon is displayed during pre-heating time required by the machine. Pour the desired amount of hot water. To stop the hot water dispens- ing process press the “ ” button. CLEANING AND MAINTENANCE Daily Cleaning of the Machine Caution: Timely cleaning and maintenance of your machine is very important as it prolongs the life of your machine.
-
Page 50
ENGLISH Empty and clean the coff ee residues drawer located inside of the ma- chine. Open the service door, remove the drawer and empty it. Empty and clean the drip tray: Press the side buttons. Remove the drip tray. Note: Empty the drip tray also when the full drip tray indicator is raised. -
Page 51: Daily Cleaning Of The Water Tank
ENGLISH Daily cleaning of the water tank Remove the small white fi lter or the INTENZA+ water fi lter (if installed) from the water tank and wash it with fresh water. Put the small white fi lter back or the INTENZA+ water fi lter (if installed) in its housing by gently pressing and turning it at the same time.
-
Page 52
ENGLISH Remove the lid and fi ll the milk carafe up to the MAX level with fresh water. Put the lid back onto the milk carafe. Pull the milk carafe dispenser to the left up to the “ ” icon. Place a container under the dispensing spout. -
Page 53
ENGLISH Press the “ ” button. The following icon is displayed. Press the “ ” button to select frothed milk. The machine reminds you to insert the carafe and pull out the milk carafe dispenser. The following icon is displayed during pre-heating time required by the machine. -
Page 54: Weekly Cleaning Of The Machine
ENGLISH Weekly Cleaning of the Machine Clean the seat of the drip tray. Clean the pre-ground coff ee compartment with the cleaning brush. Weekly cleaning of the milk carafe The weekly cleaning is more thorough as it removes any milk residues from the dispenser.
-
Page 55
ENGLISH Lift the milk carafe dispenser to remove it from the top of the carafe. The milk carafe dispenser is composed of fi ve parts that must be removed. Each part is identifi ed by capital letters (A, B, C, D, E) shown below in the images. -
Page 56: Weekly Cleaning Of The Brew Group
ENGLISH Pull the fi tting (E) outwards from the milk frothing device. Clean all the parts thoroughly with lukewarm water. Note: You can also clean these parts in the dishwasher. Reassemble the parts following the reverse order. Weekly Cleaning of the Brew Group The brew group should be cleaned every time the coff ee bean hopper is fi lled or at least once a week.
-
Page 57
ENGLISH To remove the brew group, press the «PUSH» button and pull it by the handle. Thoroughly wash the brew group with fresh, lukewarm water and care- fully clean the upper fi lter. Caution: do not use detergent/soap to clean the brew group. Let the brew group air-dry thoroughly. -
Page 58
ENGLISH Make sure the hook to lock the brew group is in the correct position by fi rmly pressing the “PUSH” button until it locks into place. Check if the hook is at the top end position. If it is not, please try again. Insert the brew group in its seat again until it locks into place without pressing the “PUSH”… -
Page 59: Weekly Cleaning Of The Coff Ee Bean Hopper, The Tray And The Compartment
ENGLISH Weekly cleaning of the coff ee bean hopper, the tray and the com- partment Clean the coff ee bean hopper, the tray and the coff ee bean hopper com- partment once a week with a cloth to remove any coff ee residuals or dust. To remove the tray push the hooks on the bottom of the coff ee bean hop- per.
-
Page 60: Monthly Cleaning Of The Milk Carafe
ENGLISH Monthly cleaning of the milk carafe In the monthly cleaning cycle we recommend using the “Saeco Milk Circuit Cleaner” to keep the entire circuit clean of milk residues. You can purchase separately the “Saeco Milk Circuit Cleaner”. Please refer to the maintenance products page for further details.
-
Page 61
ENGLISH Press the “ ” MENU button. The following icon is displayed. Press the “ ” button. The following icon is displayed. Press the “ ” button to select frothed milk. The machine reminds you to insert the carafe and pull out the milk carafe dispenser. -
Page 62
ENGLISH Put back the milk carafe dispenser by shifting it up to the » » icon. Remove the milk carafe and empty it. Remove the milk carafe and the container from the machine. Rinse and fi ll the milk carafe with fresh water up to the MAX level. Insert the milk carafe into the machine. -
Page 63: Monthly Lubrication Of The Brew Group
Lubricate the brew group after approximately 500 cups of coff ee or once a month. You can purchase separately the Saeco grease to lubricate the brew group. For further details, please refer to the maintenance products page in this manual.
-
Page 64: Monthly Cleaning Of The Brew Group With «Coff Ee Oil Remover
Caution: The “Coff ee Oil Remover” tablets are to be used for cleaning only and do not have a descaling function. For the descaling procedure use the Saeco descaling solution and follow the procedure described in the “Descaling” chapter.
-
Page 65
ENGLISH Place a container under the coff ee dispensing spout. Make sure the water tank is fi lled with fresh water up to the “MAX” level. Put a “Coff ee Oil Remover” tablet in the pre-ground coff ee compart- ment. Press the “… -
Page 66
ENGLISH Let the solution take eff ect for approximately 15 minutes. Make sure you discard the dispensed water. Switch the power button on the back of the machine to “I”. To turn on the machine press the “ ” button. Wait until the automatic rinse cycle has been completed. -
Page 67: Descaling
ENGLISH DESCALING The descaling process takes approx. 35 minutes. Limescale builds up inside the machine during use. It needs to be removed regularly as it may clog the water and coff ee circuit of your machine. The machine tells you when descaling is needed. If the machine display shows the CALC CLEAN icon, it means that you need to descale.
-
Page 68
ENGLISH Insert the empty milk carafe. Remove the “INTENZA+” water fi lter from the water tank if it was in- stalled and replace it with the small white original one. Place the water tank back into the machine. Press the “ ”… -
Page 69
ENGLISH Pull the milk carafe dispenser to the left up to the » » icon. Place a large container (1.5 lt) under both the milk carafe dispenser and the dispensing spout. Press the “ ” button to start the descaling cycle. The machine will start dispensing the descaling solution at intervals. -
Page 70
ENGLISH Remove the water tank, rinse it and fi ll it up to the MAX level with fresh water. Place it back into the machine. When inserting the water tank into the machine, the display on the left is shown. Install the milk carafe into the machine. -
Page 71: Programming
ENGLISH Remove and empty the container Empty the drip tray and place it back. The descaling cycle is now complete. Remove the small white water fi lter and place back the “INTENZA+” water fi lter into the water tank if it was installed. Note: At the end of the descaling cycle, wash the brew group as described in the “Weekly Cleaning of the Brew Group”…
-
Page 72
ENGLISH Water hardness This function allows you to adjust the water hardness setting according to the area where you live. 1 = very soft water 2 = soft water 3 = hard water 4 = very hard water For more details please see the “Measuring and Programming Water Hard- ness”… -
Page 73: How To Program Your Machine
ENGLISH How to program your machine In this example, it is shown how to program the display contrast. Proceed in the same way to program the other functions. The programming menu can only be accessed when the machine is on and shows this display.
-
Page 74
ENGLISH Press the “ ” and “ ” buttons to increase or decrease the value of the function. When the display value is changed, the “OK” message appears. Press the “ ” button to confi rm the change. Press the “ ”… -
Page 75: Meaning Of The Display Symbols
ENGLISH MEANING OF THE DISPLAY SYMBOLS This machine is equipped with a colour-coded system to make the user’s understanding of the display signals easier. The icons are colour-coded according to the traffi c light principle. Ready Signals (Green Colour) The machine is ready to brew coff ee with Arabica coff ee beans The machine is ready to brew coff ee with Robusta coff ee beans The machine is ready to brew coff ee with a mix of coff ee beans The machine is ready to brew pre-ground coff ee.
-
Page 76
ENGLISH Ready Signals (Green Colour) The machine is brewing two cups of coff ee. Coff ee brewing using pre-ground coff ee in progress. The machine is programming the amount of coff ee to brew. Frothed milk brewing. The machine is brewing cappuccino. The machine is programming the amount of milk to dispense for the cappuc- cino. -
Page 77
ENGLISH Ready Signals (Green Colour) Insert the water dispensing spout and press the “ ” button to start dispens- ing. Press “ ” to exit. The machine will remind the user that the carafe must be inserted. Warning Signals (Yellow Colour) The machine is heating up to brew beverages or dispense hot water. -
Page 78
Turn off the machine. After 30-seconds, turn it back on. Try this 2 or 3 times. If the machine does not start, contact the Philips SAECO hotline in your coun- try and communicate the Error-code which you see on the display. -
Page 79: Troubleshooting
If you are unable to solve the problem with the information below, visit www.philips.com/support for a list of frequently asked questions or contact the Philips Saeco hotline in your country. The contact details can be found in the warranty booklet by-packed separately or on www.philips.com/support.
-
Page 80
These problems can be considered normal if the coff ee blend has been changed or if the machine has just been installed. In this case wait until the machine performs a self-adjusting operation as described in section «Saeco Adapting System». -
Page 81: Energy Saving
ENGLISH ENERGY SAVING Stand-by The Saeco full automatic espresso machine is designed for energy saving, as stated by the Class A energy label. After 30 minutes of inactivity the machine turns off automatically (unless you have diff erently programmed the stand-by time). If a product has been brewed the machine performs a rinsing cycle.
-
Page 82: Technical Specification
If you need service or support, please visit the Philips website at www. philips.com/support or contact the Philips Saeco hotline in your country. The contact details can be found in the warranty booklet by-packed sepa-…
-
Page 83: Ordering Maintenance Products
ENGLISH ORDERING MAINTENANCE PRODUCTS For cleaning and descaling, use Saeco maintenance products only. You can purchase these at the Philips online shop at www.shop.philips.com/service, your local dealer or at authorised service centres. If you have any diffi culties obtaining maintenance products for your ma- chine, please contact the Philips Saeco hotline in your country.
-
Page 84: Machine Accessories
ENGLISH Milk Circuit Cleaner CA6705 Maintenance Kit CA 6706 MACHINE ACCESSORIES Removable coff ee bean hopper CA6803…
-
Page 88
The manufacturer reserves the right to make changes without prior notice. www.philips.com/saeco…
Страницы и текст этой инструкции
 Инструкция кофеварки Saeco Magic Cappuccino Combi Plus
 Информация отображена на картинке
 Информация отображена на картинке
 Информация отображена на картинке
 Информация отображена на картинке
Как использовать наш сайт инструкций OnlineManuals.ru
Наша цель состоит в том, чтобы предоставить вам быстрый доступ к содержанию инструкции для кофеварки Saeco Magic Cappuccino Combi Plus.
С помощью онлайн просмотра, Вы можете быстро просмотреть содержимое инструкции и найти решение проблемы с кофеварки Saeco Magic Cappuccino Combi Plus.
Для Вашего удобства
Если листать руководство пользователя кофеварки Saeco Magic Cappuccino Combi Plus прямо на сайте, не очень удобно для Вас, есть два возможных решения:
• Просмотр в полноэкранном режиме — легко просмотреть руководство пользователя (без загрузки его на свой компьютер), Вы можете использовать режим полноэкранного просмотра.
Для просмотра инструкции пользователя кофеварки Saeco Magic Cappuccino Combi Plus на полном экране, используйте кнопку «Открыть в Pdf-viewer».
• Загрузка на компьютер — Вы можете также скачать Инструкция кофеварки Saeco Magic Cappuccino Combi Plus на свой компьютер и сохранить его в файлах.
Многие люди предпочитают читать документы не на экране, а в печатной версии.
Возможность печати руководства пользователя также была предусмотрена на нашем сайте,
и вы можете использовать ее, нажав на иконку «печать» в Pdf-viewer.
Нет необходимости печатать все руководство кофеварки Saeco Magic Cappuccino Combi Plus, можно выбрать только нужные страницы инструкции.
Инструкция и руководство для
Philips Saeco MAGIC CAPPUCINO
28 страниц подробных инструкций и пользовательских руководств по эксплуатации на русском
 10:12
10:12
Как почистить и смазать варочный блок Saeco Philips Gaggia
 03:55
03:55
Как разобрать или депрессовать холдер кофемашин saeco. Улучшаем вкус кофе
 11:08
11:08
Saeco Magic Cappuccino Combi не делает кофе. Чистка
 30:40
30:40
Saeco Magic Capuccino Combi за 2000 рублей. Рожок со встроенной кофемолкой. Барахолка.
 03:04
03:04
Saeco Magic Cappuccino + Auto Cappuccinatore — Espresso & Latte (Эспрессо и Латте, Автокапучинатор)
 06:00
06:00
Saeco Magic Espresso White (SIN 017) — Espresso + Americano + Cappuccino Demo Test
 06:00
06:00
Saeco Aroma Inox — Espresso & Cappuccino (эспрессо / капучино / обзор / демо)
 37:51
37:51
Ремонт кофемашин Саеко https://mini-napkin.prom.ua/
Все права защищены. OOO «Проксима» ©

Все права защищены. OOO «Проксима» ©
1
Все права защищены. OOO «Проксима» ©
Поздравляем Вас с выбором этой
высокотехнологичной
эспрессо–кофеварки.
Мы рекомендуем внимательно
прочитать данную инструкцию,
чтобы узнать, как правильно
пользоваться кофеваркой и какое ей
необходимо обслуживание.
Для получения дополнительной
информации свяжитесь с Вашим дилером
либо непосредственно с ООО «Проксима».
Мы будем рады ответить
на все Ваши вопросы!
Поздравление
2
Составные части эспрессо кофеварки
Все права защищены. OOO «Проксима» ©
1
Съемный контейнер для воды
2
Основной выключатель
3
Индикатор сети
4
Кнопка приготовления кофе
5
Индикатор рабочей температуры
6
Кнопка режима пара
7
Ручка регулятора подачи
пара/горячей воды
8
Бойлер (узел присоединения рожка)
9
Насадка на трубку пара/горячей
воды «панарелло»
10 Шнур питания
11 Лоток для капель с решеткой (съемный)
12 Держатель фильтра (рожок SAECO
Crema)
13 Фильтр (ситечко), рассчитанный
на приготовление 1 2 чашек кофе
14 Мерная ложечка
15 Подставка для подогрева чашек
16 Фильтр для чалд
17 Адаптер для чалд
18 Капучинатор

3
ОСНОВНАЯ ИНФОРМАЦИЯ
Все права защищены. OOO «Проксима» ©
СОДЕРЖАНИЕ
1. Общая информация . . . . . . . . . . . . 3
2. Технические характеристики . . . . . 4
3. Правила безопасности . . . . . . . . . . 6
4. Установка . . . . . . . . . . . . . . . . . . . . . 8
5. Приготовление эспрессо . . . . . . . 11
6. Выбор сорта кофе . . . . . . . . . . . . . 15
7. Приготовление горячей воды . . . 16
8. Подача пара . . . . . . . . . . . . . . . . . . 17
9. Приготовление капучино . . . . . . . 18
10. Очистка и обслуживание . . . . . . 20
11. Очистка от накипи . . . . . . . . . . . . 21
12. Обслуживание кофеварки
в сервисном центре . . . . . . . . . . . 23
13. Правовая информация . . . . . . . . 23
14. Утилизация . . . . . . . . . . . . . . . . . . 23
Проблемы при эксплуатации
кофеварки и их устранение . . . . . 24
1 Общая информация.
Эспрессо кофеварка электроприбор, предназначенный для приготовления
1 или 2 чашек кофе эспрессо одновременно, используя для приготовления моло
тый кофе. Кофеварка укомплектована специальной трубкой подачи пара/ горячей
воды с насадкой панарелло и автоматическим капучинатором для ускоренного
приготовления капучино. Также она снабжена комплектом для приготовления кофе
эспрессо из чалд. Передняя панель кофеварки оборудована кнопками управления
и маркирована легкими для понимания символами. Элегантный дизайн кофеварки
разработан специально для домашнего использования. Кофеварка не предназна
чена для использования в профессиональных целях.
Внимание!
Производитель не несет ответственности за ущерб, причиненный в результате:
Неправильного использования кофеварки;
Ремонта кофеварки, выполненного неавторизованным персоналом;
Использования кофеварки с поврежденным шнуром питания или замененным
не в авторизованном сервисном центре;
Использования для ремонта кофеварки запасных частей и компонентов, кроме
поставляемых производителем;
Использование запчастей и аксессуаров, не предназначенных именно для этой
модели кофеварки.
Хранения, установки и эксплуатации изделия в помещении с температурой
окружающего воздуха ниже 0°.
В ВЫШЕПЕРЕЧИСЛЕННЫХ СЛУЧАЯХ гарантия на данное изделие не распрост
раняется.
1.1 Разъяснения.
Предупреждающий треугольник означает, что данное указание име
ет важное значение для безопасности пользователя. Пожалуйста,
строго следуйте инструкции, во избежание серьезных травм.
Этот символ используется для того, чтобы акцентировать внимание пользо
вателя на информации, важной для оптимального использования кофеварки.
i

4
Технические характеристики
Все права защищены. OOO «Проксима» ©
1.2 Как пользоваться инструкцией по эксплуатации.
Храните брошюру и используйте ее при необходимости.
Если у Вас возникнут вопросы по эксплуатации кофеварки, ответы на которые Вы
не найдете в брошюре, обратитесь в сервисный центр в вашем регионе!
2 Технические характеристики.
Характеристика электропитания
смотрите табличку с техническими
характеристиками снизу прибора
Потребляемая мощность
смотрите табличку с техническими
характеристиками снизу прибора
Материал корпуса
металл и термопластик
Габариты: (ШхВхГ), мм
235х350х270
Масса, кг
5,3
Длина шнура питания, м
1,2
Панель управления
фронтальная
Держатель фильтра
Рожок Saeco Crema
Контейнер для воды
съемный
Емкость контейнера для воды, л
2
Давление помпы, бар
15
Материал бойлера
алюминиевый сплав
Устройства безопасности
предохранительный клапан в бойлере

5
Правила безопасности
Все права защищены. OOO «Проксима» ©
3 Правила безопасности.
Электротехнические требования.
Прибор следует включать только
в подходящую розетку с заземлением.
Напряжение должно соответствовать
напряжению, указанному на табличке
снизу кофеварки.
A. Шнур питания.
Никогда не используйте кофеварку
с поврежденным шнуром питания!
В случае неисправности вилки или
шнура питания кофеварки следует не
замедлительно обратиться в авторизо
ванный сервисный центр для замены
неисправных деталей. Следите за тем,
чтобы шнур питания не соприкасался
с нагретыми поверхностями, не пере
гибался, не цеплялся за углы мебели
и находился на достаточном расстоя
нии от маслосодержащих жидкостей.
Не передвигайте и не тяните кофевар
ку, используя для этого шнур питания.
Не выключайте прибор, выдергивая
шнур питания из розетки, особенно
влажными или мокрыми руками. Сле
дите за тем, чтобы шнур питания нахо
дился строго на столе.
Все электрические детали кофеварки должны быть всегда су
хими, так как попадание воды может привести к короткому за
мыканию. Пар и горячая вода могут вызвать ожог. Всегда сле
дите за тем, чтобы трубка подачи пара/ горячей воды не была
направлена в сторону, где стоит человек, и будьте осторожны, когда
дотрагиваетесь до трубки. Также вероятна опасность ожога!
Использование кофеварки.
Эта эспрессо кофеварка предназначена для домашнего использования. Запреща
ется техническая переделка машины или неправильное ее использование. Так как
последствия этих действий непредсказуемы, только взрослые люди могут исполь
зовать кофеварку.

6
Правила безопасности
Все права защищены. OOO «Проксима» ©
B. Предостережение.
Дети часто не осознают опасностей,
связанных с электроприборами. Поэто
му рекомендуем ограничить доступ де
тей к кофеварке и не оставлять их од
них с включенным прибором.
C. Меры предосторожности
от ожога.
Во время работы кофеварки некото
рые ее компоненты сильно нагревают
ся. Будьте внимательны, избегайте
прямого контакта с нагретыми компо
нентами.
Не направляйте трубку пара/горячей
воды на открытые участки тела. Ни в ко
ем случае не извлекайте держатель
фильтра во время работы кофемаши
ны. Пока машина прогревается,
из трубки подачи кофе может капать
горячая вода.

7
Правила безопасности
Все права защищены. OOO «Проксима» ©
D. Место установки кофеварки.
Кофеварку следует ставить в безо
пасное место так, чтобы ее было трудно
перевернуть или обжечься. Имейте
в виду, что горячая вода и пар могут
вызвать ожоги.
НЕ храните и не эксплуатируйте ко
феварку в помещениях с температурой
окружающего воздуха ниже 0 градусов
это может нарушить нормальную ра
боту прибора.
НЕ используйте кофеварку вне по
мещения.
НЕ устанавливайте
кофеварку
вблизи открытого огня или нагрева
тельных приборов, так как корпус ко
феварки может расплавиться или де
формироваться.
Свободное пространство
для использования
и обслуживания.
Для того, чтобы быть уверенным, что
Ваша кофеварка установлена правиль
но, соблюдайте следующие правила:
Устанавливайте кофеварку на глад
кую, ровную поверхность.
Выбирайте хорошо освещенное
чистое место, рядом с розеткой пи
тания.
Проверьте, чтобы соблюдались тре
бования к минимальному расстоя
нию от стен до кофеварки, как пока
зано на рисунке.
Е. Очистка.
Перед тем как начать очистку кофе
варки, проверьте, чтобы все кнопки на
ходились в выключенном положении,
и убедитесь, что прибор выключен
из розетки. Дождитесь, пока кофевар
ка охладится. Никогда не погружайте
кофеварку в воду. Запрещается разби
рать и что либо трогать внутри корпуса
кофеварки.

8
Установка
Все права защищены. OOO «Проксима» ©
Хранение кофеварки.
Если Вы планируете долгое время
не использовать кофеварку, выключите
ее и выньте шнур питания из розетки.
Храните ее в сухом месте, недоступном
для детей. Защитите ее от пыли и гря
зи. Рекомендуем для хранения исполь
зовать заводскую упаковку кофеварки.
Техническое обслуживание.
Ремонт.
В случае поломки кофеварки или
повреждения какой либо ее части, или
в случае падения кофеварки со стола,
немедленно выньте шнур питания
из розетки. Никогда не используйте не
исправную кофеварку. Ремонт должен
осуществляться только в сервисном
центре. Производитель не несет ответ
ственности за техническое состояние
кофеварки, если ее ремонт проводился
не в авторизованном сервисном цент
ре.
Противопожарная безопасность.
В случае возгорания кофеварки ис
пользуйте для ее тушения только угле
кислотный огнетушитель. Ни в коем
случае не используйте для тушения во
ду или порошковый огнетушитель.
4 Установка.
Для Вашей безопасности и для безо
пасности окружающих Вы должны стро
го соблюдать «Правила безопасности»,
описанные в разделе 3.
4.1 Упаковка.
Заводская упаковка предназначена
для защиты кофеварки во время перевоз
ки или хранения. Рекомендуется сохра
нять ее для дальнейшего использования.
4.2 Правило установки.
До включения кофеварки убедитесь,
что соблюдены следующие правила бе
зопасности:
кофеварка установлена в безопас
ном месте;
дети не имеют доступа к кофеварке;
кофеварка не расположена вблизи
электронагревательных приборов
или рядом с открытым огнем.
При соблюдении этих правил кофе
варка готова к подключению к электри
ческой сети.
4.3 Подключение
к электропитанию.
Электричество опасно, поэто
му строго соблюдайте прави
ла безопасности инструкции.
Никогда не используйте кофе
варку с поврежденным шну
ром питания. Поврежденный
шнур или неисправная элект
рическая вилка должны быть
немедленно заменены в авто
ризованном сервисном цент
ре.
Кофеварку следует включать только
в подходящую розетку с заземлением.
Напряжение должно соответствовать
напряжению, указанному на приборе.
Никогда не используйте поврежденный
шнур. Напряжение прибора проставля
ется на фабрике. Оно указывается
на табличке, расположенной на днище
кофемашины, и должно соответство
вать напряжению в электрической сети.

Нажмите на кнопку для помощи

