У японского бренда Janome каждая портниха, независимо от умений, найдет машину по душе. Продукция данного производителя отличается надежностью, качеством. Единственная проблема, которая может возникнуть – это сложность в управлении, поэтому пользователи устройства должны перед началом работ хорошо изучить инструкцию по эксплуатации швейной машины «Джаноме».
Достоинства моделей Janome
Продукция бренда Janome неслучайно входит в топ лучших швейных машин. Каждая из моделей обладает рядом неоспоримых плюсов на фоне других агрегатов. Но чтобы наиболее корректно их обозначить, необходимо разделить швейные машины этой компании на 3 категории по типу управления.
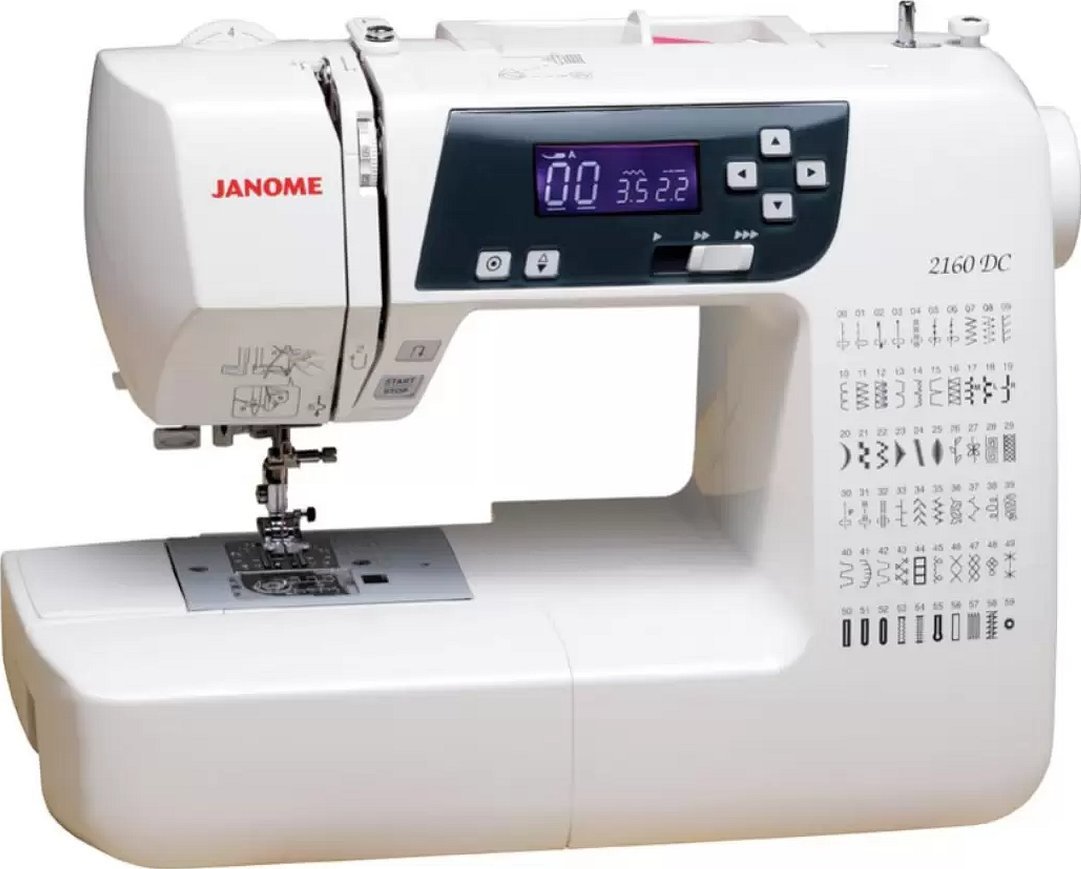
Швейная машинка «Джаноме»
Итак, достоинства моделей Janome с электромеханическим типом управления:
- удобный нитевдеватель;
- устанавливается полуавтоматический режим;
- низкий уровень шума во время работы.
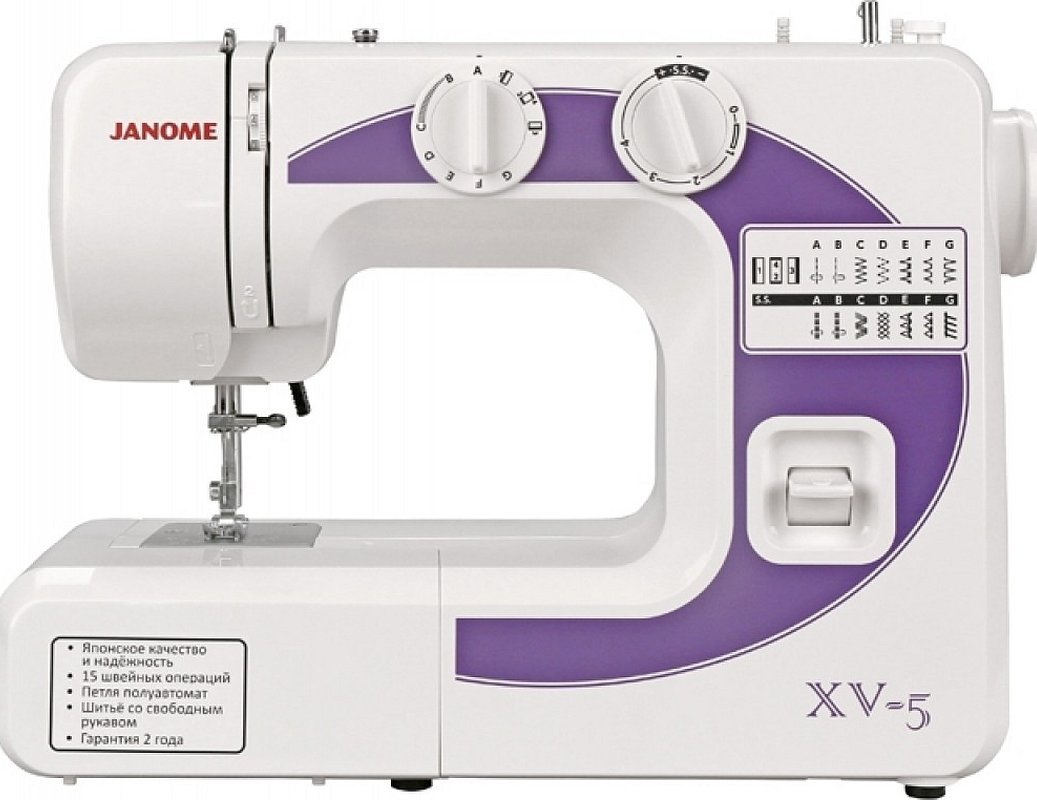
Электромеханическая модель
Механические швейные машины с электроприводом (электронные модели) обладают весомыми преимуществами для использования в быту новичками и профессионалами:
- многообразие строчек;
- автоматическое выполнение петли;
- легкая смена лапки;
- у многих моделей есть авторежим, подсветка, жесткий защитный чехол для хранения;
- нитковдеватель автоматический;
- механизм подачи ткани можно отключать;
- у стола имеется дополнительная рабочая поверхность.
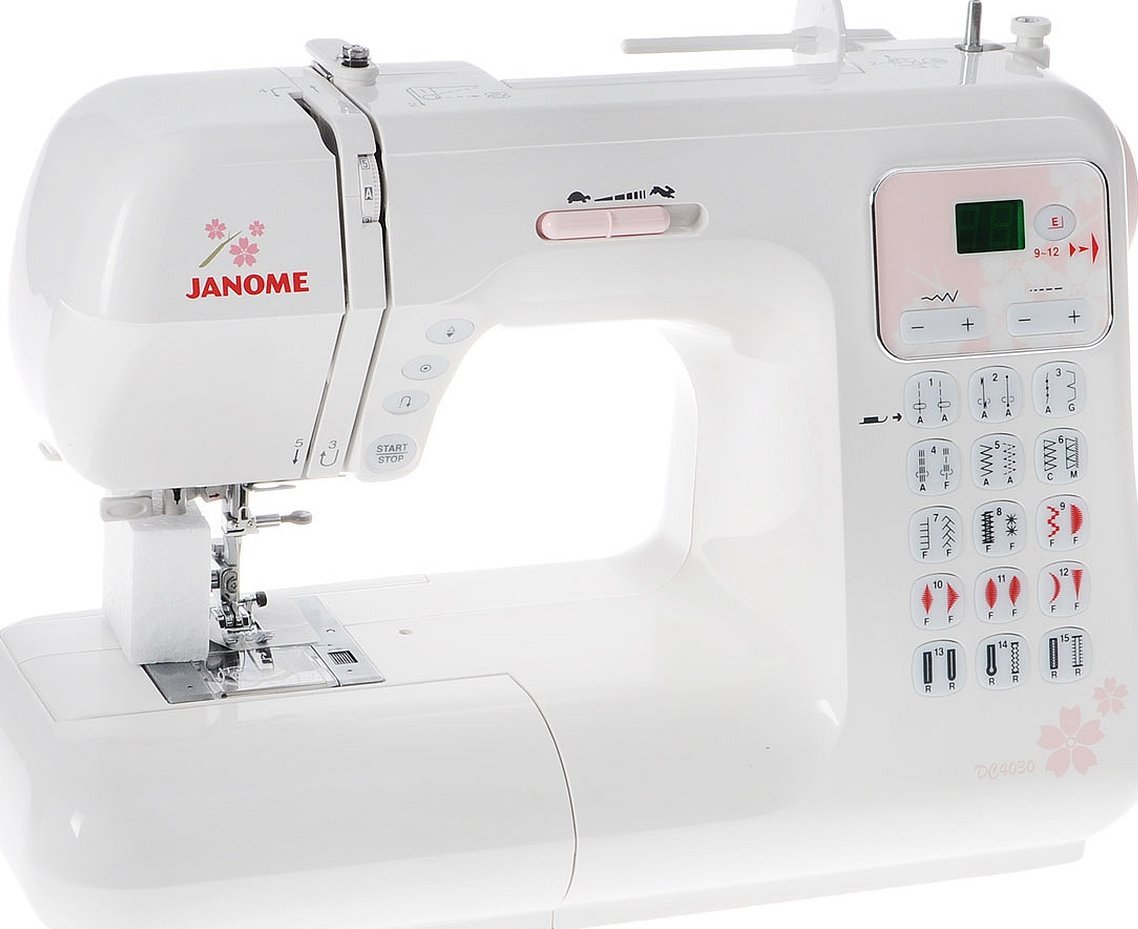
Электронная модель
Именно компьютерная линейка швейных агрегатов «Джаноме» занимает первые позиции в продажах из-за ряда своих плюсов:
- выполняет всевозможные виды строчек, декоративные отделки, узоры;
- на дисплее высвечивается вся информация о текущей работе;
- длина и ширина шва регулируется плавно;
- возможность шить двойной иглой;
- компактные модели;
- функция блокировки для обеспечения безопасности;
- наличие подсветки;
- давление лапки на ткань регулируется.
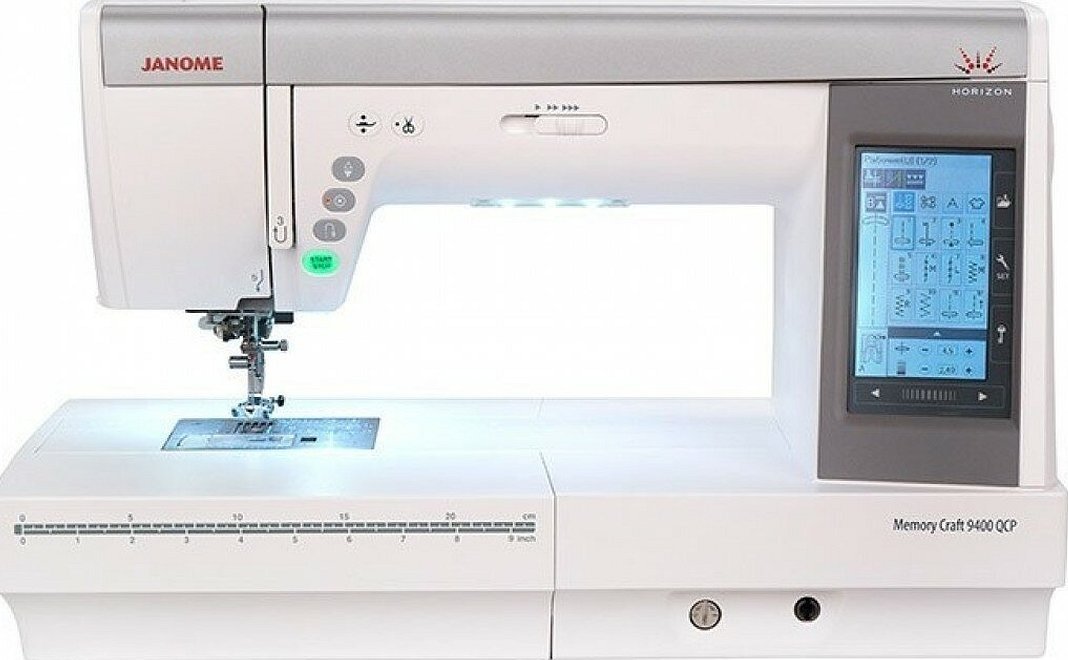
Компьютерная швейная машинка
Независимо от типа управления, все швейные машины компании Janome обладают 5 достоинствами:
- Быстрый старт и высокая скорость стежков.
- Мощный мотор позволяет сшить все виды тканей, вплоть до шерсти и плотной джинсы.
- Доступная стоимость на модели.
- Легкость в управлении, если разобраться в настройках.
- Простота в обслуживании.
Разновидности и комплектации
В модельном ряду Janome, как говорилось выше, есть 3 типа швейных машин, которые различаются комплектацией. Электромеханические модели – самые простые, электронные – золотая середина, а компьютерные – верх инженерных технологий.
Ниже о всех трех рассказывается более подробно.
Электромеханические модели
Самый простой тип швейных машин, подразумевающий лишь набор базовых функций. Минимум операций, у «Джаноме» их количество варьируется от 12 до 40. Ручное управление с помощью переключателей. Челнок в устройстве вертикальный. Обычно электромеханические модели выбирают начинающие швеи и домохозяйки для домашнего использования.
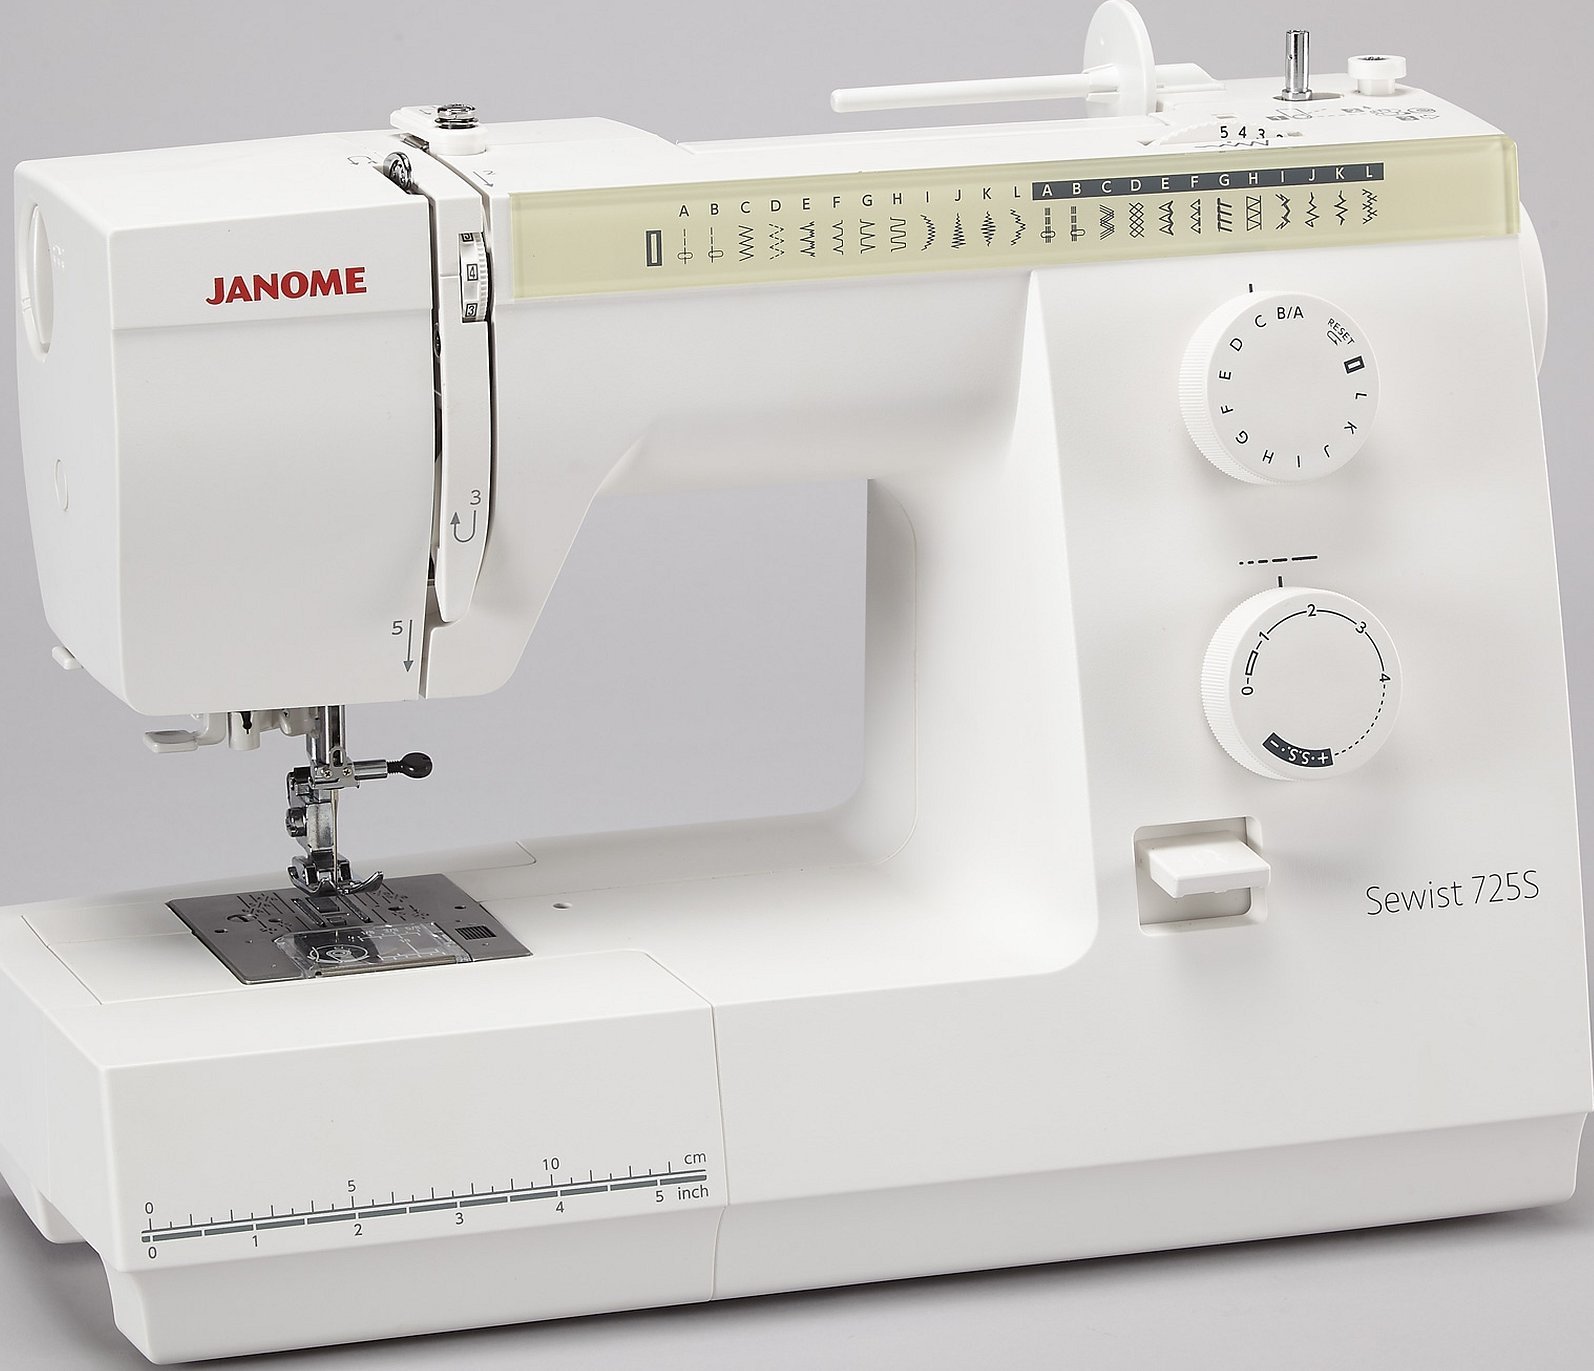
Пример электромеханической швейной машинки
Электронные швейные машины
Те же электромеханические, но с добавлением электронных компонентов, расширяющих функционал. Можно автоматизировать часть процессов – на ходу отрегулировать плавность хода, вышить необычный узор. Челнок горизонтальный, что позволяет увеличить ширину строчки. Электронные модели выбирают как компромисс между электромеханическими и «навороченными» компьютерными.
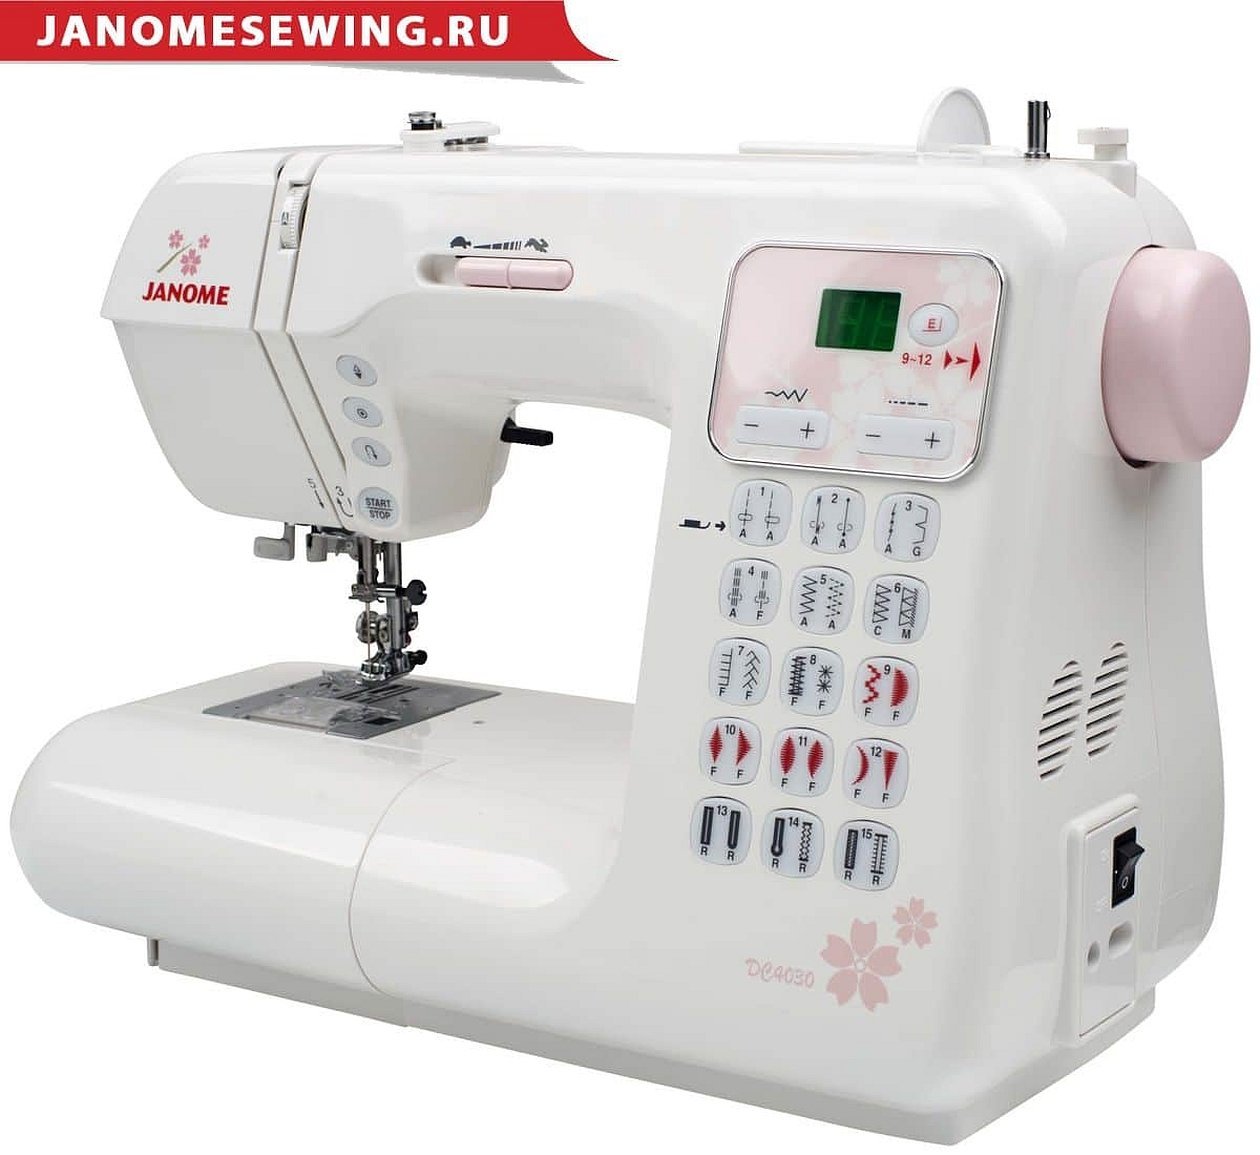
Пример электронной швейной машинки
Компьютерные агрегаты
В данных моделях имеется собственный процессор, управляющий всем оборудованием. У них высокая скорость обработки изделий из любых тканей. Можно программировать строчки, положение иглы и множество других параметров. Новые модели снабжены сенсорными дисплеями, на которых удобно редактировать задачу. Они подключаются к компьютеру для загрузки новых швейных программ.
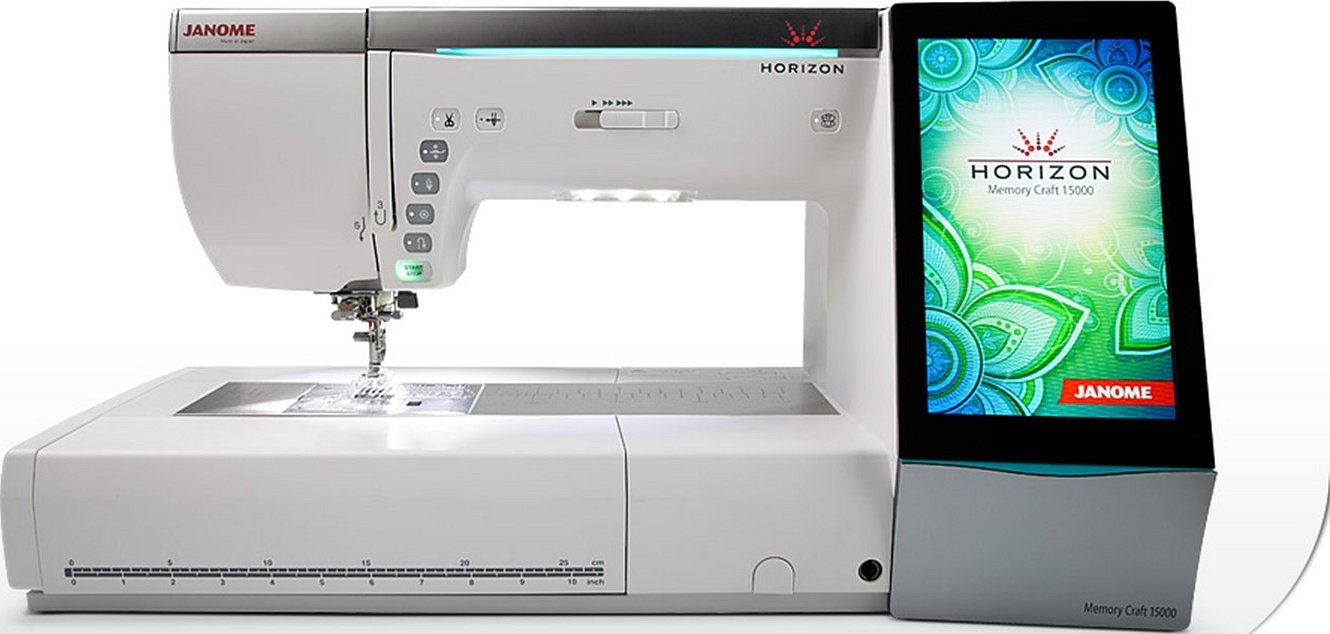
Пример компьютерной швейной машинки
Именно компания Janome первая разработала программируемые компьютерные модели швейных машин.
Так как «Джаноме» специализируется в основном на швейных машинах, среди их продукции имеются и узконаправленные промышленные модели, предназначенные для профессионального шитья на фабриках, заводах. Это вышивальные и распошивальные машины, оверлоки.
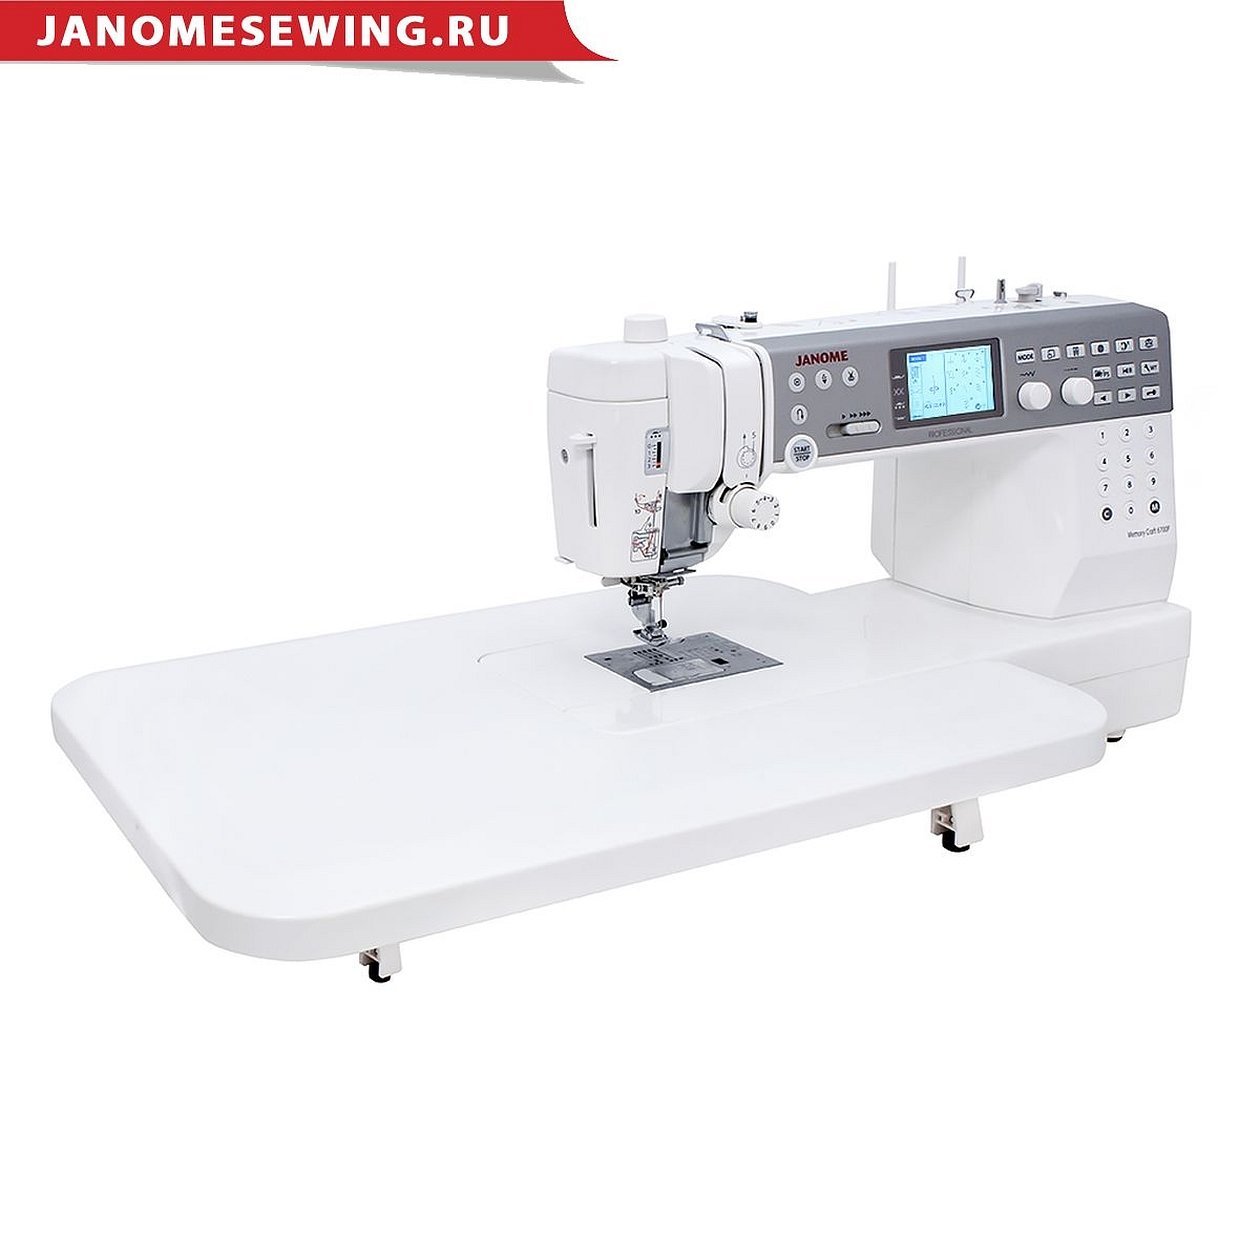
Промышленная модель
Комплектация швейной машины Janome зависит от конкретной модели. В недорогих электромеханических комплектах есть только инструкция к швейной машине Janome и само устройство. Вся продукция поставляется в фирменной коробке. Для защиты агрегата используют бортики из пенопласта.
Электронные и компьютерные модели данного бренда, помимо инструкции к швейной машинке Janome, могут быть также снабжены:
- дополнительными лапками для стежки зигзаг;
- для петли;
- для подрубки края;
- защитный чехол;
- вспариватель;
- колбочку с маслом;
- маленькую и большую отвертку;
- дополнительную лапку для вшивания замка;
- лапку-подрубатель;
- иглы;
- емкость со смазочным маслом;
- направитель потайного шва.
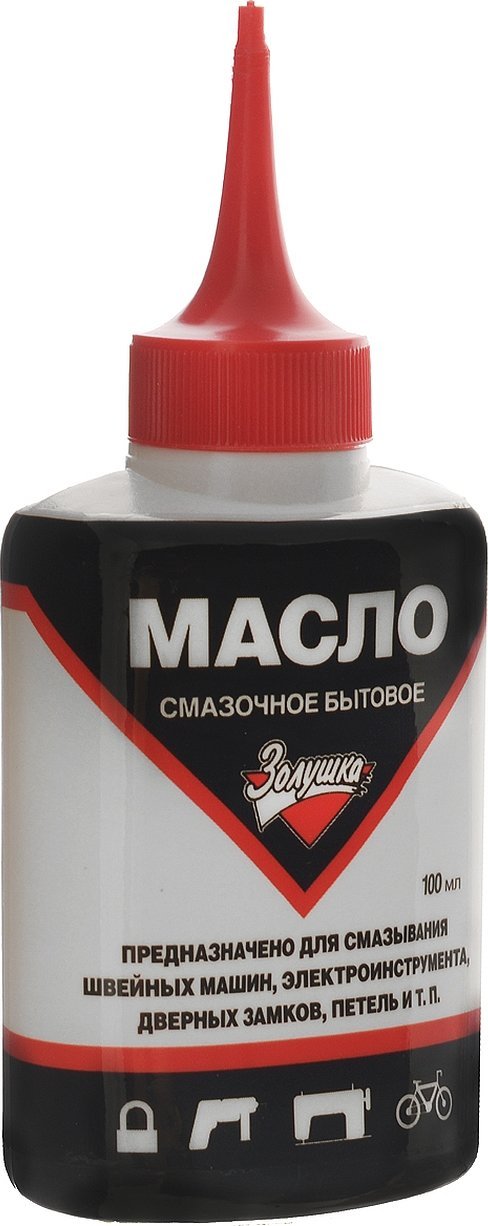
Смазочное масло
Инструкция по эксплуатации на примере «Джаноме Джуне-513»
Швейная машина Janome Juno 513 – простая электромеханическая модель с возможностью выполнения 15 операций. На примере данного продукта здесь можно посмотреть правила работы с устройством от «Джаноме».
Швейная машинка Janome – инструкция по эксплуатации (с начала подготовки устройства к работе):
- Сначала агрегат устанавливают на ровную чистую поверхность.
- Штепсель педали подключают в гнездо на устройстве, а затем вилку питания – в электрическую сеть.
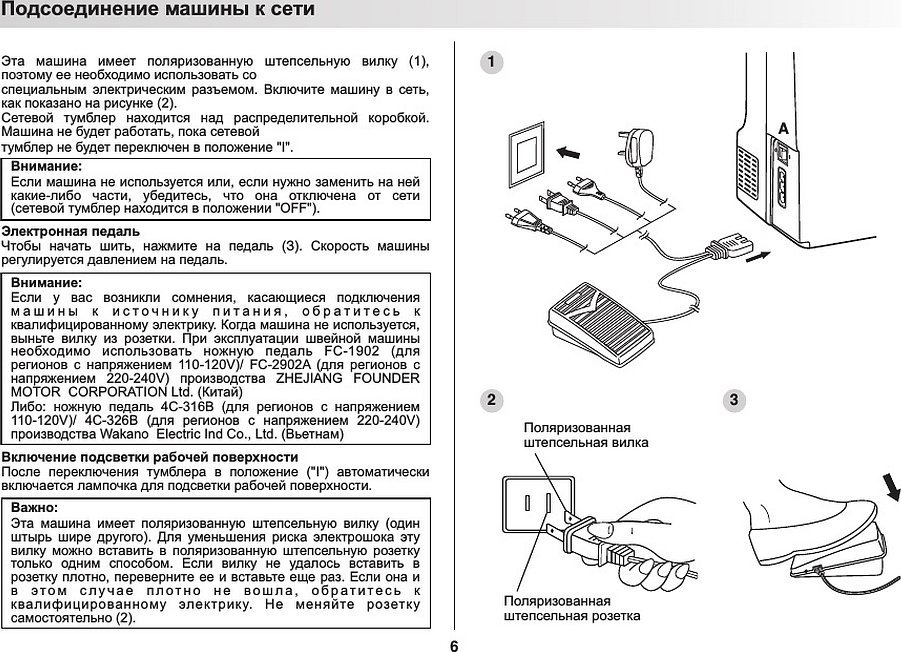
Страница инструкции
- Выключатель с обратной стороны корпуса включают, переводят в режим «On».
- Если загорелась подсветка рабочего стола, то машинка включилась и готова к работе.
Устройство запрещено оставлять включенным в сеть без присмотра.
В швейной машинке 2 стержня для катушек. Дополнительный стержень может потребоваться для намотки шпульки, чтобы не доставать верхнюю нить.
Выбор необходимого вида строчки осуществляется с помощью переключателей на передней части корпуса. На переключателе изображены строчки. При его повороте выбранная строчка должна находиться рядом с установочной отметкой. На регуляторе также расположены цифры. Чем больше цифра, тем длиннее стежок.
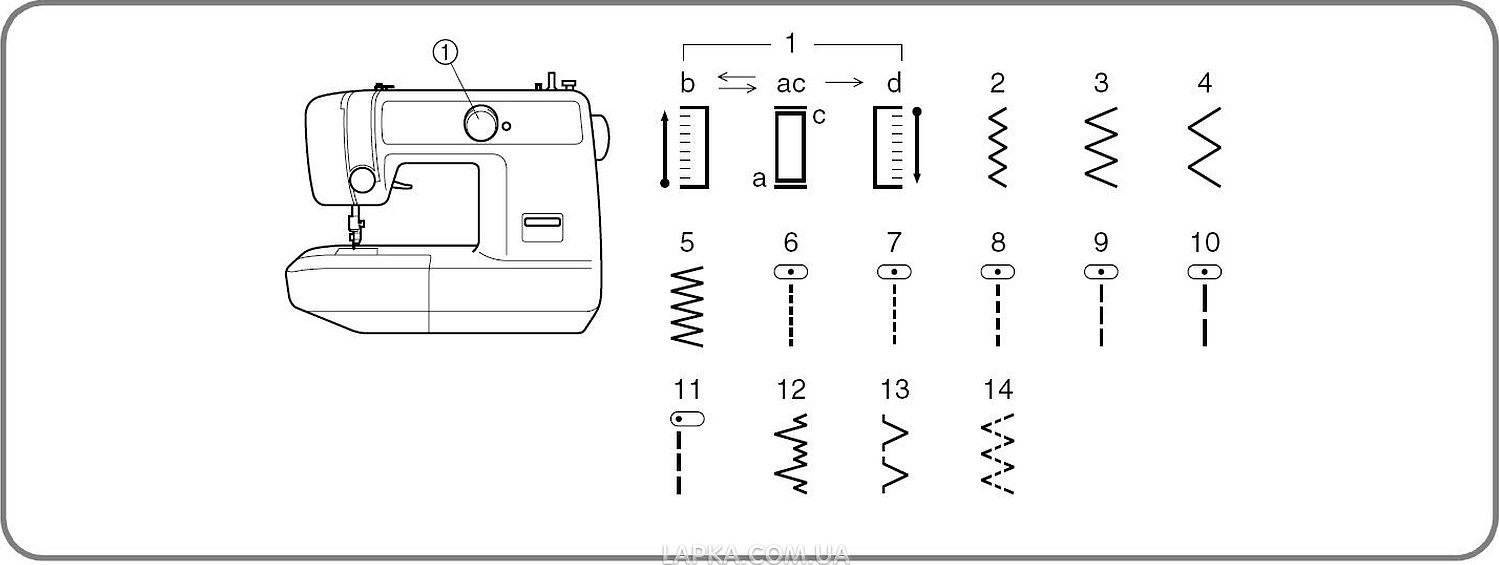
Расположения переключателя для изменения вида строчки
Но при этом необходимо помнить, что длина стежка также зависит от толщины швейной нити.
Отметка S.S на регуляторе выбирается в том случае, если необходимо работать с эластичными тканями. В данном режиме длина строчки устанавливается автоматически. Значок в виде треугольника нужен для того, чтобы сделать петлю.
Цифры на игольной пластине указывают на расстояние от центрального положения иглы. Они помогут выполнить ровный шов на выбранном расстоянии от края ткани.
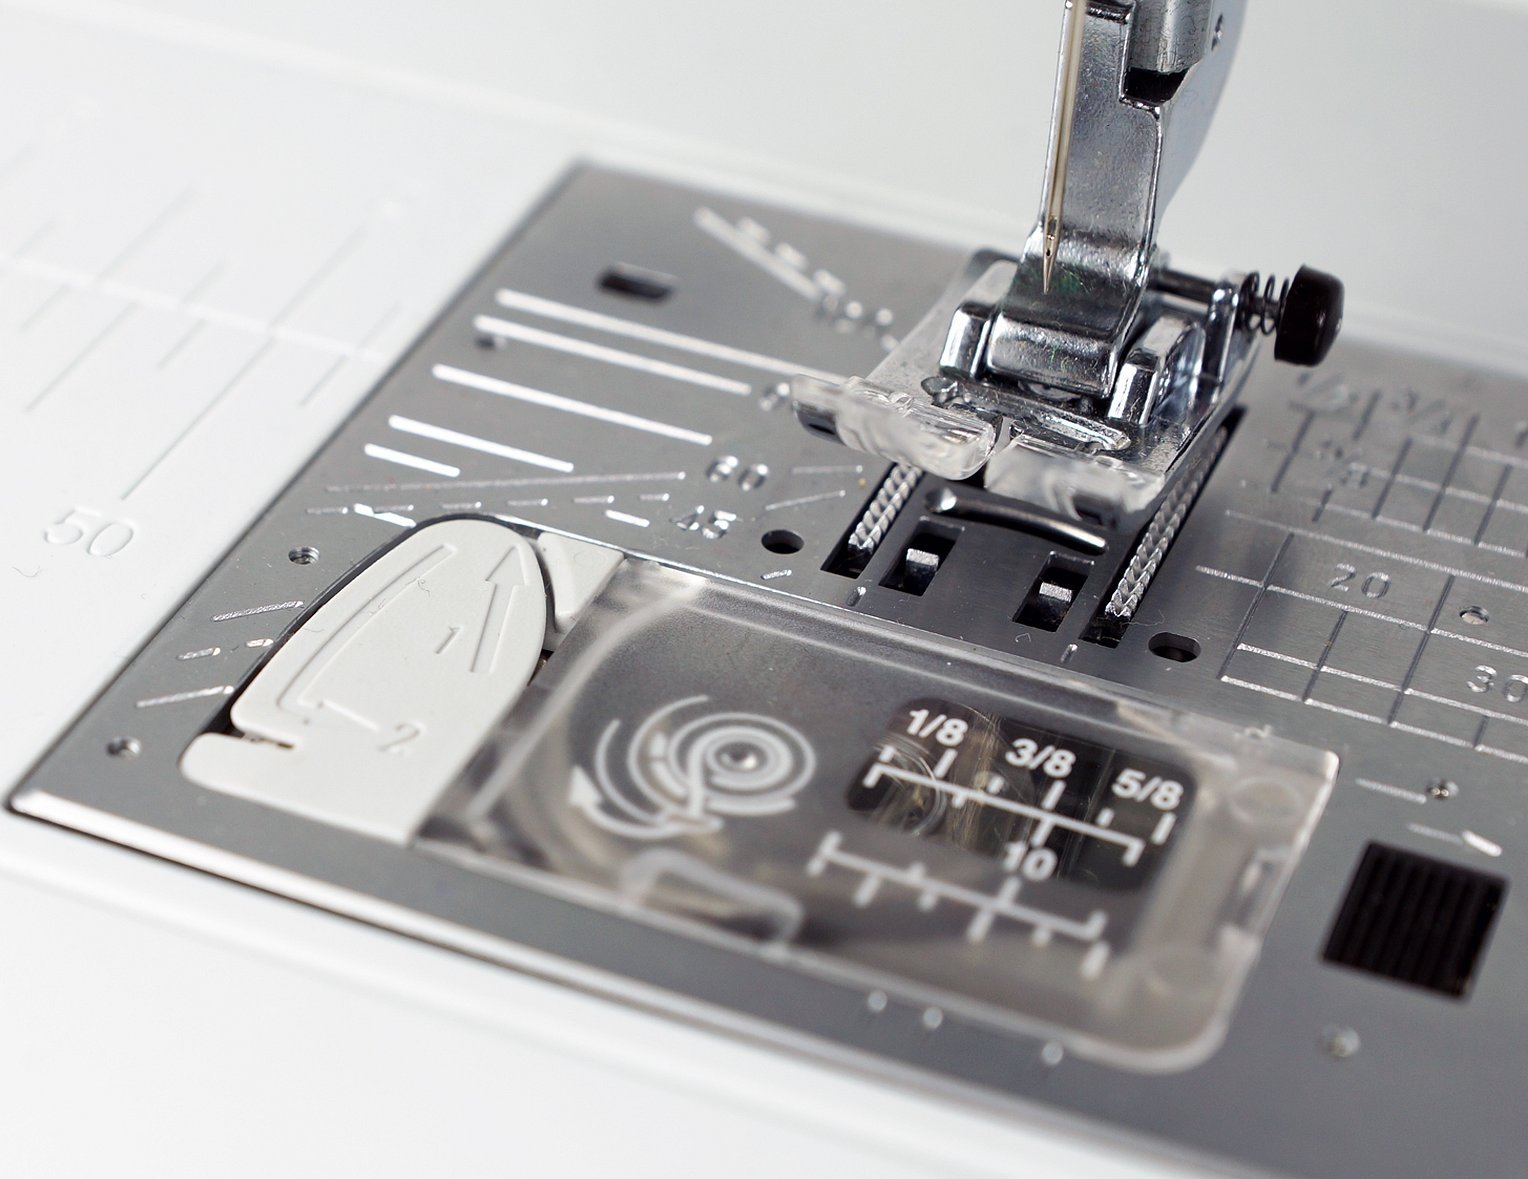
Цифры на игольной пластине
Для того чтобы швейная машина прослужила длительное время, необходимо всегда выполнять 3 правила:
- Нельзя оставлять устройство в неотапливаемых помещениях, на веранде, чердаках, у окна или на полу. В перечисленных местах всегда повышенная влажность. В таких условиях агрегат очень быстро проржавеет. Лучше всего хранить швейную машину длительное время в герметически закрытой упаковке.
- Все трущиеся части устройства необходимо смазывать машинным маслом. Оно всегда должно быть свежим. Используют его в течение 6 месяцев после покупки.
- В случае возникновения даже незначительной неполадки в работе следует незамедлительно отнести агрегат в ремонт.
Подбор иголок и ниток
Швейная машинка «Джаноме» подходит для шитья тонких, средних и тяжелых тканей. Для качественной строчки необходимо правильно подбирать швейные нитки и иголки к каждому виду ткани. Применение подходящих расходников в пошивочном деле – залог успеха.
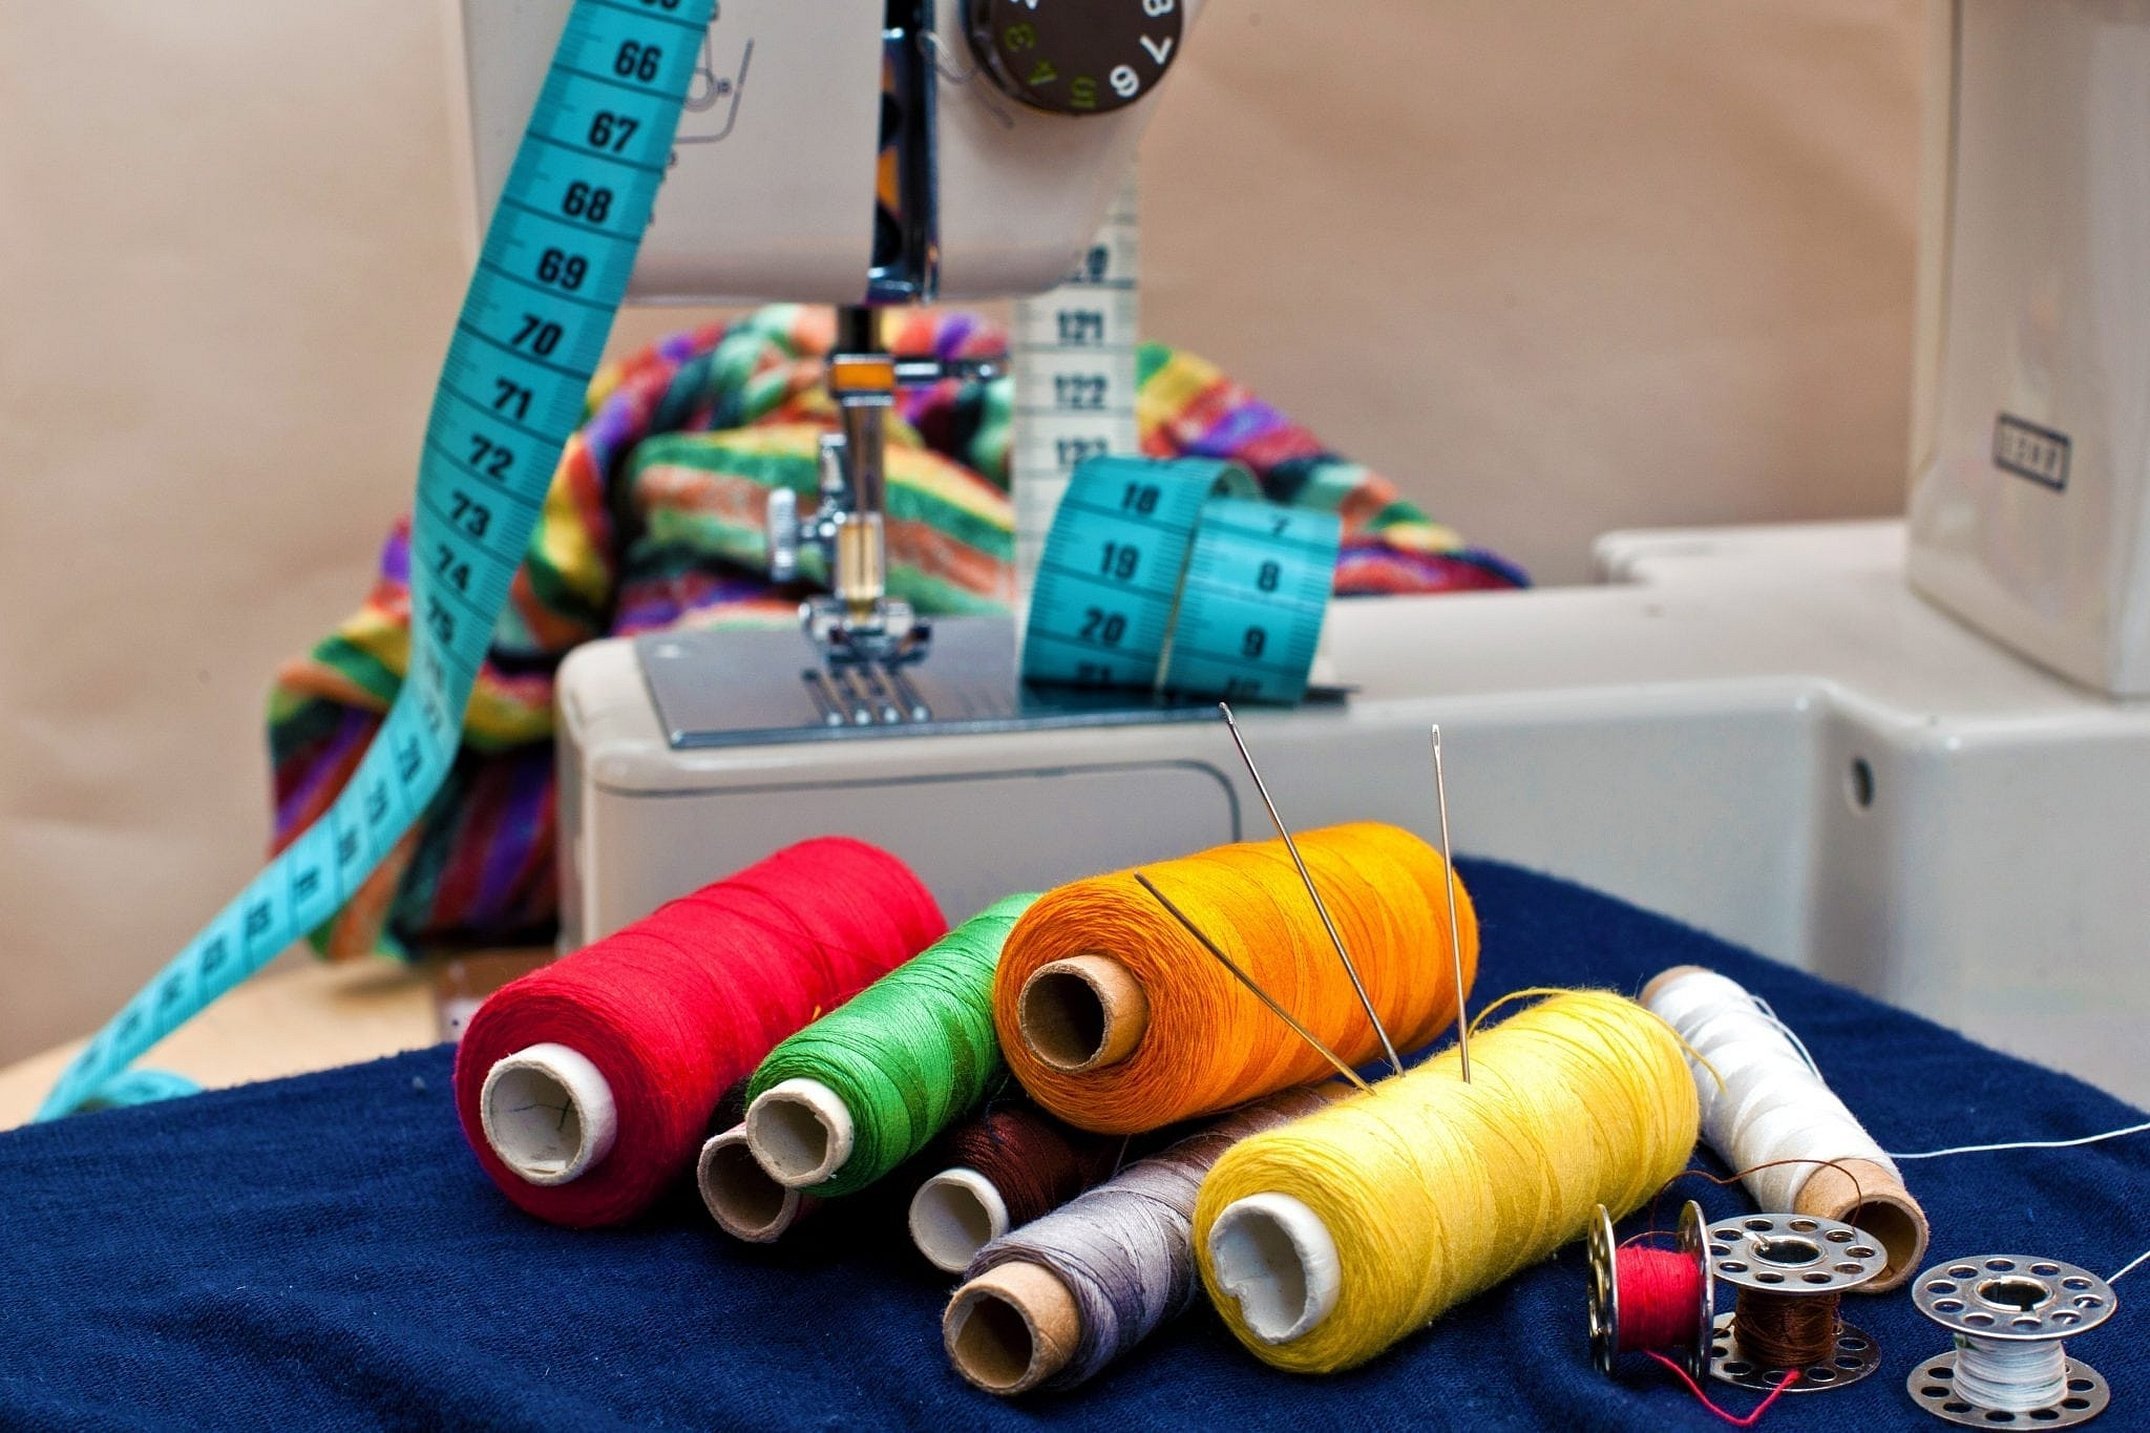
Швейные нитки и иголки
Таблица соотношения номеров нитей и типа ткани:
| Ткань | Нитки | Размер иглы |
| Легкие ткани | Тонкие шелковые
Хлопок с полиэстером Тонкие синтетические |
№ 9/65
№ 11/75 |
| Средние ткани | Шелковые №50
Хлопчатобумажные № 50-80 Синтетические № 50-60 |
№ 14/90 |
| Тяжелые ткани | Хлопчатобумажные № 40-50
Шелковые № 50 Синтетические № 40-50 |
№ 16/100 |
Правильность выбора проверяется перед началом работы с изделием на небольшом кусочке ткани.
Швейные машинки Janome – это один из лучших вариантов как для начинающих, так и уже опытных швей. Они просты в эксплуатации, особенно, если сразу после приобретения агрегата швея стала изучать руководство по работе, удобные и быстрые для производства самых различных изделий из тканей и кожи.

Перейти к контенту

Русские электронные инструкции по эксплуатации
Постоянно обновляемый большой каталог документации по эксплуатации и использованию современных устройств и оборудования на русском языке. Бесплатное скачивание файлов.
Поиск:
Главная
♥ В закладки
Просмотр инструкции в pdf


Инструкция по эксплуатации швейной машины Janome 5515.
Скачать инструкцию к швейной машине Janome 5515 (551,77 КБ)

Инструкции по эксплуатации швейных машин JANOME
« Инструкция к швейной машине Toyota ERGO15D
» Инструкция к швейной машине Astralux Astoria
Вам также может быть интересно

Инструкция к швейной машине Janome Top 18

Инструкция к швейной машине Janome ArtDecor 724E

Инструкция к швейной машине Janome 495

Инструкция к швейной машине Janome Sew Dream 510

Инструкция к швейной машине Janome HomeDecor 1015

Инструкция к швейной машине Janome CoverPro D Max

Инструкция к швейной машине Janome 3112M

Инструкция к швейной машине Janome DC 50
Добавить комментарий
Имя *
Email *
Сайт
Комментарий


Сохранить моё имя, email и адрес сайта в этом браузере для последующих моих комментариев.
- Добавить инструкцию
- Заказать инструкцию
- Политика конфиденциальности
- Manuals
- Brands
- Janome Manuals
- Sewing Machine
- Sewing Machine
- Instruction book
-
Contents
-
Table of Contents
-
Troubleshooting
-
Bookmarks
Quick Links
Related Manuals for Janome Sewing Machine
Summary of Contents for Janome Sewing Machine
-
Page 1
INSTRUCTION BOOK… -
Page 3
3. Never operate this sewing machine if it has a damaged cord or IMPORTANT SAFETY plug, if it is not working properly, if it has been dropped or damaged, or dropped into water. Return this sewing machine to the nearest authorized dealer or… -
Page 4
5. The maximum permissible power for the sewing lamp bulb is 15 watts. 6. When using your sewing machine for the first time, place a piece of waste fabric under the presser foot and run the machine without thread for a few minutes. Wipe away any oil which… -
Page 5: Table Of Contents
TABLE OF CONTENTS SECTION I ESSENTIAL PARTS SECCTION IV UTILITY STITCHING Names of Parts ………………..4~5 Overcasting ………………..25 Foot Storage Compartment …………….6 Overedge Stitch ………………… 26 Extension Table(Accessory Storage Box) …………7 Tricot Stitch ………………..26 Triple Strength Stitich ………………27 SECTION II GETTING READY TO SEW Outline Stretch Stitich ………………
-
Page 6: Section I Essential Parts
SECTION I ESSENTIAL PARTS Names of Parts Stitch length control Zigzag width control Bobbin winder stopper Bobbin winder spindle Foot storage compartment Flip-top sewing instruction panel Spool holder (large) Spool pin Top cover Thread tension dial Pressure dial Face plate Buttonhole lever Thread cutter Needle threader…
-
Page 7
@0 Thread take-up lever @1 Carrying handle @2 Handwheel @3 Clutch knob @4 Pattern selector dial @5 Feed balance dial @6 Power switch @7 Machine socket @8 Needle clamp screw @9 Drop feed lever #0 Free arm #1 Presser foot #2 Presser foot lifter… -
Page 8: Foot Storage Compartment
Foot Storage Compartment Each presser foot and pocket is lettered for easy identification and storage. To achieve optimum sewing results, use the foot recommended for each sewing technique. Needle case L. Quilter G. Blind stitch hem foot D. Hemmer foot C.
-
Page 9: Extension Table(Accessory Storage Box)
Extension Table (Accessory Storage Box) Extension Table Accessory storage box The extension table provides added sewing surface and can be easily removed for free arm sewing. Sewing accessoires are conveniently ¡ located under the extension table. For free arm sewing For attaching the table Lift out the extension table, as Position the two pins of the…
-
Page 10: Section Ii Getting Ready To Sew
SECTION II GETTING READY TO SEW Connecting the Machine to the Power Supply Before connecting the power, make sure the voltage and frequency of your electrical power conform to the machine. Switch off the power, fit the nonreversible plug into the machine socket and plug the machine into the power supply.
-
Page 11: Foot Control
Foot Control Sewing Light The sewing light is located behind the Sewing speed can be varied by the foot control. face plate. The harder you press on the control, the faster the machine runs. [To replace the bulb] • To remove..Turn to the left. •…
-
Page 12: Pressure Dial
Pressure Dial Dropping the Feed Dogs Drop feed lever is located underneath of free arm bed. To raise the feed dogs, push the lever to the direction of arrow as illustrated. The pressure dial should be set at “3” for regular sewing. Reduce the pressure to “…
-
Page 13: To Snap On And Snap Off The Preser Foot
To Snap On and Snap Off the Presser Foot To snap off To snap on Additional Clearance Turn the handwheel toward you to Press the lever on the back of the When attaching the presser foot, The presser foot can be raised raise the needle to its highest foot holder.
-
Page 14: To Detach And Attach The Foot Holder
To Detach and Attach the Foot Holder To Detach To Attach Reverse Stitch Button Seam Guide Line Remove the thumb screw The numbers on the needle plate Align the hole in the foot As long as you keep the reverse by turning the screw indicate the distance between the left holder with the threaded…
-
Page 15: Changing Needle
Changing Needle Loosen the needle clamp screw by turning it counter-clockwise. Remove the needle from the clamp. Insert the new needle into the needle clamp with the flat side away from you. When inserting the needle into the clamp, push it up as far as it will go and tighten the clamp screw firmly with the screwdriver.
-
Page 16: Thread And Needle Chart
Thread and Needle Chart Fabrics Threads Needle Size Crepe de Chine, Voile Fine Silk Light weight Lawn, Organdy, Georgette, Tricot Fine Cotton Fine Synthetic Fine Cotton Covered Polyester Linens, Cotton, Pique, 50 silk Medium weight Serge Double Knits, Percale 50 to 80 Cotton 50 to 60 Synthetic Cotton Covered Polyester Denim, Tweed, Gabardine,…
-
Page 17: Winding The Bobbin
Winding the Bobbin Horizontal Spool Pin Additional Spool Pin Removing the Bobbin Ordinary Spool Small Spool Lift up the spool pin. Place the spool of thread on the spool with the The additional spool pin is used Gently slide the hook cover plate thread coming off the spool as shown.
-
Page 18
Threading the Bobbin Winder Put the bobbin on the bobbin winder spindle, and push it to the right. With the free end of the thread held in your hand, depress the foot control. Stop the machine when it has made a few turns, and cut the thread close to the hole in the bobbin. -
Page 19
Inserting the Bobbin Place the bobbin in the bobbin Guide the thread into the notch A Continue to draw the thread lightly Pull out about 15 cm (6˝) of thread holder with the thread running on the front side of the bobbin until the thread slips into notch B. -
Page 20: Threading The Machine
Threading the Machine Raise the take-up lever to its highest position by turning the handwheel toward you. Raise the presser foot with the presser foot lifter and thread in the order from Lead the thread from the spool and pass it through the thread guide. Then draw it down along the right slot.
-
Page 21: Needle Threader
Needle Threader Raise the needle to the heighest position. Lower the presser foot. Pass the thread Pull the needle threader knob between the horn as far as it will go. and triangle as q Threader knob Gently push the button. Draw the thread to the left into the shown.
-
Page 22: Drawing Up Bobbin Thread
Drawing Up Bobbin Thread Raise the presser foot and hold the Turn the handwheel slowly towards you Pull 15 cm (6˝) of both threads back and needle thread lightly with your left hand. with your right hand until the needle under the presser foot.
-
Page 23: Balancing Needle Thread Tension
Balancing Needle Thread Tension Thread Tension for Zigzag Sewing To obtain better zigzag stitches, The needle thread and the bobbin Set the desired Loosen the needle Tighten the needle the needle thread tension should thread should interlock in the number of the thread tension by moving thread tension by moving be slightly weaker than in the…
-
Page 24: Pattern Selector Dial
Pattern Selector Dial Zigzag Width Control Stitch Length Control Variable Needle Position Select the pattern by turning the Higher the number, wider the The higher the number, the longer When pattern number 13 is pattern selector dial and the red stitch width.
-
Page 25: Straight Stitch Sewing
SECTION III BASIC SEWING Straight Stitch Sewing Machine Setting Raise the presser foot and For fastening the ends of seams, The threads are cut the proper position the fabric next to a press the reverse stitch button and length for starting the next seam. stitching guide line on the needle sew several reverse stitches.
-
Page 26: Changing The Sewing Directions
Changing the Sewing Directions Straight Stitching on Heavy Fabrics Stop the machine and bring the needle Lower the needle info the fabric at the point where you wish to down into the fabric by turning the start sewing. Press the small black button on the zigzag foot handwheel.
-
Page 27: Zigzag Stitch
SECTION IV UTILITY STITCHING Zigzag Stitch Machine Setting Machine Setting Overcasting Simple zigzag stitch is widely used for overcasting, applique, This type of stitch is used on the sewing on buttons etc. seam allowance to prevent fabrics from fraying at raw edges. It can be used to finish a hem edge.
-
Page 28: Overedge Stitch
Overedge Stitch Tricot Stitch Machine Setting Machine Setting Place the edge of the fabric next Place the fabric under the presser to the black prong of foot. foot so that the edge will be The wires on this foot prevent light slightly inside the right hand side weight fabric from rolling and of the presser foot.
-
Page 29: Triple Strength Stitich
Triple Strength Stitch Outline Stretch Stitch Machine Setting Machine Setting This strong, durable stitch is The stitch is sewn with two Pattern 14 is a narrow stretch For a 1.5 cm (5/8˝) seams, use the recommended where both stitches forward and one stitch stitch designed to eliminate 2 cm (6/8˝) marking on the needle elasticity and strength are needed…
-
Page 30: Sewing Buttons
Sewing Buttons Machine Setting Align the both holes of button To strengthen the shank, cut the threads leaving a 20 cm (8˝) tail. with the needle swing, lower Bring the needle thread down through the hole in the button and the foot and depress the foot wind it around the shank.
-
Page 31: Automatic Buttonhole
Automatic Buttonhole The size of buttonhole is Machine Setting (NOTE) automatically set by placing the button in the automatic There should buttonhole foot (R). be no gap The button holder of the foot takes a button size up to 2.5 cm Spring Slider holder…
-
Page 32
Touch Starting point Starting point Bottonhole lever y u i Pull the button holder to the back, and Insert the fabric under the foot. Sew slowly and stop the machine at the place the button in it. Push back the button strating point when a buttonhole is Turn the handwheel one complete turn by completed. -
Page 33
!0 !1 To repeat buttonhole sewing. Cut the both needle and bobbin threads When buttonhole sewing is After a buttonhole is sewn, move the indicator to pattern finished, push the buttonhole leaving about 10 cm (4˝) thread ends. “1” ( ) by turning the pattern selector dial in the Draw the needle thread to wrong side of lever upward as far as it will go. -
Page 34: Manual Buttonhole
Manual Buttonhole Machine Setting q w e Turn the handwheel toward you to raise Pull the buttonhole lever downward as far the needle to its highest position. Raise as it will go. the presser foot lifter. Lower the needle info the garment where If the diameter of the button is Set the pattern indicator at “BH”…
-
Page 35
Starting point Sew the front bartack and left row, then Sew the back bartack and right row, then stop the machine after sewing the stop the machine at the starting point. desired total length of buttonhole. To cut the opening and to reset for Pull the buttonhole lever toward you. -
Page 36: Corded Buttonhole
Corded Buttonhole Machine Setting q we r With the buttonhole foot raised, hook the filler cord on the cord spur at the back of the buttonhole foot. Bring the ends toward you under the buttonhole foot until they clear the front end. Hook the filler cord info the forks on the front of the R foot to hold them tight.
-
Page 37: Zipper Application
Zipper Application Machine Setting To sew the left side of the zipper, attach the zipper foot to Fabric Preparation: the pin on the right hand side. Place right sides of fabric together and sew to the end of the zipper To sew the right side of the zipper, attach the zipper foot opening.
-
Page 38
Attach the zipper foot with the pin on the To Sew: Sew through fold and zipper tape. Stop just right hand side. Lower the zipper foot. before the zipper foot reaches the slider on Fold back the left seam allowance. the zipper tape. -
Page 39
Close the zipper and spread the fabric flat Move the zipper foot to the left pin. Guide With the needle down in the fabric, raise the with the right side facing up. the edge of the foot along the zipper teeth foot, remove the basting stitches and open and stitch through garment and zipper tape. -
Page 40: Rolled Hem
Rolled Hem Machine Setting Make a double 0.25 cm (1/8˝) fold Lower the needle into the fabric at Lower the needle into the fabric approximately 8 cm (3˝) in length. the point where sewing is to and lift the hemmer foot. Insert the begin, then lower the hemmer folded portion of the fabric into the foot.
-
Page 41
0.7 cm (1/4˝) 0.7 cm (1/4˝) Lower the hemmer foot, then sew Trim about 0.7 cm(1/4˝) from by lifting up the edge of the fabric corners as illustrated, to reduce to keep it feeding smoothly and bulk. evenly. -
Page 42: Blind Stitch Hemming
Blind Stitch Hemming Machine Setting Position the fabric on the machine Turn the guide screw and move so that the needle just pierces the the sliding guide next to the folded folded part of the fabric when the edge. Sew guiding the folded edge along the sliding guide.
-
Page 43: Decorative Satin Stitch Patterns
SECTION V DECORATIVE STITCHING Decorative Satin Stitch Patterns Stretch Stitch Patterns Machine Setting Machine Setting Sew a row of stitches and adjust the thread tension so the needle thread Stitch length of the automatic patterns (No.14 to 18) are preset, so you do not should appear on the reverse side of the fabric.
-
Page 44: Adjusting Stretch Stitch Balance
Adjusting Stretch Stitch Balance Smocking Machine Setting 1 cm (3/8˝) When patterns are compressed, correct by turning the dial in the direction of “ + ”. When patterns are With the stitch length control at “4”, sew straight lines 1 cm(3/8˝) apart drawn out, correct by If patterns are uneven when across the area to be smocked.
-
Page 45: Quilting
Quilting Machine Setting The quiliting guide will help to keep Sew guiding the quilter over the the stitchintg lines straight. previous row of stitching. Insert the quilter in the opening, and slide it at the desired width.
-
Page 46: Pin Tucking
Pin Tucking Machine Setting Position the fabric so that the Sew guiding the folded edge along needle pierces 0.1 to 0.2 cm the sliding guide. (1/16˝) inside of folded part and Press the pin tucks to one side. lower the presser foot. Turn the guide screw and move Fold the fabric with wrong sides the sliding guide next to the folded…
-
Page 47: Shell Tuck
Shell Tuck Fagoting Machine Setting Machine Setting Fold under 1.5cm (1/12˝) on each fabric edge and press. Pin the two edges to paper 0.3cm (1/8˝) apart. Sew slowly guiding the fabric so Place the folded edge along the the needle catches the folded slot of foot.
-
Page 48: Applique
Applique Patch Work Machine Setting Machine Setting Sew seam and press seam Baste (or fuse with iron-on fabric allowance open. Sew pattern stitch joiner) applique pieces on the on the right side of garment fabric. centering stitches over the seam Stitch around the applique making line.
-
Page 49: Cleaning The Bobbin Holder
SECTION VI CARE OF YOUR MACHINE Cleaning the Bobbin Holder This machine never needs oiling but the bobbin area and hook race should be cleaned after completion of every garment. Do not store the machine in an area of high humidity, near a radiator or in direct sunlight.
-
Page 50: Cleaning The Hook Race
Cleaning the Hook Race Inserting the Bobbin Holder Take out the bobbin. Unplug the machine and remove Clean the feed dogs, hook race Line up the triangle marks and Lift up the bobbin holder and the presser foot and needle. and bobbin holder with the lint position the bobbin holder so the remove it.
-
Page 51: Trouble Shooting
Trouble Shooting Condition Cause Reference The machine does not 1. Threads have been caught in hook mechanism. See Pages 47 and 48 run smoothly and is 2. The feed dog is packed with lint. See Page 48 noisy. The needle thread 1.
-
Page 52
Condition Cause Reference Seam Puckering. 1. The needle thread tension is too tight. See Page 21 2. The needle thread is not threaded correctly. See Page 18 3. The needle is too heavy for the cloth being sewn. See Page 14 4. -
Page 56
Printed in Taiwan 753-800-162 (EN)
Рубрика: Швейный (заготовочный) цех
Швейные машины Janome. Часть 1
![]()
Janome — Джаноме
На данной странице выложены инструкции и руководства по эксплуатации, каталоги запасных частей и руководства пользователя к швейным машинам Janome.
Наиболее популярные в России модели — Janome 1000, 1108, 394, 415, 419, 521, 6019, 808, 3050, MC350, Memory Craft 300, и другие.
Файлы из-за большого количества разбиты на 2 части, вторая часть Здесь.
По-русски название этой швейной машинки — Джаноме, или Джаном.
Все инструкции можно скачать бесплатно.
Список моделей Джаноме, на которые можно скачать инструкции по эксплуатации:
- 6260
- dc3050 Janome Decor Computer 3050
- mc-11000
- 23x-18w
- 134
- 204D
- 394
- 415
- 415,419
- 419-423
- 419S,423S
- 509
- 521
- 525
- 625E
- 634
- 734
- 743
- 808
- 1000
- 1108
- 3050
- 4900
- 5018-5124
- 6019
- 6125
- 6260
- 6500
- 6600P
- 7518 7524_instruc
- 9002
- 11000
- CoverPro_1000CP
- DC3050
- DC3600
- Decor_Excel_5018,5124,Pro5124
- HQ_090D
- Jem_Platinum_720
- JP760
- JR1204,JS1004
- MB4
- MC200E_eng
- MC350_eng
- Memoru_Craft_9500
- Memory_Craft_6600
- Memory Craft 300E part_1
- Memory Craft 300E part_2
- MyExcel_18W-MW3018,23X-MX3123
- MyExcel_23L,18W,23X
- MY EXCEL W23U
- mylock_734d
- New-Home-385
- и др.
Список моделей швейных машинок Janome, на которые можно скачать каталоги запчастей :
- 18W
- 23 XЕ
- 415
- 419S and 423S
- 521
- 522
- 525s
- 542
- 639 (Jem)
- 644D_combined_Parts
- 659
- 660 (Jem Gold)
- 900cp_1000cp
- 2041s
- 2049s
- 5024_Parts
- 6019QC
- 6125QC
- 6260QC
- DC-3050
- DE-5018
- DE-5024
- DE-5124
- JD1818
- JEM Parts List and Service Manual
- JF1004,1012,1014,1018,1022_Parts
- JF series
- JP-720
- JP-760
- JR-1218s
- JS1004
- MC-300E
- MC-4800
- MC-6500P
- MC-9500
- MC-10001
- MC-11000
- ME-4123
- ML-134D
- ML-204D
- ML-634D
- ML-644d
- ML-734d
- ML-744d
- ML-4852
- ML-9102d
- PL_734
- RX18S
- US-2004
- US-2014
- US-2022
- и др.
Скачать инструкции и руководства на швейные машины Janome

Janome 6260
• 6260.
Статус: FREE. Тип файла: pdf. Размер файла: 3.72 MB. Скачан: 605 раз.
• Dc3050 JanomeDecor Computer 3050.
Статус: FREE. Тип файла: pdf. Размер файла: 923.77 kB. Скачан: 469 раз.
• Janome 1000.
Статус: FREE. Тип файла: pdf. Размер файла: 1.16 MB. Скачан: 560 раз.
• Janome 11000.
Статус: FREE. Тип файла: pdf. Размер файла: 15.72 MB. Скачан: 1772 раз.
• Janome 1108.
Статус: FREE. Тип файла: pdf. Размер файла: 1.84 MB. Скачан: 568 раз.
• Janome 134.
Статус: FREE. Тип файла: pdf. Размер файла: 4.13 MB. Скачан: 1074 раз.
• Janome 204D.
Статус: FREE. Тип файла: pdf. Размер файла: 1.69 MB. Скачан: 446 раз.
• Janome 23x-18w.
Статус: FREE. Тип файла: pdf. Размер файла: 3.96 MB. Скачан: 799 раз.
• Janome 3050.
Статус: FREE. Тип файла: pdf. Размер файла: 4.26 MB. Скачан: 1094 раз.
• Janome 394.
Статус: FREE. Тип файла: pdf. Размер файла: 2 MB. Скачан: 639 раз.
• Janome 415,419.
Статус: FREE. Тип файла: pdf. Размер файла: 1.13 MB. Скачан: 436 раз.
• Janome 415.
Статус: FREE. Тип файла: pdf. Размер файла: 2.71 MB. Скачан: 408 раз.
• Janome 419-423.
Статус: FREE. Тип файла: pdf. Размер файла: 2.92 MB. Скачан: 528 раз.
• Janome 419S,423S.
Статус: FREE. Тип файла: pdf. Размер файла: 3.58 MB. Скачан: 559 раз.
• Janome 4900.
Статус: FREE. Тип файла: pdf. Размер файла: 8.66 MB. Скачан: 848 раз.
• Janome 5018-5124.
Статус: FREE. Тип файла: pdf. Размер файла: 4.73 MB. Скачан: 1940 раз.
• Janome 509.
Статус: FREE. Тип файла: pdf. Размер файла: 1.4 MB. Скачан: 450 раз.
• Janome 521.
Статус: FREE. Тип файла: pdf. Размер файла: 3.39 MB. Скачан: 534 раз.
• Janome 525.
Статус: FREE. Тип файла: pdf. Размер файла: 3.77 MB. Скачан: 523 раз.
• Janome 6019.
Статус: FREE. Тип файла: pdf. Размер файла: 3.88 MB. Скачан: 709 раз.
• Janome 6125.
Статус: FREE. Тип файла: pdf. Размер файла: 3.99 MB. Скачан: 385 раз.
• Janome 625E.
Статус: FREE. Тип файла: pdf. Размер файла: 1.43 MB. Скачан: 394 раз.
• Janome 6260.
Статус: FREE. Тип файла: pdf. Размер файла: 4.69 MB. Скачан: 831 раз.
• Janome 634.
Статус: FREE. Тип файла: pdf. Размер файла: 3.74 MB. Скачан: 412 раз.
• Janome 6500.
Статус: FREE. Тип файла: pdf. Размер файла: 6.84 MB. Скачан: 938 раз.
• Janome 6600P.
Статус: FREE. Тип файла: pdf. Размер файла: 1.43 MB. Скачан: 609 раз.
• Janome 734.
Статус: FREE. Тип файла: pdf. Размер файла: 5.3 MB. Скачан: 976 раз.
• Janome 743.
Статус: FREE. Тип файла: pdf. Размер файла: 2.98 MB. Скачан: 402 раз.
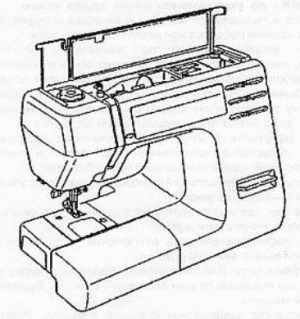
Janome 7524
• Janome 7518 7524 Instruc.
Статус: FREE. Тип файла: pdf. Размер файла: 3.77 MB. Скачан: 518 раз.
• Janome 808.
Статус: FREE. Тип файла: pdf. Размер файла: 1.35 MB. Скачан: 661 раз.
• Janome 9002.
Статус: FREE. Тип файла: pdf. Размер файла: 1 MB. Скачан: 392 раз.
• Janome CoverPro 1000CP.
Статус: FREE. Тип файла: pdf. Размер файла: 1.83 MB. Скачан: 374 раз.
• Janome DC3050.
Статус: FREE. Тип файла: pdf. Размер файла: 1.52 MB. Скачан: 446 раз.
• Janome DC3600.
Статус: FREE. Тип файла: pdf. Размер файла: 3.31 MB. Скачан: 373 раз.
• Janome Decor Excel 5018,5124,Pro5124.
Статус: FREE. Тип файла: pdf. Размер файла: 5.4 MB. Скачан: 1339 раз.
• Janome HQ 090D.
Статус: FREE. Тип файла: pdf. Размер файла: 1.01 MB. Скачан: 352 раз.
• Janome Jem Platinum 720.
Статус: FREE. Тип файла: pdf. Размер файла: 1.37 MB. Скачан: 426 раз.
• Janome JP760.
Статус: FREE. Тип файла: pdf. Размер файла: 1.44 MB. Скачан: 440 раз.
• Janome JR1204,JS1004.
Статус: FREE. Тип файла: pdf. Размер файла: 2.3 MB. Скачан: 512 раз.
• Janome MB4.
Статус: FREE. Тип файла: pdf. Размер файла: 4.7 MB. Скачан: 792 раз.
• Janome -mc-11000-.
Статус: FREE. Тип файла: pdf. Размер файла: 268.68 kB. Скачан: 393 раз.
• Janome MC200E Eng.
Статус: FREE. Тип файла: pdf. Размер файла: 2.29 MB. Скачан: 372 раз.
• Janome MC350 Eng.
Статус: FREE. Тип файла: pdf. Размер файла: 2.96 MB. Скачан: 703 раз.
• Janome Memoru Craft 9500.
Статус: FREE. Тип файла: pdf. Размер файла: 3.4 MB. Скачан: 418 раз.
• Janome Memory Craft 300E Part 1.
Статус: FREE. Тип файла: pdf. Размер файла: 370.63 kB. Скачан: 409 раз.
• Janome Memory Craft 300E Part 2.
Статус: FREE. Тип файла: pdf. Размер файла: 1.17 MB. Скачан: 590 раз.
• Janome Memory Craft 6600.
Статус: FREE. Тип файла: pdf. Размер файла: 2.4 MB. Скачан: 409 раз.
• Janome MyExcel 18W-MW3018,23X-MX3123.
Статус: FREE. Тип файла: pdf. Размер файла: 4.63 MB. Скачан: 1617 раз.
• Janome MyExcel 23L,18W,23X.
Статус: FREE. Тип файла: pdf. Размер файла: 4.31 MB. Скачан: 1432 раз.
• Janome MY EXCEL W23U.
Статус: FREE. Тип файла: pdf. Размер файла: 12.27 MB. Скачан: 1925 раз.
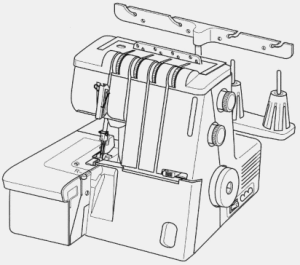
Janome Mylock 734
• Janome Mylock 734d.
Статус: FREE. Тип файла: pdf. Размер файла: 3.46 MB. Скачан: 422 раз.
• New-Home-385.
Статус: FREE. Тип файла: pdf. Размер файла: 492.81 kB. Скачан: 457 раз.
• 2121.
Статус: FREE. Тип файла: pdf. Размер файла: 949.51 kB. Скачан: 370 раз.
• 519s.
Статус: FREE. Тип файла: pdf. Размер файла: 496.84 kB. Скачан: 412 раз.
• 603.
Статус: FREE. Тип файла: pdf. Размер файла: 2.19 MB. Скачан: 420 раз.
• Instruction Manual For Janome 3318 777.
Статус: FREE. Тип файла: pdf. Размер файла: 949.51 kB. Скачан: 562 раз.
• Instruction Manual For Juno By Janome 5025s.
Статус: FREE. Тип файла: pdf. Размер файла: 6.08 MB. Скачан: 898 раз.
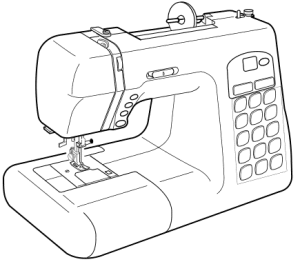
Janome 4030
• Janome4030.
Статус: FREE. Тип файла: pdf. Размер файла: 1.28 MB. Скачан: 380 раз.
• Manual Janome My Excel 18w My Excel 1221.
Статус: FREE. Тип файла: pdf. Размер файла: 2.26 MB. Скачан: 636 раз.
• Mmanual Janome My Style 100.
Статус: FREE. Тип файла: pdf. Размер файла: 655.27 kB. Скачан: 375 раз.
Возможно, будет интересно видео от мастера по ремонту швейных машин:
Если Вы не нашли нужную инструкцию, попробуйте поискать её во второй части.
Интересное по теме:
Пожалуйста, оцените статью!
![]() Загрузка…
Загрузка…
Подробнее о сайте, инструкциях и оплате
Инструкции
Здесь вы сможете скачать pdf-файлы инструкций к технике из нашего каталога.

Инструкция для швейной машины Janome 7515
Универсальное руководство по эксплуатации
Язык: русский

Инструкция для швейной машины Janome 7519
Универсальное руководство по эксплуатации
Язык: русский

Инструкция для швейной машины Janome 7522
Универсальное руководство по эксплуатации
Язык: русский

Инструкция для швейной машины Janome My Style 100
Универсальное руководство по эксплуатации
Язык: русский

Инструкция для швейной машины Janome My Style 102
Универсальное руководство по эксплуатации
Язык: русский

Инструкция для швейной машины Janome JS 1108
Универсальное руководство по эксплуатации
Язык: русский

Инструкция для швейной машины Janome 1143
Универсальное руководство по эксплуатации
Язык: русский

Инструкция для швейной машины Janome My Excel 1221
Универсальное руководство по эксплуатации
Язык: русский

Инструкция для швейной машины Janome 1243
Универсальное руководство по эксплуатации
Язык: русский

Инструкция для швейной машины Janome DC 2030
Универсальное руководство по эксплуатации
Язык: русский
