- Manuals
- Brands
- Siemens Manuals
- Dishwasher
- IQ300 SR93EX20MG
- User manual
-
Contents
-
Table of Contents
-
Troubleshooting
-
Bookmarks
Quick Links
Dishwasher
SR93EX20MG
en
User manual
Register your product on My Siemens and discover
exclusive services and offers.
siemens-home.bsh-group.com/welcome
The future moving in.
Siemens Home Appliances
Related Manuals for Siemens IQ300 SR93EX20MG
Summary of Contents for Siemens IQ300 SR93EX20MG
-
Page 1
Dishwasher SR93EX20MG User manual Register your product on My Siemens and discover exclusive services and offers. siemens-home.bsh-group.com/welcome The future moving in. Siemens Home Appliances… -
Page 2: Table Of Contents
Table of contents Safety ………. 4 Features……… 19 General information…… 4 Top basket …….. 20 Intended use…….. 4 Bottom basket …….. 20 Restriction on user group…. 4 Cutlery drawer …….. 21 Safe installation …….. 4 Etagere ……….. 21 Safe use ……….. 6 Folding prongs ……. 21 Damaged appliance …… 7 Basket heights…….. 22 Risk to children …….. 8 Before using for the first time ..
-
Page 3
Customer Service…… 57 Setting additional functions …. 31 Product number (E-Nr.), produc- Setting timer programming …. 31 tion number (FD) and consecut- Starting the programme …. 32 ive numbering (Z-Nr.) ….. 58 Interrupting programme …. 32 AQUA-STOP guarantee …. 58 Terminate programme…. 32 Switching off appliance …. 32 Technical specifications…. -
Page 4: Safety
en Safety Safety Observe the following safety instructions. General information ¡ Read this instruction manual carefully. ¡ Keep the instruction manual and the product information safe for future reference or for the next owner. ¡ Do not connect the appliance if it has been damaged in transit. Intended use Only use this appliance: ¡…
-
Page 5
Safety en WARNING ‒ Risk of electric shock! ¡ Incorrect installation is dangerous. ▶ Connect and operate the appliance only in accordance with the specifications on the rating plate. ▶ Always use the supplied power cable for the new appliance. ▶ Connect the appliance to a power supply with alternating current only via a properly installed socket with earthing. -
Page 6: Safe Use
en Safety WARNING ‒ Risk of injury! Hinges move when opening and closing the appliance door and can cause injury. ▶ If built-under or integrable appliances are not in a cavity so that one side is accessible, the hinge area must be covered at the side.
-
Page 7: Damaged Appliance
Safety en WARNING ‒ Risk of injury! ¡ Leaving the appliance door open may result in injury. ▶ Only open the appliance door to load or unload tableware in order to prevent accidents, e.g. through tripping. ▶ Do not sit or stand on the appliance door when open. ¡…
-
Page 8: Risk To Children
en Safety ▶ Never pull on the power cord to unplug the appliance. Al- ways unplug the appliance at the mains. ▶ If the appliance or the power cord is damaged, immediately unplug the power cord or switch off the fuse in the fuse box and turn off the water tap.
-
Page 9: Safety Systems
Safety en WARNING ‒ Risk of crushing! With higher-level appliances, children can become crushed between the appliance door and cabinet doors underneath. ▶ Keep an eye on children when opening and closing the ap- pliance door. WARNING ‒ Risk of chemical burns! Rinse aid and detergent may cause chemical burns to the mouth, throat and eyes.
-
Page 10: Preventing Material Damage
en Preventing material damage Only use the water hoses sup- ▶ Preventing material damage Preventing material dam- plied with the appliance or genu- ine spare hoses. Never re-use water hoses that ▶ have been used before. Preventing material damage Safe installation ¡…
-
Page 11: Childproof Lock
Childproof lock en To prevent corrosion, do not use ▶ Environmental protection and saving energy Environmental protection sponge cloths on dishwashers with a stainless steel front or and saving energy rinse such cloths thoroughly several times before using them Environmental protection and saving energy for the first time.
-
Page 12: Autoopen Dry
en Installation and connection ¡ Installation material autoOpen Dry ¡ Mains cable The appliance door opens automatic- ¡ Quick reference guide ally during the drying phase. This en- sures a particularly economical dry- Installing and connecting the ing result. appliance For best drying results wait until the end of programme before unloading You can position your built-under or the tableware.
-
Page 13: Drinking Water Connection
Installation and connection en Connect the wastewater hose to ¡ Please note that the water safety the outlet connection of the siphon system is only functional if there is using the enclosed parts. a power supply. When doing so, check that the Insert the non-heating appliance wastewater hose is not kinked, plug of the power cable into the…
-
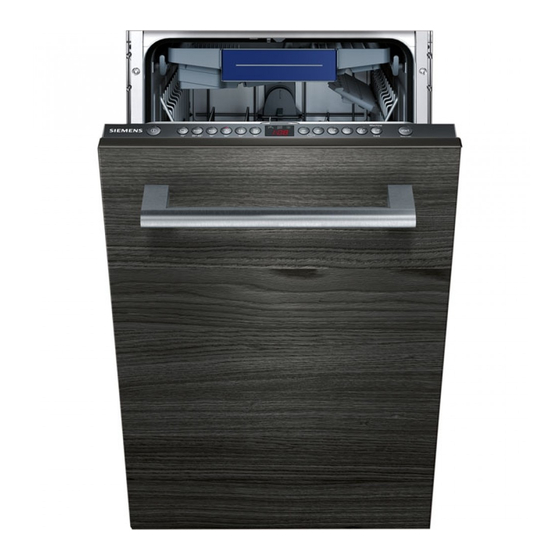
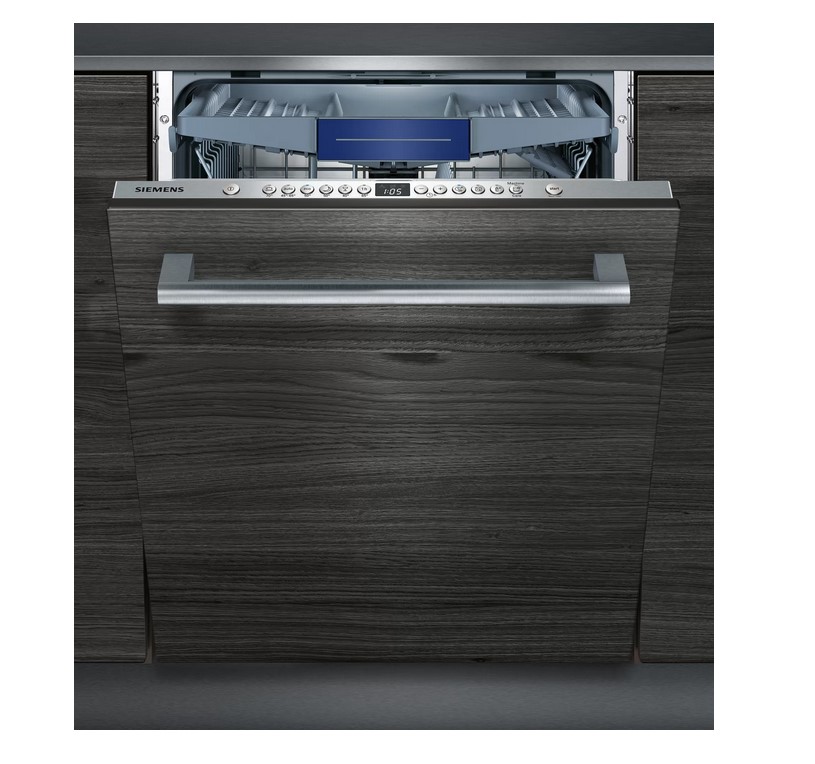
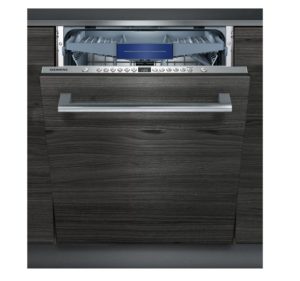
Page 14: Familiarising Yourself With Your Appliance
en Familiarising yourself with your appliance Familiarising yourself with your appliance Familiarising yourself with your appliance Familiarising yourself with your appliance Appliance You can find an overview of the parts of your appliance here. Rating plate Rating plate with «E number and FD number» → Page 58.
-
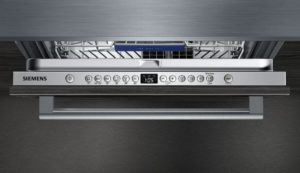
Page 15: Controls
Familiarising yourself with your appliance en «Detergent» → Page 26 is added to the detergent Detergent dispenser dispenser. «Bottom basket» → Page 20 Bottom basket «Filter system» → Page 39 Filter system Dispenser for special salt Add the special salt to the dispenser for special salt. → «Water softening system», Page 23 Tablet collecting tray During the wash cycle tablets automatically fall out of the detergent dispenser into the tablet collecting tray…
-
Page 16
en Familiarising yourself with your appliance 3 4 5 6 «Switching on the appliance» → Page 31 ON/OFF button and reset button «Switching off the appliance» → Page 32 «Terminating the programme» → Page 32 «Programmes» → Page 17 Programme buttons «Water softening system» → Page 23 Special salt refill indicator «Rinse aid system»… -
Page 17: Programmes
Programmes en Programmes Programmes You can find an overview of the pro- runtime will change if the rinse aid Programmes grammes that can be selected here. system is switched off or rinse aid Different programmes, which can be needs to be added. found on the control panel of your The consumption values can be appliance, are available depending…
-
Page 18: Information For Test Institutes
en Programmes Programme: Programme sequence Additional func- tions → «Additional Tableware: Time-optimised: ¡ Cleaning mixed table- ¡ Cleaning 65 °C functions», Speed 65° ware and cutlery. Page 19 ¡ Intermediate rinse Level of soiling: ¡ Final rinse 69 °C ¡ Removing common ¡ Drying household food remnants lightly dried-on.
-
Page 19: Additional Functions
Additional functions en Press the button for the relevant Additional func- additional function. tion → «Additional functions», Page 19 ¡ To ensure a higher hy- Press for 3 seconds. giene status for the ap- HygienePlus a The selected programme and the pliance and tableware, additional function will flash.
-
Page 20: Top Basket
en Features Raise or lower the basket evenly to Top basket the right level. Arrange cups, glasses and small → «Basket heights», Page 22 items of tableware in the top basket. Check that the basket is level on both sides. You can adjust the height of the top Slide the basket back in.
-
Page 21: Cutlery Drawer
Features en Etagere Use the cutlery shelf and space un- derneath for small cups and glasses or for large items of cutlery, e.g. cooking spoons or serving cutlery. Cutlery drawer Arrange cutlery in the cutlery drawer. If you do not need the cutlery shelf, you can fold it up.
-
Page 22: Basket Heights
en Before using for the first time Push the lever forwards and fold To use the prongs again, fold them down the prongs . back up. a The prongs audibly click into posi- tion. Basket heights Set the baskets at the right height. Appliance height 81.5 cm with cutlery drawer Setting Top basket…
-
Page 23: Water Softening System
Water softening system en Tip: You can change these settings Water softening system Water softening system and other «Basic settings» → Page 33 at any time. Hard water leaves limescale on the Water softening system tableware as well as the washing tank and parts of the appliance may become blocked.
-
Page 24: Special Salt
en Water softening system Press repeatedly until the Note: Only use special salt for right water hardness has been set. dishwashers. Do not use salt tablets. The value H04 is set at the factory. Do not use table salt. To save the settings, press Add the special salt to the dis- for 3 seconds.
-
Page 25: Regeneration Of The Water Softening System
Rinse aid system en erally only be used up to a water Additional power consumption in 0.05 hardness of 26 °E without adding special salt. The consumption values specified ¡ The water hardness is 0 — 8 °E. are laboratory measurements determ- You do not need to use special ined in accordance with the currently salt.
-
Page 26: Setting The Amount Of Rinse Aid
en Detergent Add rinse aid up to the max mark. To save the settings, press for 3 seconds. Switching the rinse aid sys- tem off If you find the rinse aid refill indicator irritating, e.g. when using combined detergents with a rinse aid compon- ent, you can switch the rinse aid sys- tem off.
-
Page 27
Detergent en starch and remove protein. Oxygen- Separate detergents based bleaching agents are generally Separate detergents are products used to remove coloured marks, e.g. that do not contain components other tea or ketchup. than detergent, e.g. powder deter- Note: Follow the manufacturer’s in- gent or liquid detergent. -
Page 28: Unsuitable Detergents
en Detergent ¡ The function of rinse aid is limited Unsuitable detergents with combined detergents. You will Do not use detergent which could generally get better results using cause damage to the appliance or rinse aid. present a risk to health. ¡…
-
Page 29: Tableware
Tableware en Close the lid of the detergent dis- Damage to glass and table- penser. ware Avoid damage to glass and table- ware. Cause Recommendation The following table- Only put tableware in ware is not dish- the dishwasher if it is washer-safe: marked as dish- ¡…
-
Page 30: Arrange Tableware
en Tableware To save resources, do not pre- Cause Recommendation rinse tableware under running wa- The water temperat- Select a programme ter. ure of the programme with lower temperat- Observe the following when arran- is too high. ures. ging tableware: After the programme –…
-
Page 31: Removing Tableware
Basic operation en cient programme for the combina- Removing tableware tion of energy/water consumption for this type of tableware and evid- WARNING ences conformity with the EU Eco- Risk of injury! design Directive. Hot tableware can cause burns to the If you do not perform any actions skin.
-
Page 32: Starting The Programme
en Basic operation Press . Terminate programme a This activates timer programming. To end a programme early or to Tip: To deactivate timer program- switch from a programme that has ming, press repeatedly until «h:00» already started, you will need to can- appears in the display.
-
Page 33: Basic Settings
Basic settings en Basic settings Basic settings You can configure the appliance to meet your needs. Basic settings Overview of basic settings The basic settings depend on the features of your appliance. Basic setting Display text Selection Description Water hardness H00 — H07 Set the water softening system to your water hardness.
-
Page 34
en Basic settings Basic setting Display text Selection Description InfoLight I00 — I01 Switch InfoLight on or off. While the programme is running, a spot of light is projected onto the floor below the appliance door. This light will not be visible if the appli- ance is installed at eye level with the cabinet front fitted flush. -
Page 35: Changing Basic Settings
Home Connect en Basic setting Display text Selection Description Wi-Fi Cn0 — Cn1 Switch the wireless network connec- tion on or off. Level «Cn0» switches the wireless network connection off. The basic setting «Wi-Fi» is only avail- able once the appliance is connec- ted to the Home Connect app.
-
Page 36: Home Connect Quick Start
en Home Connect Home Connect services in your coun- Connecting the appliance to WLAN try. You can find information about home network (Wi-Fi) this at: www.home-connect.com. Requirements To be able to use Home Connect, ¡ Home Connect app is installed on you must first set up the connection your mobile device.
-
Page 37: Remote Diagnostics
Home Connect en Activating Remote Start Data protection When you have selected «rc1» in the Please see the information on data basic settings of this function, activ- protection. ate the function on your appliance. The first time your appliance is Requirements registered on a home network ¡…
-
Page 38: Cleaning And Servicing
Dishwasher Care and Ma- ance to malfunction. To avoid such chine Cleaner for Dishwashers online faults and reduce odours, we recom- at https://www.siemens-home.bsh- mend cleaning your appliance at reg- group.com/store or from customer ular intervals. service.
-
Page 39: Filter System
Cleaning and servicing en To ensure optimum cleaning perform- Place the machine care product in ance, the programme doses the de- the appliance interior. tergents independently of each an- Only use machine care products other during the relevant cleaning specially designed for dishwash- phase.
-
Page 40: Cleaning Spray Arms
en Cleaning and servicing Turn the coarse filter anticlockwise Carefully clean the rim of dirt and remove the filter system . between the coarse and the fine fil- ter. Check that no foreign objects ‒ Re-assemble the filter system. fall into the sump. Make sure that the locking catches on the coarse filter click into posi- tion.
-
Page 41
Cleaning and servicing en Check the outlet nozzles on the spray arms for blockages under running water and remove any for- eign bodies. Insert the lower spray arm. a The spray arm clicks into position. Insert the upper spray arms and screw firmly in place. -
Page 42: Troubleshooting
en Troubleshooting Troubleshooting Troubleshooting You can rectify minor faults on your appliance yourself. Read the troubleshoot- Troubleshooting ing information before contacting after-sales service. This will avoid unneces- sary costs. WARNING Risk of electric shock! Incorrect repairs are dangerous. Repairs to the appliance should only be carried out by trained specialist ▶…
-
Page 43
Troubleshooting en Fault Cause Troubleshooting Appliance door does not Appliance door brushes Install the appliance correctly as de- ▶ open at the end of the pro- against the appliance or kit- scribed in the installation instruc- gramme. chen cabinets tions and align. Appliance door opens too Door is not correctly adjus- Adjust the appliance door as de-… -
Page 44: Error Code / Fault Display / Signal
en Troubleshooting Fault Cause Troubleshooting Appliance door opens too Door is not correctly adjus- Adjust the appliance door as de- ▶ wide when activated. ted. scribed in the installation instruc- tions. Error code / Fault display / Signal Fault Cause Troubleshooting E:20-60 lights up alternately.
-
Page 45
Troubleshooting en Fault Cause Troubleshooting E:32-00 will light up altern- Remove the filter from the supply ately or indicator for water hose supply lights up. Clean the filter. Re-insert the filter in the supply hose. Screw the water connection back Check the water connection for leaks. -
Page 46: Washing Results
en Troubleshooting Fault Cause Troubleshooting A different error code ap- A technical fault is present. Press . pears in the display window. Unplug the appliance or switch off the fuse. E:01-00 to E:90-10 Wait at least 2 minutes. Insert the mains plug of the appli- ance in a socket or switch on the fuse.
-
Page 47
Troubleshooting en Fault Cause Troubleshooting Tableware is not dry. Use a different combined detergent with a better drying performance. Extra Dry not activated to im- Activate Extra Dry. ▶ prove drying performance. Tableware removed too Wait until the programme ends. early or drying process not Only remove tableware 30 minutes yet ended. -
Page 48
en Troubleshooting Fault Cause Troubleshooting Remnants of food on table- Filters are soiled. Clean the filters. ▶ → «Cleaning filters», Page 39 ware. Filters are inserted incor- Insert the filters properly. → «Filter system», Page 39 rectly and/or not engaged. Engage the filters. Washing programme selec- Select a more intensive washing ▶… -
Page 49
Troubleshooting en Fault Cause Troubleshooting Water marks on plastic Due to laws of physics Select a more intensive pro- ▶ parts. droplet formation on plastic gramme. → «Programmes», Page 17 surfaces is unavoidable. After drying water marks are Position tableware at an angle. ▶… -
Page 50
en Troubleshooting Fault Cause Troubleshooting Tea residue or lipstick marks Too little detergent is being Use a suitable «Detergent » ▶ → Page 26 and follow the manufac- on tableware. used or is unsuitable. turer’s instructions for the amount to be used. Tableware has been pre- Only remove large remnants of food ▶… -
Page 51
Troubleshooting en Fault Cause Troubleshooting Plastic parts are discol- Tableware has been pre- Only remove large remnants of food ▶ oured. cleaned too intensely. The and do not prerinse tableware. sensors chose a weaker pro- gramme. Stubborn soiling cannot be entirely removed. Removable streaks are Amount of rinse aid to be Set the rinse aid system to a lower… -
Page 52: Home Connect Problem
en Troubleshooting Fault Cause Troubleshooting Rust spots on cutlery. Cutlery is not sufficiently Use rust-resistant tableware. ▶ rust-resistant. Knife blades are often more severely af- fected. Cutlery may also rust if Do not wash rusting items. ▶ washed together with rust- ing items.
-
Page 53: Information On Display Panel
Troubleshooting en Information on display panel Fault Cause Troubleshooting Add «Special salt» → Page 24. Special salt refill indicator Insufficient special salt. ▶ lights up. Sensor does not detect spe- Do not use special salt tablets. ▶ cial salt tablets. Refill indicator for special Water softening system is Setting the water softening system ▶…
-
Page 54: Mechanical Damage
en Troubleshooting Fault Cause Troubleshooting Appliance does not start. Mains cable is not inserted. Check whether the socket works. Check whether the mains cable is properly inserted in the socket and on the rear of the appliance. Appliance door is not closed Close the appliance door.
-
Page 55: Noise
Troubleshooting en Noise Fault Cause Troubleshooting Filling valves making knock- Caused by the domestic in- Can only be remedied in the do- ▶ ing noises. stallation. No appliance fault mestic installation. present. Does not affect functioning of the appliance. Knocking or rattling noise. Spray arm is striking table- Arrange tableware so that the spray ▶…
-
Page 56: Clean Wastewater Pump
en Transportation, storage and disposal Insert the pump cover and press Clean wastewater pump down . Large remnants of food or foreign bodies can block the waste water pump. As soon as the rinsing water no longer drains properly, the waste water pump must be cleaned.
-
Page 57: Protect Appliance From Frost
Customer Service en Protect appliance from frost Disposing of old appliance If there is a risk of frost where the ap- Valuable raw materials can be re- pliance will be standing, e.g. in a holi- used by recycling. day home, empty the appliance com- pletely.
-
Page 58: Product Number (E-Nr.), Produc- Tion Number (Fd) And Consecut- Ive Numbering (Z-Nr.)
en Technical specifications least 10 years from the date on from water damage, the appliance which your appliance was placed on must be connected to the power the market within the European Eco- supply. nomic Area. ¡ The liability guarantee is valid for the service life of the appliance.
-
Page 59: Information Regarding Free And Open Source Software
(Please search on the product web- A detailed Declaration of Conformity site for your appliance model and ad- can be found online at www.siemens- ditional documents). Alternatively, home.bsh-group.com/uk/ among the you can request the relevant informa- additional documents on the product tion from ossrequest@bshg.com or…
-
Page 60
en Declaration of Conformity UK (NI) 5 GHz WLAN (Wi-Fi): For indoor use only. 5 GHz WLAN (Wi-Fi): For indoor use only. -
Page 64
Valid within Great Britain: Imported to Great Britain by BSH Home Appliances Ltd. Grand Union House Old Wolverton Road Wolverton, Milton Keynes MK12 5PT United Kingdom Manufactured by BSH Hausgeräte GmbH under the trademark licence of Siemens AG *9001480144* 9001480144 (010720) 442 V5…
инструкцияSiemens iQ300 SN23HW26MM

Dishwasher
SN23HW26MM
en
User manual
Register your product on My Siemens and discover
exclusive services and offers.
siemens-home.bsh-group.com/welcome
The future moving in.
Siemens Home Appliances
Посмотреть инструкция для Siemens iQ300 SN23HW26MM бесплатно. Руководство относится к категории посудомоечные машины, 1 человек(а) дали ему среднюю оценку 7.5. Руководство доступно на следующих языках: английский. У вас есть вопрос о Siemens iQ300 SN23HW26MM или вам нужна помощь? Задайте свой вопрос здесь
- Dishwasher
- en
Дизайн
| Размещение бытового устройства | Отдельно стоящий |
| Размер | Полный размер (60 см) |
| Декоративная панель | Нет |
| Цвет двери | Белый |
| Цвет панели управления | Черный |
| Тип управления | Кнопки |
| Встроенный экран | Да |
| Встроенный умягчитель воды | Да |
| Длина шнура | 1.75 m |
| Длина выводящего шланга | 1.9 m |
| Длина входящего шланга | 1.5 m |
| Регулируемое расположение корзин | Верхний |
| Регулируемая высота верхней корзины | Да |
| Тип корзинки для столовых приборов | Bosch VarioFlex Basket |
| Тип отделения для столовых приборов | Корзина |
| Материал бака | Нержавеющая сталь |
| Возможность нижнего встраивания (топлесс) | Да |
Производительность
| Количество мест | 13 мест |
| Количество программ стирки | 5 |
| Класс шумовыделения | — |
| Уровень шума | 44 dB |
| Программы мойки посуды | Auto 45-65°C, Eco 50°C, Intensive 70°C, Quick 45°C, Quick 65°C |
| Система сушки | Теплообменник |
| Автоматические программы | Да |
| Количество настроек температуры | 5 |
| Температура (макс) | 70 °C |
| Продолжительность цикла | 295 min |
| Программируемое время старта (макс.) | 24 h |
| Таймер отложенного старта | Да |
| Функция AquaStop | Да |
| Защита стекла | Да |
| Половинная загрузка | Да |
| Максимальная температура горячего водоснабжения | 60 °C |
Эргономика
| Самоочищающийся фильтр | Да |
| Вспомогательный дозатор | Да |
| Автоматическое определение моющего средства | Да |
| Съемный верх | Да |
| Индикация времени до окончания | Да |
| Контроль с помощью Wi-Fi | Да |
| Поддержка управления со смартфона | Да |
Энергопитание
| Класс энергоэффективности | — |
| Потребление энергии за цикл | 0.754 кВт·ч |
| Энергопотребление на 100 циклов | — кВт·ч |
| Потребление воды за цикл | 10.1 L |
| Подключенная нагрузка | 2400 W |
| Входящее напряжение сети | 220 — 240 V |
| Частота входящего переменного тока | 50 — 60 Hz |
| Сила тока | 10 A |
| Тип разъема | Тип G |
Вес и размеры
| Вес | 51561 g |
| Ширина | 600 mm |
| Глубина | 600 mm |
| Высота | 845 mm |
| Ширина упаковки | 640 mm |
| Глубина упаковки | 680 mm |
| Высота упаковки | 880 mm |
| Масса брутто | 52800 g |
показать больше
Не можете найти ответ на свой вопрос в руководстве? Вы можете найти ответ на свой вопрос ниже, в разделе часто задаваемых вопросов о Siemens iQ300 SN23HW26MM.
Что мне делать при появлении в посудомоечной машине неприятного запаха?
В случае появления в посудомоечной машине неприятного запаха вы можете предпринять следующие шаги: — Очистить фильтры — Очистить разбрызгиватели — Очистить резиновые прокладки — Запустить программу мытья горячей водой — Запустить программу мойки при пустой посудомоечной машине
Следует ли предварительно ополаскивать посуду?
Перед помещением посуды в посудомоечную машину не рекомендуется ее ополаскивать. Для продления срока службы посудомоечной машины лучше всего складывать в нее посуду грязной. Грязь на посуде является смазкой для насоса посудомоечной машины.
Сколько средства для мытья посуды следует использовать?
Среднее количество средства для мытья посуды составляет около 25 г. Рекомендуется следовать указанным на упаковке инструкциям.
Как добавлять в посудомоечную машину соль?
Каждая посудомоечная машина оснащена отдельным отсеком для соли. Такие отсеки открываются поворотом ручки на отделении. Соль можно засыпать в отсек при помощи воронки.
Какой вес Siemens iQ300 SN23HW26MM?
Siemens iQ300 SN23HW26MM имеет вес 51561 g.
Какая высота Siemens iQ300 SN23HW26MM?
Siemens iQ300 SN23HW26MM имеет высоту 845 mm.
Какая ширина Siemens iQ300 SN23HW26MM?
Siemens iQ300 SN23HW26MM имеет ширину 600 mm.
Какая толщина Siemens iQ300 SN23HW26MM?
Siemens iQ300 SN23HW26MM имеет толщину 600 mm.
Какую маркировку энергоэффективности Siemens iQ300 SN23HW26MM имеет?
Siemens iQ300 SN23HW26MM имеет маркировку энергоэффективности -.
Инструкция Siemens iQ300 SN23HW26MM доступно в русский?
К сожалению, у нас нет руководства для Siemens iQ300 SN23HW26MM, доступного в русский. Это руководство доступно в английский.
Не нашли свой вопрос? Задайте свой вопрос здесь
Загрузить Руководство Пользователя:
Siemens IQ300 SN636X00MR в формате PDF: SN636X00MR-RU
Полноразмерная встраиваемая посудомоечная машина с пятью уровнями распределения воды обеспечивает превосходный результат мытья.
- VarioSpeed Plus: новая программа, ускоряющая мытье и сушку посуды в 3 раза с сохранением класса «А».
- При нажатии на кнопку система autoProgramme начинает контролировать весь процесс мытья посуды, блестящий результат.
- Функция hygienePlus: идеально для семей с маленькими детьми и людей с аллергией.
- aquaStop: гарантированная защита от протечек на весь срок службы прибора.
- Механический замок дверцы для защиты от непреднамеренного открывания в процессе работы посудомойки.
Техническая спецификация
Общая информация
- Вместимость — 13 комплектов посуды + 1 сервировочный
- Класс энергоэффективности: A Класс мытья: A Класс сушки: A
- Параметры потребления: 9.5 л/1 кВт/ч
- Уровень шума: 46 ДБ
- infoLight- индикатор прогресса с проекцией на пол, чтобы вы знали, когда процесс будет завершен
- Бережное отношение к хрупкой посуде и экономия электроэнергии благодаря передовой технологии HygieneDry (на основе технологии теплообменника)
- Система aquaStop обеспечивает защиту от любых протечек, как внутри прибора, так и в случае разрыва заливного шланга. В случае, если система AquaStop не сработает, компания BSH гарантирует возмещение ущерба, связанного с протечкой. Гарантия на возмещение ущерба действительна весь срок службы прибора — 10 лет.
- Благодаря замку ServoSchloss дверь закроется сама, если угол открытия менее 10 градусов
Техническая информация
- 6 Программ: Интенсивная 70 C°, Авто 45-65 C°, Эко 50 C°, Ночная программа 50 C°, Glass 40 C°, Быстрая 65 C°
- 3 специальные функции: VarioSpeedPlus, 1/2 загрузка, HygienePlus
- 5 программы
- Гидравлическая система speedMatic– инновационная технология использования воды для максимальной эффективности мытья посуды. Точный расчет направления водяных струй, подаваемых из вращающихся коромысел, и оптимальное давление позволяют добиваться максимального эффекта от каждой капли воды.
- Специальный отсек dosageAssist в ручке короба обеспечивает своевременное и равномерное растворение комбинированных моющих средств (таблеток и капсул)
- Бесщёточный мотор iQdrive с инверторным управлением обеспечивает эффективную работу с минимальным уровнем шума и сокращает расход воды
- aquaSensor управляет ходом автоматических программ, Датчик загрузки
- Посудомоечная машина подстраивается под тип моющего средства, обеспечивая оптимальный результат мытья
- Расход воды сокращается благодаря её попеременной подаче в верхнее и нижнее коромысло
- Электроника Регенерирования позволяет оптимальным образом расходовать соль, экономия может составит до 35%
- Трёхкомпонентный самоочищающийся фильтр
Комфорт и Безопасность
- Панель управления сверху
- Звуковой сигнал окончания хода программы
- Таймер запуска 1-24ч
- нержавеющая сталь
- Электронные индикаторы наличия соли и ополаскивателя
- LED индикатор наличия ополаскивателя
- VarioDrawer
- Три положения верхнего короба с системой rackmatic-3, легко переставить по высоте даже при полной загрузке
- полка для мытья чашечек эспрессо в верхнем коробе
- Система защиты стекла
Техническая информация
- Размеры прибора: (ВxШxГ): 81.5 x 59.8 x 55 см
- Металлическая пластина на столешницу для защиты от пара
- Ножки, регулируемые по высоте до 6 см, подходит для кухонь с высотой столешницы 90 см
Table of Contents for Siemens iQ 300 varioPerfect:
-
Features en 25 Etagere Use the etagere and space under- neath for small cups and glasses or for large items of cutlery, e.g. wooden spoons or serving cutlery. You can adjust the height of the etagere. 1 If you do not need the etagere, you can fold it up. Adjusting etagere 1 You can adjust the height of the etagere. 1. Position the etagere vertically and pull it upwards . 2 3 1 1 2 2. Position the etagere at a slight angle and move to the right height �
-
Features en 21 Additional func- tion Use ¡ Energy and water con- sumption are increased. Half Load ¡ Switch on with small loads. ¡ It is recommended adding less detergent to the detergent dis- penser than for a full machine load. ¡ The running time is shortened. ¡ Energy and water con- sumption are reduced. HygienePlus ¡ To ensure a higher hy- giene status
-
en Tableware 36 Cause Recommendation The water temperat- ure of the programme is too high. Select a programme with lower temperat- ures. After the programme has ended, take glass- ware and cutlery out of the appliance without delay. Arrange tableware Arrange the tableware correctly to optimise the dishwashing result and prevent damage to both the appli- ance and tableware. Tips ¡ Using the appliance allows you to save energy and water compared to washing-up by hand. �
-
en Before using for the first time 28 Before using for the first time Before using for the first time Before using for the first time Configure the settings for initial start- up. Performing initial start-up On initial start-up or after a reset to the factory settings, you will need to make settings. Requirement:»The appliance has been installed and connected.» →Page13 1. «Add special salt.» →Page29 2. «Add rinse aid.» →Page31 3. «Switch on the appliance.&qu
-
*9001496633* 9001496633 (001005) 440 MV en BSH Hausgeräte GmbH Carl-Wery-Straße 34 81739 München GERMANY www.siemens-home.bsh-group.com Manufactured by BSH Hausgeräte GmbH under the trademark licence of Siemens AG
-
en Troubleshooting 54 Fault Cause Troubleshooting Plastic parts are discol- oured. Tableware has been pre- cleaned too intensely. The sensors chose a weaker pro- gramme. Stubborn soiling cannot be entirely removed. ▶ Only remove large remnants of food and do not prerinse tableware. Removable streaks are present on glasses, glass- ware with a metallic appear- ance and cutlery. Amount of rinse aid to be dispensed is set
-
Cleaning and servicing en 43 Filter system The filter system removes coarse soiling from the dishwashing cycle. 1 2 3 1 Micro filter 2 Fine filter 3 Coarse filter Cleaning filters Soiling in the dishwashing water may block the filters. 1. After each wash check the filters for residue. 2. Turn the coarse filter anticlockwise and remove the filter system . ‒ Check that no foreign objects fall into the sump. 1 2 3. Pull down the micro filter to re- move. 4. Press the locking catches to- gether and lift the coa
-
en Technical specifications 60 With any warranty claims, we will make sure that your appliance is re- paired by trained after-sales techni- cians using genuine spare parts, in- cluding after the manufacturer’s war- ranty has expired. Function-relevant genuine spare parts according to the corresponding Eco- design Order can be obtained from Customer Service for a period of at least 10 years from the date on which your appliance was placed on the market within the European Eco-
-
Detergent en 33 Detergent Description Liquid detergent Liquid detergent works faster and is recommen- ded for shorter Pro- grammes without PreR- inse. Sometimes liquid deter- gent may leak out despite the detergent dispenser being closed. This is not a fault and is non-critical if you remember the follow- ing: ¡ Only choose a pro- gramme without PreR- inse. ¡ Do not select timer pro- gramming for starting the programme. The dosage can be adjus- ted to the level of soiling. Tip:Suitable detergents are available
-
Dishwasher SR… en User manual Register your product on My Siemens and discover exclusive services and offers. siemens-home.bsh-group.com/welcome The future moving in. Siemens Home Appliances
-
Cleaning and servicing en 41 Basic setting Display text Selection Description ¡ The Eco 50° programme has been selected in conjunction with one or more additional functions. ¡ The button lock has been activated. 2 Level «o:00» switches Eco drying off. 1 Factory setting (may vary according to model) 2 Depending on the appliance specifications Changing basic settings 1. Open the appliance door. 2. Press . 3. Hold programme button A and press repeatedly unti
Questions, Opinions and Exploitation Impressions:
You can ask a question, express your opinion or share our experience of Siemens iQ 300 varioPerfect device using right now.