Перейти к контенту
![]()
Русские электронные инструкции по эксплуатации
Постоянно обновляемый большой каталог документации по эксплуатации и использованию современных устройств и оборудования на русском языке. Бесплатное скачивание файлов.
Поиск:
Главная
♥ В закладки
Просмотр инструкции в pdf


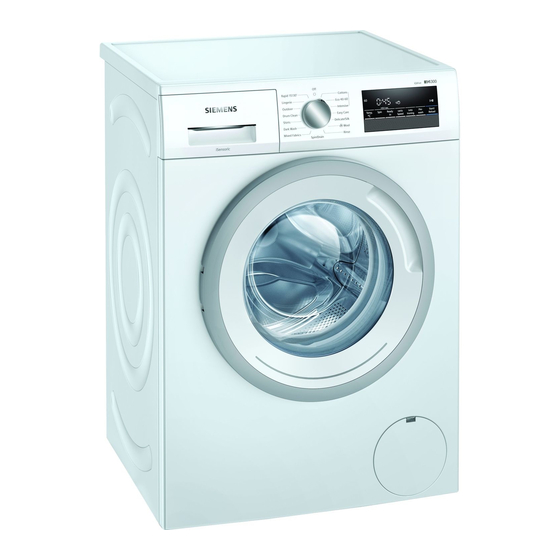
Инструкция по эксплуатации стиральной машины Siemens iQ300 WG42A2X4OE.
Скачать инструкцию к стиральной машине Siemens iQ300 WG42A2X4OE (5,15 МБ)

Инструкции по эксплуатации стиральных машин Siemens
« Инструкция к стиральной машине Bosch (Бош) Serie | 6 WAT286H2OE
» Инструкция к стиральной машине Beko ELE 67512 ZSW
Вам также может быть интересно

Инструкция к сушильной машине Siemens WT45M260OE

Инструкция к встраиваемой электрической варочной панели Siemens ET 645TN11R

Инструкция к стиральной машине Siemens iQ500 VarioPerfect WS12K240OE

Инструкция к стиральной машине Siemens WM16Y792OE

Инструкция к стиральной машине Siemens WD 15H541 OE

Инструкция к холодильнику Siemens KG39NAI31R

Инструкция к холодильнику Siemens HyperFresh iQ500 KG39NAI3AR

Инструкция к стиральной машине Siemens WS10G240OE
Добавить комментарий
Имя *
Email *
Сайт
Комментарий


![]()


Сохранить моё имя, email и адрес сайта в этом браузере для последующих моих комментариев.
- Добавить инструкцию
- Заказать инструкцию
- Политика конфиденциальности
- Manuals
- Brands
- Siemens Manuals
- Washer
- iQ300 iSensoric WM14N202GB
- User manual and installation instructions
-
Contents
-
Table of Contents
-
Troubleshooting
-
Bookmarks
Quick Links
Washing machine
WM14N202GB
en
User manual and installation instructions
Register your product on My Siemens and discover
exclusive services and offers.
siemens-home.bsh-group.com/welcome
The future moving in.
Siemens Home Appliances
Related Manuals for Siemens iQ300 iSensoric WM14N202GB
Summary of Contents for Siemens iQ300 iSensoric WM14N202GB
-
Page 1
Washing machine WM14N202GB User manual and installation instructions Register your product on My Siemens and discover exclusive services and offers. siemens-home.bsh-group.com/welcome The future moving in. Siemens Home Appliances… -
Page 2: Table Of Contents
Table of contents 1 Safety ………. 4 10 Before using for the first time…….. 32 1.1 General information…. 4 10.1 Starting an empty washing 1.2 Intended use……. 4 cycle …….. 32 1.3 Restriction on user group… 4 1.4 Safe installation …… 5 11 Laundry…….. 33 1.5 Safe use …….. 7 11.1 Preparing the laundry ….. 33 1.6 Safe cleaning and mainten-…
-
Page 3
14 Childproof lock…… 40 14.1 Activating the childproof lock ……… 40 14.2 Deactivating the childproof lock ……… 40 15 Basic settings…… 41 15.1 Overview of the basic set- tings…….. 41 15.2 Changing the basic set- tings…….. 42 16 Cleaning and servicing …. 42 16.1 Tips on appliance care… 42 16.2 Cleaning the drum…. 42 16.3 Cleaning the detergent… -
Page 4: Safety
en Safety 1 Safety Observe the following safety instructions. 1.1 General information ¡ Read this instruction manual carefully. ¡ Keep the instruction manual and the product information safe for future reference or for the next owner. ¡ Do not connect the appliance if it has been damaged in transit. 1.2 Intended use Only use this appliance: ¡…
-
Page 5: Safe Installation
Safety en 1.4 Safe installation Take note of the safety instructions when installing the appliance. WARNING ‒ Risk of electric shock! Improper installation is dangerous. ▶ Connect and operate the appliance only in accordance with the specifications on the rating plate. ▶ Connect the appliance to a power supply with alternating cur- rent only via a properly installed socket with earthing.
-
Page 6
en Safety WARNING ‒ Risk of injury! The high weight of the appliance may result in injury when lifted. ▶ Do not lift the appliance on your own. If this appliance is not correctly installed in a washer-dryer stack, the installed appliance may fall. ▶… -
Page 7: Safe Use
Safety en ▶ Wear protective gloves when installing and transporting the ap- pliance. 1.5 Safe use WARNING ‒ Risk of electric shock! If the appliance or the power cord is damaged, this is dangerous. ▶ Never operate a damaged appliance. ▶ Never pull on the power cord to unplug the appliance. Always unplug the appliance at the mains.
-
Page 8
en Safety WARNING ‒ Risk of poisoning! Detergents and care products may result in poisoning if con- sumed. ▶ If accidentally swallowed, seek medical advice. ▶ Keep detergents and care products out of the reach of children. WARNING ‒ Risk of explosion! Laundry that has been pretreated with cleaning agents that con- tain solvents may cause an explosion in the appliance. -
Page 9: Safe Cleaning And Maintenance
Safety en CAUTION ‒ Risk of chemical burns! If the detergent drawer is opened, detergent and care products may spray out from the appliance. Contact with eyes or skin may cause irritation. ▶ Rinse eyes and/or skin thoroughly with clean water if they come into contact with detergents or care products.
-
Page 10: Preventing Material Damage
en Preventing material damage Make sure that the length of the ▶ Preventing material damage 2 Preventing material thread on the connection to the water tap is at least 10 mm. damage If the water pressure is too high or too low, the appliance may not be Follow these instructions to avoid ma- Preventing material damage able to operate properly.
-
Page 11: Environmental Protection And Saving Energy
Environmental protection and saving energy en Remove all detergent residue, Reduce the washing temperature for ▶ spray residue or other residues im- lightly and normally soiled laundry. mediately if they come into contact a At low temperatures, the appliance with the appliance. consumes less energy.
-
Page 12: Installation And Connection
en Installation and connection Remove any packaging and pro- Installation and connection 4 Installation and con- tective covers completely from the appliance. nection For the environmentally friendly Installation and connection disposal of the packaging materi- 4.1 Unpacking the appliance als, observe the information on the topic of Note: Please read the information in → «Disposing of packaging»,…
-
Page 13: Contents Of Package
Installation and connection en 4.2 Contents of package After unpacking all parts, check for any damage in transit and completeness of the delivery. Washing machine WARNING Risk of electric shock! Accompanying documents The appliance contains live parts. Touching live parts is dangerous. Water inlet hose Do not operate the appliance ▶…
-
Page 14: Removing The Transit Bolts
en Installation and connection ATTENTION! Installation loca- Requirements If the appliance is installed in areas tion exposed to frost or outdoors, frozen On a wall Do not trap the residual water may damage the appli- hoses between ance and frozen hoses may crack or the wall and the split.
-
Page 15: Connecting The Appliance
Installation and connection en Unscrew and remove all four Put on the four cover caps. screws for the transit bolts with a WAF 13 wrench. Press down on the four cover caps. Pull the power cord out of the holder. 4.5 Connecting the appliance Remove the four sleeves.
-
Page 16: Aligning The Appliance
en Installation and connection Connect the water inlet hose. Note: Observe the draining heights. The draining heights are: minimum: 60 cm, maximum: 100 cm. Drainage into a Secure the con- siphon nection point with a (24–40 mm) hose clamp. Drainage into a Fix and secure washbasin the water outlet Connect the water inlet hose to a…
-
Page 17: Connecting The Appliance To The Electricity Supply
Installation and connection en Loosen the lock nuts using a WAF Screw the lock nuts tightly against 17 wrench by turning it in a clock- the housing using a WAF 17 wise direction. wrench. In doing so, hold the foot tight and To align the appliance, turn the ap- do not adjust its height.
-
Page 18
en Familiarising yourself with your appliance Familiarising yourself with your appliance 5 Familiarising yourself with your appliance Familiarising yourself with your appliance 5.1 Appliance You can find an overview of the parts of your appliance here. On certain models, specific details such as the colour and shape may differ from those pictured. -
Page 19: Familiarising Yourself With
Familiarising yourself with your appliance en 5.2 Detergent drawer Measuring aid for liquid deter- gent → «Using a measuring aid for liquid detergent», Page 38 Compartment II: ¡ Detergent for main wash ¡ Water softener ¡ Bleach ¡ Stain remover Compartment ¡ Fabric softener ¡…
-
Page 20
en Display Display 6 Display The display shows the current settings, options or relevant information. Display Display Designation Description 0:40 Programme dura- Approximate expected programme dura- tion/programme tion or programme time remaining. time remaining «Ready in» time The programme end has been set and the remaining number of hours is displayed. -
Page 21
Display en Display Designation Description End of pro- Programme status gramme Childproof lock ¡ lights up: The childproof lock is activ- ated. ¡ flashes: The childproof lock is activated and the appliance has been operated. → «Deactivating the childproof lock», Page 40 … -
Page 22: Programmes
en Buttons Buttons 7 Buttons The selection of programme settings depends on the programme that is set. Buttons You can see the selection options for each programme in the overview for → «Programmes», Page 24. Button Selection Description Start / Reload ¡ Start Start, cancel or pause the pro- gramme.
-
Page 23
Buttons en Button Selection Description The laundry is damp enough after washing that it needs to be hung out on a washing line. -
Page 24
en Programmes Less Ironing Prewash Spin – –– (Rinse Hold) – vario Speed Max. spin speed 1400 1400 (rpm) Max. temperature (°C) Max. load (kg) -
Page 25
Programmes en Less Ironing Prewash Spin – –– (Rinse Hold) – vario Speed Max. spin speed 1400 (rpm) – Max. temperature (°C) Max. load (kg) -
Page 26
en Programmes Less Ironing Prewash Spin – –– (Rinse Hold) – vario Speed Max. spin speed 1200 1400 (rpm) Max. temperature (°C) Max. load (kg) -
Page 27
Programmes en – Less Ironing – – – Prewash Spin – –– (Rinse – Hold) – – – vario Speed Max. spin speed 1400 1400 1200 (rpm) – – Max. temperature (°C) Max. load (kg) -
Page 28
en Programmes – Less Ironing – Prewash Spin – –– (Rinse – Hold) – – vario Speed Max. spin speed 1200 (rpm) – Max. temperature (°C) Max. load (kg) -
Page 29
Programmes en – Less Ironing – Prewash Spin – –– (Rinse – Hold) – vario Speed Max. spin speed (rpm) Max. temperature (°C) Max. load (kg) -
Page 30
en Programmes Less Ironing Prewash Spin – –– (Rinse Hold) – vario Speed Max. spin speed (rpm) Max. temperature (°C) Max. load (kg) -
Page 31
Programmes en – Less Ironing – Prewash Spin – –– (Rinse Hold) vario Speed Max. spin speed 1200 (rpm) Max. temperature (°C) Max. load (kg) -
Page 32: Accessories
en Accessories Accessories 9 Accessories Use original accessories. These have been made especially for your appliance. Accessories Order number Water inlet hose exten- Extend the water inlet WZ10131 sion hose for cold water or AquaStop (approx. 2.50 Pedestal with drawer Install the appliance at a WZWP20W raised height so that it can be easily loaded and…
-
Page 33: Laundry
Laundry en Pull out the detergent drawer. a The display shows the remaining programme duration. a After the programme has ended, the display shows: «End». Start the first wash cycle or set the programme selector to Off switch off the appliance. → «Basic operation», Page 37 Laundry 11 Laundry…
-
Page 34: Sorting Laundry
en Laundry – Some stubborn or dried-in stains To improve washing results and ▶ can be removed by washing prevent discolouration, sort the several times laundry according to the following – Wash large and small items of criteria before washing. laundry together –…
-
Page 35: Detergents And Care
Detergents and care products en Symbol Washing process Recommended pro- gramme Particularly gentle Delicates/Silk for washing by hand Hand wash Wool Not suitable for machine-washing – Notes Detergents and care products 12 Detergents and care ¡ Only use liquid detergents that are self-flowing products ¡…
-
Page 36: Detergent Dosage
en Detergents and care products Tip: Visit www.cleanright.eu to find further information on detergents, care products and cleaning agents for domestic use. 12.2 Detergent dosage The detergent dosage depends on: You can find out how hard your ¡ The amount of laundry water is from your local water com- pany or measure it yourself using ¡…
-
Page 37: Basic Operation
Basic operation en Adjust the programme settings. ▶ Basic operation 13 Basic operation → «Programmes», Page 24 Note: The programme settings are Basic operation not saved permanently for the pro- 13.1 Switching on the appli- gramme. ance 13.4 Loading laundry Turn the programme selector to a ▶ programme.
-
Page 38: Using A Measuring Aid For Liquid Detergent
en Basic operation 13.5 Using a measuring aid 13.6 Adding detergent and for liquid detergent care product If you order the measuring aid as an Notes accessory, you must use the measur- ¡ Please read the information in the ing aid. Safety → Page 4 and Preventing material damage → Page 10 sec- Press down on the insert and re- tions to ensure that you use the…
-
Page 39: Soaking Laundry
Basic operation en Press Ready In repeatedly until the The appliance door remains display indicates the desired locked for safety reasons if the «Ready in» time. temperature and water levels are high. Press Start / Reload. – If the temperature is high, start the Rinse programme.
-
Page 40: Switching Off The Appli- Ance
en Childproof lock a The display shows . 13.14 Switching off the appli- a The controls are locked. ance a The childproof lock remains active Turn the programme selector to even after the appliance has been switched off. 14.2 Deactivating the child- proof lock Requirement: To deactivate the childproof lock, the appliance must…
-
Page 41: Basic Settings
Basic settings en Basic settings 15 Basic settings You can configure the appliance to meet your needs. Basic settings 15.1 Overview of the basic settings Below is an overview of the basic settings on your appliance. Basic setting Programme Value Description position End signal 0 (off) Set the volume of the signal at the 1 (quiet)
-
Page 42: Changing The Basic Set- Tings
en Cleaning and servicing 15.2 Changing the basic set- Remove all de- Fresh deposits tergent residue, are easier to re- tings spray residue or move without Set the programme selector to po- other residues leaving any sition 1. immediately. residue. Keep the appli- This allows the ance door and residual water to…
-
Page 43: Descaling
Cleaning and servicing en Press down on the insert and re- Fit the insert and lock it into place. move the detergent drawer. Cleaning the opening for the deter- Press out the insert upwards from gent drawer. below. Push in the detergent drawer. Clean the detergent drawer and in- sert with water and a brush, and 16.4 Descaling…
-
Page 44: Cleaning The Drain Pump
en Cleaning and servicing Slide a sufficiently large receptacle 16.5 Cleaning the drain pump under the opening. Clean the drain pump in the event of faults, e.g. blockages or rattling noises. Emptying the drain pump Note: Please read the information in the Safety → Page 4 and Preventing material damage → Page 10 sections to ensure that you use the appliance safely.
-
Page 45
Cleaning and servicing en Cleaning the drain pump CAUTION — Risk of scalding! When you wash at high temperat- Note: Please read the information in ures, the detergent solution gets the Safety → Page 4 and Preventing hot. material damage → Page 10 sections Do not touch the hot detergent to ensure that you use the appliance ▶… -
Page 46: Cleaning The Water Outlet Hose At The Siphon
en Cleaning and servicing Insert the maintenance flap and Clean the water outlet hose and si- lock it into place. phon connecting piece. Close the maintenance flap. Reattach the water outlet hose and secure the connection point using the hose clamp. 16.6 Cleaning the water outlet hose at the siphon Switch off the appliance.
-
Page 47
Cleaning and servicing en Connect the water inlet hose and Cleaning the filter on the tap check for leaks. Note: Please read the information in the Safety → Page 4 and Preventing material damage → Page 10 sections to ensure that you use the appliance safely. Requirement: The water inlet hose is empty. -
Page 48
en Cleaning and servicing Use pliers to remove the filter. Clean the filter with a small brush. Reinsert the filter. Connect the hose and check for leaks. -
Page 49: Troubleshooting
Troubleshooting en Troubleshooting 17 Troubleshooting You can rectify minor faults on your appliance yourself. Read the troubleshoot- Troubleshooting ing information before contacting after-sales service. This will avoid unneces- sary costs. WARNING Risk of electric shock! Incorrect repairs are dangerous. Repairs to the appliance should only be carried out by trained specialist ▶…
-
Page 50
en Troubleshooting Fault Cause and troubleshooting The water pressure is low. No remedial action possible. The filters in the water inflow are blocked. Clean the filters in the water inflow → Page 46. ▶ The tap is turned off. Turn on the tap. ▶… -
Page 51
Troubleshooting en Fault Cause and troubleshooting The programme does → «Deactivating the childproof lock», Page 40 ▶ not start. Ready In is activated. Check whether Ready In is activated. ▶ → «Buttons», Page 22 Laundry is caught in the door. Open the door again. Remove any trapped laundry. Close the door. -
Page 52
en Troubleshooting Fault Cause and troubleshooting The water is not drain- Immediate measure: Mix one tablespoon of fabric ▶ ing. softener with 0.5 litres of water and pour the mix- ture into the left-hand compartment (not for outdoor clothing, sportswear or items stuffed with down). Reduce the amount of detergent for the next wash- ▶… -
Page 53
Troubleshooting en Fault Cause and troubleshooting No water is visible in Water is below the visible area. the drum. Not a fault – no action required. ▶ Do not add any extra water to the appliance while it ▶ is operating. Drum jerks after the This is caused by an internal motor test. -
Page 54
en Troubleshooting Fault Cause and troubleshooting The spin programme Drain pipe or water outlet hose is blocked. does not start. Clean the drain pipe and the water outlet hose. ▶ Drain pipe or water drain hose is caught or jammed. Ensure that the drain pipe and water drain hose are ▶… -
Page 55
Troubleshooting en Fault Cause and troubleshooting Detergent or fabric Too much detergent/fabric softener in the detergent softener drips off the drawer. seal and collects on When dosing liquid detergent and fabric softener, ▶ the door or in the seal observe the marking in the detergent drawer and fold. -
Page 56
en Troubleshooting Fault Cause and troubleshooting Water is leaking out at Water inlet hose is not correctly/securely connected. the water inlet hose. Connect the water supply hose correctly. Connect- ing the water inlet hose Tighten the screw connection. Water is leaking out at The water outlet hose is damaged. -
Page 57: Transportation, Storage And Disposal
Transportation, storage and disposal en Drain the remaining detergent 17.1 Emergency release solution. Releasing the door → «Cleaning the drain pump», Page 44 Requirement: The drain pump is Detach the hoses. empty. → Page 44 ATTENTION! Escaping water may 18.2 Inserting the transit cause material damage. bolts Do not open the door if you can ▶…
-
Page 58: Using The Appliance Again
en Transportation, storage and disposal Insert all screws into the four 18.4 Disposing of old appli- transit bolts and tighten slightly. ance Valuable raw materials can be re- used by recycling. WARNING Risk of harm to health! Children can lock themselves in the appliance, thereby putting their lives at risk.
-
Page 59: Customer Service
Customer Service en 19.1 Product number (E-Nr.) Customer Service 19 Customer Service and production number If you have any queries on use, are Customer Service (FD) unable to rectify faults on the appli- You can find the product number (E- ance yourself or if your appliance Nr.) and the production number (FD) needs to be repaired, contact Cus- on the appliance’s rating plate.
-
Page 60
en Consumption values Consumption values 20 Consumption values The following information is provided in accordance with the EU Ecodesign Consumption values Regulation. The values given for programs other than the Eco 40-60 are indicat- ive only and were determined in accordance with the applicable standard EN60456. -
Page 61: Technical Specifications
Technical specifications en of printing its web address had not Technical specifications 21 Technical specifica- yet been published. Please then fol- low the instructions on searching for tions models. The model identifier is made up of the characters before the slash Facts and figures for your appliance Technical specifications in the product number (E-Nr.) on the can be found here.
-
Page 64
Valid within Great Britain: Imported to Great Britain by BSH Home Appliances Ltd. Grand Union House Old Wolverton Road Wolverton, Milton Keynes MK12 5PT United Kingdom Manufactured by BSH Hausgeräte GmbH under the trademark licence of Siemens AG *9001543719* 9001543719 (010219)
Загрузить Руководство Пользователя:
Siemens WG42A2X4OE IQ300 в формате PDF: WG42A2X4OE_RU
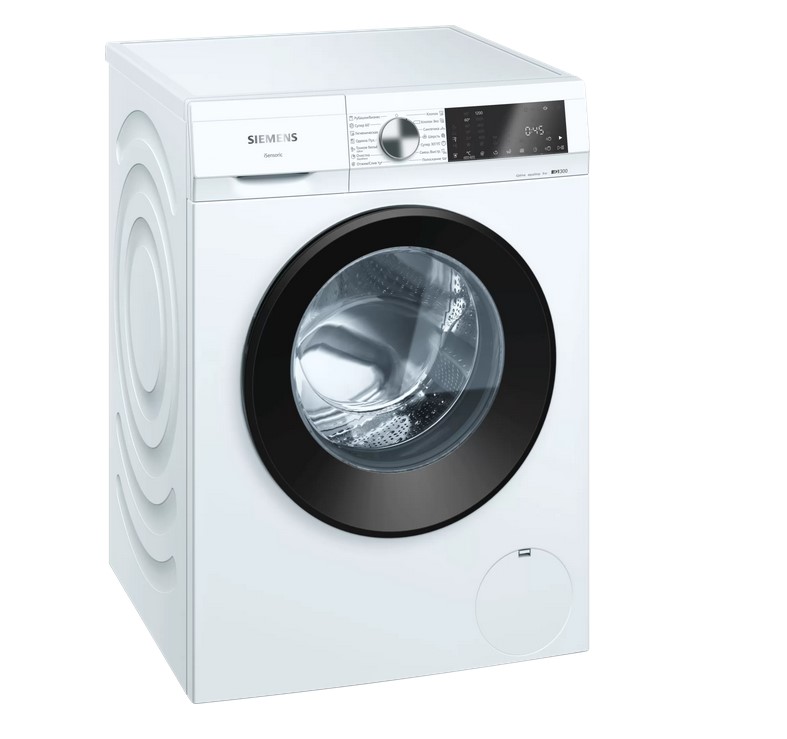
Новая стиральная машина с технологией iSensoric и умным двигателем iQdrive.
- Система aquaStop: гарантированная защита от протечек на весь срок службы прибора.
- Благодаря большому LED-дисплею с сенсорным управлением основные опции и функции всегда на виду.
- Инновационный бесщёточный двигатель iQdrive с 10-летней гарантией обеспечивает тихую и стабильную работу прибора.
- Технология waveDrum: бережная стирка ваших вещей благодаря уникальной форме захватов и каплеобразному рельефу барабана.
- Технология antiVibration: особый рельеф боковых стенок машины обеспечивает стабильную и тихую работу прибора.
Техническая спецификация
Общая информация
- Максимальная загрузка: 9 кг
- Макс. скорость отжима: 1200 об/мин
- Класс эффективности отжима: B
- Класс энергоэффективности: A-30%
- aquaStop — защита от протечек с гарантией на весь срок службы прибора
- iQdrive- бесщеточный мотор нового поколения , 10-летняя гарантия
- Полностью автоматическая стиральная машина
- Уровень шума во время фазы стирки при стандартной программе Хлопок 60° при полной загрузке: dB (A): 50
- Уровень шума при отжиме при стандартной программе Хлопок 60°C при полной загрузке, dB (A) : 72
Техническая информация
- Регулирование настроек программ и выбор дополнительных опций с помощью клавиш на дисплее TouchControl: Старт/Пауза/Дозагрузка, Антисмин, SpeedPerfect, Скорость отжима/Режим «Без отжима»
- StainRemoval: удаление наиболее распространённых трудновыводимых пятне.
Комфорт и Безопасность
- Барабан waveDrum
- Электронный выбор программ стирки и специальных функций
- 3D-AQUATRONIC — быстрое и равномерное смачивание белья
- Непрерывная система дозирования воды по степени загрузки и типу ткани
- Контроль пенообразования
- Подавление дисбаланса при отжиме
- Самоочищающаяся кювета для моющего средства
- Индикация передозировки моющего средства
- Блокировка от детей
- Акустический сигнал окончания программы
- Звукоизоляция нижней крышки
Техническая информация
- Размеры (В х Ш х Г): 84.5 x 59.7 x 58.8 см
- Возможность встраивания под столешницу
Посмотреть инструкция для Siemens IQ300 iSensoric WM14N272NL бесплатно. Руководство относится к категории стиральные машины, 5 человек(а) дали ему среднюю оценку 9. Руководство доступно на следующих языках: -. У вас есть вопрос о Siemens IQ300 iSensoric WM14N272NL или вам нужна помощь? Задайте свой вопрос здесь
Не можете найти ответ на свой вопрос в руководстве? Вы можете найти ответ на свой вопрос ниже, в разделе часто задаваемых вопросов о Siemens IQ300 iSensoric WM14N272NL.
При какой температуре следует стирать одежду?
Рекомендуемая температура стирки указывается на этикетке.
Стоит ли использовать средство для удаления накипи при стирке в стиральной машине?
Необходимость использования средства для удаления накипи отсутствует. Предотвратить появление накипи можно уменьшив количество стирок при высокой температуре и благодаря использованию рекомендуемого количества моющего средства при стирке.
Как предотвратить появление неприятного запаха в стиральной машине?
Возникновения неприятных запахов можно избежать периодической стиркой при 60 градусах и благодаря использованию рекомендуемого количества моющего средства.
Какой вес Siemens IQ300 iSensoric WM14N272NL?
Siemens IQ300 iSensoric WM14N272NL имеет вес 71119 g.
Какие сертификаты Siemens IQ300 iSensoric WM14N272NL имеет?
Siemens IQ300 iSensoric WM14N272NL имеет следующие сертификаты: CE, VDE.
Какая высота Siemens IQ300 iSensoric WM14N272NL?
Siemens IQ300 iSensoric WM14N272NL имеет высоту 848 mm.
Какая ширина Siemens IQ300 iSensoric WM14N272NL?
Siemens IQ300 iSensoric WM14N272NL имеет ширину 598 mm.
Какая толщина Siemens IQ300 iSensoric WM14N272NL?
Siemens IQ300 iSensoric WM14N272NL имеет толщину 550 mm.
Инструкция Siemens IQ300 iSensoric WM14N272NL доступно в русский?
К сожалению, у нас нет руководства для Siemens IQ300 iSensoric WM14N272NL, доступного в русский. Это руководство доступно в -.
Не нашли свой вопрос? Задайте свой вопрос здесь