-
Page 1
F10E02101 E L E C T R O N I C F L A S H EF-500 DG SUPER INSTRUCTIONS BEDIENUNGSANLEITUNG MODE D’EMPLOI INSTRUCCIONES ISTRUZIONI PER L’USO BRUGSANVISNING GEBRUIKSAANWIJZING 2~13 ENGLISH 14~25 DEUTSCH 26~39 FRANÇAIS 40~52 ESPAÑOL 53~65 ITALIANO 66~77 DANSK 78~89 NEDERLANDS… -
Page 3
EF-500 SUPER EO… -
Page 4
3.AF 12.MODE 13.SEL 16.ZOOM 17.TEST 18.LIGHT EOS-1V, EOS 3, EOS 7, EOS 55, EOS Kiss , NEW EOS Kiss, EOS IX E, EOS IX 50, D30 TEST TEST… -
Page 6
◄LOCK ZOOM ETTL TTL 17mm 17mm ZOOM LIGHT LIGHT… -
Page 7
ETTL TTL ETTL TTL ETTL ETTL ETTL TTL 0.7m 9m 17 28mm 0.5m 35mm 0.7m EOS700 750 850… -
Page 8
TTL, M(1/1, 1/2) M(1/4, 1/8) M(1/16 1/32) MULTI ETTL TTL 1/1 1/128 EOS700 750 850 MODE EOS700 750 850… -
Page 9
ETTL M MODE ETTL P Tv Av M DEP ETTL EF-500 SUPER EOS-1V 3 7 EOS620 650 700 850 1000… -
Page 10
1 199Hz EOS700 750 850 MULTI MODE 0 60 75 90 0 60 75 90 0 60 75 90 120 150 180… -
Page 11
0.5 2m EF-500 SUPER EF-500 SUPER EOS750 EOS850 0.5m 5m 1m 5m MODE C1 C4 ETTL MODE ETTL MODE 1 2 3… -
Page 12
MODE… -
Page 13
ETTL ETTL EF-500 SUPER ETTL MODE ETTL EOS-1V EOS-1V 1 2 3 8 1 1 1 1 8 ETTL MODE ETTL MODE… -
Page 14
ETTL MODE ETTL M MULTI MODE… -
Page 15
MULTI ETTL M MULTI MODE MODE MODE EF-500 SUPER ETTL ETTL EF-500 SUPER… -
Page 17
1 30 MODE MODE EF-500 SUPER 50 ISO 100 m 105mm 1 700 28mm 105mm 17mm 335g 77 139 117… -
Page 18
ENGLISH Thank you very much for purchasing the Sigma EF-500 SUPER EO Electronic Flash. This product is specifically developed for the Canon EOS series SLR cameras. Depending on the camera model, functions and operation may vary. Please read this instruction booklet carefully. To add to your enjoyment of photography, the flash has a variety of features. -
Page 19: Description Of The Parts
DESCRIPTION OF THE PARTS EXTERNAL PARTS 1.Flash Head 2.Built-in Wide Panel 3.AF Auxiliary Light 4.Bounce Angle; Up and Down 5.Bounce Angle; Right and Left 6.Bounce Lock and Release Button; Up and Down 7.Swivel Lock and Release Button; Right and Left 8.LCD Panel 9.Battery Cover 10.Shoe Ring 11.Shoe CONTROLS 12.MODE Button 13.<SEL>…
-
Page 20: Adjusting The Flash Head
If it still blinks, after this procedure, check the battery power. ADJUSTING THE FLASH HEAD Depress the Bounce “Up and Down” Lock and Release Button, and adjust the flash head to the desired position. appears on the LCD panel, when you turn on the flash, and if this mark blinks, then the flash head is adjusted to an incorrect position.
-
Page 21: Limits Of Continuous Shooting
1. Set the camera’s mode to Full-AUTO Mode. ( Usually Mode. If the camera does not have Mode, set to P Mode.) 2. Turn on the power switch of the flash, the ETTL (TTL) mark will appear on the LCD panel and flash will start charging. 3.
-
Page 22: Second Curtain Synchronization
1. Set the camera’s exposure mode to M. 2. Press the MODE button on the flash unit to select M. 3. The guide number value blinks when you press the SEL button. 4. Press button to set the desired flash power output. 5.
-
Page 23: Modeling Flash
so, please refer to your camera’s instruction manual regarding “exposure correction”. will disappear when Hi-speed sync (FP Flash) is cancelled. FE LOCK “FE” lock mode allows you to choose exposure for the part of the viewfinder, and lock it in, before taking the picture. 1.
-
Page 24: Multi Flash Mode
MULTI FLASH MODE While the shutter is open, the flash will fire repeatedly. By doing so a series of images of the subject will be exposed in one frame. A dark background with a bright subject shows more effectively in this mode. It is possible to set the firing frequency between 1Hz and 199Hz.
-
Page 25: Channel Setting
within the range of 1m/3ft~5m/16ft from the subject. Preparation for Wireless Flash Channel Setting In case of other people are using Wireless Flash mode near you, your flash may be connected with the other person’s flash and your flash may fire. In this circumstance, please set the different channel for your flash from that of the other person’s flash.
-
Page 26
4. Place the Slave Unit at the desired position. 5. Make sure that the Master Unit and Slave Unit have both been charged. Master Unit’s Ready Light is lit and Slave Unit’s AF Auxiliary Light is blinking. 6. Focus on the subject and take the picture. Master Flash Unit OFF + Slave Flash Unit(s) Please set the Master Flash unit as following. -
Page 27: Wireless Manual Flash
Wireless High-Speed Sync (FP Flash) 1. Please set the master flash to Wireless Flash mode. (Refer to Page 10) 2. Press the + or – button to set to (Master Flash unit firing ON) or (Master Flash unit firing OFF). 3.
-
Page 28: Wireless Multi Flash
3. Press the + button or – button to select indicator. (blinking) 4. Press the SEL button, make the flash output display and blink. 5. Press the + button or – button to set the flash output amount for 1. 6.
-
Page 29: Designated Slave Flash
If you are using a Canon brand flash unit with ETTL function on your camera, and the EF-500 Super flash unit as a slave unit, please do not use ETTL function, as the monitor pre-flash may cause the slave to fire prematurely. Designated Slave Flash If you use two or more EF-500 Super flash units, you can designate which flashes will fire together by using the channel settings.
-
Page 30
WEIGHT : 335 g/11.8oz. DIMENSIONS : 77mm(W)/3.0in. x 139mm(H)/5.5in. x 117mm(L)/4.6in. -
Page 31
DEUTSCH Vielen Dank, dass Sie sich für ein SIGMA EF-500 Super EO Blitzgerät entschieden haben. Dieses Produkt wurde speziell für den Einsatz an Spiegelreflexkameras der Canon EOS-Serie entwickelt. Abhängig von dem jeweiligen Kameramodell können Funktionen und Handhabung differieren. Bitte lesen Sie diese Gebrauchsanleitung bezogen auf Ihr Kameramodell sorgfältig durch. -
Page 32: Beschreibung Der Teile
Beschreibung der Teile Externe Teile 1.Blitzkopf 2.Eingebaute Weitwinkel-Streuscheibe 3.AF-Hilfsilluminator 4.Verstellwinkel vertikal 5.Schwenkwinkel horizontal 6.Verstellver –u. entriegelung vertikal 7.Schwenkver –u. entriegelung horizontal 8.Flüssigkeitskristallanzeige 9.Batteriefachdeckel 10.Klemmrad 11.Aufsteckfuß Bedienungselemente 12.Betriebsartentaste <MODE> 13.Wahltaste <SEL> 14.<+> Steigerungstaste 15.<-> Reduzierungstaste 16.ZOOM Taste <ZOOM> 17.Testauslöser <TEST> 18.Beleuchtungstaste <LIGHT> 19.Bereitschaftslampe 20.Hauptschalter Kameramodelle und Funktionen Obgleich dieses Gerät mit einer Vielzahl von Funktionen ausgestattet ist, können sich je nach Kameramodell, an dem es verwendet wird, Einschränkungen ergeben.
-
Page 33
Reflektor, wodurch der Ausleuchtwinkel des Gerätes automatisch auf 17mm eingestellt wird. Sollte die eingebaute Weitwinkelstreuscheibe versehentlich abgerissen werden, funktioniert die ZOOM-Taste nicht mehr. In diesem Fall wenden Sie sich bitte an Ihren Händler oder direkt an einen autorisierten SIGMA Service. -
Page 34
BELEUCHTUNG DER LCD Beim Druck auf die LIGHT Taste wird das Display für ca. acht Sekunden lang beleuchtet. Durch erneuten Druck auf die LIGHT Taste bleibt die Beleuchtung für länger als acht Sekunden aktiviert. E-TTL (TTL) Blitzautomatik Im TTL-Blitzautomatikbetrieb kontrolliert die Kamera die abgeblitzte Lichtmenge, so- dass sich daraus die korrekte Belichtung des Hauptobjektes ergibt. -
Page 35: Grenzen Der Serienauslösung
Grenzen der Serienauslösung Um ein Überhitzen des Gerätes zu verhindern, legen Sie eine 10minütige Pause nach dem Absolvieren der im folgenden genannten Aufnahmeserien ein. Betriebsart Anzahl der Blitzaufnahmen TTL, M (1/1, ½) 15 Serienauslösungen M (1/4, 1/8) 20 Serienauslösungen M (1/16-1/32) 40 Serienauslösungen Multi 10 Sequenzen…
-
Page 36
FP-Kurzzeitblitzsynchronisation, nur an Kameras der Gruppe A Wenn Sie mit einem gewöhnlichen Blitzgerät arbeiten, können Sie keine kürzere Verschlusszeit als die Synchronzeit der Kamera verwenden, da der Blitz in dem Moment gezündet werden muss, in dem das Bildfenster von den Verschlussvorhängen vollständig freigegeben ist. Bei der Kurzzeitsynchronisation sendet das Gerät ununterbrochen Blitze, während der Verschluss abläuft. -
Page 37
Belichtungskorrektur Sie können die Blitzbelichtungskorrektur mit der normalen Belichtungskorrektur in Ihren Blitzaufnahmen kombinieren, um die Hintergrundhelligkeit zu kontrollieren. Die Korrektur kann in dem Bereich von +/- 3 Stufen in 1/3 Schritten (bei einigen Kameramodellen in 1/2 Schritten) erfolgen. Diese Funktion steht an den Modellen EOS 620, 650, 700, 850 und 1000 nicht zur Verfügung. 1. -
Page 38: Indirektes Blitzen
8. Drücken Sie die Taste oder , um die gewünschte Anzahl von Blitzen einzustellen. 9. Nach dem erneuten Druck auf die Wahltaste SEL stellt die Anzeige das Blinken ein. 10. Sobald die Bereitschaftslampe aufleuchtet, ist der Blitz einsatzbereit. Achtung : Bitte wählen Sie eine längere Verschlusszeit als: Anzahl der eingestellten Blitze / Blitzfrequenz in Hz Indirektes Blitzen Bei Blitzaufnahmen in Innenräumen erscheint häufig ein harter…
-
Page 39
Vorbereitung für das kabellose Blitzen Kanalwahl Für den Fall, dass andere Personen in Ihrer Nähe die kabellose Blitzauslösung nutzen und Ihr eigenes Gerät auf diese Blitze reagieren sollte, stellen Sie bitte an Ihrem Gerät einen anderen Kanal als die anderen Fotografen ein. -
Page 40
Master Blitzgerät EIN + Slave Blitzgerät(e) Bitte stellen Sie den „Master“ ein wie folgt: 1. Drücken Sie die Betriebsartentaste MODE und wählen Sie das E-TTL Symbol. 2. Drücken Sie oder , um die Anzeige einzustellen. 3. Drücken Sie mehrmals die Wahltaste SEL und vergewissern Sie sich, dass das Blitzverhältnis auf eingestellt ist. -
Page 41
Stellen Sie das „Master“ Gerät ein wie folgt: 1. Bitte stellen Sie den „Master“ auf Blitzen AUS. 2. Drücken Sie die Betriebsartentaste MODE und wählen Sie das E-TTL Symbol. 3. Drücken Sie mehrmals die Wahltaste SEL, bis die Verhältnisanzeige blinkt. 4. -
Page 42: Kabelloser Stroboskopbetrieb
Kabelloses, manuelles Blitzen Sie können die Blitzleistung des „Slave“ Gerätes manuell durch das „Master“ Gerät steuern. Die Blitzleistung der „Slave“ Geräte untereinander kann gleich oder verschieden sein. Um die korrekte Blitzbelichtung festzulegen, benutzen Sie einen Handblitzbelichtungsmesser. Kabelloses manuelles Blitzen mit gleicher Blitzleistung Bitte stellen Sie das „Master“…
-
Page 43
Normaler „Slave“ Geräte Betrieb Selbst wenn der EF-500 Super nicht an der Kamera angesetzt ist, kann er durch den eingebauten Blitz der Kamera oder ein anderes Blitzgerät ausgelöst werden. 1. Verbinden sie das Blitzgerät mit dem Kameragehäuse. 2. Stellen Sie die Kamera auf die gewünschte Belichtungsautomatik. Falls Sie A oder M wählen, stellen Sie bitte auch die gewünschte Blende ein. -
Page 44: Technische Daten
7. Drücken Sie oder , um den Kanal einzustellen. (C1 oder C2) 8. Drücken Sie die Wahltaste SEL, sodass die Anzeige der Blitzleistung blinkt. 9. Drücken Sie oder , um die Blitzleistung einzustellen. Legen Sie die korrekte Blitzbelichtung durch übereinstimmendes Einstellen der Entfernungsanzeige auf dem Display mit der tatsächlichen Entfernung zwischen „Slave“…
-
Page 45
FRANÇAIS Nous vous remercions d’avoir choisi le flash électronique Sigma EF-500 SUPER EO. Ce produit a été conçu spécifiquement pour être utilisé avec les boîtiers reflex Canon EOS. Les fonctions et le mode opératoire pouvant varier d’un appareil à l’autre, nous vous recommandons de vous référer au mode d’emploi de votre boîtier. -
Page 46: Description Des Elements
DESCRIPTION DES ELEMENTS ELEMENTS EXTERNES 1.Tête Flash 2.Elargisseur d’angle intégré 3.Illuminateur d’assistance AF 4.Angle d’inclinaison : Haut et Bas 5.Angle de rotation : Droite et Gauche 6.Verrouillage de la tête orientable Haut et Bas 7.Verrouillage du pivotement Droite et Gauche 8.Ecran LCD 9.Couvercle du compartiment piles 10.Vis de blocage du sabot 11.Sabot CONTROLS 12.Bouton de MODE 13.Bouton SELECT <SEL>…
-
Page 47
MISE EN VEILLE AUTOMATIQUE Le flash se met en veille automatiquement après environ 90 secondes de non-activation, afin de préserver la puissance des piles. Pour le remettre en route, appuyez sur le bouton TEST ou appuyez à mi-course sur le déclencheur de l’appareil. Le système de mise en veille automatique ne fonctionne pas en mode de flash à… -
Page 48
RETRO ECLAIRAGE DE L’ECRAN LCD Si vous appuyez sur le bouton LIGHT , l’écran LCD est éclairé pendant environ 8 secondes. Ce rétro éclairage peut être prolongé en appuyant à nouveau sur le bouton LIGHT . FLASH AUTOMATIQUE ETTL (TTL) En mode TTL AUTO, l’appareil assure le contrôle de la quantité… -
Page 49: Limites Des Prises De Vue Consecutives Au Flash
LIMITES DES PRISES DE VUE CONSECUTIVES AU FLASH Pour éviter une surchauffe, laissez le flash au repos au moins 10 minutes après des séquences de prises de vues consécutives en respectant le tableau ci-dessous. Mode Nombre d’éclairs TTL, M(1/1,1/2) 15 éclairs consécutifs M(1/4, 1/8) 20 éclairs consécutifs M(1/16-1/32)
-
Page 50: Memorisation D’exposition Au Flash (Fe Lock)
Sélectionnez le mode d’exposition sur l’appareil. (vous pouvez utiliser les modes “Tv” ou “M”) Sélectionnez une vitesse d’obturation supérieure à la vitesse de synchronisation normale. Mettez le flash sous tension en plaçant l’interrupteur sur «ON». Choisissez le mode flash en appuyant sur le bouton (les MODE modes “ETTL”…
-
Page 51: Flash Indirect
Faites la mise au point sur le sujet Assurez-vous que le sujet se trouve à l’intérieur de la plage de distance affichée sur l’écran LCD du flash. Vous pouvez prendre la photo dès que la lampe témoin de charge est allumée. «FB»…
-
Page 52
La lumière prenant la teinte de la surface sur laquelle elle se réfléchit, il est recommandé de choisir une surface blanche. Selon les propriétés réfléchissantes de la surface, la distance du sujet et d’autres facteurs, l’intensité et la distance réelle parcourue par l’éclair peuvent varier. Nous vous conseillons de vérifier la confirmation de l’exposition correcte (témoin ETTL ou TTL sur l’écran LCD) après la prise de vue. -
Page 53
Pondération (ID) des flashes asservis Si vous utilisez plusieurs flashes asservis, il est possible d’attribuer à chacun un numéro ID qui permettra de répartir la puissance entre eux selon une pondération particulière. Appuyez sur le bouton MODE et sélectionnez le témoin ETTL Appuyez sur le bouton SEL plusieurs fois jusqu’à… -
Page 54
Faites la mise au point et prenez la photo Flash sans fil ETTL avec pondération (deux flashes asservis) Le système sans fil ETTL décrit ci-dessous comme un exemple consiste en un flash maître attaché sur le boîtier, paramétré comme non actif (OFF) fonctionnant avec deux flashes asservis. Lorsque vous réglez le ratio de répartition de la lumière, le système automatique ETTL contrôle la quantité… -
Page 55: Flash Manuel Sans Fil
Appuyez sur la touche pour déterminer la valeur de la correction d’exposition souhaitée. Appuyez sur le bouton à plusieurs reprises pour confirmer la correction d’exposition retenue. Aucun réglage particulier n’est nécessaire au niveau des flashes asservis. Vous pouvez aussi régler la correction d’exposition individuellement au niveau de chaque flash esclave. Mémorisation d’exposition au flash sans fil (FE Lock) Mettez-vous d’abord en mode de flash sans fil Faites la mise au point sur le sujet, et appuyez ensuite sur le bouton FEL du boîtier en plaçant le sujet…
-
Page 56: Flash Esclave
Appuyez sur SEL pour faire cesser le clignotement. Si vous n’utilisez que deux flashes asservis, sélectionnez à l’étape (les étapes doivent alors être supprimées). Multi Flash (stroboscopique) sans fil Veuillez paramétrer le flash maître comme suit : Suivez la procédure de changement de mode flash sans fil et sélectionnez le symbole MULTI Appuyez sur le bouton pour faire clignoter la fréquence d’éclairs.
-
Page 57: Caracteristiques Techniques
le flash esclave prématurément. Flash esclave désigné Si vous utilisez deux ou plus de deux flashes EF-500 Super, vous pouvez désigner quels flashes se déclencheront ensemble en paramétrant des canaux de communication. Dans ce mode, un flash servira de flash esclave de contrôle, et les autres de flashes esclaves d’éclairage. Préparation du ou des flashes d’éclairage Attachez le flash sur la griffe de l’appareil.
-
Page 58
POIDS : 335 g DIMENSIONS : 76mm(l) x 138mm(H) x 116mm(L) -
Page 59
ESPAÑOL Muchas gracias por comprar el Flash electrónico Sigma EF-500 SUPER EO. Este producto ha sido desarrollado específicamente para cámaras SLR de Canon EOS. Dependiendo del modelo de cámara, las funciones serán diferentes. Por favor lea este manual de instrucciones detenidamente para el cuerpo de su cámara. -
Page 60: Descripción De Las Partes
DESCRIPCIÓN DE LAS PARTES PARTES EXTERIORES 1. Cabezal de flash 2. Pantalla angular incorporada 3. Luz auxiliar AF 4. Angulo de basculación; Arriba y abajo 5. Angulo de giro; Derecha e izquierda 6. Botón de bloqueo y desbloqueo de la basculación; Arriba y abajo 7.
-
Page 61: Ajuste Del Cabezal Del Flash
AJUSTE DEL CABEZAL DEL FLASH Presione el botón de bloqueo y desbloqueo del movimiento arriba y abajo, mientras ajusta el cabezal a la posición deseada. Aparecerá en la pantalla LCD cuando ponga en marcha el flash, y si esta marca parpadea entonces el cabezal del flash no está…
-
Page 62
ILUMINACIÓN DE LA PANTALLA LCD Cuando presiona el botón Light, la pantalla LCD se iluminará acerca de 8 segundos. La iluminación se prolongará si vuelve a presionar el botón light otra vez. FLASH AUTOMÁTICO ETTL (TTL) En el modo TTL AUTO, la cámara controlará la cantidad de luz para obtener la exposición correcta del sujeto. En el tipo A de cámaras se ajustará… -
Page 63: Sincronización Con La Segunda Cortinilla
LIMITACIONES DEL DISPARO CONTINUO Para prevenir recalentamientos, por favor no utilice la unidad de flash por lo menos 10 minutos después de utilizar el número de exposiciones que se muestran en la tabla a continuación. Modo Número de exposiciones con Flash TTL, M(1/1,1/2) 15 Disparos continuos de flash M(1/4, 1/8)
-
Page 64: Luz De Modelado
De esta manera se puede utilizar una velocidad más rápida que la velocidad de sincronización. 1. Seleccione el modo de exposición de la cámara. (Puede utilizar el modo “Tv” y “M”) 2. Seleccione una velocidad más rápida que la velocidad de sincronización normal de la cámara 3.
-
Page 65: Flash Reflejado
6. Puede realizar la fotografía después de confirmar que la Luz de Preparado del flash está iluminada. Para cancelar la compensación de exposición, por favor empiece desde el paso 1 y escoja +0 en el dispositivo. FB (Bracketing del Flash) Con el FB, se pueden obtener bracketing con los disparos del flash en el sujeto, mientras la exposición del ambiente permanecerá…
-
Page 66: Control Remoto Del Flash
sujetos de 0.5 metros a 2 metros. Cuando el cabezal del flash está inclinado a 7º la marca parpadeará. CONTROL REMOTO DEL FLASH Cuando utilice el modo “Control remoto del flash”, Puede realizar fotografías con sensación de imagen tridimensional con sombra o puede realizar imágenes naturales con sombra dependiendo de la exposición del flash sin ningún cable de conexión entre el flash y la cámara.
-
Page 67
2. Presione el botón + o — para indicar la marca… -
Page 68
Flash Auto ETTL por control remoto (sólo para cámaras de tipo B) En esta función de flash Auto ETTL por control remoto, la cámara calcula automáticamente la correcta exposición. Flash Auto ETTL por control remoto con el ratio del flash desconectado Si no se desea el ratio del flash, la identificación del esclavo no es necesario. -
Page 69
ID esclava, Flash Auto ETTL por control remoto con el ratio del flash (tres unidades esclavas) El siguiente procedimiento es para una unidad Master con tres unidades esclavas. Este procedimiento ajusta dos ratios de flash y la cantidad de compensación de exposición la controla la tercera unidad. Esta función solo se puede utilizar con las cámaras EOS 1V y EOS-3. -
Page 70: Flash Esclavo
3. Presione el botón MODE y seleccione los modos ETTL, M, MULTI. 4. Presione el botón SEL para que aparezca el indicador de modo Flash Manual con Control Remoto Se puede ajustar manualmente la unidad esclava del flash con la unidad Master. La unidad externa puede estar uniformada o variar entre las unidades esclavas.
-
Page 71: Designación Del Flash Esclavo
diafragma deseado también. 3. Conecte la unidad de flash. Presione el disparador levemente. Ahora el diafragma y la sensibilidad de la película se transmite automáticamente a la unidad de flash. 4. Desmonte la unidad de flash de la cámara. 5. Presione el botón MODE y seleccione el modo (Esclavo).
-
Page 72: Especificaciones
13. Presione el botón MODE y seleccione .( Modo esclavo) 14. Presione el botón SEL para que el indicador de canal parpadee. 15. Presione el botón + o – y ajuste el mismo número de canal para todas las unidades. 16.
-
Page 73: Descrizione Delle Parti
ITALIANO Grazie per la preferenza accordata al Flash elettronico Sigma EF-500 Super Eo. Questo prodotto è stato studiato specificatamente per le reflex Canon Eos. A seconda del modello della macchina, funzioni e operatività possono variare. Leggete attentamente questo manuale quando usate il flash con la vostra macchina.
-
Page 74: Caricamento Delle Batterie
MODELLI E FUNZIONI Nonostante questo flash sia equipaggiato con numerose funzioni, talune potrebbero non essere disponibili, a seconda del modello della macchina con la quale viene abbinato. Si raccomanda di accertarsi che il proprio apparecchio fotografico sia tra quelli indicati nell’elenco qui sotto. Si raccomanda inoltre di far riferimento alle spiegazioni di ogni singola funzione contenute nel manuale.
-
Page 75
COLLEGARE E SEPARARE IL FLASH DALLA MACCHINA Accertatevi che il flash sia spento. Inserite quindi la slitta del flash in quella della macchina e ruotate l’anello di bloccaggio saldamente Quando attaccate o staccate il flash, afferratelo saldamente dal basso per evitare danni all’innesto. Se il flash incorporato della macchina è… -
Page 76: Limitazioni Quando Si Scatta In Sequenza
Il Flash è completamente carico quando appare la spia di pronto lampo Quando la macchina riceve l’esposizione appropriata, sul display LCD appare per 5 secondi il simbolo ETTL (TTL). Se questa indicazione non appare significa che l’illuminazione del flash non è sufficiente. Ripetete lo scatto a una distanza inferiore. La luce ausiliaria AF si accende automaticamente se la luce a disposizione non è…
-
Page 77
La corretta esposizione si può calcolare usando la seguente formula NG (Numero Guida): distanza flash-soggetto = valore di diaframma Il flah calcola la distanza flash soggetto che compare nel display LCD proprio con questa formula. (Consultare la tabella 1 dell’ultima pagina) SINCRONIZZAZIONE DELLA SECONDA TENDINA Quando si fotografa un soggetto in movimento con sincronizzazione lenta, davanti a lui comparirà… -
Page 78: Compensazione Dell’esposizione
4. Mettete a fuoco il soggetto nel centro della cornice AF del mirino, premete il pulsante di bloccaggio FE Il flash compirà un pre-scatto, calcolerà e memorizzerà la quantità di luce necessaria a un’esposizione corretta; Il mirino della macchina mostrerà per 0,5 secondi la scritta FEL e setterà la corretta esposizione Se il mirino mostrerà…
-
Page 79
Questa funzione non può essere usata con i modelli Eos 700, 750, 850… -
Page 80: Flash Indiretto
1. Regolate la modalità di esposizione della macchina su M e impostate anche il valore di diaframma 2. Premete il pulsante Mode fino a quando appare l’opzione Multi-flash 3. Premete SEL fino a quando la frequenza di scatto del flash comincia a lampeggiare 4.
-
Page 81
Impostare il canale del flash principale ( Master) 1. Premere il pulsante MODE e impostare il segnale 2. Premere il pulsante SEL alcune volte fino a far lampeggiare la spia del canale di trasmissione 3. Premere il pulsante per impostare il numero del canale ( C1 4. -
Page 82
la sequenza flash… -
Page 83
4. Sistemare il flash secondario nella posizione desiderata 5. Assicurarsi che il flash principale e quello secondario siano pronti alla emissione del lampo La spia pronto lampo del flash principale è accesa e quella del flash secondario lampeggia 6. Mettere a fuoco il soggetto e scattare la foto Flash principale OFF + Flash secondari Impostare il flash principale come descritto sotto 1. -
Page 84
( Interruttore del flash principale su OFF) -
Page 85
3. La procedura per impostare il flash ad alta velocità a distanza è la medesima impiegata per impostare normalmente il flash ad alta velocità. Non è necessario fare tutte le regolazioni su ciascun flash Compensazione dell’esposizione con il flash a distanza 1. -
Page 86: Flash Ausiliario Normale
5. Premere il pulsante per impostare il valore d’uscita 6. Premere il pulsante SEL, per far apparire il canale d’uscita e lampeggiare il numero 7. Premere il pulsante per impostare il valore d’uscita 8. Premere il pulsante SEL, per far apparire il canale d’uscita e lampeggiare il numero 9.
-
Page 87
Slave… -
Page 88
Se sulla vostra fotocamera usate un flash Canon in ETTL e impiegate un EF-500 Super come flash secondario, non potete usare la funzione ETTL, perché il lampo pre flash del Canon potrebbe far accendere prematuramente il flash secondario. Stabilire i flash secondari Se si usano due o più… -
Page 89
DANSK Tillykke med dit valg af Sigma EF-500 SUPER EO Flash. Denne flash er udviklet specielt til Canon EOS-modellerne. Afhængig af kameramodel kan funktioner og betjening variere. For at få det fulde udbytte af flashen anbefaler vi, at du læser denne vejledning. Brugsanvisningen til kameraet indeholder også… -
Page 90: Isætning Af Batterier
BESKRIVELSE AF FLASHENS DELE UDVENDIGE DELE 1.Flashhoved 2.Indbygget vidvinkelforsats 3.AF-hjælpelys 4.Vinkel; Op og ned 5.Vinkel; Højre og venstre 6.Lås; Op og ned 7.Lås; Højre og venstre 8.LCD-display 9.Batteridæksel 10.Låseskrue 11.Monteringsfod BETJENIGNSKNAPPER 12.MODE KNAP 13.<SEL> SELECT knap 14.< + > Indstillingsknap 15.< — > Indstillingsknap 16.ZOOM knap 17.EST knap 18.LIGHT knap 19.Klar-lampe 20.Tænd/sluk KAMERAMODELLER OG FUNKTIONER Selv om denne flash har mange funktioner, kan der være visse begrænsninger i funktionerne med visse…
-
Page 91
JUSTERING AF FLASHHOVEDET Tryk på ”Op/ned” låseknappen mens flashhovedet justeres til den ønskede vinkel. vises på LCD-displayet når du tænder flashen. Hvis dette symbol blinker, er flashens hoved indstillet til en forkert vinkel. MONTERING OG AFMONTERING AF FLASHEN Sluk for flashen. Skub flashfoden ind i kameraets flashsko og spænd låseskruen. -
Page 92: Kontinuerlig Optagelse
2. Tænd for flashen, TTL indikatoren vil ses på LCD-displayet og flashen vil begynde at lade op. 3. Fokuser på motivet. 4. Kontroller at motivet er indenfor rækkevidden angivet på LCD-displayet. 5. Tryk på udløserknappen når flashen er fuldt opladet. Når flashen er opladet vises klarsignalet i søgeren.
-
Page 93
1. Sæt kameraet på M indstilling. 2. Tryk på MODE-knappen på flashen for at vælge M. 3. Værdien for lysstyrken (ledetallet) blinker når du trykker på SEL-knappen. 4. Tryk på + eller – knappen for at vælge flashens lysstyrke. 5. Displayet vil holde op med at blinke og i stedet lyse konstant når du trykker på… -
Page 94
Valg af lukkertider der er langsommere end kameraets almindelige synkroniseringstid annullerer High Speed Sync. og flashen indstilles automatisk til den almindelige ETTL funktion. For igen at aktivere High Speed Sync. følges ovenstående fremgangsmåde. Det er muligt at anvende eksponeringskorrektion sammen med High Speed Sync. Se venligst kameraets brugsanvisning vedr. eksponeringskorrektion. Symbolet vil forsvinde fra LCD-displayet når High Speed Sync. -
Page 95
3. Displayet vil vise når du trykker på SEL-knappen. 4. Fokuser på motivet. 5. Kontroller at motivet er indenfor flashens rækkevidde angivet på LCD-displayet. 6. Kontroller at symbolet vises i søgeren. 7. Tryk på udløserknappen for at tage billedet. Om nødvendigt gentages trin 4 – 6. Denne funktion annulleres automatisk efter eksponeringen af det 3. -
Page 96
Placer Slave-flashen på det ønskede sted. Undgå at placere Slave-flashen indenfor billedfeltet. Placer Slave-flashen mellem 0,5m til 5m fra motivet og placer kameraet mellem 1m og 5m fra motivet. Forberedelser til trådløs flash Valg af kanal Hvis andre anvender trådløs flash i nærheden af dig, kan de to flashudstyr affyre hinanden. For at undgå dette kan du vælge en anden kanal for din flash. -
Page 97
Hvis lysstyrken (ratio) angives som eller , se venligst afsnittet om ”Trådløs ETTL Autoflash med indstilling af lysstyrken (to slave-flash) eller (tre slave-flash)” og indstil lysstyrkeforholdet til 4. Placer Slave-flashen på det ønskede sted. 5. Kontroller at både Master-flash og Slave-flash er opladede (Master-flashen klarlampe er tændt og Slave-flashens AF-hjælpelys blinker). -
Page 98
10. Placer Slave-flashenhederne på det ønskede sted. 11. Kontroller at både Master-flash og Slave-flash er opladede. 12. Fokuserer på motivet og tag billedet. Hvis du ønsker at ændre indstillingerne kan du starte fra punkt 3. Hvis du ønsker at annullere indstillingerne, bør du indstille lysstyrkeforholdet til (se punkt 4). -
Page 99
Hvis Master-flashen er indstillet til at blive affyret (ON) vil den også blive affyret med den valgte lysstyrke. Trådløs manuel flash med forskellig lysstyrke Du kan vælge forskellig lysstyrke for hver Slave-flash. (I det følgende eksempel anvendes 3 Slave-flashenheder). Indstil Master-flashen som følger: 1. -
Page 100: Udvalgte Slave-Flash
8. Tryk på SEL-knappen gentagne gange for at få vist displayet. 9. Placer Slave-flashen på det ønskede sted. Undgå at placere Slave-flashen indenfor billedfeltet. 10. Når du har kontrolleret at alle flashenheder er klar, kan du tage billedet. Når EF-500 Super er opladet vil AF-hjælpelyset blinke. Flashen fungerer ikke hvis EF-500 Super er monteret på…
-
Page 101
NEDERLANDS Hartelijk dank voor de aankoop van de Sigma EF-500 Super EO electronenflitser. Dit product is speciaal ontworpen voor de Canon EOS SLR camera’s. Afhankelijk van het gebruikte cameramodel kunnen de diverse functies afwijken. Wij adviseren u deze gebruiksaanwijzing aandachtig te lezen. De talloze aantrekkelijke extra’s van deze flitser vormen een welkome uitbreiding van uw fotografische mogelijkheden. -
Page 102: Omschrijving Van De Onderdelen
Omschrijving van de onderdelen Externe onderdelen 1.Flitskop 2.Ingebouwde groothoek diffusor 3.AF hulplicht 4.Flitshoek bij indirect flitsen 5.Rotatiehoek, links/rechts 6.Vergrendelknop indirect flitsen 7.Vergrendelknop rotatie links/rechts 8.LCD display 9.Batterijdeksel 10.Vastzetring 11.Flitsvoetje Instelknoppen/toetsen 12.Functietoets 13.<SEL> keuzetoets 14.<+> plustoets 15.<-> mintoets 16.Zoomtoets 17.Test toets 18. Lichttoets 19. OK lampje 20. Aan/uit schakelaar Camera modellen en functies Deze flitser is voorzien van veel extra functies.
-
Page 103
Automatische uitschakeling Indien de flitser enige tijd niet wordt gebruikt zal hij zich na ongeveer 90 sec. automatisch uitschakelen om energie te sparen. Om de flitser weer in te schakelen drukt u op de testknop of de ontspanknop van de camera half in. -
Page 104
Verlichting van het LCD display Wanneer u de LIGHT toets indrukt, zal het LCD display voor ca. 8 sec. worden verlicht. Het LCD display zal langer dan 8 sec. worden verlicht indien u de LIGHT knop nogmaals indrukt. ETTL (DDL) Auto Mode De ETTL (DDL) Auto mode voorziet de opname van de correcte belichting en controleert de hoeveelheid flitslicht. -
Page 105: Maximale Prestaties Bij Continu Fotograferen
Maximale prestaties bij continu fotograferen. Om oververhitting te voorkomen dient u uw flitser tenminste 10 minuten niet te gebruiken na het aantal flitsen in de onderstaande tabel: Mode Aantal flitsen TTL, M(1/1,1/2) 15 flitsen achter elkaar M(1/4, 1/8) 20 flitsen achter elkaar M(1/16-1/32) 40 flitsen achter elkaar Multi…
-
Page 106
3. Zet de flitser aan 4. Selecteer de gewenste flits mode door het indrukken van de MODE toets ( de ETTL of M modes kunnen worden gebruikt) 5. Druk op de + of – toetsen tot dat zichtbaar is op het LCD display 6. -
Page 107: Meervoudig Flitsen
FB mode (Flash Exposure Bracketing) Met de FB instelling is het mogelijk een belichtingstrapje te maken met een wisselende flitsinstelling terwijl de overige belichtingsinstellingen ongewijzigd blijven. Het belichtingstrapje maakt een correcte belichting en een onder- en overbelichting die kan variëren van -+ 3 stops in stappen van 1/3 LW (of in stappen van 1/2LW met sommige camera’s) De FB mode kan niet worden gebruikt met de EOS 620, 650, 700, 800 en 1000 1) Druk op de SEL toets tot dat het…
-
Page 108: Draadloos Flitsen
Draadloos flitsen Indien u één of meerdere draadloze flitsers zoals de EF-500 Super gebruikt kunt u een veel natuurlijkere belichting van het onderwerp creëren en bijvoorbeeld lelijke schaduwvorming bij portretten vermijden. Met de EF-500 Super wordt de draadloze verbinding tot stand gebracht door het licht van de flitser. De camera zal, als hij op de draadloze mode staat ingesteld, automatisch de juiste belichting kiezen.
-
Page 109
Master unit AAN + Slave unit(s) Stel de Master unit als volgt in 1. Druk op de MODE toets en selecteer het ETTL / symbool 2. Druk op de + of – toets tot het symbool zichtbaar is 3. Druk herhaaldelijk op de SEL toets en bevestig dat de flitsratio Indien de ratio wordt weergegeven als , zie dan het hoofdstuk “Automatische draadloze ETTL flits met flitsratio AAN (2 Slave Units) of (3 Slave units) en reset de flits op de flitsratio… -
Page 110
Wanneer u de instelling wilt veranderen, kunt u beginnen bij stap 3 Wanneer u de instelling wilt annuleren, zet dan de flitsratio op (zie stap 4) Draadloze High-Speed Synchronisatie (FP Flits) 1. Stel de hoofdflitser in op de Draadloze Flits Mode (zie blz 10) 2. -
Page 111: Slave Functie
3. Druk op de + of – toets om het symbool (knipperend) te selecteren 4. Druk op de SEL toets zodat de flitslichtopbrengst indicatie en knippert 5. Druk op de + of – toets om flitslichtopbrengst-waarde op 1 in te stellen 6.
-
Page 112: Technische Gegevens
Voorkeuze van de slave flitser Als u twee of meerdere EF-500 Super flitsers gebruikt, kunt u een voorkeuze maken welke flitsers tegelijk flitsen door verschillende kanaalinstellingen. In deze stand zal één flitsunit gebruikt worden op de camera als aansturende flitser en de overigen voor de slave belichting. Het instellen van de slave mode.
-
Page 113
Table1 Tabelle1 Tabla1 Tablla1 Tabel1 T ableau1 C uadro1 / GN / NG ISO100 17mm 28mm 35mm 50mm 70mm 85mm 105mm 14.1 21.2 24.7 28.3 32.5 35.4 17.5 10.6 12.4 14.2 16.3 17.7 1/16 11.5 12.5 1/32 1/64 1/128 Table2 Tabelle2 Tabla2 Tablla2… -
Page 114
DANSK CE-mærket er i overensstemmelse med de gældende regler i EU. SIGMA (Deutschland) GmbH Carl-Zeiss-Str. 10/2, D-63322 Rödermark, F.R.GERMANY Verkauf : 0 60 74-8 65 16 55 Service : 0 60 74-8 65 16 66 Fax : 0 60 74-8 65 16 77 EF-500 SUPER EO 03 2001.3.24…
Скачать
1
F12S03101
E L E C T R O N I C F L A S H
EF-500
DG SUPER
SA-N
⏕ㄕ᪺᭡
INSTRUCTIONS
BEDIENUNGSANLEITUNG
MODE D’EMPLOI
INSTRUCCIONES
ISTRUZIONI PER L’USO
BRUGSANVISNING
GEBRUIKSAANWIJZING
ᮇㄊ
ENGLISH
DEUTSCH
FRANÇAIS
ESPAÑOL
ITALIANO
DANSK
NEDERLANDS
2~12
13~22
23~32
33~42
43~52
53~62
63~71
72~81

249 ₽
Инструкция (руководство пользователя) на Вспышка Sigma EF-500 DG Super
Артикул: sigma-ef-500-dg-super
Категория: Sigma
-
Описание
-
Детали
Описание
Инструкцию по эксплуатации Sigma EF-500 DG Super на русском языке можно будет скачать в личном кабинете после оформления и оплаты заказа.
Детали
| Формат файла |
|
|---|---|
| Размер инструкции в кб |
7245 |
Sigma EF 500 (DG) ST: Дешево
и сердито…
Мысль при
покупке:
«Если не будет вспыхивать, можно
ударить ею по голове»

Обзаведясь камерой Nikon F65
я решил как можно быстрей купить
полнофункциональную вспышку, т.к.
использование низковольтного
переходника и высоковольтной
вспышки в ручном режиме не имеет
особого смысла (нет TTL замера), а
встроенная вспышка годится разве
что тараканов на кухне пугать…
Итак, для меня важным
является ведущее число и
поворотная голова. Вспышки Nikon SB-27,28
показались мне неоправданно
дорогими. Вспышка Nikon SB-50DX
показалась мне заманчивым
вариантом, т.к. она имеет невысокую
цену и возможность совместного
действия со встроенной в корпус
камеры вспышкой показалась мне
интересной. Metz хороши, но дороги.
Exakta — мягко говоря не очень, при
такой цене….
Я давно приглядывался к
вспышкам Sigma серии EF 500. EF 500 (DG) Super
является вполне профессиональной
вспышкой, конкурирующая с топовыми
вспышками ведущих производителей,
однако она существенно дешевле
конкурентов. Любительская EF 500 (DG) ST
аналогична Super за исключением
поддержки беспроводной
синхронизации, стробоскопического
режима, расширенного ручного
режима, моделирующего света, и
высокоскоростной синхронизации. Я
решил, что эти режимы мне вряд ли
пригодятся в обозримом будущем,
поэтому я окончательно решил взять
вспышку EF 500 ST. Вспышка с
аббревиатурой DG просто дополнена
специфическими режимами замера с
цифровыми камерами, например D-TTL
для Nikon.
Итак я стал счастливым
обладателем Sigma EF 500 DG ST.
Вспышка сделана в ставшем
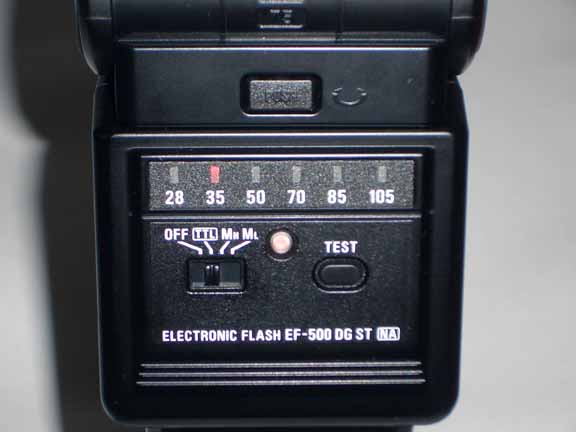
уже привычном стиле «Кобра» и
имеет следующие органы управления
и индикаторы на задней панели:
переключатель «Выкл. — TTL — Ручн. —
Ручн. с 1/16 мощности», кнопка «тест»,
индикатор готовности, примитивный
индикатор положения зума (по совместительству
индикатор
сверхширокоугольного режима и
индикатор неполадок) в виде линейки
со значениями зума, против которых
загорается лампочка. Хотелось бы
иметь ЖК дисплей с подсветкой, как
во вспышке Super.
Вспышка имеет ведущее
число 50 при установке рефлектора
для освечивания угла,
соответствующего объективу 105мм. (40
для 50 мм). Это рекордная мощность
для любительской вспышки за такую
цену.
Рефлектор зуммируется
синхронно с объективом ступенчато
в диапазоне 28-35-50-70-85-105мм, плюс 17мм
при выдвинутом рассеивателе.

Зуммирование только
автоматическое. Т.е. в ручную можно
установить только 28 мм слегка
выдвинув рассеиватель. Хотелось бы
иметь возможность ручного
зуммирования.
Головы вспышки вращается
в вертикальном направлении до 90
град. вверх и 7 град. вниз (для съемки
с очень близкого расстояния),
вправо до 90 град., влево до 180 (!!) град.
Таким образом возможности съемки с
отраженным светом практически неограниченны.

Вспышка отрабатывает все
возможные режимы замера TTL (3D,
матричный сбалансированный,
многозонный, центровзвешенный
замеры — в зависимости от камеры и
объектива).Плюс ручной режим с
полной мощностью и ручной с 1/16
мощности (ведущее число в таком
случае уменьшается в 4 раза).
Защита от «красных глаз»:
Выдается серия маломощных предвспышек, заставляющих сузиться
зрачки снимаемых, после чего
срабатывает затвор и испускается
основной импульс вспышки. Однако
высота корпуса вспышки достаточно
велика, т.е. расстояние от оси
объектива до оси рефлектора велико
и можно не беспокоиться о
возникновении «красных глаз». «Красный»
свет возникает при отражении света
вспышки от глазного дна, при этом
свет отражается строго обратно в
сторону рефлектора вспышки. При
большом расстоянии между осью
объектива и осью рефлектора вспышки
этот «красный свет» не
попадает в объектив и «красноглазые»
не появляются (т.е. Блэйда вызывать
не надо =)). Таким образом этот режим
фактически не требуется (возможно
он понадобиться при съемки с
больших расстояний). К тому же этот
режим вызывает существенную
задержку спуска затвора.
Синхронизация по задней
шторке (медленная синхронизация):
обеспечивает срабатывание вспышки
после экспонирования кадра не сразу
после спуска затвора, а перед его закрытием, что
обеспечивает создание эффекта «кометного»
следа за движущимися объектами при
съемке на длительных выдержках.
Подсветка автофокуса:
Очень полезный режим. Позволяет
камере уверенно фокусироваться в
самых сложных условиях контраста
объекта съемки и в полной темноте.
Эта подсветка работает эффективней
встроенного в корпус камеры
прожектора. На корпусе вспышки
установлен светодиодный прожектор,
который при недостаточной
освещенности или контрасте рисует
на объекте съемки характерную серию
полосок в круге (т.н. «полосаточка»),
тем самым создавая искусственный контраст и подсветку. Заявленный
диапазон действия 0.7-9 м. К тому же
свет от светодиодного прожектора
не так заметен, нежели свет от
встроенного в корпус камеры
прожектора.
Готовность вспышки
отражается индикатором в
видоискателе и лампочкой на
корпусе вспышки. Если при съемке в TTL
режиме мощности вспышки не хватило,
то этот индикатор мигает.
Время перезарядки
вспышки составляет около 6 сек. для
батареек, и 4 сек для аккумуляторов.
При этом в режиме TTL используется
теристорный переключатель, что
обеспечивает сохранение заряда в
конденсаторе — это заметно
сокращает время перезарядки и
экономит батареи. При съемки
достаточно светлых сюжетов с
небольшого расстояния (~3 м) у меня
получалось так, что вспышка была
готова мгновенно после
срабатывания, т.е. можно было
снимать серию из нескольких кадров.
При работе в ручном
режиме с 1/16 мощности можно смело
снимать серии, т.к. вспышка работает
в скоростном режиме без подзарядки.
Малейшая задержка в серии позволит
вспышке подзарядиться после
очередной серии.
Вообще ручные режимы
неудобны для использования, т.к.
вспышка не имеет встроенного
калькулятора и расчет диафрагмы
или расстояния необходимо
производить по 3-м таблицам из
инструкции, что занимает
достаточно времени. А
автоматический не-TTL режим отсутствует как таковой.
Вспышка имеет выдвижной
рассеиватель, который позволяет
задать освечивание для объектива 17мм.
Однако здесь есть некоторые
тонкости: слегка выдвинув
рассеиватель можно принудительно
задать угол освечивания для 28 мм.
Еще этот рассеиватель можно
использовать как отражатель для
подсветке теней при съемке
отраженным от потолка светом. Опыт
показал, что при съемке с близкого
расстояния, когда голова вспышки
направлена строго в потолок над
снимаемым, у последнего могут
появиться неприятные тени под
глазами, носом и т.п. Для устранения
этого я рекомендую направлять
вспышку чуть назад за камеру, либо
воспользоваться специальным
отражателем («баунсером»). Роль
этого баунсера может выполнять тот
самый выдвигающийся из головы
вспышки диффузор. Достаточно лишь
выдвинуть его максимально, но не до
конца, т.е. чтоб он не откинулся,
закрыв отражатель вспышки, а
остался торчать перпендикулярно
стеклу отражателя. Пронаблюдайте
за репортерами, когда они снимаю с
близкого расстояния.


Для себя я сделал
двухсторонний баунсер из матового
полупрозрачного пластика, фольги, и
пенополиэтиленовой пленки (ее
можно найти в коробках из под
электроники). Баунсер крепится к
голове вспышки с помощью банальной
резинки. И одной стороной
обеспечивает более мягкое
рассеивание, а другой (если его
перевернуть) более категоричное
отражение с подсветкой теней. И
вообще, лучше максимально
использовать белые стены и/или
потолок при съемке со вспышкой, что
создает максимально естественное
освещение. Благо вращающаяся
голова вспышки, ее мощность и TTL
режим обеспечивают полную свободу
при съемке с отраженным светом.
Последняя информация. Данная вспышка (по крайней мере с «никоновски»
исполненном башмаком) работает в ручных режимах со всеми камерами, имеющими
стандартный горячий башмак. Необходимо только изолировать два управляющих
контакта, расположенных на горячем башмаке камеры ближе к видоискателю, иначе
вспышка будет срабатывать через раз. Работа вспышки проверена на Зените и
Sony Cyber-Shot DSC-V1 (для этой камеры достаточно
просто вдвинуть вспышку в полозки чуть-чуть не до конца, тогда управляющие
контакты будут изолированы)
Итог: Прекрасная вспышка
за смешные деньги…
![]()
F10E02101
E L E C T R O N I C F L A S H
EF-500 DG SUPER
INSTRUCTIONS
BEDIENUNGSANLEITUNG
MODE D’EMPLOI
INSTRUCCIONES
ISTRUZIONI PER L’USO
BRUGSANVISNING
GEBRUIKSAANWIJZING
EO
2~13 ENGLISH 14~25 DEUTSCH 26~39 FRANÇAIS 40~52 ESPAÑOL 53~65 ITALIANO 66~77
DANSK 78~89 NEDERLANDS 90~101
1

2
1
3
10
11
4
6
7
5 8
9
12 13 14 15 16
2

1
|
1. |
2. |
3.AF |
4. |
|||||
|
5. |
6. |
7. |
||||||
|
8. |
9. |
10. |
11. |
|||||
|
12.MODE |
13.SEL |
14. |
15. |
16.ZOOM |
||||
|
17.TEST |
18.LIGHT |
19. |
20. |
″ |
||||
|
┘ |
EOS |
||||
|
A |
EOS-1V, EOS 3, EOS 7, EOS 55, EOS Kiss |
, NEW EOS Kiss, EOS IX E, EOS IX 50, D30 |
|||
|
B |
EOS |
||||
|
″ |
4 |
||||
|
30 |
4 |
4
″OFF
4
″ON
TEST
″ON
4

″OFF
◄LOCK
|
ETTL TTL |
||
|
″ ON |
||
17mm
17mm
ZOOM
♣
6

|
ETTL TTL |
5 |
|||||||
|
├ |
||||||||
|
AF |
0.7m |
9m |
||||||
|
AF |
||||||||
|
17 28mm |
0.5m |
35mm |
0.7m |
|||||
|
EOS700 |
750 |
850 |
||||||
|
Tv |
30 |
|||||||
|
Av |
||||||||
|
30 |
||||||||
|
30 |
||||||||
|
ETTL TTL |
10 |
|||||||
|
ETTL TTL |
||||||||
|
A |
ETTL |
B |
TTL |
|||||
|
P |
||||||||
|
″ |
ON |
ETTL |
TTL |
M
7

|
TTL, M(1/1, 1/2) |
15 |
|
|
M(1/4, 1/8) |
20 |
|
|
M(1/16 |
1/32) |
40 |
|
MULTI |
10 |
|
ETTL TTL |
||||
|
1/1 1/128 |
||||
|
EOS700 |
750 |
850 |
||
|
M |
||||
|
M |
||||
|
MODE |
||||
|
SEL |
||||
|
SEL |
||||
|
┘ |
m F
1
↓
EOS700 750 850
FP &
Tv M
″ON


2
├

FE &
FE
|
P Tv |
Av M DEP |
|
|
ETTL |
||
|
AF |
FEL |
|
|
FEL |
0.5 |
|
├
EF-500 SUPER EOS-1V 3 7
|
1 |
3 |
1 |
2 |
1 |
2 |
|||||
|
3 |
3 |
|||||||||
|
EOS620 |
650 |
700 |
850 |
1000 |
||||||
|
SEL |
||||||||||
|
SEL |
9

FB
|
1 |
3 |
1 |
2 |
|||
|
1 |
2 |
3 |
3 |
|||
|
SEL |
||||||
|
SEL |
||||||
|
2 |
100
|
3 |
||||
|
EOS700 |
750 |
850 |
||
|
M |
||||
|
MULTI |
||||
|
MODE |
||||
|
SEL |
||||
|
SEL |
||||
|
SEL |
||||
|
SEL |
|
0 |
60 |
75 |
90 |
0 |
7 |
|||||
|
0 |
60 |
75 |
90 |
0 |
60 |
75 |
90 |
120 |
150 |
180 |
![]()
7
0.52m
|
↓ |
||||||||||||||||
|
EF-500 SUPER |
||||||||||||||||
|
2 |
EF-500 SUPER |
|||||||||||||||
|
B |
EOS750 |
|||||||||||||||
|
EOS850 |
||||||||||||||||
|
0.5m |
5m |
1m |
5m |
|||||||||||||
|
MODE |
||||||||||||||||
|
SEL |
||||||||||||||||
|
C1 |
C4 |
|||||||||||||||
|
SEL |
||||||||||||||||
|
ETTL |
||||||||||||||||
|
MODE |
||||||||||||||||
|
SEL |
||||||||||||||||
|
C1 |
C4 |
|||||||||||||||
|
SEL |
||||||||||||||||
|
ID |
||||||||||||||||
|
ID |
||||||||||||||||
|
ETTL |
||||||||||||||||
|
MODE |
||||||||||||||||
|
SEL |
ID |
|||||||||||||||
|
ID |
1 2 |
3 |
||||||||||||||
|
SEL |
||||||||||||||||
|
ID |
||||||||||||||||
|
11 |

12

ETTL
|
2 |
3 |
|||||||
|
43 |
||||||||
|
ETTL |
||||||||
|
MODE |
||||||||
|
SEL |
||||||||
|
ID |
2 |
|||||||
|
ID |
||||||||
|
3 |
┘ |
|||||||
|
├ |
|
ID |
2 |
|||||
|
OFF |
2 |
|||||
|
EOS-1V |
3 |
||||||
|
8 |
1 |
1 |
1 |
1 |
8 |
||
|
2 |
ID |
1 |
2 |
||||
|
OFF |
|||||||
|
ETTL |
|||||||
|
MODE |
|||||||
|
SEL |
|||||||
|
SEL |
|||||||
|
SEL |
ID 1
|
4++ |
||||
|
ON |
||||
|
ETTL |
|
ID |
3 |
|||||||
|
OFF |
3 |
|||||||
|
2 |
1 |
|||||||
|
EOS-1V 3 |
||||||||
|
3 |
ID |
1 |
2 3 |
|||||
|
OFF |
||||||||
|
ETTL |
||||||||
|
MODE |
||||||||
|
SEL |
||||||||
|
SEL |
||||||||
|
SEL |
||||||||
|
SEL |
13

|
(FP |
) |
FE |
||||||||||||
|
FEL |
||||||||||||||
|
ON |
OFF |
|||||||||||||
|
FE |
||||||||||||||
|
FP |
||||||||||||||
|
FB |
||||||||||||||
|
SEL |
SEL |
|||||||||||||
|
SEL |
SEL |
|||||||||||||
|
FB |
||||||||||||||
|
ETTL |
||||||||||||||
|
MODE |
||||||||||||||
|
SEL |
2 |
|||||||||||||
|
ETTL M |
MULTI |
|||||||||||||
|
MODE |
||||||||||||||
|
SEL |
||||||||||||||
|
M |
||||||||||||||
|
SEL |
||||||||||||||
|
SEL |
ON |
|||||||||||||
|
ID |
||||||||||||||
|
3 |
||||||||||||||
|
M |
||||||||||||||
|
SEL |
||||||||||||||
|
SEL |
||||||||||||||
|
SEL |
||||||||||||||
|
SEL |
||||||||||||||
14

|
MULTI |
|
|
SEL |
|
|
SEL |
|
|
SEL |
|
|
SEL |
|
″ ON |
||||||||
|
ISO |
||||||||
|
MODE |
||||||||
|
SEL |
||||||||
|
ISO |
||||||||
|
ISO |
SEL |
|||||||
|
MODE |
||||||||
|
SEL |
||||||||
|
SEL |
||||||||
|
SEL |
||||||||
|
SEL |
||||||||
|
EF-500 SUPER |
AF |
|||||||
|
TTL |
ETTL |
|||||||
|
ETTL |
EF-500 SUPER
15

|
Tv M |
||||
|
1 |
30 |
|||
|
″ |
ON |
|||
|
ISO |
||||
|
MODE |
||||
|
SEL |
||||
|
C1 C2 |
||||
|
SEL |
||||
|
SEL |
|
MODE |
|||||||
|
SEL |
|||||||
|
SEL |
|||||||
|
SEL |
|||||||
|
EF-500 SUPER |
AF |
||||||
|
SEL |
├TTL
|
50 ISO 100 m |
105mm |
|||
|
″ |
4 |
4 |
4 |
|
|
6 |
4 |
|||
|
220 |
100 |
|||
|
1 |
700 |
|||
|
28mm 105mm |
||||
|
17mm |
17

ENGLISH
Thank you very much for purchasing the Sigma EF-500 SUPER EO Electronic Flash. This product is specifically developed for the Canon EOS series SLR cameras. Depending on the camera model, functions and operation may vary. Please read this instruction booklet carefully. To add to your enjoyment of photography, the flash has a variety of features. To make the most of all these features, and to get the maximum performance and enjoyment from your flash, please read this instruction booklet, together with your camera’s instruction manual, before using the flash, and also keep it handy for your future reference.
PRECAUTIONS
In order to avoid causing any damage or injury, please read this instruction manual very carefully, paying attention to the cautionary signs below, before using the flash.
Please take special note of the two cautionary signs below.
 Warning !!
 Caution!!
Using the product disregarding this warning sign might cause serious injury or other dangerous results.
Using the product disregarding this caution sign might cause injury or damage.
 Symbol denotes the important points, where warning and caution are required.
  Symbol contains information regarding the actions that must be avoided.
 Warning !!
This flash contains high voltage circuits. To avoid electric shock or burns, do not attempt to disassemble the flash. If the outside shell of the unit is broken or cracked, do not touch the mechanism inside.
Do not fire the flash close to eyes. Otherwise the bright light could damage the eyes. Keep at least 1m/3feet distance between face and the flash unit, when taking a picture with flash.
Do not touch the synchro terminal of your camera when the flash is attached to hot shoe. High voltage circuitry could cause electric shock.
Never use your camera in an environment where flammable, burnable, gas, liquids or chemicals, etc, exist. Otherwise, it might cause fire or explosion.
 Caution !!
Do not use this flash unit on any camera other than the Canon EOS series cameras; otherwise the flash may damage the circuitry of these cameras.
This flash unit is not waterproof. When using the flash and camera in the rain or snow or near water, keep it from getting wet. It is often impractical to repair internal electrical components damaged by water.
Never subject the flash and camera to shock, dust, high temperature or humidity. These factors might cause fire or malfunctioning of your equipment.
When the flash is subjected to sudden temperature change, as when the flash unit is brought from a cold exterior to warm interior, condensation might form inside. In such a case, place your equipment in a sealed plastic bag before such a change, and do not use the flash unit, until it reaches room temperature.
Do not store your flash in a drawer or cupboard etc., containing naphthalene, camphor or other insecticides. These chemicals will have negative effects on the flash unit.
Do not use a thinner, Benzene or other cleaning agents to remove dirt or finger prints from the component. Clean with a soft, moistened cloth.
For extended storage, choose a cool dry place, preferably with good ventilation. It is recommended that the flash be charged and fired several times a month, to maintain proper capacitor functioning.
18

DESCRIPTION OF THE PARTS
EXTERNAL PARTS
|
1.Flash Head 2.Built-in Wide Panel |
3.AF Auxiliary Light 4.Bounce Angle; Up and Down 5.Bounce |
|||
|
Angle; Right and Left |
6.Bounce Lock and Release Button; Up and Down |
7.Swivel Lock and Release |
||
|
Button; Right and Left |
8.LCD Panel |
9.Battery Cover 10.Shoe Ring 11.Shoe |
||
|
CONTROLS |
||||
|
12.MODE Button |
13.<SEL> SELECT Button 14.< + > Increment Button |
15.< — > Decrement Button |
||
|
16.ZOOM Button |
17.TEST Button 18.LIGHT Button 19.Ready Light 20.Power Switch |
CAMERA MODELS AND FUNCTIONS
Although this Flash unit has been equipped with numerous functions, depending on the camera model being used some functions may have some limitations. Please confirm the type camera you have from the list below. Please refer to explanations of each function through the instruction manual; If no model information is specified, it means that this function of flash can be used with all type of EOS cameras.
A type camera EOS-1V, EOS 3, EOS 7, EOS 55, EOS Kiss III, New EOS Kiss, EOS IX E, EOS IX 50, D30
|
B type camera |
All other EOS cameras except those listed above |
ABOUT THE BATTERY
This flash unit uses four “AA” type Alkaline dry cell batteries or Ni-Cad, Ni-MH, rechargeable batteries. Manganese batteries can also be used but as they have a shorter life than Alkaline batteries, we do not recommend using them. Please replace batteries if it takes more than 30seconds to light the Ready Lamp.
To assure proper electrical contact, clean the battery terminals before installing the batteries
NiCad batteries do not have standardized contacts. If you use NiCad batteries, please confirm that the battery contacts touch the battery compartment properly.
To prevent battery explosion, leakage or overheating, use four new AA batteries of the same type and brand. Do not mix the type or new and used batteries.
Do not disassemble or short-circuit batteries, or expose them fire or water; they may explode. Also, do not recharge the batteries other than Ni-Cd rechargeable batteries.
When the flash will not be used for an extended period of time, remove the batteries from the flash, to avoid the possibility of damage from leakage.
Battery performance decreases at low temperatures. Keep batteries insulated when using the flash in cold weather. As with any flash, it is recommended you carry spare batteries when on a long trip, or when photographing outdoors in cold weather.
BATTERY LOADING
1.Be sure to set the Power Switch to the off position then slide, the battery cover in the direction of the arrow to open.
2.Insert four AA size batteries into the battery chamber. Be sure the + and – ends of the batteries are aligned according to the diagram in the chamber.
3.Close the cover.
4.Slide the Power Switch to the ON position. After few seconds, the Ready Lamp will light, indicating that the flash unit can be fired.
5.Please press the “Test Button” to be sure that the flash is working properly.
AUTO POWER OFF
To conserve battery power, the flash unit automatically turns itself off when the flash is not used within approximately 90seconds. To turn the flash on again, depress the “TEST” button or the camera shutter button, halfway. Please note that, “Auto Power Off” mechanism does not work with wireless TTL flash mode, normal slave flash, and designated slave flash modes.
ERROR INDICATION
If the battery power is not sufficient or there is electric information error between the camera and flash unit, the “Flash Coverage Angle” will blink on the LCD panel. When this occurs, turn the power switch off and on.
19

If it still blinks, after this procedure, check the battery power.
ADJUSTING THE FLASH HEAD
Depress the Bounce “Up and Down” Lock and Release Button, and adjust the flash head to the desired position.
 appears on the LCD panel, when you turn on the flash, and if this mark blinks, then the flash head is adjusted to an incorrect position.
ATTACHING AND REMOVING THE FLASH TO AND FROM THE CAMERA
Be sure turn off the Power Switch. Then insert the Shoe Base into the hot shoe on the camera and turn the Shoe Locking Ring until it is tight.
When you attach or remove the flash, grasp the bottom of the flash to prevent damage to the shoe foot and camera’s hot shoe.
If the camera’s built-in flash is set in up position, please close it before you attach the flash unit.
To remove the flash, rotate the shoe-locking ring in the opposite direction of ◄LOCK mark, until it stops.
SETTING OF FLASH COVERAGE ANGLE
When you press the ZOOM button  symbol appears. Each time you press the ZOOM button, the LCD panel display will change and indicate the zoom position in sequence, as follows.
Auto
Generally, in the ETTL (TTL) mode, the flash will automatically set the zoom position according to the focal length of your lens.
When you turn on the main switch, the flash will memorize and set the zoom head position to the last setting used. If you use a lens wider than the flash head setting, there may be under exposed areas around the edge of the picture. Depending on the flash head setting, the flash’s Guide Number will be changed.
WIDE PANEL
This flash is equipped with built in type wide panel, which can provide ultra wide 17mm angle of coverage. Slide out the wide panel and flip it down to cover flash’s head. Then the coverage angle setting of the flash will be set to 17mm automatically.
If the built-in wide panel comes off accidentally, the ZOOM button will not function. In this case please contact the store where you have purchased the flash, or a service station.
LCD PANEL ILLUMINATION
When you press the LIGHT button, the LCD panel will illuminate for about 8 seconds. The illumination stays on longer than 8sec, if you press the LIGHT button once again.
ETTL (TTL) AUTO FLASH
In the TTL AUTO Mode, the camera will control the amount of flash lighting to get the appropriate exposure for the subject.
“A” type cameras can be set in ETTL mode. “B” type cameras can be set in TTL mode.
20
![]()
|
1. Set the camera’s mode to Full-AUTO Mode. ( Usually |
Mode. If the camera does not have |
Mode, |
|
set to P Mode.) |
2.Turn on the power switch of the flash, the ETTL (TTL) mark will appear on the LCD panel and flash will start charging.
3.Focus on your subject.
4.Check that the subject is located within the effective distance range indicated on the LCD panel.
5.Press the shutter button, after the flash is fully charged.
Note: When the flash is fully charged, the ready light in the viewfinder appears.
When the camera receives the appropriate exposure, the ETTL (TTL) mark on the LCD panel will appear for 5 seconds. If this indication does not appear, the flash illumination is not sufficent for that situation. Please re-take the picture at a closer distance.
The AF Auxiliary Light will turn on automatically as you focus on a dark area. Note: Effective distance is up to about 0.7 to 9 meter (2.3-29.5 feet).
When the camera is set to Creative Zone, please remember that the flash will be set to the last chosen mode each time.
When the flash is fully charged, the flash mark will appear in the finder. If the shutter is released before the flash is fully charged, the camera will take the picture at a slow shutter speed, with no flash.
If the flash ranges below apply, the distance range bar marks on the LCD panel will blink.
|
Zoom Setting |
Flash Range |
|
17-28mm |
0.5m or shorter |
35mm or longer 0.7m or shorter
USING FLASH IN OTHER CAMERA MODES (Except EOS700, 750, 850)
Shutter Speed Priority Setting
By selecting the Tv mode of the camera, you can set the shutter speed from 30sec. to 1/X sync speed. When you set the desired shutter speed, the camera will select the appropriate aperture value for the background. If the subject is too light or too dark, the aperture value indicator will blink and show the limit values (maximum or minimum aperture). In such as case, the camera proceeds to take flash photograph at the limit value. Thus, the main subject in the picture may be exposed correctly, but the background will become under or over exposed.
Aperture Priority Setting
By selecting the Av mode of your camera, the camera will select the appropriate shutter speed for the background. If the subject is too bright or too dark, the shutter speed indicator will blink and show the limit highest or slowest shutter speed value. The highest shutter speed will be limited to the camera’s normal flash synchronization speed. In such a case, the camera proceeds to take a flash photograph at the limit value. Thus, the main subject in a picture may be exposed correctly, but the background will become under or overexposed.
When used with M Mode
You can set the desired shutter speed and aperture value. The sync speed of camera is 30sec. If you adjust exposure according to the exposure meter indication, the camera will work as for Daylight synchronization flash or slow synchronization.
LIMITS OF CONTINUOUS SHOOTING
To prevent overheating of the flash’s circuitry, please do not use your Flash unit for at least 10minutes after using the number of flash exposures, shown in the below table have been made in quick succession.
|
Mode |
Number of Flash Exposures |
|
TTL, M(1/1,1/2) |
15 Continuous Flash Shots |
|
M(1/4, 1/8) |
20 Continuous Flash Shots |
|
M(1/16-1/32) |
40 Continuous Flash Shots |
|
Multi |
10 Cycle |
MANUAL FLASH OPERATION
Manual flash is provided when shooting the subjects when the correct, Exposure is difficult to obtain in the TTL mode. In the manual flash mode, you can set the flash power level from 1/1 (full) to 1/128 power in one step increments.
21

1.Set the camera’s exposure mode to M.
2.Press the MODE button on the flash unit to select M.
3.The guide number value blinks when you press the SEL button.
|
4. Press |
or |
button to set the desired flash power output. |
5.The manual flash output display will stop blinking and remain displayed after you press the SEL button again.
6.Adjust the focusing by pressing the shutter button, read-out subject distance from the focus ring on the lens. Then, adjust the F-stop or flash power, until the distance indicated on the LCD panel of the flash, and subject distance becomes about equal.
7.When the Ready Light of the flash is illuminated, the unit is ready for use.
You can calculate the correct exposure by using the following formula: Guide Number “GN” / Flash to Subject Distance = F-stop
This flash unit will automatically calculate and indicate the appropriate Subject Distance according to the above formula.(Please refer to table1 on the last page)
SECOND CURTAIN SYNCHRONIZATION
When you photograph a moving subject with slow synchronization, usually the furrow of the subject will be exposed in front of the subject. The ordinary flash light will fire when the first shutter curtain is fully opened, thus the subject will be exposed from the time flash is fired to the time the shutter is closed (First curtain synchronization). When you use second curtain synchronization, the flash will fire just before the second curtain begins to closes, and the subject will be exposed by ambient light from the time the shutter opens until the flash fires. As a result the furrow of the subject will be recorded behind the subject. It will be a more natural effect.
|
This mode cannot be used with EOS 700, 750, 850 cameras. |
|||||||
|
1. Set the desired picture-taking mode of the camera |
|||||||
|
2. |
Press |
or |
, button |
mark will be displayed on the LCD panel. |
|||
|
3. |
Adjust the focus, and take the picture after confirming the ready light. |
||||||
|
First curtain synchronization will be set, if |
mark is not |
||||||
|
displayed. |
|||||||
|
If the camera is set to Full Auto Mode this function cannot be used. |
|||||||
|
To cancel second –curtain synchronization, turn off the |
mark on the LCD panel by using |
or |
buttons. |
HIGH SPEED SYNC (FP) FLASH, A TYPE CAMERAS ONLY
When you take a picture with an ordinary flash, you cannot use a shutter speed faster than the camera’s synchronized speed, because the flash must fire when the shutter curtain is fully open. The High Speed Sync keeps firing while the shutter curtain is running. Thus you can use a shutter speed faster than the shutter’s normal synchronized speed.
1.Select the camera’s exposure mode. (“Tv” or “M” modes can be used)
2.Select a shutter speed faster than the camera’s normal synchronized speed.
3.Slide the Power Switch of the flash to the ON position.
4.Choose the Flash Mode by using MODE button (“ETTL” or “M” modes can be used).
|
5. Press |
or |
button until the |
mark is displayed on the LCD |
||
|
panel. |
6.Focus on the subject
7.Check that the subject is located within the effective distance, indicated on the LCD panel.
8.Confirm the  mark in the viewfinder of the camera, and then you can take the picture.
With high-speed sync, the Guide Number changes depending on the shutter speed. The flash range will be shorter (ie Guide Number will be smaller) when shutter speed is faster. (Please refer to table2 on the last page). Selecting shutter speeds slower than the camera’s normal synchronized speed cancels Hi-speed sync. Then the flash will automatically set to normal ETTL operation. To activate FP flash again, follow the procedure (No.1) for High speed sync (FP flash) described in this instruction manual.
It is possible to use exposure compensation function, with high speed synchronization operation. To do 22

so, please refer to your camera’s instruction manual regarding “exposure correction”.
 will disappear when Hi-speed sync (FP Flash) is cancelled.
FE LOCK
“FE” lock mode allows you to choose exposure for the part of the viewfinder, and lock it in, before taking the picture.
1.Set the camera’s exposure mode (“P”, “Tv”, “Av”, “M” or “DEP”).
2.Set the flash’s mode to the E-TTL or the High Speed Sync.
3.Focus on the subject
4.Focus on the subject in the center AF frame of the viewfinder, and depress FE lock button.
The flash unit will make a pre-flash and calculate and memorize, the amount of light necessary for correct exposure. The camera’s viewfinder will display “FEL” for 0.5 sec and the correct exposure will be set.
If the viewfinder shows  mark, it means that power is not sufficient for correct exposure. Please get closer to the subject and repeat from step 3.
5. After composing the picture, press the shutter button.
Les modalités de la fonction FEL peuvent varier selon le boîtier utilisé. Nous vous conseillons de vous reporter au mode d’emploi de votre appareil.
MODELING FLASH
When the EF-500 Super is used with EOS1V, -3 ,-7 (Elan 7), a modeling flash can be fired, so you can check the lighting and shadow effects before you take the picture.
When the camera is set to modeling flash, the Flash panel will display the  symbol automatically.
EXPOSURE COMPENSATION
You can use flash exposure compensation in combination with normal exposure compensation (to control the background exposure level) in flash picture. Flash exposure compensation can be set 1/3 stops in 3-stop increments (or in 1/2 stop increments with some cameras).
This mode cannot be used with EOS 620, 650, 700, 850 and 1000 cameras.
1.Press the SEL button and select 
2.Press the 
 or
or 
 button to set the desired flash exposure compensation amount.
3.Display will stop blinking and remain displayed, after pressing the SEL button again.
4.Focus on the subject.
5.Please check that the subject is within the flash range as displayed on the EF 500 Super’s LCD panel.
6.You can take the picture after confirming that the Ready Light of the flash is illuminated. To cancel exposure compensation, please start from step 1 and choose + 0 on display.
FB (Flash Exposure Bracketing)
With FB, you can get bracketed flash shots of the subject, while the ambient exposure level remains constant. The bracketed flash shots can be taken in the sequence of correct exposure, under exposure and
over exposure, up to 3 stops in 1/3EV increments (or 1/2EV increments with some cameras).
1.Press the SEL button;  mark will blink.
2.Press the 
 or
or 
 button to set the flash exposure bracketing amount.
3. will be displayed after pressing the SEL button again.
4.Adjust the focusing
5.Please check that the subject is within the flash range displayed on the EF500 Super’s LCD panel.
6.Check through the viewfinder and confirm the  flash charged mark, and take the picture.
7.If it is necessary, repeat steps 4 to 6.
This function will be cancelled automatically after making the third exposure.
23

MULTI FLASH MODE
While the shutter is open, the flash will fire repeatedly. By doing so a series of images of the subject will be exposed in one frame. A dark background with a bright subject shows more effectively in this mode. It is possible to set the firing frequency between 1Hz and 199Hz. Up to 100 flashes can be fired continuously. The maximum number of flashes varies, depending on the flash guide number and firing frequency settings. (Please refer to table3 on the last page).
This function cannot be used with EOS 700, 750, 850 cameras.
1.Set the camera’s exposure mode to M mode, and set the F number
2.Press the MODE button until the Multi-flash mode appears
3.Press the SEL button until the flash firing frequency starts to blink.
|
4. |
Press the |
or |
button to set the desired flash frequency value. |
|||||||
|
5. |
After pressing the |
SEL |
button again, the flash power level will blink. |
|||||||
|
6. |
Press the |
or |
button to set the desired power level. |
|||||||
|
7. |
Press the |
SEL |
button again, the number of flashes will blink. |
|||||||
|
8. |
Press the |
or |
button to set the desired number of flashes. |
|||||||
9.Press the SEL button again, the display will stop blinking.
10.When the ready light of the flash is illuminated, the unit is ready to use.
Note: Please set the shutter speed longer than; Number of Flashes you want Firing Frequency
BOUNCE FLASH
When you take a photo with flash in a room, sometimes a strong shadow will appear behind the subject, if you point the flash head upwards or sideways to reflect the light off the ceiling, wall etc. the subject will be illuminated softly. Press the lock button and adjust the flash head to set the bounce angle.
|
UP: 0°, 60°, 75°, 90° |
DOWN: 0°,7° |
|
RIGHT: 0°, 60°, 75°, 90 |
LEFT: 0°, 60°, 75°,90°, 120°, 150°, 180° |
When the bounce flash mode is activated, a bounce indicator  will appear on the LCD panel.
The picture will receive the color from the reflecting surface. Please choose a white surface for bouncing.
Depending on the reflecting surface, the subject distance and other factors, the effective distance range for the TTL AUTO may change. Please check for correct exposure confirmation (ETTL or TTL mark on the LCD panel) after releasing the shutter.
Close-up Exposures
For bounce flash can be tilted 7° downward for close-ups. The Flash will be effective only for the subjects 0.5 meter to 2 meters. When the flash head is tilted 7° will blink.
WIRELESS FLASH
When you use the “Wireless Flash” mode, you can take pictures with a more three-dimensional feeling by shadow, or you can make natural image by shadow depending on the flash position, without any extension cord connecting the camera body and flash. In case of EF-500 Super, communication between the camera body and the flash will be done by the light of the flash. In the “Wireless Flash” mode, the camera will calculate the correct exposure automatically.
The camera models of B type, can be used with “Wireless Manual Flash” and “Wireless Multi Flash” functions only. The EOS750 and EOS850 cannot be used with “Wireless Flash”.
In this instruction, we call a flash unit, which is attached to the camera body “Master unit ”, and we call a flash unit at a remote position “Slave unit”.
When you set a slave unit at the desired position, you can use mini-stand. This mini-stand has a screw hole for a tripod.
Place the slave flash unit at the desired location. Do not place the slave unit within the picture area. Please set the flash unit within the range of 0.5m/1.5ft~5m/16ft from the subject and set the camera body
24

within the range of 1m/3ft~5m/16ft from the subject.
Preparation for Wireless Flash
Channel Setting
In case of other people are using Wireless Flash mode near you, your flash may be connected with the other person’s flash and your flash may fire. In this circumstance, please set the different channel for your flash from that of the other person’s flash.
Channel setting for Master unit
1.Press the MODE button to Select the  mark.
mark.
2.Press the SEL button several times to make the channel indicator blink.
|
3. |
Press the + or – button to set the channel number. (C1 |
C4) |
||||
|
4. |
Press the |
SEL |
button several times to stop the blinking. |
|||
|
Channel setting for Slave unit |
||||||
|
1. |
Press the |
button to Select the ETTL |
mark. |
|||
|
MODE |
2.Press the SEL button several times to make the channel indicator blink.
3.Press the + or – button to set the channel to the same number. (C1
C4) as the master unit.
4. Press the SEL button several times to stop the blinking.
If the channel setting number of Master and Slave are
different, the Slave will not fire. Please set the same number for Master and Slave.
Slave ID Setting
When you use several Slave units, the Slave ID can be set to distinguish a Slave unit from Main flash.
1. Press the MODE button to Select the ETTL 
 mark.
mark.
2.Press the SEL button several times to make the Slave ID indicator blink.
3.Press the + or – button and set the ID number. (1, 2 or 3)
4.Press the SEL button, the display will stop blinking.
If you want to all Slave units to fire at the same flash output, this setting is not necessary.
Master Flash ON/OFF Setting
You can set the Master flash unit firing ON or OFF.
Master Flash unit firing ON
1.Press the MODE button to Select the  mark.
mark.
2.Press the + or – button to indicate the  mark.
mark.
Master Flash unit firing OFF
1.Press the MODE button to Select the  mark.
mark.
2.Press the + or – button to indicate the  mark.
mark.
Wireless ETTL Autoflash (A type cameras only)
In this Wireless ETTL Autoflash function, the camera automatically calculates the correct exposure.
Wireless ETTL Autoflash With Flash Ratio OFF
If no flash ratio is desired, the slave ID setting is not necessary. You can set 1, 2 or 3.
All the Slave flash units will fire at the same flash output and the ETTL autoflash system controls the total flash amount automatically, to obtain a correct flash exposure.
|
Master Flash unit ON + Slave Flash unit(s) |
|
|
Please set the Master Flash unit as following. |
|
|
1. Press the MODE button to Select the ETTL |
mark. |
2.Press the + or – button to indicate the  mark
mark
3.Press the SEL button several times and confirm that the flash ratio is 1:1.
If the flash ratio is indicated as  or
or  , please refer to the column of “Wireless ETTL Autoflash With Flash Ratio ON (Two Slave Units) or (Three Slave Units)” and reset to the flash ratio to 1:1.
25

4.Place the Slave Unit at the desired position.
5.Make sure that the Master Unit and Slave Unit have both been charged. Master Unit’s Ready Light is lit and Slave Unit’s AF Auxiliary Light is blinking.
6.Focus on the subject and take the picture.
Master Flash Unit OFF + Slave Flash Unit(s)
Please set the Master Flash unit as following.
1.Same process as Master Flash unit ON + Slave Flash unit(s) and set the
2.following icons to be indicate.
ETTL
3.Place the Slave Unit at the desired position.
4.Make sure that the Master Unit and Slave Unit have both been charged.
5.Focus on the subject, and take the picture
Slave ID, Wireless ETTL Autoflash With Flash Ratio (Two Slave Units)
The Wireless ETTL autoflash system, described as an example, consists of a master unit on the camera, set to master flash OFF, and two slave units. When you set the flash ratio, the ETTL autoflash system then controls the total flash amount according to the flash ratio, to obtain a correct exposure.
|
Only EOS-1V, EOS-3 cameras can use this function. |
||||
|
The flash ratio can be set between 8 : 1 1 : 1 |
1 : 8. |
|||
|
Please set the Slave ID to 1 and 2 for each Slave unit. |
||||
|
Set the Master unit as follow. |
||||
|
1. |
Please set the Master Flash unit firing mode to OFF. |
|||
|
2. |
Press the |
MODE |
button to Select the ETTL |
mark. |
3.Press the SEL button several times to make the flash ratio indicator blink.
4.Press the + or – button and select the  . (Blinking)
5.Press the SEL button to make flash ratio value blink.
6.Press the + or – button to set the flash ratio.
7.Press the SEL button to make the Flash Ratio indicator stop blinking.
8.Place the Slave Unit at the desired position.
9.Confirm that both the master and slave units are charged.
10.Focus on the subject and take the picture.
If you want to change the settings, you can start from step 3.
If you want to cancel the setting, please set the flash ratio 1:1. (refer to step 4)
Slave ID, Wireless ETTL Autoflash With Flash Ratio (Three Slave Units)
The following wireless ETTL autoflash procedure is for a master unit with three (3) slave units. This procedure sets the two (2) flashes ratio and the flash exposure compensation amount for other slave unit.
|
Only EOS-1V and EOS-3 camera can use this function. |
||
|
Please be set the Slave ID 1, 2 and 3 for each Slave unit. |
||
|
Set the Master unit as follow. |
||
|
1. |
Please set the Master Flash unit firing mode to OFF. |
|
|
2. |
Press the MODE button to Select the ETTL |
mark. |
3.Press the SEL button several times to make the flash ratio indicator display blink.
4.Press the + or – button to select the 1 2 3. (Blinking)
5.Press the SEL button to make the flash ratio value blink.
6.Press the + or – button to set the flash ratio.
7.Press the SEL button to make the flash exposure compensation display blink.
8.Press the + or – button and set the flash exposure compensation amount.
9.Press the SEL button to make the indicator stop blinking.
10.Place the Slave Units at the desired position.
11.Confirm that both the master and slave units are charged.
12.Focus on the subject and take the picture.
If you want to change the settings, you can start from step 3.
If you want to cancel the setting, please set the flash ratio to 1:1. (refer to step 4)
26

Wireless High-Speed Sync (FP Flash)
|
1. |
Please set the master flash to Wireless Flash mode. (Refer to Page 10) |
||
|
2. |
Press the + or – button to set to |
(Master Flash unit firing ON) or |
(Master Flash unit firing OFF). |
3.The remainder of the procedure for setting wireless high-speed sync, is the same as for normal high-speed sync. It is not necessary to make any additional settings on the Slave units.
Wireless Flash Exposure Compensation
1.Please set master flash unit to the Wireless Flash Mode.
2.Press the SEL button to make  mark blink.
3.Press the + or – button to set the flash exposure compensation amount.
4.Press the SEL button several times to make exposure compensation indicator appear.
5.The remainder of the procedure for setting wireless Flash Exposure Compensation is the same as for normal flash exposure compensation.
It is not necessary to make any additional setting on the Slave units.
You can also set the flash exposure compensation individually for each slave unit.
Wireless FE Lock
1.First please set the flash to Wireless Flash mode.
2.Focus on the subject and press the FEL button on the camera.
3.The procedure for setting wireless EF lock is the same as for normal FE lock. It is not necessary to make any change to the settings on the Slave units.
Wireless Flash Exposure Bracketing (FB)
1.First please set the flash to the Wireless Flash Mode.
2.Press the SEL button several times to make the  mark blink.
3.Press the + or – button and set the flash exposure compensation amount.
4.Press the SEL button several times to make an indicator stop blinking.
5.The remainder of procedure for setting wireless FB is the same as for normal FB. It is not necessary to change any settings on the Slave units.
Changing the Mode of Wireless
Please set the flash as follows.
1.Press the MODE button to select the ETTL /  mark.
mark.
2.Press and hold the SEL button more than 2 seconds to make the mode indicator blink.
3.Press the MODE button and select the ETTL, M, or MULTI mode.
4.Press the SEL button to make the mode of indicator stop blinking.
Wireless Manual Flash
You can manually set the slave unit’s flash output, with the master unit. The flash output among the slave units can be uniform or varied. To determine the proper flash exposure, use a hand-held flash meter.
Wireless Manual Flash With Uniform Flash Output
Please set the Master flash unit as described below.
1. Please followe the procedure of Changing the Mode of Wireless and set to the M  mark.
mark.
2.Press the SEL button several times to make the flash output amount indicator blink.
3.Press the + button or – button to set the flash output amount.
4.Press the SEL button several times and the flash output will be displayed without blinking.
If the master flash unit ON function is set, the master unit will also fire, at the same flash output.
Wireless Manual Flash With Varied Flash Output
You can set a different flash output for each slave unit(s) (Following are explains the procedure for using with three slave flash units). Please set the master flash unit as follow.
|
1. |
Please be followed the procedure for Changing the Mode of Wireless, and set to the M |
mark. |
||
|
2. |
Press the |
SEL |
button several times to make the mark blink. |
|
|
27 |

3.Press the + button or – button to select  indicator. (blinking)
4.Press the SEL button, make the flash output display and  blink.
5.Press the + button or – button to set the flash output amount for 1.
6.Press the SEL button, make the flash output display and  blink.
7.Press the + button or – button to set the flash output amount for 2.
8.Press the SEL button, make the flash output display and  blink.
9.Press the + button or – button to set the flash output amount for 3.
10.Press the SEL button to make the indicator stop blinking.
Note: If there are only two slave units, please select the  indicator at step 3 ( step 9 and step 10 may be omitted).
Wireless Multi Flash
|
Please set the master flash unit as follows. |
||||
|
1. |
Please follow the procedure for Changing the Mode of Wireless, and set to the MULTI |
mark. |
||
|
2. |
Press the |
SEL |
button to make the firing frequency display blink. |
|
|
3. |
Press the |
+ button or – button to set the firing frequency. |
||
|
4. |
Press the |
SEL |
button to make the flash output amount display blink. |
|
|
5. |
Press the |
+ button or – button to set the flash output amount. |
||
|
6. |
Press the |
SEL |
button to make the flash count display blink. |
|
|
7. |
Press the |
+ button or – button to set the flash count. |
||
|
8. |
Press the |
SEL |
button to make the indicator stop blinking. |
|
|
The firing frequency and flash count will be the same for all slave units. |
Slave Flash
When you select this mode with the MODE button, please make sure that the indicator of flash mode (ETTL, M, MULTI) is not displayed.
Normal Slave Flash
Even if the EF-500 Super is not attached to the camera body, you can fire the flash by using the camera’s built-in flash or another flash unit
1.Attach the flash unit to the camera’s hot shoe.
2.Set the camera’s exposure mode to the desired mode. If you use A or M mode, set the desired aperture value also.
3.Turn on the flash unit. Then press the shutter button half way.
Now, the aperture value and film speed are automatically transmitted to the flash unit.
4.Remove the flash unit from camera.
5.Press the MODE button and select the  /
/  (Slave) mode.
6.Press the SEL button several times to make the flash output amount indicator blink.
7.Press the + button or – button to set the flash output amount.
Determine the appropriate flash power by setting the distance indicator on the LCD panel to coincide as closely as possible, with the actual distance from the slave flash to the subject. If the actual distance is out of range, you need to change the aperture value.
You can set the film speed or aperture value on the flash unit manually, if desired.
a.For the film speed … Press the MODE to select the ISO, then press the SEL button to make the indicator blink. Press the + button or – button and set the desired film speed, then press the SEL button once again.
b.For the aperture value … When the flash unit is set to the Slave mode, press the SEL button to make the indicator for the aperture value blink, and press the + button or – button to set the desired aperture value. Then press the SEL button.
8.Press the SEL button several times to make the display stop blinking.
9.Place the slave unit in the desired location. Do not place the slave unit within the Picture area.
10.After you confirm that all flash units are fully charged, press the shutter button to take the picture. When the EF-500 Super is fully charged, the AF Auxiliary Light will blink.
The flash will not fire if the EF-500 Super is attached to the camera body while it is in the Slave Mode setting.
28

If you are using a Canon brand flash unit with ETTL function on your camera, and the EF-500 Super flash unit as a slave unit, please do not use ETTL function, as the monitor pre-flash may cause the slave to fire prematurely.
Designated Slave Flash
If you use two or more EF-500 Super flash units, you can designate which flashes will fire together by using the channel settings. In this mode, one flash unit will be used as the Slave Controller and the others for firing as Slaves.
Setting the Slave Flash unit(s) for firing
1.Attach the firing flash unit to the camera body.
2.Set the camera’s exposure mode to S or M mode.
Then set the shutter speed to 1/30 or slower. The slave Controller will transmit the designated signal before the others fire. Thus if you use a shutter speed faster than 1/30, the firing flash units will not be synchronized.
3.Switch “ON” the flash unit, and press the camera’s shutter button halfway.
Now, aperture value and film speed are automatically transmitted to the slave flash unit.
4.Remove the slave flash unit from camera.
5.Press the MODE button and select the  /
/  . (Slave Mode)
6.Press the SEL button to make the channel display indicator blink.
7.Press the + button or – button to set the channel number. (C1 or C2)
8.Press the SEL button to make the output amount display indicator of flash blink.
9.Press the + button or – button to set the flash output amount.
Set the flash power by setting the distance indicator on the LCD panel to coincide as closely as possible with the actual distance from the slave flash to the subject. If the actual distance is out of range, you need to change the aperture value.
10.Press the SEL button several times to make the display stop blinking.
11.Place the slave unit in the desired location. Do not place the slave unit within the picture area.
Setting for Slave Controller unit
12.Attach the Slave Controller flash unit to the camera body.
13.Press the MODE button and select the  /
/  (Slave Mode).
14.Press the SEL button to make the channel display indicator blink.
15.Press the + button or – button to set the same channel number as that set on the firing flash unit.
16.Press the SEL button to make the flash output amount display indicator blink.
17.Press the + button  mark displayed.
18.Press the SEL button to make the display stop blinking.
19.After you confirm that all flash units are fully charged, press the shutter button to take the picture. When the firing flash unit of EF-500 Super is fully charged, the AF Auxiliary Light will blink.
You cannot set the aperture value by SEL button, if you select the  mark at the setting of flash
output amount. The flash unit will be set to the Slave Controller mode. The Slave Controller unit functions only to control the slave unit.
SPECIFICATIONS
TYPE : Clip-on type serial-controlled TTL auto zoom electric flash GUIDE NUMBER : 50 (ISO 100/m, 105mm head position)
POWER SOURCE : Four AA type alkaline batteries or, : Four AA type Ni-Cd batteries or, : Four AA type Ni-MH Nickel-Metal Hydride
RECYCLING TIME : about 6.0 sec. (Alkaline batteries)
: about 4.0 sec. (Ni-Cd, Ni-MH Nickel-Metal Hydride) NUMBER OF FLASHES : about 220 flashes (Alkaline batteries)
: about 100 flashes (Ni-Cd, Ni-MH Nickel-Metal Hydride) FLASH DURATION : about 1 / 700 sec. (full power firing)
FLASH ILLUMINATE ANGLE : 28mm 105mm motor powered control (17mm with Built-in Wide Panel) AUTO POWER OFF : Available
COLOR TEMPERATURE : Suitable for Daylight type Color Films 29
WEIGHT : 335 g/11.8oz. DIMENSIONS : 77mm(W)/3.0in. x 139mm(H)/5.5in. x 117mm(L)/4.6in.
30
![]()
DEUTSCH
Vielen Dank, dass Sie sich für ein SIGMA EF-500 Super EO Blitzgerät entschieden haben. Dieses Produkt wurde speziell für den Einsatz an Spiegelreflexkameras der Canon EOS-Serie entwickelt. Abhängig von dem jeweiligen Kameramodell können Funktionen und Handhabung differieren. Bitte lesen Sie diese Gebrauchsanleitung bezogen auf Ihr Kameramodell sorgfältig durch. Um Ihre Freude an der Fotografie zu steigern, besitzt dieses Gerät eine Vielzahl von Ausstattungsmerkmalen. Sie sollten diese Gebrauchsanleitung im Zusammenhang mit Ihrer Kamerabedienungsanleitung studieren und für zukünftiges Nachschlagen griffbereit halten, um die Funktionen in vollem Umfang nutzen und die maximale Leistung des Gerätes ausschöpfen zu können.
Vorsichtsmaßnahmen
Um Verletzungen oder Beschädigungen zu verhindern, lesen Sie diese Bedienungsanleitung vor dem ersten Einsatz Ihres Blitzgerätes bitte sehr sorgfältig und vollständig durch und beachten Sie unbedingt die untenstehenden Warnzeichen. Bitte beachten Sie speziell die beiden folgenden Warnzeichen.
|
Warnung!! |
Wenn Sie die entsprechenden Hinweise nicht befolgen, kann dies zu |
|
ernsthaften Verletzungen oder anderen gefährlichen Folgen führen. |
|
|
Achtung!! |
Wenn Sie die entsprechenden Hinweise nicht befolgen, können Verletzungen |
|
oder Schäden entstehen. |
 Dieses Symbol verweist auf die wichtigen Punkte, an denen Vorsicht geboten ist.
  Dieses Symbol enthält Informationen bezüglich zu unterlassender Handlungen.
 Warnung!!
Dieses Blitzgerät enthält hochspannungsführende Schaltkreise. Um elektrische Schläge oder Verbrennungen zu vermeiden, versuchen Sie nicht, das Gerät zu öffnen. Sollte das äußere Gehäuse gebrochen oder zersprungen sein, berühren Sie keine inneren Geräteteile.
Blitzen Sie nicht aus kurzer Entfernung direkt in die Augen. Andernfalls kann das grelle Licht die Augen verletzen. Halten Sie beim Fotografieren zumindest einen Abstand von einem Meter zwischen Gesicht und Blitzgerät ein.
Berühren Sie nicht einen eventuell zusätzlich vorhanden Blitzkontakt (X) Ihrer Kamera, wenn das Blitzgerät im Zubehörschuh steckt. Hochspannungsführende Stromkreise könnten einen elektrischen Stromschlag verursachen.
Benutzen Sie Ihre Ausrüstung nie in der Umgebung entflammbarer, brennbarer Gase, Flüssigkeiten oder Chemikalien etc. Andernfalls könnte dies zu einem Brand oder einer Explosion führen.
 Achtung!!
Benutzen Sie dieses Blitzgerät nicht an einer anderen Kamera als an einer der Canon EOS-Serie; andernfalls könnte der Blitz die Schaltkreise der Kamera beschädigen.
Dieses Blitzgerät ist nicht wasserdicht. Wenn Sie die Ausrüstung im Regen, Schnee oder in der Nähe von Wasser verwenden, bewahren Sie sie davor, nass zu werden. Es ist häufig unmöglich, Wasserschäden interner elektrischer Komponenten zu reparieren.
Setzen Sie das Blitzgerät niemals Stößen, Staub, Hitze oder Feuchtigkeit aus. Diese Faktoren könnten einen Brand oder Fehlfunktionen Ihrer Ausrüstung verursachen.
Wenn das Gerät plötzlichen Temperaturschwankungen ausgesetzt, etwa aus einer kalten Umgebung in einen warmen Innenraum gebracht wird, kann sich Kondensniederschlag im Inneren des Gerätes bilden. In solchen Fällen stecken Sie das Gerät bitte vor dem Temperaturwechsel in eine zu verschließende Plastiktasche und benutzen Sie es erst wieder, wenn es sich der Raumtemperatur angepasst hat.
Bewahren Sie das Gerät nicht in einer Schublade oder einem Schrank auf, wo es schädlichen Dämpfen wie derer von Naphthalin, Kampfer oder Insektiziden ausgesetzt ist.
Verwenden Sie weder Verdünner, Benzin noch andere Reinigungsmittel, um Schmutz oder Fingerabdrücke von dem Gerät zu entfernen. Benutzen Sie ein weiches, gegebenenfalls angefeuchtetes, fusselfreies Tuch.
Bewahren Sie das Blitzgerät an einem trockenen, kühlen und gut belüfteten Ort auf. Lösen Sie den Blitz von Zeit zu Zeit aus, um seine volle Leistungsfähigkeit langfristig zu erhalten.
31

Beschreibung der Teile
Externe Teile
1.Blitzkopf 2.Eingebaute Weitwinkel-Streuscheibe 3.AF-Hilfsilluminator 4.Verstellwinkel vertikal 5.Schwenkwinkel horizontal 6.Verstellver –u. entriegelung vertikal 7.Schwenkver –u. entriegelung horizontal 8.Flüssigkeitskristallanzeige 9.Batteriefachdeckel 10.Klemmrad 11.Aufsteckfuß
Bedienungselemente
12.Betriebsartentaste <MODE> 13.Wahltaste <SEL> 14.<+> Steigerungstaste 15.<-> Reduzierungstaste 16.ZOOM Taste <ZOOM> 17.Testauslöser <TEST> 18.Beleuchtungstaste <LIGHT> 19.Bereitschaftslampe 20.Hauptschalter
Kameramodelle und Funktionen
Obgleich dieses Gerät mit einer Vielzahl von Funktionen ausgestattet ist, können sich je nach Kameramodell, an dem es verwendet wird, Einschränkungen ergeben. Bitte entnehmen Sie der nachstehenden Tabelle, in welche Kategorie Ihre Kamera einzustufen ist.
Bitte beachten Sie die Erklärungen der jeweiligen Funktionen in dieser Bedienungsanleitung; wenn kein spezielles Kameramodell erwähnt wird, steht diese Funktion für alle EOS Kameras zur Verfügung.
|
Gruppe A |
EOS-1V, EOS 3, EOS 30, EOS 50/E, EOSs 500N, EOS 300, EOS IXE, D30 |
|
Gruppe B |
Alle anderen EOS-Kameras, die nicht unter Gruppe A gelistet sind |
Batteriehinweise
Dieses Blitzgerät benötigt vier „AA“ Alkaline Trockenbatterien oder wiederaufladbare Ni-Cad oder Ni-MH Akkus. Wechseln Sie den kompletten Batteriesatz aus, wenn die Aufladezeit mehr als 30 Sekunden beträgt.
Um einwandfreien elektrischen Kontakt zu gewährleisten, reinigen Sie die Batteriekontakte, bevor Sie die Batterien einsetzen.
NiCad Akkus besitzen keine standardisierten Kontakte. Falls Sie NiCad Akkus verwenden, vergewissern Sie sich, dass die Batteriekontakte jene des Batteriefaches einwandfrei berühren.
Verwenden Sie ausschließlich vier frische „AA“ Mignonzellen einer Marke und eines Typs, um die Gefahr des Platzens einer Batterie, des Austritts von Batteriesäure oder der Überhitzung vorzubeugen. Mischen Sie keinesfalls frische und gebrauchte Batterien.
Batterien dürfen weder geöffnet, noch kurzgeschlossen bzw. ins Feuer geworfen werden, da sie explodieren können. Zur Wiederaufladung dürfen nur hierfür geeignete Zellen verwendet werden, wie etwa NiCad. Wenn Sie das Blitzgerät längere Zeit nicht benutzen wollen, entnehmen Sie bitte die Batterien, um Schäden durch austretende Batteriesäure zu verhindern.
Bei niedrigen Temperaturen lässt die Leistung jeder Batterie nach. Bewahren Sie die Batterien daher bei kalter Witterung bis zur Aufnahme getrennt vom Blitzgerät möglichst körperwarm auf.
Wie bei jedem Blitzgerät empfiehlt sich die Mitnahme von Ersatzbatterien auf einer Reise oder für Außenaufnahmen bei winterlichen Temperaturen.
Einlegen der Batterien
1.Vergewissern Sie sich, dass der Hauptschalter auf OFF steht und öffnen Sie den Batteriefachdeckel durch Schieben in Pfeilrichtung und klappen Sie ihn nach oben.
2.Setzen Sie vier Mignonzellen Typ „AA“ entsprechend der Markierung der Polung (+ und -) in das Batteriefach ein.
3.Schließen Sie den Batteriefachdeckel.
4.Schalten Sie das Gerät am Hauptschalter ein. Nach einigen Sekunden leuchtet die Blitzbereitschaftslampe auf und zeigt somit an, dass das Gerät nunmehr zündbereit ist.
5.Um sich von der Funktionsfähigkeit durch einen Probeblitz zu überzeugen, genügt ein Druck auf den Testauslöser.
Automatische Abschaltung
Um Strom zu sparen, schaltet sich das Gerät 90 Sekunden nach der letzten Betätigung automatisch ab. Zur Wiedereinschaltung genügt ein Druck auf den Testauslöser oder das Antippen des Kameraauslösers. Die automatische Abschaltung steht nicht im kabellosen Blitzbetrieb zur Verfügung.
32

Fehleranzeige
Bei ungenügender Batteriespannung bzw. fehlerhaftem Informationsaustausch zwischen Kamera und Blitzgerät blinkt die Anzeige des Leuchtwinkels auf dem Display. Schalten Sie das Gerät in diesem Fall kurzfristig aus und wieder ein. Führt dies nicht zum Erlöschen der Anzeige, prüfen Sie bitte die Batteriespannung.
Einstellen des Blitzkopfes
Drücken Sie die Verstellwinkelverund -entriegelungstaste, während
Sie den Blitzkopf in die gewünschte Position neigen.
Wenn Sie das Gerät einschalten, erscheint  auf dem LCD. Sollte das Symbol blinken, befindet sich der Blitzkopf in einer unzulässigen Position.
Anbringen und Abnehmen des Blitzgerätes
Vergewissern Sie sich, dass das Gerät ausgeschaltet ist. Schieben Sie dann den Aufsteckfuß des Blitzes in den Zubehörschuh der Kamera und drehen Sie das Klemmrad handfest an.
Fassen Sie das Gerät zum Ansetzen bzw. Abnehmen ausschließlich an seinem Unterteil an, um Beschädigungen am Steckfuß oder am Zubehörschuh der Kamera zu vermeiden.
Falls der eingebaute Blitz der Kamera ausgeklappt sein sollte, muss er vor dem Anbringen des EF 500 eingeklappt werden.
Um den Blitz abzunehmen, drehen Sie das Klemmrad in entgegengesetzter Richtung der ◄LOCK-Markierung bis zum Anschlag.
Einstellen des Ausleuchtwinkels (Zoomreflektor)
Nach Druck auf die ZOOM-Taste erscheint das Symbol  . Durch wiederholtes Drücken der ZOOM-Taste ändert sich die Einstellung des ZOOMreflektors und der Anzeige in der LCD wie folgt:
Auto
In der Betriebsart E-TTL (TTL) reguliert das Gerät die Einstellung des Zoomreflektors innerhalb des Einstellbereiches automatisch entsprechend der Brennweite des verwendeten Objektives.
Beim Einschalten des Blitzes stellt sich der Zoomreflektor automatisch auf die zuletzt benutzte Einstellung.
Sofern Sie eine kürzere Objektivbrennweite benutzen, als am Zoomreflektor eingestellt wurde, werden die Bildecken abgedunkelt wiedergegeben.
Die Blitzleistung ändert sich in Abhängigkeit von der Zoomreflektoreinstellung.
Weitwinkelstreuscheibe
Der Blitz ist mit einer eingebauten Weitwinkelstreuscheibe ausgestattet, die die Ausleuchtung bis zum Bildwinkel eines 17mm Objektives ermöglicht. Ziehen Sie die Streuscheibe heraus und klappen Sie sie vor den Reflektor, wodurch der Ausleuchtwinkel des Gerätes automatisch auf 17mm eingestellt wird.
Sollte die eingebaute Weitwinkelstreuscheibe versehentlich abgerissen werden, funktioniert die ZOOM-Taste nicht mehr. In diesem Fall wenden Sie sich bitte an Ihren Händler oder direkt an einen autorisierten SIGMA Service.
33

BELEUCHTUNG DER LCD
Beim Druck auf die LIGHT Taste wird das Display für ca. acht Sekunden lang beleuchtet. Durch erneuten Druck auf die LIGHT Taste bleibt die Beleuchtung für länger als acht Sekunden aktiviert.
E-TTL (TTL) Blitzautomatik
Im TTL-Blitzautomatikbetrieb kontrolliert die Kamera die abgeblitzte Lichtmenge, sodass sich daraus die korrekte Belichtung des Hauptobjektes ergibt.
Kameras der Gruppe A unterstützen die E-TTL Betriebsart, jene
|
der Gruppe |
B die TTL-Betriebsart. |
|
|
1. Stellen Sie |
die Kamera auf Vollautomatik. (Für gewöhnlich |
. |
Sollte die Kamera nicht über diese Einstellung verfügen, stellen Sie sie auf P-Automatik.)
2.Schalten Sie das Blitzgerät am Hauptschalter ein. Das TTL Symbol erscheint auf dem LCD und das Gerät beginnt, sich aufzuladen.
3.Stellen Sie scharf.
4.Vergewissern Sie sich, dass sich das Hauptobjekt innerhalb der in dem LCD angezeigten Blitzreichweite befindet.
5.Nachdem der Blitz vollständig aufgeladen ist, betätigen Sie den Auslöser. Die Blitzbereitschaftsanzeige im Sucher informiert Sie über den Ladezustand des Blitzes.
Wenn die Kamera ausreichende Belichtung ermittelt hat, erscheint das E-TTL (TTL) Symbol für fünf Sekunden auf dem Display. Sollte diese Anzeige nicht erscheinen, war die Blitzbelichtung nicht ausreichend. Wiederholen Sie in diesem Fall die Aufnahme aus kürzerer Entfernung.
Das AF-Hilfslicht schaltet sich automatisch ein, wenn Sie ein Motiv im Dunkeln anvisieren. Seine Reichweite beträgt ca. 0,7 bis 9 Meter.
Sofern sich die Kamera in einem Kreativprogramm befindet, beachten Sie bitte, dass das Blitzgerät jeweils in die zuletzt gewählte Einstellung zurückkehrt.
Sobald das Blitzgerät die volle Ladekapazität erreicht hat, erscheint die Bereitschaftsanzeige im Sucher. Wenn der Auslöser vor Erreichen der Zündbereitschaft betätigt wird, löst die Kamera entsprechend der Lichtverhältnisse mit langer Verschlusszeit aus.
Wenn die nachfolgenden Blitzdistanzen zur Anwendung gelangen, blinken die Entfernungsmarkierungen
|
auf dem LCD. |
|
|
Zoombereich |
Blitzentfernung |
|
17-28mm |
0,5m oder kürzer |
|
35mm oder länger |
0,7m oder kürzer |
Einsatz des Blitzgerätes in anderen Betriebseinstellungen (außer EOS 700, 750, 850)
Einsatz mit Blendenautomatik
Bei Wahl der Blendenautomatik kann an der Kamera eine Verschlusszeit innerhalb deren Einstellbereich zwischen 30 Sekunden und 1/x (Synchronzeit) eingestellt werden. Je nach gewählter Verschlusszeit ermittelt die Kamera die passende Blende entsprechend der Helligkeit des Hintergrundes. Bei zu hellen oder dunklen Motiven blinkt die Blendenanzeige mit dem jeweiligen Grenzwert (größte oder kleinste Blende). In diesem Fall belichtet die Kamera die Blitzaufnahme mit dem Grenzwert, wobei das Hauptobjekt richtig belichtet sein mag, der Hintergrund jedoch unterbzw. überbelichtet wird.
Einsatz mit Zeitautomatik
Bei Wahl der Zeitautomatik ermittelt die Kamera zur vorgewählten Blende die passende Verschlusszeit zur Helligkeit des Hintergrundes. Bei zu hellen oder dunklen Motiven blinkt die Verschlusszeitenanzeige mit dem jeweiligen Grenzwert. In diesem Fall belichtet die Kamera die Blitzaufnahme mit dem Grenzwert, wobei das Hauptobjekt richtig belichtet sein mag, der Hintergrund jedoch unterbzw. überbelichtet wird.
Einsatz mit manueller Einstellung
In dieser Betriebsart können Sie sowohl die Blende als auch die Verschlusszeit in dem Bereich zwischen der Synchronzeit und 30 Sekunden vorwählen. Sofern Sie sich dabei nach den Angaben des Belichtungsmessers richten, arbeitet die Kamera wie beim Aufhellblitzen bzw. bei der Langzeitsynchronisation.
34

Grenzen der Serienauslösung
Um ein Überhitzen des Gerätes zu verhindern, legen Sie eine 10minütige Pause nach dem Absolvieren der im folgenden genannten Aufnahmeserien ein.
|
Betriebsart |
Anzahl der Blitzaufnahmen |
|
TTL, M (1/1, ½) |
15 Serienauslösungen |
|
M (1/4, 1/8) |
20 Serienauslösungen |
|
M (1/16-1/32) |
40 Serienauslösungen |
|
Multi |
10 Sequenzen |
Manueller Blitzbetrieb
Der manuelle Blitzbetrieb empfiehlt sich immer dann, wenn Motive geblitzt werden, deren korrekte Belichtung mittels TTL-Betriebsart nur schwierig zu erreichen ist. In der manuellen Betriebsart lässt sich die Blitzleistung von 1/1 (voll) bis zu 1/128 in einstufigen Schritten wählen.
1.Schalten Sie die Kamera auf M.
2.Drücken Sie am Blitzgerät die Betriebsartentaste MODE, um M zu wählen.
3.Der Wert der Blitzleistung blinkt, wenn Sie die Wahltaste SEL drücken.
|
4. Drücken Sie die Taste |
oder |
, um die gewünschte Blitzleistung |
||
|
einzustellen. |
5.Nach dem erneuten Drücken der Wahltaste SEL stoppt das Blinken des Blitzleistungswertes und die Anzeige bleibt bestehen.
6.Stellen Sie Ihr Motiv durch Antippen des Kameraauslösers scharf und lesen Sie die Entfernung von der Einstellskala des Objektives
ab. Verändern Sie anschließend die Blendeneinstellung oder die Blitzleistung so lange, bis die angezeigte Blitzreichweite auf dem LCD des Blitzgerätes der tatsächlichen Entfernung zum Motiv entspricht.
7.Sobald die Bereitschaftslampe aufleuchtet, ist das Gerät zündbereit.
Die korrekte Belichtung kann nach der folgenden Formel ermittelt werden:
Leitzahl (GN) / Abstand Blitz zum Motiv (in m) = Arbeitsblende
Das Blitzgerät ermittelt und indiziert die Entfernung zum Hauptobjekt automatisch entsprechend der obigen Formel. Bitte beachten Sie die Tabelle 1.
Synchronisation auf den zweiten Verschlussvorhang
Bei Blitzaufnahmen bewegter Objekte mit längerer Verschlusszeit werden vom Objektiv ausgehende Leuchtspuren vor ihm abgebildet, denn der Blitz zündet im Normalfall, sobald der erste Verschlussvorhang das Bildfenster vollständig freigegeben hat. Das Objekt wird somit belichtet vom Moment des Blitzes an bis zum Schließen des Bildfensters am Ende der Verschlusszeit. Wird der Blitz hingegen auf den zweiten Verschlussvorhang synchronisiert, so zündet der Blitz erst kurz bevor der zweite Vorhang das Bildfenster wieder verschließt. Hierdurch wird das Motiv zunächst durch das vorhandene Licht und erst am Ende des Verschlussablaufes vom Blitzlicht belichtet, sodass die Leuchtspuren des Objektes hinter ihm erscheinen, was weitaus natürlicher wirkt.
Aufgrund der für diesen Effekt notwendigen längeren Verschlusszeit empfiehlt sich der Einsatz eines Statives.
Diese Betriebsart ist an den Kameras EOS 700, 750 und 850 nicht verfügbar.
1. Stellen Sie die Kamera auf die gewünschte Betriebsart.
|
2. Drücken Sie die Taste oder , bis das Symbol |
auf dem LCD |
|
erscheint. |
3.Stellen Sie Ihr Motiv scharf und lösen aus, nachdem die Bereitschaftslampe aufleuchtet.
Die Synchronisation auf den ersten Verschlussvorhang ist eingestellt, wenn das  Symbol nicht
angezeigt wird.
Um die Synchronisation auf den zweiten Verschlussvorhang auszuschalten, schalten Sie das  Symbol auf dem LCD durch Drücken der
 oder
oder 
 Taste aus.
Diese Funktion steht nicht zur Verfügung, wenn die Kamera auf Vollautomatik geschaltet ist. 35
 Loading…