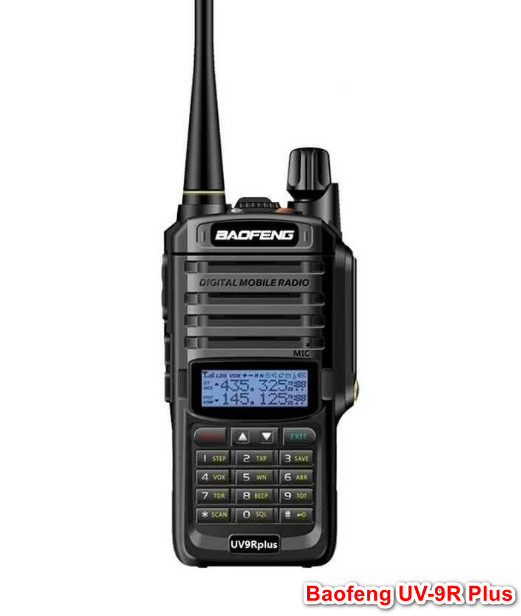
Радиостанция Baofeng UV-9R Plus (8W) IP67 — портативная рация для охоты, рыбалки, туризма, охранников и водителей. Не требует регистрации в органах Роскомнадзора и работает в двух диапазонах VHF 136 — 174 МГц и UHF 400-520 МГц, что позволяет легко соединять данную рацию с большинством других радиостанций на рынке. Может принимать сигнал одновременно на двух частотах. Количество каналов: 128, настраиваются с помощью программного кабеля. Рацию можно самостоятельно перепрошить, чтобы общаться на своих частотах, используя ее вместо телефона. Поддержка кодировки CTCSS/DCS защищает переговоры внутри группы от посторонних.
Baofeng UV-9R Plus отличается от своего предшественника Baofeng BF-A58 повышенной до 8W выходной мощностью передатчика и ее трехступенчатым регулированием, а также увеличенной до 2500 мАч емкостью аккумулятора. Ударопрочный корпус рации защищен от пыли и влаги по стандарту IP67. UV-9R Plus ударопрочная. Надёжный корпус изготавливается из качественного пластика, справляющегося с большими нагрузками. Радиокомпоненты фиксируются на алюминиевом шасси.
Рация водонепроницаемая — без ущерба для эксплуатационных характеристик выдерживает погружение в воду до 1 метра в течение 5 минут. Рация обеспечивает уверенную радиосвязь на расстоянии до 10 километров при прямой видимости, до 3-4 КМ в условии леса, и до 2 км в условиях плотной городской застройки. Еще особенности — встроенный светодиодный фонарик, Возможность программирования с помощью ПК, клипса с возможностью быстрого съема.
В комплекте: антенна, гарнитура, зарядка, ремешок, клипса.
Схема устройства
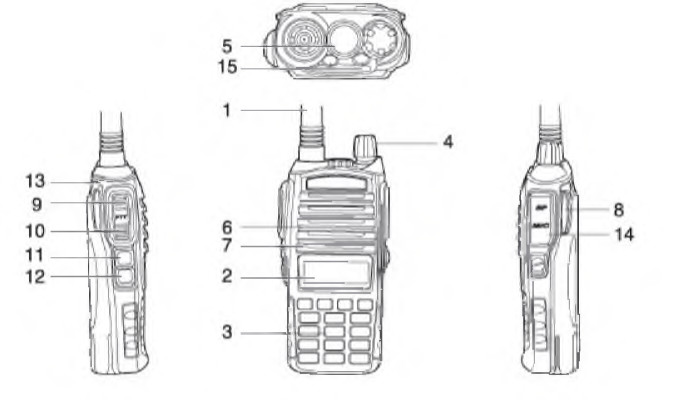
- Антенна
- LCD экран
- ЖКИ экран
- Ручка регулятора (Вкл/выкл, громк.)
- Фонарик
- Динамик
- Микрофон
- Кнопка извлечения батареи
- Кнопка PTT-А (передача на канале A)
- Кнопка PTT-B (передача на канале B)
- Кнопка F (FM-радио, тревога)
- Кнопка M (фонарик, монитор)
- Петля для шнурка
- Разъём внешней гарнитуры
- Светодиодный индикатор
Сопутствующие Товары
Цвет
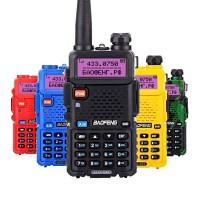
Черный (Baofeng UV-5R)
Зеленый (Baofeng UV-5R)+200.00 р.
Красный (Baofeng UV-5R)+200.00 р.
Синий (Baofeng UV-5R)+200.00 р.
Желтый (Baofeng UV-5R)+200.00 р.
Дополнительно хочу:
Запрограммировать LPD/PMR каналы (бесплатно)
1699.00 р.
Цвет
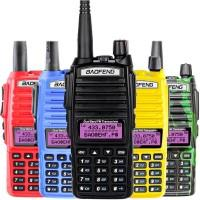
Черный (Baofeng UV-82)
Зеленый (Baofeng UV-82)+200.00 р.
Синий (Baofeng UV-82)+200.00 р.
Дополнительно хочу:
Запрограммировать LPD/PMR каналы (бесплатно)
1799.00 р.
Цвет
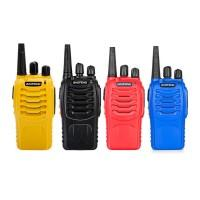
Чёрный (Baofeng BF-888S)
Красный (Baofeng BF-888S)
Желтый (Baofeng BF-888S)
Синий (Baofeng BF-888S)
Дополнительно хочу:
Запрограммировать LPD/PMR каналы (бесплатно)
850.00 р.
Дополнительно хочу:
Запрограммировать LPD/PMR каналы (бесплатно)
1990.00 р.
Похожие статьи

Программое обеспечение (софт) для раций
Программное обеспечение (софт) для настройки и программирования раций Baofeng, TYT, WLN, Quansheng, Baojie можно скачать по следующим ссылкам:Характеристики, отзывы, цены на рации Baofeng и рации друг..
117910
19.10.2018

Драйверы
Драйверы для программаторов и раций BaofengДрайверы и программы с диска, идущего в комплекте с программаторами BaofengДрайверы и программы с диска для универсального программатора 6 в 1Драйвер програм..
54654
19.10.2018
![]()
В данной рации используется литий-ионный аккумулятор и не требует предварительного заряда- разряда, т.к не обладает эффектом памяти. Начать пользоваться рацией можно без предварительной зарядки, т.к. аккумулятор как правило уже заряжен.
1. Перед началом работы обязательно установите антенну, в противном случае есть риск повредить передатчик рации: т.к. антенна является нагрузкой для рации, а без нагрузки может быть поврежден передатчик рации. Антенну нужно затягивать двумя пальцами без излишних усилий. Каждый день перед началом пользования проверяйте антенну на затяжение.
2. Вставьте аккумулятор.
3. Сверху поверните регулятор громкости по часовой стрелке- он же является выключателем/ включателем рации.
4. Если при включении на дисплее справа вы видите небольшие цифры, то вы находитесь в режиме памяти частот (или его называют канальный режим). Данные числа соответствуют ячейкам в памяти. В каждой ячейке памяти по умолчанию уже записаны частоты. Вы же можете занести в память свои частоты. А с помощью кабеля программирования можно записывать буквенные обозначения частотам в памяти. В канальном режиме вы не можете менять частоты, т.к. они уже записаны в ячейках памяти. Рекомендуем пользоваться другими частотами в частотном режиме (в режиме свободного ввода частоты).
5. Для перехода в режим ввода частоты нужно выключить рацию повернув регулятор громкости против часовой стрелки до щелчка. Затем одновременно зажимаете кнопку MENU и включаете рацию повернув регулятор громкости по часовой стрелки.
6. В частотном режиме можно устанавливать нужную вам частоту в пределах доступного диапазона. Штатная антенна хорошо сочетается с частотами 433 и 446 мГц. Набираете на клавиатуре цифра вида 433.ХХХ, где XXX- произвольные числа. На другой рации производите аналогичные настройки.
7. Изменение мощности передатчика. На дисплее сверху отображаются три буквы: H- максимальная мощность, М- средняя мощность и L- слабая мощность. Изменение мощности происходит нажатием на клавишу #. Чем выше мощность тем вас дальше могут услышать на другой рации с такой же частотой.
8 При зажатии клавиши # происходит блокировка клавиатуры. Рекомендуем всегда пользоваться блокировкой после внесения всех необходимых настроек, что бы не допустить случайное нажатие.
Это все основные настройки, которые вам потребуются для начала использования рацией. Более подробная инструкция по всем пунктам меню доступна
здесь
Составлено специально для клиентов магазина Baofengs.ru
Популярные товары за последнюю неделю которые понравились нашим клиентам
Содержание
- Руководство пользователя для рации Baofeng UV-9R Plus
- Галерея
- Ссылка для скачивания
- Другие инструкции и файлы
- Другие инструкции
- Английская версия
- Дополнительные файлы (драйверы, прошивки и прочее)
- Cервис-мануал
- Информация
- Схема устройства
Руководство пользователя для рации Baofeng UV-9R Plus
Руководство пользователя для рации Baofeng UV-9R Plus на русском языке.
Галерея
Для просмотра всех изображений нажмите на кнопки прокрутки
Ссылка для скачивания
Инструкция по эксплуатации и руководство пользователя для Baofeng UV-9R Plus
Другие инструкции и файлы
Другие инструкции
Английская версия
Дополнительные файлы (драйверы, прошивки и прочее)
Cервис-мануал
Информация
Радиостанция Baofeng UV-9R Plus (8W) IP67 — портативная рация для охоты, рыбалки, туризма, охранников и водителей. Не требует регистрации в органах Роскомнадзора и работает в двух диапазонах VHF 136 — 174 МГц и UHF 400-520 МГц, что позволяет легко соединять данную рацию с большинством других радиостанций на рынке. Может принимать сигнал одновременно на двух частотах. Количество каналов: 128, настраиваются с помощью программного кабеля. Рацию можно самостоятельно перепрошить, чтобы общаться на своих частотах, используя ее вместо телефона. Поддержка кодировки CTCSS/DCS защищает переговоры внутри группы от посторонних.
Baofeng UV-9R Plus отличается от своего предшественника Baofeng BF-A58 повышенной до 8W выходной мощностью передатчика и ее трехступенчатым регулированием, а также увеличенной до 2500 мАч емкостью аккумулятора. Ударопрочный корпус рации защищен от пыли и влаги по стандарту IP67. UV-9R Plus ударопрочная. Надёжный корпус изготавливается из качественного пластика, справляющегося с большими нагрузками. Радиокомпоненты фиксируются на алюминиевом шасси.
Рация водонепроницаемая — без ущерба для эксплуатационных характеристик выдерживает погружение в воду до 1 метра в течение 5 минут. Рация обеспечивает уверенную радиосвязь на расстоянии до 10 километров при прямой видимости, до 3-4 КМ в условии леса, и до 2 км в условиях плотной городской застройки. Еще особенности — встроенный светодиодный фонарик, Возможность программирования с помощью ПК, клипса с возможностью быстрого съема.
В комплекте: антенна, гарнитура, зарядка, ремешок, клипса.
Схема устройства

- Антенна
- LCD экран
- ЖКИ экран
- Ручка регулятора (Вкл/выкл, громк.)
- Фонарик
- Динамик
- Микрофон
- Кнопка извлечения батареи
- Кнопка PTT-А (передача на канале A)
- Кнопка PTT-B (передача на канале B)
- Кнопка F (FM-радио, тревога)
- Кнопка M (фонарик, монитор)
- Петля для шнурка
- Разъём внешней гарнитуры
- Светодиодный индикатор
- Стандарт — VHF/UHF
- Диапазон частот — 136-174 МГц, 400-520 МГц
- Мощность передатчика — 8 Вт
- Переключение мощности передатчика — есть
- Радиус действия — 10 км
- Вид модуляции — FM
- Чувствительность — 0.2 мкВ (0,2)
- Количество каналов — 128
- Количество ячеек памяти — 120
- Поддержка кодирования — CTCSS, DCS, DTMF
- Количество кодов — 154
- Голосовая активация через гарнитуру (VOX) — есть
- Голосовая активация без гарнитуры (iVOX) — есть
- Функция «нажми и говори» (PTT) — есть
- Сканирование каналов — есть
- Сканирование двух каналов (Dual Watch) — есть
- Блокировка клавиатуры — есть
- Звук при нажатии кнопок — есть
- Программирование с компьютера — есть
- Копирование настроек между рациями — есть
- Сигнал окончания передачи (Roger Beep) — есть
- Таймер разговора — есть
- Антенна — съемная
- Отображение информации — дисплей с подсветкой
- Корпус — влагозащищенный, ударопрочный
- Поддержка стандарта влагозащиты — IP67
- Материал корпуса — пластик с металлическим шасси
- Встроенный фонарик — есть
- Время работы — 24 ч
- Время работы (прием) — 24 ч
- Время работы (разговор) — 10 ч
- Время работы (ожидание) — 24 ч
- Количество элементов питания — 1
- Тип аккумулятора — Li-Ion
- Емкость аккумулятора — 2800 мА⋅ч
- Мощность громкоговорителя — 1000 мВт
- Регулировка громкости — есть
- Размеры (ШхВхТ) — 62x130x38 мм
- Высота с антенной — 270 мм
- Вес — 250 г
- Рабочая температура — -20 — 60 °C
Источник

-
Contents
-
Table of Contents
-
Bookmarks
Quick Links
UV-9R PRO SERIES
Amateur Radio
USER’S MANUAL
Related Manuals for PO Fung Electronic UV-9R PRO Series
Summary of Contents for PO Fung Electronic UV-9R PRO Series
-
Page 1
UV-9R PRO SERIES Amateur Radio USER’S MANUAL… -
Page 2
PREFACE Thank you for purchasing UV-9R PRO Series Amateur Radio, which is a dual band/dual display/dual watch. This easy-to-use radio will deliver you secure, instant and reliable communications at peak efficiency. Please read this manual carefully before use. The information presented herein will help you to derive maximum performance from your radio. -
Page 3: Table Of Contents
Table of Contents Chapter1. Getting Started 5.3 Making a call 1.1 Regulations and Safety Warnings 5.4 Channel selection 1.2 Main features 5.5 Frequency (VFO) mode 1.3 Content of the packaging 5.6 Channel (MR) mode Chapter2. Charging the Battery Chapter6. Advanced Features 2.1 Charging the Battery Pack 6.1 Frequency scanning 2.2 Charger Supplied…
-
Page 4: Chapter1. Getting Started
Chapter1. Getting Started 1.1 Regulations and Safety Warnings FCC Licensing Information This device complies with Part 90 and 15 of the federal Communications Commission (FCC) Rules. Operation is subject to the condition that that this device does not cause harmful interference. The radio operates on radio frequencies that are regulated by the Federal Communications Commission (FCC).
-
Page 5
Rules. These limits are designed to provide reasonable protection against harmful interference in a residential installation. This equipment generates and can radiate radio frequency energy. If not installed and used in accordance with the instructions, it may cause harmful interference to radio communications. However, there is no guarantee that interference will not occur in a particular installation. -
Page 6
Transmitter Power levels that this Radio transmits on. Failure to comply may be unlawful and liable for prosecution. At this subject, refer to the “EU” specification guide 2014/53/EU. Please note that the above information is applicable to EU countries only. Compliance with RF Exposure Standards The radio complies with the following RF energy exposure standards and guidelines: •… -
Page 7
• When worn on the body, always place the radio in an approved holder, holster, case, or body harness or by use of the correct clip for this product. Use of non-approved accessories may result in exposure levels which exceed the FCC’s occupational/ controlled environmental RF exposure limits. -
Page 8
■Precautions for Batteries Charging Prohibitions To protect you against any property loss, bodily injury or even death, be sure to observe the following safety instructions: 1. Do not charge or replace your battery in a location containing fuels, chemicals, explosive atmospheres and other flammable or explosive materials. -
Page 9
one packaging. 3. The radio must be switched off and secured against switch-on, if the battery is attached. The content of the shipment must be declared in the shipping documents and by a Battery Shipping Label on the packaging. Contact your hauler for the local regulations and further information. -
Page 10: Main Features
1.2 Main features • Frequency band: 144-146 & 430-440MHz (in Europe)* • Frequency band: 144-148 & 420-450MHz (in USA)* • VHF and UHF bands and channel name displayed • Operating modes: UHF/VHF, UHF/UHF, VHF/VHF • Output power: 5W • Up to 128 memory channels •…
-
Page 11: Chapter2. Charging The Battery
Chapter2. Charging the Battery 2.1 Charging the Battery Pack The Li-ion battery pack is not charged at the factory; please charge it before use. Charging the battery pack for the first time after purchase or extended storage (more than 2 months) may not bring the battery pack to its normal maximum operating capacity.
-
Page 12: How To Charge
the battery. Remember to put the battery or radio into an insulated container. Do not put it into a metal container. 2.4 How to Charge a. Plug the AC adaptor into the AC outlet, and then plug the cable of the AC adaptor into the DC jack located on the back of the charger.
-
Page 13: Chapter3. Installation Of Accessories
c. Keep it away from hot places and direct sunlight. » Do not short circuit the battery terminals. » Never attempt to remove the casing from the battery pack. » Never store the battery in unsafe surroundings, as a short may cause an explosion. »…
-
Page 14: Installing The Battery Pack
3.3 Installing the battery pack Before attaching or removing the battery make sure your radio is turned off by turning the power/volume knob all the way counter-clockwise. Insert the two protrusions on the front of the battery into the notches on the bottom of the radio, and then press the tail of the battery toward the radio until you hear a «click».
-
Page 15: Additional Speaker/Microphone (Optional)
3.4 Installing the Additional Speaker/Microphone (Optional) a. Use a flat-blade screwdriver to unscrew the screw at the lower end of the cover counterclockwise to remove the headset cover. b. Insert the protruding part of the lower end of the headset into the slot indicated by the arrow in the figure below, and then align the nut on the upper end of the headset with the corresponding threaded hole of the transceiver and rotate it clockwise until it is tightened.
-
Page 16: Chapter4. Radio Overview
Chapter4. Radio Overview 4.1 Buttons and controls of the radio…
-
Page 17
1. Antenna 2. Led: transmission (red) ; reception (green) 3. Flashlight 4. SOS: If you keep it pressed for 5 seconds you will hear an alarm note and the radio will switch to alarm mode 5. Power / Switch / Volume control: Rotate to switch on/off the radio and adjust the volume 6. -
Page 18: Display Of The Radio
4.2 LCD Display of the radio LCD Display 1. These symbols show that you set a DCS or CTCSS code in tx or rx. In tx mode it appears while you are transmitting, while in rx mode it is shown also in stand-by condition. 2.
-
Page 19: Status Indications
11. Battery level indicator. When the battery is almost used up, the icon starts blinking and the transmission is blocked. Charge the radio. 12. Indicates the channel number that you stored 13. When the radio is in reception mode, this icon is displayed 14.
-
Page 20
• [MENU] key: It is used for activating the MENU, choose each MENU selection and confirm the parameter. In the off state, press and hold this key to turn on the radio, allowing to switch between frequency (VFO) mode or memory (MR) mode. -
Page 21
A short momentary press of the key enables the reverse function. When listening to broadcast FM a momentary press will start the scanning. Scanning in broadcast FM will stop as soon as an active station is found, regardless of scanner resume method. To enable the scanner, press and hold the [*SCAN] key for about two seconds. -
Page 22: Chapter5. Basic Operations
5. BASIC OPERATIONS 5.1 Power on the radio Turning the unit on • To turn the unit on, simply rotate the Volume/Power knob clockwise until you hear a «click». If your radio powers on correctly there should be an audible double beep after about one second and the display will show a message or flash the LCD depending on settings for about one second.
-
Page 23: Channel Selection
transmission from 2.5 cm to 5 cm. 5.4 Channel selection There are two modes of operation: Frequency (VFO) mode, and Channel or Memory (MR) mode. For everyday use, Channel (MR) mode is going to be a whole lot more practical than Frequency (VFO) mode. However, Frequency (VFO) mode is very handy for experimentation out in the field.
-
Page 24: Chapter6. Advanced Features
6. ADVANCED FEATURES 6.1 Frequency scanning This function can scan the frequency. a. In frequency mode, press [*SCAN] key for more than 2 seconds. The radio will start scanning the frequency according to the set frequency step. b. You can change the scanning direction with the ▲ and ▼ keys. c.
-
Page 25: Cursor▼▲Conversion (A/B)
6.4 Cursor▼▲Conversion (A/B) Directly press [EXIT] key to move the cursor up and down. Then, you can modify or confirm the parameters indicated by the cursor. Important1: P52UV has a dual-frequency display function. In frequency mode, you will see on the display two different receiving and transmitting frequencies;…
-
Page 26: Manual Programming (Channels Memory)
To turn it on press MON; push it again, the flash light will be strobe; push it again: it will turn off. 6.9 TX 1000Hz, 1450Hz, 1750Hz, 2100Hz repeaters tone Press [PTT] + [SOS] to send 1750Hz repeaters tone. This function is useful for communications through repeaters. If you have the keypad lock enabled on your radio, you can still send a 1750Hz tone the regular way without having to unlock your radio.
-
Page 27: Repeaters Programming
e. Enter RX frequency (Ex. 432000) f. [MENU] [2][7] [MENU] [1][0] [MENU] Enter the desired channel (Ex 10) —>>[EXIT] RX has been added g. Enter TX frequency (Ex. 437000) h. [MENU] [2][7] [MENU] [1][0] [MENU] Enter the same channel (Ex 10) —>>…
-
Page 28
a. Turn off the radio. Press and hold the [MENU] key to turn on the radio and return to the frequency(VFO) mode. The channel number on the right will disappear. b. Use the numeric keypad to enter the repeater’s output (your receiving) frequency. c. -
Page 29: Chapter7. Working The Menu System
7. WORKING THE MENU SYSTEM For a complete reference on available menu items and parameters, see Appendix C, Shortcut Menu operations. Note: in channel mode, the setting of these features is not possible: CTCSS/ DCS tones, wide/narrow bandwidth, PTT-ID, Busy channel lock out, channel name edit. 7.1 Basic use Using the menu with arrow keys a.
-
Page 30: Functions And Operations
b). To cancel your changes, press [EXIT] and it will reset that menu item and bring you out of the menu entirely. f. To exit out of the menu at any time, press the [EXIT] key. g. All further examples and procedures in this manual will use the numerical menu short- cuts. 7.3 Functions and operations (1) Squelch level (SQL) — MENU No.0 Thanks to this function you can adjust the squelch in 10 different levels:…
-
Page 31
automatically activated. You can choose amongst 11 levels: OFF-10. 1 is the highest level, 10 is the lowest one. Note: the higher is the level, the higher is the microphone sensitivity. The VOX function cannot be modified in SCAN and FM radio mode. -
Page 32
• OFF: • R-DCS: D023N-D754N (Normal DCS) • R-DCS: D023I-D754I (Inverse DCS) Note: In P52UV there are 208 groups of normal and inverse DCS codes. This function cannot be amended in channel mode. (12) Receiving CTCSS (R-CTCSS) — MENU No.11 As DCS codes, the CTCSS codes can be added to the channels for creating new private channels. -
Page 33
Selects 1 of 15 DTMF codes. The DTMF codes are programmed with software and are up to 5 digits each. (19) SCAN Resume Mode (SC-REV) — MENU No.18 Thanks to this function, P52UV can SCAN in frequency or channel mode. You can choose amongst three options: •… -
Page 34
(23) Channel B Display Mode (MDF-B) — MENU No.22 This function is used to set the display mode of channel B. Display modes: • FREQ.: Frequency + channel No. • CH: Channel number • NAME: Channel name Note: Channel name mode must be set by the programming software. Up to three numbers or characters can be edited. (24) Busy Channel Lock (BCL) — MENU No. -
Page 35
Note: You cannot overwrite a stored channel, you have to delete it first. See following paragraph No.28. (29) Channel Delete (DEL-CH) — MENU No.28 In this menu you can delete a channel of the radio. (30) Standby backlight (WT-LED) — MENU No.29 In this MENU you can choose the color of the backlight when the radio is in standby mode. -
Page 36
When this function is on, you may receive signals of A/B channel or frequency. It can also be used for cross band receiving and transmitting. You can choose amongst the following settings: OFF: P52UV can receive in both VFO (not simultaneously); ▲ or ▼ will blink on the transmitting frequency band. A: The radio can receive in both VFO (not simultaneously) but can transmit in VFO A only. -
Page 37
1,2,3,4,5,….10 to set the delay time. (38) Display mode at the turning on (PONMSG) Menu No.38 With this function you can set the display mode when the radio is turned on. Available options: • FULL: full frequency character is displayed. •… -
Page 38
Appendix A. – Trouble shooting guide Phenomena Analysis Solution The battery may be installed improperly. Remove and reattach the battery. The battery power may run out. Recharge or replace the battery. You cannot turn on the radio. The battery may suffer from poor contact caused Clean the battery contacts or replace the by dirty or damaged battery contacts. -
Page 39: Appendix A. — Technical Specifications
Appendix B. — Technical Specifications Frequency Range 144.0-148.0 & 420.0-450.0MHz (Tx, FCC Rule parts 97 to USA users) 136.0-174.0 & 400.0-520.0MHz (Scanning Receiver,FCC Rule parts 15B to USA users) 144.0-146.0& 430.0-440.0MHz (Tx/Rx. Limited to EU users) Memory Channel 128 Groups Operation Voltage DC 7.4 V ±10% Battery Capacity…
-
Page 40: Appendix C. — Shortcut Menu Operations
Appendix C. — Shortcut Menu operations MENU Name Selectable Enter item LCD display (Full Name) 0-9 Levels SQL — Squelch Level MENU+0 0:Lowest 9:Highest 2.5K/5.0K/6.25K/10.0K STEP –Step Frequency MENU+1 12.5K/20.0K/25.0K/50.0K HIGH:5W TXP – Transmit Power MENU+2 Low:1W OFF: SAVE — Battery Saving MENU+3 OFF, 1-9 OFF: off…
-
Page 41
OFF/1,2,3…8,9,10 ABR –Auto Backlight MENU+6 *Time-out for the LCD backlight. (seconds) *Monitor [A] and [B] at the same time. The TDR – Dual Watch MENU+7 display with the most recent activity ([A] or [B]) Operation becomes the selected display. BEEP — Keypad Beep MENU+8 *Allows audible confirmation of a key press. -
Page 42
67.0HZ…254.1HZ *Mutes the speaker of the transceiver in the absence of a specific and continuous R-CTCS — Receiver CTCSS MENU+11 sub-audible signal. If the station you are Listening to does not transmit this specific and continuous signal, you will not hear anything. D023N…D754N D023I …D754I *Transmits a specific low-level digital signal to… -
Page 43
OFF: No DTMF Side Tones are heard DT-ST : Side Tones are heard only from manually keyed DTMF codes DTMFST — DTMFST MENU+16 ANI-ST: Side Tones are heard only from automatically keyed DTMF codes DT+ANI : All DTMF Side Tones are heard 1,…,15 S-CODE — Signal Code MENU+17… -
Page 44
FREQ: Displays programmed Frequency CH: Displays the channel number MDF-A — Channel A MENU+21 NAME: Displays the channel name Display Mode *Note: Names must be entered using software. FREQ: Displays programmed Frequency CH: Displays the channel number MDF-B — Channel B MENU+22 NAME: Displays the channel name Display Mode… -
Page 45
000…127 *This menu is used to either create new or MEM-CH — Store a modify existing channels (0 through 127) so MENU+27 Memory Channel that they can be accessed from MR/Channel Mode 000…127 *This menu is used to delete the programmed DEL-CH — Delete a information from the specified channel (0 MENU+28… -
Page 46
VHF:144-148,UHF:430-450 (Canadian IC standard) VHF:144-146,UHF:430-440 (EU CE standard) BAND — Band Selection MENU+33 *In VFO/Frequency mode, sets [A] or [B] to the VHF or UHF band. A band transmit (Upper row frequency) TDR-AB — Transmit B band transmit (Bottom row frequency) selection while in Dual MENU+34 *When enabled, priority is returned to selected… -
Page 47
FULL: Performs an LCD screen test at power-on MSG : Displays a 2-line power on message PONMSG-Power On MENU+38 *Controls the behavior of the display when the Message transceiver is turned on. *Sends an end-of-transmission tone to indicate ROGER — Roger Beep MENU+39 to other stations that the transmission has ended. -
Page 48
Declaration of Conformity Baofeng and Pofung hereby declares that the radio equipment type listed in Appendix B is in compliance with Directive 2014/53/EU. The full text of the EU Declaration of Conformity is available at the following link: http://www.pofung.cn/download.asp?EnBigClassName=EU+DOC&EnSmallClassName=&page=3. Via your local Baofeng helpdesk, your dealer from where you purchased this radio or send an email to wangjianhui@baofengradio.com. -
Page 49
WARNING: MODIFICATION OF THIS DEVICE TO RECEIVE CELLULAR RADIOTELEPHONE SERVICE SIGNALS IS PROHIBITED UNDER FCC RULES AND FEDERAL LAW. PO FUNG ELECTRONIC (HK) INTERNATIOANL GROUP COMPANY LIMITED Address: Room 1508, 15/F, Office Tower II, Grand Plaza, 625 Nathan Road, Kowloon, Hong Kong…

