Общая документация по автомобилю
Skoda Fabia II: Знакомство с автомобилем (rus.) Пособие по программе самообразования.
Содержание: Skoda Fabia, Размеры автомобиля, Система питания, Двигатели, Комбинации двигатель / КП, Коробка передач, Ходовая часть, Системы пассивной безопасности, Отопление и климатическая установка, Электрооборудование, Салон.
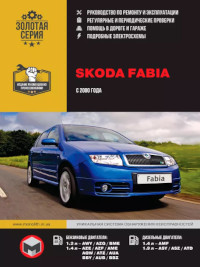
Skoda Fabia II 2006->: Руководство по эксплуатации, ремонту и техническому обслуживанию (rus.) Рассмотрены автомобили Skoda Fabia второго поколения с 2006 года выпуска с бензиновыми двигателями: 1.2 / 44 кВт (BBM) Simos 9.1, 1.2 / 51 кВт (BZG) Simos 9.1, 1.4 / 63 кВт (BXW) Magneti Marelli 4HV, 1.6 / 77 кВт (BTS) Bosch Motronic ME 07.05.20 и дизельными двигателями: 1.4 / 51 кВт (BNM) TDI, 1.4 / 59 кВт (BNV, BMS) TDI, 1.9 / 77 кВт (BSW, BLS) TDI. 400 страниц.
Skoda Fabia II — экономим на сервисе (rus.) Книга адресована владельцам автомобилей Skoda Fabia 2 с трехцилиндровым бензиновым двигателем. В издании приведены иллюстрированные рабочие операции по самостоятельной замене автомобильных расходников, не требующие использования сложного специального инструмента и технической подготовки владельца автомобиля. Многие операции, показанные на данном автомобиле, аналогично выполняют-ся на модификациях Skoda Fabia с другими двигателями. 89 страниц, 10 Мб.
Skoda Fabia II 2007 — : Руководство по эксплуатации, техническому обслуживанию и ремонту (rus.) Ремонт в фотографиях. Выпуск с 2007 г. Рестайлинг в 2010 г. Бензиновые двигатели: 1.2 л (BBM), BZG 1.2 л (BZG), 1.4 л (BXW), 1.6 л (BTS). Коробки передач: 5-ступенчатая механическая коробка передач 02Т, 6-ступенчатая автоматическая коробка передач 09G.
Содержание: Устройство автомобиля, Рекомендации по эксплуатации, Неисправности в пути, Техническое обслуживание, Двигатель, Трансмиссия, Ходовая часть, Рулевое управление, Тормозная система, Электрооборудование, Кузов, Система отопления, кондиционирования и вентиляции салона, Системы безопасности, Колеса и шины, Приложения, Схемы электрооборудования (электросхемы), Предметный указатель. 313 стр. 66 Мб.
Skoda Fabia II RS. Демонстрация автомобиля (rus.) Устройство и принцип действия. Программа самообучения 084 Skoda.
Основное отличие новой модели Fabia RS от модели первого поколения находится под капотом. Модель предыдущего поколения с дизельным двигателем TDI 1,9 л/96 кВт являлась воплощением мечты нетребовательных водителей о быстром, но в то же время экономичном автомобиле. Но именно этот силовой агрегат не позволял воспринимать автомобиль как поистине спортивный.
На модель Fabia RS второго поколения устанавливается бензиновый двигатель 1.4 TSI мощностью 132 кВт (180 л.с.) с турбонагнетателем и компрессором. Такое увеличение мощности стало для модели второго поколения огромным скачком вперёд, благодаря чему ей удалось сохранить динамические характеристики предшественницы: автомобиль разгоняется от 0 до 100 км/ч всего лишь за 7,3 с, а стрелка спидометра, характерного только для модификации Combi, замирает на отметке 224 км/ч или 226 км/ч. Даже при использовании всего потенциала автомобиля расход топлива новой RS остаётся на низком уровне — для преодоления 100 км автомобилю требуется всего лишь 6,4 л топлива. Мощность двигателя передаётся на колёса через 7-ступенчатую коробку передач DSG. Оптимально настроенное шасси автомобиля и система XDS (электронная блокировка дифференциала) повышают удовольствие от вождения.
Содержание: Skoda Fabia RS, Краткое описание, Габаритные размеры автомобиля: Skoda Fabia RS и Skoda Fabia Combi RS, Двигатель (CAVE), Коробка передач (DSG 0AM), Шасси, Передняя подвеска, Задняя подвеска, Рулевое управление, Тормозная система, Система XDS, Колёсные диски и шины, Салон автомобиля.
Общая информация по сервисному обслуживанию
Подходит ко многим автомобилям VW, Skoda, SEAT, Audi
ссылка на мою шкоду
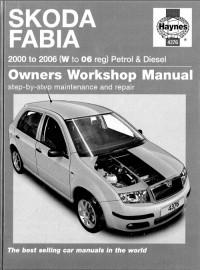
Руководство на английском языке по техническому обслуживанию и ремонту автомобиля Skoda Fabia 2000-2006 годов выпуска.
- Автор: A.K. Legg
- Издательство: Haynes Publishing
- Год издания: 2006
- Страниц: 373
- Формат: PDF
- Размер: 122,1 Mb
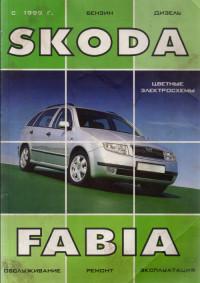
Руководство по эксплуатации, техническому обслуживанию и ремонту автомобиля Skoda Fabia с 1999 года выпуска с бензиновыми и дизельными двигателями.
- Автор: —
- Издательство: Техническая книга
- Год издания: 2007
- Страниц: 246
- Формат: PDF
- Размер: 234,9 Mb

Руководство по техническому обслуживанию и ремонту автомобиля Skoda Fabia 2000-2006 годов выпуска с бензиновыми и дизельными двигателями.
- Автор: —
- Издательство: Алфамер
- Год издания: —
- Страниц: 384
- Формат: —
- Размер: —
Руководство по техническому обслуживанию и ремонту автомобиля Skoda Fabia с 2000 года выпуска.
- Автор: —
- Издательство: Skoda Auto
- Год издания: —
- Страниц: —
- Формат: PDF
- Размер: 553,0 Mb
Руководство по техническому обслуживанию и ремонту автомобиля Skoda Fabia с 2007 года выпуска.
- Автор: —
- Издательство: Skoda Auto
- Год издания: —
- Страниц: —
- Формат: PDF
- Размер: 33,8 Mb
Руководство по эксплуатации и ремонту автомобиля Skoda Fabia с 2000 года выпуска с бензиновыми и дизельными двигателями.
- Автор: —
- Издательство: Монолит
- Год издания: —
- Страниц: 428
- Формат: —
- Размер: —

Руководство по эксплуатации и ремонту автомобилей Skoda Fabia/Fabia Combi/Fabia Sport Edition с 2007 года выпуска с бензиновыми и дизельными двигателями.
- Автор: —
- Издательство: Монолит
- Год издания: —
- Страниц: 350
- Формат: —
- Размер: —

Сборник руководств по эксплуатации и техническому обслуживанию автомобиля Skoda Fabia второго поколения.
- Автор: —
- Издательство: Skoda Auto
- Год издания: -/2010/2014
- Страниц: 284/276/213
- Формат: PDF
- Размер: 84,6 Mb
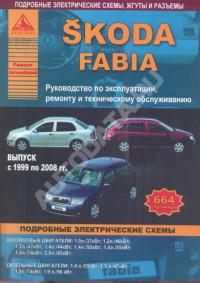
Руководство по эксплуатации, техническому обслуживанию и ремонту автомобиля Skoda Fabia 1999-2008 годов выпуска с бензиновыми и дизельными двигателями.
- Автор: —
- Издательство: Арго-Авто
- Год издания: —
- Страниц: 664
- Формат: —
- Размер: —
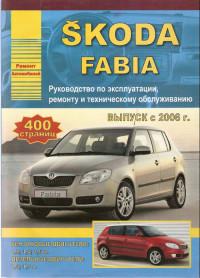
Руководство по эксплуатации, техническому обслуживанию и ремонту автомобиля Skoda Fabia с 2006 года выпуска с бензиновыми и дизельными двигателями.
- Автор: —
- Издательство: Арго-Авто
- Год издания: 2009
- Страниц: 400
- Формат: —
- Размер: —
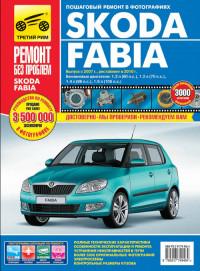
Руководство по эксплуатации, техническому обслуживанию и ремонту автомобиля Skoda Fabia с 2007 года выпуска с бензиновыми двигателями объемом 1,2/1,4/1,6 л.
- Автор: —
- Издательство: Третий Рим
- Год издания: 2012
- Страниц: 325
- Формат: —
- Размер: —

Руководство по техническому обслуживанию автомобиля Skoda Fabia второго поколения.
- Автор: —
- Издательство: За рулем
- Год издания: 2010
- Страниц: 89
- Формат: PDF
- Размер: 35,7 Mb

Руководство по эксплуатации, техническому обслуживанию и ремонту автомобиля Skoda Fabia с 2007 года выпуска.
- Автор: —
- Издательство: Мир автокниг
- Год издания: —
- Страниц: 400
- Формат: —
- Размер: —

- Manuals
- Brands
- Skoda Manuals
- Automobile
- Fabia II 2011
Manuals and User Guides for Skoda Fabia II 2011. We have 4 Skoda Fabia II 2011 manuals available for free PDF download: Workshop Manual
Skoda Fabia II 2011 Workshop Manual (211 pages)
Brand: Skoda
|
Category: Air Conditioner
|
Size: 4.31 MB
Table of Contents
-
Service
3
-
Table of Contents
3
-
Technical Data
5
-
General Notes on the Air Conditioning System
5
-
Important Instructions
5
-
Further Documentation and Information Means
6
-
Principles of the Air-Conditioning Technology
6
-
Advantages of the Air Conditioning System — Comfort
8
-
Operation of the Air Conditioning System
8
-
Refrigerant R134A
9
-
Vapour Pressure Table for Refrigerant R134A
10
-
Properties of Refrigerant R134A
11
-
Evidence of Leaks
12
-
Refrigerant Oil
13
-
General Occupational Safety
13
-
Using Pressure Tank
15
-
Safety Precautions When Working with Extraction and Filling Systems
16
-
Safety Measures When Working on Vehicles with Air Conditioning System and When Using
17
-
Basics for Working on the Refrigerant Circuit
18
-
General Instructions for Refrigerant Circuit
21
-
Extractor, Filler and Measurement Valves for Quick Couplings of the AC Service Station on the
26
-
Pressures and Temperatures in the Refrigerant Circuit and Its Arrangement
28
-
Switch and Sender on the Refrigerant Circuit
32
-
Electrical Components Which Are Not Fitted on the Refrigerant Circuit
33
-
The Inspection and Measurement Work Can be Performed Using the Pressure Gauge
34
-
Air Conditioning Service and Recycling Equipment
35
-
Repair and Maintenance Instructions for Refrigerant Circuit
35
-
Legal Texts and Legal Regulations
37
-
Laws and Regulations
37
-
Verification Procedure of Refrigerant
38
-
Refrigerant Circuit
39
-
Important Repair Instructions for Air Conditioning Systems
39
-
Working with the A/C Service Station
40
-
-
Important Instructions for Working with the A/C Service Station
41
-
Connecting the A/C Service Station to the Refrigerant Circuit for Measuring and Testing
42
-
Empty the Refrigerant Circuit with the A/C Service Station
42
-
Important Instructions for Working with the A/C Service Station
42
-
Evacuate the Refrigerant Circuit with the A/C Service Sta- Tion
43
-
Evacuate the Refrigerant Circuit with the A/C Service Station
43
-
Fill Refrigerant into the Reservoir (Filling Cylinder or Reservoir Bottle) of the A/C Service Station
44
-
Fill the Refrigerant Circuit with the A/C Service Station
44
-
Operate the Air Conditioning System after Filling
44
-
Draining the A/C Service Station
45
-
Leak Detection on the Refrigerant Circuit
46
-
Looking for Leaks in the Refrigerant Circuit — Important Instructions
46
-
Leak Detection on the Refrigerant Circuit with Compressed Air or Nitrogen
47
-
Detecting Leaks on the Refrigerant Circuit with the Leak Detector VAG1796
49
-
Detecting Leaks on the Refrigerant Circuit with the Leak Detector VAS 6196 or VAS 6201A
49
-
Cleaning the Refrigerant Circuit with Compressed Air and Nitrogen
56
-
Removing Contaminants from the Refrigerant Circuit
56
-
Cleaning Refrigerant Circuit with Refrigerant R134A (Flush)
58
-
Principle Circuit Diagrams for Different Rinsing Cycles
62
-
Adapter for Setting up the Rinsing Cycles
65
-
Complaints
70
-
Possible Complaints
70
-
Temperature Test of Cooling Capacity
71
-
Odour from the Heating and Air Conditioning Unit
72
-
Check the Pressure in the Refrigerant Circuit (with the A/C Service Station)
75
-
Test Requirements before the Pressure Test
75
-
Check Pressures
76
-
Continuation of the Test Depending on the Arrangement of the Refrigerant Circuit
78
-
Pressure Test for Vehicles with Throttle and Catch Pan (with AC Compressor Regulated from the Inside)
78
-
Pressure Test for Vehicles with Expansion Valve and Fluid Reservoir (with AC Compressor Regulated from the Inside)
82
-
Replace Components of the Refrigerant Circuit
95
-
Replace Parts on the Refrigerant Circuit — General Instructions
95
-
Components of the Refrigerant Circuit Leaking or Damaged — the Refrigerant Circuit Is Absolutely Empty
96
-
Components of the Refrigerant Circuit Leaking or Damaged — Refrigerant Is Still in the Refrigerant Circuit
97
-
Replace AC Compressor
97
-
Replace Catch Pan and Throttle/Fluid Reservoir
98
-
-
Tools and Materials, Which Are Avail- Able from the Importer
100
-
Tools and Materials, Which Are Available from the Importer
100
-
A/C Service Station
101
-
Flushing Device for the Refrigerant Circuits 6336/1 or Fol- Low-Up Models (Manufacturer Waeco)
102
-
Flushing Device for the Refrigerant Circuits 6336/1 or Follow-Up Models (Manufacturer Waeco)
102
-
Flushing Device for the Refrigerant Circuits 6337/1 or Fol- Low-Up Models (Manufacturer Behr)
102
-
Flushing Device for the Refrigerant Circuits 6337/1 or Follow-Up Models (Manufacturer Behr)
102
-
Leak Detection System VAS 6196
102
-
Leak Detector V.A.G 1796
102
-
Adapter Case of Motor Car Set VAS 6338/1
103
-
Case of Release Tools VAS 6127/3
103
-
Leak Detection System VAS 6201A
103
-
Socket Insert T10364
103
-
Setting up Tools and Materials Which Are Available from a Dealer
104
-
Tools and Materials, Which Are Commercially Available
104
-
Bottle Connecting Piece for Pressure Bottle
105
-
Filling Hoses
105
-
Valve Caps with Replacement Gaskets
105
-
A/C Service Station
106
-
Pressure Gauge with Pressure Reducer for Nitrogen
106
-
Quick-Coupling Adapter for Service Connections
106
-
Tools, Which You Make Yourself
106
-
-
Service
109
-
Heating
111
-
Summaries of Components, Disassembling and Assembling the Heater Unit
111
-
Summary of Components — Interior
111
-
Assembly Overview — Heater Unit
113
-
Disassembling and Assembling the Heater Unit
114
-
Summary of Components: Heat Exchanger, Heating Element for Air Auxiliary Heating Z35
116
-
Dash Panel Vent and Air Guide Ducts, Ventilation
117
-
Removing and Installing the Centre Dash Panel Vent
117
-
Remove and Install Footwell Vent
118
-
Removing and Installing the Right/Left Side Vent
118
-
Remove and Install the Forced Ventilation Frame for Passenger Compartment, Check
119
-
Heater Control
121
-
Removing and Installing Heater Control
121
-
Plug Connections at the Heater Control
122
-
Removing and Installing Flex Shafts
122
-
-
Components on the Heater Unit
124
-
Components on the Heater Unit
125
-
Removing and Installing Control Motor of Fresh Air Flap and Re-Circulating Air Flap V154
125
-
Removing and Installing Dust Pollen Filter
127
-
Removing and Installing the Control Motor for Air Distribution Flaps
128
-
Removing and Installing the Control Unit for Temperature Flap
129
-
Removing and Installing Fresh Air Blower V2
130
-
Removing and Installing Series Resistor for Fresh Air Blower N24
131
-
Removing and Installing the Heating Unit from the Vehicle
132
-
Air Conditioning System
134
-
Notes Regarding the Odours Coming from the Heating and Air Conditioning Unit
135
-
Description of the Air Conditioning System
136
-
Operation of the Air Conditioning System
136
-
Structure of the Refrigerant Circuit
136
-
Parts of the Refrigerant Circuit
138
-
Extractor, Filler and Measurement Valves for Quick Couplings of the AC Service Station on the
140
-
Parts of the Protection and Control of the Refrigerant Circuit
142
-
Refrigerant Circuit
142
-
Properties of Refrigerant R 134A and of the Refrigerant Oil
145
-
Refrigerant Oil
146
-
Refrigerant R134A
146
-
-
Air Conditioning System — Engine Com- Partment
148
-
Air Conditioning System — Engine Compartment
149
-
Components of the Air Conditioning System in the Engine Compartment — Summary of Components- Vehicles from MY 2011
152
-
Removing and Installing the Refrigerant Lines of the Con- Denser
153
-
Removing and Installing the Refrigerant Lines of the Condenser
153
-
Removing and Installing the Refrigerant Lines from the AC Compressor
155
-
Removing and Installing the Refrigerant Lines on the Ex- Pansion Valve
156
-
Removing and Installing the Refrigerant Lines on the Expansion Valve
156
-
Check Valve for Condensation Water Drain
157
-
Removing and Installing the AC Compressor from Holder
157
-
Removing and Installing Ambient Temperature Sensor G17
158
-
-
Components of the Air Conditioning System — Engine Compartment
159
-
Removing and Installing, Inspecting High Pressure Sender G65
159
-
Removing and Installing the Expansion Valve
160
-
Inspecting the Pressure Relief Valve on the AC Compressor
161
-
Removing and Installing AC Compressor
161
-
Reasons for Rinsing the Refrigerant Circuit
163
-
Running-In Instructions of the AC Compressor
163
-
Removing and Installing the Condenser
164
-
Replace Dessicator Cartridge
165
-
Repairing Air Conditioning System Magnetic Coupling N25
168
-
Quick Couplings for Refrigerant Lines
172
-
Separating Quick Couplings for Refrigerant Lines
172
-
Removing and Installing the Heating and Air Conditioning Unit from the Vehicle
176
-
Dash Panel Vent and Air Guide Ducts, Ventilation
179
-
-
Climatic, Air Conditioning System with Manual Control
180
-
10. Climatic, Air Conditioning System with Manual Control
181
-
Summary of Components — Heating and Air Conditioning Unit
183
-
Dismantling and Assembling Heater and Air Conditioning Unit
185
-
Expansion Valve — Summary of Components
187
-
Removing and Installing Evaporator
187
-
Control for Heating and Air Conditioning System
189
-
Removing and Installing Flex Shaft for Positioning Unit of Air Distribution Flaps
191
-
Removing and Installing Control Motor of Fresh Air Flap and Re-Circulating Air Flap V154
192
-
Removing and Installing the Control Motor of Temperature Flap V68
192
-
Climatronic — Air Conditioner with Automatic Regulation)
195
-
Summary of Components — Interior
195
-
Summary of Components of Heating and Air Conditioning Unit
198
-
Dismantling and Assembling Heater and Air Conditioning Unit
200
-
Function of the Control and Display Unit for Front Air Con- Ditioning System E87 with Climatronic Control Unit J255
202
-
Function of the Control and Display Unit for Front Air Conditioning System E87 with Climatronic Control Unit J255
202
-
Removing and Installing Fresh Air Blower Control Unit J126
206
-
Removing and Installing Sunlight Penetration Photosensor G107
206
-
Removing and Installing the Control Motor of Air Flow Flap V71
207
-
Removing and Installing the Control Motor of Central Flap V70
208
-
Removing and Installing Defroster Flap Control Motor V107
209
-
Removing and Installing Defroster Flap Control Motor V107 and Temperature Flap Control Motor V68
209
-
Advertisement

Skoda Fabia II 2011 Workshop Manual (198 pages)
Brand: Skoda
|
Category: Automobile
|
Size: 5.72 MB
Table of Contents
-
Service
2
-
Table of Contents
3
-
Technical Data
5
-
Identification of the Gearbox
5
-
Location on the Gearbox
5
-
Identification Characters, Aggregate Assignment, Ratios
6
-
Identification Characters, Aggregate Assignment, Ratios (Octavia II)
10
-
Identification Characters, Aggregate Assignment, Ratios (Fabia II)
10
-
Identification Characters, Aggregate Assignment, Ratios (Roomster)
11
-
Identification Characters, Aggregate Assignment, Ratios (Rapid India)
12
-
Identification Characters, Aggregate Assignment, Ratios (Rapid)
12
-
Identification Characters, Aggregate Assignment, Ratios (Superb II)
13
-
Identification Characters, Aggregate Assignment, Ratios (Octavia III)
13
-
Torque Con- ⇒ Electronic Catalogue of Original Parts
13
-
Gear
13
-
Reverse Gear
13
-
Intermediate Drive Wheel
13
-
Gear Output Gear
13
-
Ratio
13
-
Final Drive Output Shaft
13
-
Crown Wheel
13
-
Contents
14
-
Information for the Automatic Gearbox 09G
16
-
Torque Converter
16
-
Atf
16
-
-
Information and Repair Instructions for the Automatic Gearbox 09G
16
-
Repair Instructions
17
-
Explanation of the Terms Used in this Workshop Manual
19
-
Draining the Torque Converter
21
-
Removing and Installing Gasket Ring for Torque Converter
21
-
Checking the Torque Converter
22
-
Installing the Torque Converter
22
-
-
Controls, Housing
24
-
Electric and Electronic Components, Fitting Locations of the Automatic Gearbox
24
-
Summary of Components
24
-
Summary of Components — Electric and Electronic Components, Fitting Locations of the Automatic Gearbox
30
-
Removing and Installing Automatic Gearbox Control Unit J217
42
-
Install
43
-
Removing
43
-
Removing and Installing Automatic Gearbox Control Unit
43
-
-
Assembly Overview — Shift Mechanism
45
-
Repairing Shift Mechanism
45
-
Summary of Components — Gearshift Mechanism -Octavia II up to 10.2009
45
-
Summary of Components — Gearshift Mechanism — Octavia II as of 11.2009
48
-
Summary of Components — Gearshift Mechanism -Superb II
50
-
Summary of Components — Shift Mechanism up to 10.2011
51
-
Summary of Components — Shift Mechanism as of 11.2011
53
-
Gearshift Mechanism
55
-
-
Inspecting the Gearshift Mechanism
58
-
Inspecting and Adjusting the Selector Lever Control Cable
59
-
Check the Function of the Ignition Key Removal Lock
61
-
Removing and Installing the Cover for the Shift Mechanism
62
-
Removing and Installing and Installing Selector Lever Handle up to 10.2012
69
-
Removing and Installing Retractor Spring
70
-
Removing and Installing Selector Lever Handle
73
-
-
Removing and Installing Selector Lever Handle as of 11.2012
74
-
Installing the Lock Button at the Selector Lever Handle
76
-
Removing and Installing Selector Mechanism
78
-
Removing and Installing Slave Cylinder
84
-
Remove and Install Shift Mechanism
88
-
Removing and Installing Shift Mechanism
92
-
-
Removing and Installing the Selector Lever Control Cable
96
-
Removing and Installing Selector Lever Lock Solenoid N110
104
-
Removing and Installing the Tiptronic Switch F189
104
-
Checking the Plug Connections at the Gearshift Mechanism
108
-
Emergency Release of Gearshift Mechanism out of Position «P
109
-
Removing and Installing the Gearbox
111
-
Removing the Gearbox
111
-
Removing Gearbox
115
-
Installing the Gearbox
136
-
Tightening Torques
138
-
M10
142
-
M12
142
-
Screws 1) -1
142
-
Screws/Nuts M6
142
-
Nm + Torque a Further Mounting, Screws / 4 Turn)
143
-
Screws / 4 Turn)
143
-
Attaching Gearbox to Assembly Stand
149
-
Transporting an Automatic Gearbox
149
-
Check the ATF Level Level and Top up
151
-
Change ATF or Top up after Repair
156
-
ATF Coolant Circuit
159
-
ATF Radiator — Summary of Components
159
-
Summary of Components for Gearboxes with KGV, KGU
160
-
Removing and Installing ATF Radiator
163
-
-
Gears, Control
169
-
General Instructions
169
-
Removing and Installing Oil Pan, Oil Filter, Slide Valve Body and Internal Wiring Looms
169
-
-
Summary of Components — Oil Pan, Oil Strainer, Slide Valve Body, Internal Wiring Looms
169
-
Components at Wiring Loom of 8-Pin Plug
171
-
Components at Wiring Loom of 8-Pin Plug
172
-
Removing and Installing Oil Pan
172
-
Removing and Installing the Oil Filter
174
-
Removing and Installing the Slide Valve Body
175
-
Removing and Installing Wiring Loom with 14-Pin Plug
184
-
Removing and Installing Wiring Loom with 8-Pin Plug and Integrated Gearbox Oil Temperature Sender G93
185
-
Removing and Installing the Gearbox Input R.p.M. Sender G182
187
-
Removing and Installing the Gearbox Output R.p.M. Sender G195
188
-
Removing, Installing and Setting Multi-Function Switch F125
189
-
Setting Multi-Function Switch F125
191
-
-
Final Drive — Differential
193
-
Replacing the Left Flange Shaft Gasket Ring
193
-
Replacing the Right Flange Shaft Seal Ring
194
-
Replacing the Gasket Ring for the Gearshift Shaft
197
-
Skoda Fabia II 2011 Workshop Manual (165 pages)
Brand: Skoda
|
Category: Automobile
|
Size: 3.96 MB
Table of Contents
-
Table of Contents
3
-
Technical Data
5
-
Identification of the Gearbox
5
-
Identification Characters, Aggregate Assignment, Ratios, Filling Capacities (Fabia II)
5
-
Identification Characters, Aggregate Assignment, Ratios, Filling Capacities (Roomster)
10
-
Identification Characters, Aggregate Assignment, Ratios, Filling Capacities (Rapid)
14
-
Identification Characters, Aggregate Assignment, Ratios, Filling Capacities (Rapid NH)
15
-
Overview of Transmission System
17
-
Designation of Components and Transmission Ratio
17
-
General Repair Instructions
18
-
Clutch
22
-
Clutch Control
22
-
Summary of Components — Foot Controls (Fabia II 2007 ►; Roomster 2006 ►)
23
-
Removing and Installing, Setting Angular Clutch Pedal Switch F36
24
-
Removing and Installing, Setting Cylindrical Clutch Pedal Switch F36 , (Fabia II 2007 ►; Roomster 2006 ►)
25
-
Removing and Installing the Crash Strut for the Clutch Pedal (Fabia II 2007 ►; Roomster 2006 ►)
26
-
Removing and Installing the Clutch Pedal (Fabia II 2007 ►; Roomster 2006 ►)
31
-
Summary of Components — Foot Controls (Fabia II 2011 ►; Roomster 2011 ►; Rapid NH 2013 ►)
33
-
Summary of Components — Foot Controls (Rapid)
40
-
Removing and Installing the Bracket with the Master Cylinder (Fabia II 2011 ►; Roomster 2011 ►; Rapid NH 2013 ►)
42
-
Removing and Installing the Bracket with the Master Cylinder (Rapid 2011 ►)
45
-
Removing and Installing the Bracket Without the Master Cylinder (Fabia II 2011 ►; Roomster 2011 ►; Rapid NH 2013 ►)
47
-
Removing and Installing the Bracket Without the Master Cylinder (Rapid 2011 ►)
48
-
Removing and Installing the Clutch Pedal with the Over-Centre Helper Spring (Fabia II 2011 ►; Roomster 2011 ►)
50
-
Removing and Installing the Clutch Pedal with the Over-Centre Helper Spring (Rapid)
52
-
Removing and Installing the Clutch Pedal with the Tension Spring (Fabia II 2011 ►; Roomster 2011 ►; Rapid NH 2013 ►)
53
-
Summary of Components — Hydraulic (Fabia II ►; Roomster ►; Rapid NH)
55
-
Summary of Components — Hydraulic (Rapid 2011 ►)
58
-
Check Hydraulic Clutch Control
61
-
Removing and Installing the Master Cylinder (Fabia II 2007 ►; Roomster 2006 ►)
62
-
Removing and Installing the Master Cylinder (Fabia II 2011 ►; Roomster 2011 ►; Rapid NH 2013 ►)
65
-
Removing and Installing the Slave Cylinder
65
-
Bleeding the Clutch Control
69
-
Repairing the Clutch Release Mechanism
70
-
Repairing Clutch
72
-
Fault Finding Power Transmission — Problems with the Clutch and Clutch Control
74
-
Controls, Housing
80
-
Shift Mechanism
80
-
Installation Position — Selector Mechanism
80
-
Summary of Components — Gearshift Mechanism
82
-
Summary of Components — Gearshift Knob with Shift Lever Collar
83
-
Removing and Installing Gearshift Knob and Shift Lever Collar (Fabia II, Roomster)
83
-
Remove and Install Gearshift Knob and Shift Lever Collar (Rapid)
84
-
Remove and Install Gearshift Knob and Shift Lever Collar (Rapid NH)
85
-
Summary of Components — Shift Lever and Shift Housing
86
-
Summary of Components — Control Cables
88
-
Plastic Relay Lever as of 06.07 (Fabia II, Roomster, Rapid NH)
91
-
Remove and Install Shift Mechanism (Fabia II, Roomster, Rapid NH)
93
-
Removing and Installing Shift Mechanism (Rapid)
98
-
Setting the Shift Mechanism
100
-
Removing and Installing the Gearbox
103
-
Removing the Gearbox
103
-
Installing the Gearbox
112
-
Inspect the Gear Oil Level in the Gearbox
116
-
Disassembling and Assembling the Gearbox
117
-
Gearbox — Summary of Components
117
-
Summary of Components
118
-
Removing and Installing Gearbox Housing Cover and 5Th Gear
119
-
Detaching and Attaching Clutch Housing
120
-
Removing and Installing the Drive Shaft, Output Shaft, Differential Gear, Shift Mechanism and Gearshift Forks
121
-
Mounting Sequence
122
-
Repairing Gearbox Housing and Clutch Housing
130
-
Repairing Shift Mechanism
134
-
Disassembling and Assembling the Gearshift Forks
136
-
Gears, Shafts
139
-
Drive Shaft
139
-
Disassembling and Assembling the Drive Shaft
139
-
Output Shaft
148
-
Disassembling and Assembling the Output Shaft
148
-
Final Drive — Differential
155
-
Replacing the Flange Shaft Gasket Rings (Gearbox Assembled)
155
-
Removing
155
-
Install
156
-
Differential Gear
158
-
Disassembling and Assembling Differential Gear
158
-
Adjusting the Differential Gear
163
Advertisement
Skoda Fabia II 2011 Workshop Manual (194 pages)
Brand: Skoda
|
Category: Automobile
|
Size: 5.16 MB
Advertisement
Related Products
-
Skoda Octavia II 2010
-
Skoda Superb II 2012
-
Skoda Superb II 2013
-
Skoda Superb II 2014
-
Skoda Superb II 2015
-
Skoda Superb II 2016
-
Skoda Superb II 2017
-
Skoda Superb II 2018
-
Skoda Superb II 2008
-
Skoda Octavia II 2006
Skoda Categories
Automobile
Car Receiver
Automobile Accessories
Car Navigation system
Car Video System
More Skoda Manuals
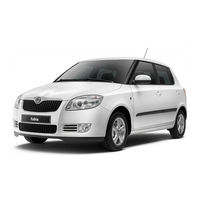
Посмотреть инструкция для Skoda Fabia (2012) бесплатно. Руководство относится к категории автомобили, 21 человек(а) дали ему среднюю оценку 8.5. Руководство доступно на следующих языках: русский. У вас есть вопрос о Skoda Fabia (2012) или вам нужна помощь? Задайте свой вопрос здесь
Шкода Фабия (2012 года выпуска) – это небольшой городской автомобиль, который поставляется с бензиновыми и дизельными двигателями. Примерно весит около 1 тонны, а длина автомобиля составляет около 4 метров. Объем багажника находится в диапазоне от 300 до 1200 литров, в зависимости от того, сложены ли сиденья заднего ряда. Салон автомобиля неплохо оборудован и отделан качественными материалами.
Стоит отметить, что зеркала заднего вида (боковые и заднее) имеют довольно малый размер и ограниченный обзор. Некоторые владельцы также отмечают неудобство при парковке из-за недостаточной видимости сзади. В автомобиле установлено пятиступенчатое или семиступенчатое коробка передач. Разгон автомобиля от 0 до 100 км/ч составляет от 9 до 14 секунд, в зависимости от двигателя и коробки передач. Топливный расход составляет примерно от 6 до 8 л/100 км, в зависимости от условий эксплуатации.
Шкода Фабия (2012) также имеет ряд безопасностных опций, таких как подушки безопасности и система контроля стабильности. Она также может похвастаться хорошей управляемостью на дороге и удобностью в управлении. В целом, это достойный автомобиль, хотя несколько неудобств могут понадобиться для учета при планировании использования этого автомобиля в качестве своего транспортного средства.
Главная
Не можете найти ответ на свой вопрос в руководстве? Вы можете найти ответ на свой вопрос ниже, в разделе часто задаваемых вопросов о Skoda Fabia (2012).
Как перевести мили в километры?
1 миля равна 1,609344 километрам, а 1 километр — 0,62137119 милям.
Где я могу узнать идентификационный номер транспортного средства Skoda?
Место размещения идентификационного номера транспортного средства зависит от марки и типа транспортного средства. Номер может быть выбит на раме транспортного средства или указан на номерном знаке. Чтобы узнать место расположения идентификационного номера транспортного средства лучше всего ознакомиться с руководством по эксплуатации Skoda Fabia (2012).
Что такое идентификационный номер транспортного средства (VIN)?
Идентификационный номер транспортного средства — уникальный для каждого транспортного средства идентификационный номер. Аббревиатура VIN расшифровывается как «Vehicle Identification Number» (Идентификационный номер транспортного средства).
Когда транспортному средству Skoda требуется техническое обслуживание?
Регулярное техническое обслуживание необходимо всем транспортным средствам. С информацией о том, как часто необходимо проходить техническое обслуживание и чему именно стоит уделять особое внимание можно ознакомиться в инструкции по техническому обслуживанию. Как правило, транспортное средство требует технического обслуживания каждые 2 года или 30 000 километров пробега.
Когда следует заменять тормозную жидкость на Skoda?
Тормозную жидкость рекомендуется менять каждые два года.
В чем разница между топливом E10 и E5?
В топливе E10 содержится до десяти процентов этанола, в то время как в E5 содержится менее пяти процентов. Соответственно, топливо E10 менее вредит окружающей среде.
Одна или несколько дверей не открываются изнутри. Что мне делать?
Скорее всего, замок оснащен защитой от детей и поэтому не может быть открыт изнутри. Процедура открытия замка с защитой от детей зависит от марки и типа замка.
Автомобильный радиоприемник не включается, что делать?
Если автомобильный радиоприемник не включен, на него не будет подаваться питание. Убедитесь, что красный провод подключен к контактному источнику питания, а желтый провод — к источнику питания постоянной мощности.
Инструкция Skoda Fabia (2012) доступно в русский?
Да, руководствоSkoda Fabia (2012) доступно врусский .
Не нашли свой вопрос? Задайте свой вопрос здесь