![]()
Spovan MG01 — это многофункциональные спортивные часы на каждый день. Они созданы как для повседневной городской жизни так и для туризма, рыбалки и занятия спортом. В этих часах встроен качественный высотомер который покажет вам уровень над морем, барометр покажет вам давление в паскалях, компас укажет вам направление если вдруг вы потерялись в городских джунглях или лесу, так же здесь есть отличный термометр который показывает очень точный прогноз погоды, новый улучшенный хронограф.
Пошаговая настройка альтиметра, барометра, компаса подойдёт также к часам: Spovan Bravo II, Spovan Mingo II и возможно других моделей. А так же таких марок как Sunroad FR802, Hama M-110, Bozlun MG03 и тд. #часы #навигация #погода
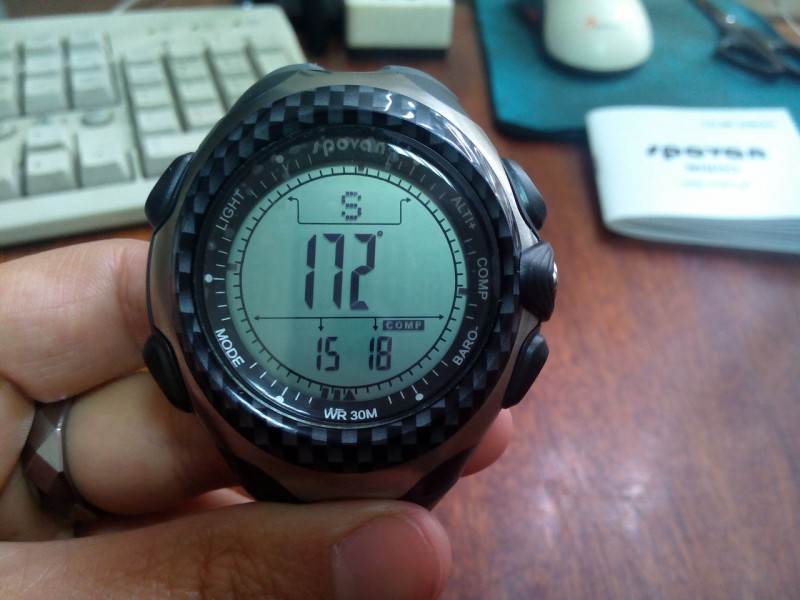
У альтиметра есть 4 вида корректировки:
- ZERO — нулевой, ставит 0. Служит для определения относительных высот (типа «насколько высоко я забрался»).
- ALTI — абсолютная высота, нужно указать высоту с известным значением.
- SEAP — нужно ввести удельное давление на уровне моря взятое из официальных источников.
- F.DEF — заводская настройка.
Шаг 1.
- Заходим на сайт ⇨ Google Maps Find Altitude.
- В окошко Search For Location пишем свой адрес (то место где вы находитесь), нажимаем Search.
- Под картой получаем результат Last point clicked: 220 m.
Шаг 2.
- Берём в руки часы, входим в режим альтиметра ALTI+.
- Зажимаем на 2 секунды кнопку MODE.
- Моргает ZERO, оно нас не интересует, нажимаем ещё раз на MODE, моргает ALTI, то что надо.
- Верхней правой или нижней кнопкой выставляем значение высоты полученное на сайте.
- Зажимаем кнопку MODE на 2 сек. что бы зафиксировать результат.
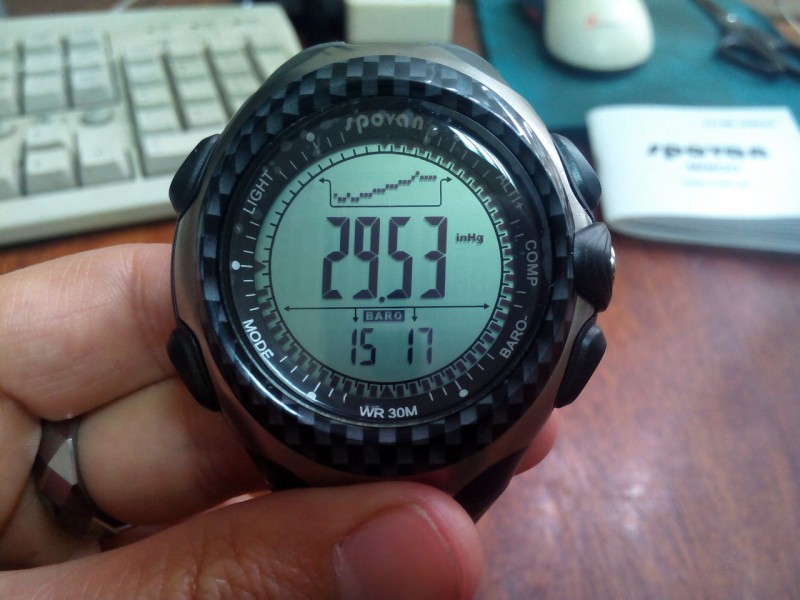
У барометра 2 вида корректировки:
- AIRP. — абсолютное давление. Это то давление которое у вас сейчас на вашей высоте над уровнем моря, оно же при правильных настройках показывается по середине большими цифрами.
- F.DEF — заводская настройка.
Выбираем F.DEF — заводская настройка, и нажимаем YES.
Если и после этого
ваш нанотехнологичный гаджет неправильно
показывает давление попробуйте:
- Выставить настройки заново.
- Выставить
точное давление с сайта в режиме SEAP. - Почитать инструкцию.
Как правильно определять предстоящую погоду по барометру?
Если давление резко поднялось, то: летом — будет сухая, возможно ясная погода, зимой — к морозу. Если давление резко опустилось, то: летом — к осадкам, зимой — к оттепели или снижению мороза.
Настройка компаса.
- Входим в режим компаса (кнопка COMP).
- Кладём часы на ровную поверхность параллельно горизонту вдали от электромагнитных приборов и железобетонных конструкций.
- Нажимаем на 2 сек. кнопку MODE появляется слово CAL (калибровка).
- Нажимаем кнопку ALTI+, индикатор начинает моргать.
- Аккуратно вращаем часы по часовой стрелке пока не выскочат данные компаса.
- Затем ещё раз нажимаем на кнопку MODE должно появится слово DEC.
- Выставляем магнитное склонение для своего города.
- Нажимаем кнопку MODE на 2 сек что бы зафиксировать результат.

Как узнать магнитное склонение:
- Идём на сайт ⇨ World Magnetic Model Calculator.
- На карте выбираем своё местоположение.
- В появившейся таблице смотрим значение в колонке MF/D.


По умолчанию заводская настройка альтиметра 1013.2 mbar (== hPa), что соответствует 760 мм рт.ст.
«… есть точно такие же но Bozlun MG03. Пол года пользуюсь и всё гуд.
Альтиметр выставил по знаку в городе где точная высота указана, и хочу
сказать показывают с погрешностью в 2-3 метра максимум. Температуру оч.
точно показывают если лежат мин 5 на столе или ещё где нибудь. Давление
вообще на удивление точно показывает даже на руке, только умножать нужно
на 0.75, да и забыл про термометр, -10 это минимум. Так что пол года
батарея держит и часто пользуюсь часами просто понажимать кнопочки. Купаться точно можно и ничего с ними не будет, да и в баню ходил с ними,
показывает максимум +60.«
Наконец-то получил свои часы. Эмоции только положительные. Компас сверял с профессиональным геологическим — показания один в один. Подсветка на «светлом» варианте циферблата работает интересно — светятся только цифры. Думал, что будет светиться подложка, короче, офигительно. По поводу комментария выше про температуру — всё это есть в инструкции (в спецификациях), которую я отсканировал.
UPD от 06.07.17: Перед поездкой на природу желательно проверить показания. Через некоторое время калибровка сбивается. Это выражено неадекватными показаниями высоты и «застопоренным» компасом.
За основу взята статья из этого ⇨ источника.
Инструкция к часам ⇨ Spovan MG01 (скан).
Инструкция к часам ⇨ Spovan Bravo II.
Обзор часов на ⇨ YouTube.
Полный обзор функций на примере Spovan Mingo на ⇨ YouTube.
Всем привет!
Давайте рассмотрим интересные часики известного китайского бренда Spovan, который специализируется на создании часов для спорта, рыбалки и альпинизма.
Вашему вниманию представляю модель Spovan Mingo 1.
Официальная страничка продукта:
spovan.com/index.php?_m=mod_product&_a=view&p_id=1231
В конце обзора будет подробный видеообзор.
Вкратце что умеет:
* часы, будильник, секундомер, таймер
* барометр с возможностью калибровки
* альтиметр с возможностью калибровки
* цифровой компас с возможностью калибровки и установки магнитного склонения
* прогноз погоды на основе давления и температуры
* чарты давления и высоты за 24 часа
* метроном
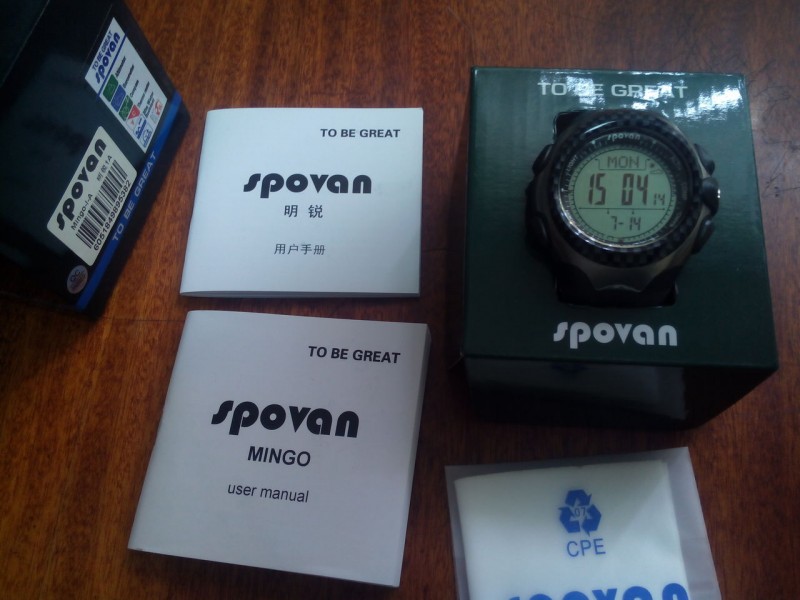
Комплект поставки.
* часы
* фирменная коробка со вкладышем для часов
* инструкции на кит. и англ. языках
* салфеточка для протирки часов
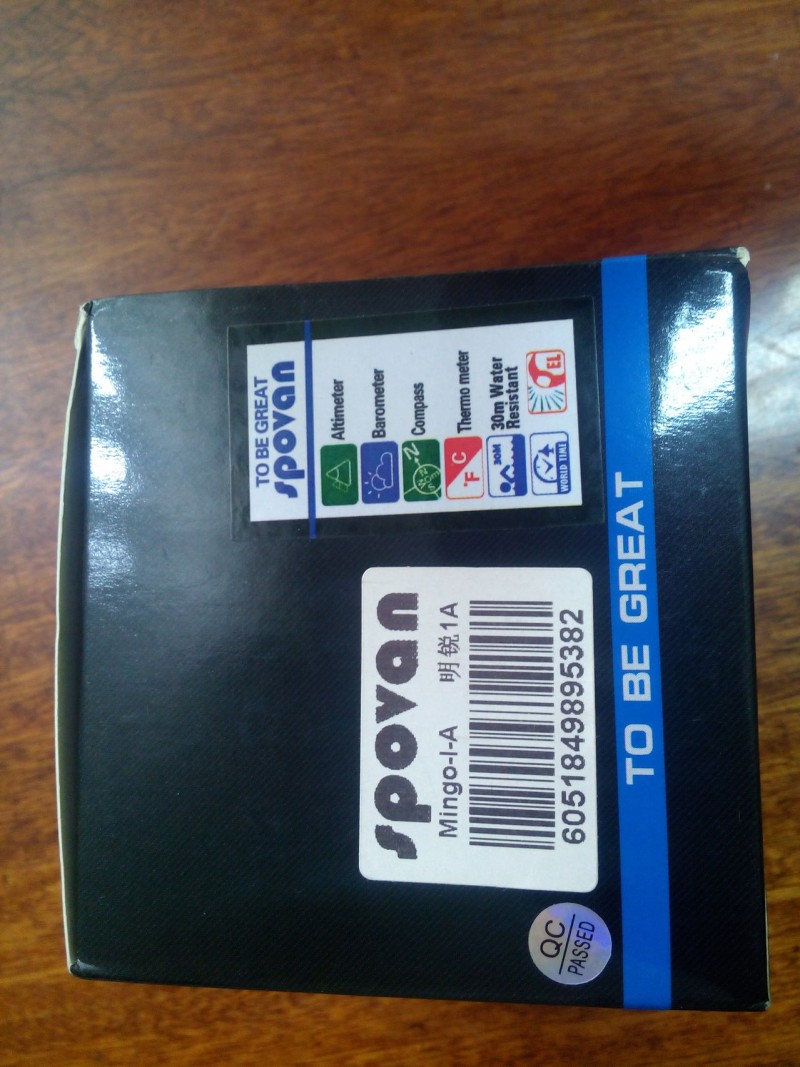
На коробке отображены основные характеристики.
Часы довольно крупные, вместе с кнопками в диаметре 50 мм, экран 33мм, толщина 15мм, ширина ремешка 27мм у оснований, дальше 22мм.
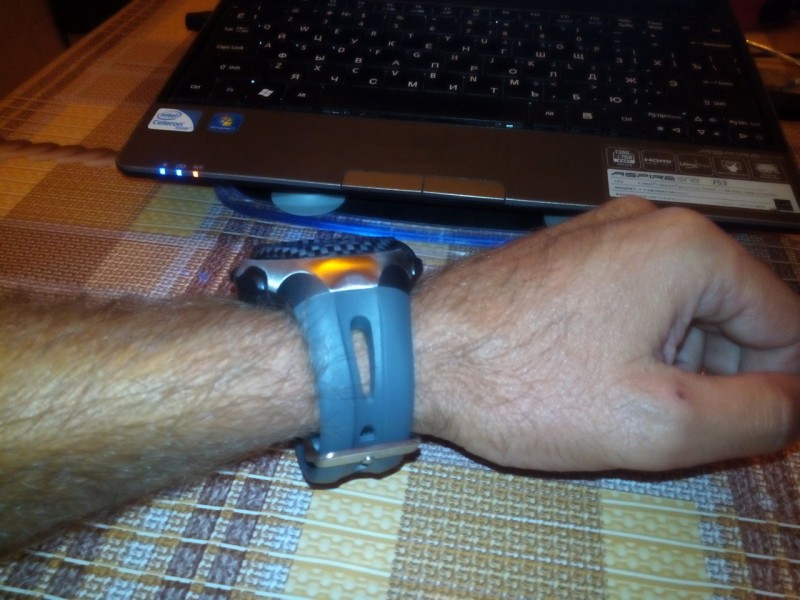
Длина ремешка рассчитана на широкий диапазон толщины запастий, от самого тонкого до очень толстого, подойдет всем.
Часы довольно массивные, на моем тонком запястье смотрятся достаточно громоздко.
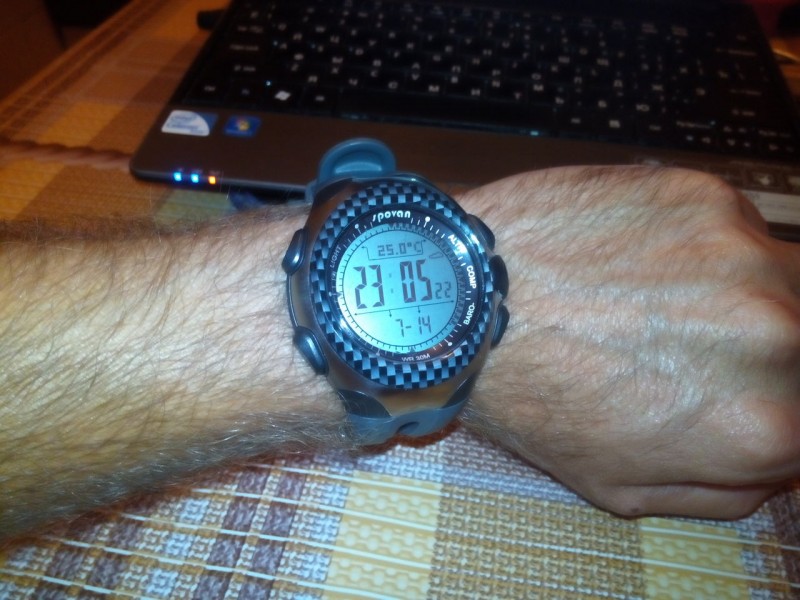
Экран не стекло, пластик, как и во многих спортивных часах.
Вокруг него идет дизайнерское решение — пластиковая вставка в виде шахматного узора (хороший подарок шахматистам 
Далее вокруг него идет металлическая вставка.
Еще дальше снова пластик.
Задняя крышка снова металл.
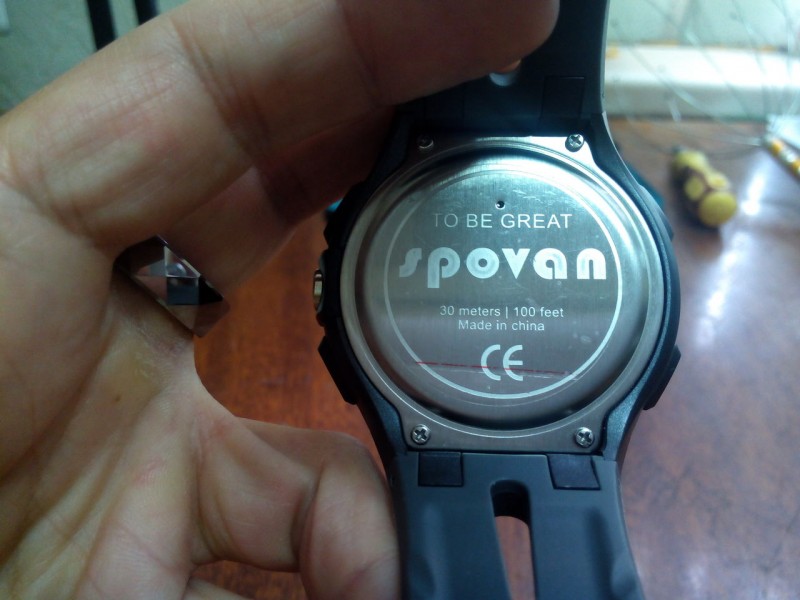
На задней крышке мы видим их логотип + надпись «TO BE GREAT» и некое упоминание о 30 метрах. Весьма сомнительно, что в них можно нырять. Скорее всего это лишь 3АТМ, т.е. небольшой дождь и брызги, погружать в воду и нырять нельзя.
Кнопок всего пять, две на левой стороне.
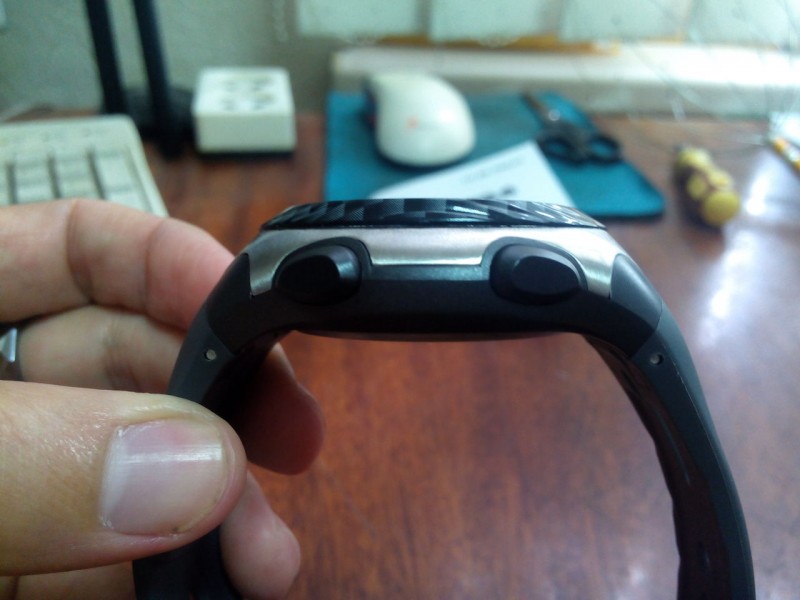
И три на правой.
Все 5 рабочие, имеют свои функции, фейковых нет.
Верхняя левая как и на большинстве часов подсветка.
Подсветка не очень яркая, ее видно только в темноте, подсвечивается не весь экран, а сами цифры и все символы на экране, включая точки секунд по кругу.
Длительность подсветки — 3сек.
Нижняя левая — кнопка MODE, служит для переключения режимов часов и для задания настроек в этих режимах.
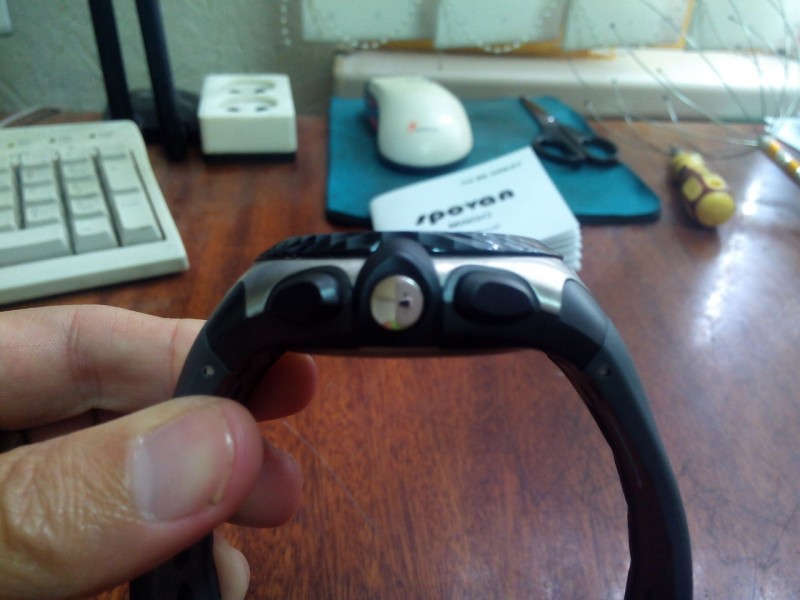
Верхняя правая включение режима альтиметра + другие функции, нижняя правая включение режима барометра + другие функции, средняя правая включение режима компаса.
В инструкции для краткости эти кнопки названы латинскими буквами против часовой стрелки: левая верхняя — A, нижняя B, нижняя правая C, средняя D, верхняя правая E.
Я тоже в обзоре буду придерживаться этого обозначения.
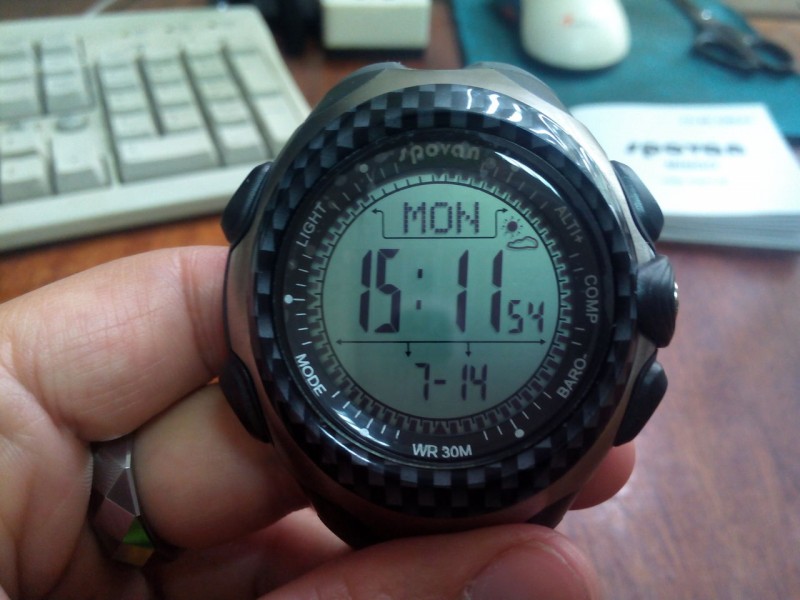
Основной экран такой:

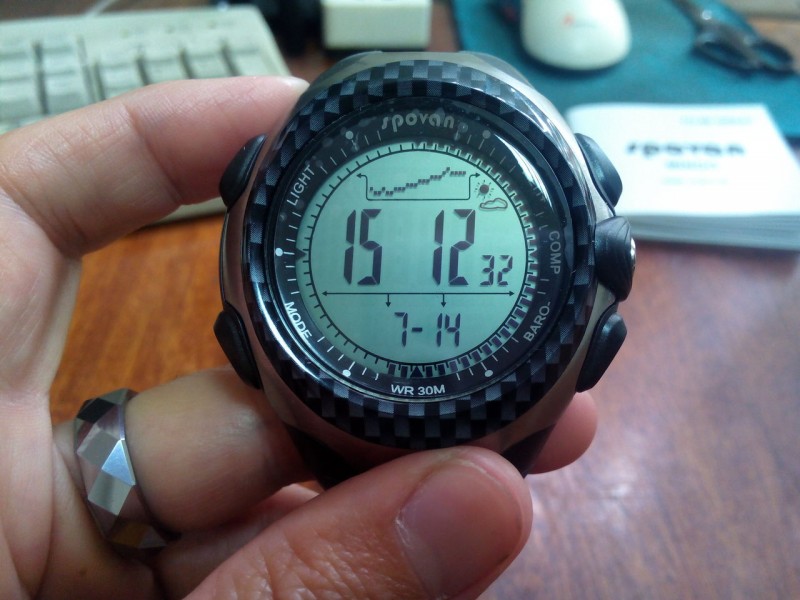
Мы видим разделение на 3 части, посредине время, внизу дата, а сверху возможны варианты: день недели, температура, чарт высоты за 24 часа, чарт давления за 24 часа.
Переключается это все удержанием кнопки E.
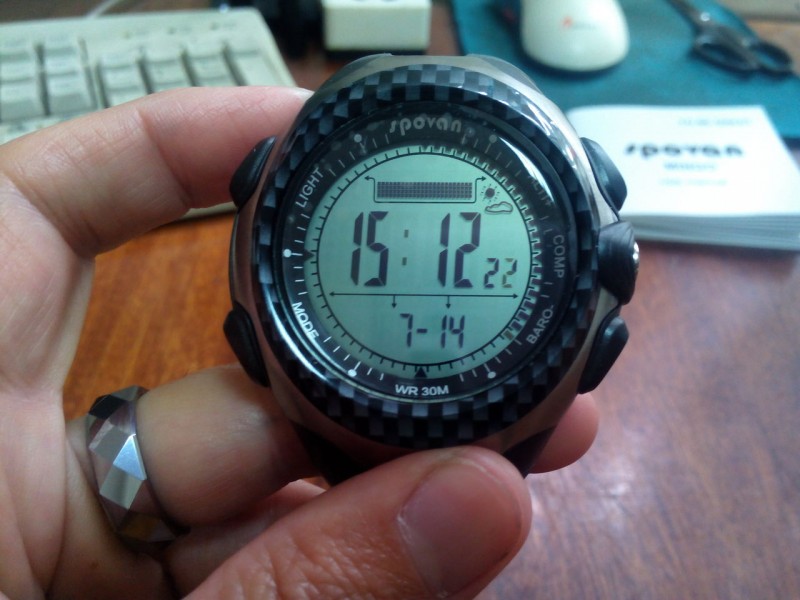
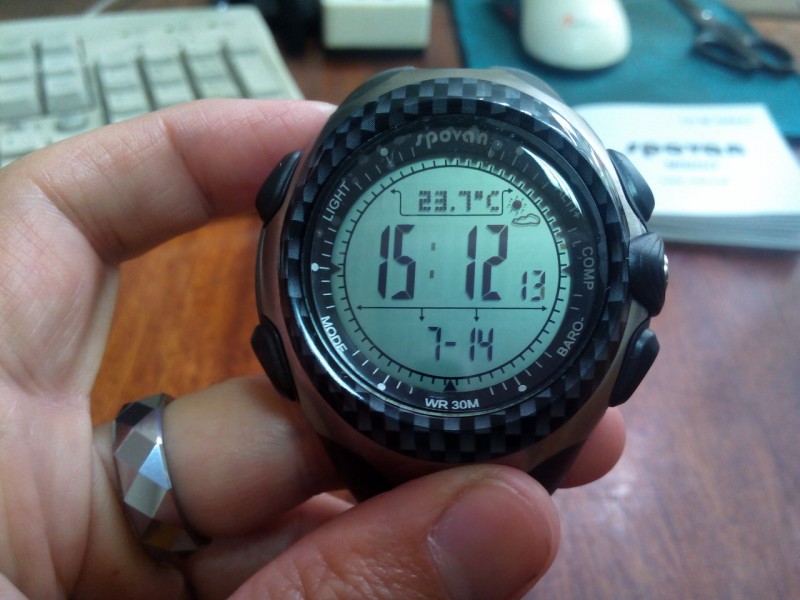
Вверху справа отображается значок прогноза погоды, там может быть солнышко, тучки, дождь и т.д.
При удержании кнопки B (MODE) мы попадаем в основные настройки часов, в которых можно задать время, дату, формат даты, 24/12 часов, яркость дисплея от 01 до 10 единиц, я остановился на 5 единицах, сигнал при нажатии кнопок.
Из основного режима при нажатии кнопки B мы попадаем в режим будильника.
Их два независимых, AL1 и AL2.

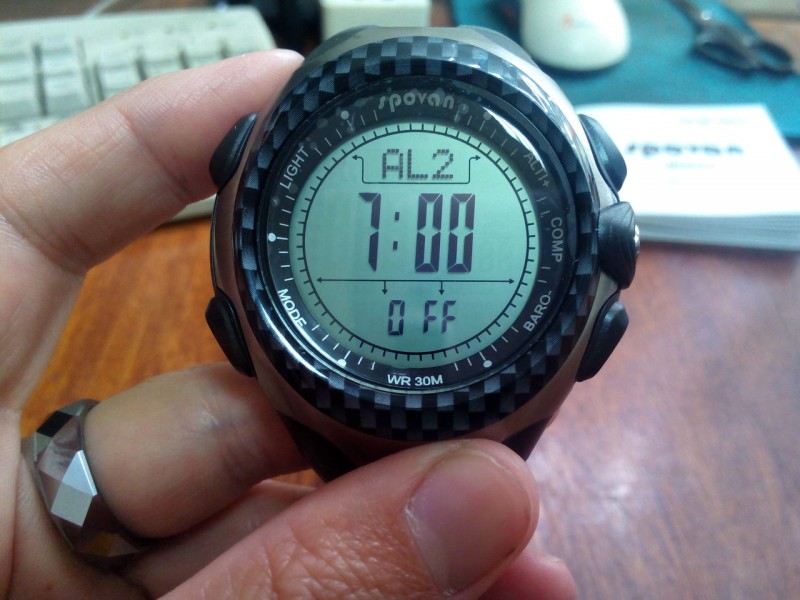
Плюс тут же можно настроить Chime — подача сигнала каждый час.
Сигнал будильника достаточно громкий для того, чтобы разбудить человека.
Только уставший или очень крепко спящий человек не услышит его.
Для задания параметров в этом режиме, как в большинстве других, нужно удерживать кнопку B, для переключения между будильниками — кнопку E.
Следующий режим хронометр, он же секундомер.
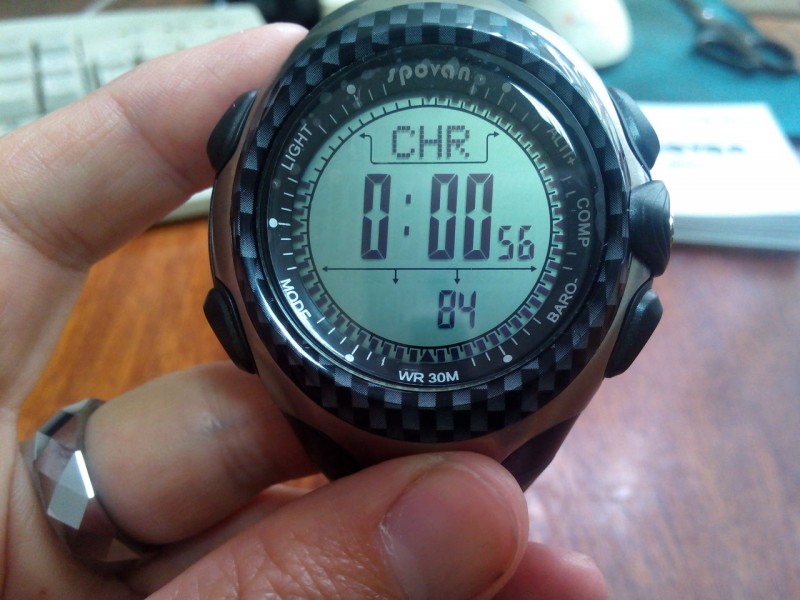
Переключение на него — понажимать кнопку B, старт/стоп — кнопка E.
При этом на экране будет отображаться отсчет часов, минут, секунд, сотых секунды, а по кругу для анимации бегут точки и они же по совместительству десятые секунды. Т.е. весь круг — это секунда, каждые 6 точек — 0.1сек.
Пока секундомер считает, мы можем нажать кнопку C.
При этом значение первого круга пробежки заносится в память, и так при каждом нажатии на C мы можем запоминать время каждого круга нашей пробежки в памяти часов до 100 кругов.

При каждом запоминании времени круга (нажатии C), время на экране замирает на 10 сек, чтобы мы могли, пока продолжаем бег, хорошо рассмотреть результат круга, в фоне же время продолжает отсчитываться и возобновляется через 10 сек уже с текущего значения с учетом этих 10 сек.
Очень удобно.
Как прибежали — нажимаем кнопку E.
Для чтения результатов по каждому кругу — удерживаем кнопку B, затем кнопками C или E мы можем смотреть общее время и время по каждому кругу.
Удерживаем B — выходим из режима просмотра результатов, и теперь, удерживая C мы можем их обнулить.
Следующий режим — таймер обратного отсчета.
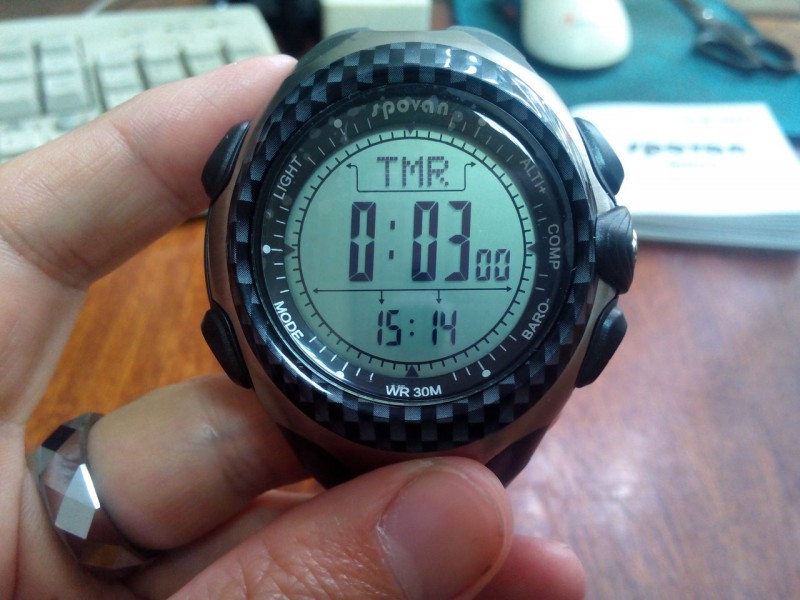
В нем уже для нашего удобства есть предустановленные значения времени в минутах: 1, 3, 5, 10, 15, 45, которые можно переключать клавишей C, и также есть одна свободная ячейка для сохранения нашего значения времени. Либо же мы можем каждый раз задавать какое угодно значение времени обычным способом.
В последние 10 мин он будет пищать каждую минуту, в последнюю минуту будет пищать каждые 10 сек, плюс каждую секунду в последние 5сек.
Следующий довольно интересный режим — PACER, он же метроном.
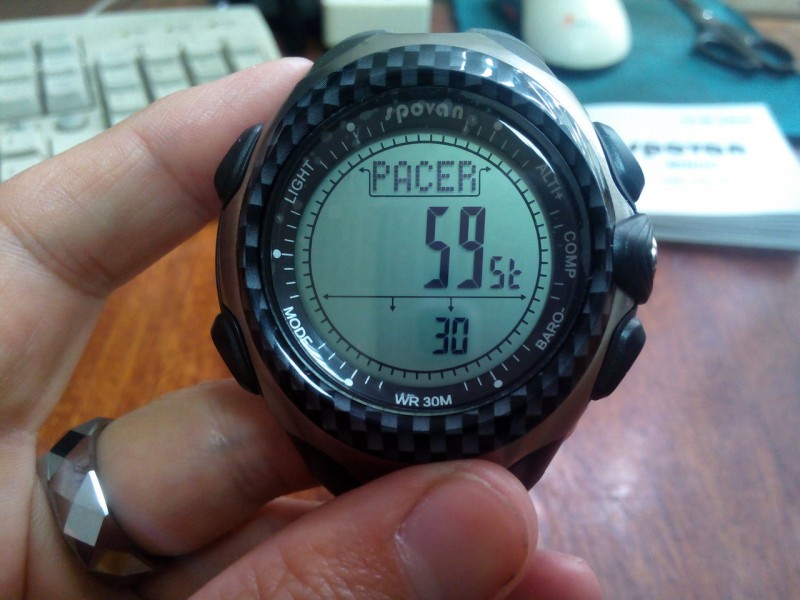
В нем задаем значение в ударах в минуту и он начинает отбивать нам ритм.
Я впервые встречаю этот режим в часах.
Можно придумать достаточно много способов его применения, например, задание ритма шага при ходьбе, беге, упражнениях, успокоение сердечного ритма после пробега, даже музыканты найдут в нем что-то полезное.
Также метроном может быть состыкован с секундомером: он пищит, секундомер считает в такт, останавливаются оба одновременно кнопкой E.
Следующий режим T2 — можно выставить второе мировое время, минуты и часы.

Находясь в основном режиме часов, нажимаем E, попадаем в режим альтиметра.
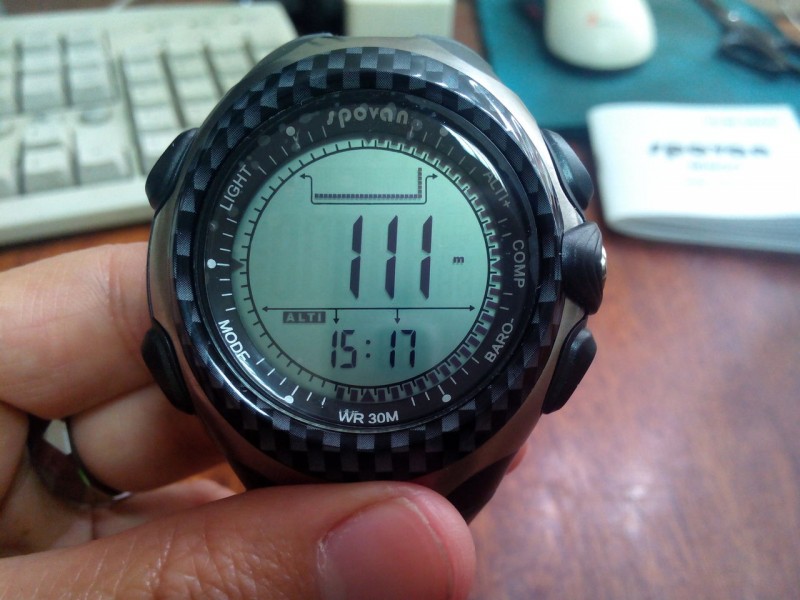
Мы видим текущую высоту над уровнем моря, внизу экрана время в формате часы: минуты, в верхней части экрана кнопкой E можно переключать отображение чарта высоты за последние 24 часа либо текущей температуры.
При удержании кнопки E будут по кругу переключаться единицы измерения температуры и высоты: метры, футы, градусы Цельсия и Фаренгейта.
Когда в верхней части отображен чарт высоты, можно кнопкой C просматривать значения истории высот за последние 24 часа с интервалом в 1 час.
Высоту часы высчитывают по атмосферному давлению воздуха.
Очень большой плюс этой модели в том, что в настройках можно задать значение высоты в вашей точке.
Причем сделать это можно разными способами.
Удерживаем кнопочку B, попадаем в настройки альтиметра и можем либо установить в данной точке ноль, если мы хотим померить перепад высот между текущей точкой и точкой назначения, либо выставить высоту по известному значению высоты в вашей местности, взятому в интернете, например, тут:
www.vhfdx.ru/karta-vyisot
При этом не забудьте прибавить высоту вашего этажа или спуститесь вниз.
Либо выставить высоту по известному атмосферному давлению в вашей местности на данный момент, взять можно с погодных сайтов типа rp5 или gismeteo.
Находясь в основном режиме, нажимаем кнопку C — попадаем в режим давления.
Кнопкой E можно переключать что будет отображаться вверху экрана: чарт давления за 24 часа, температура или максимальное давление.
Кнопкой C можно просматривать показания давления за 24 часа с интервалом в 1 час.
Удержание кнопки E — переключение единиц давления гектопаскали (миллибары) / дюймы ртутного столба.
Удобнее последние, перевод с них в миллиметры ртутного столба — умножить на 25.4
Удержанием кнопки B можно зайти в настройки барометра и задать известное значение, взятое на погодном сайте для вашей местности.
При этом могут измениться показания альтиметра, нам нужно зайти и откалибровать его известным значением высоты.
Из основного режима часов нажатием кнопки D попадаем в режим цифрового компаса.
В нем три плавающие точки указывают на север и по одной точке на остальные части света.
Держать часы в этом режиме нужно строго горизонтально как в режиме просмотра, так и калибровки.
Цифра на экране показывает азимут — угол по часовой стрелке между севером и вашим направлением, кнопкой C можно переключить на обратный азимут — против часовой стрелки, при этом появится соотв. значок на экране.
В настройках компаса можно его откалибровать, при калибровке по кругу движется точка, часы нужно держать горизонтально и вращать в том же направлении.
Немаловажно, что в настройках часов можно задать магнитное склонение для вашей местности — угол между магнитным полюсом и географическим севером.
Это значение очень разнится в зависимости от вашей позиции на глобусе + оно довольно быстро изменяется с течением лет.
Текущие значения можно взять тут:
www.ngdc.noaa.gov/geomag-web/
Для моего города +8°, т.е. географический север на 8 градусов левее показаний компаса. После прописывания этого значения компас будет сразу указывать на географический север.
Температурный датчик — это маленькая дырочка на задней крышке.

Для измерения температуры воздуха часы нужно снять на некоторое время, иначе измеряете температуру запястья.
Показания температуры могут отображаться на главном экране, в режимах альтиметра и барометра.
Точность неплохая, по моим измерениям около 0.5°C
Инструкция на хорошем английском + очень много подробных иллюстраций о том, какую кнопку вы нажимаете и что получаете.
Часы весьма хороши, симпатичны, обладают прекрасным функционалом за небольшие деньги, подойдут спортсменам, альпинистам, энтузиастам и простым людям.
И напоследок, как обещал выше, даю подробный видео обзор часов.
Если вам понравился обзор, пожалуйста, нажмите на реф. ссылку часиков
www.newfrog.com/p/compact-compass-digital-watch-el-backlight-metronome-countdown-timer-52668.html?pcode=10346
Спасибо за внимание.
Перейти к контенту
![]()
Spovan MG01 — это многофункциональные спортивные часы на каждый день. Они созданы как для повседневной городской жизни так и для туризма, рыбалки и занятия спортом. В этих часах встроен качественный высотомер который покажет вам уровень над морем, барометр покажет вам давление в паскалях, компас укажет вам направление если вдруг вы потерялись в городских джунглях или лесу, так же здесь есть отличный термометр который показывает очень точный прогноз погоды, новый улучшенный хронограф.
Пошаговая настройка альтиметра, барометра, компаса подойдёт также к часам: Spovan Bravo II, Spovan Mingo II и возможно других моделей. А так же таких марок как Sunroad FR802, Hama M-110, Bozlun MG03 и тд. #часы #навигация #погода
У альтиметра есть 4 вида корректировки:
- ZERO — нулевой, ставит 0. Служит для определения относительных высот (типа «насколько высоко я забрался»).
- ALTI — абсолютная высота, нужно указать высоту с известным значением.
- SEAP — нужно ввести удельное давление на уровне моря взятое из официальных источников.
- F.DEF — заводская настройка.
Шаг 1.
- Заходим на сайт ⇨ Google Maps Find Altitude.
- В окошко Search For Location пишем свой адрес (то место где вы находитесь), нажимаем Search.
- Под картой получаем результат Last point clicked: 220 m.
Шаг 2.
- Берём в руки часы, входим в режим альтиметра ALTI+.
- Зажимаем на 2 секунды кнопку MODE.
- Моргает ZERO, оно нас не интересует, нажимаем ещё раз на MODE, моргает ALTI, то что надо.
- Верхней правой или нижней кнопкой выставляем значение высоты полученное на сайте.
- Зажимаем кнопку MODE на 2 сек. что бы зафиксировать результат.
У барометра 2 вида корректировки:
- AIRP. — абсолютное давление. Это то давление которое у вас сейчас на вашей высоте над уровнем моря, оно же при правильных настройках показывается по середине большими цифрами.
- F.DEF — заводская настройка.
Выбираем F.DEF — заводская настройка, и нажимаем YES.
Если и после этого
ваш нанотехнологичный гаджет неправильно
показывает давление попробуйте:
- Выставить настройки заново.
- Выставить
точное давление с сайта в режиме SEAP. - Почитать инструкцию.
Как правильно определять предстоящую погоду по барометру?
Если давление резко поднялось, то: летом — будет сухая, возможно ясная погода, зимой — к морозу. Если давление резко опустилось, то: летом — к осадкам, зимой — к оттепели или снижению мороза.
Настройка компаса.
- Входим в режим компаса (кнопка COMP).
- Кладём часы на ровную поверхность параллельно горизонту вдали от электромагнитных приборов и железобетонных конструкций.
- Нажимаем на 2 сек. кнопку MODE появляется слово CAL (калибровка).
- Нажимаем кнопку ALTI+, индикатор начинает моргать.
- Аккуратно вращаем часы по часовой стрелке пока не выскочат данные компаса.
- Затем ещё раз нажимаем на кнопку MODE должно появится слово DEC.
- Выставляем магнитное склонение для своего города.
- Нажимаем кнопку MODE на 2 сек что бы зафиксировать результат.
Как узнать магнитное склонение:
- Идём на сайт ⇨ World Magnetic Model Calculator.
- На карте выбираем своё местоположение.
- В появившейся таблице смотрим значение в колонке MF/D.
Как узнать магнитное склонение:
- Идём на сайт ⇨ World Magnetic Model Calculator.
- На карте выбираем своё местоположение.
- В появившейся таблице смотрим значение в колонке MF/D.
Как узнать магнитное склонение:
- Идём на сайт ⇨ World Magnetic Model Calculator.
- На карте выбираем своё местоположение.
- В появившейся таблице смотрим значение в колонке MF/D.
По умолчанию заводская настройка альтиметра 1013.2 mbar (== hPa), что соответствует 760 мм рт.ст.
«… есть точно такие же но Bozlun MG03. Пол года пользуюсь и всё гуд.
Альтиметр выставил по знаку в городе где точная высота указана, и хочу
сказать показывают с погрешностью в 2-3 метра максимум. Температуру оч.
точно показывают если лежат мин 5 на столе или ещё где нибудь. Давление
вообще на удивление точно показывает даже на руке, только умножать нужно
на 0.75, да и забыл про термометр, -10 это минимум. Так что пол года
батарея держит и часто пользуюсь часами просто понажимать кнопочки. Купаться точно можно и ничего с ними не будет, да и в баню ходил с ними,
показывает максимум +60.«
Наконец-то получил свои часы. Эмоции только положительные. Компас сверял с профессиональным геологическим — показания один в один. Подсветка на «светлом» варианте циферблата работает интересно — светятся только цифры. Думал, что будет светиться подложка, короче, офигительно. По поводу комментария выше про температуру — всё это есть в инструкции (в спецификациях), которую я отсканировал.
UPD от 06.07.17: Перед поездкой на природу желательно проверить показания. Через некоторое время калибровка сбивается. Это выражено неадекватными показаниями высоты и «застопоренным» компасом.
За основу взята статья из этого ⇨ источника.
Инструкция к часам ⇨ Spovan MG01 (скан).
Инструкция к часам ⇨ Spovan Bravo II.
Обзор часов на ⇨ YouTube.
Полный обзор функций на примере Spovan Mingo на ⇨ YouTube.
Всем привет!
Давайте рассмотрим интересные часики известного китайского бренда Spovan, который специализируется на создании часов для спорта, рыбалки и альпинизма.
Вашему вниманию представляю модель Spovan Mingo 1.
Официальная страничка продукта:
spovan.com/index.php?_m=mod_product&_a=view&p_id=1231
В конце обзора будет подробный видеообзор.
Вкратце что умеет:
* часы, будильник, секундомер, таймер
* барометр с возможностью калибровки
* альтиметр с возможностью калибровки
* цифровой компас с возможностью калибровки и установки магнитного склонения
* прогноз погоды на основе давления и температуры
* чарты давления и высоты за 24 часа
* метроном
Комплект поставки.
* часы
* фирменная коробка со вкладышем для часов
* инструкции на кит. и англ. языках
* салфеточка для протирки часов
На коробке отображены основные характеристики.
Часы довольно крупные, вместе с кнопками в диаметре 50 мм, экран 33мм, толщина 15мм, ширина ремешка 27мм у оснований, дальше 22мм.
Длина ремешка рассчитана на широкий диапазон толщины запастий, от самого тонкого до очень толстого, подойдет всем.
Часы довольно массивные, на моем тонком запястье смотрятся достаточно громоздко.
Экран не стекло, пластик, как и во многих спортивных часах.
Вокруг него идет дизайнерское решение — пластиковая вставка в виде шахматного узора (хороший подарок шахматистам
Далее вокруг него идет металлическая вставка.
Еще дальше снова пластик.
Задняя крышка снова металл.
На задней крышке мы видим их логотип + надпись «TO BE GREAT» и некое упоминание о 30 метрах. Весьма сомнительно, что в них можно нырять. Скорее всего это лишь 3АТМ, т.е. небольшой дождь и брызги, погружать в воду и нырять нельзя.
Кнопок всего пять, две на левой стороне.
И три на правой.
Все 5 рабочие, имеют свои функции, фейковых нет.
Верхняя левая как и на большинстве часов подсветка.
Подсветка не очень яркая, ее видно только в темноте, подсвечивается не весь экран, а сами цифры и все символы на экране, включая точки секунд по кругу.
Длительность подсветки — 3сек.
Нижняя левая — кнопка MODE, служит для переключения режимов часов и для задания настроек в этих режимах.
Верхняя правая включение режима альтиметра + другие функции, нижняя правая включение режима барометра + другие функции, средняя правая включение режима компаса.
В инструкции для краткости эти кнопки названы латинскими буквами против часовой стрелки: левая верхняя — A, нижняя B, нижняя правая C, средняя D, верхняя правая E.
Я тоже в обзоре буду придерживаться этого обозначения.
Основной экран такой:
Мы видим разделение на 3 части, посредине время, внизу дата, а сверху возможны варианты: день недели, температура, чарт высоты за 24 часа, чарт давления за 24 часа.
Переключается это все удержанием кнопки E.
Вверху справа отображается значок прогноза погоды, там может быть солнышко, тучки, дождь и т.д.
При удержании кнопки B (MODE) мы попадаем в основные настройки часов, в которых можно задать время, дату, формат даты, 24/12 часов, яркость дисплея от 01 до 10 единиц, я остановился на 5 единицах, сигнал при нажатии кнопок.
Из основного режима при нажатии кнопки B мы попадаем в режим будильника.
Их два независимых, AL1 и AL2.
Плюс тут же можно настроить Chime — подача сигнала каждый час.
Сигнал будильника достаточно громкий для того, чтобы разбудить человека.
Только уставший или очень крепко спящий человек не услышит его.
Для задания параметров в этом режиме, как в большинстве других, нужно удерживать кнопку B, для переключения между будильниками — кнопку E.
Следующий режим хронометр, он же секундомер.
Переключение на него — понажимать кнопку B, старт/стоп — кнопка E.
При этом на экране будет отображаться отсчет часов, минут, секунд, сотых секунды, а по кругу для анимации бегут точки и они же по совместительству десятые секунды. Т.е. весь круг — это секунда, каждые 6 точек — 0.1сек.
Пока секундомер считает, мы можем нажать кнопку C.
При этом значение первого круга пробежки заносится в память, и так при каждом нажатии на C мы можем запоминать время каждого круга нашей пробежки в памяти часов до 100 кругов.
При каждом запоминании времени круга (нажатии C), время на экране замирает на 10 сек, чтобы мы могли, пока продолжаем бег, хорошо рассмотреть результат круга, в фоне же время продолжает отсчитываться и возобновляется через 10 сек уже с текущего значения с учетом этих 10 сек.
Очень удобно.
Как прибежали — нажимаем кнопку E.
Для чтения результатов по каждому кругу — удерживаем кнопку B, затем кнопками C или E мы можем смотреть общее время и время по каждому кругу.
Удерживаем B — выходим из режима просмотра результатов, и теперь, удерживая C мы можем их обнулить.
Следующий режим — таймер обратного отсчета.
В нем уже для нашего удобства есть предустановленные значения времени в минутах: 1, 3, 5, 10, 15, 45, которые можно переключать клавишей C, и также есть одна свободная ячейка для сохранения нашего значения времени. Либо же мы можем каждый раз задавать какое угодно значение времени обычным способом.
В последние 10 мин он будет пищать каждую минуту, в последнюю минуту будет пищать каждые 10 сек, плюс каждую секунду в последние 5сек.
Следующий довольно интересный режим — PACER, он же метроном.
В нем задаем значение в ударах в минуту и он начинает отбивать нам ритм.
Я впервые встречаю этот режим в часах.
Можно придумать достаточно много способов его применения, например, задание ритма шага при ходьбе, беге, упражнениях, успокоение сердечного ритма после пробега, даже музыканты найдут в нем что-то полезное.
Также метроном может быть состыкован с секундомером: он пищит, секундомер считает в такт, останавливаются оба одновременно кнопкой E.
Следующий режим T2 — можно выставить второе мировое время, минуты и часы.
Находясь в основном режиме часов, нажимаем E, попадаем в режим альтиметра.
Мы видим текущую высоту над уровнем моря, внизу экрана время в формате часы: минуты, в верхней части экрана кнопкой E можно переключать отображение чарта высоты за последние 24 часа либо текущей температуры.
При удержании кнопки E будут по кругу переключаться единицы измерения температуры и высоты: метры, футы, градусы Цельсия и Фаренгейта.
Когда в верхней части отображен чарт высоты, можно кнопкой C просматривать значения истории высот за последние 24 часа с интервалом в 1 час.
Высоту часы высчитывают по атмосферному давлению воздуха.
Очень большой плюс этой модели в том, что в настройках можно задать значение высоты в вашей точке.
Причем сделать это можно разными способами.
Удерживаем кнопочку B, попадаем в настройки альтиметра и можем либо установить в данной точке ноль, если мы хотим померить перепад высот между текущей точкой и точкой назначения, либо выставить высоту по известному значению высоты в вашей местности, взятому в интернете, например, тут:
www.vhfdx.ru/karta-vyisot
При этом не забудьте прибавить высоту вашего этажа или спуститесь вниз.
Либо выставить высоту по известному атмосферному давлению в вашей местности на данный момент, взять можно с погодных сайтов типа rp5 или gismeteo.
Находясь в основном режиме, нажимаем кнопку C — попадаем в режим давления.
Кнопкой E можно переключать что будет отображаться вверху экрана: чарт давления за 24 часа, температура или максимальное давление.
Кнопкой C можно просматривать показания давления за 24 часа с интервалом в 1 час.
Удержание кнопки E — переключение единиц давления гектопаскали (миллибары) / дюймы ртутного столба.
Удобнее последние, перевод с них в миллиметры ртутного столба — умножить на 25.4
Удержанием кнопки B можно зайти в настройки барометра и задать известное значение, взятое на погодном сайте для вашей местности.
При этом могут измениться показания альтиметра, нам нужно зайти и откалибровать его известным значением высоты.
Из основного режима часов нажатием кнопки D попадаем в режим цифрового компаса.
В нем три плавающие точки указывают на север и по одной точке на остальные части света.
Держать часы в этом режиме нужно строго горизонтально как в режиме просмотра, так и калибровки.
Цифра на экране показывает азимут — угол по часовой стрелке между севером и вашим направлением, кнопкой C можно переключить на обратный азимут — против часовой стрелки, при этом появится соотв. значок на экране.
В настройках компаса можно его откалибровать, при калибровке по кругу движется точка, часы нужно держать горизонтально и вращать в том же направлении.
Немаловажно, что в настройках часов можно задать магнитное склонение для вашей местности — угол между магнитным полюсом и географическим севером.
Это значение очень разнится в зависимости от вашей позиции на глобусе + оно довольно быстро изменяется с течением лет.
Текущие значения можно взять тут:
www.ngdc.noaa.gov/geomag-web/
Для моего города +8°, т.е. географический север на 8 градусов левее показаний компаса. После прописывания этого значения компас будет сразу указывать на географический север.
Температурный датчик — это маленькая дырочка на задней крышке.
Для измерения температуры воздуха часы нужно снять на некоторое время, иначе измеряете температуру запястья.
Показания температуры могут отображаться на главном экране, в режимах альтиметра и барометра.
Точность неплохая, по моим измерениям около 0.5°C
Инструкция на хорошем английском + очень много подробных иллюстраций о том, какую кнопку вы нажимаете и что получаете.
Часы весьма хороши, симпатичны, обладают прекрасным функционалом за небольшие деньги, подойдут спортсменам, альпинистам, энтузиастам и простым людям.
И напоследок, как обещал выше, даю подробный видео обзор часов.
Если вам понравился обзор, пожалуйста, нажмите на реф. ссылку часиков
www.newfrog.com/p/compact-compass-digital-watch-el-backlight-metronome-countdown-timer-52668.html?pcode=10346
Спасибо за внимание.
Перейти к контенту
![]()
Spovan MG01 — это многофункциональные спортивные часы на каждый день. Они созданы как для повседневной городской жизни так и для туризма, рыбалки и занятия спортом. В этих часах встроен качественный высотомер который покажет вам уровень над морем, барометр покажет вам давление в паскалях, компас укажет вам направление если вдруг вы потерялись в городских джунглях или лесу, так же здесь есть отличный термометр который показывает очень точный прогноз погоды, новый улучшенный хронограф.
Пошаговая настройка альтиметра, барометра, компаса подойдёт также к часам: Spovan Bravo II, Spovan Mingo II и возможно других моделей. А так же таких марок как Sunroad FR802, Hama M-110, Bozlun MG03 и тд. #часы #навигация #погода
У альтиметра есть 4 вида корректировки:
- ZERO — нулевой, ставит 0. Служит для определения относительных высот (типа «насколько высоко я забрался»).
- ALTI — абсолютная высота, нужно указать высоту с известным значением.
- SEAP — нужно ввести удельное давление на уровне моря взятое из официальных источников.
- F.DEF — заводская настройка.
Шаг 1.
- Заходим на сайт ⇨ Google Maps Find Altitude.
- В окошко Search For Location пишем свой адрес (то место где вы находитесь), нажимаем Search.
- Под картой получаем результат Last point clicked: 220 m.
Шаг 2.
- Берём в руки часы, входим в режим альтиметра ALTI+.
- Зажимаем на 2 секунды кнопку MODE.
- Моргает ZERO, оно нас не интересует, нажимаем ещё раз на MODE, моргает ALTI, то что надо.
- Верхней правой или нижней кнопкой выставляем значение высоты полученное на сайте.
- Зажимаем кнопку MODE на 2 сек. что бы зафиксировать результат.
У барометра 2 вида корректировки:
- AIRP. — абсолютное давление. Это то давление которое у вас сейчас на вашей высоте над уровнем моря, оно же при правильных настройках показывается по середине большими цифрами.
- F.DEF — заводская настройка.
Выбираем F.DEF — заводская настройка, и нажимаем YES.
Если и после этого
ваш нанотехнологичный гаджет неправильно
показывает давление попробуйте:
- Выставить настройки заново.
- Выставить
точное давление с сайта в режиме SEAP. - Почитать инструкцию.
Как правильно определять предстоящую погоду по барометру?
Если давление резко поднялось, то: летом — будет сухая, возможно ясная погода, зимой — к морозу. Если давление резко опустилось, то: летом — к осадкам, зимой — к оттепели или снижению мороза.
Настройка компаса.
- Входим в режим компаса (кнопка COMP).
- Кладём часы на ровную поверхность параллельно горизонту вдали от электромагнитных приборов и железобетонных конструкций.
- Нажимаем на 2 сек. кнопку MODE появляется слово CAL (калибровка).
- Нажимаем кнопку ALTI+, индикатор начинает моргать.
- Аккуратно вращаем часы по часовой стрелке пока не выскочат данные компаса.
- Затем ещё раз нажимаем на кнопку MODE должно появится слово DEC.
- Выставляем магнитное склонение для своего города.
- Нажимаем кнопку MODE на 2 сек что бы зафиксировать результат.
Как узнать магнитное склонение:
- Идём на сайт ⇨ World Magnetic Model Calculator.
- На карте выбираем своё местоположение.
- В появившейся таблице смотрим значение в колонке MF/D.
Как узнать магнитное склонение:
- Идём на сайт ⇨ World Magnetic Model Calculator.
- На карте выбираем своё местоположение.
- В появившейся таблице смотрим значение в колонке MF/D.
По умолчанию заводская настройка альтиметра 1013.2 mbar (== hPa), что соответствует 760 мм рт.ст.
«… есть точно такие же но Bozlun MG03. Пол года пользуюсь и всё гуд.
Альтиметр выставил по знаку в городе где точная высота указана, и хочу
сказать показывают с погрешностью в 2-3 метра максимум. Температуру оч.
точно показывают если лежат мин 5 на столе или ещё где нибудь. Давление
вообще на удивление точно показывает даже на руке, только умножать нужно
на 0.75, да и забыл про термометр, -10 это минимум. Так что пол года
батарея держит и часто пользуюсь часами просто понажимать кнопочки. Купаться точно можно и ничего с ними не будет, да и в баню ходил с ними,
показывает максимум +60.«
Наконец-то получил свои часы. Эмоции только положительные. Компас сверял с профессиональным геологическим — показания один в один. Подсветка на «светлом» варианте циферблата работает интересно — светятся только цифры. Думал, что будет светиться подложка, короче, офигительно. По поводу комментария выше про температуру — всё это есть в инструкции (в спецификациях), которую я отсканировал.
UPD от 06.07.17: Перед поездкой на природу желательно проверить показания. Через некоторое время калибровка сбивается. Это выражено неадекватными показаниями высоты и «застопоренным» компасом.
За основу взята статья из этого ⇨ источника.
Инструкция к часам ⇨ Spovan MG01 (скан).
Инструкция к часам ⇨ Spovan Bravo II.
Обзор часов на ⇨ YouTube.
Полный обзор функций на примере Spovan Mingo на ⇨ YouTube.
Shenzhen Spovan Technology Co., Ltd.About SpovanFloor 11, Tower B, Fuchangsheng Ind. Zone, No. 2, Chengxin Road, Longgang Dist., Shenzhen, ChinaSpovan is the professional manufacturer of outdoor sport watches and smart watches.Shenzhen Spovan Technology Co., Ltd.About SpovanFloor 11, Tower B, Fuchangsheng Ind. Zone, No. 2, Chengxin Road, Longgang Dist., Shenzhen, ChinaSpovan is the professional manufacturer of outdoor sport watches and smart watches.Shenzhen Spovan Technology Co., Ltd.Shenzhen Spovan Technology Co., Ltd.Shenzhen Spovan Technology Co., Ltd.Shenzhen Spovan Technology Co., Ltd.Shenzhen Spovan Technology Co., Ltd.Shenzhen Spovan Technology Co., Ltd.Shenzhen Spovan Technology Co., Ltd.Shenzhen Spovan Technology Co., Ltd.Shenzhen Spovan Technology Co., Ltd.Shenzhen Spovan Technology Co., Ltd.Shenzhen Spovan Technology Co., Ltd.Shenzhen Spovan Technology Co., Ltd.Shenzhen Spovan Technology Co., Ltd.Shenzhen Spovan Technology Co., Ltd.Shenzhen Spovan Tec
Download
- bobby-carl


- Manuals
- Brands
- spovan Manuals
- Watch
- BRAVO II
- User manual
-
Bookmarks
Quick Links
spovan
spovan
spovan
spovan
BRAVO Ⅱ Ⅱ Ⅱ Ⅱ
user manual
TO BE
TO
BE GREAT
TO
TO
BE
BE
GREAT
GREAT
GREAT
Summary of Contents for spovan BRAVO II
-
Page 1
TO BE BE GREAT GREAT GREAT GREAT spovan spovan spovan spovan BRAVO Ⅱ Ⅱ Ⅱ Ⅱ user manual… -
Page 2
1.0 Introduction Thank you for purchasing of this watch. Your watch features electronic sensors which measure and shows the outdoor conditions: temperature, pressure, altitude and compass directions. Your Watch provides the essential information at the time during you are performing hiking, wild camping and other outdoor activities especially for a prolonged period. -
Page 3
2.0 Buttons And Its Functions A key: : : : back light: to turn on the EL back light for 3seconds. B key: : : : setting mode:To select among the current time, daily alarm, stop watch, time, pacer, and dual time mode. Press and hold B key to switch to the setting mode. -
Page 4: Major Function Modes
3.0 Major Function Modes…
-
Page 5
4.0 Current Time Mode—Functional Display Functional Display: The current mode includes 4 kinds of functional display: Day of week display Temperature display Altitude tendency display, and Sea level pressure tendency display To select among different functional display, press and hold E button following the adjacent diagram. -
Page 6
4.1 Current Time Mode-Setting the current time How to Set the Current Time 1. Press and hold B button for about 2 seconds in current time mode. In setting display, the flashing “SET” icon will appear. 2. In setting display, Press the B button to change the selection following the adjacent current time setting sequence. -
Page 7
5. When month-day order setting is selected, press the E or C button to select between month-day and day-month format. When 12/24 hour format setting is being selected, press the E or C button to select between 12 and 24 hour format. 6. -
Page 8
5.0 Daily Alarm Mode-Daily Alarm and Chime Display Daily Alarm mode 1. The watch includes two daily alarms: Daily Alarm 1 and Daily Alarm 2, the Daily Alarm 1 and Daily Alarm 2 are working independently. 2. Press the E button to switch among the Daily Alarm 1 and Daily Alarm 2 and Chime Display following the adjacent diagram. -
Page 9
2. When the Daily Alarm 1(2) is ON, the alarm indicator will appear. 3. If the Alarm indicator is appeared, the watch will sound at the preset alarm time every day. When the alarm sounds, press any button to stop the beep. How to Turn ON/OFF the Hourly Chime 1. -
Page 10
5.1 Daily Alarm Mode-Setting the Alarm How to set the Alarm 1 and Alarm 2 1. To select the setting display, hold the B button for about 2 seconds in Alarm 1(2) Display, then the flashing “SET” icon will appear. 2. -
Page 11
6.0 Chronograph Mode-Start/Stop the Chronograph Chronograph Mode The watch includes a function to measure elapsed times, accumulative elapsed time and lap times — Chronograph Mode. The display shows the “All Zero”display when the chronograph is being selected the first time or the chronograph has been reset. -
Page 12
button once to start the chronograph(counting); press the E button once again to stop the chronograph(not counting). 2. The elapsed time between the two keystrokes will appear on the display. Repeat the above mentioned steps to get the accumulative elapsed time of which the chronograph is running. How to Reset the Chronograph 1. -
Page 13
6.1 Chronograph Mode-Recording and Recalling Lap Time How to Record Lap Time 1. The chronograph can measure elapsed time without stopping the counting — lap time. 2. The chronograph mode allows recording lap time up to 100 laps. 3. When The Chronograph is counting, press the C button once to record a lap time(this key operation will not affect the counting). -
Page 14
How to recall lap times 1. To recall lap times, press and hold the B button in the chronograph display. 2. When the total time display is appeared, press the E button or C button to check the next/previous lap time. 3. -
Page 15
7.0 Timer Mode-Countdown Timer and the Quick-Set-Value Countdown Timer: The watch includes a countdown timer feature: the timer mode. The timer starts counting from the preset value to zero and stops at zero. The Quick-Set-Value(QSV) The Quick-Set-Value is a set of default values which preset in the watch for using the timer more easily. -
Page 16
and these values can NOT be changed by the user. The User Preset Value(UPV) The User Preset Value is a value which can be changed by the user. The setting range is up to 99 hours 59 minutes 99 seconds. Once the User Preset Value has been set, such as 30 minutes, that value is stored into the watch for the user to recall next time. -
Page 17
7.1 Timer Mode-Setting the User Preset Value How to set the User Preset Value 1. To select setting display, press and hold the B button for 2 seconds, and the flashing “SET” icon will appear. 2. In setting display, press the B button to change the selection among hour, minute and second. -
Page 18
7.2 Timer Mode-Using the Timer How to Use the Timer 1. When the Timer is set, press the E button to start the timer. Press the E button once again to stop the timer. 2. The timer to “Zero” will be shown on the display continuously. 3. -
Page 19
How to reload the timer 1. To reload the timer(existing preset counting time) for a new counting, press the C button when the timer was stopped. 2. To start a new counting using a new preset counting timer, set the timer again. -
Page 20
8.0 Pacer Mode-Using the Pacer Pacer Mode When the pacer is activated, it will generate beep rate pre — defined beeping rate. The beeping rate can be set from 30 to 180 beats per minute(BOM) in step of 5. How to Use the Pacer Mode Once the beeping rate has been set (for example 30 BPM), press the E button will start the beeping. -
Page 21
the step counter will advance one. 2. When the pacer is activated and the step counter starts counting, pressing the E button can stop the pacer and step counter at the same time. 3. The maximum counting range of the step counter is 99999 steps. 4. -
Page 22
8.1 Pacer Mode-Setting the Pacer value How to set the beeping rate 1. To select the setting display, press and hold the B button for 2 seconds in the pacer mode. 2. When the beeping rate digits start to flash, press the E or C button to increase/decrease the number. -
Page 23
How to use the pacer when it links with chronograph mode 1. When pacer mode is ON: press the B button to select chronograph mode. 2. Press the E button will start the counting and beeping at the same time. 3. -
Page 24
9.0 Dual Time Mode-Dual Time and Setting the Dual Time Dual Time Mode The watch includes a function to show the time for a second time zone- Dual Time Mode. The second digit of the dual time synchronizes with the current time How to set the Dual Time 1. -
Page 25
between minute and hour. 3. When the digits are flashing(selected), press the E or C button to increase/decrease the number. (Hold down the button change the number at a higher speed). 4. When the setting is completed, press and hold the B button to exit the setting display. -
Page 26
10.0 Altimeter Mode-Temperature and History Display Function display The watch includes two altimeter functional displays: Temperature and History Display. One of the two functional displays will be appeared on the top row of the display. The current(history) altitude and the current(history) time shows on the middle row and bottom row of the display respectively. -
Page 27
Temperature Display In temperature Display, the top display shows the current temperature in degree Celsius (℃ ℃ ℃ ℃ ) or degree Fahrenheit(℉ ℉ ℉ ℉ ). IMPORTANT: If you want to have an accurate reading of air temperature, you must remove the watch from the wrist that allows no body temperature effect on your watch. -
Page 28
10.1 Altimeter Mode-Unit Selection and Altimeter Adjustment How to switch between Units? The watch can display altitude in meter(m) or feet(ft); the watch can display temperature in degree Celsius(℃) or degree Fahrenheit(℉). To switch among different unit, press and hold the E button to change the units following the adjacent units select sequence. -
Page 29
Altimeter Adjustment There are 4 kinds of adjustment method: Zero Altitude: Adjust altitude mandatory to zero for relative altitude measurement, then a indicator “ ” will be appeared on the display. Absolute Altitude: Set altitude to a known value and it can recall for next setting. -
Page 30
NOTE: Altitude is adjusted independently, so that the effects of the previous sea level pressure adjustment will be ignored if the absolute altitude is selected. NOTE: The watch includes an automatic Sea Level Pressure comparison feature, this smart feature allows NO fluctuation altitude readings will be recorded even staying at the same altitude. -
Page 31
10.2 Altimeter Mode-Zero Altitude Adjustment How to measure the relative altitude? The watch can measure relative altitude, for example, it can measure the ascending or the descending altitude between the starting point and the finish point of a trail. To measure the ascending or descending altitude of a trail by setting the current altitude to “zero”… -
Page 32
reference point such as the starting point of a trail. An “ ” indicator will be appeared on the display. Adjust the altimeter by using zero altitude adjustment 1. To select the adjustment display, press and hold the B button in altimeter mode. -
Page 33
10.3 Altimeter Mode-Absolute Altitude Adjustment Before adjusting the altitude Adjusting the altimeter at a place where the altitude is determined, such as sea level(0m) or beside an altitude sign pole(e.g., 89m), because that altitude will be inputted into the watch during the adjustment. -
Page 34
among the zero altitude, absolute altitude, sea level pressure and factory default adjustment. 2. To adjust the watch by using absolute altitude adjustment, press the E button in absolute altitude display, and the altitude reading will appear. 3. When altitude reading is appeared, press the E or C button to increase or decrease the number to the target one. -
Page 35
10.4 Altimeter Mode-Sea Level Pressure Adjustment Why need to adjust the sea level pressure As altitude is calculated by the difference between current and sea level pressure, so the sea level pressure changing or using the watch in a place which has a different sea level pressure will effect the altitude reading. -
Page 36
2. To select the adjustment display, press and hold the B button in altimeter mode. Then press the B button to select among the zero altitude, absolute altitude, sea level pressure and factory default adjustment. 3. To adjust the watch by using sea level pressure adjustment, press the E button in sea level pressure display, and the sea level pressure reading will appear. -
Page 37
10.5 Altimeter Mode-Factory Default Adjustment How to adjust the altimeter by using factory default adjustment 1. The watch can also adjust the altitude reading calculation back to using factory default value. 2. To select the adjustment display, press and hold the B button in altimeter mode. -
Page 38
altitude, absolute altitude, sea level pressure and factory default adjustment. 3. To adjust the watch by using factory default adjustment(restore to factory default by setting sea level pressure to 1013.2mb), press the E button in factory default display, and the indicator “NO” will appear. -
Page 39
11.0 Barometer Mode-Temperature and History Display Function Display The watch includes three barometer functional displays: Temperature, Sea Level Pressure and History Display. One of the three functional displays will be appeared on the top row of the display. The current(history) pressure and the current(history) time shows on the middle row and bottom row of the display respectively. -
Page 40
To perform force detect function which get one reading immediately, press and hold C button. Temperature Display In temperature display, the current temperature in degree Celsius(℃) or degree Fahrenheit(℉) shows on the top row of the display. IMPORTANT: If you want to have an accurate reading of air temperature, you must remove the watch from the wrist (for 20 to 30 minutes) that allows no body temperature effect on your watch. -
Page 41
11.1 Barometer Mode-Unit Selection and Adjustment How to switch between units The watch can display pressure in mb/hPa or inHg; the watch can display temperature in degree Celsius(℃) or degree Fahrenheit(℉). To switch among different unit, press and hold the B button to change the units following the adjacent units selection sequence. -
Page 42
Why the barometer need to be adjusted The watch was calibrated for you in the factory. For normal use, you need not to calibrate the barometer. But for vigorous users, the watch includes a adjustment procedure. Barometer adjustment There are 2 kinds of barometer adjustment method: absolute pressure and factory default adjustment. -
Page 43
11.2 Barometer Mode-Absolute Pressure Adjustment Before calibrating the barometer Before calibrate the barometer, you must have the absolute pressure of your current position, because that pressure value will be inputted into the watch during the adjustment. -
Page 44
Consult the nearest observatory station to get the ambient barometric pressure of your current position. IMPORTANT: Input an incorrect pressure during the calibration procedure, it results a mistaken pressure reading in future. How to adjust the barometer by using absolute pressure adjustment 1. -
Page 45
11.3 Barometer Mode-Factory Default Adjustment How to adjust the barometer bu using factory default adjustment 1. The watch can also adjust the pressure reading calculation back to using factory default value. 2. To select the adjustment display, press and hold the B button in barometer mode. -
Page 46
absolute pressure adjustment and factory default adjustment. 3. To adjust the watch by using factory default adjustment, press the E button in factory default display, and the indicator “NO” will appear. 4. When the indicator “NO” is appeared, press the E or C button to select between “YES”(reset the watch to factory default) or “NO”(abort the resetting). -
Page 47
12.0 Compass Mode-Precautions The precautions when using the compass Keep your watch away from magnets or the appliances which may contain magnetic objects such as mobile phones, speakers, motors and etc The watch, like most magnetic compass, point to the magnetic north which is slightly different from the true north. -
Page 48
To achieve a accurate result, you should avoid measuring direction on the following conditions: 1. The watch is placed close to a magnetic objects. 2. The watch is placed closed to a metal objects. 3. The watch is placed close to an electrical appliances. 4. -
Page 49
12.1 Compass Mode-Compass and Bearing Directions The direction of an object The direction of an object from a point can be specified in either compass directions or bearing directions. The watch includes both compass directions and bearing directions. The compass directions The compass directions are shown on the adjacent table. -
Page 50
Southeast. The compass direction of object D from point A is Northwest. The nearing directions The bearing direction of an object is defined as the angular difference between North and the object.(Assume 0°for North, and the measuring range is from 0°to 359°) For example, in the figure, the bearing direction of object B from point A is 90°. -
Page 51
12.2 Compass Mode-Compass Mode Compass Mode In the compass mode, the top of the displays shows the compass direction. The middle display shows the bearing direction. The bottom display shows the current time in hour and minute. The pointer encircled the display shows the direction of magnetic north analogically. -
Page 52
compass mode, the watch will go to the IDLE Mode automatically. During the IDLE mode, press any button except A button to activate the compass again. Distortion If distortion is detected, the indicator “OFF CAL” with flashing direction digits will appear. Please refer to the coming section “Calibrating the compass”… -
Page 53
12.3 Compass Mode-Backward Bearing Backward Bearing Direction The watch includes a backward bearing function. The backward bearing direction is the bearing direction that on the opposite direction from normal bearing direction. When the “Backward Bearing” indicator “ ” is appeared, the watch is showing the backward bearing direction of the navigation direction. -
Page 54
12.4 Compass Mode-Applications of the Compass Check your position by backward bearing directions Spot two distant identifiable landmarks such as mountains, light-house, fort and building of your current position, for example the mountain A and B. Check out the backward bearing directions of mountain A and B of your current position such as 135°from mountain A and 270°from mountain B. -
Page 55
starting from the mountain B. You current positon on the map will be the inter section point (point A) of the lies 135°and 270°. Check the Trek course correct During a trekking, the watch can keep your course correct. For example, the correct trail start from point A and finishes at point E as it is drawn on the adjacent map. -
Page 56
12.5 Compass Mode-Magnetic Declination What is Magnetic Declination The Magnetic North Pole which is slightly different from the True North Pole. Like most magnetic compass, points to the Magnetic North Pole. On the contrary, everything measure from a map is related to the True North Pole. -
Page 57
For serious compass user or who intends to perform accurate navigation, compass must be adjusted for magnetic declination. The watch also includes a compensation setting for Magnetic Declination. Check the coming section “Calibrating the compass-Magnetic Declination Mode”for more detail. Magnetic Declination information Most topographic maps include a small arrow which shown magnetic north pole and or the magnetic declination information. -
Page 58
12.6 Compass Mode-Magnetic Declination Compensation Magnetic Declination Compensation To compensate an object’s bearing by subtract westerly (W) magnetic declination or add westerly (E) magnetic declination with the magnetic bearing. Example 1: 23°Westerly magnetic declination and the compass needle points 323°. TB=MB-W. -
Page 59
The true bearing will be 300°. Example 2: 22°Easterly magnetic declination and the compass needle points 278°. TB=MB+E. While MB=278°; E=22° TB=278°+22° TB=300° The true bearing will be 300°. The watch allows you compensate the compass bearing at a place where the magnetic declination is either Westerly declination or Easterly declination. -
Page 60
12.7 Compass Mode-Magnetic Declination at Major Cities NOTE: Since Magnetic declination will be changed as going with time,recommend to check the update data from following site:http://www.magnetic-declination.com/& http://www.ngdc.noaa.gov/geomagmodels/Declination.jsp… -
Page 61
Calibrating Mode-Calibration the Compass 12.8 When to Calibration the Compass The watch has to employ a compass calibration in one of the following conditions: The watch is using for the first time The battery has been replaced The bearing direction digits are flashing, and the “OFF CAL”indicator appear The compass use in a location that is apart from the place in which the compass had been calibrated… -
Page 62
The compass calibration includes two different processes: Rotation Calibration Mode and Magnetic Declination Setting. It is advisable to carry out them both from time to time, that achieves a more accurate reading. IMPORTANT: If the watch has not been calibrated, the direction made by the watch may be a inaccurate direction. -
Page 63: Calibration Mode
Calibrating the compass-Rotation 12.9 Calibration Mode Rotation Calibration Display 1. Press and hold the B button, into the Rotation Calibration Display. 2. Press the B button to switch between the rotation calibration and magnetic declination. 3. Press the E button to start rotation calibration in rotation calibration stop display, the pointers will start rotating, turning the watch (keep parallel to the horizon) in the same direction of the rotating pointers).
-
Page 64
Calibrating the compass-Magnetic 12.10 Declination Mode Magnetic Declination Mode 1. Check the coming section “Magnetic Declination at Major Cities” to get the magnetic declination of the city which is close to your current position. That angle will be inputted into the watch during the calibration. -
Page 65: Battery Replacement
13.0 Battery Replacement Low Battery Detection When the battery-low indicator appears on the display, it means that the capacity of the battery is low. It is recommended to replace the battery with a new CR2032. However, if the appearance of battery-low indicator is caused by using the watch under very cold condition, the indicator will be disappeared when normal temperature returns.
-
Page 66: Specifications
Specifications 14.0 Current Time Mode Hour, minute, second, am, pm, month, date, and Day of week Sea Level Pressure Tendency Display, Altitude Tendency Display, Temperature. Time System 12-hour or 24-hour format. Calendar System Auto-Calendar pre-programmed from the year 2000 to 2099. Daily Alarm Mode 2 daily alarms.
-
Page 67
Operation Mode countdown. Quick Set 6 quick set Value(1, 3, 5, 10, 15 and 45 minutes Timer Sounds Sounds for 30 seconds when count to zero. Pacer Mode Measuring Range 30 BPM to 180 BPM. 5 BPM per step. Step counter Up to 99999 steps. -
Page 68
inHg). Sampling Interval First 5 minutes: 1 second. After 5 minutes: 1 minute. History Recall Last 24 hour. Thermometer Resolution 0.1 ℃ (0.1℉). Measuring Range -10.0℃ to 60 ℃ (14.0 ℉ to 140 ℉). Compass Mode Resolution 1°display (digital). 1 of 60 pointers (graphical). Measuring Range 0°…

По умолчанию заводская настройка альтиметра 1013.2 mbar (== hPa), что соответствует 760 мм рт.ст.
«… есть точно такие же но Bozlun MG03. Пол года пользуюсь и всё гуд.
Альтиметр выставил по знаку в городе где точная высота указана, и хочу
сказать показывают с погрешностью в 2-3 метра максимум. Температуру оч.
точно показывают если лежат мин 5 на столе или ещё где нибудь. Давление
вообще на удивление точно показывает даже на руке, только умножать нужно
на 0.75, да и забыл про термометр, -10 это минимум. Так что пол года
батарея держит и часто пользуюсь часами просто понажимать кнопочки. Купаться точно можно и ничего с ними не будет, да и в баню ходил с ними,
показывает максимум +60.«
Наконец-то получил свои часы. Эмоции только положительные. Компас сверял с профессиональным геологическим — показания один в один. Подсветка на «светлом» варианте циферблата работает интересно — светятся только цифры. Думал, что будет светиться подложка, короче, офигительно. По поводу комментария выше про температуру — всё это есть в инструкции (в спецификациях), которую я отсканировал.
UPD от 06.07.17: Перед поездкой на природу желательно проверить показания. Через некоторое время калибровка сбивается. Это выражено неадекватными показаниями высоты и «застопоренным» компасом.
За основу взята статья из этого ⇨ источника.
Инструкция к часам ⇨ Spovan MG01 (скан).
Инструкция к часам ⇨ Spovan Bravo II.
Обзор часов на ⇨ YouTube.
Полный обзор функций на примере Spovan Mingo на ⇨ YouTube.
Shenzhen Spovan Technology Co., Ltd.About SpovanFloor 11, Tower B, Fuchangsheng Ind. Zone, No. 2, Chengxin Road, Longgang Dist., Shenzhen, ChinaSpovan is the professional manufacturer of outdoor sport watches and smart watches.Shenzhen Spovan Technology Co., Ltd.About SpovanFloor 11, Tower B, Fuchangsheng Ind. Zone, No. 2, Chengxin Road, Longgang Dist., Shenzhen, ChinaSpovan is the professional manufacturer of outdoor sport watches and smart watches.Shenzhen Spovan Technology Co., Ltd.Shenzhen Spovan Technology Co., Ltd.Shenzhen Spovan Technology Co., Ltd.Shenzhen Spovan Technology Co., Ltd.Shenzhen Spovan Technology Co., Ltd.Shenzhen Spovan Technology Co., Ltd.Shenzhen Spovan Technology Co., Ltd.Shenzhen Spovan Technology Co., Ltd.Shenzhen Spovan Technology Co., Ltd.Shenzhen Spovan Technology Co., Ltd.Shenzhen Spovan Technology Co., Ltd.Shenzhen Spovan Technology Co., Ltd.Shenzhen Spovan Technology Co., Ltd.Shenzhen Spovan Technology Co., Ltd.Shenzhen Spovan Tec
Download
- bobby-carl
- Manuals
- Brands
- spovan Manuals
- Watch
- BRAVO II
- User manual
-
Bookmarks
Quick Links
spovan
spovan
spovan
spovan
BRAVO Ⅱ Ⅱ Ⅱ Ⅱ
user manual
TO BE
TO
BE GREAT
TO
TO
BE
BE
GREAT
GREAT
GREAT
Summary of Contents for spovan BRAVO II
-
Page 1
TO BE BE GREAT GREAT GREAT GREAT spovan spovan spovan spovan BRAVO Ⅱ Ⅱ Ⅱ Ⅱ user manual… -
Page 2
1.0 Introduction Thank you for purchasing of this watch. Your watch features electronic sensors which measure and shows the outdoor conditions: temperature, pressure, altitude and compass directions. Your Watch provides the essential information at the time during you are performing hiking, wild camping and other outdoor activities especially for a prolonged period. -
Page 3
2.0 Buttons And Its Functions A key: : : : back light: to turn on the EL back light for 3seconds. B key: : : : setting mode:To select among the current time, daily alarm, stop watch, time, pacer, and dual time mode. Press and hold B key to switch to the setting mode. -
Page 4: Major Function Modes
3.0 Major Function Modes…
-
Page 5
4.0 Current Time Mode—Functional Display Functional Display: The current mode includes 4 kinds of functional display: Day of week display Temperature display Altitude tendency display, and Sea level pressure tendency display To select among different functional display, press and hold E button following the adjacent diagram. -
Page 6
4.1 Current Time Mode-Setting the current time How to Set the Current Time 1. Press and hold B button for about 2 seconds in current time mode. In setting display, the flashing “SET” icon will appear. 2. In setting display, Press the B button to change the selection following the adjacent current time setting sequence. -
Page 7
5. When month-day order setting is selected, press the E or C button to select between month-day and day-month format. When 12/24 hour format setting is being selected, press the E or C button to select between 12 and 24 hour format. 6. -
Page 8
5.0 Daily Alarm Mode-Daily Alarm and Chime Display Daily Alarm mode 1. The watch includes two daily alarms: Daily Alarm 1 and Daily Alarm 2, the Daily Alarm 1 and Daily Alarm 2 are working independently. 2. Press the E button to switch among the Daily Alarm 1 and Daily Alarm 2 and Chime Display following the adjacent diagram. -
Page 9
2. When the Daily Alarm 1(2) is ON, the alarm indicator will appear. 3. If the Alarm indicator is appeared, the watch will sound at the preset alarm time every day. When the alarm sounds, press any button to stop the beep. How to Turn ON/OFF the Hourly Chime 1. -
Page 10
5.1 Daily Alarm Mode-Setting the Alarm How to set the Alarm 1 and Alarm 2 1. To select the setting display, hold the B button for about 2 seconds in Alarm 1(2) Display, then the flashing “SET” icon will appear. 2. -
Page 11
6.0 Chronograph Mode-Start/Stop the Chronograph Chronograph Mode The watch includes a function to measure elapsed times, accumulative elapsed time and lap times — Chronograph Mode. The display shows the “All Zero”display when the chronograph is being selected the first time or the chronograph has been reset. -
Page 12
button once to start the chronograph(counting); press the E button once again to stop the chronograph(not counting). 2. The elapsed time between the two keystrokes will appear on the display. Repeat the above mentioned steps to get the accumulative elapsed time of which the chronograph is running. How to Reset the Chronograph 1. -
Page 13
6.1 Chronograph Mode-Recording and Recalling Lap Time How to Record Lap Time 1. The chronograph can measure elapsed time without stopping the counting — lap time. 2. The chronograph mode allows recording lap time up to 100 laps. 3. When The Chronograph is counting, press the C button once to record a lap time(this key operation will not affect the counting). -
Page 14
How to recall lap times 1. To recall lap times, press and hold the B button in the chronograph display. 2. When the total time display is appeared, press the E button or C button to check the next/previous lap time. 3. -
Page 15
7.0 Timer Mode-Countdown Timer and the Quick-Set-Value Countdown Timer: The watch includes a countdown timer feature: the timer mode. The timer starts counting from the preset value to zero and stops at zero. The Quick-Set-Value(QSV) The Quick-Set-Value is a set of default values which preset in the watch for using the timer more easily. -
Page 16
and these values can NOT be changed by the user. The User Preset Value(UPV) The User Preset Value is a value which can be changed by the user. The setting range is up to 99 hours 59 minutes 99 seconds. Once the User Preset Value has been set, such as 30 minutes, that value is stored into the watch for the user to recall next time. -
Page 17
7.1 Timer Mode-Setting the User Preset Value How to set the User Preset Value 1. To select setting display, press and hold the B button for 2 seconds, and the flashing “SET” icon will appear. 2. In setting display, press the B button to change the selection among hour, minute and second. -
Page 18
7.2 Timer Mode-Using the Timer How to Use the Timer 1. When the Timer is set, press the E button to start the timer. Press the E button once again to stop the timer. 2. The timer to “Zero” will be shown on the display continuously. 3. -
Page 19
How to reload the timer 1. To reload the timer(existing preset counting time) for a new counting, press the C button when the timer was stopped. 2. To start a new counting using a new preset counting timer, set the timer again. -
Page 20
8.0 Pacer Mode-Using the Pacer Pacer Mode When the pacer is activated, it will generate beep rate pre — defined beeping rate. The beeping rate can be set from 30 to 180 beats per minute(BOM) in step of 5. How to Use the Pacer Mode Once the beeping rate has been set (for example 30 BPM), press the E button will start the beeping. -
Page 21
the step counter will advance one. 2. When the pacer is activated and the step counter starts counting, pressing the E button can stop the pacer and step counter at the same time. 3. The maximum counting range of the step counter is 99999 steps. 4. -
Page 22
8.1 Pacer Mode-Setting the Pacer value How to set the beeping rate 1. To select the setting display, press and hold the B button for 2 seconds in the pacer mode. 2. When the beeping rate digits start to flash, press the E or C button to increase/decrease the number. -
Page 23
How to use the pacer when it links with chronograph mode 1. When pacer mode is ON: press the B button to select chronograph mode. 2. Press the E button will start the counting and beeping at the same time. 3. -
Page 24
9.0 Dual Time Mode-Dual Time and Setting the Dual Time Dual Time Mode The watch includes a function to show the time for a second time zone- Dual Time Mode. The second digit of the dual time synchronizes with the current time How to set the Dual Time 1. -
Page 25
between minute and hour. 3. When the digits are flashing(selected), press the E or C button to increase/decrease the number. (Hold down the button change the number at a higher speed). 4. When the setting is completed, press and hold the B button to exit the setting display. -
Page 26
10.0 Altimeter Mode-Temperature and History Display Function display The watch includes two altimeter functional displays: Temperature and History Display. One of the two functional displays will be appeared on the top row of the display. The current(history) altitude and the current(history) time shows on the middle row and bottom row of the display respectively. -
Page 27
Temperature Display In temperature Display, the top display shows the current temperature in degree Celsius (℃ ℃ ℃ ℃ ) or degree Fahrenheit(℉ ℉ ℉ ℉ ). IMPORTANT: If you want to have an accurate reading of air temperature, you must remove the watch from the wrist that allows no body temperature effect on your watch. -
Page 28
10.1 Altimeter Mode-Unit Selection and Altimeter Adjustment How to switch between Units? The watch can display altitude in meter(m) or feet(ft); the watch can display temperature in degree Celsius(℃) or degree Fahrenheit(℉). To switch among different unit, press and hold the E button to change the units following the adjacent units select sequence. -
Page 29
Altimeter Adjustment There are 4 kinds of adjustment method: Zero Altitude: Adjust altitude mandatory to zero for relative altitude measurement, then a indicator “ ” will be appeared on the display. Absolute Altitude: Set altitude to a known value and it can recall for next setting. -
Page 30
NOTE: Altitude is adjusted independently, so that the effects of the previous sea level pressure adjustment will be ignored if the absolute altitude is selected. NOTE: The watch includes an automatic Sea Level Pressure comparison feature, this smart feature allows NO fluctuation altitude readings will be recorded even staying at the same altitude. -
Page 31
10.2 Altimeter Mode-Zero Altitude Adjustment How to measure the relative altitude? The watch can measure relative altitude, for example, it can measure the ascending or the descending altitude between the starting point and the finish point of a trail. To measure the ascending or descending altitude of a trail by setting the current altitude to “zero”… -
Page 32
reference point such as the starting point of a trail. An “ ” indicator will be appeared on the display. Adjust the altimeter by using zero altitude adjustment 1. To select the adjustment display, press and hold the B button in altimeter mode. -
Page 33
10.3 Altimeter Mode-Absolute Altitude Adjustment Before adjusting the altitude Adjusting the altimeter at a place where the altitude is determined, such as sea level(0m) or beside an altitude sign pole(e.g., 89m), because that altitude will be inputted into the watch during the adjustment. -
Page 34
among the zero altitude, absolute altitude, sea level pressure and factory default adjustment. 2. To adjust the watch by using absolute altitude adjustment, press the E button in absolute altitude display, and the altitude reading will appear. 3. When altitude reading is appeared, press the E or C button to increase or decrease the number to the target one. -
Page 35
10.4 Altimeter Mode-Sea Level Pressure Adjustment Why need to adjust the sea level pressure As altitude is calculated by the difference between current and sea level pressure, so the sea level pressure changing or using the watch in a place which has a different sea level pressure will effect the altitude reading. -
Page 36
2. To select the adjustment display, press and hold the B button in altimeter mode. Then press the B button to select among the zero altitude, absolute altitude, sea level pressure and factory default adjustment. 3. To adjust the watch by using sea level pressure adjustment, press the E button in sea level pressure display, and the sea level pressure reading will appear. -
Page 37
10.5 Altimeter Mode-Factory Default Adjustment How to adjust the altimeter by using factory default adjustment 1. The watch can also adjust the altitude reading calculation back to using factory default value. 2. To select the adjustment display, press and hold the B button in altimeter mode. -
Page 38
altitude, absolute altitude, sea level pressure and factory default adjustment. 3. To adjust the watch by using factory default adjustment(restore to factory default by setting sea level pressure to 1013.2mb), press the E button in factory default display, and the indicator “NO” will appear. -
Page 39
11.0 Barometer Mode-Temperature and History Display Function Display The watch includes three barometer functional displays: Temperature, Sea Level Pressure and History Display. One of the three functional displays will be appeared on the top row of the display. The current(history) pressure and the current(history) time shows on the middle row and bottom row of the display respectively. -
Page 40
To perform force detect function which get one reading immediately, press and hold C button. Temperature Display In temperature display, the current temperature in degree Celsius(℃) or degree Fahrenheit(℉) shows on the top row of the display. IMPORTANT: If you want to have an accurate reading of air temperature, you must remove the watch from the wrist (for 20 to 30 minutes) that allows no body temperature effect on your watch. -
Page 41
11.1 Barometer Mode-Unit Selection and Adjustment How to switch between units The watch can display pressure in mb/hPa or inHg; the watch can display temperature in degree Celsius(℃) or degree Fahrenheit(℉). To switch among different unit, press and hold the B button to change the units following the adjacent units selection sequence. -
Page 42
Why the barometer need to be adjusted The watch was calibrated for you in the factory. For normal use, you need not to calibrate the barometer. But for vigorous users, the watch includes a adjustment procedure. Barometer adjustment There are 2 kinds of barometer adjustment method: absolute pressure and factory default adjustment. -
Page 43
11.2 Barometer Mode-Absolute Pressure Adjustment Before calibrating the barometer Before calibrate the barometer, you must have the absolute pressure of your current position, because that pressure value will be inputted into the watch during the adjustment. -
Page 44
Consult the nearest observatory station to get the ambient barometric pressure of your current position. IMPORTANT: Input an incorrect pressure during the calibration procedure, it results a mistaken pressure reading in future. How to adjust the barometer by using absolute pressure adjustment 1. -
Page 45
11.3 Barometer Mode-Factory Default Adjustment How to adjust the barometer bu using factory default adjustment 1. The watch can also adjust the pressure reading calculation back to using factory default value. 2. To select the adjustment display, press and hold the B button in barometer mode. -
Page 46
absolute pressure adjustment and factory default adjustment. 3. To adjust the watch by using factory default adjustment, press the E button in factory default display, and the indicator “NO” will appear. 4. When the indicator “NO” is appeared, press the E or C button to select between “YES”(reset the watch to factory default) or “NO”(abort the resetting). -
Page 47
12.0 Compass Mode-Precautions The precautions when using the compass Keep your watch away from magnets or the appliances which may contain magnetic objects such as mobile phones, speakers, motors and etc The watch, like most magnetic compass, point to the magnetic north which is slightly different from the true north. -
Page 48
To achieve a accurate result, you should avoid measuring direction on the following conditions: 1. The watch is placed close to a magnetic objects. 2. The watch is placed closed to a metal objects. 3. The watch is placed close to an electrical appliances. 4. -
Page 49
12.1 Compass Mode-Compass and Bearing Directions The direction of an object The direction of an object from a point can be specified in either compass directions or bearing directions. The watch includes both compass directions and bearing directions. The compass directions The compass directions are shown on the adjacent table. -
Page 50
Southeast. The compass direction of object D from point A is Northwest. The nearing directions The bearing direction of an object is defined as the angular difference between North and the object.(Assume 0°for North, and the measuring range is from 0°to 359°) For example, in the figure, the bearing direction of object B from point A is 90°. -
Page 51
12.2 Compass Mode-Compass Mode Compass Mode In the compass mode, the top of the displays shows the compass direction. The middle display shows the bearing direction. The bottom display shows the current time in hour and minute. The pointer encircled the display shows the direction of magnetic north analogically. -
Page 52
compass mode, the watch will go to the IDLE Mode automatically. During the IDLE mode, press any button except A button to activate the compass again. Distortion If distortion is detected, the indicator “OFF CAL” with flashing direction digits will appear. Please refer to the coming section “Calibrating the compass”… -
Page 53
12.3 Compass Mode-Backward Bearing Backward Bearing Direction The watch includes a backward bearing function. The backward bearing direction is the bearing direction that on the opposite direction from normal bearing direction. When the “Backward Bearing” indicator “ ” is appeared, the watch is showing the backward bearing direction of the navigation direction. -
Page 54
12.4 Compass Mode-Applications of the Compass Check your position by backward bearing directions Spot two distant identifiable landmarks such as mountains, light-house, fort and building of your current position, for example the mountain A and B. Check out the backward bearing directions of mountain A and B of your current position such as 135°from mountain A and 270°from mountain B. -
Page 55
starting from the mountain B. You current positon on the map will be the inter section point (point A) of the lies 135°and 270°. Check the Trek course correct During a trekking, the watch can keep your course correct. For example, the correct trail start from point A and finishes at point E as it is drawn on the adjacent map. -
Page 56
12.5 Compass Mode-Magnetic Declination What is Magnetic Declination The Magnetic North Pole which is slightly different from the True North Pole. Like most magnetic compass, points to the Magnetic North Pole. On the contrary, everything measure from a map is related to the True North Pole. -
Page 57
For serious compass user or who intends to perform accurate navigation, compass must be adjusted for magnetic declination. The watch also includes a compensation setting for Magnetic Declination. Check the coming section “Calibrating the compass-Magnetic Declination Mode”for more detail. Magnetic Declination information Most topographic maps include a small arrow which shown magnetic north pole and or the magnetic declination information. -
Page 58
12.6 Compass Mode-Magnetic Declination Compensation Magnetic Declination Compensation To compensate an object’s bearing by subtract westerly (W) magnetic declination or add westerly (E) magnetic declination with the magnetic bearing. Example 1: 23°Westerly magnetic declination and the compass needle points 323°. TB=MB-W. -
Page 59
The true bearing will be 300°. Example 2: 22°Easterly magnetic declination and the compass needle points 278°. TB=MB+E. While MB=278°; E=22° TB=278°+22° TB=300° The true bearing will be 300°. The watch allows you compensate the compass bearing at a place where the magnetic declination is either Westerly declination or Easterly declination. -
Page 60
12.7 Compass Mode-Magnetic Declination at Major Cities NOTE: Since Magnetic declination will be changed as going with time,recommend to check the update data from following site:http://www.magnetic-declination.com/& http://www.ngdc.noaa.gov/geomagmodels/Declination.jsp… -
Page 61
Calibrating Mode-Calibration the Compass 12.8 When to Calibration the Compass The watch has to employ a compass calibration in one of the following conditions: The watch is using for the first time The battery has been replaced The bearing direction digits are flashing, and the “OFF CAL”indicator appear The compass use in a location that is apart from the place in which the compass had been calibrated… -
Page 62
The compass calibration includes two different processes: Rotation Calibration Mode and Magnetic Declination Setting. It is advisable to carry out them both from time to time, that achieves a more accurate reading. IMPORTANT: If the watch has not been calibrated, the direction made by the watch may be a inaccurate direction. -
Page 63: Calibration Mode
Calibrating the compass-Rotation 12.9 Calibration Mode Rotation Calibration Display 1. Press and hold the B button, into the Rotation Calibration Display. 2. Press the B button to switch between the rotation calibration and magnetic declination. 3. Press the E button to start rotation calibration in rotation calibration stop display, the pointers will start rotating, turning the watch (keep parallel to the horizon) in the same direction of the rotating pointers).
-
Page 64
Calibrating the compass-Magnetic 12.10 Declination Mode Magnetic Declination Mode 1. Check the coming section “Magnetic Declination at Major Cities” to get the magnetic declination of the city which is close to your current position. That angle will be inputted into the watch during the calibration. -
Page 65: Battery Replacement
13.0 Battery Replacement Low Battery Detection When the battery-low indicator appears on the display, it means that the capacity of the battery is low. It is recommended to replace the battery with a new CR2032. However, if the appearance of battery-low indicator is caused by using the watch under very cold condition, the indicator will be disappeared when normal temperature returns.
-
Page 66: Specifications
Specifications 14.0 Current Time Mode Hour, minute, second, am, pm, month, date, and Day of week Sea Level Pressure Tendency Display, Altitude Tendency Display, Temperature. Time System 12-hour or 24-hour format. Calendar System Auto-Calendar pre-programmed from the year 2000 to 2099. Daily Alarm Mode 2 daily alarms.
-
Page 67
Operation Mode countdown. Quick Set 6 quick set Value(1, 3, 5, 10, 15 and 45 minutes Timer Sounds Sounds for 30 seconds when count to zero. Pacer Mode Measuring Range 30 BPM to 180 BPM. 5 BPM per step. Step counter Up to 99999 steps. -
Page 68
inHg). Sampling Interval First 5 minutes: 1 second. After 5 minutes: 1 minute. History Recall Last 24 hour. Thermometer Resolution 0.1 ℃ (0.1℉). Measuring Range -10.0℃ to 60 ℃ (14.0 ℉ to 140 ℉). Compass Mode Resolution 1°display (digital). 1 of 60 pointers (graphical). Measuring Range 0°…
Похожие видео
Spovan MG01. Барометр, термометр, компас и т.д. Отличные часы рыбакам и грибникам!Скачать

Часы SPOVAN SPV-709B, расширенный функционал (барометр, альтиметр, история)Скачать

Часы SPOVAN SPV-709B, расширенный функционал (барометр, альтиметр, история)Скачать
Часы SPOVAN SPV-709B, расширенный функционал (барометр, альтиметр, история)Скачать
СТРАННЫЕ ЧАСЫ Карабин С КОМПАСОМ БАРОМЕТРОМ И ВЫСОТОМЕРОМ SPOVAN Elementum2 умныеСкачать

Spovan SPV710A | ЧАСЫ НА ВСЕ СЛУЧАИ ЖИЗНИ | + НАСТРОЙКАСкачать

Spovan SPV710A | ЧАСЫ НА ВСЕ СЛУЧАИ ЖИЗНИ | + НАСТРОЙКАСкачать
Spovan SPV710A | ЧАСЫ НА ВСЕ СЛУЧАИ ЖИЗНИ | + НАСТРОЙКАСкачать
Спортивные Часы на все случаи жизни Spovan SPV709 водонепроницаемые, термометр,барометр,альтиметрСкачать
Модернизированные стелс капитаны на 230-250 кубов.Скачать

Модернизированные стелс капитаны на 230-250 кубов.Скачать
Модернизированные стелс капитаны на 230-250 кубов.Скачать
Дополнительные материалы
Spovan MG01 не убиваемые Часы со всеми плюшками Wrist Watch Sports watches WaterproofСкачать

Spovan MG01 часы с функционалом как у Casio Pro TrekСкачать

Spovan MG01 часы с функционалом как у Casio Pro TrekСкачать
Spovan MG01 часы с функционалом как у Casio Pro TrekСкачать
Часы SPOVAN MG 01 с АлиэкпрессСкачать

Часы Spovan с термометром, барометром и альтиметромСкачать

Часы Spovan с термометром, барометром и альтиметромСкачать
Часы Spovan с термометром, барометром и альтиметромСкачать
060.Spovan MG01 — часы для альпинистов, выживальщиков, рыбаков, охотников и т.д.Скачать

Часы SPOVAN bravo 2s полный обзорСкачать

Часы SPOVAN bravo 2s полный обзорСкачать
Часы SPOVAN bravo 2s полный обзорСкачать
Тест-драйв наручных часов Spovan.Скачать

Самые функциональные Skmei 1358 измерят ВСЕ — Compass, Barometer, Thermometer и т.д.Скачать

Самые функциональные Skmei 1358 измерят ВСЕ — Compass, Barometer, Thermometer и т.д.Скачать
Самые функциональные Skmei 1358 измерят ВСЕ — Compass, Barometer, Thermometer и т.д.Скачать
Крутые рыбацкие часы с барометром с Алиэкспресс. Распаковка посылок Алиэкспресс 2019.Скачать

Спортивные часы SKMEI 1358 — шагомер, компас, высотомер и другие функцииСкачать

Спортивные часы SKMEI 1358 — шагомер, компас, высотомер и другие функцииСкачать
Спортивные часы SKMEI 1358 — шагомер, компас, высотомер и другие функцииСкачать
Альтиметр (МИНИ МЕТЕОСТАНЦИЯ) с Aliexpress / ALTIMETER 8 in 1Скачать

Спрортивные часы Spovan Leader-II распаковкаСкачать

Спрортивные часы Spovan Leader-II распаковкаСкачать
Спрортивные часы Spovan Leader-II распаковкаСкачать
- Инструкция К Часам Spovan Mg01
- Инструкция К Часам Spovan
- Часы Spovan Инструкция На Русском
Как на вид так и сами по себе классные часы. Начнем с того что в часах есть такие фищки как: барометр, альтиметр, компас. Ремень у данных часов сделан с внутренней стороны из кожи, а внешне из какого то материала похожего на бук или это так выработанная кожа.
Jul 18, 2015 — Обзор многофункциональных часов Spovan SPV709. Внутри можно найти только часы обклеенные в пленки и инструкцию. Хорошим примером часов с электронным компасом будут Spovan Bravo II. Дисплее сделать это не сложно все написано в инструкции, особенно,. Популярный spovan наручные часы хорошего качества и по доступным ценам вы можете купить на AliExpress. Вы можете скачать инструкцию в формате pdf для любого калибра Seiko.
Сам дисплей сделан в инверте, то есть фон весь темный/черный, а цифры и буквы светлые — выглядит это необычно. Так же есть береговая подсветка, ее очень хорошо видно в темноте и она не слепит глаза. Думаю данные часы понравятся тем кто любит стиль гранж или любят военную тематику.
А так же понравятся тем кто ходят в походы, занимаются стрельбой. Spovan MG01 покупал тут: ➤ Возвращайте свой% с каждой покупки в Интернете: ПОДПИШИСЬ НА КАНАЛ! Мы в Instagram: Мы в twitter: @KitayskiyKitay Наш сайт: Наша группа ВК: Рады видеть Вас на нашем канале Китайский Китай!
Здесь мы расскажем о интернет-покупках из Китая Европы, России и Америки. На нашем канале вы найдете много интересного, а именно видео-распаковки посылок из самых разных стран, обзоры самых популярных товаров, наши рекомендации, а еще много акций и конкурсов для наших подписчиков! Вы узнаете где и как лучше покупать через интернет без потерь для себя. Какие текущие промо акции и скидки на aliexpress, действуют в данный момент и какие не стоит пропускать.
Aliexpress отзывы Вступайте в ряды наших подписчиков, вы не пожалеете, с нами интересно!
Часы с альтиметром в горах являются не просто роскошью, сколько очень удобным инструментом как для планирования графика передвижения на основе пройденного набора высоты, так и для навигации, поскольку высота является одним из удобных ориентиров, а без компаса и вовсе нельзя обойтись, конечно при отсутствии GPS навигатора, и навигатор из кармана постоянно вытаскивать не всегда есть возможность или желание, иногда его вообще нет. Да и в принципе, без часов не очень удобно в походе, особенно руководителю группы. Эту и остальные статьи без назойливой рекламы Вы можете прочесть на моем новом сайте.
Первыми на рынок туристических часов с сенсорами ABC (altimetr, barometr, compas) вышла финская компания Suunto, которая и по сей день является одним из лидеров рынка. Чуть позже в бой ввязалась японская Cassio, чья серия Protrack примечательна наличием солнечного элемента для питания часов, и как следствие — отсутствие необходимости замены батарейки. И совсем недавно на рынок ворвались китайцы с многочисленными репликами Suunto. В этой статье я хочу обратить внимание именно на китайский рынок ABC часов. Цена на подобные часы начинается с 20$. У меня сложилось такое впечатление, что некоторые дешевые модели выпускаются на одном и том же заводе, так как внешне и функционально они практически не отличимы, лишь логотипы разные.
Но встречаются уникальные и довольно интересные экземпляры у каждого бренда. Функционально они тоже различны. У самых дешевых часов вы не найдете компаса, а тем более шагомера. В дорогих моделях можно встретить Bluetooth и даже GPS. Но тут стоит оговориться, что две последние функции в туристических часах будут скорее во вред, нежели во благо, так как они не скажутся положительно на энергопотреблении.
По моему опыту эксплуатации GPS в них удобен лишь для мониторинга тренировок, но ни как не для навигации. Использовать GPS для ориентирования на местности я пробовал, карта в них абсолютно бесполезна в силу низкого разрешения экрана и его монохромности.
Максимум что можно, то это ориентироваться по заранее нарисованному треку или расстоянию и направлению до точки. А в режиме GPS время работы часов сопоставимо со временем работы обычного навигатора, так что эта полезность сомнительна.
На дорогих (70-100$) часах можно встретить даже сапфировое стекло. Так же попадаются уникальные модели с титановым корпусом. С водонепроницаемостью практически у всех брендов дела обстоят худо, ну как худо — случайное погружение они конечно выдержат, но вот лезть в горячий душ, а тем более ванную, в них не стоит.
И на всех моделях без исключения (по крайней мере я не нашел других) запрещено нажимать кнопки под водой, во избежание попадания ее внутрь корпуса. Из брендов можно выделить такие как с довольно оригинальной внешне линейкой. Часы были приобретены. Цена на них иногда подскакивает до 283$ дабы потом продать со ‘скидкой’. На момент написания обзора они стоили 68$, простояв пару дней за эту цену, опять подорожали до стандартных 82$, за которые я их и приобрел. Считаю, что потраченных денег данная модель вполне стоит. На вид это очень качественная реплика финских Suunto.
Смотрятся довольно стильно. Подойдут не только для таскания в горах, но и неплохо будут смотреться на вашей руке в городе. Часы имеют ударопрочный пластиковый корпус и стальной, невращающейся безель.
На светлой версии часов ремешок сшит из 2 слоев нейлоновой стропы, довольно жесткий, а самое главное — его можно заменить неспециализированным, как на многих часах такого класса, подойдет понравившейся вам ремень шириной 24 мм. Это лишит вас большой головной боли в будущем. Для тех же Suunto, один мой знакомый, за много лет использования, купил ремешков на сумму превышающую стоимость самих часов, а ценник финны на ремешки ломят конский, к слову сказать. Стекло, по заявлению продавцов, — сапфировое, соответственно должно царапаться меньше чем стандартное минеральное, слегка утоплено вглубь безеля. Специально уточнил у продовца на сколько оно сапфировое, те дают руку на отсечение что так оно и есть.
Что мы имеем, приобретая данную модель:. Функции времени: время, дата, будильник, таймер, секундомер, автоматический переход на летнее время, мировое время.
Высотомер с графиком изменения высоты за прошедшие 24 часа, расчетом набора высот и перепада от определенной точки. Барометр с графиком записи атмосферного давления за последние 48 часов. Предсказание погоды на основе барометрического давления. Шагомер, считающий пройденное расстояние и затраченные калории. Время восхода и заката солнца. Подсветка электролюминисцентная. На относительно крупной мужской руке часы смотрятся вполне пропорционально.
В режиме высотомера вы можете установить нулевую отметку, относительно которой прибор будет показывать высоту — высота восхождения, просмотреть график набора высоты за последние сутки, показания в который записываются раз в пол часа, а также суммарный набор и сброс высоты за 24 часа. Не забудьте периодически калибровать высотомер или по GPS высоте из навигатора, или по заранее известным точкам.
Но как по мне, точности в 50 метров, которой можно добиться от барометрического альтиметра, вполне достаточно. Барометр в горах вам поможет сориентироваться в тенденции изменения погоды. Это в совокупности с народными приметами позволяет хоть немного корректировать планы в связи с предстоящими погодными изменениями. Как рассказывал один пейзажный фотограф: утром, за долго до того, как появится солнце, достаточно взглянуть на график изменения давления и понять, стоит ли вообще высовывать нос из палатки на мороз, для съемок рассвета, или можно дальше дрыхнуть, так как если небо затянуло, то и от фотографий в данном случае ждать ничего хорошего не приходится. В режиме барометра высвечивается давление, снятое с датчика, и давление приведенное к тому, что в данный момент на уровне моря, с учетом разницы в высоте.
Также можно переключиться в режим просмотра графика давления за последние сутки. Показания, как и в случае с альтиметром, записываются раз в полчаса.
В часах имеется встроенный компас. На его точность я полагаться бы слепо не стал, но сориентировать карту на местности и выбрать приблизительное направление движения он вполне поможет.
В компас можно вводить магнитное склонение для данной точки местности, рассчитать вы можете его,например,. Вводится склонение с точностью до градуса.

К примеру, для Санкт-Петербурга на 2016 г. Оно составляло 10.52°E ± 0.44°, и изменяется на величину 0.15°E в год. Также не забывайте периодически калибровать компас. Не очень удачным, на мой взгляд, является расположение кнопки вызова компаса, так как довольно часто, при активной физической работе, происходит случайное нажатие на эту самую кнопку. Который очень активно кушает батарейку, благо довольно быстро он переходит в режим экономии энергии — попросту отключается, благодаря чему элемент питания высадить в ноль таким образом будет сложно. Хотя, если учесть, что дизайн часов стырен с Suunto, будем надеяться, что это сделано не с проста. В целом, часы получились довольно неплохими и сбалансированными, своих денег стоят однозначно.
Но есть некоторые минусы, в частности, невозможность менять нижнее поле данных в режиме часов. Хорошо было бы туда выводить альтиметр или шагомер. Да, они бы кушали батарейку значительно больше, но это было бы удобно. И как я писал выше, чтоб добраться до настроек времени таймера, вам придется лезть в меню. В самом же таймере такая возможность отсутствует.
И почему нет ежечасного сигнала, не вполне понятно. Так же для удобства можно было бы сделать возможность калибровать высотомер из экрана альтиметра, как это реализовано для компаса. Мировое время без знания аббревиатуры города и того, в каком часовом поясе этот город располагается, выставлять не очень удобно. В инструкции расшифровка городов отсутствует. Но плюсов, как по мне, гораздо больше. За вполне приемлемые деньги мы получаем шикарный туристический прибор, который, судя по отзывам, прослужит вам довольно долго. По крайней мере, хлипкостью часы подобного класса не отличаются.
Еще раз отмечу, что заявлено сапфировое стекло, о чем специально интересовался у продавца, а уж на сколько оно в действительности сапфировое, оставим на совести производителя, практика покажет устойчивость к царапинам. Смотрятся стильно, и не так грубо и брутально, как, модные нынче, G-Shock и их реплики.
Думаю, что аналоги от конкурентов и самого North Edge, сильно отличаться по функционалу не будут. Удачного вам выбора. UPD: Водонепроницаемость часов оказалась ни такой уж высокой. После того, как я, внутри оказалась вода. Открыв батарейный отсек, просушив их сутки, вода испарилась, а часы продолжили функционировать. Может конечно во время того, как я плавал, случайно нажалась кнопка, что ни в коем случае нельзя делать под водой. Но факт остается неизменным.

Инструкция К Часам Spovan Mg01
Для использования в водных походах часы не годятся! Была надежда, что часы текут через уплотнительную резинку под безелем, так как он крепится к основному корпусу часов исключительно на четырех миниатюрных шурупах. Разобрал часы, нанес под безель силиконового герметика по периметру. Но нет, чуда не случилось. Текут они через кнопки.
Инструкция К Часам Spovan
Даже при активном использовании под дождем внутри появляется конденсат. Стекло оказалось ни сколько не сапфировым! Царапается как и обычное минеральное.
Так что китайцы нагло врут. Так же было выявлено, что при замере отрицательных температур, нет индикации знака минус. То есть данная модель часов для экстремальных условий не особенно годятся.
Часы Spovan Инструкция На Русском
Конечно есть отзывы, что народ в них купается без последствий, но мне, как и некоторым другим обладателям не повезло. В дальнейшем буду пользоваться часами Casio. На модель премиум класса PRW-7000 уже. Также недавно сделал, которые я взял для того, чтоб было не жалко на скалах и в горах.
Shenzhen Spovan Technology Co., Ltd.About SpovanFloor 11, Tower B, Fuchangsheng Ind. Zone, No. 2, Chengxin Road, Longgang Dist., Shenzhen, ChinaSpovan is the professional manufacturer of outdoor sport watches and smart watches.Shenzhen Spovan Technology Co., Ltd.About SpovanFloor 11, Tower B, Fuchangsheng Ind. Zone, No. 2, Chengxin Road, Longgang Dist., Shenzhen, ChinaSpovan is the professional manufacturer of outdoor sport watches and smart watches.Shenzhen Spovan Technology Co., Ltd.Shenzhen Spovan Technology Co., Ltd.Shenzhen Spovan Technology Co., Ltd.Shenzhen Spovan Technology Co., Ltd.Shenzhen Spovan Technology Co., Ltd.Shenzhen Spovan Technology Co., Ltd.Shenzhen Spovan Technology Co., Ltd.Shenzhen Spovan Technology Co., Ltd.Shenzhen Spovan Technology Co., Ltd.Shenzhen Spovan Technology Co., Ltd.Shenzhen Spovan Technology Co., Ltd.Shenzhen Spovan Technology Co., Ltd.Shenzhen Spovan Technology Co., Ltd.Shenzhen Spovan Technology Co., Ltd.Shenzhen Spovan Tec
Download
- bobby-carl
