-
Contents
-
Table of Contents
-
Troubleshooting
-
Bookmarks
Quick Links
U S E R
M A N U A L
P O W E R E D B Y
Related Manuals for SCHUBERTH SRC-System
Summary of Contents for SCHUBERTH SRC-System
-
Page 1
U S E R M A N U A L P O W E R E D B Y… -
Page 2: Table Of Contents
5.2 CONNECTING THE ANTENNA CABLE . ……. . . 26 8.10 TROUBLESHOOTING THE INTERCOM ……. . 36 5.3 ATTACHING THE SRC-SYSTEM™ ……..27 9. CLICK-TO-LINK® (CTL) ……….. . 36 5.4 POSITIONING THE SPEAKERS ……..27 5.5 POSITIONING THE MICROPHONE . ……..28 10. SUPPORT …………. . 37 5.6 REMOVING THE SRC-SYSTEM™ FROM YOUR HELMET . ….28 11. NOTICES …………. . . 37 5.7 WEARING AND REMOVING THE HELMET……28 5.8 CLEANING THE SRC-SYSTEM™ ACOUSTIC COLLAR . ….. 28 6. CONNECTING MOBILE PHONES, GPS AND MP3 PLAYERS ….. 29 IMPORTANT: This is version 1.0 of the User Manual. Please note, that our manual is updated 6.1 MOBILE PHONE . ……….29 periodically on our website in order to include the very latest features as well the new 6.2 GPS DEVICE …………
-
Page 3: Introduction
This manual will help you operate the headset, but you should first familiarize of volume according to ambient noise and driving speed. You can also control yourself with the Bluetooth® functionality of your mobile phone and/or GPS the volume level manually. AGC sensitivity levels can be customized to suit device before using the SRC-System™. your personal preferences. The retail box contains one SRC-System™. When paired with another ➤VOX technology for safe and hands-free operation of some key functions SRC-System™, the units can be used for Intercom at a range of up to 700 m/ (Voice Dial, Answer Call, Reject Call). VOX sensitivity levels can be customized 2,300 ft (subject to terrain). to suit your personal preferences. ➤PLC software (Packet Loss Concealment) for real-time compensation of audio YOUR SRC-SYSTEM OFFERS THE FOLLOWING CONNECTIVITY OPTIONS: losses in challenging environments. 1. Mobile phone communication (supporting Bluetooth® Handsfree* and A2DP ➤Advanced software which you should update while in standby mode, via any and AVRCP profiles at a 10 m / 33 ft. range) PC running Windows® XP™, Vista™ or Windows 7. 2. Wireless music-streaming (supporting the Bluetooth® Stereo A2DP and AVRCP ➤Spoken status announcements, so that you always know to whom or what profiles and compatible with a variety of MP3 Players, adapters and other device you are connected to at any given time. audio devices) We wish you a great riding experience and remain available for any inquiries you 3. 2-way or 3-Way Bike-to-Bike Intercom for conference calls with other may have. Just write us at Service@schuberth.com SRC-System™ headsets (up to 700 m/ 2,300 ft) in Full Duplex** mode…
-
Page 4: Contents Of The Retail Box
2. CONTENTS OF THE RETAIL BOX Wall charger plug USB adapter cable SRC-SYSTEM™ FOR S2 HELMETS* Velcro® pads Channel A Button MP3 cable • Connect to Rider A Corded • MP3 Button Microphone Microphone sponges Speaker pads Mobile Button User Manual, stickers Channel B Button • Connect to Rider B • FM Radio Button IMPORTANT:…
-
Page 5: Basic Setup And Configuration
• Set custom AGC and VOX sensitivity levels suited to your specific riding 2 blue flashes every 3 seconds Audio active style and conditions. 1 red flash every 3 seconds Standby – Battery is low SRC-SYSTEM SETTINGS CAN BE CUSTOMIZED IN TWO WAYS: 2 red flashes every 3 seconds Low battery while audio active • V ia the free SRC-System™ Upgrades software available for download from Solid red Charging www.schuberth.com/register/en. Requires PC and cable-connected device…
-
Page 6: Voice Menu
The Voice Menu is available in several languages. 1. P ress and hold the Channel “A” button and Channel “B” button simultaneously 5.1 REMOVING THE EXISTING ACOUSTIC COLLAR for 3 seconds while on standby. First, remove the existing Acoustic Collar from your helmet as follows: 2. A fter entering the menu, follow the voice instructions in English or choose your Pull out and remove the Acoustic Collar from the front at its bent center. preferred language 4.6 AUDIO SOURCES AND PRIORITIES The different audio sources connected to the SRC-System™ are prioritized as shown below, i.e. the higher priority source will always override and interrupt the lower one. For example, incoming phone calls will interrupt ongoing Intercom calls, while 5.2 CONNECTING THE ANTENNA CABLE incoming intercom calls will interrupt the audio from the built-in FM Radio etc. Your SRC-System™ has an antenna cable which must be connected to the built- in antenna cable connector in the Schuberth helmet. Higher Priority 1. Mobile Phone audio or GPS instructions* …
-
Page 7: Attaching The Src-System
1. Make sure to place the speaker and microphone cords inside the helmet, and protective plastic cover. then secure the SRC-System™ into place. 2. Push and insert the SRC-System™ starting from the back of the helmet area. Do the same for the sides of the SRC-System™ and then the front of the On the helmet remove the rubber helmet area to secure the SRC-System™ into place. protector from the antenna connector. 4. Align the two connector heads and snap the two fasteners back into place to lock the connector in a closed position. 5.4 POSITIONING THE SPEAKERS For best audio results, make sure that both of your speakers are placed as closely as possible just opposite your ears. The following applies to both sides of the SRC-System™: 1. Open the rear red button located under the interior lining that covers the cheek pads (the button is held by a black ring). Lift the lining slightly. 2. Attach the corresponding oval Velcro pads to the speaker-shaped indentations on the EPS (expanded polystyrene) and position the speakers on the Velcro pads. 5. The antenna connector can now be safely stowed away inside the antenna connector pocket on the center of the SRC-System™.
-
Page 8: Positioning The Microphone
2. Attach the microphone to the Velcro, as shown in illustration. NOTE: Your SRC-System™ Acoustic Collar is designed for maximum comfort. However, since it contains an entire electronic kit within, it will have a slight a bulge. Therefore, putting your SRC equipped helmet on or taking it off may feel different than what you are used to with a standard Acoustic Collar.
-
Page 9: Connecting Mobile Phones, Gps And Mp3 Players
NOTE: If you plan to use a GPS device in parallel with your mobile phone, then you Thanks to MDC technology the SRC-System™ offers parallel connectivity as should pair your mobile phone to the GPS device and not to the SRC-System™. In such case, skip this section and proceed directly with section 6.2.
-
Page 10: Gps Device
1. If the pairing process is not completed within two minutes the headset will return to Standby mode When the headset is on an active phone call, any Intercom call request will be 2. The priority schedule of your SRC-System™ has been set in a way to avoid automatically rejected. incoming intercom calls to interrupt GPS instructions in progress. In such case the Once the phone call ends, you can make and accept Intercom calls again.
-
Page 11: Mp3 Music
Using a Bluetooth® device that supports the AVRCP profile will allow you to OPERATING YOUR A2DP SOURCE FROM YOUR HEADSET operate all major A2DP source functions directly from your headset. Play Press the MP3 Button for 3 seconds NOTE: The SRC-System™ can also receive audio via the enclosed cable from non- Pause / Stop* Press the MP3 Button for 3 seconds Bluetooth® MP3 Players or audio sources as described in section 6.3b Forward…
-
Page 12: Built-In Fm Radio
Mobile Phone station RDS ON/OFF While the Radio is on, press and hold Volume Up and 2. T ap the Channel “B” button within 20 seconds of finding the FM station (Default: OFF) Volume Down Buttons simultaneously for 3 seconds to save it as the current Preset. Thanks to the RDS feature, your headset will automatically select the strongest Scan and Save: Scan through FM stations signal available for the FM station you wish to listen to, no matter where you are 1. P ress and hold the Volume Up button for 6 seconds. The SRC-System™ riding. will search upwards (higher frequency) for a station. When a station is found, it can be heard for a few seconds. 2. T o stop the scan on this station: Tap the Volume Up Button. 3. T ap the Channel “B” button within 20 seconds of finding the FM station to save it as the current Preset. 4. T o continue scan: Wait for the next station to be found.
-
Page 13: Using The Intercom
AUTOMATIC RADIO TUNING Your SRC-System™ allows you to connect to other bikers using SRC headsets This feature makes finding new stations fast and easy by automatically creating a within a range of up to 700 meters / 2,300 ft. (subject to terrain). To set up one temporary list of 6 “on-the-go” radio stations. or two Intercom Bluetooth® connections, you must first pair your SRC-System™ headset with the other headsets. 1. Turn on the Radio. Pairing is a one time process. Once completed, the headsets will remain paired 2. Press and hold the Volume Down button for 6 seconds. and automatically recognize each other whenever they are within range. 3. Y our SRC-System™ will search upwards (higher frequency) from the Your headset has two Intercom channels available for headset-to-headset current station and store the next 6 FM stations it discovers as “on the connections. Therefore, your SRC-System™ can communicate simultaneously in go” stations. conference mode with up to two other SRC headsets. 4. I f desired, repeat from Step 2 to store the next 6 FM stations as “on the 8.2 INTERCOM COMPATIBILITY go” stations. You can use your SRC-System™ headset for Intercom communication with any other SRC-System™ headset and with cardo scala rider headsets. For further NOTE: These 6 temporary “on the go” stations cannot be saved and do not replace details visit www.cardosystems.com/SRC.
-
Page 14: U Sing The Src-System™ For Intercom With Other
8.4 USING THE SRC-SYSTEM™ FOR INTERCOM WITH OTHER SRC-SYSTEM™ 8.4b. THREE-WAY INTERCOM HEADSETS The SRC-System™ offers three-way intercom conference connectivity as follows: INTERCOM CHANNEL PAIRING / CONNECTION PAIRING MODE LED Use Channel “A” Use Channel “B” BUTTON INDICATORS CHANNEL “A” CHANNEL “A” BUTTON Rapid RED flashing CHANNEL “B” CHANNEL “B” BUTTON Rapid BLUE flashing 8.4a. TWO-WAY INTERCOM Rider “2”…
-
Page 15: Making Intercom Calls
NOTE: While the Intercom is on, the Redial and Voice Dial functions will be disabled. 8.9 NOTEWORTHY ISSUES 8.6 RECEIVING INTERCOM CALLS 1. Busy Status (When using a SRC-System™ headset) When a paired headset calls you via intercom, the call will begin almost instantly. When attempting an Intercom call with a headset that is already on a Phone/ GPS/ Intercom call, you will hear two beeps indicating the other headset is busy. NOTE: The headsets preset priority modes have been set in a way to avoid incoming 2.
-
Page 16: Troubleshooting The Intercom
1. Mobile Phone audio or GPS instructions* First, make sure your microphone is located properly in front of the center of your 2. Intercom / Click-to-Link® mouth. 3. A2DP (Stereo Bluetooth) audio The SRC-System™ is designed for use in loud environments. Therefore, you 4. FM Radio (Built-in) should test the Intercom functionality only in a noisy environment, such as next 5. AUX (for corded connection i.e. Music Players) to an idling motorcycle and not indoors. Please also verify that the headsets Lower Priority *GPS instructions from Smartphone GPS Apps are prioritized like A2DP audio were paired together properly by following the instructions in the relevant Setup sections.
-
Page 17: Support
Phone: +49-391-8106-555 making or accepting a call you should pull over to the side of the road and stop. Any publications, For the latest information on Software upgrades please visit our website at advertisements, announcements or other similar communications, which imply that you can use the device on the move, merely refer to its technical capabilities and are not to be understood as www.schuberth.com/en/motorcycle/service/src-systemtm.html an encouragement to engage in such activity. and register on-line. You must establish whether use of the device might represent a violation of any laws or regula- IMPORTANT: tions applicable in the location of use and adhere to the relevant rules. In this respect, any use of OPENING ACOUSTIC COLLAR ZIPPER VOIDS WARRANTY! the device is exclusively at the user’s own risk and responsibility. The basic requirements for safe use include that you must be physically capable of using the The electronic components inside the Acoustic Collar of the SRC-System™ are device and not suffer from any illness or restrictions that might impair your capability to use the closed by a sealed zipper. Please do not tamper with or open the zipper as this device safely and ride on the road. Furthermore, you must hold a valid driving licence for the will void your warranty. vehicle. Under no circumstances may you consume alcohol or mind altering drugs, which might impair your alertness, before or during use of the device. Federal Communications Commission (FCC) 16. 15.21 You are cautioned that changes or modifications not expressly approved by the part responsible for compliance could void the user’s authority to operate the equipment. 15.105(b) This equipment has been tested and found to comply with the limits for a Class B digital device, pursuant to part 15 of the FCC / IC rules. These limits are designed to provide reasonable protec- tion against harmful interference in a residential installation. This equipment generates, uses and can radiate radio frequency energy and, if not installed and used in accordance with the instructions, may cause harmful interference to radio communications. However, there is no…
-
Page 18
European CE Notice Device, irrespective of whether the Device is used by the original purchaser or any third party. The SRC-System™ headset (the “Product”) is in conformity with the following essential require- The Company hereby notifies you that using this Device may also be in contravention to local, ments of Council Directive 1999/5/EC (referred to as R&TTE Directive): Articles 3.1a, 3.1.b and 3.2. federal, state or national laws or regulations, and that any use of the Device is entirely at your The Product is manufactured in accordance with Annex II of the above directive. sole risk and responsibility. Declaration of Conformity (DOC) 1. You, your heirs, legal representatives, successors or assigns, hereby voluntarily and forever The SRC-System™ headset is compliant with and adopts the Bluetooth® Specification 2.1 and has release, discharge, indemnify and hold harmless the Company from any and all litigation, successfully passed all interoperability tests that are specified in the Bluetooth® specification. How- claims, debts, demands, actions and liability which may arise, directly or indirectly, from using ever, interoperability between the device and other Bluetooth®-enabled products is not guaranteed. the Device for any distress, pain, suffering, discomfort, loss, injury, death, damages to or in respect to any person or property however caused, WHETHER ARISING FROM THE NEGLIGENCE OR OTHERWISE, and which may hereafter accrue to you on some future date as a result of said WAIVER AND GENERAL RELEASE use, to the fullest extent permitted by law. (not for countries of the European Union) 2. You fully understand and assume the risks in using the Device, including risk of negligent acts BY USING THE SRC-SYSTEM™ YOU WILL WAIVE SUBSTANTIAL LEGAL RIGHTS INCLUDING THE or omissions by others. -
Page 19
(b) these risks and dangers may be caused by the negligence of the manufacturers or its agents Limitation of Liability or any third party involved in designing or manufacturing the Device; IN NO EVENT SHALL THE COMPANY BE LIABLE FOR ANY SPECIAL, INDIRECT, PUNITIVE, INCIDEN- (c) these risks and dangers may arise from foreseeable or unforeseeable causes. You hereby TAL, EXEMPLARY OR CONSEQUENTIAL DAMAGES, OR ANY DAMAGES WHATSOEVER RESULTING assume all risks and dangers and all responsibility for any losses and/ or damages, whether FROM THE USE OF THE DEVICE, WHETHER BASED ON BREACH OF CONTRACT, TORT (INCLUDING caused in whole or in part by the negligence or other conduct of others, including the NEGLIGENCE), PRODUCT LIABILITY OR OTHERWISE, EVEN IF ADVISED OF THE POSSIBILITY OF SUCH Company. DAMAGES. YOU ACKNOWLEDGE AND AGREE THAT THE LIMITATIONS SET FORTH ABOVE ARE FUNDAMENTAL 5. You confirm that you have read this release of liability and fully understand its terms and that you have given up substantial rights by not returning the Device for a full refund (see refund ELEMENTS OF THIS AGREEMENT AND THE DEVICE WOULD NOT BE PROVIDED TO YOU ABSENT SUCH option below). LIMITATIONS. SOME STATE STATUTES MIGHT APPLY REGARDING LIMITATION OF LIABILITY. Disclaimer of Warranty RETURN FOR FULL REFUND THE COMPANY DISCLAIMS ALL EXPRESS AND IMPLIED WARRANTIES WITH REGARD TO THE ENCLOSED IF YOU ARE UNWILLING TO ACCEPT AND AGREE TO THE ABOVE CONDITIONS, YOU MAY RETURN THIS DEVICE TO THE RESELLER OR TO THE COMPANY FOR A FULL REFUND, PROVIDED THAT YOU DO SO DEVICE, INCLUDING WITHOUT LIMITATION ANY IMPLIED WARRANTIES OF MERCHANTABILITY, FITNESS FOR A PARTICULAR PURPOSE, AND NON-INFRINGEMENT. THE DEVICE AND ITS ACCESSORIES ARE NO LATER THAN 7 BUSINESS DAYS FOLLOWING THE PURCHASE OF THE DEVICE (proof of purchase PROVIDED “AS IS” AND “AS AVAILABLE” WITHOUT WARRANTY OF ANY KIND BEYOND THOSE ASSUMED required) AND SUBJECT TO THE WRAPPING BEING INTACT. WHEN DOING SO, PLEASE REFER TO THIS SECTION. BY NOT RETURNING THE DEVICE FOR REFUND WITHIN THE PERIOD PROVIDED, YOU ARE IN THE ENCLOSED MANUAL. EXPLICITLY IN AGREEMENT WITH THE ABOVE, AND RENOUNCE ALL RIGHTS TO FUTURE CLAIMS AND DEMANDS AGAINST THE COMPANY AS DEFINED ABOVE. www.schuberth.com…
DE
ES
GB
IT
FR
NL
SRC
S Y S T E M
Quick Start Guide
2
SRC
S Y S T E M
Quick Start Guide
DE
Unter www.schuberth.com/src-system fi nden Sie eine interaktive
Anwendung, die Ihnen alle Funktionen des SRC-Systems erklärt.
Alle Funktionen können Sie dort auch sebst ausprobieren.
(Die Seriennummer fi
SRC-System).
Hinweis:
Für eine korrekte Handhabung empfehlen wir Ihnen das
Manual sorgfältig zu lesen.
Hinweis:
Vor erster Inbetriebnahme müssen Sie Ihr SRC-System
mindestens
Kanal A Taste
Handy Taste
Kanal B Taste
Lautstärke hoch /
Vorwärts Taste*
Lautstärke runter /
Rückwärts Taste*
* nur bei Telefonen mit A2DP Unterstützung
Montieren Sie das SRC-System an Ihrem SCHUBERTH
Klapphelm.
Einschalten des SRC-Systems.
1. Drücken und halten Sie die Handy Taste mindestens
4 Sekunden lang.
2. LED Signal: Leuchtet 3 mal blau auf.
3. Audiosignal: Ansteigender Ton.
Verbinden des SRC-Systems mit einem Handy.
1. Schalten Sie das SRC-System ein.
2. Halten Sie die Handy Taste an Ihrem SRC-System mindestens 6 Sekunden lang gedrückt, bis die roten und blauen LED Anzeigen schnell abwechselnd blinken.
3. Suchen Sie gemäß der Gebrauchsanleitung Ihres Handys auf Ihrem Handy nach Bluetooth ® Geräten.
4. Geben Sie
0000
(4 Nullen) als PIN bzw. Passwort ein.
Anrufe empfangen
Anrufe abweisen
Gespräch beenden
Betätigen Sie während eines ankommenden Anrufs die Handy
Taste oder sprechen Sie laut ein beliebiges Wort aus.
Schweigen Sie während eines ankommenden Anrufs für
15 Sekunden oder drücken und halten
Sie die Handy Taste für 3 Sekunden.
Drücken Sie während des Gesprächs kurz die Handy Taste, oder überlassen
Sie das Au egen Ihrem Gesprächspartner.
3
4
SRC
S Y S T E M
Verbinden des SRC-Systems mit einem
Navigationsgerät.
(Falls Sie zusätzlich ein Handy nutzen, muss dieses mit dem
Navigationsgerät verbunden werden.)
1. Schalten Sie das SRC-System ein.
2. Halten Sie die Lautstärke hoch Taste des SRC-Systems mindestens 6 Sekunden lang gedrückt, bis die roten und blauen LEDs gleichzeitig schnell blinken.
3. Suchen Sie auf dem GPS Navigationsgerät nach Bluetooth ®
Geräten und folgen Sie dabei den Anweisungen.
4. Wenn Ihr Navigationsgerät zur Eingabe einer PIN oder eines
Passworts auffordert, geben Sie bitte
0000
(vier Nullen) ein.
Zwei-Wege Intercom Verbindung zwischen zwei
Nutzern.
1. Schalten Sie beide SRC-Systeme ein.
2. Halten Sie die gewünschte Kanaltaste “A” auf Ihrem Gerät mindestens 6 Sekunden lang gedrückt, bis die LED Anzeige schnell rot blinkt.
3. Wiederholen Sie diesen letzten Schritt mit dem zweiten
SRC-System.
Bedienung des Radios.
Radio einschalten
Radio ausschalten
Zum nächsten vorprogrammierten Sender wechseln
RDS Ein/Aus
Drücken und halten Sie im Standby
Modus die Kanal “B” Taste für
3 Sekunden.
Betätigen und halten Sie bei eingeschaltetem Radio die Kanal “B”
Taste für 3 Sekunden.
Betätigen Sie während des Radioempfangs kurz die Kanal “B” Taste um zwischen den sechs vorprogrammierten Sendern zu navigieren.
Betätigen und halten Sie bei eingeschaltetem Radio die Lautstärketasten (hoch/runter) gleichzeitig für
3 Sekunden.
Hersteller
SCHUBERTH GmbH
Stegelitzer Str. 12
D — 39126 Magdeburg
Germany phone: +49 (0)391 8106-0 fax: +49 (0)391 8106-180 e-mail: [email protected]
www.schuberth.com
Technische Änderungen vorbehalten.
Keine Gewährleistung auf Irrtümer und Druckfehler.
5
6
SRC
S Y S T E M
Quick Start Guide
GB
Visit www.schuberth.com/src-system to experience an interactive demonstration of the SRC-System functions.
(You will fi nd the serial number on the size label attached to your
SRC-System).
Caution:
To fully understand the proper use of the SRC-System, it is necessary to read its comprehensive user guide.
Caution:
Make sure that your headset is fully charged for at least
4 hours before initial use.
Channel A button
Mobile button
Channel B button
Volume up /
Forward Button*
Volume down /
Rewind Button*
* only for telephones that support A2DP
Attach the SRC-System to your helmet.
Turn on the SRC-System.
1. Press the mobile button steadily for at least 4 seconds.
2. Led indication: 3 blue fl ashes.
3. Audio feedback: ascending tone (low-high).
Pairing to a Bluetooth
®
mobile phone.
1. Switch on your SRC-System.
2. Press and hold the mobile button for at least 6 seconds until the red and blue lights begin rapidly alternating.
3. Search for Bluetooth
®
SRCS device on your phone.
4. Enter
0000
(4 zeros) as your PIN or passkey.
Answer a call
Reject a call
Terminate a call
During an incoming call tap the mobile button or speak loudly any word of your choice.
Remain silent for 15 seconds, or press and hold the mobile button for
3 seconds during an incoming call.
Tap the mobile button during a call, or let the other party terminate the call.
7
8
SRC
S Y S T E M
Pairing to a GPS device.
(If you are also using a mobile phone, this must be connected to the navigation system too).
1. Switch on your SRC-System.
2. Hold down the volume up button on the SRC-System for at least 6 seconds, until the red and blue lights are fl ashing quickly at the same time.
3. Search for the Bluetooth ® SRCS device on your GPS screen.
4. If your GPS device prompts for a PIN or passkey, enter
0000
(4 zeros).
Two-way intercom pairing options between two people.
1. Switch on both SRC-Systems.
2. Hold down the channel “A“ button on your equipment for at least six seconds, until the red LED display fl quickly.
3. Repeat this step with the second SRC-System.
Operating the radio.
Turn on the radio
Turn off the radio
Switch to next preset
FM station
RDS on/off
(default: off)
While in standby mode, press and hold the channel “B” button for
3 seconds.
While listening to the radio, press and hold the channel “B” button for
3 seconds.
While listening to the radio, tap the channel “B” button to cycle through the six preset FM stations.
While the radio is on, press and hold volume up and volume down buttons simultaneously for 3 seconds.
Manufacturer
SCHUBERTH GmbH
Stegelitzer Str. 12
D — 39126 Magdeburg
Germany phone: +49 (0)391 8106-0 fax: +49 (0)391 8106-180 e-mail: [email protected]
www.schuberth.com
Subject to technical changes.
We do not accept liability for mistakes and printing errors.
9
10
SRC
S Y S T E M
Guide d‘Utilisation Rapide
FR
Visitez le site www.schuberth.com/src-system pour découvrir une démonstration interactive des fonctionnalités du SRC-System.
(Vous trouverez le numéro de série sur l‘étiquette indiquant la taille, sur votre système SRC).
Attention:
Pour bien comprendre l‘utilisation du SRC-System, il est nécessaire de lire le Guide d‘Utilisation Détaillé.
Attention:
Assurez-vous de charger complètement votre kit mains libres pendant au moins quatre heures avant la première
utilisation.
Bouton Canal A
Bouton Téléphone mobile
Bouton Canal B
Volume fort /
Bouton Avance*
Volume faible /
Bouton Retour*
* convient uniquement aux téléphones
Attachez le SRC-System à l‘intérieur de votre casque.
Allumez le SRC-System.
1. Appuyez sur le Bouton Mobile pendant au moins
4 secondes.
2. Voyant : trois clignotements bleus.
3. Retour audio : son ascendant (faible-élevé).
Appairage à un téléphone mobile Bluetooth
®
.
1. Mettez votre système SRC en marche.
2. Appuyez sur le bouton Mobile et maintenez-le enfoncé pendant au moins 6 secondes, jusqu’à ce que les lumières rouge et bleu clignotent rapidement et alternativement.
3. Recherchez les dispositifs Bluetooth
®
SRCS dans votre téléphone.
4. Entrez
0000
(quatre zéros) en tant que code d’entrée ou code PIN.
Répondre
Refuser un appel
Mettre fin
à
un appel
Lors d‘un appel entrant, appuyez sur le bouton Mobile ou prononcez à haute voix le mot de votre choix.
Lors d‘un appel entrant, restez silencieux pendant 15 secondes, ou appuyez sur le bouton Mobile pendant 3 secondes.
Appuyez sur le bouton Mobile pendant un appel, ou laissez votre interlocuteur mettre fi
11
12
SRC
S Y S T E M
Appairage à un dispositif GPS.
(Si vous utilisez également un téléphone mobile, celui-ci doit être connecté avec le système GPS).
1. Mettez votre système SRC en marche.
2. Maintenez la touche d‘augmentation de volume du système SRC appuyée au moins pendant 6 secondes, jusqu‘à ce que les LED rouges et bleues clignotent rapidement et simultanément.
3. Recherchez les kits Bluetooth
®
dans votre dispositif GPS.
4. Si votre dispositif GPS vous demande un code PIN ou code d‘entrée, entrez
0000
(quatre zéros).
Options d’appairage intercom bi-directionnelle entre deux interlocuteurs.
1. Allumez les deux systèmes SRC.
2. Appuyez pendant au moins six secondes sur la touche canal „A“, jusqu‘à ce que le voyant „Af chage“ clignote en rouge et rapidement.
3. Répétez cette étape avec le deuxième système SRC.
Utilisation de la radio.
Allumer la radio
Eteindre la radio
Passer
à
la prochaine station présélectionnée
RDS on/off
(Défaut : off)
En mode Veille, appuyez sur le bouton CANAL „B“ pendant 3 secondes.
En écoutant la radio, appuyez sur le bouton CANAL „B“ pendant 3 secondes.
En écoutant la radio, appuyez sur le bouton CANAL „B“ pour passer d’une station FM à l’autre
(6 stations présélectionnées)
Quand la radio est allumée, appuyez sur les boutons Volume fort et faible simultanément pendant 3 secondes.
Fabricant
SCHUBERTH GmbH
Stegelitzer Str. 12
D — 39126 Magdeburg
Allemagne
Tél: +49 (0)391 8106-0
Fax: +49 (0)391 8106-180 e-mail: [email protected]
www.schuberth.com
Sous réserve de modifi cations techniques.
Sous réserve d’erreurs et de fautes d‘impression.
13
14
SRC
S Y S T E M
Guía de inicio rápido
ES
Visite a www.schuberth.com/src-system para que experimente una demostración interactiva de las funciones del SRC-System.
(Encontrará el número de serie en la etiqueta grande de su sistema SRC).
Atención :
Para realizar un uso apropiado del SRC-Sistema, es necesario leer su completa guía de usuario.
Atención :
Asegúrese de que su kit manos libres está completamente cargado, por menos cuatro horas, antes de su primer uso.
Botón del canal A
Botón teléfono móvil
Botón del canal B
Sube Volumen /
Botón para Adelantar*
Baja Volumen /
Botón para Retroceder*
* sólo para teléfonos con soporte A2DP
Incorpore el sistema SRC a su casco.
Fije el SRC-Sistema.
1. Presione y mantenga presionado el botón móvil durante al menos 4 segundos.
2. Led: mostrara tres destellos azules.
3. Reacción de audio: tono ascendente (bajo-alto).
Emparejamiento con un teléfono móvil con
Bluetooth ® .
1. Encienda su sistema SRC.
2. Presione y mantenga presionado el botón móvil durante al menos seis segundos, hasta que las luces roja y azul comiencen a alternar rápidamente.
3. Busque los dispositivos Bluetooth SRCS en su teléfono móvil.
4. Introduzca
0000
(cuatro ceros) como su contraseña
<PIN> o <Clave>.
Contestar una llamada
Rechazar una llamada
Terminar una llamada
Pulse el botón móvil o diga en voz alta cualquier palabra que desee durante una llamada entrante.
Manténgase en silencio durante 15 segundos, o presione el botón móvil durante al menos tres segundos.
Pulse el botón móvil, o deje que la otra parte termine la llamada.
15
SRC
S Y S T E M
Emparejamiento con un dispositivo GPS.
(En caso de que utilice además un móvil, éste debe estar enlazado al sistema de navegación).
1. Encienda su sistema SRC.
2. Mantenga pulsada la tecla para subir el volumen del sistema SRC durante al menos 6 segundos, hasta que las
LED roja y azul parpadeen rápidamente de forma simultánea.
3. Busque el SRC-Sistema en su dispositivo GPS.
4. Si su dispositivo GPS le solicita una contraseña <PIN> o clave, introduzca
0000
(cuatro ceros).
Opciones de emparejamiento del intercomunicador de dos vías entre dos participantes.
1. Conecte los dos sistemas SRC.
2. Pulse la tecla de canal “A” del dispositivo al menos durante seis segundos hasta que el indicador LED parpadee en rojo a alta velocidad.
3. Repita este paso con el segundo sistema SRC.
16
Manejo de la radio.
Radio encendida (on)
Radio apagada
(off)
Cambiar a la siguiente estación predefinida
RDS (sistema radial de datos)
ENCENDIDO/
APAGADO ON/OFF
(Defecto: OFF)
Mientras esta en modo de espera, presione y mantenga presionado el botón CANAL “B” durante al menos 3 segundos.
Mientras escucha la radio, presione y mantenga presionado el botón CANAL
“B” durante al menos 3 segundos.
Mientras escucha la radio, pulse el botón CANAL “B” para alternar entre las 6 estaciones de radio FM prede fi nidas.
Mientras la radio está encendida (on), presione y mantenga presionado el botón de subir volumen y bajar volumen simultáneamente durante al menos 3 segundos.
Fabricante
SCHUBERTH GmbH
Stegelitzer Str. 12
D — 39126 Magdeburg
Alemania phone: +49 (0)391 8106-0 fax: +49 (0)391 8106-180 e-mail: [email protected]
www.schuberth.com
Reservado el derecho a realizar modifi caciones técnicas
No se otorga garantía por erratas y fallos de impresión.
17
18
SRC
S Y S T E M
Guida Rapida
IT
Andare su www.schuberth.com/src-system per provare una dimostrazoine interattiva delle funzioni dello SRC-System.
(Il numero di serie lo trovate sull‘etichetta grande attaccata al vostro sistema SRC).
Attenzione:
Per capire pienamente l‘uso corretto dello SRC-System,
è necessario leggere la sua Guida per l‘Utente completa.
Attenzione:
Accertarsi che l‘auricolare sia completamente carico lasciandolo in carica per almeno quattro ore prima
Pulsante CANALE A
Pulsante per Telefono
Cellulare
Pulsante CANALE B
Pulsante per Alzare il Volume /
Avanzare (FWD)*
Pulsante per Abbassare il Volume /
Riavvolgere (REW)*
* solo per telefoni con collegamento A2DP
Attaccare lo SRC-System al casco.
Accendere lo SRC-System.
1. Premere il Pulsante del Cellulare per almeno 4 secondi.
2. Indicazione luminosa: tre lampeggi blu.
3. Feedback sonoro: Tono crescente (da basso ad alto).
Abbinamento a un telefono cellulare Bluetooh
®
.
1. Accendere il sistema SRC.
2. Premere e tenere premuto il Pulsante Cellulare per almeno sei secondi fi nchè le Luci Rossa e Blu cominciano a lampeggiare alternandosi rapidamente.
3. Cercare l‘apparecchio SRCS Bluetooth ® sul telefono.
4. Inserire
0000
(quattro zeri) come PIN o password.
Risposta a una telefonata
Rifiuto di una telefonata
Fine di una telefonata
Durante una telefonata in arrivo, premere il pulsante Cellulare o pronunciare a alta voce una parola di propria scelta.
Rimanere in silenzio per 15 secondi, o premere e tenere premuto il pulsante
Cellulare per 3 secondi nel corso di una chiamata in entrata.
Premere il pulsante Cellulare durante una telefonata, o lasciare che l‘altra persona nisca la telefonata.
19
SRC
S Y S T E M
Abbinamento con un dispositivo GPS.
(Nel caso utilizziate un cellulare supplementare, questo deve venire collegato al sistema di navigazione).
1. Accendere il sistema SRC.
2. Tenere premuto il tasto del volume su del sistema SRC almeno 6 secondi fi contemporaneamente.
3. Cercare gli auricolari Bluetooth ® sul dispositivo GPS
4. Se il dispositivo GPS richiede un PIN o una password inserire
0000
(quattro zeri).
Opzioni per abbinamento interfono a due vie fra due partecipanti.
1. Accendete entrambi i sistemi SRC.
2. Tenete premuto il tasto canale „A“ sul vostro apparecchio almeno sei secondi, fi lampeggi velocemente.
3. Ripetete l‘operazione con il secondo sistema SRC.
20
Funzionamento della radio.
Accendere la radio
Spegnere la radio
Passare alla stazione predefinita successiva
RDS ACCESO/
SPENTO
(Predefinito:
SPENTO)
Mentre è in modalità di Standby, premere e tenere premuto il Pulsante
CANALE „B“ per 3 secondi.
Mentre si ascolta la Radio, premere e tenere premuto il Pulsante CANALE
„B“ per 3 secondi.
Mentre si ascolta la Radio, premere il
Pulsante CANALE „B“ per passare fra le
6 Stazioni FM Prede fi nite.
Mentre la Radio è accesa, premere e tenere premuti contemporaneamente i Pulsanti per Alzare e Abbassare il
Volume per 3 secondi.
Produttore
SCHUBERTH GmbH
Stegelitzer Str. 12
D — 39126 Magdeburg
Germania
Telefono: +49 (0)391 8106-0
Fax: +49 (0)391 8106-180 e-mail: [email protected]
www.schuberth.com
Modifi che tecniche riservate.
Nessuna garanzia riguardante gli errori e gli errori di stampa.
21
SRC
S Y S T E M
Wegwijzer voor een snelle start
Bezoek www.schuberth.com/src-system voor een interactieve demonstratie van de SRC-System-headset-functies.
(Het serienummer vindt u op het maatlabel dat aan uw SRC-System is gehecht).
Let op:
Om volledig te begrijpen hoe de SRC-System-headset werkt is het nodig om de uitgebreide handleiding te lezen.
Let op:
Zorg ervoor dat uw headset volledig (minstens vier uur) opgeladen is, voor u hem voor het eerst gaat gebruiken.
NL
de knop voor kanaal A de knop voor de mobiele telefoon de knop voor kanaal B knop voor harder / vooruitspoelen* knop voor zachter / terugspoelen*
* alleen bij telefoontoestellen
22
Bevestig de SRC-System-headset aan uw de helm.
Zet de SRC-System-headset aan.
1. Houd de knop voor mobiel bellen voor ten minste 4 seconden ingedrukt.
2. Het indicatielampje geeft drie blauwe fl
3. De audio-reactie: een oplopende toon
(van laag naar hoog).
De SRC-System-headset afstemmen op een
Bluetooth ® mobiele telefoon.
1. Zet uw SRC-systeem aan.
2. Druk op de knop voor mobiel bellen en houd die ten minste zes seconde ingedrukt, tot er snel-afwisselend een rood en een blauw controlelampje gaan branden.
3. Zoek op uw mobiele telefoon naar Bluetooth
®
SRCSapparaten.
4. Vul als uw pin- of toegangscode
0000
(vier maal nul) in.
Het aannemen van een gesprek
Het gesprek niet aannemen
(reject)
Een gesprek beeindigen
Tik op de knop voor mobiel bellen of zeg luid een willekeurig woord.
Zeg 15 seconde niets of druk 3 seconde lang op de knop voor mobiel bellen.
Tik op de knop voor mobiel bellen of laat de andere partij ophangen.
23
SRC
S Y S T E M
De SRC-System-headset afstemmen op een gps.
(Mocht u bovendien een mobiele telefoon gebruiken, dan dient deze verbonden te worden met het navigatiesysteem).
1. Zet uw SRC-systeem aan.
2. Houd de volume-hogerknop van het SRC-systeem ten minste 6 seconden lang ingedrukt, tot de rode en blauwe
LEDs snel gelijktijdig knipperen.
2. Zoek op uw gps navigatiesysteem naar Bluetooth ® -headsets
3. Als uw gps vraagt naar een pin- of toegangscode, vul dan
0000
(vier maal nul) in.
De mogelijkheden tot een tweeweg-intercom tussen twee mensen.
1. Schakel beide SRC-systemen in.
2. Houd de kanaaltoets “A” op uw toestel tenminste zes seconden lang ingedrukt totdat het LED display snel rood begint te knipperen.
3. Herhaal deze stap met het tweede SRC-systeem.
24
Bediening van de radio.
De radio aandoen
De radio uitdoen
Terwijl de headset in de sluimerstand
(stand-by) staat, drukt u 3 seconde op de knop voor kanaal “B”.
Terwijl u naar de radio luistert, drukt u 3 seconde op de knop voor kanaal
“B”.
Naar het volgende voorgeprogrammeerde station gaan
Tik op de knop voor kanaal “B” om één voor één de 6 FM-voorkeurzenders langs te lopen.
De RDS aan / uit zetten (staat van zichzelf op uit)
houd de knoppen voor harder en zachter tegelijkertijd 3 seconde ingedrukt terwijl de radio aanstaat.
Fabrikant
SCHUBERTH GmbH
Stegelitzer Str. 12
D — 39126 Magdeburg
Duitsland phone: +49 (0)391 8106-0 fax: +49 (0)391 8106-180 e-mail: [email protected]
www.schuberth.com
Technische wijzigingen voorbehouden.
Geen garantie op fouten en drukfouten.
25
M O R E T H A N H E L M E T S
S C H U B E R T H . C O M
Änderungen vorbehalten. Keine Gewährleistung auf Irrtümer und Druckfehler.
Subject to change. Not responsible for mistakes or printing errors.
SCHUBERTH GMBH
Stegelitzer Straße 12
39126 Magdeburg
Germany
Telefon
phone
+49 (0)391 8106-0
Telefax
fax
+49 (0)391 8106-180 [email protected]
Table of Contents for SCHUBERTH SRC-System PRO:
-
4. CUSTOMIZATION AND SETTINGS Get the most out of your SRC-System™ PRO by changing the settings and customizing your unit according to your own personal preferences. There are three ways to change the settings: via the Cardo Community on a PC / Mac, the SmartSet App or from the Settings Menu on your device. Cardo Community SmartSet App Settings Menu Set your Buddy name for 1+8 Intercom Add friends to your Buddy list Download the latest rmware upgrade Set your Hot-Dial number
-
5. COME INIZIARE 5.1 FUNZIONI GENERALI Accendere / Spegnere Premere s per 2 sec. • Accendere: 3 brevi lampeggi blu + tono crescente • Spegnere: 3 brevi lampeggi rossi + tono decrescente Volume Premere + o — per regolare e impostare il volume della sorgente audio attuale Interrompere / ripristinare il suono Premere contemporaneamente + e — Indicatore del livello della batteria In Standby, premere + e —
-
3. Maak het tweede apparaat ook gereed voor intercomkoppeling door zijn handleiding te volgen. Beide apparaten zijn nu gereed om te koppelen. 4. Na een paar seconden ziet u 2 seconden een ononderbroken licht van beide apparaten, wat aangeeft dat ze gekoppeld en klaar voor gebruik zijn. 5. Als het koppelen niet binnen 2 minuten afgerond is gaat de apparaten terug in stand-by. 6.2b BELLEN NAAR KANAAL “A” EN “B”. Er zijn twee
-
3. Sluit nu de rode knoop zo dat het zwarte “knoopsgat” hem op zijn plaats houdt. Reserve speakerkussentjes zijn meegeleverd om het speakervolume desgewenst te vergrote n door de speake rs dichter bij uw oren te brenge n. Dat doet u door eenvoudigweg de speakerkussentje s tussen de klittenbandkussentjes in de uitsparingen in de hel m en de speakers te plaatsen 3.5 HET PLAATSEN VAN DE MICROFOON Om te zorgen dat het kinstuk van de helm makkelijk sluit (naar beneden klapt) en plaats het driehoekige stukje stof in het kindeel zoveel mogelijk naat
-
6.1b PAIRING WITH A “1+8” INTERCOM BUDDY 1. In Standby, press s for 5 seconds to enter pairing mode. 2. Enter “1+8” intercom pairing mode on the second unit. After a few seconds the units should recognize each other. 3. If pairing was successful, a purple light appears for 2 seconds. If your SRC-System™ PRO already has a full list of 8 paired “1+8” Intercom Buddies, pairing another buddy will replace the buddy that you have not spoken to for the longest time. Pairing Online – Cardo Community® You can also nd your f
-
1. TER INTRODUCTIE Bedankt dat u voor het SRC-System™ PRO-Bluetooth® communicatie- en entertainmentsysteem voor Schuberth helmen kiest. Deze handleiding helpt u bij het initiëren, congureren en bedienen van de SRC-System™ PRO. De SRC-System™ PRO biedt u onder andere de volgende belangrijke mogelijkheden: MOGELIJKHEDEN INTERCOM • intercomgroepsgespr
-
DEVOLUCIÓN POR REEMBOLSO COMPLETO SI NO DESEA ACEPTAR LAS CONDICIONES ANTERIORES PUEDE DEVOLVER ESTE EQUIPO A LA COMPAÑÍA PARA OBTENER UN REEMBOLSO COMPLETO, SIEMPRE QUE NO LO HAGA MÁS TARDE DE 7 DÍAS HÁBILES TRAS LA COMPRA DEL EQUIPO (se requiere prueba de compra) Y SUJETO A QUE EL EMPAQUE ESTÉ INTACTO. AL HACERLO MENCIONE ESTA SECCIÓN. DE LO CONTRARIO ESTÁ EXPLÍCITAMENTE ACEPTANDO LO ANTERIOR Y RENUNCIA A TODO DERECHO A FUTUROS RECLAMOS Y DEMANDAS CONTRA LA COMP
-
Manuale per l’Utente POWERED BY
-
Handleiding POWERED BY
-
3. INSTALLAZIONE 3.1 RIMOZIONE DEL COLLARE ACUSTICO ESISTENTE Innanzitutto, rimuovere il collare acustico esistente dal casco procedendo come segue: 1. Aprire entrambi i bottoni automatici. 2. Sollevare il cuscino posteriore dal retro nella sua parte centrale curvata. 3. Liberare le puntine del cuscino posteriore dalle loro rispettive intaccature all’interno del bordo del casco. 3.2 COLLEGAMENTO DEL CAVO DELL’ANTEN
-
INHALT 1. EINFÜHRUNG ……………………………………………….3 2. BATTERIE AUFLADEN …………………………………………4 3. MONTAGEANLEITUNG ………………………………………..5 3.1 AUSBAU DES VORHANDENEN AKUSTIKKRAGENS ……………………….5 3.2 ANSCHLUSS DES ANTENNEN KABELS ………………………………… 5 3.3 EINBAU DES SRC
Questions, Opinions and Exploitation Impressions:
You can ask a question, express your opinion or share our experience of SCHUBERTH SRC-System PRO device using right now.
Schuberth SRC а также новая модификация SRC PRO для шлемов Schuberth C3 и С3 PRO пользуется большой популярностью среди байкеров. Гарнитура очень удобна, не создает шума на скорости, легко устанавливается вместо штатного воротника шлема C3\C3 PRO.
За несколько лет производства, нашей компанией накоплен значительный опыт в успешном ремонте характерных неисправностей Schuberth SRC.
Вот наиболее популярные из них:
1. Выход из строя наушников.
Стоимость замены на заводские наушники от Cardo Packtalk Bold JBL 40мм — 4000 р. за пару
Стоимость замены на Hi-Fi наушники Sony, House of Marley, AKG — от 19500 р. (гарантия на наушники 12 мес.) Подробнее…
Дефект проявляется обычно на громкости выше среднего, прогрессирует, до полного выхода наушников из строя.
Рекомендуем сразу менять на Hi-Fi, в результате Вы получите бОльшую громкость, несравненно боле высокое качество звучания, не только музыки, но и разговора по телефону или интерком-связи.
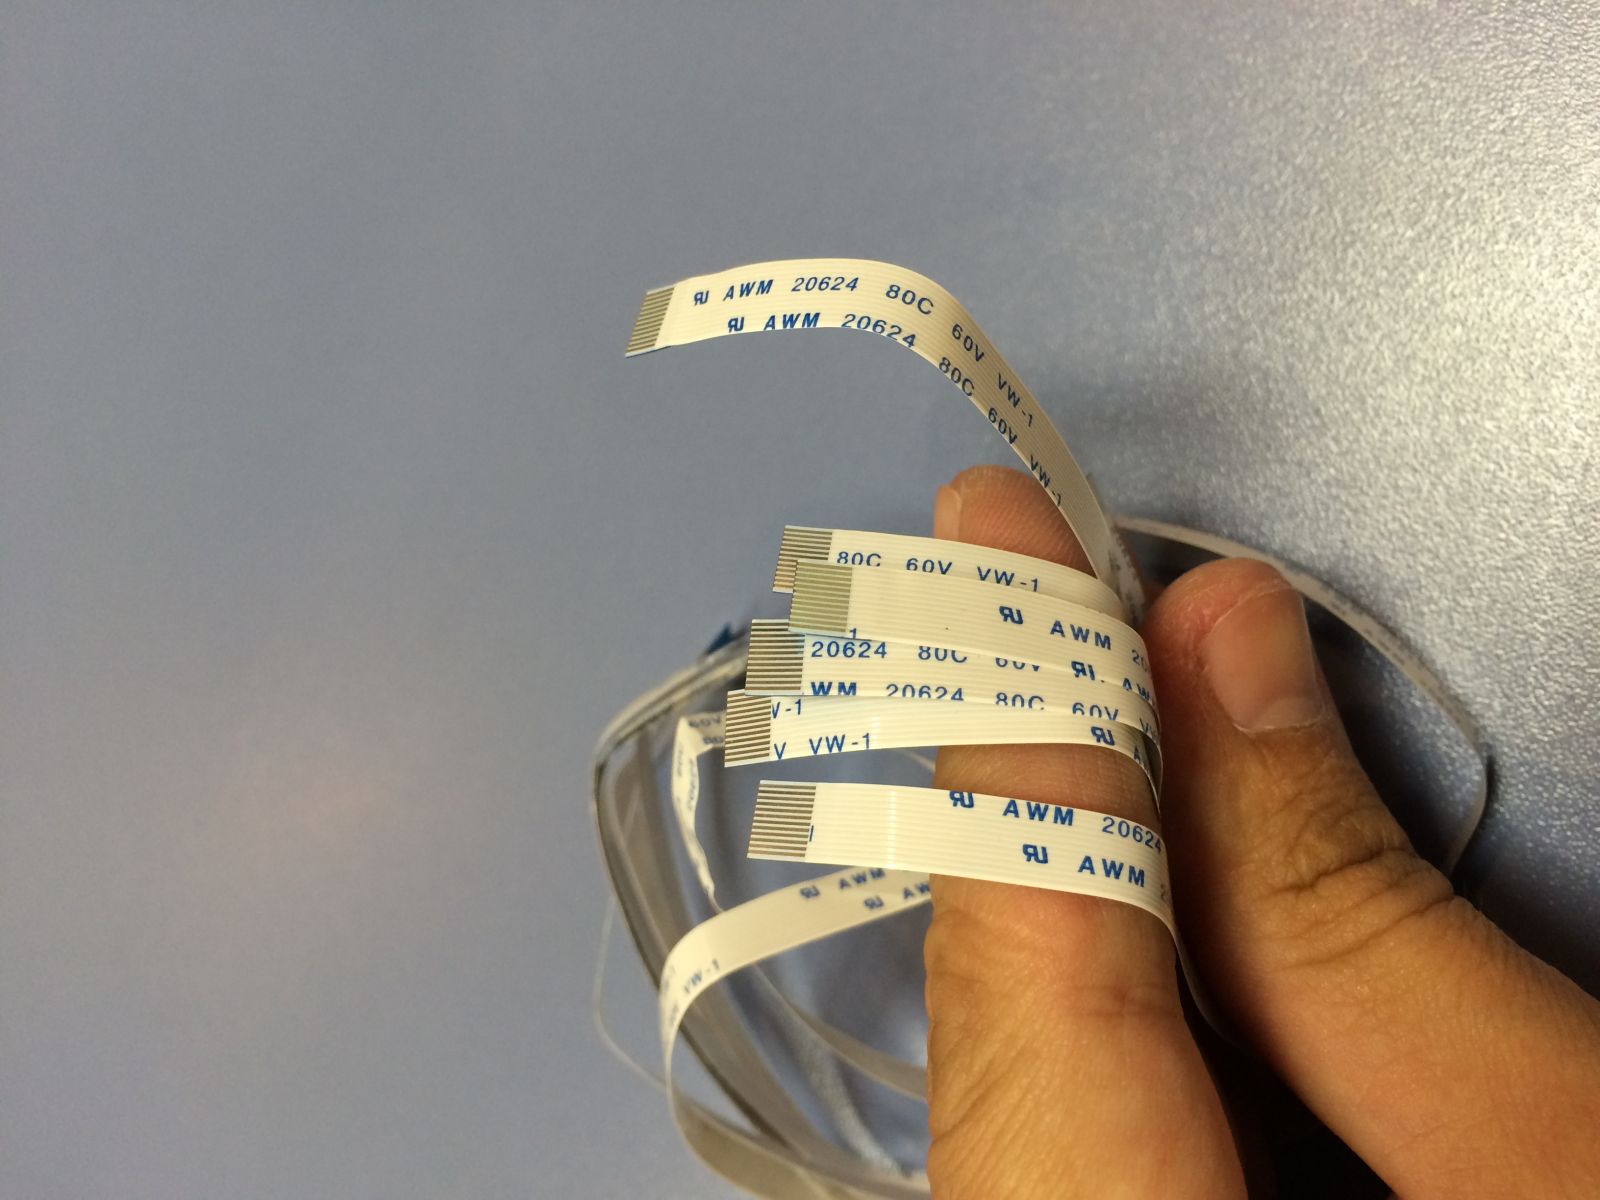
2. Обрыв соединительного шлефа
Стоимость ремонта шлейфа Schuberth SRC с дополнительным усилением мест обрыва — 4000 р.
Проблема проявляется по разному: гарнитура SRC не включается, включается но может внезапно выключиться, пропадает звук, пропадает индикация, нет связи с компьютером. Помимо замены шлефа на новый, мы производим усиление мест наиболее вероятного обрыва, чтобы исключить выход из строя этого элемента гарнитуры Schuberth C3/C3 pro в дальнейшем.
.jpg)
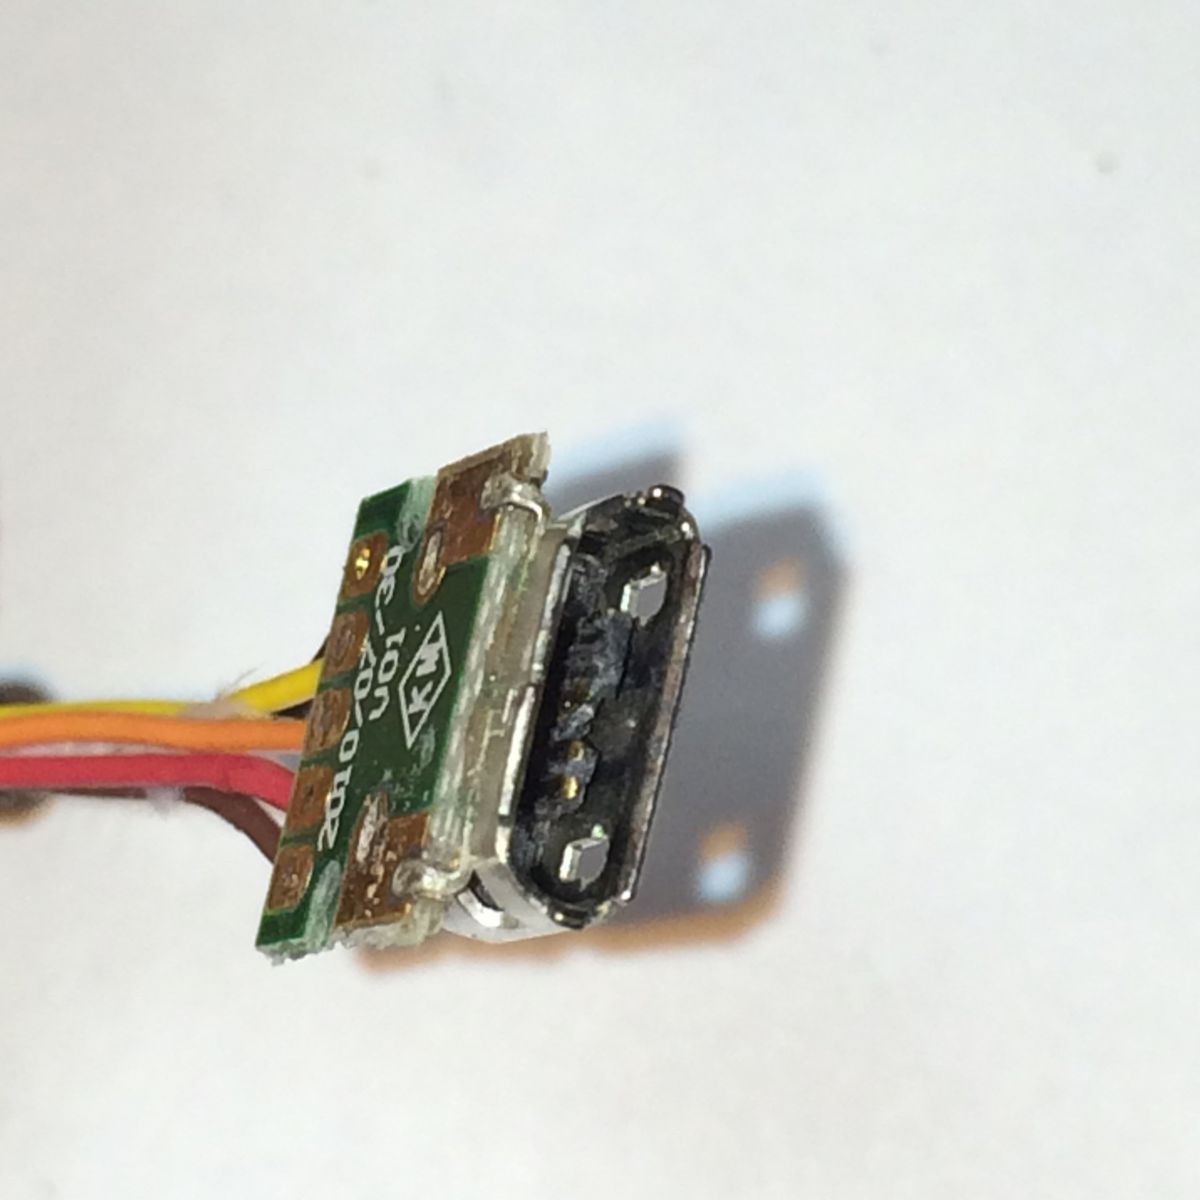
3. Поломка зарядного разъема Schuberth SRC
Стоимость ремонта с заменой разъема — от 4000 р.
Возникает из-за неаккуратного использования зарядного устройства с microUSB разъемом. В результате — поломка контактов или проводки гарнитуры Schuberth C3.
По всем вопросам относительно ремонта, обращайтесь по т. 8495-771-28-21
Наш адрес: г. Москва, ул. Зорге 19, GPStrade.ru
Зарядный разъем micro USB был полностью уничтожен. Замена разъема в сборе обошлась владельцу в 4000 руб.
Уважаемые посетители!
11-24 сентября оффлайн магазин на Роменской работает с 12.00 до 19.00.
онлайн-заказы принимаем в обычном режиме

-
-
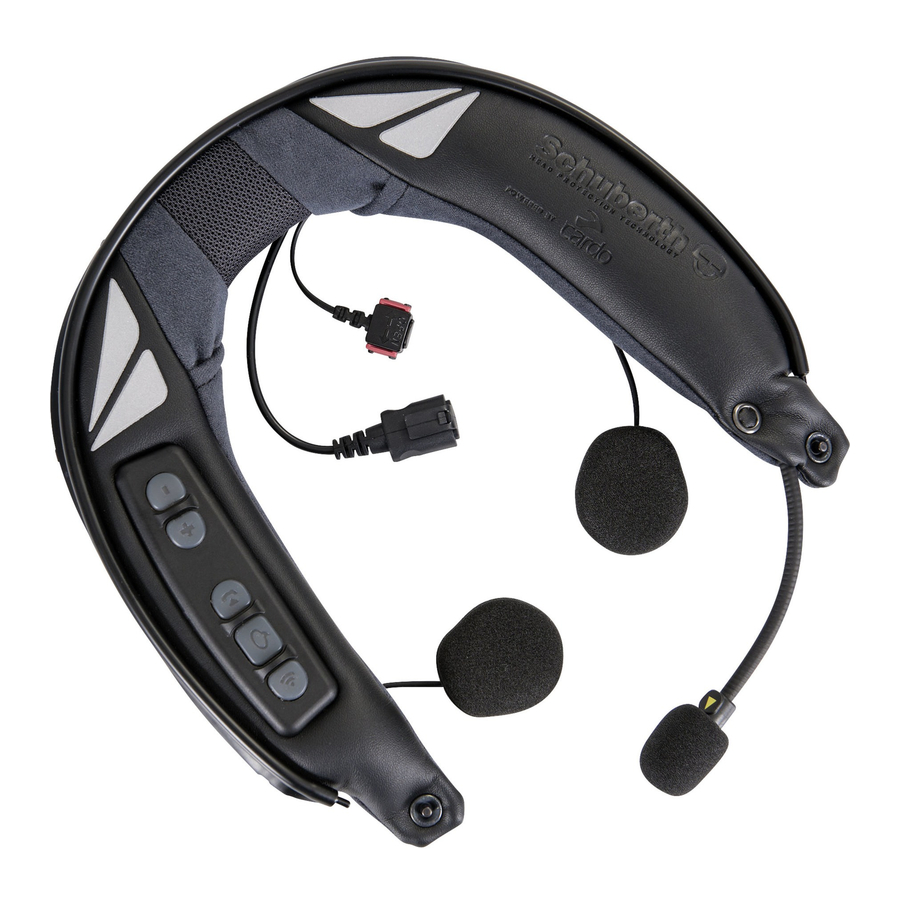
Мотогарнитуры для шлема
-
Schuberth

Переговорные устройства для мотоциклистов мотогарнитура для шлема Schuberth SRC Systems предназначены для связи между пилотом и пассажиром, а так же связи между другими мотоциклистами. Мотогарнитуры Schuberth SRC Systems можно использовать для приема голосовых сообщений с навигатора с поддержкой Bluetooth или для прослушивания MP3 музыки с телефона или плеера по проводу, либо через Bluetooth. Некоторые мотогарнитуры Schuberth SRC Systems оснащены радиоприемником для прослушивания радио с функцией RDS или без нее.