Manuals Directory
Manualsdir.ru — Онлайн поиск инструкций и руководств
Стиральные машины AEG
Эта инструкция подходит к следующим моделям:
LS 62840L
Требуется руководство для вашей AEG LS60840L Стиральная машина? Ниже вы можете просмотреть и загрузить бесплатно руководство в формате PDF. Кроме того, приведены часто задаваемые вопросы, рейтинг изделия и отзывы пользователей, что позволит оптимально использовать ваше изделие. Если это не то руководство, которое вы искали, – свяжитесь с нами.
Ваше устройство неисправно, и в руководстве отсутствует решение? Перейдите в Repair Café для получения бесплатных ремонтных услуг.
Руководство

Рейтинг
Сообщите нам, что вы думаете о AEG LS60840L Стиральная машина, оставив оценку продукта. Хотите поделиться вашими впечатлениями от данного изделия или задать вопрос? Вы можете оставить комментарий в нижней части страницы.
Довольны ли вы данным изделием AEG?
Да Нет
Будьте первым, кто оценит это изделие
0 голоса
Часто задаваемые вопросы
Наша служба поддержки выполняет поиск полезной информации по изделиям и отвечает на часто задаваемые вопросы. Если вы заметили неточность в наших часто задаваемых вопросах, сообщите нам об этом с помощью нашей контактной формы.
Стиральная машина не реагирует, когда я нажимаю кнопку включения. Что мне делать? Проверенный
Это обычно означает, что дверца стиральной машины недостаточно плотно закрыта. Откройте и закройте дверцу и попробуйте снова.
Это было полезно (22038)
Моя стиральная машина не запускает слив. Что делать? Проверенный
Основной причиной того, что стиральная машина не запускает слив, может быть засор в шланге подачи или слива воды. Если у вас есть доступ к этим шлангам, постарайтесь удалить засорение. Если проблема не решается, или у вас нету доступа к шлангам, обратитесь к специалисту по ремонту машин или к производителю.
Это было полезно (21688)
В стиральную машину не поступает вода, что мне делать? Проверенный
Проверьте, открыт ли входной патрубок для воды и нет ли перегибов в шланге подачи воды. Если это не решит проблему, обратитесь к производителю.
Это было полезно (8430)
Дверца стиральной машины не открывается, что мне делать? Проверенный
Причин может быть несколько. Наиболее частая причина — засорение фильтра. Отключите прибор от сети и проверьте фильтр. При необходимости удалите все засорения. Расположение фильтра зависит от модели. Также возможно наличие специального рычага для открытия двери. Если эти варианты не помогают, последний вариант — отключить прибор от сети на 30-60 минут и после этого попытаться открыть дверцу. Если это не сработает, обратитесь к производителю или механику.
Это было полезно (6903)
Моя стиральная машина громко шумит и/или вибрирует. Что делать? Проверенный
Возможно, вы не выровняли стиральную машину. Это можно сделать, отрегулировав ножки машины. Также причина проблемы может крыться в избыточной загрузке машины. Если причина шума и вибрации не в этом, обратитесь к производителю.
Это было полезно (6108)
В какое отделение должно быть моющее средство? Проверенный
У большинства стиральных машин есть 3 отделения для моющего средства. Эти отделения часто имеют маркировку I, II и *, чтобы показать, куда идет моющее средство. Ячейка I используется для предварительной стирки, II — для основной стирки, а * — для кондиционера. Чаще всего используется второй отсек.
Это было полезно (4076)
Моя стиральная машина пахнет, что мне делать? Проверенный
Есть стиральные машины с функцией самоочистки. Если эти функции недоступны, можно добавить 100 мл белого уксуса или 100 г кристаллов соды и запустить стиральную машину по программе 90 ℃.
Это было полезно (3294)
Могу ли я подключить стиральную машину к розетке с теплой водой? Проверенный
Хотя стиральные машины, вероятно, могут подавать воду до 65 ° C, большинство производителей не рекомендуют это делать. Существуют циклы стирки, в которых используется только холодная вода. В таких случаях теплая вода может повредить результат вашей стирки. Также многие стиральные машины рассчитаны на подключение к розетке холодной воды.
Это было полезно (2749)
На что следует обратить внимание при транспортировке стиральной машины? Проверенный
При транспортировке стиральной машины следует зафиксировать положение барабана. Можно использовать транспортировочный болт, который поставляется в комплекте со стиральной машиной. Он не даст барабану вращаться внтури машины. Также необходимо слить всю воду.
Это было полезно (1301)
Можно ли ставить сушильную и стиральную машину одну на другую? Проверенный
В целом сушильную и стиральную машину возможно поставить прямо одну на другую. Это относится только к моделям с фронтальной загрузкой. Тем не менее для этого рекомендуется использовать крепежные элементы. Это позволит избежать вибрации и падения верхней машины и повреждения нижней машины.
Это было полезно (1023)
Можно ли подключить стиральную машину к удлинителю? Проверенный
Технику, требующую большого количества энергии, например стиральную машину, нельзя подключать ко всем удлинителям. Посмотрите, какова потребляемая мощность стиральной машины, которая указывается в ваттах, и проверьте, может ли удлинитель с этим справиться. Существуют удлинители с более толстыми кабелями, предназначенные для работы с более крупными приборами.
Это было полезно (1016)
В чем разница в использовании стиральной машины с сушилкой и отдельной стиральной машины и сушилки? Проверенный
Самым большим преимуществом стирально-сушильной машины является то, что она занимает меньше места. Однако отдельная сушилка сможет сушить больше, чем стирально-сушильная машина. Стирально-сушильная машина также потребляет относительно больше энергии и требует больше времени.
Это было полезно (1016)

Согласие на обработку персональных данных
Для того, чтобы оказывать Вам услуги, нам требуется такая информация, как ваше имя и номер телефона. Сайт
компании
«AEG», расположенный на доменном имени aeg-servis.com может использовать указанную
информацию для связи с Вами по телефону с целью предоставления информации о предлагаемых Сайтом услугах
и рекламных кампаниях.
При поступлении от вас обращения в виде заполнения и отправки любой формы на Сайте, сотрудник компании
«AEG» может связаться с Вами для получения дополнительной информации, необходимой для Вашего
обслуживания и ответа на интересующие вопросы.
Администрация Сайта компании «AEG» обязуется не передавать персональные данные третьим лицам без
Вашего разрешения, за исключением информации, необходимой для выполнения вашего обслуживания. Со своей
стороны, Вы предоставляете сотрудникам компании «AEG» право использовать любую полученную от
Вас информацию для выполнения указанных выше действий.
Оставляя на сайте персональные данные, Вы подтверждаете и признаете, что внимательно в полном объеме
прочитали данное Соглашение и согласны с ним без оговорок и ограничений.
Закрыть
- Manuals
- Brands
- AEG Manuals
- Washer
- LAVAMAT LS 60840 L
- User manual
-
Contents
Table of Contents -
Bookmarks
Quick Links
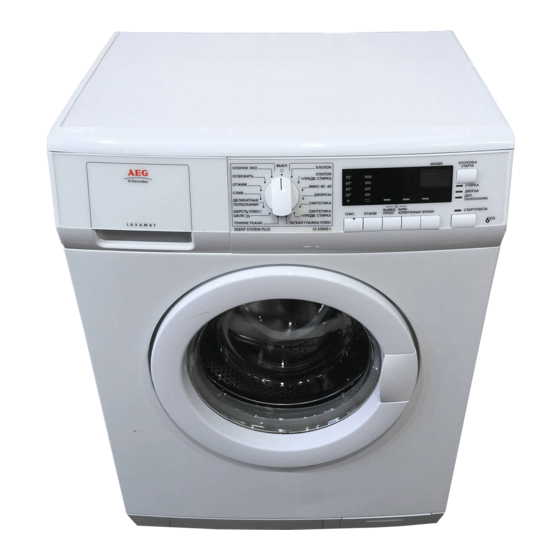
LAVAMAT LS 60840 L — LS 62840 L
User manual
Washing Machine
Related Manuals for AEG LAVAMAT LS 60840 L
Summary of Contents for AEG LAVAMAT LS 60840 L
-
Page 1
LAVAMAT LS 60840 L — LS 62840 L User manual Washing Machine… -
Page 2: Table Of Contents
Contents Thank you for choosing one of our high-quality products. To ensure optimal and regular performance of your appliance please read this instruction manual carefully. It will enable you to navigate all processes perfectly and most efficiently. To refer to this manual any time you need to, we recommend you to keep it in a safe place.
-
Page 3: Operating Instructions
Safety information Ecological hints Subject to change without notice Operating instructions Safety information Read carefully & keep for future reference. • The safety of Your appliance complies with the industry standards and with legal re‐ quirements on the safety of appliances. However, as manufacturers, we feel it is our duty to provide the following safety notes.
-
Page 4: Use
Safety information • When unpacking the appliance, check that it is not damaged. If in doubt, do not use it and contact the Service Centre. • All packing and transit bolts must be removed before use. Serious damage can occur to the product and to property if this is not adhered to.
-
Page 5: Product Description
Product description • Make sure that children or pets do not climb into the drum. To prevent children or pets becoming trapped inside the drum the ma‐ chine incorporates a special feature. To ac‐ tivate this device, rotate the button (without pressing it) inside the door clockwise until the groove is horizontal.
-
Page 6: Detergent Dispenser Drawer
Control panel Drain pump Adjustable feet Detergent dispenser drawer Compartment for prewash phase or stain re‐ mover. The prewash detergent is added at the beginning of the wash programme. The stain remover is added during the STAIN-Ac‐ tion phase in the main wash. Compartment for powder or liquid detergent used for main wash .
-
Page 7: Display
Display DELAY START button Indicator pilot lights Symbols : Handwash, Cold, Rinse Hold, Child Lock Display Duration of selected programme (7.1) : Duration of selected programme: After selecting a programme, the duration is displayed in hours and minutes (for example 2.05 ). The duration is calculated automatically on the basis of the maximum recommended load for each type of fabric.
-
Page 8: Indicator Pilot Lights
Indicator pilot lights (10) Indicator pilot lights (10) After having pressed the button 8 , the WASHING pilot light ( 10.1 ) comes on. When the pilot light 10.1 comes on this means that the machine is operating. The DOOR pilot light ( 10.2 ) indicates if the door can be opened: •…
-
Page 9: Daily Use
Daily use Daily use Load the laundry 1. Open the door by carefully pulling the door handle outwards. Place the laundry in the drum, one item at a time, shaking them out as much as possible. 2. Close firmly the door. You must hear a click during closing.
-
Page 10: Select The Required Programme By Means Of Programme Selector Dial
Daily use Select the required programme by means of programme selector dial (1) You can choose the right programme for any type of laundry following the descriptions on the washing programme tables (see «Washing Programmes»). Turn the programme selector dial to the required programme. The programme selector determines the type of washing cycle (e.g.
-
Page 11: Select The Stain Option (Button 4)
Daily use When these buttons are pressed, the corresponding pilot lights come on. When they are pressed again, the pilot lights go out. If an incorrect option is selected, the in yellow pilot light of the button 8 blinks for 3 times and the Err message appears on the display for some seconds.
-
Page 12: Select An Additional Rinse (Extra Rinse)
Daily use You must select this option after you have set the programme and before you press the button 8 . The wash programme can be delayed from 30 min — 60 min — 90 min, 2 hours and then by 1 hour up to a maximum of 20 hours by means of this button.
-
Page 13: Opening The Door After The Programme Has Started
Helpful hints and tips Opening the door after the programme has started First set the machine to pause by pressing the button 8 . If the pilot light 10.2 goes off, after some minutes the door can be opened. If the door remains locked — the pilot light 10.2 is on, this means that the machine is already heating, that the water level is above the bottom edge of the door.
-
Page 14: Removing Stains
Helpful hints and tips Removing stains Stubborn stains may not be removed by just water and detergent. It is therefore advisable to treat them prior to washing. Blood: treat fresh stains with cold water. For dried stains, soak overnight in water with a special detergent then rub in the soap and water.
-
Page 15: Quantity Of Detergent To Be Used
Washing programmes Quantity of detergent to be used The type and quantity of detergent will depend on the type of fabric, load size, degree of soiling and hardness of the water used. Follow the product manufacturers’ instructions on quantities to use. Use less detergent if: •…
-
Page 16
Washing programmes Programme Maximum and Minimum Temperature Detergent Cycle Description Options Compartment Maximum Fabrics Load Type of Laundry 40 — 60 MIX SPIN, RINSE HOLD, 40° STAIN, SENSITIVE, EX‐ Main wash — Rinses — Long spin TRA RINSE Maximum spin speed Max. -
Page 17
Washing programmes Programme Maximum and Minimum Temperature Detergent Cycle Description Options Compartment Maximum Fabrics Load Type of Laundry DELICATES SPIN, RINSE HOLD, 40°- Cold STAIN , TIME SAV‐ Main wash — Rinses — Short spin , EXTRA RINSE Maximum spin speed Max. -
Page 18: Care And Cleaning
Care and cleaning Programme Maximum and Minimum Temperature Detergent Cycle Description Options Compartment Maximum Fabrics Load Type of Laundry FRESH UP SPIN 30° Main wash — Rinses — Short spin Maximum spin speed Max. load 3 kg This programme may be used for quick wash for sport items, or cotton and synthetic items lightly soiled or worn once.
-
Page 19: Maintenance Wash
Care and cleaning Maintenance wash With the use of low temperature washes it is possible to get a build up of residues inside the drum. We recommend that a maintenance wash be performed on a regular basis. To run a maintenance wash: •…
-
Page 20: Drain Pump
Care and cleaning 3. Clean the chamber of dispenser drawer with a brush. Drain pump The pump should be inspected regularly and particularly if: • the machine does not empty and/or spin • the machine makes an unusual noise during draining due to objects such as safety pins, coins etc.
-
Page 21: Cleaning The Water Inlet Filters
Care and cleaning When no more water comes out, un‐ screw the pump and remove it. Always keep a rag nearby to dry up spillage of water when removing the pump. Remove any objects from the pump impeller by rotating it. Put the cap back on the emergency emp‐…
-
Page 22: Emergency Emptying Out
Care and cleaning 1. Turn off the water tap. 2. Unscrew the hose from the tap. 3. Clean the filter in the hose with a stiff brush. 4. Screw the hose back onto the tap. Make sure the connection is tight. 5.
-
Page 23: Frost Precautions
What to do if… is full, put the cap back on the hose. Empty the bowl. Repeat the procedure until water stops flowing out; 6. clean the pump if necessary as previously described; 7. replace the emergency emptying hose in its seat after having plugged it; 8.
-
Page 24
What to do if… Problem Possible cause/Solution The door has not been closed. • Close the door firmly. The plug is not properly inserted in the power socket. • Insert the plug into the power socket. There is no power at the socket. •… -
Page 25
What to do if… Problem Possible cause/Solution Too much detergent or unsuitable detergent (creates too much foam) has been used. • Reduce the detergent quantity or use anoth‐ er one. Check whether there are any leaks from one of the inlet hose fittings. It is not always easy to see this as the water runs down the hose;… -
Page 26: Technical Data
Technical data Problem Possible cause/Solution The electronic unbalance detection device has cut in because the laundry is not evenly distrib‐ uted in the drum. The laundry is redistributed by reverse rotation of the drum. This may hap‐ pen several times before the unbalance disap‐ pears and normal spinning can resume.
-
Page 27: Consumption Values
Consumption values Water supply pressure Minimum 0,05 MPa Maximum 0,8 MPa Maximum Load Cotton 6 kg Spin Speed Maximum 1000 rpm (LS 60840 L) 1200 rpm (LS 62840 L) Consumption values Programme Energy consumption Water consumption Programme duration (KWh) (litres) (Minutes) White Cottons 95°…
-
Page 28
Installation 1. After removing all the packaging, careful‐ ly lay machine on it’s back to remove the polystyrene base from the bottom. 2. Remove the power supply cable and the draining and inlet hose from the hose holders on the rear of the appliance. 3. -
Page 29: Positioning And Levelling
Installation 4. Slide out the relevant plastic spacers. 5. Fill the smaller upper hole and the two large ones with the corresponding plastic plug caps supplied in the bag containing the instruction booklet. Positioning and levelling Install the machine on a flat hard floor. Make sure that air circulation around the machine is not impeded by carpets, rugs etc.
-
Page 30: Water Inlet
Installation Carefully level by screwing the adjustable feet in or out. Never place cardboard, wood or similar materials under the machine to compensate for any unevenness in the floor. Water inlet This appliance must be connected to a cold water supply. 1.
-
Page 31: Electrical Connection
Electrical connection This could be done by tying it to the tap with a piece of string or attaching it to the wall. 2. In a sink drain pipe branch. This branch must be above the trap so that the bend is at least 60 cm above the ground.
-
Page 32: Environment Concerns
Environment concerns WARNING! Should the appliance power supply cable need to be replaced, this must be carried out by a Service Centre. Environment concerns The symbol on the product or on its packaging indicates that this product may not be treated as household waste.
-
Page 36
www.electrolux.com…
Бесплатная доставка
По Москве и большинству городов России
Подробнее
Бесплатное подключение
Профессионально установим технику на готовые коммуникации
Подробнее
Бесплатное хранение
До 365 дней — купите сегодня, а получите когда удобно
Подробнее
Простой возврат и обмен
Что-то не так? Обменяем товар или вернем деньги
Подробнее