Перейти к контенту
![]()
Русские электронные инструкции по эксплуатации
Постоянно обновляемый большой каталог документации по эксплуатации и использованию современных устройств и оборудования на русском языке. Бесплатное скачивание файлов.
Поиск:
Главная
♥ В закладки
Просмотр инструкции в pdf


/%D0%A1%D1%82%D0%B8%D1%80%D0%B0%D0%BB%D1%8C%D0%BD%D1%8B%D0%B5%20%D0%BC%D0%B0%D1%88%D0%B8%D0%BD%D1%8B/%20%D0%BC%D0%B0%D1%88%D0%B8%D0%BD%D0%B0%20%D1%81%20%D1%81%D1%83%D1%88%D0%BA%D0%BE%D0%B9%20Bosch%20Serie|6%20WDU28590OE.jpg)
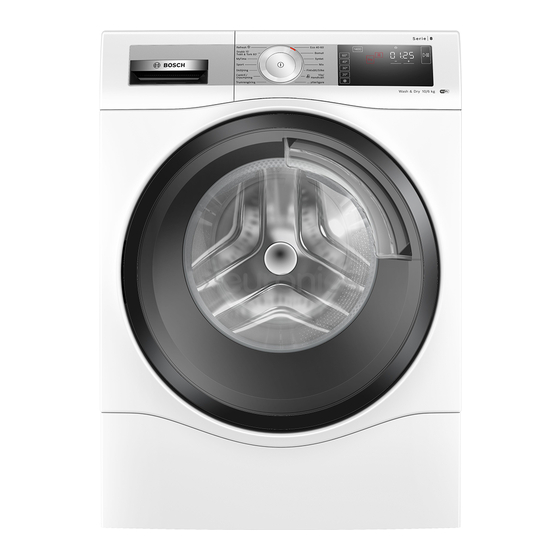
Инструкция по эксплуатации стиральной машины Bosch (Бош) машина с сушкой Bosch Serie|6 WDU28590OE.
Скачать инструкцию к стиральной машине Bosch (Бош) машина с сушкой Bosch Serie|6 WDU28590OE (3,02 МБ)

Инструкции по эксплуатации стиральных машин Bosch (Бош)
« Инструкция к стиральной машине Bosch (Бош) машина узкая Bosch Serie | 2 WLG24060OE
» Инструкция к стиральной машине Bosch (Бош) машина узкая Bosch Serie | 8 WLW24M40OE
Вам также может быть интересно
/%D0%9A%D1%83%D1%85%D0%BE%D0%BD%D0%BD%D1%8B%D0%B5%20%D0%BC%D0%B0%D1%88%D0%B8%D0%BD%D1%8B/MUM48SL.jpeg)
Инструкция к кухонной машине Bosch (Бош) MUM48SL
/%D0%A1%D1%82%D0%B8%D1%80%D0%B0%D0%BB%D1%8C%D0%BD%D1%8B%D0%B5%20%D0%BC%D0%B0%D1%88%D0%B8%D0%BD%D1%8B/Serie%204%20WLG2426FOE.jpg)
Инструкция к стиральной машине Bosch Serie 4 WLG2426FOE
/%D0%A1%D1%82%D0%B8%D1%80%D0%B0%D0%BB%D1%8C%D0%BD%D1%8B%D0%B5%20%D0%BC%D0%B0%D1%88%D0%B8%D0%BD%D1%8B/%20%D0%BC%D0%B0%D1%88%D0%B8%D0%BD%D0%B0%20%D1%81%D1%82%D0%B0%D0%BD%D0%B4%D0%B0%D1%80%D1%82%D0%BD%D0%B0%D1%8F%20Bosch%20Serie%20|%204%20WGA242X4OE.jpg)
Инструкция к стиральной машине Bosch (Бош) машина стандартная Bosch Serie | 4 WGA242X4OE
/%D0%A5%D0%BE%D0%BB%D0%BE%D0%B4%D0%B8%D0%BB%D1%8C%D0%BD%D0%B8%D0%BA%D0%B8/VitaFresh%20KGN39VW21R.jpeg)
Инструкция к холодильнику Bosch (Бош) VitaFresh KGN39VW21R
/%D0%A1%D1%82%D0%B8%D1%80%D0%B0%D0%BB%D1%8C%D0%BD%D1%8B%D0%B5%20%D0%BC%D0%B0%D1%88%D0%B8%D0%BD%D1%8B/WLG%2020265OE.jpg)
Инструкция к стиральной машине Bosch (Бош) WLG 20265OE
/%D0%A1%D1%82%D0%B8%D1%80%D0%B0%D0%BB%D1%8C%D0%BD%D1%8B%D0%B5%20%D0%BC%D0%B0%D1%88%D0%B8%D0%BD%D1%8B/Avantixx%206%20VarioPerfect%20WLK24260OE.jpg)
Инструкция к стиральной машине Bosch Avantixx 6 VarioPerfect WLK24260OE
/%D0%A5%D0%BE%D0%BB%D0%BE%D0%B4%D0%B8%D0%BB%D1%8C%D0%BD%D0%B8%D0%BA%D0%B8/Serie%20|%206%20VitaFresh%20Plus%20KGN39AX32R.jpg)
Инструкция к холодильнику Bosch (Бош) Serie | 6 VitaFresh Plus KGN39AX32R
/%D0%9A%D0%BE%D1%84%D0%B5%D0%BC%D0%BE%D0%BB%D0%BA%D0%B8/TSM6A013B.jpeg)
Инструкция к кофемолке Bosch (Бош) TSM6A013B
Добавить комментарий
Имя *
Email *
Сайт
Комментарий


![]()


Сохранить моё имя, email и адрес сайта в этом браузере для последующих моих комментариев.
- Добавить инструкцию
- Заказать инструкцию
- Политика конфиденциальности
Требуется руководство для вашей Bosch WDU28590OE Стиральная машина с сушилкой? Ниже вы можете просмотреть и загрузить бесплатно руководство в формате PDF. Кроме того, приведены часто задаваемые вопросы, рейтинг изделия и отзывы пользователей, что позволит оптимально использовать ваше изделие. Если это не то руководство, которое вы искали, – свяжитесь с нами.
Ваше устройство неисправно, и в руководстве отсутствует решение? Перейдите в Repair Café для получения бесплатных ремонтных услуг.
Руководство

Рейтинг
Сообщите нам, что вы думаете о Bosch WDU28590OE Стиральная машина с сушилкой, оставив оценку продукта. Хотите поделиться вашими впечатлениями от данного изделия или задать вопрос? Вы можете оставить комментарий в нижней части страницы.
Довольны ли вы данным изделием Bosch?
Да Нет
5 голоса
Часто задаваемые вопросы
Наша служба поддержки выполняет поиск полезной информации по изделиям и отвечает на часто задаваемые вопросы. Если вы заметили неточность в наших часто задаваемых вопросах, сообщите нам об этом с помощью нашей контактной формы.
Моя стирально-сушильная машина издает много шума и / или громко вибрирует, что я могу с этим поделать? Проверенный
Возможно, стирально-сушильная машина не выровнена. Вы можете сделать это, отрегулировав ножки до идеального уровня. Проблема также может быть вызвана тем, что в машину загружено слишком много одежды. Если это не причина вашей проблемы, вам следует связаться с производителем.
Это было полезно (1268)
Моя стирально-сушильная машина пахнет, что мне делать? Проверенный
Есть стирально-сушильные машины с функцией самоочистки. Если эти функции недоступны, можно добавить 100 мл белого уксуса или 100 г кристаллов соды и запустить стирально-сушильную машину по программе 90 ℃.
Это было полезно (543)
В чем разница в использовании стиральной машины с сушилкой и отдельной стиральной машины и сушилки? Проверенный
Самым большим преимуществом стирально-сушильной машины является то, что она занимает меньше места. Однако отдельная сушилка сможет сушить больше, чем стирально-сушильная машина. Стирально-сушильная машина также потребляет относительно больше энергии и требует больше времени.
Это было полезно (298)
Могу ли я подключить стиральную машину с сушкой к удлинителю? Проверенный
Приборы, требующие большого количества энергии, такие как стиральная машина с сушкой, не могут быть подключены ко всем удлинителям. Посмотрите, какова потребляемая мощность стирально-сушильной машины, которая указана в ваттах, и проверьте, может ли удлинитель справиться с этим. Существуют удлинители с более толстыми кабелями, предназначенные для работы с более крупными приборами.
Это было полезно (256)
- Manuals
- Brands
- Bosch Manuals
- Washer/Dryer
- WDU8H542SN
- User manual and installation instructions
-
Contents
-
Table of Contents
-
Troubleshooting
-
Bookmarks
Quick Links
Washer dryer
WDU8H542SN
[en]
User manual and installation
instructions
Related Manuals for Bosch WDU8H542SN
Summary of Contents for Bosch WDU8H542SN
-
Page 1
Washer dryer WDU8H542SN [en] User manual and installation instructions… -
Page 2: Table Of Contents
Futher information and explanations are available online: Table of contents 1 Safety ………. 4 6 Before using for the first time … 20 1.1 General information…. 4 6.1 Starting an empty washing cycle ……… 20 1.2 Intended use……. 4 1.3 Restriction on user group… 4 7 Display ……..
-
Page 3
20 Transportation, storage and 14.13 Cancelling the drying pro- disposal …….. 55 gramme …….. 35 20.1 Removing the appliance .. 55 14.14 Unloading the laundry .. 35 20.2 Inserting the transit bolts.. 55 14.15 Switching off the appli- ance…….. 35 20.3 Using the appliance again .. 55 20.4 Disposing of old appliance .. 56 15 Childproof lock…… -
Page 4: Safety
en Safety 1 Safety Observe the following safety instructions. 1.1 General information ¡ Read this instruction manual carefully. ¡ Keep the instruction manual and the product information safe for future reference or for the next owner. ¡ Do not connect the appliance if it has been damaged in transit. 1.2 Intended use Only use this appliance: ¡…
-
Page 5: Safe Installation
Safety en 1.4 Safe installation Take note of the safety instructions when installing the appliance. WARNING ‒ Risk of electric shock! Incorrect installation is dangerous. ▶ Connect and operate the appliance only in accordance with the specifications on the rating plate. ▶ Connect the appliance to a power supply with alternating cur- rent only via a properly installed socket with earthing.
-
Page 6: Safe Use
en Safety ▶ If the power cord is too short and a longer one is not available, please contact an electrician to have the domestic installation adapted. WARNING ‒ Risk of injury! The high weight of the appliance may result in injury when lifted. ▶…
-
Page 7
Safety en ▶ If the appliance or the power cord is damaged, immediately un- plug the power cord or switch off the fuse in the fuse box and turn off the water tap. ▶ Call customer services. → Page 56 An ingress of moisture can cause an electric shock. ▶… -
Page 8
en Safety WARNING ‒ Risk of explosion! Highly flammable objects such as lighters or matches may ignite during the drying process. ▶ Remove all highly flammable objects from any pockets in your laundry before the drying process. Unwashed laundry that has come into contact with solvents, oil, wax, wax remover, paint, grease or stain remover may ignite when drying is in progress. -
Page 9: Safe Cleaning And Maintenance
Safety en CAUTION ‒ Risk of scalding! When you wash at high temperatures, the detergent solution gets hot. ▶ Do not touch the hot detergent solution. CAUTION ‒ Risk of chemical burns! If the detergent drawer is opened, detergent and care products may spray out from the appliance. Contact with eyes or skin may cause irritation.
-
Page 10
en Safety WARNING ‒ Risk of poisoning! Poisonous fumes may be given off if you use cleaning agents that contain solvents. ▶ Do not use cleaning agents that contain solvents. -
Page 11: Preventing Material Damage
Preventing material damage en Make sure that the valve housing ▶ 2 Preventing material for the water inlet hose does not come into contact with its sur- damage roundings and is not subjected to any external forces. Follow these instructions to avoid ma- Ensure that the inner diameter of terial damage and damage to the ap- ▶…
-
Page 12: Environmental Protection And Saving Energy
en Environmental protection and saving energy Do not use cleaning products with Reduce the washing temperature for ▶ a high alcohol content. lightly and normally soiled laundry. Do not use hard scouring pads or ▶ a At lower temperatures, the appli- cleaning sponges.
-
Page 13: Installation And Connection
Installation and connection en Replace the accessories in ques- ▶ 4 Installation and con- tion before operating the appli- ance. nection → «Accessories», Page 31 Note: The appliance has been tested 4.1 Unpacking the appliance at the factory to check it is in working order. As a result, water stains may ATTENTION! remain in the appliance.
-
Page 14
en Installation and connection If the appliance is tilted at an angle 4.4 Removing the transit greater than 40°, residual water may bolts leak out of the appliance and cause material damage. The appliance is secured for trans- Tilt the appliance carefully. portation using transit bolts on the ▶… -
Page 15: Connecting The Appliance
Installation and connection en Remove the power cable from the Press down on the 4 cover caps. holder. 4.5 Connecting the appliance Remove the 4 sleeves. Connecting the water inlet hose WARNING Risk of electric shock! The appliance contains live parts. Touching live parts is dangerous. Do not immerse the electrical ▶…
-
Page 16: Aligning The Appliance
en Installation and connection ATTENTION! 4.6 Aligning the appliance When draining, the water outlet hose In order to reduce noise and vibra- is subject to water pressure and may tion and to prevent the appliance come loose from the installed con- from moving, align the appliance cor- nection point.
-
Page 17: Connecting The Appliance To The Electricity Supply
Installation and connection en Screw the lock nuts tightly against the housing using a WAF 17 wrench. In doing so, hold the foot tight and do not adjust its height. 4.7 Connecting the appliance to the electricity supply Note: Your electrical domestic install- ation for this appliance must comply with the local legal provisions and safety regulations, and should in-…
-
Page 18: Familiarising Yourself With Your Appliance
en Familiarising yourself with your appliance 5 Familiarising yourself with your appliance 5.1 Appliance You can find an overview of the parts of your appliance here. On certain models, specific details such as the colour and shape may differ from those pictured. Maintenance flap for the drain Water inlet hose → Page 15 pump → Page 42 Door…
-
Page 19: Control Panel
Familiarising yourself with your appliance en Measuring aid for liquid deter- gent → «Inserting the measuring aid for liquid detergent», Page 33 Dispenser II: detergent for the main wash Compartment : Fabric softener Compartment I: Detergent for prewash 5.3 Control panel You can use the control panel to configure all functions of your appliance and to obtain information about the operating status.
-
Page 20: Before Using For The First Time
en first time tivate the activated settings by re- Pour washing powder into com- peatedly pressing on the relevant partment II. buttons on the display. ATTENTION! Pressing on the display with force may cause damage. Do not apply heavy pressure on ▶ the display.
-
Page 21: Display
Display en 7 Display The display shows the current settings, options or relevant information. Example: Display Display Designation Description 0:40 Programme dura- Approximate expected programme dura- tion/programme tion or programme time remaining. time remaining 8h «Ready in» time → «Buttons», Page 23 6,0 kg Recommended The maximum load capacity for the selec-…
-
Page 22
en Display Display Designation Description Wi-Fi ¡ Lights up: The appliance is connected to your home network. ¡ Flashes: The appliance is trying to con- nect to your home network. → «Home Connect «, Page 36 Energy manager The appliance is connected to the smart energy system (energy manager). -
Page 23: Buttons
Buttons en 8 Buttons Button Selection Description (mains ¡ Switch on Switch the appliance on or off. switch) ¡ Switch off — 90° (Tem- – 90 °C Adjust the temperature in °C. perature) — 1400 — 1400 rpm Adjust the spin speed or deactivate (Spinspeed) the spin cycle.
-
Page 24
en Buttons Button Selection Description (Easy Iron) ¡ Activate Activate or deactivate the reduced creasing programme. ¡ Deactivate In order to reduce creasing in the laundry, the spin cycle and the spin speed are adapted. The laundry is damp enough after washing that it needs to be hung out on a washing line. -
Page 25
Buttons en Button Selection Description ¡ Activate The dryness level defines how damp (Cupboard or dry the laundry is after the pro- ¡ Deactivate Dry+) gramme ends. (Remote ¡ Activate → «Remote start», Page 38 start) ¡ Deactivate ¡ Open the Home Connect menu… -
Page 26: Dryness Level
en Dryness level 9 Dryness level In some programmes, a dryness level is predefined. The dryness level defines how dry or damp your laundry is after the programme ends. Dryness level Laundry Drying result Multi-layered, thick laundry The laundry is dry. that does not dry readily.
-
Page 27: Programmes
Programmes en 10 Programmes Note: The laundry’s care labels provide you with additional information on pro- gramme selection. Programme Description Max. Max. load load (kg) (kg) Wash Dry- Bomull Wash hard-wearing items made from cotton, 10,0 (Cottons) linen or blended fabrics. Also suitable as a short programme for nor- mally soiled laundry when you activate Speed .
-
Page 28
en Programmes Programme Description Max. Max. load load (kg) (kg) Wash Dry- ¡ Max. 1400 rpm Wash items made from cotton, linen, or syn- thetic or blended fabrics. Suitable for lightly soiled laundry. Programme setting: ¡ Max. 60 °C ¡ Max. 1400 rpm Fintvätt/Silke Wash delicate, washable items made from –… -
Page 29
Programmes en Programme Description Max. Max. load load (kg) (kg) Wash Dry- … ytterligare Select additional programmes directly via the – – (App Pro- Home Connect app. grams) A description of the programmes can be found in the Home Connect app. Note: Your appliance must be connected to your home network and registered in your Home Connect app. -
Page 30
en Programmes Programme Description Max. Max. load load (kg) (kg) Wash Dry- Refresh Reduce creases and air-based odours from – suits and fabrics made of linen or wool. Tip: Remove the laundry immediately after the programme has ended to prevent creasing. Notes ¡… -
Page 31: Accessories
QR code in the table of contents or on www.bosch- – Remove curtain hooks and lead strips or use a mesh laundry home.com.
-
Page 32: Detergents And Care
¡ You can find further information in the digital instruction manual by 14.2 Setting a programme scanning the QR code in the table of contents or on www.bosch- Turn the programme selector and home.com. set the required programme. ¡ Observe the information on safety → «Programmes», Page 27…
-
Page 33: Loading Laundry
operation en Press to call up the saved pro- Insert the measuring aid. gramme. Note: To overwrite the saved pro- gramme, repeat the steps above. 14.5 Loading laundry Note: To prevent creasing, note the maximum load for the programmes. → «Programmes», Page 27 Requirement: The laundry is pre- pared.
-
Page 34: Adding Detergent And Care Product
en operation Fold the measuring aid down and is selected, the laundry is not click it into place. spun and the water is drained after rinsing. Note: If you do not remove the laun- dry once the programme has ended, the crease-reduction function starts after 15 minutes and takes approx.
-
Page 35: Cancelling The Washing Programme
Childproof lock en Close the door. Wipe the rubber gasket dry and re- move any foreign objects. Press . 14.12 Cancelling the washing programme Press . Open the appliance door. The appliance door remains locked for safety reasons if the temperature and water levels are high.
-
Page 36: Home Connect
WPS function in the digital instruction manual by scanning the QR code in the table of Requirements contents or on www.bosch- ¡ Your router has a WPS function. home.com. ¡ Wi-Fi is activated on the router. The Home Connect services are not ¡…
-
Page 37: Connecting The Appliance To A Wlan Home Network (Wi-Fi) Without Wps Func- Tion
Home Connect en Reconnect the appliance to the Open the Home Connect app on ‒ Wi-Fi home network with WPS your mobile device and carry out function. the steps in the app. Connect the appliance to the In the Home Connect app, enter Home Connect app. → Page 37 the network name (SSID) and password (key) for your home net- work.
-
Page 38: Activating Wi-Fi On The Appliance
en Home Connect Once your appliance is displayed Press . in the Home Connect app, carry a The display shows «YES» . out the last steps in the Press . Home Connect app. a The network settings are reset. a If the display shows «con» , the ap- a If End is shown on the display, the pliance is connected to the network settings are reset.
-
Page 39: Data Protection
Home Connect en 16.8 Data protection Please see the information on data protection. The first time your appliance is registered on a home network connected to the Internet, your appliance will transmit the following types of data to the Home Connect server (initial registration): ¡…
-
Page 40: Basic Settings
en Basic settings 17 Basic settings You can configure the basic settings for your appliance to meet your needs. 17.1 Overview of the basic settings Basic setting Programme Value Description position End signal 0 (off) Set the volume of the signal at the 1 (quiet) end of the programme.
-
Page 41: Changing The Basic Set- Tings
Note: You can find further information in the digital instruction manual by scanning the QR code in the table of contents or on www.bosch- home.com. 18.1 Cleaning the drum CAUTION Risk of injury!
-
Page 42: Cleaning The Drain Pump
en Cleaning and servicing Fit the insert and click it into place. Open and remove the service flap. Clean the opening for the deter- Slide a sufficiently large container gent drawer. under the opening. Push in the detergent drawer. Take the drain hose out of the holder.
-
Page 43
Cleaning and servicing en Cleaning the drain pump CAUTION — Risk of scalding! When you wash at high temperat- Requirement: The drain pump is ures, the detergent solution gets empty. → Page 42 hot. Since water may remain in the Do not touch the hot detergent ▶… -
Page 44
en Cleaning and servicing Screw the pump cap as far as it will go. 90° The handle on the pump cap must be in a vertical position. Insert and close the service flap. -
Page 45: Troubleshooting
Troubleshooting en 19 Troubleshooting You can rectify minor faults on your appliance yourself. Read the troubleshoot- ing information before contacting after-sales service. This will avoid unneces- sary costs. WARNING Risk of electric shock! Incorrect repairs are dangerous. Repairs to the appliance should only be carried out by trained specialist ▶…
-
Page 46
en Troubleshooting Fault Cause and troubleshooting The display goes out Energy-saving mode is active flashes. Press any button. ▶ a The symbol lights up again. «E:30 / -80» Drain pipe or water outlet hose is blocked. Clean the drain pipe and the water outlet hose. ▶… -
Page 47
Troubleshooting en Fault Cause and troubleshooting The filter in the water inflow is blocked. Clean the water inflow filter. ▶ The tap is turned off. Turn on the tap. ▶ The water inlet hose is kinked or jammed. Ensure that the water inlet hose is not kinked or ▶… -
Page 48
en Troubleshooting Fault Cause and troubleshooting The appliance is not Check whether the lighting in your kitchen or other ▶ working. appliances are working. The programme does You have not pressed . not start. Press . ▶ Door is not closed. Close the door. -
Page 49
Troubleshooting en Fault Cause and troubleshooting The water is not drain- Immediate measure: Mix one tablespoon of fabric ▶ ing. softener with 0.5 litres of water and pour the mix- ture into the left-hand compartment (not for outdoor clothing, sportswear or items stuffed with down). Reduce the amount of detergent for the next wash- ▶… -
Page 50
en Troubleshooting Fault Cause and troubleshooting Vibrations and move- Appliance is not correctly aligned. ment of the appliance → «Aligning the appliance», Page 16 ▶ whilst spinning. The appliance feet are not fixed. Secure the appliance feet. ▶ → «Aligning the appliance», Page 16 Transit bolts have not been removed. → «Removing the transit bolts», Page 14. -
Page 51
Troubleshooting en Fault Cause and troubleshooting The spin programme Note: Where possible, mix large and small items in does not start. the drum. Different sized items of laundry distribute themselves better during the spin cycle. Start the Centrif. programme. ▶ Loud noises during Appliance is not correctly aligned. -
Page 52
en Troubleshooting Fault Cause and troubleshooting The spin result is not Redistribute the laundry in the drum. ▶ satisfactory. The laun- Note: Where possible, mix large and small items in dry is too wet/too the drum. Different sized items of laundry distribute damp. -
Page 53
Troubleshooting en Fault Cause and troubleshooting Drying programme Door is not closed. does not start. Close the door. Press to start the programme. No drying programme is selected. Select a suitable drying programme. ▶ → «Programmes», Page 27 The laundry is too Unsuitable programme for the type of fabric. -
Page 54
en Troubleshooting Fault Cause and troubleshooting Fan noise during the Process fan is active. washing phase. Not a fault – normal operating noise. ▶ The programme dura- The programme operation is optimised electronically. tion changes during This may change the programme duration. the wash cycle. -
Page 55: Emergency Release
Page 13 and in the digital instruction manual by → «Starting an empty washing scanning the QR code in the table of cycle», Page 20. contents or on www.bosch- home.com. Turn off the tap. Empty the water inlet hose. Switch off the appliance.
-
Page 56: Disposing Of Old Appliance
en Customer Service 20.4 Disposing of old appli- 21 Customer Service ance Function-relevant genuine spare parts Valuable raw materials can be re- according to the corresponding Eco- used by recycling. design Order can be obtained from Customer Service for a period of at WARNING least 10 years from the date on Risk of harm to health!
-
Page 57: Consumption Values
Consumption values en 22 Consumption values The following information is provided in accordance with the EU Ecodesign Regulation. The values specified for programmes other than Eco 40-60 are only given as a guide and were determined in accordance with the applicable standards EN60456 and EN62512. Programme Load Pro-…
-
Page 58: Technical Data
¡ Networked standby mode A detailed RED Declaration of Con- (Wi-Fi): 2,00 W formity can be found online at Water pressure ¡ Minimum: www.bosch-home.com among the 100 kPa additional documents on the product (1 bar) page for your appliance. ¡ Maximum: 1000 kPa (10 bar) Length of the wa- 150 cm…
-
Page 59: Declaration Of Conformity
2.4 GHz band (2400–2483.5 MHz): requirements. Max. 100 mW A detailed Declaration of Conformity 5 GHz band (5150–5350 MHz + can be found online at www.bosch- 5470–5725 MHz): Max. 100 mW home.co.uk among the additional documents on the product page for your appliance. UK (NI) 5 GHz WLAN (Wi-Fi): For indoor use only.
-
Page 60
Expert advice for your Bosch home appliances, help with problems or a repair from Bosch experts. Find out everything about the many ways Bosch can support you: www.bosch-home.com/service Contact data of all countries are listed in the attached service direct- ory.