- Manuals
- Brands
- Siemens Manuals
- Telephone
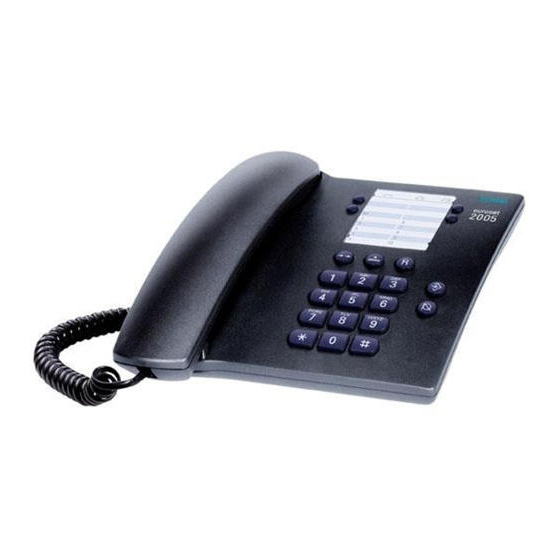
- euroset 2005
- Operating instructions manual
-
Contents
Table of Contents -
Troubleshooting
-
Bookmarks
Quick Links
Operating instructions
Key functions
Redial / Pause key
Recall key
Repertory keys
euroset 2005
Speed dialing keys 1-9
+
and numeric keypad
Set / Mute key
H a n d s e t v o l u m e c o n —
trol key
Related Manuals for Siemens euroset 2005
Summary of Contents for Siemens euroset 2005
-
Page 1: Operating Instructions
2005 Operating instructions Key functions Redial / Pause key Speed dialing keys 1-9 and numeric keypad Recall key Set / Mute key Repertory keys H a n d s e t v o l u m e c o n -…
-
Page 2: Connections
Dispose of the telephone in an environmentally friendly manner in accordance with the relevant legislation. Do not forget to include the User’s Guide when passing on your Euroset 2005 to a third party. Recommendations for telephone installation Do not expose the telephone to direct sunlight or other heat s o u r c e s .
-
Page 3: Last Number Redial
Saving and dialing call numbers Saving and dialing call numbers Saving and dialing call numbers Saving and dialing call numbers Saving and dialing call numbers Last number redial The last number dialed is automatically saved. D i a l i n g : D i a l i n g : D i a l i n g : D i a l i n g :…
-
Page 4: Mute
Adjusting the telephone Adjusting the telephone Adjusting the telephone Adjusting the telephone Adjusting the telephone Mute You can deactivate the telephone’s microphone. During a call: Press mute key. To reactivate microphone: Press the mute key again. Setting the handset volume The handset volume can be set to 2 levels.
-
Page 5: Special Functions / Consultation
Operation at private PABXs Operation at private PABXs Operation at private PABXs Operation at private PABXs Operation at private PABXs Special functions / consultation You can conduct a consultation call or forward a call while a trunk call is in progress. To do this, press the recall key .
-
Page 6: Wall Mounting
Wall mounting Wall mounting (see diagram) You can install the telephone on the wall once the connecting cords have been attached: Using the template provided, drill two holes (5 mm ). Insert dowel plugs and screw in flat-head wood screws leaving a slight gap between the screw head and the wall (screws must not be flush).
Инструкцию для Siemens Euroset 2005 GR на русском языке, в формате pdf можно скачать с нашего сайта. Наш каталог предоставляем Вам инструкцию производителя фирмы Siemens, которая была взята из открытых источников. Ознакомившись с руководством по эксплуатации от Siemens, Вы на все 100% и правильно сможете воспользоваться всеми функциями устройства.
Для сохранения инструкции «Телефон DECT Siemens Euroset 2005 GR» на русском языке на вашем компьютере либо телефоне, нажмите кнопку «Скачать инструкцию». Если активна кнопка «Инструкция онлайн», то Вы можете просмотреть документ (manual), в своём браузере онлайн.
Если у Вас нет возможности скачать инструкцию по эксплуатации либо просмотреть её, Вы можете поделиться ссылкой на эту страницу в социальных сетях и при удобном моменте скачать инструкцию. Либо добавьте эту страницу в закладки Вашего браузера, нажав кнопку «Добавить страницу в закладки браузера».
Руководства Siemens EUROSET2005 Размер файлов: 5178 KB, Язык: English, Формат: pdf, Платформа: Windows/Linux, Дата: 2017-03-27
На данной странице вы можете скачать руководства Siemens EUROSET2005. Мы предлагаем вам ознакомиться с руководством пользователя, инструкцией по сервисному обслуживанию и ремонту.
Также здесь вы найдете список заказных номеров на комплектующие Siemens EUROSET2005.
Все файлы предоставляются исключительно в ознакомительных целях. И не являютя руководством по ремонту, а направлены лишь на то чтобы помочь вам более детально ознакомиться с принципом построения устройства.
Содержимое представленных здесь руководств требуют от вас знания технического английского языка.
Если вы собираетесь скачать руководство по сервисному обслуживанию Siemens EUROSET2005, иными словами сервис мануал, вы дожны обладать хотя бы минимальными познаниями в области электроники и пониманием базовых принципов работы электромеханических устройств.
Для просмотра руководств вам понадобится Adobe Acrobat Reader версии 9 и выше либо другая программа для просмотра pdf файлов.
В связи с популярностью информации представленной на сайте и ее бесплатного предоставления конечному пользователю, убедительная просьба использовать специальные программные продукты для многопотокового скачивания файлов.
Руководства для Siemens EUROSET2005
- Руководство пользователя (User manual)
- Руководство по сервисному обслуживанию (Service manual)
- Руководство по ремонту (Repair manual)
- Перечень комплектующих (PartList)
Профи
(892),
закрыт
5 лет назад
Oleg Petrenko
Ученик
(171)
7 лет назад
Инструкция на русском языке составлена некорректно.
Чтобы поменять громкость и мелодию необходимо:
1. Снять трубку
2. Нажать клавишу сохранения (уголок со стрелкой)
3. Нажать клавишу решетка
4. Нажать последовательно две цифровые клавиши от 0 до 9 (Например, 23 — вторая мелодия, третий уровень громкости)
5. Нажать клавишу сохранения (уголок со стрелкой)
6. Положить трубку.
Проверить установленную мелодию и громкость можно путем звонка с другого телефона.
Владимир ВоробьевУченик (144)
5 лет назад
У меня вопрос несколько под другим углом: как сохранить выбор режима без звука навсегда? Даже в инструкции написано, что для выключения звука набираем «0» и сохраняем «до первого снятия трубки».
Информации не нашёл. Модель телефона siemens euroset 5005.
Дмитрий Ефимкин
Знаток
(452)
5 лет назад
Я согласен с Olegom Petrenko, что инструкция немного не корректная. Но методом тыка выяснилось, что Oleg немного не прав. У телефона всего 3 мелодии и 3 уровня громкости. Мелодия №1 ставить клавишами 1(тихо), 2 (средняя) или 3 (громкая). Мелодия №2 ставить клавишами 4(тихо), 5 (средняя) или 6 (громкая). Мелодия №3 ставить клавишами 7(тихо), 8 (средняя) или 9 (громкая). 0 — бесшумный. А установка по такому же алгоритму, как было описано выше:
1. Снять трубку
2. Нажать клавишу сохранения (уголок со стрелкой)
3. Нажать клавишу решетка
4. Нажать цифровые клавиши от 0 до 9 (мелодия №1 (1,2 или 3), мелодия №2 (4,5 или 6), мелодия №3 (7,8 или 9)
5. Нажать клавишу сохранения (уголок со стрелкой)
6. Положить трубку.
Saving and dialing call numbers
Saving and dialing call numbers
Saving and dialing call numbers
Saving and dialing call numbers
Saving and dialing call numbers
The last number dialed is automatically saved.
D i a l i n g :
D i a l i n g :
D i a l i n g :
D i a l i n g :
D i a l i n g :
Repertory dialing and speed dialing
You can store call numbers as
(a) repertory
repertory numbers on the 4 repertory keys
repertory
repertory
repertory
speed dialing
speed dialing
(b) speed dialing
speed dialing
speed dialing numbers on the digit keys (max. 21 digits).
Saving: (or saving with notebook function)
Saving: (or saving with notebook function)
Saving: (or saving with notebook function)
Saving: (or saving with notebook function)
Saving: (or saving with notebook function)
either…
either…
either…
either…
either…
or…
or…
or…
or…
or…
D i a l l i n g :
D i a l l i n g :
D i a l l i n g :
D i a l l i n g :
D i a l l i n g :
Dialling a repertory number
Dialling a repertory number
Dialling a repertory number
Dialling a repertory number
Dialling a repertory number
N o t e s o n s a v i n g a n d d e l e t i n g r e p e r t o r y a n d s p e e d
N o t e s o n s a v i n g a n d d e l e t i n g r e p e r t o r y a n d s p e e d
N o t e s o n s a v i n g a n d d e l e t i n g r e p e r t o r y a n d s p e e d
N o t e s o n s a v i n g a n d d e l e t i n g r e p e r t o r y a n d s p e e d
N o t e s o n s a v i n g a n d d e l e t i n g r e p e r t o r y a n d s p e e d
d i a l n u m b e r s
d i a l n u m b e r s
d i a l n u m b e r s
d i a l n u m b e r s
d i a l n u m b e r s
and
only dialled with DTMF dialling.
The following steps delete numbers saved to the repertory or speed
dial keys:
The number entered is longer than 21 digits.
Saving a number will delete the previous content of the memory.
D i a l l i n g p a u s e s
D i a l l i n g p a u s e s
D i a l l i n g p a u s e s
D i a l l i n g p a u s e s
D i a l l i n g p a u s e s
One or more dialling pauses (not at 1st digit) can be entered using
Pauses are transferred to the memory and are necessary for certain
extension systems (e.g.: 0
Dialling a dialling pause within the first 5 digits:
Dialling a dialling pause within the first 5 digits:
Dialling a dialling pause within the first 5 digits: The entire number
Dialling a dialling pause within the first 5 digits:
Dialling a dialling pause within the first 5 digits:
saved is dialled, including the 2-second dialling pause.
Dialling a dialling pause after the first 5 digits:
Dialling a dialling pause after the first 5 digits:
Dialling a dialling pause after the first 5 digits:
Dialling a dialling pause after the first 5 digits: The portion of the
Dialling a dialling pause after the first 5 digits:
number saved after the pause is only dialled after pressing the
k e y .
Lift the handset, press the redial key.
Lift handset, (or with notebook function: during a call)
press Set key.
As repertory
As repertory
As repertory
As repertory
As repertory
Press repertory key;
As speed dial
As speed dial
As speed dial
As speed dial
As speed dial
Press speed dial key and speed dial number (number
key);
Enter number for repertory or speed dial.
Press Set key, (or after the call) replace handset.
Lift handset, press
repertory key.
Y o u c a n a l s o d i a l
a n y a d d i t i o n a l
digits.
are saved regardless of the set dialling mode but are
Dialling a speed dial number
Dialling a speed dial number
Dialling a speed dial number
Dialling a speed dial number
Dialling a speed dial number
2368).
3
(max. 21 digits) or
Lift handset, press
speed dial key.
P r e s s s p e e d d i a l
n u m b e r ( n u m b e r
key).
.