Знаток
(394),
на голосовании
3 года назад
Голосование за лучший ответ
Борис Капитанов
Мудрец
(12154)
3 года назад
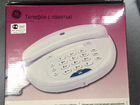
Инструкции нет. Но можно попробовать догадаться, экспериментально. Например, так: снимаете трубку, нажимаете любую кнопку A, B или С — что справа, на клавиатуре набираете нужный номер и жмёте кнопку STORE. По идее, номер должен быть запомнен под той буквой, которую вы нажали вначале. Что-бы набрать этот номер: снимаете трубку, и нажимаете кнопку с соответствующей буквой. Алгоритм, примерно такой, хотя возможны нюансы в очерёдности нажатия кнопок.
1 / 2
2 / 2

❮
❯
200 ₽
Московская область, Щёлково
Обновлено: 03.11.2021
Кнопочный Телефон с памятью
Похожие объявления
Рабочий, в отличном состоянии….
500 ₽
Щёлково

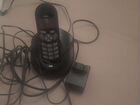
Телефон с цветным дисплеем, ростест, все работает, отличный внешний вид, удобно пользоваться в квартире трубка без проводов. В комплекте аккумулятор и блок питания. Цена за один….
1 000 ₽
Щёлково
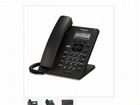
SIP — Телефон Panasonic в отличном состоянии….
1 800 ₽
Щёлково

9 шт DA610 — белые ПО 400 руб за ШТУКУ…
400 ₽
Щёлково
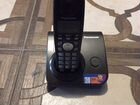
В отличном состоянии, все комплектующие в сборе…
500 ₽
Щёлково
Model EX29350
Speakerphone
User s Guide
Thomson Asia Limited
3/F.,Delta House,3 On Yiu Street ,
Siu Lek Yuen,Shatin,Hong Kong
is a trademark of General Electic company used under license
to Thomson Inc.Indianapolis,IN 46290
I
NTRODUCTION
Your Caller ID phone stores and displays specific
information, provided by your local telephone company, to
subscribers of Caller ID or similar caller identification
services. You must subscribe to one of these services in
order to use this unit.
Your Caller ID phone enables you to:
Identify callers before you answer the phone.
Record up to 60 Caller ID messages sequentially.
Know who called while you were away.
To get the most from your new phone, we suggest that
you take a few minutes right now to read through this
user’s guide.
IMPORTANT: In order to use this unit, you must subscribe to
either the standard Number Caller ID Service.
B
Y
B
EFORE
OU
EGIN
P
C
ARTS
HECKLIST
Make sure your package includes the items:
1.
Handset Coiled Cord
2.
Corded Handset
3.
Base
4.
Telephone Line Cord
M
J
R
ODULAR
ACK
EQUIREMENTS
You need an RJ11 type modular phone jack, which is the
most common type of phone jack. If you don’t have a
modular jack, call your local phone company to find out
how to get one installed.
I
T
P
NSTALLING
HE
HONE
D
ESKTOP INSTALLATION
1. Plug the coiled cord into the corded handset and the base.
2. Push the switch on the battery door to unlock the
battery door.(Push the switch to «
» position.)
3. Remove the battery compartment door.
4. Insert 3 sized AA batteries. (Not include in package)
The unit will be at its optimal performance provided that
you have installed the 3 pieces AA sized dry batteries.
5. Put the compartment door back on.
6. Push the switch on the battery door to lock the battery
door.(Push the switch to «
«position.)
7. Plug the telephone line cord into the modular jack and
into the TEL. LINE jack on the back of the base.
NOTE: The phone automatically defaults to touch-tone dialing.
To change to pulse (rotary) dialing, see «Tone/Pulse Dialing». If
you don’t know which type of service you have, check with the
phone company.
LCD Display Icons
1.
: SPEAKERPHONE
2.
: LOW BATTERY INDICATOR
3. MUTE : MUTE
4.
: NUMBER OF CALLS
5. NEW : NEW CID
6.
: VOICE MAIL
7. REP : REPEAT
8.
: TIME
9.
: DATE
M
D
10. AM : MORNING
11. PM : AFTERNOON
F
K
UNCTION
EY
1. SPEAKER
2. REDIAL
3. VOL
4. CONTRAST
5. STORE
6. DIAL
7. FLASH
8. MUTE
9. DEL
10. <REVIEW>
11. MENU
S
U
ET
P
T
/P
D
S
ONE
ULSE
IALING
ELECTION
Use a tooling to move T/P switch in the bottom to set
dialing mode. (T: tone or P: pulse.)
NOTE: The phone is shipped in Tone Dialing Mode from the
manufacturer.
F
T
S
LASH
IME
ETTING
Using a tooling to move FLASH switch in the bottom to
set FLASH timing. (100ms/300ms/600ms.)
D
A
T
S
ATE
ND
IME
ETTING
1. Press «MENU» button, LCD displays «set 1 date».
2. Press «MENU» button to enter date/time setting mode.
3. Press 0~9 button to input the year, date and time.
4. Press «DEL» button to save the setting and exit setting
mode.
L
A
C
S
OCAL
REA
ODE
ETTING
1. Press «MENU» button, LCD displays «set 1 date».
2. Press » < » or » > » button, LCD displays «set 2 code».
3. Press «MENU» button to enter local area code setting.
4. Press 0~9 button to input local area code.
5. Press «DEL» button to save the setting and exit setting
mode.
R
L
S
INGER
EVEL
ETTING
T
here are total 3 ring levels. (HI/MID/LO)
Move ring volume switch in the back of the base to set
Ringer level.
R
V
ECEIVE
OLUME
There are total 3 receive volume levels. (HI/MID/LO)
While on the phone, press the «VOL» button to adjust the
receive volume of handset or speaker.
(Volume «Lo» displays «
«, «Mid» displays «
«, «Hi»
displays «
«.)
F
T
S
LASH
IME
ETTING
There are three flash timings for selection.
Move the hard switch for selecting flash timing on the
bottom to select proper flash timing .100ms ,300ms ,or
600ms.
P
B
HONE
ASICS
I
U
I
N
SE
NDICATOR
The «IN USE» indicator will light up when the phone is on the line.
S
I
PEAKER
NDICATOR
The SPEAKER indicator will light up when the speaker is
activated.
R
A C
ECEIVING
ALL
1. Check the display to see who is calling.
2. Press the «SPEAKER» button or pick up the handset to
answer the phone.
3. Press the «SPEAKER» button again or put the handset
on cradle to hang up.
M
A C
AKING
ALL
To make a call, press the «SPEAKER» button or pick up