- Manuals
- Brands
- Helion Manuals
- Monocular
- 2 XP50 PRO
- Manual
-
Contents
-
Table of Contents
-
Troubleshooting
-
Bookmarks
Quick Links
Summary of Contents for Helion 2 XP50 PRO
-
Page 1
Helion 2 Pro Manual… -
Page 2
Content Description Package Contents Features Components and Controls Button Operation Using the Battery Pack Battery Charging Battery Installation Precautions External Power Supply Powering on and Image Setting Microbolometer Calibration Discrete Digital Zoom Status Bar Quick Menu Functions Main Menu Functions Enter the Main Menu Mode Image Detail Boost… -
Page 3
(fog, smog, rain) and beyond obstacles like branches, tall grass, dense foliage, etc. known to hinder target detection. Helion 2 Pro thermal imaging scopes do not require an external source of light and are not affected by bright light exposure. -
Page 4: Package Contents
Package Contents Helion 2 Pro Thermal Monocular IPS7 rechargeable battery Battery Charger Power adapter USB cable Carrying case Hand strap Quick-Start guide Lens cloth Warranty card…
-
Page 5
Features NETD less than 25 mK 4 operating modes: Forest, Rocks, Identification, User 3 calibration modes: (Manual, Semi-Automatic, Automatic) 8 color display palettes Defective pixel repair Image Detail Boost technology Stadiametric rangefinder Display-Off function Functional and ergonomic design All-metal, light-alloy body Updatable firmware Wide operating temperature range of -25 to +50°… -
Page 6: Components And Controls
Components and Controls…
-
Page 7
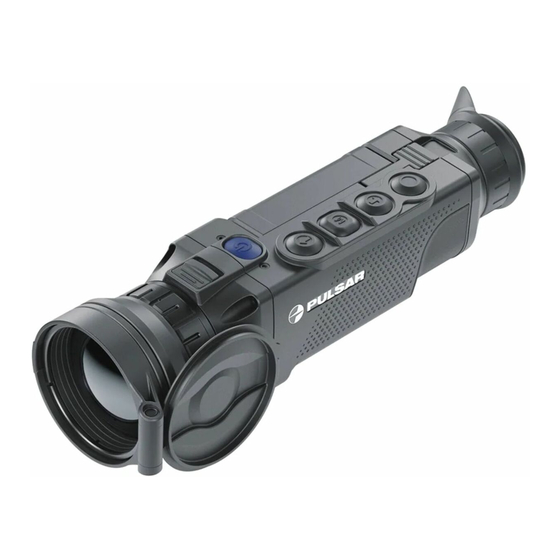
1. Lens cover… -
Page 8
2. Lens focus ring 3. Battery Pack 4. Micro-USB connector 5. Eyeshade 6. Diopter adjustment ring 7. Record button REC 8. Navigation button DOWN 9. Button MENU 10. Navigation button UP 11. ON/OFF/Calibrationbutton 12. Latch for lens change 13. Lever for Battery Pack 14. -
Page 9: Button Operation
Button Operation Operation Button Power device on short press Power device off long press for 3 secs Turn display o? long press for less than 3 secs Turn display on short press Calibrate the microbolometer short press Switch observation modes short press Switch color palettes long press…
-
Page 10
Navigation downwards/leftwards short press Con?rm selection short press Exit submenu without con?rming long press selection Exit menu (switch to viewing mode) long press Quick Menu Button Enter quick menu short press Switch between quick menu options short press Increase value short press Decrease value short press… -
Page 11: Battery Charging
Battery Charging Helion 2 Prothermal imaging scopes are supplied with a rechargeable Li-Ion Battery Pack IPS7 which allows operation for up to 8 hours. Please remember to charge the Battery Pack before first use. Charging Step 1. Install the battery into the charger 1.
-
Page 12
If the indicator lights green continuously, the battery is fully charged. You can disconnect it from the charger. If the indicator of the charger lights up red continuously upon battery installation, the battery charge level is probably lower than acceptable (the battery has been in deep discharge for too long). -
Page 13: Battery Installation
Battery Installation 1. Lift the lever(13). 2. Insert the battery (3) into the dedicated slot in the device body until it stops so that element F is located below. 3. Lock the battery (3) by lowering the lever (13).
-
Page 14
Precautions Only use the charger supplied with the Battery Pack. The use of any other charger may irreparably damage the Battery Pack or the charger and may cause fire. During long-term storage, the Battery Pack should be partially charged – the charge level should be between 50% and 80%. -
Page 15: External Power Supply
External Power Supply ☐ Show device diagram…
-
Page 17
The thermal imaging scope can be supplied from an external power source such as Power Bank (5 V). 1. Connect the external power source to the USB port (4) of the device. 2. The device will switch to operation from the external power supply and the IPS7 Battery Pack will be gradually recharged. -
Page 18
Powering on and Image Setting ☐ Show device diagram… -
Page 20
1. Open the lens cover (1). 2. Turn the device on with a short press of the ON/OFF (11). 3. To obtain a crisp image of the icons on the display, rotate the diopter adjustment ring (6). After this, there is no need to rotate the diopter adjustment ring for distance or any other conditions. -
Page 21
Microbolometer Calibration ☐ Show device diagram… -
Page 23
Calibration eliminates image flaws (such as vertical bars, phantom images, grainy field of view, etc.) by equalizing the microbolometer background temperature. There are three calibration modes: Manual (M), Semi-Automatic (SA) and Automatic (A). Select the desired mode in the menu option Calibration Mode M Mode (Manual). -
Page 24
Discrete Digital Zoom ☐ Show device diagram… -
Page 26
The device allows you to quickly increase base magnification (please refer to the Optical Magnification line in the Specifications table) by 2, 4 or 8 times, as well as to return to the base magnification. To operate the discrete digital zoom, press successively the DOWN (8) button. -
Page 27: Status Bar
Status Bar The status bar at the bottom of the display shows current operating statuses via icons, including: 1. Color Mode (shown only if the Black Hot palette is selected) 2. Observation Mode 3. Calibration Mode (in Automatic calibration mode a countdown timer will appear instead of the calibration mode icon 3 seconds before automatic calibration begins).
-
Page 28
Quick Menu Functions ☐ Show device diagram… -
Page 30
The quick menu allows you to change the base settings (display brightness and contrast) and use the smooth digital zoom and stadiametric rangefinder. Enter the menu with a short press of the M (9) button. To toggle between the functions below, press successively the M (9) button. Brightness –… -
Page 31: Enter The Main Menu
Enter the Main Menu ☐ Show device diagram…
-
Page 33
1. Enter the main menu with a long press of the M (9) 2. Press the UP (10) / DOWN (8) buttons to move through the menu items. 3. Enter a submenu of the main menu with a short press of the M (9) 4. -
Page 34
Mode ☐ Show device diagram… -
Page 36
The device has four operating modes of the thermal imager: Forest (mode for object observation in low thermal contrast conditions), Rocks (mode for object observation in high thermal contrast conditions), Identification (high imagery resolution), User (personalized brightness and contrast settings). 1. -
Page 37
Image Detail Boost https://www.youtube.com/embed/GNezJKveMRc ☐ Show device diagram… -
Page 39
The Image Detail Boost function increases the sharpness of the contours of heated objects, which increases their detail. The result of the function depends on the selected mode and observation conditions: the higher the contrast of objects, the more noticeable the effect. This option is enabled by default, but can be disabled in the main menu. -
Page 40: Color Modes
Color Modes ☐ Show device diagram…
-
Page 42
Selection of color palette. The base image mode is White Hot. To select an alternative palette: 1. Press and hold the M (9) button to enter the main menu. 2. Select the Color Modes icon with the UP (10) / DOWN (8)buttons. 3. -
Page 43
Violet Sepia Note:you can also switch from a selected color palette to the base mode with a long press of the UP (10)button. -
Page 44: Calibration Mode
Calibration Mode ☐ Show device diagram…
-
Page 46
Selection of calibration mode. There are three calibration modes: Manual (M), Semi-Automatic (SA) and Automatic (A). To select the calibration mode: 1. Press and hold the M (9) button to enter the main menu. 2. Use the UP (10) / DOWN (8) buttons to select the Calibration Mode option. -
Page 47
Microphone ☐ Show device diagram… -
Page 49
1. Press and hold the M (9) button to enter the main menu. 2. Select the Microphone menu item with the UP (10) / DOWN (8) buttons. 3. Turn the microphone on / off with a short press of the M (9) button. 4. -
Page 50
Icon Brightness ☐ Show device diagram… -
Page 52
1. Press and hold the M (9) button to enter the main menu. 2. Select the Icon Brightness submenu with the UP (10) / DOWN (8)buttons. 3. Enter the submenu with a short press of the M (9) button. 4. Set the desired icon brightness (menu and status bar icons) from 1 to 10 with the UP (10) / DOWN (8) buttons. -
Page 53: General Settings
General Settings ☐ Show device diagram…
-
Page 55
1. Press and hold down the ? (9) button to enter the main menu. 2. Select option General Settings with the UP (10) / DOWN (8) buttons. 3. Press briefly the ? (9) button to confirm. The following settings are available: Language Language selection: 1. -
Page 56: Units Of Measure
Units of Measure Selection of units of measure: 1. Select option Units of Measure with UP (10) / DOWN (8)buttons. 2. Enter the submenu with a short press of the M (9) button. 3. Select the desired units of measurement with a short press of the UP (10) / DOWN (8) buttons: Meters or Yards.
-
Page 57
Observation Mode — Forest Calibration Mode — Automatic Language — English Microphone — Off Wi-Fi — Off (default password) Magnification — Off (without digital zoom) PiP — Off Colour Mode — White Hot Units ofmeasurement- Meters Warning:The date and time settings and default pixel map are not restored. Format This menu option allows you to format the Flash memory card. -
Page 58
Wi-Fi Activation ☐ Show device diagram… -
Page 60
1. Press and hold the M (9) button to enter the main menu. 2. Use the UP (10) / DOWN (8) buttons to select the Wi-Fi Activation menu option. 3. Turn Wi-Fi on/off with a short press of the M (9). -
Page 61
Wi-Fi Settings ☐ Show device diagram… -
Page 63
This item enables you to set up your device for operation in a Wi-Fi network. 1. Press and hold down the M (9) button to enter the main menu. 2. Select the Wi-Fi Settings menu option with the UP (10) / DOWN (8) buttons. 3. -
Page 64: Device Information
Device Information ☐ Show device diagram…
-
Page 66
This menu item allows the user to view the following information about the device: Full Name SKU Number Serial Number Firmware Version Hardware Version Service Information To display information, do the following: 1. Press and hold down theM (9) button to enter the main menu. 2. -
Page 67
Video Recording and Photography ☐ Show device diagram… -
Page 69
Helion 2 Prothermal imagers feature video recording and photography of the image being observed to the internal memory card. Before using this feature please set the date and time (see General Settings section). The built-in recorder operates in two modes – Video and Photo: Video mode. -
Page 70
Wi-Fi Function The device has a function enabling wireless communication with external devices (smartphone or tablet) via Wi-Fi. Turn on the wireless module in the WI-Fi Activation menu option. Wi-Fi operation is shown in the status bar as follows: Connection status Indication on the status bar Wi-Fi is switched off Wi-Fi activated by the user, Wi-Fi in… -
Page 71
Stadiametric Rangefinder ☐ Show device diagram… -
Page 73
Helion 2 Prothermal imagers are equipped with a stadiametric rangefinder which allows the user to determine the approximate distance to an object of a known size with reasonable accuracy. 1. Select the Stadiametric Rangefinder function with short presses of the M (9) button until the icon is selected. -
Page 74
Display-Off Function ☐ Show device diagram… -
Page 76
This function deactivates the image transmission to the display by minimizing its brightness. This helps prevent accidental disclosure. However, the device stays on. 1. When the device is on, press and hold the ON/OFF(11) button. The display goes out and the message Display Off appears. -
Page 77: Pip Function
PiP Function ☐ Show device diagram…
-
Page 79
PiP (Picture in Picture) function allows you to see both the main image and a magnified image in a dedicated window. Turn on/off the PiP function with a long press of the DOWN (8) button. Change the zoom ratio in the PiP window with a short press of the DOWN (8) button. The zoomed image is displayed in a dedicated window, while the image in the rest of the screen is displayed at base magnification (2.5x). -
Page 80
Stream Vision 2 Helion 2 Prosupport Stream Vision and Stream Vision 2 mobile apps that allow you to stream real-time image from your device to your smartphone or tablet via Wi-Fi. We recommend using the latest version – Stream Vision 2. -
Page 81
You can find further guidelines on Stream Vision here. Download from Google Play Download from App Store Find answers to frequently asked questions about using Stream Vision here. -
Page 82: Firmware Update
Firmware Update Stream Vision 2 1. Download free Stream Vision 2 App in Google Play Store. 2. Connect your Pulsar device to your mobile device (smartphone or tablet). 3. Launch Stream Vision 2 and go to section “Settings”. 4. Select your Pulsar device and press “Check firmware update”. 5.
-
Page 83: Usb Connection
USB Connection ☐ Show device diagram…
-
Page 85
1. Connect one end of the USB cable to the Micro-USB (4) port of your device and the other end to the USB port of your PC / laptop. 2. Turn the device on with a short press of the ON/OFF (11) button (a device that has been turned off cannot be detected by your computer). -
Page 86: Technical Inspection
Technical Inspection It is recommended to carry out a technical inspection before each use of the device. Check the following: The state of the objective and eyepiece lenses (there should be no cracks, grease spots, dust, deposits). The device appearance (there should be no cracks on the housing). The state of the rechargeable battery (should be charged) and the electric contacts (should be no signs of salts, oxidation or debris).
-
Page 87
Technical Maintenance and Storage Maintenance should be carried out no less frequently than twice a year, and should consist of the following measures: Wipe external plastic and metal surfaces with a cotton cloth to remove dust and dirt. To avoid damage to the paint coating, do not use chemically active substances, solvents, etc. Clean the electric contacts of the Battery Pack and the device’s battery slot using a non- greasy organic solvent. -
Page 88: Troubleshooting
Troubleshooting ☐ The device does not turn on Possible cause Battery Pack is discharged. Solution Charge the Battery Pack. ☐ The device does not operate on external power supply Possible cause The USB cable is damaged. Solution Replace the USB cable. Possible cause External power supply is discharged.
-
Page 89
Solution If the image does not clear after calibration, you need to recalibrate. ☐ The image is too dark Possible cause Brightness or contrast level is too low. Solution Adjust the brightness or contrast level in the Quick Menu. ☐ Poor image quality / Detection range reduced Possible cause Problems described may arise in adverse weather conditions (snow, rain, fog, etc.). -
Page 90
☐ Wi-Fi signal is missing or interrupted Possible cause Smartphone or tablet is out of range of a strong Wi-Fi signal. There are obstacles between the device and the smartphone or tablet (e.g., concrete walls). Solution Relocate smartphone or tablet into the Wi-Fi signal line of sight. More information on solving problems with connection to Stream Vision by following the link. -
Page 91
Possible cause You are looking through glass. Solution Remove the glass or change the viewing position to avoid it. -
Page 92: Specifications
Specifications XP50 PRO Model XP50 PRO 77431 Microbolometer Type uncooled Resolution, Pixels 640?480 Pixel Pitch, ?m NETD, mK < 25 Frame Rate, Hz Optical Characteristics Optical Magnification, x Smooth Digital Zoom, x 2.5-20 Digital Zoom x2/x4/x8 Objective Lens F50 mm, F/1.0 Minimum Focus Distance, m/y ? 5 / 5.47 Field of View (Horizontal), °/ m@100 m…
-
Page 93
Display Type AMOLED Resolution, Pixels 1024?768 Operational Characteristics Power Supply, V 3 – 4.2 Battery Type / Capacity /Nominal Li-Ion Battery Pack IPS7 / 6400 mAh / Output Voltage DC 3.7 V External Power Supply 5 V (USB) Battery Run Time at t=22°C, hours* Level of Protection (acc. -
Page 94
Standard 802.11 b/g *Actual operating time will depend to what extent the Wi-Fi and built-in video recorder is used. **The reception range may vary depending on various factors: obstacles, other Wi-Fi networks. -
Page 96
Legal Compliances and Disclaimers Attention! Helion 2 Pro thermal imaging monoculars require a license if exported outside your country. Electromagnetic compatibility.This product complies with the requirements of European standard EN 55032: 2015, Class A. Caution! Operation of this equipment in a residential environment could cause radio interference.
This manual is also suitable for:
77431
-
Contents
-
Table of Contents
-
Troubleshooting
-
Bookmarks
Available languages
-
EN
-
RU
Quick Links
THERMAL IMAGING SCOPE
HELION
2
XP50 PRO
USER MANUAL
ENGLISH | РУССКИЙ
Related Manuals for Pulsar HELION 2 XP50 PRO
Summary of Contents for Pulsar HELION 2 XP50 PRO
-
Page 1
THERMAL IMAGING SCOPE HELION XP50 PRO USER MANUAL ENGLISH | РУССКИЙ… -
Page 2
Warning! Operation of this equipment in a residential environment could cause radio interference. For detailed information about the device, please download the complete user manual: https://www.pulsar-nv.com/glo/products/33/thermal-imaging-scopes/helion-version-2/ Attention! Les monoculaires d’imagerie thermique Helion 2 PRO nécessitent une licence s’ils sont exportés hors de votre pays. -
Page 3: Technical Specifications
**The reception range may vary depending on various factors: obstacles, other Wi-Fi networks. * with IPS14 Battery Pack (purchased separately). This product is subject to change in line with improvements to its design. ** with a special battery container (purchased separately). THERMAL IMAGING SCOPE HELION 2 XP50 PRO…
-
Page 4: Description Of Controls
If the indicator lights green continuously, the battery is fully charged. You can disconnect it from the charger. • To charge the battery, connect the micro-USB plug of the USB cable to port (E) of the charger. • Connect the plug of the USB cable to the mains adapter. THERMAL IMAGING SCOPE HELION 2 XP50 PRO…
-
Page 5: External Power Supply
ON (11) button is also allowed in this mode (as in the Semi-Automatic mode). • Do not drop or hit the Battery Pack. • Keep the Battery Pack out of the reach of children. THERMAL IMAGING SCOPE HELION 2 XP50 PRO…
-
Page 6
Red Hot; Red Monochrome; Rainbow; Ultramarine; Violet; Sepia. Note. You can also switch from a selected colour palette to the base mode with a long press of the UP (10) button. THERMAL IMAGING SCOPE HELION 2 XP50 PRO… -
Page 7
Select minute value with a short press of the UP (10) / DOWN (8) buttons. • Turn Wi-Fi off with a short press of the M (9) button. • Save the selected time and exit the submenu with a long press of the M (9) button. THERMAL IMAGING SCOPE HELION 2 XP50 PRO… -
Page 8: Status Bar
Enter the Restore default pixel map submenu with a short press of the М (9) button. • Select Yes if you wish to return to default pixel map, or No if you do not. • Confirm the selection with a short press of the М (9) button. THERMAL IMAGING SCOPE HELION 2 XP50 PRO…
-
Page 9: Pip Function
Helion 2 PRO thermal imagers are equipped with a stadiametric rangefinder which allows the user to determine Note: the Stream Vision application allows you to update the firmware features of your Pulsar Device. the distance to an object of a known size with reasonable accuracy.
-
Page 10: Troubleshooting
द if your Pulsar device is not connected to your phone but it’s already in the My Devices section, you may use The table below lists problems that may occur when using the device. Carry out the recommended checks Wi-Fi to download update.
-
Page 11: Технические Характеристики
* Фактическое время работы зависит от степени использования Wi-Fi и встроенного видеорекордера. ** с помощью специального контейнера батарей (приобретается отдельно). **Дальность приёма может меняться в зависимости от разных факторов: наличие препятствий, других сетей Wi-Fi. Для улучшения потребительских свойств изделия в его конструкцию могут вноситься усовершенствования. ТЕПЛОВИЗОР HELION 2 XP50 PRO…
-
Page 12
Снимите защитную крышку с аккумуляторной батареи. • Установите аккумуляторную батарею в зарядное устройство до упора, как показано на рис., опустите рычаг (С). • После установки батареи на зарядном устройстве загорится индикатор (D) зеленого цвета и начнет ТЕПЛОВИЗОР HELION 2 XP50 PRO… -
Page 13
Режим М (ручной). Закройте крышку объектива, выполните краткое нажатие кнопки ON (11). По • завершению процесса калибровки откройте крышку. Батарея оснащена системой защиты от короткого замыкания. Однако следует избегать ситуаций, которые могут привести к короткому замыканию. Режим SA (полуавтоматический). Калибровка включается коротким нажатием кнопки ON (11). Крышку ТЕПЛОВИЗОР HELION 2 XP50 PRO… -
Page 14
из трёх режимов в качестве базового. • Автоматический выход из меню происходит после 10 секунд бездействия. Примечание: Выбор базового режима для настройки Пользовательского также возможен в меню быстрого доступа. Примечание: Быстрое переключение режимов наблюдения возможно при использовании кнопки UP (10). ТЕПЛОВИЗОР HELION 2 XP50 PRO… -
Page 15
• Для включения микрофона кратко нажмите кнопку M (9). • При включенном микрофоне в вашем видео будет записываться звуковая дорожка. • Для отключения микрофона кратко нажмите кнопку M (9). По умолчанию микрофон в приборе отключен. ТЕПЛОВИЗОР HELION 2 XP50 PRO… -
Page 16
Возврат всех ранее отключенных пользователем дефектных пикселей в исходное состояние: • Нажатием кнопки М (9) войдите в подменю. • Выберите «ДА», если хотите вернуться к заводской карте пикселей, или «НЕТ» для отмены выбора. • Подтвердите выбор нажатием кнопки М (9). ТЕПЛОВИЗОР HELION 2 XP50 PRO… -
Page 17
позволяет с достаточной точностью определить расстояние до объекта, если заранее известен его размер. записи в формате MM:SS (минуты : секунды); lREC | 00:25. • • Видеофайлы сохраняются на встроенную карту памяти после выключения записи видео. Для выбора функции «СТАДИОМЕТРИЧЕСКИЙ ДАЛЬНОМЕР» кратко ТЕПЛОВИЗОР HELION 2 XP50 PRO… -
Page 18: Подключение Usb
Данная функция отключает передачу изображения на дисплей, до минимума снижая яркость его द если ваше устройство Pulsar не подключено к вашему телефону, но оно уже находится в разделе свечения, что позволяет предотвратить случайную демаскировку. При этом прибор продолжает работать. «Мои устройства», вы можете использовать Wi-Fi для загрузки обновления.
-
Page 19: Техническое Обслуживание
Разряжен источник внешнего Зарядите источник внешнего питания. питания. питания. Изображение нечетное, с Необходима калибровка. Проведите калибровку согласно инструкции. вертикальными полосами и неравномерным фоном. Изображение слишком Установлен низкий уровень Отрегулируйте яркость или контраст темное яркости или контраста ТЕПЛОВИЗОР HELION 2 XP50 PRO…
-
Page 20
PulsarVision pulsar.vision pulsarvision…
This manual is also suitable for:
77431
Посмотреть инструкция для Pulsar Helion 2 XP50 Pro бесплатно. Руководство относится к категории без категории, 2 человек(а) дали ему среднюю оценку 8.3. Руководство доступно на следующих языках: русский, английский. У вас есть вопрос о Pulsar Helion 2 XP50 Pro или вам нужна помощь? Задайте свой вопрос здесь
Не можете найти ответ на свой вопрос в руководстве? Вы можете найти ответ на свой вопрос ниже, в разделе часто задаваемых вопросов о Pulsar Helion 2 XP50 Pro.
Инструкция Pulsar Helion 2 XP50 Pro доступно в русский?
Да, руководствоPulsar Helion 2 XP50 Pro доступно врусский .
Не нашли свой вопрос? Задайте свой вопрос здесь
Specifications:2234/2234899-helion_2_xp50_pro.pdf file (22 Feb 2023) |
Accompanying Data:
Pulsar HELION 2 XP50 PRO Monocular PDF Operation & User’s Manual (Updated: Wednesday 22nd of February 2023 08:34:46 AM)
Rating: 4.4 (rated by 64 users)
Compatible devices: FORWARD F455, TRAIL LRF XQ38, Forward FN155, KRYPTON FXG50, AXION XQ38, DIGIFORCE 860RT, AXION X?30, AXION KEY X?22.
Recommended Documentation:
Operation & User’s Manual (Text Version):
(Ocr-Read Summary of Contents of some pages of the Pulsar HELION 2 XP50 PRO Document (Main Content), UPD: 22 February 2023)
-
14, 14 ТЕПЛОВИЗОР HELION 2 XP50 PRO закрывать не требуется (микроболометр закрывается внутренней шторкой). Прибор калибруется самос�…
-
12, 12 ТЕПЛОВИЗОР HELION 2 XP50 PRO ЭЛЕМЕНТЫ ПРИБОРА И ОРГАНЫ УПРАВЛЕНИЯ 1. Крышка объектива 2. Кольцо фокусировки объектива 3. Аккумуляторная батарея 4. Разъем microUSB 5. Наглазник окуля�…
-
13, Pulsar HELION 2 XP50 PRO 13 ТЕПЛОВИЗОР HELION 2 XP50 PRO кратко мигать с определенным интервалом: один раз, если заряд батареи составляет от 0 до 50%; два раза, если заряд батареи от 51 до 75%; три ра�…
-
5, Pulsar HELION 2 XP50 PRO 5 THERMAL IMAGING SCOPE HELION 2 XP50 PRO • Plug the mains adapter into a 100-240 V socket and the battery charging process will start. • If the indicator of the charger lights up red continuously upon battery installation, the battery charge level is probably lower than acceptable (the battery has bee…
-
2, EN Attention! Helion 2 PRO thermal imaging scopes require a license if exported outside your country. Electromagnetic compliance This product complies with EU Standard EN 55032:2015, Class A. Warning! Operation of this equipment in a residential environment could cause radio interference. For detailed in…
-
Pulsar HELION 2 XP50 PRO User Manual
-
Pulsar HELION 2 XP50 PRO User Guide
-
Pulsar HELION 2 XP50 PRO PDF Manual
-
Pulsar HELION 2 XP50 PRO Owner’s Manuals
Recommended: TH-CSC08, P1343-E, PCX5750-TD128E, Web Share 111U, Scalar 50
Operating Impressions, Questions and Answers:
Table of Contents for Pulsar HELION 2 XP50 PRO:
-
www.pulsar-vision.com PulsarVision pulsar.vision pulsarvision
-
18 ТЕПЛОВИЗОР HELION 2 XP50 PRO нажмите на кнопку М (9). • Выберите пиктограмму краткими нажатиями кнопки М (9). • На дисплее появятся штрихи для измерений, пиктограммы трех объектов и цифры измеряемой дистанции для трех объектов. • Имеется три предус�
-
EN Attention! Helion 2 PRO thermal imaging scopes require a license if exported outside your country. Electromagnetic compliance This product complies with EU Standard EN 55032:2015, Class A. Warning! Operation of this equipment in a residential environment could cause radio interference. For detailed information about the device, please download the complete user manual: https://www.pulsar-nv.com/glo/products/33/thermal-imaging-scopes/helion-version-2/ FR Attention! Les monoculaires d’imagerie ther
-
9 THERMAL IMAGING SCOPE HELION 2 XP50 PRO • Switch to the PHOTO mode with a long press of the REC (7) button. • Take a picture with a short press of the REC (7) button. • The image freezes for 0.5 sec while the photo is saved to the internal memory. • In the top left corner of the display you will see a camera icon and the number of pictures you are able to take. If the number is less than 100 the actual number will be shown (i.
-
19 ТЕПЛОВИЗОР HELION 2 XP50 PRO POWER • При выборе данного варианта компьютер используется прибором как внешнее питание. В строке статуса появится пиктограмма . Прибор продолжает работать, все функции доступны. • Зарядка аккумуляторной ба�
-
14 ТЕПЛОВИЗОР HELION 2 XP50 PRO закрывать не требуется (микроболометр закрывается внутренней шторкой). Прибор калибруется самостоятельно, согласно программному алгоритму. Крышку закрывать не требуется (микроболомет
-
8 THERMAL IMAGING SCOPE HELION 2 XP50 PRO Wi-Fi Settings This menu option allows you to set up your device for operation in a Wi-Fi network. Password Setup This menu option allows you to set a password to access your thermal imager from an external device. The password is used to connect an external device (i.e. smartphone) to your thermal imager. • Enter the Wi-Fi setting submenu with a short press of the M (9) button. • E
-
USER MANUAL ENGLISH | РУССКИЙ HELION 2 XP50 PRO THERMAL IMAGING SCOPE
-
4 THERMAL IMAGING SCOPE HELION 2 XP50 PRO EXTERNAL VIEW AND CONTROLS 1. Lens cover 2. Lens focus ring 3. Battery Pack 4. Micro-USB connector 5. Eyeshade 6. Diopter adjustment ring 7. Record button REC 8. Navigation button DOWN 9. Button MENU 10. Navigation button UP 11. Activation / calibration button ON 12. Latch for lens change 13. Lever for Battery Pack 14. Tripod socket DESCRIPTION OF CONTROLS But
-
12 ТЕПЛОВИЗОР HELION 2 XP50 PRO ЭЛЕМЕНТЫ ПРИБОРА И ОРГАНЫ УПРАВЛЕНИЯ 1. Крышка объектива 2. Кольцо фокусировки объектива 3. Аккумуляторная батарея 4. Разъем microUSB 5. Наглазник окуляра 6. Кольцо диоптрийной подстройки окуляра 7. Кнопка записи REC 8. Кнопка нави
-
15 ТЕПЛОВИЗОР HELION 2 XP50 PRO Image Detail Boost Функция «Image Detail boost» увеличивает резкость контуров нагретых объектов, что повышает их детализацию. Результат работы функции зависит от выбранного режима и условий наблюдения: чем выше контрастность объектов, тем заметнее эффект. Данная функц�
-
6 THERMAL IMAGING SCOPE HELION 2 XP50 PRO DISCRETE DIGITAL ZOOM The device allows you to quickly increase base magnication (please refer to the Magnication line in the Technical Specications Table) by two or four or eight times, as well as to return to the base magnication. To operate the discrete digital zoom, press successively the DOWN (8) button. QUICK MENU FUNCTIONS The quick menu allows you to change the base setti
-
17 ТЕПЛОВИЗОР HELION 2 XP50 PRO Пользователю доступна следующая информация о приборе: полное наименование прибора, SKU номер прибора, серийный номер прибора, версия ПО прибора, версия сборки п
-
3 THERMAL IMAGING SCOPE HELION 2 XP50 PRO ENGLISH TECHNICAL SPECIFICATIONS Model HELION 2 XP50 PRO SKU 77431 Microbolometer Type uncooled Resolution, Pixels 640х480 Pixel Pitch, μm 17 NETD, mK < 25 Frame Rate, Hz 50 Optical Characteristics Optical Magnication, x 2.5 Smooth Digital Zoom, x 2.5-20 Digital Zoom x2/x4/x8 Objective Lens F50 mm, F/1.0 Field of View (Horizontal), °/ m@100 m 12.4 / 21.8 Eyepiece Focu
-
7 THERMAL IMAGING SCOPE HELION 2 XP50 PRO Calibration Mode Selection of calibration mode. There are three calibration modes: Manual, Semi-Automatic and Automatic. To select the calibration mode: • Press and hold the M (9) button to enter the main menu. • Select the Calibration icon with the UP (10) / DOWN (8) buttons. • Enter the submenu with a short press of the М (9) button. • Select one of the calibratio
Questions, Opinions and Exploitation Impressions:
You can ask a question, express your opinion or share our experience of Pulsar HELION 2 XP50 PRO device using right now.