-
Contents
-
Table of Contents
-
Bookmarks
Quick Links
Related Manuals for Tevo Black Widow
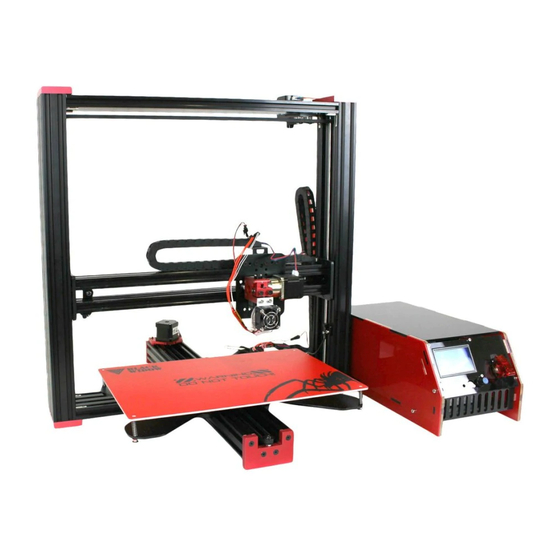
Summary of Contents for Tevo Black Widow
-
Page 3
READ THIS MANUAL COMPLETELY BEFORE ASSEMBLING AND POWERING UP YOUR PRINTER! Hazards and Warnings The TEVO Black Widow 3D printer has motorized and heated parts. When the printer is in operation always be aware of possible hazards. Electric Shock Hazard Never open the electronics bay of the printer while the printer is powered on. -
Page 4: Table Of Contents
1. Table of Contents 1. Table of Contents………………….2 2. Letter from Tevo ………………….3 3. Lower Frame Assembly ………………..4 4. Y Endplate and Idler Assembly ………………5 5. Y Motor and Idler Assembly B-13, B-18…………….7 6. Bed Carriage Assembly ………………..10 7.
-
Page 5: Letter From Tevo
2. Letter from Tevo Dear User, Thank you for purchasing the Black Widow 3D printer. This guide will step you through the assembly and the first runs of the printer. If you have any problems during assembly, please go to our Facebook group: https://www.facebook.com/groups/TEVO.Black.Widow.owners/…
-
Page 6: Lower Frame Assembly
3. Lower Frame Assembly Item Qty Part name C beam extrusion L=550 2080 extrusion L=210 L corner connector Start the assembly of the bottom of the frame by following the figure above to see how to set the extrusions.
-
Page 7: Y Endplate And Idler Assembly
4. Y Endplate and Idler Assembly Bag Name: B-1 Item Part name Y axis endplate 1 M5x20 bolts Install the Y axis endplate 1 in place by using M5x20 bolts.
-
Page 8
Bag Name: B-1 Item Qty Part name M5x25 bolt Idler 8x5x1mm shim M5 nut Install the idler wheel on the Y axis front endplate as shown in the figure above. Tighten the nut against the plate so that bolt will stay rigidly in place. The idler should be able to freely rotate with no drag. -
Page 9: Y Motor And Idler Assembly B-13, B-18
5. Y Motor and Idler Assembly B-13, B-18 Bag Name: B-13, B-18 Item Part name GT2 pulley Stepper motor M3x8 bolt Y motor upper bracket Install the motor on the Y motor upper bracket using the M3x8 bolts. Install the GT 2 gear pulley on to the motor shaft.
-
Page 10
Item Part name Lower Y bracket M4x16 bolt Put the Y motor and upper bracket on the lower bracket and use M5 bolts and T-nuts to install on the extrusion. Leave 2 mm gap from the end of extrusions to allow tightening of the belt later on. -
Page 11
Item Qty Part name Bed belt bracket GT2 belt Zip ties Loop the belt around idler and GT2 pulley and put end of belt through holes in the part no 1. (Bed belt bracket). Install the bed belt bracket on the right side (looking from the front otherwise the bed will move in the wrong direction. -
Page 12: Bed Carriage Assembly
6. Bed Carriage Assembly Bag Name: B-10 Item Qty Part name M5 locknut 6mm spacer 8x5x1mm shim V-slot wheel M5x30 bolt Eccentric nut Heated bed carriage…
-
Page 13
Remove the Y motor and brackets with the motor and slide the hotbed carriage in place. Use the provided wrench to adjust the eccentric nuts to adjust wheels, so the carriage moves smoothly in grooves. After this, use two M5 bolts to fasten the belt bracket in place to bed. -
Page 14: Second Y Endplate Assembly
7. Second Y Endplate Assembly Bag Name: B-2 Item Qty Part name M5x20 bolts Y axis endplate 2…
-
Page 15: Axis Assembly B-3, B-4
8. X Axis Assembly B-3, B-4 Bag Name: B-3, B-4 Item Part name M5 locknut 8x5x1 shim V slot wheel Z slide plate Eccentric nut M5x25 bolt 6mm spacer M5 nut POM trapezoid nut 5mm brass spacer…
-
Page 16
When you have both Z slides assembled, try them in the extrusions and adjust the eccentric nuts so the wheel feels snug, but still rolls smoothly inside the extrusion. -
Page 17
Bag Name: B-3, B-4 Item Part name M5x15 bolts Assemble the X axis by mounting the Z slides to 2040 extrusions by using M5x15 bolts. -
Page 18: Z Axis Uprights
9. Z Axis Uprights Bag Name: B-5, B-6 Item Part name C beam extrusion L corner bracket Z axis endplate M5x20 bolt Bearing Prepare two pieces of the Z uprights as shown in above picture. Put bearing in the slot located in the plate.
-
Page 19
Install the Z uprights to the bottom frame and tighten in place. Make sure you use a square to check squareness before tightening. -
Page 20: Z Axis Assembly
Z Axis Assembly Bag Name: B-7, B-8 Item Part name X Gantry assembly Z Rods Screw the leadscrews in POM nuts as shown in picture above.
-
Page 21
Item Part name Lock collar GT2 pulley Loop Belt Bearings Fasten the lock collars in both leadscrews (around 5mm from bottom of screw). Next lower the assembly in the frame as seen picture in following page. -
Page 23
Make sure that the end of the leadscrews goes inside of the bearing and the lock collar rests on top of bearing on both sides. After this you can install the GT pulley (item n.2) and lock collar (item n.1) at the top of both leadscrews, see the photo below. -
Page 24
Put the looped belt in place and install the top 2080 extrusion as shown in the following picture. Install the red top Z plate in place by using M5x20 bolts and lower the top extrusion slightly so you can firmly press and tighten the lock collar against the bearing in the plates in both sides. -
Page 25: Z Motor Bracket Assembly
Z Motor Bracket Assembly Bag Name: B-12 Item Part name M5x20 bolt Idler 8x5x1 shim M5 nut Z axis motor bracket M3x8 bolts Build the Z axis motor bracket as shown in the above and following pictures. Use M3x8 bolts to attach motor to the bracket. Make sure you will not tighten the bolt too much so that the idler can roll freely.
-
Page 26
Install the Z axis bracket assembly in place and install the Z loop belt. You can tighten belt by sliding motor towards back of the printer. -
Page 27: Extruder Plate Assembly And Installation
Extruder Plate Assembly and Installation Bag Name: B-9, B-11 Item Part name Extruder plate M5x25 bolt 6mm spacer 8x5x1 shim V slot wheel M5 locknut eccentric nut Start to assemble the extruder plate as shown in picture above and follow the assembly in following pictures.
-
Page 28
Item Part name X axis belt bracket M5x15 bolt… -
Page 29
Item Part name Drag chain bracket M5x15 bolt… -
Page 30
After extruder plate is assembled you can install it on X axis to make it easier you can loosen the bottom screw with eccentric nut and put it back again when you have the plate in place. Follow the same procedure as you did with the Z plate assembly to adjust the eccentric nut. -
Page 31: Extruder Assembly And Installation
Extruder Assembly and Installation Item Part name Adjustment bolts M3x25 bolts Assemble the extruder using two M3 bolts as shown in picture above. The two bolts shown by number 1 is used to adjust the tension for the filament. These needs to be adjusted to get the optimal grip on filament (example if the gear is turning but filament is slipping, you need tighten these bolts).
-
Page 32
Item Part name M5x15 bolt 6mm spacer Follow these pictures above to install the extruder. -
Page 34: Motor And Belt Installation
X Motor and Belt Installation Bag Name: B-19 Item Part name X axis motor M4x16 bolt M4 T-nut X motor bracket GT2 pulley M3x8 bolt 6mm spacer Assemble the X axis motor and bracket as pictured above.
-
Page 35
Item Part name X axis motor plate M5x25 bolt M5 locknut 8x5x1 shim Idler M4 T-nut M4x10 bolt… -
Page 36
Install the motor with bracket and idler as shown in the picture above. After that, loop the belt around idler and GT2 pulley in motor shaft and put the loose ends through the belt bracket on the extruder plate and use zip ties to close the looped ends… -
Page 37
Install the heated bed as shown in following picture, so that cable connector faces the back of the printer. Place the non-conductive spacer between the bed and the spring. HOT BED SCREW Item Part name M3 “thumb” nut spring M3 bolt M3 non-conductive spacer… -
Page 38
Install the drag chain in place on top of X axis extrusion. -
Page 39: Limit Switch Installation
Limit Switch Installation…
-
Page 40
Bag Name: B-14, B-15, B-16 Item Part name X axis switch Y axis switch Z axis switch Install the limit switches as shown in the pictures above. -
Page 41
Bltouch Installation Instructions (Optional) If you have printer with BLtouch option, then follow the following picture to install it on the printer. The bracket of BLtouch can be adjusted up and down as needed and you should adjust it so that the BLtouch pin will go back in before nozzle hits bed. (When the pin is ejected it should be around 2mm lower than the nozzle and when it is retracted it should be higher than nozzle so that it won’t hit the printed part). -
Page 42: Control Box Assembly
Control Box Assembly Assemble the control box as shown in following pictures by using M4x12 bolts and M4 nuts. Install the PSU, LCD, mainboard and fan in box by using spacers provided within the kit. Use M4x12 bolts and M4 nuts to assemble the casing.
-
Page 43
Item Part name M3x45 bolts + M3x8 spacers and M3 nuts M3x20 bolts and M3 nuts M3x20 bolts + M3x8 spacers and M3 nuts M3x10 bolts and M3 nuts M4x8 bolts (for power supply) -
Page 44: Mainboard Connections
Mainboard Connections Connect the mainboard according the next page wiring schematic. The fan connection is meant for print cooling fan (not for the hot end cooling fan, which should be connected directly to 24V). When wired properly your printer should now be ready to be powered up. Please check all cables again before connecting the power supply unit to AC power.
-
Page 45: Wiring Schematic
Wiring Schematic…
-
Page 46: Setting Up Repetier-Host For Printing
Setting Up Repetier-Host for Printing This printer works with most slicing/printing software like Simplify 3D, Cura, Repetier-Host, etc. But we will go in details for Repetier-Host software and tell you how to set it up so that you can make your first print. First, we recommend you to download the Repetier-Host from their website: https://www.repetier.com/ After installation is done and you start the software, you should get following screen:…
-
Page 47
You should get following screen: First set Port: to whatever port your mainboard uses (when you have connected your printer to PC it should show up in here). Set “Baud Rate:” to 250000 and don’t touch any other settings in this tab. -
Page 48
After this click tab “Printer Shape” and you will get following screen: Set the values according to the picture above. -
Page 49
Next click tab: “Extruder” and set the values as shown in following picture You can set the “Color:” by clicking it and just choosing color. The color won’t affect any way in printing as it just shows the imported model in this color… -
Page 50: Bltouch Calibration (Only If You Have Bltouch Option)
BLTouch Calibration (only if you have BLTouch option) One of the first things to do before printing is to calibrate BLTouch sensor, so that nozzle distance from the bed will be correct. We recommend doing this from Repetier-Host. Open Repetier-Host and connect to the printer. After this, select “Manual Control” tab and you should see “G-Code:”…
-
Page 51: Slicer Settings For Repetier-Host
Slicer Settings for Repetier-Host For Repetier-Host you can use several slicers, but we will show how to set the CuraEngine. On the right side of main screen, click on the tab “Slicer” and select CuraEngine as shown in following screen. Then click button “Configuration”…
-
Page 52
You will get following screen. Click on button “Import” to import our settings for printer and select the saved file BlackWidow.rcp (It should be on the SD following the printer) -
Page 53: First Test Print
First Test Print After this you are set and you can drag and drop a STL model from the folder to Repetier- Host screen. After this you can click “Slicer” tab again and click “Slice with CuraEngine” Now on left side of screen you can see “Connect” button. Press it to make the connection between printer and PC.
-
Bookmarks
Quick Links
TEVO Black Widow
Laser manual V0.1
Related Manuals for Tevo Black Widow
Summary of Contents for Tevo Black Widow
-
Page 1
TEVO Black Widow Laser manual V0.1… -
Page 2: Safety Instruction
Safety instruction! You have to wear laser goggles at all the times before connecting power to laser and operating it as any reflections from laser can blind you immediately. When you are finished to operate laser disconnect power from it immediately so that you don’t activate it accidentally while 3D printing or operating the printer.
-
Page 3
For wiring of the laser connect the PWM control wire to the servo port of MKS GEN board as pointed by arrows in following picture. Be careful to connect wire right way so that colours are facing same way as in picture (black and red). -
Page 4
When everything is installed the next step is to adjust the laser spot size. To do this you have to first drive Z manually so that lens is around 50mm (2 inch) up from bed. Then you can but the safety goggles on and turn on the power of the printer (it is recommended that you put some small piece of metal under laser in case that the laser turns on directly so that you don’t burn hole in heatbed surface.) -
Page 5
Software To make gcode files for engraving you have to first install Inkscape (https:// inkscape.org/en/) and after installing it you have to install repetier laser plugin for it. You can find great instruction on installing and using the plugin from repetier website (https://www.repetier.com/repetier-g-code- plugin-for-inskscape/).
| Document’s Content and Additional Information | Share Manual |
|---|---|
|
Tevo Black Widow Assembly manual
Pages Preview: Document Transcription:
See Details |
|
|
Tevo Black Widow Manual
Pages Preview: Document Transcription:
See Details |


Search code, repositories, users, issues, pull requests…
Provide feedback
Saved searches
Use saved searches to filter your results more quickly
Sign up