-
Contents
-
Table of Contents
-
Bookmarks
Quick Links
UPPER AND LOWER FEED LOCKSTITCH SEWING
MACHINE FOR MEDIUM AND HEAVY DUTY
UPPER AND LOWER FEED
LOCKSTITCH SEWING
MACHINE FOR HEAVY DUTY WITH THICK THREAD
Related Manuals for typical GC0303
Summary of Contents for typical GC0303
-
Page 1
UPPER AND LOWER FEED LOCKSTITCH SEWING MACHINE FOR MEDIUM AND HEAVY DUTY UPPER AND LOWER FEED LOCKSTITCH SEWING MACHINE FOR HEAVY DUTY WITH THICK THREAD OPERATION INSTRUCTION / PARTS MANUAL… -
Page 2
TYPICAL SEWING MACHINE WANPING MACHINERY CO.,LTD. -
Page 3
CONTENT Operation Instruction 1. Main technical specifications 2. Operation preparation 3. Installing the motor 4. Connecting the clutch lever to the pedal 5. Installing belt guard 6. Installing the bobbin winder 7. Lubrication 8. Trial run 9. Hook oil amount adjustment 10. -
Page 4
Operation instruction Notice: 1. Parts design is subject to change without notice. 2. Only the professional can adjust and repair the machine except adjusting stitch length. -
Page 5
(1)Cleaning machine GC0303 GC0303CX Model Clean off the grease and dusts on the Surface of ma- Application Medium and heavy duty chine with gasoline and soft cloth. Max. Sewing Speed 2000spm 1800spm (2)Inspection Max. Stitch length 12mm Before use a thorough inspection should be done upon Max. -
Page 6
The belt guard should be installed for safety. Align pulley (B) of the bobbin winder with the outside of the belt , and there should be a proper clearness between them , so that pulley (B) can be contacted with the belt when stop latch thumb le- ver (A) is depressed, thereby the belt drives prlley (B) white the machine running , the bobbin winder should be parallel with belt slit (E) of the table,… -
Page 7
When the machine left out of operation for a quite long time and used again, remove the red rubber plug on top of the machine head, oil it thoroughly, the lift the presser foot and run at a low speed of 1000 ~ 1500spm, observe the sparkling condition through oil window (c), as the lubrication is well, keep the running test at the low speed about 30 minutes, then increase the speed gradually,… -
Page 8
Adjusting plate Standard clearance 0.5-1.0 By-pass oil hole… -
Page 9
Turn the balance wheel to lift the needle bar to its highest point, loosen needle set screw l, making the needle groove turn to the left side of an opera- tor, fully insert the needle shank up to the bottom of needle socket, then tighten needle set screw l. -
Page 10
When threading the needle thread, raise the needle bar to its highest position, lead the thread from the spool and pass it in the order instructed. (1) Lead the thread down through the three-eye thread guide on the top. (2) Pass down thru the left hole of thread re- tainer , then down thru the lower hole of thread retainer . -
Page 11
Stitch length can be set by turning stitch length regulating dial(A). The figures on the stitch length regulation dial plate (B) indicate the stitch length. Reverse sewing can be obtained when feed re- verse lever (C) is depressed and forward sewing can be restored automatically when feed reverse lever (C) is released. -
Page 12
、 In general, the thread tension is to be adjusted in accordance with materials thread and others. In practice, the thread tension is adjusted ac- cording to the stitches resulted to get the normal stitches. When adjusting the bobbin thread tension, turn bobbin case tension spring screw (A) clock- wise for more tension or turn the screw counter clockwise for less tension. -
Page 13
thread take-up spring(C) to zero, and to turn ten- sion stud (B) clockwise until spring ( C ) just comes into contact with the stop slot on the thread take-up spring regulator, then to further turn tension stud (B) counter-clockwise by 1/2 turn After adjustment, tighten tension stud set screw (A). -
Page 14
(B) The needle thread tension is too weak or the bobbin thread is too strong, turn the tension regulating thumb nut clockwise to make the needle thread get more tension or turn the bobbin case ten- sion regulating screw counter clockwise with small plastic screw driver to make the bobbin thread get less tension (Fig.22) ( c) Other abrormal stitches as shown in Fig.20… -
Page 15
2. Adjusting rotating hook point timing with needle. The motive relation between rotating rotating and needle affects the sewing quality. Standard tim- ing relation is : turn the balance wheel to locate needle bar to its lowest position , and lift back 2.5 mm the rotating hook point(D) should be coin- cides with needle center line ( C ),and hook point ( D ) is 1.2mm above the upper edge(E)of needle eye. -
Page 16
To adjust the position of feed dog, move feed dog to the front end of throat plate, Loosen Screw A (See Fig 29b), move feed dog support B in the direction shown by arrow (Fig.29a) to adjust. After adjustment tighten Screw(A). Feed dog is 0.8~1.2mm above the surface of throat plate horizontally. -
Page 17
、 、 ) Turn balance wheel to lower Feed dog (A) till it is horizontal with the surface (B) of thrat plate, at the moment, the tip of needle ( ) shonld be horizontal with the surfaces of throat plate and feed dog. Adjustment cam be done by adjusting the position of feed cam and feed dog lift cam. -
Page 18
tension discs should be pushed apart to open when the presser foot is lifted. But the open timing of the tension discs can be adjusted as follows: Remove face plate and the rubber plug at rear side of arm and loosen screw (A) of the knee lifting lever (left), then the tension releasing cam can be moved leftward or rightward when the cam is moved rightward, it is later to open, otherwise… -
Page 19
The lift amount of walking presser foot together with presser foot can also be adjusted slightly. When adjusting, loosen screw (A) adjust its center distance B between the screw (A) and the presser foot lift shaft. The lift amount is increased as to shorten the center distance B, and the lift amount is decreased as to widen the center distance B. -
Page 20
Remove the throat plate, clean off all the dust and lint on the slit of the feed dog (A), the installing the throat plate. Clean off all the dust around the rotating hook (A), and clean the bobbin case with soft cloth. Take off the oil filter, clean off the dust of filter screen (A) with gasoline. -
Page 21
Parts Manual… -
Page 22
51 52 9 10… -
Page 23
No . Part number Name Remark 242WF1-001 7WF4-001 7WF4-005 Holder Screw 1WF3-025 Face plate 1KT1-002 Rear cover(small) 241WF1-005 Φ 22T1-003C Rubber Plug( Φ 22T1-003C Rubber plug( 11.8) Thread finger 22T1-003C Screw 22T1-003C Screw 7WF4-004 Oil screen complete 14WF4-005 Three-eye finger 36T2-004 Screw 36T2-005… -
Page 24
25 26 41 42… -
Page 25
No . Part number Name Remark Arm shaft 70WF1-001 Rubber plug 22T3-001A Collar 22T3-002B Screw 22T3-002B Front bushing 4WF1-006 Middle bushing 4WF1-002 J0.0.40 Screw Rear bushing 22T3-005 Oil seal complete 22T3-006F Screw 22T3-008 Screw 22T3-007C Feed dog lift cam 36T3-003D Screw 36T3-003D Seperating piece for cam… -
Page 26
14 15… -
Page 27
No . Part number Name Remark Feed dog 20 T3-008 Feed dog 75WF4-001 Feed dog support complet 36T4-001A 75WF4-005A Feed dog support complet 51T5-001A Washer 36T4-001A Eccentric shaft Screw J0.0.50 Feed dog support crank 4WF2-002 61-04-01/B504 Screw 22T2-019 Screw Feed shaft 7WF2-004 Stop ring GB894.1 15… -
Page 28
P U S H… -
Page 29
No . Part number Name Remark 4WF2-012 Link pin Stitch length bracket 7WF2-012 Stitch length bracket 75WF4-002 20T2-031 Screw Screw 22T5-010D Bushing 5WF1-003 Shaft for stitch length bracket 22T5-004 Rubber plug( 36T5-003 J0.0.5 Set screw 7WF2-009 Reverse feed lever crank Shaft for block 1KT3-002 Spring… -
Page 31
No . Part number Name Remark 33T3-003 Presser foot lift bar 22T1-011 Screw 1KT4-005 Presser bar lift cam O-type ring 4.5×1.8G GB3452.1-92 Oil seal 22T7-004B Knee lifter lever(left)complete 22T7-004B Lever(left) 22T7-004B Thread releasing cam 22T7-004B Screw 22T7-004B Screw 1KT4-004 Knee lifter drawing bar 22T7-005A Screw 35T3-305… -
Page 33
No . Part number Name Remark 7WF5-001 Shim 7WF5-002 7WF5-003 Washer G B / T 9 5 6 Guide shaft 7WF5-004 Needle of bearing 7WF5-005 Walking foot 7WF5-006 Walking foot 11WF5-001 61-04-01/B316 Screw Screw 7WF5-008 Washer G B 9 3 4 Holder for walking foot bar 7WF5-009 Link of walking foot… -
Page 34
7.Oil Pump -29-… -
Page 35
No . Part number Name Remark 15WF4-003 Oil pump 15WF4-006 Big gear for oil pump 15WF4-007 small gear for oil pump GB/T67 M3×10 Screw 15WF4-004 Cover for oil pump Adjusting plate for oil pump 22T8-007 Filter complete 22T8-008A Screw for oil pump 22T8-009 Shaft for oil pump 15WF4-005… -
Page 37
No . Part number Name Remark 4WF5-001 Oil reservoir 22T9-001A Screw 22T9-001A Washer 2KT9-008 Gasket 22T9-001A Hinge pin 22T9-001A Spring 22T9-001A Knee lifter stop bracket 22T9-001A Screw 22T9-001A 22T9-036 Screw 4WF5-002 Knee lifter prop bar 22T9-003B Connector GB/T5781 M6×12 /M6×20 Screw 22T9-003B Bent rod…
This manual is also suitable for:
Gc0303cx
Перейти к контенту
-
Contents
-
Table of Contents
-
Bookmarks
Quick Links
UPPER AND LOWER FEED LOCKSTITCH SEWING
MACHINE FOR MEDIUM AND HEAVY DUTY
UPPER AND LOWER FEED
LOCKSTITCH SEWING
MACHINE FOR HEAVY DUTY WITH THICK THREAD
Related Manuals for typical GC0303
Summary of Contents for typical GC0303
-
Page 1
UPPER AND LOWER FEED LOCKSTITCH SEWING MACHINE FOR MEDIUM AND HEAVY DUTY UPPER AND LOWER FEED LOCKSTITCH SEWING MACHINE FOR HEAVY DUTY WITH THICK THREAD OPERATION INSTRUCTION / PARTS MANUAL… -
Page 2
TYPICAL SEWING MACHINE WANPING MACHINERY CO.,LTD. -
Page 3
CONTENT Operation Instruction 1. Main technical specifications 2. Operation preparation 3. Installing the motor 4. Connecting the clutch lever to the pedal 5. Installing belt guard 6. Installing the bobbin winder 7. Lubrication 8. Trial run 9. Hook oil amount adjustment 10. -
Page 4
Operation instruction Notice: 1. Parts design is subject to change without notice. 2. Only the professional can adjust and repair the machine except adjusting stitch length. -
Page 5
(1)Cleaning machine GC0303 GC0303CX Model Clean off the grease and dusts on the Surface of ma- Application Medium and heavy duty chine with gasoline and soft cloth. Max. Sewing Speed 2000spm 1800spm (2)Inspection Max. Stitch length 12mm Before use a thorough inspection should be done upon Max. -
Page 6
The belt guard should be installed for safety. Align pulley (B) of the bobbin winder with the outside of the belt , and there should be a proper clearness between them , so that pulley (B) can be contacted with the belt when stop latch thumb le- ver (A) is depressed, thereby the belt drives prlley (B) white the machine running , the bobbin winder should be parallel with belt slit (E) of the table,… -
Page 7
When the machine left out of operation for a quite long time and used again, remove the red rubber plug on top of the machine head, oil it thoroughly, the lift the presser foot and run at a low speed of 1000 ~ 1500spm, observe the sparkling condition through oil window (c), as the lubrication is well, keep the running test at the low speed about 30 minutes, then increase the speed gradually,… -
Page 8
Adjusting plate Standard clearance 0.5-1.0 By-pass oil hole… -
Page 9
Turn the balance wheel to lift the needle bar to its highest point, loosen needle set screw l, making the needle groove turn to the left side of an opera- tor, fully insert the needle shank up to the bottom of needle socket, then tighten needle set screw l. -
Page 10
When threading the needle thread, raise the needle bar to its highest position, lead the thread from the spool and pass it in the order instructed. (1) Lead the thread down through the three-eye thread guide on the top. (2) Pass down thru the left hole of thread re- tainer , then down thru the lower hole of thread retainer . -
Page 11
Stitch length can be set by turning stitch length regulating dial(A). The figures on the stitch length regulation dial plate (B) indicate the stitch length. Reverse sewing can be obtained when feed re- verse lever (C) is depressed and forward sewing can be restored automatically when feed reverse lever (C) is released. -
Page 12
、 In general, the thread tension is to be adjusted in accordance with materials thread and others. In practice, the thread tension is adjusted ac- cording to the stitches resulted to get the normal stitches. When adjusting the bobbin thread tension, turn bobbin case tension spring screw (A) clock- wise for more tension or turn the screw counter clockwise for less tension. -
Page 13
thread take-up spring(C) to zero, and to turn ten- sion stud (B) clockwise until spring ( C ) just comes into contact with the stop slot on the thread take-up spring regulator, then to further turn tension stud (B) counter-clockwise by 1/2 turn After adjustment, tighten tension stud set screw (A). -
Page 14
(B) The needle thread tension is too weak or the bobbin thread is too strong, turn the tension regulating thumb nut clockwise to make the needle thread get more tension or turn the bobbin case ten- sion regulating screw counter clockwise with small plastic screw driver to make the bobbin thread get less tension (Fig.22) ( c) Other abrormal stitches as shown in Fig.20… -
Page 15
2. Adjusting rotating hook point timing with needle. The motive relation between rotating rotating and needle affects the sewing quality. Standard tim- ing relation is : turn the balance wheel to locate needle bar to its lowest position , and lift back 2.5 mm the rotating hook point(D) should be coin- cides with needle center line ( C ),and hook point ( D ) is 1.2mm above the upper edge(E)of needle eye. -
Page 16
To adjust the position of feed dog, move feed dog to the front end of throat plate, Loosen Screw A (See Fig 29b), move feed dog support B in the direction shown by arrow (Fig.29a) to adjust. After adjustment tighten Screw(A). Feed dog is 0.8~1.2mm above the surface of throat plate horizontally. -
Page 17
、 、 ) Turn balance wheel to lower Feed dog (A) till it is horizontal with the surface (B) of thrat plate, at the moment, the tip of needle ( ) shonld be horizontal with the surfaces of throat plate and feed dog. Adjustment cam be done by adjusting the position of feed cam and feed dog lift cam. -
Page 18
tension discs should be pushed apart to open when the presser foot is lifted. But the open timing of the tension discs can be adjusted as follows: Remove face plate and the rubber plug at rear side of arm and loosen screw (A) of the knee lifting lever (left), then the tension releasing cam can be moved leftward or rightward when the cam is moved rightward, it is later to open, otherwise… -
Page 19
The lift amount of walking presser foot together with presser foot can also be adjusted slightly. When adjusting, loosen screw (A) adjust its center distance B between the screw (A) and the presser foot lift shaft. The lift amount is increased as to shorten the center distance B, and the lift amount is decreased as to widen the center distance B. -
Page 20
Remove the throat plate, clean off all the dust and lint on the slit of the feed dog (A), the installing the throat plate. Clean off all the dust around the rotating hook (A), and clean the bobbin case with soft cloth. Take off the oil filter, clean off the dust of filter screen (A) with gasoline. -
Page 21
Parts Manual… -
Page 22
51 52 9 10… -
Page 23
No . Part number Name Remark 242WF1-001 7WF4-001 7WF4-005 Holder Screw 1WF3-025 Face plate 1KT1-002 Rear cover(small) 241WF1-005 Φ 22T1-003C Rubber Plug( Φ 22T1-003C Rubber plug( 11.8) Thread finger 22T1-003C Screw 22T1-003C Screw 7WF4-004 Oil screen complete 14WF4-005 Three-eye finger 36T2-004 Screw 36T2-005… -
Page 24
25 26 41 42… -
Page 25
No . Part number Name Remark Arm shaft 70WF1-001 Rubber plug 22T3-001A Collar 22T3-002B Screw 22T3-002B Front bushing 4WF1-006 Middle bushing 4WF1-002 J0.0.40 Screw Rear bushing 22T3-005 Oil seal complete 22T3-006F Screw 22T3-008 Screw 22T3-007C Feed dog lift cam 36T3-003D Screw 36T3-003D Seperating piece for cam… -
Page 26
14 15… -
Page 27
No . Part number Name Remark Feed dog 20 T3-008 Feed dog 75WF4-001 Feed dog support complet 36T4-001A 75WF4-005A Feed dog support complet 51T5-001A Washer 36T4-001A Eccentric shaft Screw J0.0.50 Feed dog support crank 4WF2-002 61-04-01/B504 Screw 22T2-019 Screw Feed shaft 7WF2-004 Stop ring GB894.1 15… -
Page 28
P U S H… -
Page 29
No . Part number Name Remark 4WF2-012 Link pin Stitch length bracket 7WF2-012 Stitch length bracket 75WF4-002 20T2-031 Screw Screw 22T5-010D Bushing 5WF1-003 Shaft for stitch length bracket 22T5-004 Rubber plug( 36T5-003 J0.0.5 Set screw 7WF2-009 Reverse feed lever crank Shaft for block 1KT3-002 Spring… -
Page 31
No . Part number Name Remark 33T3-003 Presser foot lift bar 22T1-011 Screw 1KT4-005 Presser bar lift cam O-type ring 4.5×1.8G GB3452.1-92 Oil seal 22T7-004B Knee lifter lever(left)complete 22T7-004B Lever(left) 22T7-004B Thread releasing cam 22T7-004B Screw 22T7-004B Screw 1KT4-004 Knee lifter drawing bar 22T7-005A Screw 35T3-305… -
Page 33
No . Part number Name Remark 7WF5-001 Shim 7WF5-002 7WF5-003 Washer G B / T 9 5 6 Guide shaft 7WF5-004 Needle of bearing 7WF5-005 Walking foot 7WF5-006 Walking foot 11WF5-001 61-04-01/B316 Screw Screw 7WF5-008 Washer G B 9 3 4 Holder for walking foot bar 7WF5-009 Link of walking foot… -
Page 34
7.Oil Pump -29-… -
Page 35
No . Part number Name Remark 15WF4-003 Oil pump 15WF4-006 Big gear for oil pump 15WF4-007 small gear for oil pump GB/T67 M3×10 Screw 15WF4-004 Cover for oil pump Adjusting plate for oil pump 22T8-007 Filter complete 22T8-008A Screw for oil pump 22T8-009 Shaft for oil pump 15WF4-005… -
Page 37
No . Part number Name Remark 4WF5-001 Oil reservoir 22T9-001A Screw 22T9-001A Washer 2KT9-008 Gasket 22T9-001A Hinge pin 22T9-001A Spring 22T9-001A Knee lifter stop bracket 22T9-001A Screw 22T9-001A 22T9-036 Screw 4WF5-002 Knee lifter prop bar 22T9-003B Connector GB/T5781 M6×12 /M6×20 Screw 22T9-003B Bent rod…
This manual is also suitable for:
Gc0303cx
- Manuals
- Brands
- typical Manuals
- Sewing Machine
- GC0303
- Operation instructions manual
Upper and lower feed lockstitch sewing machine
1
2
3
4
5
6
8
9
10
11
12
13
14
15
17
18
19
20
21
22
24
25
26
27
28
29
31
32
33
34
35
36
-
Contents
-
Table of Contents
-
Bookmarks
Advertisement
Operation instruction
Notice:
1. Parts design is subject to change without notice.
2. Only the professional can adjust and repair the machine except adjusting stitch
length.
Previous Page
Next Page
- 1
- 2
- 3
- 4
- 5
- 6
- 7
- 8
Show Quick Links
- Quick Links:
-
Operation Instruction
Hide quick links:
Advertisement
Related Manuals for typical GC0303
-

Sewing Machine typical GC6760 SERIES Setup, Instruction & Service Manual
Double lockstitch high-speed seamer with direct drive with bottom and needle feed (56 pages)
-

Sewing Machine typical GC2605 Operating Instructions & Parts Manual
Cylinder bed compound feed binding machine (44 pages)
-

Sewing Machine typical GC6-6 Instruction Book
Compound feed lockstitch sewing machine (56 pages)
-
Sewing Machine Typical GC6180 Instruction Book
High-speed lockstitch sewing machine
with drop feed (34 pages) -
Sewing Machine typical GC9 SERIES Instruction Book & Parts Catalogue
(77 pages)
-

Sewing Machine typical GC6-7D Instruction Book & Parts Catalogue
Compound feed lockstitch sewing machine (35 pages)
-
Sewing Machine typical GC6280 Instruction Book
Direct-drive high-speed lockstitch sewing machine with drop feed (25 pages)
-

Sewing Machine typical GC0303D Operation Instructions Manual
(38 pages)
-

Sewing Machine typical GC24660 User Manual
Post-bed single/twin needle upper and lower roller feed sewing machine (36 pages)
-

Sewing Machine Typical GC20616 Operation Instructions And Parts Manual
Single needle upper and lower roller feed needle feed lockstitch sewing machine (34 pages)
-
Sewing Machine typical GC6880 Instruction Manuals For Control
High speed 1-needle flatbed sewing machine (11 pages)
-

Sewing Machine typical GC0323 Manual
Lockstitch sewing machine with top and bottom feed (39 pages)
-

Sewing Machine typical GT856D Instruction Book
(43 pages)
-

Sewing Machine typical GT1790A Instruction Book
Computer-controlled high speed lockstitch buttonholing machine (85 pages)
-

Sewing Machine typical GC20606-D2 Operation Instruction Manual
2/1- needle compound feed lockstitch sewing machine with automatic thread trimmer (47 pages)
-
Sewing Machine typical TW3-P335 Instruction Book & Parts Catalogue
Cylinder arm compound feed lockstitch (42 pages)
Related Content for typical GC0303
-
GC0323 Operation Instruction
typical GC0323
-
TW1-1245 Operation Instruction
typical TW1-1245
-
GC0303D Operation Instruction
typical GC0303D
-
GC20606-D2 Operation
typical GC20606-D2
-
GT1790A Operation Preparation
typical GT1790A
-

-
GT856D The Introduction To The Operation Panel And The Sewing Operations
typical GT856D
-

TW7-6BR Briet Instruction
typical TW7-6BR
-
TW3-P335 Brief Instruction
typical TW3-P335
-
GC6-6 Operation
typical GC6-6
-
GC2605 Operation
typical GC2605
-
GC6880 Safety Instruction
typical GC6880
This manual is also suitable for:
Gc0303cx
Note for Owners:
Guidesimo.com webproject is not a service center of typical trademark and does not carries out works for diagnosis and repair of faulty typical GC0303 equipment. For quality services, please contact an official service center of typical company. On our website you can read and download documentation for your typical GC0303 device for free and familiarize yourself with the technical specifications of device.
-
Singer 2250
Feature Benefit 10 Built-in Stitch Patterns 6 Basic Stitches, 3 Decorative Stitches, 1 Buttonhole—perfect for crafts, home dec, clothing construction and much more! Automatic 4-step Buttonhole Make beautiful buttonholes automatically in 4 easy steps Adjustable Stitch Length Adjust the desired stitch length by a simple turn of the dial Adjustable Tension Ensures excellent straigh …
2250 Sewing Machine, 2
-
Brother TN-842B
TN-842ATN-842B ᧄ㊎ᧄ❔㊎ㅍࠅࡒࠪࡦ ᧄ㊎ᧄ❔㊎ㅍࠅ⥄േ♻ಾࠅࡒࠪࡦTWIN NEEDLE NEEDLE FEED LOCK STITCHER TWIN NEEDLE NEEDLE FEED LOCK STITCHER WITH THREAD TRIMMER ࡄ࠷ࡉ࠶ࠢPARTS BOOK …
TN-842B Sewing Machine, 73
-
Brother XC9110-021
2112ef1XC9110-021Quick Start Guide 1 – Preparing the bobbin thread – / Guide de démarrage rapide 1 – Préparation du fil de la canette – / Kurzstartanleitung 1 – Vorbereitung des Spulenfadens –Verkorte handleiding 1 – De onderdraad voorbereiden – / Guía de inicio rápido 1 – Preparación del hilo de la bobina – / Guida di avvio rapido 1 – Preparazione della spolina � …
XC9110-021 Sewing Machine, 2
-
UnionSpecial 34700 G
From the library of: Superior Sewing Machine & Supply LLCFINEST STYLES TYPEN 34700 G 34700 DG 34700 KG 34700 KDG CATALOG NO. KATALOG NR. 292 INDUSTRIAL SEWING MACHINES G … ,, TWO NEEDLE CYLINDER BED COVER SEAM MACHINE WITH CLOSE COUPLED PULLER t ‘ t ZWEINADEL ZYLINDER 0BERDECKMASCHINE MIT PULLER DICHT HINTER DEM DR0CKERFUSS Union Special Corp. 400 North Franklin Street, Chicago, Illinoi …
34700 G Sewing Machine, 76
-
SunStar KM-1060BL
SSUUNNSSTTAARR MMAACCHHIINNEERRYY CCOO..,, LLTTDD..USER’SMANUALKM-1060BL Series KM-1060BLHigh Speed, 1-Needle, Unison Feed Lock Stitch MachineKM-1060BL-7High Speed, 1-Needle, Unison Feed Lock StitchMachine with an Automatic Thread TrimmerKM-1062BL High Speed, 2-Needle, Unison Feed Lock Stitch MachineKM-1062BL-7High Speed, 2-Needle, Unison Feed Lock StitchMachine with an Automatic Thread Trimmer1 …
KM-1060BL Sewing Machine, 40
-
Rimoldi 183
-:/ -· —·< -?~~:f::-11~r;;~r:j’.:~~~t:::’.~;?~;;i:·;1f:~:’.T’.7~~~:~~:::::r::,;:·~::’.:·:tc:’.}t’_:~:?’·,:1:’;:’,::0j,»:1r0′.~:~:n~~; •· .. · ··1N$TRl!CTIONS. HANPB.ori~ .. ·••·~il3RAllCHSA~~l;ISIJN~Eijc>J’f·c ; .. , r [email protected]~1~,d~¥t:tJ~~, .·.:,·.•,··:~:·::::-·:.-}j/);:’.’»: :� …
183 Sewing Machine, 79
-
UnionSpecial Picoetta G79000 Series
TT’:—CATALOG No. 60Instructions for Installing, Operating and Adjustingwith List of PartsPicoetta MachinesClass G79000UNION SPECIAL MACHINE COMPANYGeneral Olllce and Factory: 400 North Franklin StreetCHICAGO. ILLINOISa!BRANCHES AND SERVICE STATIONS, UNITED STATESIJostoii. Muss.T^iin, Mass.Havcrhili. Mass.New York. N. Y.Utiea. N. Y.Rochester, X. Y..Johnson City. N. Y.Buffalo, N. Y.Troy. N. Y. …
Picoetta G79000 Series Sewing Machine, 44
-
JUKI LZ-2280N Series
LZ-2280NSeriesHigh-speed, 1-needle, Lockstitch, Zigzag Stitching MachineLZ-2284C-7LZ-2280N SeriesHigh-speed, 1-needle, Lockstitch, Zigzag Stitching MachineLZ-2282N-7/CP-180AThe sewing machine produces soft seams with consistency with a low tension applied to the thread even when it runs at a high speed. …
LZ-2280N Series Sewing Machine, 4
Popular Sewing Machine User Guides:

Проблема в следующем, например сшиваеш детали нитью номер 40 и использую иглу 90 верхняя нить раскручивается и рвется также и с 110 но когда используеш 120 все нормально . Может кто то сталкивался с подобной проблемой или 120 норма для нить 40 . Какое соответствие игла -нить ?Иглы новые гроз бекер заусенцев нет ни где вроде бы, мастера вызывал но проблему не решили, нитки еврон, филан, титан со всеми так
Войдите или зарегистрируйтесь, чтобы писать комментарии, задавать вопросы и участвовать в обсуждении.
Комментарии 36
Войдите или зарегистрируйтесь, чтобы писать комментарии, задавать вопросы и участвовать в обсуждении.

Привет. При переходе между иглами, ничего переставать не требуется. Я настраивал на 120той, и потом от 140ой до 90той всё чётко.


Сильно нить верхнюю натягивал
Не притендую на экспертное мнение, но, свою машинку я сам настроил . Свёл к минимуму зазор между иглой и носиком челнока. Просто при подьеме иглы не всегда образуется петля достаточного размера и носик челнока не захватывет её, тем более при сильном натяжении и толстом материале. Тогда образуются пропуски. А если нитка раскручивается, то при подьёме иглы петля и вовсе расслаивается и носик входит в нить между волокон и рвёт её.
И мне очень не нравятся нитки еврон, тоже раскручиваются и расслаиваются . Филан, синтон и DURAK не раскручиваются и шить одно удовольствие!
Так что минимизация зазора практически в ноль дала мне 99% избавление от рванины и пропусков даже на евроне.
Спасибо за совет все таки подожду мастера так глубоко лезть пока не буду

navigator-h
Не притендую на экспертное мнение, но, свою машинку я сам настроил . Свёл к минимуму зазор между иглой и носиком челнока. Просто при подьеме иглы не всегда образуется петля достаточного размера и носик челнока не захватывет её, тем более при сильном натяжении и толстом материале. Тогда образуются пропуски. А если нитка раскручивается, то при подьёме иглы петля и вовсе расслаивается и носик входит в нить между волокон и рвёт её.
И мне очень не нравятся нитки еврон, тоже раскручиваются и расслаиваются . Филан, синтон и DURAK не раскручиваются и шить одно удовольствие!
Так что минимизация зазора практически в ноль дала мне 99% избавление от рванины и пропусков даже на евроне.
Добрый день, подскажите как настроить этот зазор ? И как я понял при установке более толстой иглы носик челнока уже будет задевать за саму иглу, т.е придётся постоянно его двигать при переходе иглы с Толстой на тонкую
Привет. При переходе между иглами, ничего переставать не требуется. Я настраивал на 120той, и потом от 140ой до 90той всё чётко.

Однозначно — это настройка машины.
У меня была таже проблема на китайской машине, раскручивало и потом рвало верхнюю нить. Особенно когда нужно было закреп сделать. Проблема была именно на 40-ке. Замена игл и ниток проблему не решала.
Пару дней назад был мастер, сделал настройку и все работает.
Ищи хорошего настройщика!
Спасибо есть хороший настройщик но его не дозавешся две недели жду, буду еще просить его
Сегодня поставил 110 иглу на 90 нить шет пока нормально, вчера не хотела при тех же настройках машины. Это что на нее атмосферное давление влияет 


vovhikk
Сегодня поставил 110 иглу на 90 нить шет пока нормально, вчера не хотела при тех же настройках машины. Это что на нее атмосферное давление влияет
Нитка. Элементарная замена нитки 40 на нитку 40, но другого производителя. Другое кручение.
Тупо в колпачке шпульку наоборот поставил и прочие мелочи, на которые ты не обращаешь внимания.
А машина очень даже
Тебе щаз такого бреда наговорят.
Ты нашел где создать тему…
Одни мастера

Фото пришли, как машинка заправлена

у меня тоже typical gc0303 — иглы по коже только 120-130 использую. (130 ставлю для отделочных строчек под нить 10, 15). Тут не только влияет соответствие нить/игла, еще и толщина материалов. Алькантару, к примеру, можно 90й иглой пройти, а для кожи 120-130. Кожу ведь пробить нужно-это тяжелый материал, поэтому и иглы толще. Ну, и еще на пробив кожи влияет маркировка иглы -«LR». Еще может влиять натяжение нижней нити на шпульном колпачке- там маленький винтик чуть ослабить, чтоб, держа за нить, при легком потрясывании, шпулька под своим весом опускалась.
Ну и мастер настройщик еще не факт, что мастер. Нужно самому проверить зазор между челноком и иглой и точку прохода челнока мимо иглы -(стр.11). welltex.ru/etc/file_manag…typical/GC0303_0303CX.pdf -если зазор чуть больше, то челнок будет не подхватывать нить с иглы а бить по нити и стягивать ее и дальше как у тебя на фото.
Спасибо по поводу мастера с самого начала были сомнения как только он начал настраивать

блин… че вспомнил! была добыта PFAF с идеальным накатом. шуршит а не шьет. но нитку дербанила. в металолом сдал. думал ей хана. теперь муки совести до конца дней.
нехрена себе. я че один в нитках ничего не понимаю? ладно… машинку купил пойду учиться…

иголка тонкая, 90 это вобще для 60-й нитки
Странно, а я идиот 90 иглой кожу шью. А торпеду вообще 80й. Надо срочно 120 ставить, чтоб дыры видно было)))
taxa-73
Странно, а я идиот 90 иглой кожу шью. А торпеду вообще 80й. Надо срочно 120 ставить, чтоб дыры видно было)))
Не слушай его, глупости говорит
SteamMachine
иголка тонкая, 90 это вобще для 60-й нитки
для 60й нитки 70ая игла.
для 60й нитки игла используется 70ка
для 40й — 90ая. Если ну очень толстый бутерброд сшивать, то 100ка
для 20й — 120… Опять же, можно до 140 увеличивать, если ну очень толсто.
для 10й — 140 минимум. Иногда 150-160 когда ковры строчу или ковролин
Это при условии, что у меня идеально настроена машина.
Если нет, то конечно размер игл увеличивается для каждой нити, иначе нить просто пушит
очень много нюансов в этом кроется, особенно влияющих на качество
Я ж и говорю.
Но не надо кричать, что 60ку надо шить 90й иглой.
Это очень широкая игла для такой нитки.
Тут вообще надо поосторожнее быть с высказываниями, новички все за чистую монету принимают
90-я широкая? действительно чтото нетак…


такая проблема была, но я использовал 20 нить и 130 иглу мучался с регулировкой, (все это было с российскими нитками) потом перешел на италию, и все пошло как надо.

Я сломал мозг, читая это нагромождение букв

тупикал еще тот получился

У меня была точь в точь проблема. Игла гроц 90R, нить Веритас 40ка, пушит и рвет! Поставил 100ку и проблемы на малой скорости ушли. На высокой проблем уже нет со 120! Понято что надо менять нить, но пока не актуально, тк учусь шить)
Нашел в сети два способа проверить подходит ли игла к ните:
1. Отрезать 20-30см нити, вдеть иглу и пытать «катать» иглу по нитке. Если будет стопорить и «врезаться» в нить, берем номер выше иглы и также пробуем. Должно без проблем «кататься» игла по ните.
2. В ушко иглы должно проходить вдвое сложенная нитка.

Шпулька к челноке не болтается?
У меня даже звук издавала небольшой и было тоже самое.
РАзобрал\подогнул. ВСё прошло.
Была такая же история на аналогичном аппарате с перетопом джек 6380. Правда там на 110 игле нормально было с 40 нитью. Как ни пытался настроить натяжение на 90 игле — бесполезно. Сейчас на тройном продвижении такого нет, утяжку регулирую как угодно на 90 игле и шьет без запинки. Иглы и нить те же, что и на перетопе использовал. Вывод лично мой был такой, что дело не в настройках, а в типе машинки. Это был один из аргументов при решении поменять машинку.
может нить не для швейной машины? попробуй другого производителя. воще игла 120 для кожи нормально. хотя ней болинки и ремни стяжные шьют. так что думаю проблема в нитке.
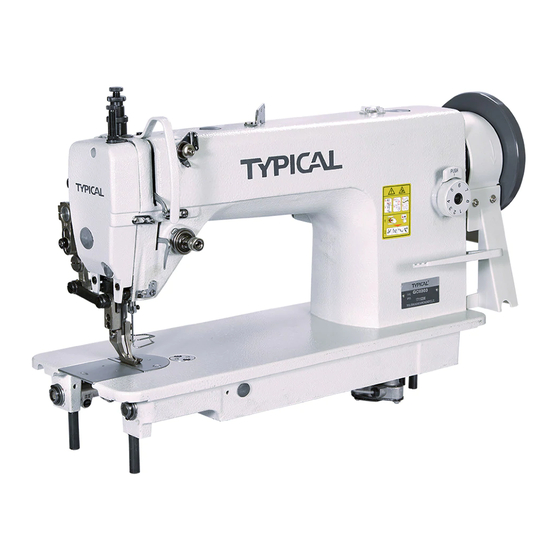
Typical GC 0303 – швейная машина с двойным продвижением. Представленная модель предназначена для работы с кожей, кожзамом, кожвинилом, алькантарой, брезентом, жаккардом, макспедом, оксфордом и прочими тяжелыми материалами толщиной до восьми миллиметров в сборке. Система иглы – DPx17. Рекомендуемый размер игл – №100―№160. Возможная толщина нити – #20―#40. Максимальная длина стежка – до 8 миллиметров. Максимальная скорость работы составляет 2000 ст/мин.
Когда речь идет о первоклассных швейных машинах, бренд Типикал на слуху у всех швейников, а модель Typical 0303 уже давно стала легендарной классикой среди портных. Если вы хотите уйти от ручного труда, обновить морально устаревшее оборудование или в принципе начать шить кожаную обивку, чехлы, сумки, ремни, кошельки, тактическое снаряжение и многое другое – данная машинка с двойным продвижением это ваш выбор. Typical GC0303 полностью отвечает уникальным потребностям кожевников, которые ищут надежную и недорогую швейную машину с необходимыми функциями. В частности, представленная модель оснащена двойной подачей материала. При таком виде продвижения материал перемещается при помощи зубчатой рейки и шагающих лапок, то есть за счет двух транспортеров – верхнего и нижнего. В свою очередь, механизм шагающей лапки имеет конструкцию из двух частей – внутренней и внешней. Когда внутренняя фиксирует материал, внешняя лапка, синхронно с зубчатой рейкой, выполняет его перемещение на длину стежка. Таким образом создается необходимое усилие для подачи толстых материалов и прохода утолщений при сборке многослойных узлов изделия. Кроме того, как и положено машинам подобного класса, данная модель оснащена двукратно увеличенным челноком, что позволяет эффективно работать с толстой нитью и уменьшить частоту перезаправки шпулек. Для продуктивной работы с толстыми материалами, Типикал 0303 также имеет высокий подъем лапок, сила давления которых может регулироваться, увеличенный ход игловодителя, для прокалывания материала на большую толщину, и увеличенный ход нитепритягивателя, для лучшей затяжки толстой нити в крепкий шов.
Представленная швейная машина двойного продвижения комплектуется столом, подставкой для катушек, устройством для быстрой намотки нити на шпульку и мелкими расходниками. Мотор в заводскую поставку не входит. Для оснащения мы рекомендуем современный серводвигатель мощностью 550 / 750 ватт. Мотор устанавливается раздельно – крепится под столом, а обороты на основной вал передаются через ремень. Подача смазки осуществляется автоматическим насосом, качающим масло на точки трения в автономном режиме. Все механизмы, непосредственно находящиеся в корпусе машинки Typical GC 0303, смазываются автоматически. Для механизма верхнего транспортера щедро протянуты фитили, но прокапать шарниры в начале работы, тоже будет не лишним. К счастью, для этого вам ничего не потребуется разбирать, ведь отверстия для капельной смазки уже предусмотрены.