-
Contents
-
Table of Contents
-
Bookmarks
Quick Links
Related Manuals for Native Instruments TRAKTOR KONTROL S4
Summary of Contents for Native Instruments TRAKTOR KONTROL S4
-
Page 2: Table Of Contents
Table of Contents 1. Disclaimer ……………………1 2. Welcome to TRAKTOR KONTROL S4 …………….. 2 2.1. Document Conventions ………………2 2.2. Documentation Resources …………….3 2.3. In this Document ………………..3 3. Concepts ……………………4 3.1. S4 and TRAKTOR Control Concept …………..4 3.2.
-
Page 3
9. Integrating External Devices ………………79 9.1. Integrating Microphone ………………. 79 9.2. Integrating Turntable ………………80 9.3. Integrating CD Players ………………81 9.4. Enabling Scratch Function in TRAKTOR …………81 10. Setting the TRAKTOR KONTROL S4 as Your Default Audio Interface ……83… -
Page 4: Disclaimer
The information in this document is subject to change without notice and does not represent a commitment on the part of Native Instruments GmbH. The software described by this document is subject to a License Agreement and may not be copied to other media. No part of this publication may be copied, reproduced or otherwise transmitted or recorded, for any purpose, without prior written permission by Native Instruments GmbH, hereinafter referred to as Native Instruments.
-
Page 5: Welcome To Traktor Kontrol S4
Welcome to TRAKTOR KONTROL S4 2. WELCOME TO TRAKTOR KONTROL S4 Thank you for choosing TRAKTOR KONTROL S4, it is because of customers like you that we can continue developing groundbreaking music software and hardware. TRAKTOR KONTROL S4 is a fully integrated hardware and software DJ performance system.
-
Page 6: Documentation Resources
• TRAKTOR PRO 3 Manual: For in-depth information on all features provided by the TRAKTOR software, refer to the TRAKTOR PRO 3 Manual. 2.3. In this Document What you are reading now is the TRAKTOR KONTROL S4 Manual. This manual is structured as follows: •…
-
Page 7: Concepts
Concepts 3. CONCEPTS In this section you are briefly introduced to the main concepts of the TRAKTOR KONTROL S4 and some basic concepts of the TRAKTOR software. 3.1. S4 and TRAKTOR Control Concept This section quickly introduces the main areas and concepts of your TRAKTOR KONTROL S4 hardware controller with reference to the TRAKTOR PRO software.
-
Page 8: Haptic Drive Modes
Concepts 3.2. Haptic Drive Modes You can operate the Jog Wheels on the S4 in three different modes, called HAPTIC DRIVE MODEs. Each HAPTIC DRIVE MODE provides you with different control functions for the Jog Wheels. • JOG mode: The JOG mode lets you control the playback of your tracks by spinning the Jog Wheel.
-
Page 9: Automatic Track Synchronization
Concepts STEMS mode is available only for STEM Decks. On the S4 Decks A and B the STEMS button lights up blue whereas on the S4 Decks C and D the STEMS button lights up orange. For more Information, refer to Playing with STEM Decks.
-
Page 10: Snap Mode And Quantize Mode
Concepts 3.6. Snap Mode and Quantize Mode Snap mode and Quantize mode are important tools that can help you when working with Cue Points and Loops, and for jumping in the track: • The Snap mode ensures that any Loop or Cue Point you set in a track snaps to the closest beat.
-
Page 11: Setting Up Traktor Kontrol S4
Registering and Installing a Native Instruments Product using NATIVE ACCESS. This section describes how to set up the TRAKTOR KONTROL S4. When all devices are connec- ted your setup will look like the following illustration: TRAKTOR KONTROL S4 setup.
-
Page 12: Connecting An Amplification System
Setting up TRAKTOR KONTROL S4 4.2. Connecting an Amplification System To connect your power amplifier system to the TRAKTOR KONTROL S4: • Connect the MAIN OUT XLR or RCA outputs on the rear panel of the TRAKTOR KONTROL S4 to the inputs of your amplification system using the appropriate cables.
-
Page 13: Connecting Headphones
Setting up TRAKTOR KONTROL S4 • Connect the BOOTH OUT outputs on the rear panel of the TRAKTOR KONTROL S4 to the inputs of your monitoring system using appropriate cables. 4.4. Connecting Headphones To connect headphones to the TRAKTOR KONTROL S4: •…
-
Page 14: Final Preparation
Setting up TRAKTOR KONTROL S4 4.6. Final Preparation After successfully setting up the TRAKTOR KONTROL S4 system, you need to prepare final steps before you can start using you S4. At first you switch on your devices and then you configure TRAKTOR to be used with you S4.
-
Page 15
Setting up TRAKTOR KONTROL S4 Switching to TRAKTOR Default Settings When you start TRAKTOR with the S4 for the first time, TRAKTOR asks if you want to switch Mix- er FX selection and the Tempo fader range to default setting. This is necessary to get the intended user experience of your S4: TRAKTOR alert for switching Mixer FX and TEMPO fader range to default settings. -
Page 16: Importing Music To The Track Collection
Setting up TRAKTOR KONTROL S4 4.7. Importing Music to the Track Collection The most convenient way to get your tracks into TRAKTOR’s Track Collection is using drag and drop: • Drag the music files from the location on your computer and drop them in the Track Collec- tion folder in TRAKTOR’s Browser Tree.
-
Page 17: Traktor Kontrol S4 Overview
TRAKTOR KONTROL S4 Overview 5. TRAKTOR KONTROL S4 OVERVIEW This section introduces you to the TRAKTOR KONTROL S4 and all its control elements and con- nectors. TRAKTOR KONTROL S4 Overview. (1) Decks: You can use the Decks to control tracks and Samples, similar to DJ turntables or CD players but with additional features.
-
Page 18
TRAKTOR KONTROL S4 Overview (3) FX Units: You can further process the signals in the Mixer channels by using the two FX Units located at the top-left and top-right on your S4 and in the software interface. The FX Units give you access to a collection of high-quality effects included in TRAKTOR. -
Page 19: Decks
TRAKTOR KONTROL S4 Overview 5.1. Decks TRAKTOR KONTROL S4 provides you with two physical Decks to control the TRAKTOR Decks. Each Deck provides you with the following control elements: S4 Deck. (1) Browse controls: Allow you to scroll through the Track Collection to find and load tracks, as well as previewing tracks and preparing playlists.
-
Page 20
TRAKTOR KONTROL S4 Overview (4) SYNC (Lock): Syncs the Deck to the Tempo Master. Using SHIFT and SYNC (Lock) locks the TEMPO fader for the Deck. For more information, refer to Adjusting Tempo Locking the Key of Tracks. (5) TEMPO fader: Lets you manually adjust the track tempo on that Deck. The TEMPO fader can be operated in Absolute mode and in Relative mode. -
Page 21: Browse Controls
TRAKTOR KONTROL S4 Overview (19) FX Unit: The FX Units allow you to control the effect parameters in the FX Units in the TRAK- TOR software. Each Deck features one FX Unit which can be assigned to any Mixer channel. FX Unit 1 is located on the left Deck, and FX Unit 2 on the right Deck.
-
Page 22
TRAKTOR KONTROL S4 Overview Pad section. (1) HOTCUES button: Enables HOTCUES mode. In this mode, you can store and trigger Cue Points and Loops within tracks using the Pads. On Decks A and B the HOTCUES button lights up blue whereas on Decks C and D the HOTCUES button lights up orange. The HOTCUES mode is the default mode for Track Decks and STEM Decks. -
Page 23: Display Elements For Tracks And Stem Files
TRAKTOR KONTROL S4 Overview 5.1.3. Display Elements for Tracks and STEM Files When the HOTCUES mode or the STEMS mode is enabled, the display contains the following ele- ments: Display elements for tracks and STEM Files. (1) Track title: Displays the title of the loaded track or STEM File.
-
Page 24: Mixer
Decks. 5.2. Mixer Sitting in the middle of the TRAKTOR KONTROL S4 controller, the Mixer receives the audio sig- nals coming from Decks. There is one channel for each Deck. The Mixer’s purpose is to adjust the relative level of each channel, to control the mixer channels’ frequency content, possibly feeding them into the FX Units before sending the overall result to the Master output, and in the end, to generate the mix that is sent to your audience.
-
Page 25
TRAKTOR KONTROL S4 Overview (2) MASTER knob: Adjusts the MASTER signal level. For more information, refer to Adjusting Levels. (3) QUANT (Snap) button: Allows you to enable or disable Quantize mode and Snap mode. For more information, refer to Snap Mode and Quantize Mode. -
Page 26: Mixer Channel
TRAKTOR KONTROL S4 Overview 5.2.1. Mixer Channel The Mixer channels receive the individual audio signals from the Decks. Each Mixer channel con- tains controls to adjust the incoming and outgoing levels, and the audio signal’s frequency con- tent. Any of the four Mixer channels can integrate different external sources. Whereas Mixer chan- nels A and B are equipped with an additional PHONO pre-amplifier for connecting turntables, Mix- er channels C and D integrate microphones instead.
-
Page 27: Fx Unit
TRAKTOR KONTROL S4 Overview (6) MIXER FX Amount knob: The MIXER FX Amount knob controls the amount of the MIXER FX to be applied to the audio signal. In center position the MIXER FX is disabled for the individual Mixer channel. For more information, refer to Playing with MIXER Effects.
-
Page 28: Front Panel View
TRAKTOR KONTROL S4 Overview 5.4. Front Panel View The front panel hosts controls for assigning the Mixer channels to the crossfader, and sockets for connecting headphones and a microphone. Front panel. (1) Crossfader Curve selector: Selects the curve which lets the audio signals fade in and out when moving the crossfader from one side to the other.
-
Page 29
(11) USB HUB: Connects a USB device, for example, another TRAKTOR controller or a USB-Hub. (12) USB socket: Connects your S4 to the computer using the supplied USB cable. (13) PSU socket: Connects the supplied Native Instruments Power Supply to the S4. (14) Power switch: Switches the S4 on or off. -
Page 30: Mixing Your First Tracks
Mixing Your First Tracks 6. MIXING YOUR FIRST TRACKS In this section you will learn to mix your first two tracks, using Deck A and Deck B, with the SYNC function. For this method, you will not need to use the Jog Wheels or your headphones. At first you will prepare the Mixer by adjusting the control elements for mixing tracks between Deck A to Deck B.
-
Page 31: Loading The First Track Into Deck A
Press the VIEW button to maximize the Browser view in the software. Turn the Browse encoder to select one of your tracks in the Track List, or a demo track, for example, Berlin Hauptbahnhof by Native Instruments. Press the Browse encoder to load the selected track into that Deck.
-
Page 32: Starting Playback Of Deck A
Mixing Your First Tracks TRAKTOR now analyzes the track to determine its tempo, and to create the Beatgrid and the Waveform. Press the VIEW button again to minimize the Browser view in the software. 6.3. Starting Playback of Deck A To start playback on Deck A: Press the Play/Pause button on the left S4 Deck.
-
Page 33
Press the VIEW button to maximize the Browse view in the software. Turn the Browse encoder to select one of your tracks in the Track List, or a demo track, for example, Lisa by Native Instruments. Press the Browse encoder to load the track into the Deck. -
Page 34: Syncing The Track Tempos
Mixing Your First Tracks Press the VIEW button again to minimize the Browser view in the software. 6.5. Syncing the Track Tempos In order to sync the tempos of both tracks: • Press the SYNC (Lock) button on the right S4 Deck. The tempo of the track in Deck B is now synced to the running track, indicated by the equal tempo value in the software’s Deck Header.
-
Page 35
Mixing Your First Tracks The audio signal of the track in Mixer channel B fades into the Master signal. While the track in Deck A reaches its end, slowly move the crossfader towards the right-most position. The audio signal of Mixer channel A slowly fades out of the Master signal. Only Mixer chan- nel B is now audible. -
Page 36: Tutorials
Tutorials 7. TUTORIALS The tutorials in this section introduces you to the several functions and features of the S4. The fol- lowing list provides you with an overview of the tutorials including the link to it: • Browsing and Loading Tracks: By having your music imported in TRAKTOR, you can use the Browse controls on the S4 to find tracks for your mix.
-
Page 37: Browsing And Loading
Tutorials you to preview your tracks and your sound adjustments before you transition to the next track. For more information, refer Previewing Tracks in the Browser, and Using CUE Channel. • Working with the Preparation List: TRAKTOR’s Browser allows you to prepare for your next mix.
-
Page 38: Controlling Playback
Tutorials Press and hold the Star button + turn the Browse encoder to select another favorite folder. The Track List shows the content according to the selected folder. Loading the Track into the Deck To load the selected track into the Deck: •…
-
Page 39: Using Transport Controls
Tutorials 7.2.1. Using Transport Controls The Transport Controls let you start and pause playback as well as cue the track. Starting/Pausing Playback To start the playback of the loaded track: • Press the Play/Pause button. To pause the playback: • Press the Play/Pause button again.
-
Page 40
Tutorials Enabling JOG Mode To enable JOG mode: • Press the JOG button on the Deck. The JOG button brightly lights up in the color of the focused Deck. Tempo Bending and Nudging You can use the Jog Wheel to manually correct the sync of tracks by bending or nudging the Deck tempo. -
Page 41
Tutorials If you select the option Ticks when Nudging in the Preferences, you then feel ticks in the Jog Wheel when spinning it using its outer rim. This option applies only for JOG mode. For more information, refer to Preferences. Cueing and Scratching You can hold the track playback with the Jog Wheel to cue a beat or to scratch: Touch and hold the top plate of the Jog Wheel. -
Page 42
Tutorials While holding the top plate, spin the Jog Wheel back and forth to perform a scratch. If you select the option Enable Haptic Hotcues Preferences, you then feel haptic feedback in the Jog Wheel when cuing Cue Points and Loop markers while touching the top plate. -
Page 43: Using Jog Wheels In Turntable Mode
Tutorials Disabling the Top Plate’s Touch-Sensitivity You can disable the touch-sensitivity of the top plate for the JOG mode. This enables you to also use the top plate to bend or nudge the track tempo. To disable the touch-sensitivity: • Press the JOG button.
-
Page 44
Tutorials In the Preferences you can adjust the Base speed for the Jog wheels. For more information, refer to Preferences. Enabling Turntable Mode To enable Turntable mode: • Press the TT button on that Deck. The TT button brightly lights up in the color of the focused Deck. Tempo Bending and Nudging During Deck playback you can use the Jog Wheel to temporarily bend or to nudge the Deck tem- po. -
Page 45
Tutorials Cueing, Seeking and Scratching You can use the Jog Wheel to cue a beat or to scratch: Touch and hold the top plate of the Jog Wheel. The Jog Wheel stops to rotate and and the playback is held. While holding the top plate, spin the Jog Wheel clockwise or counterclockwise to cue a beat or to seek in the track. -
Page 46: Assigning Mixer Channels To The Crossfader
Tutorials While holding the top plate, quickly spin the Jog Wheel back and forth for scratching the track. When you release the top plate, the Jog Wheel continues to rotate and the Deck playback continues. By enabling the option Enable Haptic Hotcues in the Preferences, you then feel a haptic feedback in the Jog Wheel when cuing Cue Points and Loop markers using the top plate.
-
Page 47: Setting The Crossfader Curve
Tutorials To assign a Mixer channel to the right crossfader side: • Set the crossfader assign selector for the corresponding Mixer channel to the right. Unassigning Mixer Channels To unassign a Mixer channel from the crossfader: • Set the crossfader assign selector for the corresponding Mixer channel to the center position. 7.3.1.
-
Page 48: Adjusting Levels
Tutorials • Set the crossfader curve selector to the center position. If you want the crossfader to use the sharp curve: • Set the crossfader curve selector to the right. 7.4. Adjusting Levels When you mix tracks you need to make sure that the levels of both tracks are at the same level for flawless transitions.
-
Page 49
Tutorials To adjust the outgoing level of a Mixer channel: • Move the relevant channel fader up or down. The outgoing level changes accordingly. When the channel fader is set to its maximum posi- tion, the outgoing signal level equals the level of the incoming signal. You can also use the channel faders to transitions between audio signals without using the cross- fader. -
Page 50: Using The Equalizer
Tutorials To avoid damaging your ears, always watch the listening level of the connected speakers or power amplifier, and set it to a comfortable listening level. 7.5. Using the Equalizer You can use the equalizer to slightly adjust certain frequencies in the audio signal to highlight a specific part, like, attenuating vocals or a lead line.
-
Page 51: Using Cue Channel
Tutorials 7.6. Using CUE Channel You can use the CUE channel on the Mixer to preview tracks in the headphones. Any Mixer chan- nel is equipped with a CUE button to route the audio signal into the CUE channel. You can use the MIX and VOL knobs to determining the level for the CUE channel, as well as the ratio between the cued signal and the MASTER signal.
-
Page 52: Adjusting Tempo
Tutorials 7.7. Adjusting Tempo You can adjust the track tempo with the automatic Deck synchronization function SYNC and the TEMPO fader. When youusing the TEMPO fader the resulting effect depends on several factors: • When the SYNC function is used, changing the Tempo by moving the TEMPO fader only works on the Deck assigned to Tempo Master.
-
Page 53
Tutorials The track tempo decreases or increases, respectively. The key of the track changes accord- ingly. Locking TEMPO Fader To prevent accidental tempo changes you can lock the TEMPO fader: On the Deck, press and hold SHIFT to access the secondary Deck controls. While holding SHIFT, press the SYNC (Lock) button. -
Page 54
Tutorials Resetting Relative Tempo Fader Position When the TEMPO fader position in the software Deck does not match the TEMPO fader position on the S4 Deck, then you can reset the relative TEMPO fader position on the S4: On the S4 Deck, press and hold SHIFT to access the secondary Deck controls. While holding SHIFT, press the MASTER (Reset) button. -
Page 55: Locking The Key Of Tracks
Tutorials 7.8. Locking the Key of Tracks When you sync tracks, you change their tempos and, consequently, their pitches (or keys). Slow- ing down a track’s tempo will cause the track’s pitch to drop while speeding up a track’s tempo will cause the track’s pitch to rise.
-
Page 56
Tutorials The track tempo changes but the key value remains at the locked value. Adjusting the Key without Changing Tempo To change the pitch without changing the track tempo: Move the TEMPO fader up or down to set the desired track tempo. Press and hold SHIFT to access the secondary Deck functions. -
Page 57: Playing With Cue Points
Tutorials The enabled Keylock is indicated by the blue dot next to the key value. While holding SHIFT, turn the LOOP encoder clockwise to shift up the key value. Turn the LOOP encoder counterclockwise to shift down the key value. The pitch changes accordingly but the tempo remains unchanged.
-
Page 58
Tutorials Storing Cue Points as Hotcues Buttons To store a Cue Point as Hotcue: • At the desired position in the track, press a Pad. The Cue Point is set at the current playback position in the track and stored as Hotcue on the Pad. -
Page 59: Playing With Loops
Tutorials 7.10. Playing with Loops Loops are used as tools for remixing parts of tracks and can be used to extend track transitions. In this section you learn to play with Loops on the S4. Besides enabling Loops, you can store Loops as Hotcues in the track using the Deck’s Pads.
-
Page 60
Tutorials Changing the Loop Size You can instantly change the size of an enabled or disabled Loop: • Turn the LOOP encoder clockwise or counterYou can change the size of the enabled or disa- bled Loop:clockwise. The Loop size for the enabled Loop instantly changes by the value displayed in the Loop Control bar. -
Page 61: Playing With Flux Mode And Reverse Mode
Tutorials This instantly moves the Loop within the track by the selected Loop size. Removing a Stored Loop To remove a stored Loop from the Hotcue and from the track: • Press SHIFT and press a green lit Pad. The Loop is removed from the Hotcue and from the track. The Pad is now unlit. 7.11.
-
Page 62
Tutorials Flux mode is enabled. The second, virtual playhead continues forwards in the track. Press and hold a Pad with the Hotcue. The playback continues from the stored Cue Point or Loop. Release the Pad. The playback resumes at the playhead position created by Flux mode. You can also use Flux mode in conjunction with the Jog Wheel in JOG mode. -
Page 63: Playing With Mixer Effects
Tutorials 7.12. Playing with MIXER Effects A Mixer FX is a grouped effect that can be applied to the audio signal in the Mixer channel using the Mixer FX Amount knob. You can choose between the FILTER effect and one of four preselec- ted MIXER FX with the FX SELECT buttons 1 to 4.
-
Page 64: Playing With Fx Units
Tutorials Applying MIXER FX to the Audio Signal To apply the selected MIXER FX, in combination with a low-pass Filter, to the audio signal: • Turn the MIXER FX Amount knob counterclockwise. To apply the selected MIXER FX in combination with a high-pass Filter to the audio signal: •…
-
Page 65: Adding Tracks To The Preparation List
Tutorials The FX Unit Assign button lights up brightly. You can assign both FX Units to any Mixer channel at a time. Controlling FX Units On the S4 the FX Units reflect the current FX Unit configuration in TRAKTOR. To control the FX Units: Turn the FX Unit knobs 1 — 4 clockwise or counterclockwise to change the corresponding Ef- fect parameter.
-
Page 66: Previewing Tracks In The Browser
Tutorials Turn the Browse encoder to select a track in the Track List. Press the Preparation List button on that Deck. The track is added to the Preparation List. A diamond icon appears in the first column in the Track List in TRAKTOR indicating that the track is added to the Preparation List. Pressing the Preparation List button again removes the track from the Preparation List.
-
Page 67: Playing With Remix Decks
Tutorials To switch the Deck Focus on the right S4 Deck: • Press the DECK SELECT buttons B or D to switch the Deck focus to the corresponding Deck. When Decks A and Deck B are focused on the S4, the Deck LEDs light up blue. When Decks C and Deck D are focused on the S4, the Deck LEDs light up orange.
-
Page 68
Tutorials The TRAKTOR Layout switches to Browser view. Press and hold the Star button and turn the Browse encoder to select the All Remix Sets favorite folder. Turn the Browse encoder to select a Remix Set in the Track List. Press the Browse encoder to load the Remix Set into that Deck. -
Page 69
Tutorials To stop the playback of a Sample, press and hold SHIFT to access the Decks secondary functions. The colors of the first row of Pads change to white. While holding SHIFT, press the Pad for the corresponding Sample you want to stop play- back. -
Page 70
Tutorials The Volume parameter value in the display changes accordingly. Muting Sample Slots You can mute a Sample Slot immediately: Press and hold the Mute button. While holding the Mute button, press the Pad corresponding to the Sample Slot. The Sample Slot is muted. To unmute the Sample Slot, repeat the aforementioned steps. -
Page 71
Tutorials The Filter parameter value in the display changes accordingly. Selecting another Sample in Sample Slot You can instantly select another Sample in any Sample Slot, independent of the playback status of the Sample Slot. When the Sample Slot is playing Press and hold the Pad below the Pad for the corresponding Sample to access the sound controls for the Sample Slot. -
Page 72
Tutorials When the new Sample is highlighted, release the Pad. The playback of the Sample starts immediately in sync with the Quantize value. Enabling and Adjusting the Remix Deck’s Quantize Mode The Remix Deck provides an internal Quantize mode to let the Samples trigger at the right beat in the internal timeline. -
Page 73: Using Pattern Recorder
Tutorials The Quantize value changes accordingly. 7.17.1. Using Pattern Recorder The Pattern Recorder allows you to program sequences to be played by the Samples in the Remix Slots. When the Pattern Recorder is enabled, you can instantly play and record your sequences by tapping the Pads.
-
Page 74
Tutorials STEM Files allow you to interact with four different musical elements of a track independently. You can modify these four STEM Parts individually to create spontaneous instrumentals, remixes, or mashups. You can create transitions between musical elements STEM Part by STEM Part, or ap- ply effects and EQ to a specific STEM Part, rather than the entire track. -
Page 75
Tutorials • Press the Play/Pause button on the Deck. The STEM Deck plays back the STEM File. Adjusting STEM Part Volumes In order to adjust the volumes for the individual STEM Parts: Press the STEMS button to access STEM Deck controls. Press and hold the Pad below the Pad for the corresponding STEM Part to access the sound controls for that STEM Part. -
Page 76
Tutorials To reset the STEM Part volume, press and hold the Pad below the Pad of the corresponding STEM Part and press the MOVE encoder. The STEM Part volume is reset to full level. Muting STEM Parts You can mute a STEM Part immediately: Press and hold the Mute button and press the Pad corresponding to the STEM Part. -
Page 77
Tutorials Press and hold the Pad below the Pad corresponding to the STEM Part to access the sound controls for that STEM Part. The display shows the current Volume and Filter effect parameter values. While holding the Pad, press the LOOP encoder to enable the Filter effect for that STEM Part. -
Page 78: Correcting Beatgrids Of Tracks
Tutorials 7.19. Correcting Beatgrids of Tracks When a track contains a complex rhythm or an uneven timing, it can happen that the Beatgrid cal- culated by TRAKTOR does not precisely match the beat of the track. It is then not possible to match the beats of that track when mixing it using the SYNC function.
-
Page 79
Tutorials Besides the beat of the track, you now hear a second beat tick (like a metronome tick) repre- senting the Beatgrid. If the beat tick does not match the beat of the track, the Beatgrid is set incorrectly. Correcting Beatgrid To correct the Beatgrid setting, proceed as follows: While holding the GRID button, slightly turn the Jog Wheel clockwise or counterclockwise to move the Beatgrid forward or backward, respectively. -
Page 80: Preferences
Preferences 8. PREFERENCES When opening the Preferences dialog in TRAKTOR you will find an additional page for the S4 con- troller with configuration settings. Accessing TRAKTOR Preferences To open the Preferences in TRAKTOR: Click the Preferences button in TRAKTOR’s Header. Select the Traktor S4 MK3 page.
-
Page 81
Preferences Transport • Tempo Faders: Determines the TEMPO fader mode. • In Absolute mode, the track tempo automatically adjusts according to the TEMPO fader position when loading the track. • In Relative mode, the track tempo is always set to the original tempo independent of the current TEMPO fader position when loading the track. -
Page 82: Integrating External Devices
Integrating External Devices 9. INTEGRATING EXTERNAL DEVICES The S4 provides you with the possibility to integrate external audio devices. Besides integrating microphones, you can also connect devices like turntables and CD players. This enables you to mix in external audio from vinyl and CD. In conjunction with turntables and CD players you can enable TRAKTOR’s Scratch function to control the Decks with timecode vinyls or timecode CDs, which you can purchase separately.
-
Page 83: Integrating Turntable
Integrating External Devices Switching the Deck to Live Input To switch the S4 Deck to Live Input Press the EXT button on the Mixer channel you want to insert the microphone signal from. The Deck has switched to Live Input. You can now speak into the microphone. Set the incoming microphone signal to an adequate level by turning the GAIN knob on the Mixer channel.
-
Page 84: Integrating Cd Players
CD player(s). For this, you need the the timecode control vinyl or CD which you can pur- chase separately on the Native Instruments website. This section introduces you the workflow on how to enabling the Scratch function in TRAKTOR.
-
Page 85
Integrating External Devices Click the Deck letter of the Deck for which you want to enable the Scratch function. The context menu opens. Select Track Deck. The Deck switches to Track Deck. Click the Deck letter again to open the context menu. Select Scratch Control. -
Page 86: Setting The Traktor Kontrol S4 As Your Default Audio Interface
10. SETTING THE TRAKTOR KONTROL S4 AS YOUR DEFAULT AUDIO INTERFACE If you want to use the TRAKTOR KONTROL S4 for playback of all audio applications on your com- puter, you can set it as your default audio interface. Windows…

Manual

Disclaimer
The information in this document is subject to change without notice and does not represent a commitment on the part of Native Instruments GmbH. The software described by this document is subject to a License Agreement and may not be copied to other media. No part of this publication may be copied, reproduced or otherwise transmitted or recorded, for any purpose, without prior written permission by Native Instruments GmbH, hereinafter referred to as Native Instruments.
“Native Instruments”, “NI” and associated logos are (registered) trademarks of Native Instruments GmbH.
Mac, Mac OS, GarageBand, Logic, iTunes and iPod are registered trademarks of Apple Inc., registered in the U.S. and other countries.
Windows, Windows Vista and DirectSound are registered trademarks of Microsoft Corporation in the United States and/or other countries.
All other trade marks are the property of their respective owners and use of them does not imply any affiliation with or endorsement by them.
Document authored by: Native Instruments GmbH
Software version: 2.5 (05/2012)
Special thanks to the Beta Test Team, who were invaluable not just in tracking down bugs, but in making this a better product.

Contact
Germany
Native Instruments GmbH
Schlesische Str. 29-30
D-10997 Berlin
Germany
www.native-instruments.de
USA
Native Instruments North America, Inc. 6725 Sunset Boulevard
5th Floor
Los Angeles, CA 90028 USA www.native-instruments.com
© Native Instruments GmbH, 2012. All rights reserved.

Table of Contents
Table of Contents
|
1 Welcome to the World of TRAKTOR KONTROL S4! ……………………………………………….. |
11 |
|||
|
1.1 |
What Is TRAKTOR KONTROL S4? …………………………………………………………………………………….. |
11 |
||
|
1.2 |
The TRAKTOR KONTROL S4 Documentation ……………………………………………………………………… |
11 |
||
|
1.2.1 |
Where To Start …………………………………………………………………………………………….. |
11 |
||
|
1.2.2 |
In This Manual …………………………………………………………………………………………….. |
14 |
||
|
1.2.3 |
Manual Conventions …………………………………………………………………………………….. |
15 |
||
|
1.3 |
System Requirements ………………………………………………………………………………………………….. |
16 |
||
|
2 TRAKTOR KONTROL S4 Overview …………………………………………………………………….. |
17 |
|||
|
3 |
Importing Your Music …………………………………………………………………………………… |
20 |
||
|
3.1 |
What Is the Track Collection? ……………………………………………………………………………………….. |
20 |
||
|
3.2 |
Importing Music Folders ………………………………………………………………………………………………. |
21 |
||
|
3.3 |
Tracks Managed by iTunes …………………………………………………………………………………………… |
22 |
||
|
3.3.1 |
Playing Tracks Managed by iTunes …………………………………………………………………. |
22 |
||
|
3.3.2 |
Importing a Selection of Tracks from iTunes …………………………………………………….. |
24 |
||
|
3.3.3 |
Importing iTunes Playlists …………………………………………………………………………….. |
24 |
||
|
4 |
Tutorials ……………………………………………………………………………………………………. |
25 |
||
|
4.1 |
Playing Your First Track ……………………………………………………………………………………………….. |
25 |
||
|
4.1.1 |
Quick Loading a Track ………………………………………………………………………………….. |
26 |
||
|
4.1.2 |
Playing the Track …………………………………………………………………………………………. |
28 |
||
|
4.1.3 |
If You Don’t Hear the Track ……………………………………………………………………………. |
29 |
||
|
4.2 |
Mixing In a Second Track ……………………………………………………………………………………………… |
31 |
||
|
4.2.1 |
Pre-listening a Second Track Directly from the Browser …………………………………….. |
32 |
||
|
4.2.2 |
Loading and Playing the Second Track ……………………………………………………………. |
33 |
||
|
4.2.3 |
Using Headphones to Prepare the Mix …………………………………………………………….. |
33 |
||
|
4.2.4 |
Synchronizing the Second Track …………………………………………………………………….. |
34 |
||
|
4.2.5 |
Setting a Cue Point as Starting Point ……………………………………………………………… |
35 |
TRAKTOR KONTROL S4 — Manual — 4

|
Table of Contents |
|||
|
4.2.6 |
Interlude: In Case the Left Track Is Over ………………………………………………………….. |
37 |
|
|
4.2.7 |
Mixing In the Track by Using the Channel EQ and Filter …………………………………….. |
37 |
|
|
4.2.8 |
Doing Everything by Hand ……………………………………………………………………………… |
38 |
|
|
4.3 |
Adjusting Levels …………………………………………………………………………………………………………. |
41 |
|
|
4.3.1 |
The Theory ………………………………………………………………………………………………….. |
41 |
|
|
4.3.2 |
The Practice ………………………………………………………………………………………………… |
42 |
|
|
4.4 |
Looping and Cueing …………………………………………………………………………………………………….. |
45 |
|
|
4.4.1 |
Playing with Loops ……………………………………………………………………………………….. |
45 |
|
|
4.4.2 |
Using Hotcues …………………………………………………………………………………………….. |
48 |
|
|
4.5 |
Using Samples in Your Mix …………………………………………………………………………………………… |
50 |
|
|
4.5.1 |
Loading a Sample from the Collection …………………………………………………………….. |
51 |
|
|
4.5.2 |
Triggering the Sample ………………………………………………………………………………….. |
52 |
|
|
4.5.3 |
Capturing a Sample From a Track Deck …………………………………………………………… |
54 |
|
|
4.5.4 |
Unloading a Sample …………………………………………………………………………………….. |
56 |
|
|
4.5.5 |
Getting More Controls Over the Samples …………………………………………………………. |
56 |
|
|
4.6 |
Adding FX |
………………………………………………………………………………………………………………….. |
57 |
|
4.6.1 |
Group Mode ………………………………………………………………………………………………… |
58 |
|
|
4.6.2 |
Getting the FX Unit Ready ……………………………………………………………………………… |
58 |
|
|
4.6.3 |
Assigning Decks to the FX Unit and Bringing In the FX ………………………………………. |
59 |
|
|
4.6.4 |
Controlling the FX Unit …………………………………………………………………………………. |
60 |
|
|
4.6.5 |
Single Mode ………………………………………………………………………………………………… |
61 |
|
|
4.6.6 |
Storing a Snapshot ………………………………………………………………………………………. |
61 |
|
|
4.7 |
Using the Loop Recorder ………………………………………………………………………………………………. |
62 |
|
|
4.7.1 |
Choosing a Source ……………………………………………………………………………………….. |
63 |
|
|
4.7.2 |
Recording a Loop …………………………………………………………………………………………. |
64 |
|
|
4.7.3 |
Overdubbing ……………………………………………………………………………………………….. |
66 |
|
|
4.7.4 |
Further Uses of the Recorded Loop …………………………………………………………………. |
66 |
|
|
4.8 |
Synchronization ………………………………………………………………………………………………………….. |
67 |
TRAKTOR KONTROL S4 — Manual — 5

|
Table of Contents |
|||
|
4.8.1 |
Introduction ………………………………………………………………………………………………… |
67 |
|
|
4.8.2 |
Who’s the Master? ……………………………………………………………………………………….. |
69 |
|
|
4.8.3 |
Other Useful Tools for Synching ……………………………………………………………………… |
72 |
|
|
4.8.4 |
In Conclusion ………………………………………………………………………………………………. |
73 |
|
|
5 Hardware Reference …………………………………………………………………………………….. |
74 |
||
|
5.1 |
Areas and Concepts …………………………………………………………………………………………………….. |
74 |
|
|
5.1.1 |
Decks …………………………………………………………………………………………………………. |
74 |
|
|
5.1.2 |
Mixer ………………………………………………………………………………………………………….. |
78 |
|
|
5.1.3 |
FX Units ……………………………………………………………………………………………………… |
79 |
|
|
5.1.4 |
Loop Recorder ……………………………………………………………………………………………… |
80 |
|
|
5.1.5 |
Front and Rear Panels ………………………………………………………………………………….. |
81 |
|
|
5.2 |
Types of Control Elements ……………………………………………………………………………………………. |
81 |
|
|
5.2.1 |
Buttons ………………………………………………………………………………………………………. |
81 |
|
|
5.2.2 |
Knobs ………………………………………………………………………………………………………… |
82 |
|
|
5.2.3 |
Encoders …………………………………………………………………………………………………….. |
83 |
|
|
5.2.4 |
Jog Wheels ………………………………………………………………………………………………….. |
83 |
|
|
5.2.5 |
Faders ……………………………………………………………………………………………………….. |
84 |
|
|
5.2.6 |
Displays, Meters and Indicators …………………………………………………………………….. |
84 |
|
|
5.2.7 |
Switches …………………………………………………………………………………………………….. |
85 |
|
|
5.2.8 |
Sockets ………………………………………………………………………………………………………. |
86 |
|
|
5.3 |
The Decks |
………………………………………………………………………………………………………………….. |
86 |
|
5.3.1 |
Deck Flavors and Structure ……………………………………………………………………………. |
86 |
|
|
5.3.2 |
SHIFT Buttons: Accessing Secondary Functions ………………………………………………… |
88 |
|
|
5.3.3 |
Deck Assign Buttons: Switching Deck Focus …………………………………………………….. |
88 |
|
|
5.3.4 |
Deck Display: Informed at a Glance ………………………………………………………………… |
89 |
|
|
5.3.5 |
LOAD Button ……………………………………………………………………………………………….. |
91 |
|
|
5.3.6 |
Jog Wheel ……………………………………………………………………………………………………. |
92 |
|
|
5.3.7 |
Tempo Fader and Tempo Offset Buttons ………………………………………………………….. |
93 |
TRAKTOR KONTROL S4 — Manual — 6

|
Table of Contents |
|||
|
5.3.8 |
Loop Section ……………………………………………………………………………………………….. |
96 |
|
|
5.3.9 |
Sample Play Buttons ……………………………………………………………………………………. |
99 |
|
|
5.3.10 |
Hotcue Buttons ……………………………………………………………………………………………. |
102 |
|
|
5.3.11 |
PLAY and CUE Buttons …………………………………………………………………………………. |
106 |
|
|
5.3.12 |
SYNC Button ……………………………………………………………………………………………….. |
107 |
|
|
5.3.13 |
SHIFT Button ……………………………………………………………………………………………….. |
108 |
|
|
5.4 |
The Mixer |
…………………………………………………………………………………………………………………… |
109 |
|
5.4.1 …………………………………………………………………………………………….. |
Mixer Overview |
110 |
|
|
5.4.2 …………………………………………………………………………………………. |
The Main Section |
110 |
|
|
5.4.3 …………………………………………………………………… |
The Channels and the Crossfader |
112 |
|
|
5.4.4 ………………………………………………………………………………………. |
The Master Display |
118 |
|
|
5.4.5 ……………………………………………………… |
The BROWSE Encoder and BROWSE Button |
121 |
|
|
5.5 |
The FX Units ………………………………………………………………………………………………………………. |
122 |
|
|
5.5.1 ………………………………………………………………………… |
Single Mode and Group Mode |
123 |
|
|
5.5.2 ………………………………………………………………………………………… |
FX Unit Reference |
123 |
|
|
5.6 |
The Loop ……………………………………………………………………………………………………….Recorder |
124 |
|
|
5.6.1 …………………………………………………………………………………………….. |
DRY/WET Knob |
125 |
|
|
5.6.2 ………………………………………………………………………………………………… |
SIZE Button |
125 |
|
|
5.6.3 …………………………………………………………………………………………………. |
REC Button |
126 |
|
|
5.6.4 ………………………………………………………………………………………………. |
UNDO Button |
126 |
|
|
5.6.5 ………………………………………………………………………………………………… |
PLAY Button |
127 |
|
|
5.6.6 …………………………………………………………… |
Copying and Saving the Recorded Loop |
127 |
|
|
5.7 |
Browsing, …………………………………………………………………………………….Loading and Copying |
127 |
|
|
5.7.1 ……………………………………………………………………….. |
Browsing Tracks and Samples |
128 |
|
|
5.7.2 ………………………………………………………………………………….. |
Copying across the S4 |
131 |
|
|
5.8 |
The Rear ……………………………………………………………………………………………………………Panel |
133 |
|
|
5.8.1 ………………………………………………………………………………………… |
MAIN OUT Section |
134 |
|
|
5.8.2 …………………………………………………………………………….. |
INPUT CHANNEL D Section |
134 |
TRAKTOR KONTROL S4 — Manual — 7

|
Table of Contents |
|||
|
5.8.3 |
INPUT CHANNEL C Section …………………………………………………………………………….. |
135 |
|
|
5.8.4 |
POWER Section ……………………………………………………………………………………………. |
136 |
|
|
5.9 |
The Front Panel …………………………………………………………………………………………………………… |
136 |
|
|
5.10 |
TRAKTOR KONTROL S4 Modes ……………………………………………………………………………………….. |
137 |
|
|
5.10.1 |
Native Traktor Mode ……………………………………………………………………………………… |
137 |
|
|
5.10.2 |
MIDI Mode …………………………………………………………………………………………………… |
137 |
|
|
6 Customizing TRAKTOR KONTROL S4 …………………………………………………………………. |
140 |
||
|
6.1 |
The Preferences Window ………………………………………………………………………………………………. |
140 |
|
|
6.2 |
Settings and Preferences for the S4 Control Elements ………………………………………………………. |
141 |
|
|
6.3 |
S4 Control Options ………………………………………………………………………………………………………. |
143 |
|
|
6.3.1 |
Restore Default ……………………………………………………………………………………………. |
148 |
|
|
6.3.2 |
Calibration …………………………………………………………………………………………………. |
149 |
|
|
6.4 |
Other Settings of Interest …………………………………………………………………………………………….. |
149 |
|
|
6.4.1 |
Switching the Deck Flavors ……………………………………………………………………………. |
150 |
|
|
6.4.2 |
Adjusting the Input Routing ………………………………………………………………………….. |
150 |
|
|
6.4.3 |
Using Four FX Units ……………………………………………………………………………………… |
153 |
|
|
6.5 |
The Setup Wizard ………………………………………………………………………………………………………… |
154 |
|
|
7 The S4 Audio Interface and Control Panel …………………………………………………………. |
161 |
||
|
7.1 |
Settings on Mac OS X ………………………………………………………………………………………………….. |
161 |
|
|
7.2 |
Settings on Windows: The Control Panel …………………………………………………………………………. |
162 |
|
|
7.2.1 |
Opening the Control Panel …………………………………………………………………………….. |
162 |
|
|
7.2.2 |
Audio Settings Page …………………………………………………………………………………….. |
163 |
|
|
7.2.3 |
Diagnostics Page …………………………………………………………………………………………. |
166 |
|
|
7.3 |
Using the S4 Audio Interface with Other Music Applications ……………………………………………… |
167 |
|
|
7.4 |
Using the S4 as your Default Audio Interface ………………………………………………………………….. |
168 |
|
|
7.4.1 |
Windows XP ………………………………………………………………………………………………… |
168 |
|
|
7.4.2 |
Windows Vista and 7 ……………………………………………………………………………………. |
168 |
|
|
7.4.3 |
Mac OS X ……………………………………………………………………………………………………. |
168 |
TRAKTOR KONTROL S4 — Manual — 8

|
Table of Contents |
||||
|
8 |
Troubleshooting and Help ……………………………………………………………………………… |
170 |
||
|
8.1 |
TRAKTOR Won’t Start …………………………………………………………………………………………………… |
170 |
||
|
8.2 |
Hardware-related Problems ………………………………………………………………………………………….. |
170 |
||
|
8.2.1 |
Basics ……………………………………………………………………………………………………….. |
170 |
||
|
8.2.2 |
USB and Driver Issues ………………………………………………………………………………….. |
171 |
||
|
8.2.3 |
Update the Driver ………………………………………………………………………………………… |
172 |
||
|
8.2.4 |
USB — related Power Issues ……………………………………………………………………………… |
172 |
||
|
8.2.5 |
Using the TRAKTOR KONTROL S4 with a Laptop ………………………………………………… |
173 |
||
|
8.3 |
Loose Jog Wheel Top Plate ……………………………………………………………………………………………. |
173 |
||
|
8.4 |
TRAKTOR Crashes ……………………………………………………………………………………………………….. |
174 |
||
|
8.5 |
Getting Help ………………………………………………………………………………………………………………. |
174 |
||
|
8.5.1 |
Knowledge Base / Readme / Online Support …………………………………………………….. |
174 |
||
|
8.5.2 |
Forum ………………………………………………………………………………………………………… |
175 |
||
|
8.6 |
Updates |
…………………………………………………………………………………………………………………….. |
175 |
|
|
9 |
Appendix A – Common Setups ………………………………………………………………………… |
176 |
||
|
9.1 |
TRAKTOR ………………………………………………………………………………..KONTROL S4 Basic Setup |
176 |
||
|
9.2 |
Adding a ……………………………………………………………………………………………………Microphone |
186 |
||
|
9.3 |
Using a ……………………………………………………………………………………………………Master Mixer |
189 |
||
|
9.4 |
TRAKTOR ………………………………………………………….KONTROL S4 with Turntables or CD Decks |
189 |
||
|
9.5 |
TRAKTOR …………………………………………………………………………..KONTROL S4 with Slave Mixer |
193 |
||
|
10 |
Appendix B – Technical …………………………………………………………………Information |
195 |
||
|
10.1 |
Technical ……………………………………………………………………………………………….Specifications |
195 |
||
|
10.2 |
Block Diagram ……………………………………………………………………………………………………………. |
199 |
||
|
11 |
Appendix C – Quick ……………………………………………………………………….References |
200 |
||
|
11.1 |
Track Deck …………………………………………………………………………………………..Quick Reference |
200 |
||
|
11.2 |
Remix Deck ………………………………………………………………………………………….Quick Reference |
203 |
||
|
11.3 |
Mixer Quick ………………………………………………………………………………………………….Reference |
207 |
||
|
11.3.1 ……………………………………………………………………….. |
Main Section Quick Reference |
207 |
TRAKTOR KONTROL S4 — Manual — 9

|
Table of Contents |
|||
|
11.3.2 |
Channel and Crossfader Quick Reference ………………………………………………………… |
208 |
|
|
11.3.3 |
Master Display Quick Reference …………………………………………………………………….. |
209 |
|
|
11.4 |
FX Unit Quick Reference ………………………………………………………………………………………………. |
209 |
|
|
11.5 |
Loop Recorder Quick Reference ……………………………………………………………………………………… |
210 |
|
|
11.6 |
Browsing, Loading and Copying Quick Reference …………………………………………………………….. |
211 |
|
|
Index |
………………………………………………………………………………………………………… |
212 |
TRAKTOR KONTROL S4 — Manual — 10
![]()
Welcome to the World of TRAKTOR KONTROL S4!
What Is TRAKTOR KONTROL S4?
1Welcome to the World of TRAKTOR KONTROL S4!
We are delighted that you have chosen TRAKTOR KONTROL S4!
1.1What Is TRAKTOR KONTROL S4?
TRAKTOR KONTROL S4 is the first fully integrated hardware and software DJ performance system created by the makers of TRAKTOR. TRAKTOR KONTROL S4 fuses the full-featured TRAKTOR KONTROL S4 hardware controller with the state-of-the-art TRAKTOR software.
The all-in-one TRAKTOR KONTROL S4 controller offers you an ergonomic DJ mixer, a built-in 24-bit/96 kHz audio interface, and a high-resolution control surface perfectly tailored for TRAKTOR. All controls needed for live performances now are at your fingertips!
—The TRAKTOR team at Native Instruments.
1.2The TRAKTOR KONTROL S4 Documentation
1.2.1Where To Start
TRAKTOR KONTROL S4 provides you with many information sources. The main sources are meant to be read in the following sequence:
▪Setup Guide
▪TRAKTOR KONTROL S4 Manual (this document) and video tutorials
▪TRAKTOR 2 Getting Started Guide
Additionally, an overview poster and keyboard shortcut overview card will help you in your everyday work with TRAKTOR KONTROL S4. Finally, the Controller Editor Reference Manual deals specifically with the Controller Editor (see below).
Hereafter is a quick description of each of these documentation sources.
TRAKTOR KONTROL S4 — Manual — 11
Welcome to the World of TRAKTOR KONTROL S4!
The TRAKTOR KONTROL S4 Documentation
Some of these documents (Setup Guide, Overview Poster and Keyboard Shortcut Overview Card) are available in printed form in the product box. The whole documentation is also available in PDF format and located within the TRAKTOR KONTROL S4 installation folder on your hard drive. You can also access these documents from the application’s Help menu.
Your First Stop: the Setup Guide
A printed Setup Guide is included in the product box. It will guide you through the software and hardware installation of your TRAKTOR KONTROL S4 system, from the very beginning to the first sound coming through your speakers. This should be your first stop in learning TRAKTOR KONTROL S4.
First read the Setup Guide. Then proceed with this TRAKTOR KONTROL S4 Manual to get more familiar with TRAKTOR KONTROL S4!
TRAKTOR KONTROL S4 Manual
After having read the Setup Guide and followed its instructions, your TRAKTOR KONTROL S4 system should be up and running. The next step is to read this TRAKTOR KONTROL S4 Manual. The TRAKTOR KONTROL S4 Manual first gives you a practical approach to TRAKTOR KONTROL S4. Then, it provides you with a detailed reference of your TRAKTOR KONTROL S4 hardware controller along with extra information (solving common issues, specifications, etc.). The next section will give you an overview of the manual content.
Video Tutorials
The Native Instruments website provides you with a bunch of video tutorials that give you a hands-on approach to many sides of the TRAKTOR KONTROL S4 workflow. To see them, point your favorite browser to following URL:
http://www.native-instruments.com/s4tutorials.
TRAKTOR 2 Getting Started Guide
The Getting Started guide gives you a practical approach to the TRAKTOR software. Here you will learn about additional features of TRAKTOR that extend beyond the TRAKTOR KONTROL S4 controller.
TRAKTOR KONTROL S4 — Manual — 12

Welcome to the World of TRAKTOR KONTROL S4!
The TRAKTOR KONTROL S4 Documentation
TRAKTOR 2 Manual
For in-depth information on all features provided by the TRAKTOR software, please refer to the TRAKTOR 2 Manual. It is available as a PDF file in the Documentation subfolder of the TRAKTOR 2 installation folder.
Overview Poster
In the product box, you will also find a double-sided overview poster depicting the top panel of your TRAKTOR KONTROL S4 hardware controller: on one side, you will find an overview of the main areas and their functionality; on the other side, you will find a description of every control element to be found on the Decks, the FX Units, the Loop Recorder and the rear and front panels of your controller. This poster can be used as a quick reference when using your TRAKTOR KONTROL S4, saving you from opening the manual each time you feel uncertain about a particular control element.
Keyboard Shortcut Overview Card
A keyboard shortcut overview card is included in the product box. It gives you the dedicated keyboard mappings for the TRAKTOR software.
Controller Editor Reference Manual
Beside of using your TRAKTOR KONTROL S4 hardware controller together with the TRAKTOR software, you can also use it as a powerful and highly versatile MIDI controller to pilot any other MIDI-capable application or device. This is made possible by the Controller Editor software, a little application that allows you to precisely define all MIDI assignments for your TRAKTOR KONTROL S4 controller. The Controller Editor should have been installed during the TRAKTOR KONTROL S4 installation procedure. For more info on this, please refer to the Controller Editor Reference Manual available as a PDF file in the Documentation subfolder of the Controller Editor installation folder on your hard disk.
The Jog Wheel Calibration Guide
The jog wheels of the S4 where designed to recalibrate themselves dynamically during the use of the controller; however, there is one situation in which manual recalibration of the jog wheels can be necessary. If you accidentally turn the controller upside-down while it is connected to your computer, the jog wheel sensors might lose track of the position of the jog wheels’ top plates. As a result, the jog wheels may not respond as expected when you turn it back to
TRAKTOR KONTROL S4 — Manual — 13

Welcome to the World of TRAKTOR KONTROL S4!
The TRAKTOR KONTROL S4 Documentation
the normal position. If this occurs, the easiest way to resolve this is to switch the unit off and on again. Alternatively you can recalibrate the jog wheels manually in TRAKTOR. Please refer to the separate Jog Wheel Calibration Guide in the Documentation subfolder of the TRAKTOR 2 program folder.
1.2.2In This Manual
What you are reading now is the TRAKTOR KONTROL S4 Manual. This manual is structured as follows:
▪The first part is this introduction.
▪Chapter ↑2, TRAKTOR KONTROL S4 Overview quickly introduces you to the TRAKTOR KONTROL S4 user interface and its main areas, both on the hardware side and software side.
▪Chapter ↑3, Importing Your Music shows you how to import your own music into the powerful Track Collection of TRAKTOR, so that you can use all TRAKTOR KONTROL S4 features with your own tracks.
▪Chapter ↑4, Tutorials is a selection of tutorials focused on your controller. They will let you progressively discover how to use the various tools provided by TRAKTOR KONTROL S4. These practical examples will simplify the learning process and get you quickly started with computer-based DJing.
▪Chapter ↑5, Hardware Reference is an extensive reference of all hardware control elements to be found on your TRAKTOR KONTROL S4 hardware controller. Whenever you are unsure about the functionality of a particular control element, you will find here all the necessary information.
▪Chapter ↑6, Customizing TRAKTOR KONTROL S4 shows you how to customize TRAKTOR KONTROL S4 in order to make it fit your particular needs.
▪Chapter ↑7, The S4 Audio Interface and Control Panel describes the on-board audio interface of the TRAKTOR KONTROL S4 hardware controller.
▪Chapter ↑8, Troubleshooting and Help provides you with a list of most common problems and their solutions, along with info on how to get help.
▪Finally, three appendixes provide you with useful additional information:
TRAKTOR KONTROL S4 — Manual — 14

Welcome to the World of TRAKTOR KONTROL S4!
The TRAKTOR KONTROL S4 Documentation
◦Appendix A shows you how to integrate TRAKTOR KONTROL S4 to your studio or live setup in various configurations.
◦Appendix B gives you the technical specifications of the TRAKTOR KONTROL S4 controller.
◦Appendix C provides you with Quick Reference tables for all control elements on your controller. Should you have any doubt about a particular control element, you will find here a useful reminder!
1.2.3Manual Conventions
This section introduces you to the signage and text highlighting used in this manual. This manual uses particular formatting to point out special facts and to warn you of potential issues. The icons introducing these notes let you see what kind of information is to be expected:
Whenever this exclamation mark icon appears, you should read the corresponding note carefully and follow the instructions and hints given there if applicable.
This light bulb icon indicates that a note contains useful extra information. This information may often help you to solve a task more efficiently, but does not necessarily apply to the setup or operating system you are using; however, it’s always worth a look.
Furthermore, the following formatting is used:
▪Text appearing in (drop-down) menus (such as Open…, Save as… etc.) and paths to locations on your hard drive or other storage devices is printed in italics.
▪Text appearing elsewhere (labels of buttons, controls, text next to checkboxes etc.) is printed in blue. Whenever you see this formatting applied, you will find the same text appearing somewhere on the screen.
▪Important names and concepts are printed in bold.
►Single instructions are introduced by this play button type arrow.
→Results of actions are introduced by this smaller arrow.
TRAKTOR KONTROL S4 — Manual — 15

Welcome to the World of TRAKTOR KONTROL S4!
System Requirements
Pet Names for Software and Hardware
Throughout the documentation, we will refer to the TRAKTOR KONTROL S4 hardware controller either as “TRAKTOR KONTROL S4” or simply “S4.”
Likewise, the TRAKTOR software will often be referred as “TRAKTOR PRO” or simply “TRAKTOR.”
Hence, a sentence like “TRAKTOR KONTROL S4 is a highly integrated DJ system allowing you to control TRAKTOR from your S4” shouldn’t sound weird to you.
1.3System Requirements
For the minimum system requirements your computer needs to meet, see the TRAKTOR specifications section of the Native Instruments website:
http://www.native-instruments.com/#/en/products/dj/traktor-pro-2/specifications/?page=2050
To check the compatibility with several operating systems, please have a look at: http:// www.native-instruments.com/compatibility
TRAKTOR KONTROL S4 — Manual — 16

TRAKTOR KONTROL S4 Overview
2TRAKTOR KONTROL S4 Overview
This mini-chapter will quickly introduce you to TRAKTOR KONTROL S4’s main areas and concepts, both on your TRAKTOR KONTROL S4 hardware controller and in the TRAKTOR software.
Take the time to read these few pages, as they will familiarize you with the way TRAKTOR KONTROL S4 works and let you catch sight of the power of its design. If you’re familiar with importing music files in TRAKTOR, you can skip ↑3, Importing Your Music and start right away with the tutorials in chapter ↑4, Tutorials after having read this chapter.
TRAKTOR KONTROL S4 — Manual — 17
TRAKTOR KONTROL S4 Overview
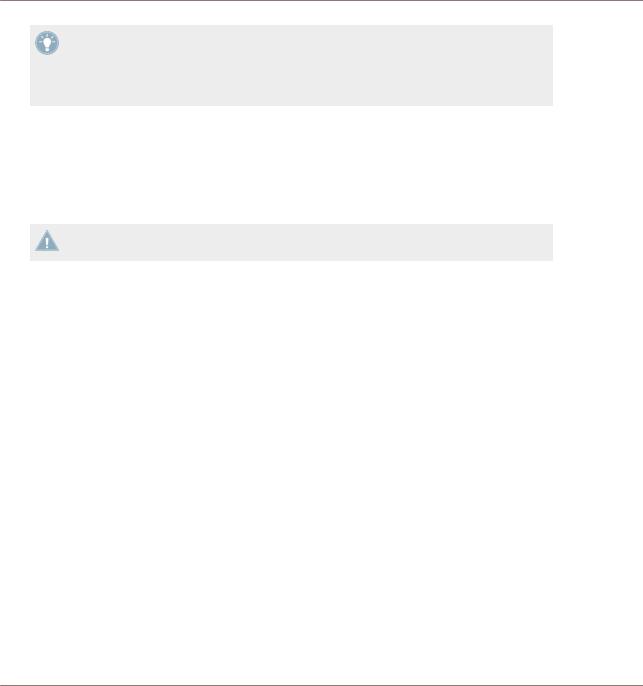
Hardware controller and software side by side
▪(1) Decks: TRAKTOR KONTROL S4 provides you with four virtual Decks. The Decks are the place where tracks, Samples and live input are played back. The Decks can be seen as the virtual equivalent to the good old vinyl or CD decks—just with a bunch of powerful additional features and the flexibility of a computer-based system. The two Decks on your S4 hardware controller allow you to control the four software Decks (labeled A, B, C and
D)available in TRAKTOR: The left Deck on your S4 can control Decks A and C in the software. The right Deck on your S4 can control Decks B and D in the software.
TRAKTOR KONTROL S4 — Manual — 18

TRAKTOR KONTROL S4 Overview
▪(2) FX Units: The signals coming from the Decks can be further processed by two FX Units located at the top of your hardware and software interface. You can even activate two additional FX Units in the software, allowing you to process each Deck individually. The FX Units give you access to the whole collection of high-quality FX included in TRAKTOR: The left FX Unit on your S4 can control the left FX Unit(s) in the software. The right FX Unit on your S4 can control the right FX Unit(s) in the software.
▪(3) Mixer: Sitting in the middle of your TRAKTOR KONTROL S4 controller and of TRAKTOR’s window, the Mixer receives on its four channels the audio signals coming from the four Decks described above. There is one channel for each Deck. As any DJ mixer, the Mixer’s purpose basically is to adjust the relative level of each channel, to control the channels’ frequency content, possibly feeding them into the FX Units before sending the overall result to the Main section at its top — and in the end, to generate the mix that is sent to your audience.
You will find a more detailed presentation at the beginning of chapter ↑5, Hardware Reference, followed by a thorough description of each control element to be found on your TRAKTOR KONTROL S4 controller. For an in-depth explanation of each and every functionality provided by the TRAKTOR software, please refer to the separate TRAKTOR 2 Manual. It is available as a PDF file in the Documentation subfolder of the TRAKTOR 2 installation folder.
TRAKTOR KONTROL S4 — Manual — 19
Importing Your Music
What Is the Track Collection?
3Importing Your Music
Most likely you already have a collection of music files on your computer. For those of you who can’t wait for mixing their own tracks, this chapter is for you! You will learn here how to quickly import your music into the powerful Track Collection of TRAKTOR.
If you prefer to start learning how to use TRAKTOR KONTROL S4 right away, skip this chapter and go on with the tutorials in chapter ↑4, Tutorials, which make use of the demo tracks provided with TRAKTOR KONTROL S4. You can always come back here at a later point.
3.1What Is the Track Collection?
The Track Collection (or simply “Collection”) represents the whole music that you have used, that you are using or that you plan to use in TRAKTOR.
Based on the music files on your computer, the Track Collection is just another way to display them. The Collection makes it easy to organize, tag, and prepare your tracks for being integrated into your mix.
Worth to note is that the Track Collection doesn’t care about the actual file structure on your hard disk, nor will it alter this structure in any way (as long as you don’t delete your files from within TRAKTOR).
The Track Collection is:
▪A database storing numerous information about your music files.
▪A convenient way to represent and search your music files, according to many of their characteristics (tags) like title, artist name, BPM, genre, length, etc.
▪The place where TRAKTOR-specific information about your tracks is stored.
▪The basis on which you can create your Playlists.
The Track Collection is not:
▪Moving, copying nor converting any audio file to some secret location.
▪Modifying in any way the hierarchic structure of your files on your hard disk.
TRAKTOR KONTROL S4 — Manual — 20
![]()
Importing Your Music
Importing Music Folders
To make use of the Track Collection, you have to populate it by importing your music files.
3.2Importing Music Folders
TRAKTOR offers an easy import function for tracks stored on your hard drive:
►Right-click (Windows) or [Ctrl]+click (Mac OS X) on the Track Collection entry in the Browser Tree and choose Import Music Folders from the menu.
The contextual menu for the Track Collection, with the Import Music Folders entry selected.
By default this process imports all music files contained in the My Music folder of your operating system.
TRAKTOR analyzes music for certain characteristics (BPM, etc.) when importing tracks for the first time. This function takes some time to process. Be sure to prepare the tracks you want to use in a DJ set beforehand if you want to use features such as synching or Auto Looping with them.
If you have stored tracks in other folders or on external storage devices, you can add these folders to the list of TRAKTOR Music Folders as follows:
1.Open Preferences > File Management.
TRAKTOR KONTROL S4 — Manual — 21
Importing Your Music
Tracks Managed by iTunes
2.Click Add… at the bottom of the Music Folders section.
3.Navigate to a folder you want to add.
4.Confirm with OK.
Repeat to add all of your Music Folders.
Subfolders are automatically included in the scan. Hence, you don’t need to add them to this list.
3.3Tracks Managed by iTunes
If you have organized your music collection with iTunes, TRAKTOR KONTROL S4 offers direct access to your iTunes Library and your iTunes playlists.
3.3.1Playing Tracks Managed by iTunes
You can browse your iTunes Library and playlists directly from your TRAKTOR KONTROL S4. By the way, this will be the opportunity to introduce you to browsing and loading from your hardware controller. For this, we will use following control elements:
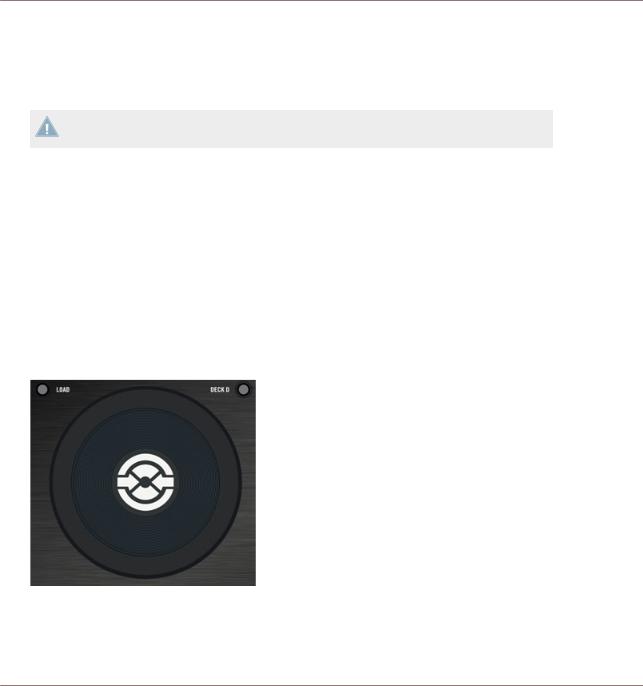
▪ Any of the jog wheels:
TRAKTOR KONTROL S4 — Manual — 22
Importing Your Music
Tracks Managed by iTunes
▪Any of the LOOP MOVE encoders, located below each jog wheel:
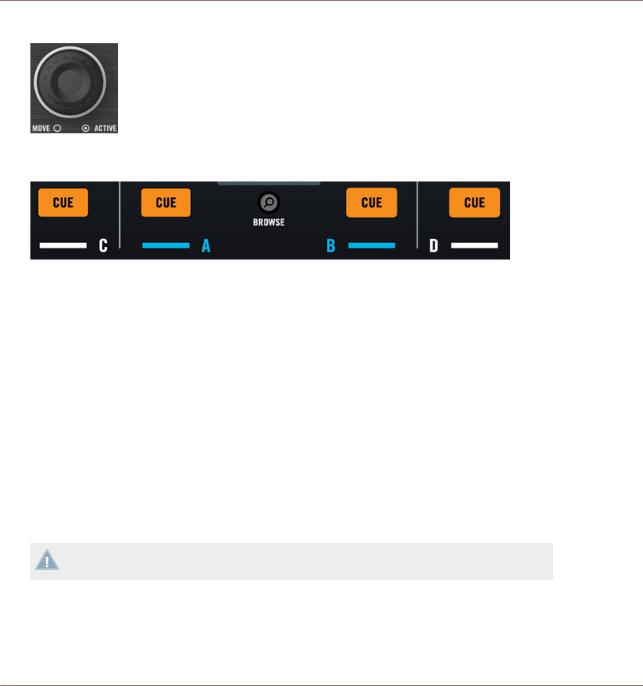
▪The CUE buttons, located on each channel of the Mixer, and the BROWSE button in <between:
Please do the following:
1.Push the BROWSE button to enter Browse mode. On your computer screen, the Browser fills up the whole TRAKTOR window.
2.Turn the LOOP MOVE encoders to scroll through the Browser Tree until the iTunes icon gets selected, then push the encoder to open that node.
3.Browse through the iTunes Library and playlists in the same manner: turn the LOOP MOVE encoder to scroll within the iTunes node and push the encoder to expand/collapse the selected node.
4.Once the desired playlist is selected in the Browser Tree, select a track from the list by spinning the jog wheel.
5.To load the selected track on to the left or right Deck, press the flashing CUE button on the corresponding channel of the Mixer (A or B).
6.Repeat steps 3-5 to load a track on the other Deck.
7.When you are done, press the BROWSE button again to leave the Browse mode.
The iTunes tree node represents a read-only view on your iTunes Library and playlists. Editing functions are not available in this view.
Software Equivalent
Of course, you can do all this from the TRAKTOR user interface too:
TRAKTOR KONTROL S4 — Manual — 23

Importing Your Music
Tracks Managed by iTunes
1.Click the iTunes icon in the Browser Tree to open that node.
2.Browse through the Library and playlists as you would do in iTunes.
3.Load a track into a Deck as you would do from a normal TRAKTOR Playlist—for example by dragging the track onto that Deck.
3.3.2Importing a Selection of Tracks from iTunes
You can import a selection of tracks from your iTunes Library into the Track Collection via the TRAKTOR user interface:
1.Click the iTunes icon in the Browser Tree to open that node.
2.Select the tracks to import into the Track Collection.
3.Drag the selection onto the Track Collection icon in the Browser Tree.
4.Alternatively right-click (Windows) or [Ctrl]-click (Mac OS X) on the selection and choose Import to Collection in the contextual menu.
3.3.3Importing iTunes Playlists
You can directly import iTunes playlists as TRAKTOR Playlists via the TRAKTOR user interface:
1.Click the iTunes icon in the Browser Tree to open that node.
2.Select the playlist to be imported.
3.Drag the playlist onto the Playlists icon.
4.Alternatively right-click (Windows) or [Ctrl]-click (Mac OS X) on the playlist and choose Import to Playlists in the contextual menu.
TRAKTOR KONTROL S4 — Manual — 24
Tutorials
Playing Your First Track
4Tutorials
This chapter will guide you through the most common tasks that you will encounter during your work with TRAKTOR KONTROL S4.
The tutorials are workflow-oriented. They start with the simplest tasks and progressively lead you to more complex operation, helping you to get more and more familiar with your TRAKTOR KONTROL S4 system. After reading this, you should have the basic know-how allowing you to mix with TRAKTOR KONTROL S4.
The tutorials presented here and in the following chapter make use of the included demo tracks, which were copied to your hard disk during the TRAKTOR KONTROL S4 installation procedure. Thus, you can follow these tutorials even if you haven’t imported your own music yet into the Track Collection. For more info on how to import your music into the Collection, please refer to chapter ↑3, Importing Your Music above.
4.1Playing Your First Track
This first tutorial will show you how to load and play a track, how to check the needed audio outputs and how to quickly troubleshoot your system if no music can be heard.
Prerequisites
We assume here that your TRAKTOR KONTROL S4 system is already up and running. If it’s not the case, please follow first the instructions in the separate Setup Guide and come back here when you’re done!
In case you already changed some settings in TRAKTOR KONTROL S4 before you start with these tutorials, we strongly recommend you to reset your TRAKTOR KONTROL S4 system to the factory settings by doing the following:
1.In the TRAKTOR software, click the Help menu in the menu bar at the top of your screen (on Mac OS X) or at the top of the window (on Windows), and select Help > Start Setup Wizard.
2.In the window that opens, just click Finish at the bottom right corner without touching anything else.
TRAKTOR KONTROL S4 — Manual — 25
Tutorials
Playing Your First Track
→Your TRAKTOR KONTROL S4 is now reset to the factory settings.
The tutorials presented here assume that TRAKTOR KONTROL S4 is in its default factory state. If it’s not the case, we cannot guarantee that you will experience what we describe here, and you might miss important things to know!
4.1.1Quick Loading a Track
Let’s load the track “Techno 1” from the included demo tracks on to Deck A.
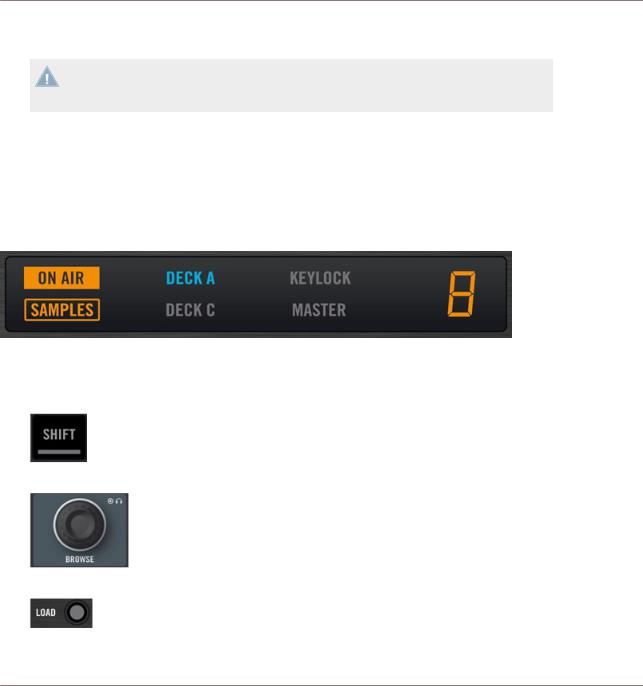
Since Deck A is sitting in the left part of the TRAKTOR window, we will use the left Deck on your S4. You can check this by looking at the left Deck’s display: you should see a lit blue indicator reading “DECK A”:
The Deck Display with a lit DECK A indicator
To select and load the track, we will use three control elements on your S4:
▪Any of the two SHIFT buttons (one at the bottom of each Deck):
▪The BROWSE encoder (in the top center of the Mixer):
▪The left Deck’s LOAD button (above the jog wheel):
TRAKTOR KONTROL S4 — Manual — 26
Tutorials
Playing Your First Track
While looking at the TRAKTOR window, do the following:
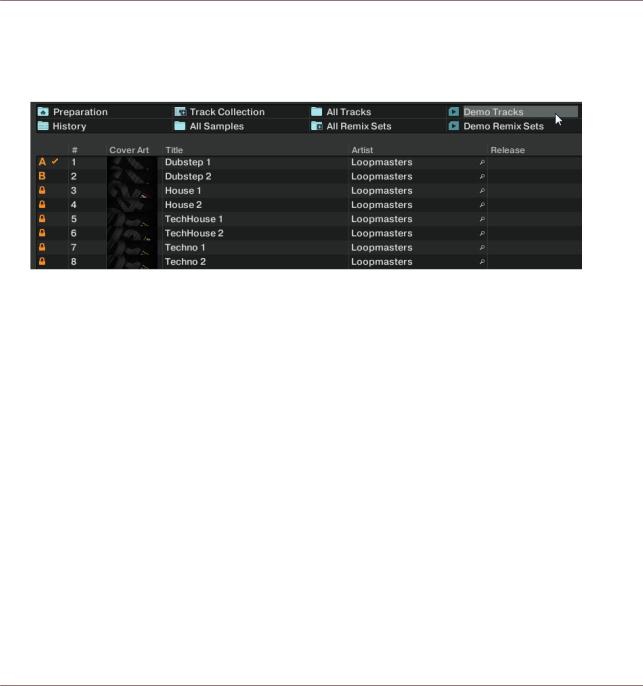
1.Hold SHIFT and turn the BROWSE encoder to select the Demo Tracks Favorite (Favorites are customizable shortcuts sitting at the top of the Browser in TRAKTOR’s window).
The tracks of the “Demo Tracks” Playlist appear below:
Release SHIFT and turn the BROWSE encoder to scroll through the Playlist and navigate to the track Techno 1.
2.Once the track is highlighted, press the LOAD button on the left Deck to load that track on to Deck A.
TRAKTOR KONTROL S4 — Manual — 27
Tutorials
Playing Your First Track
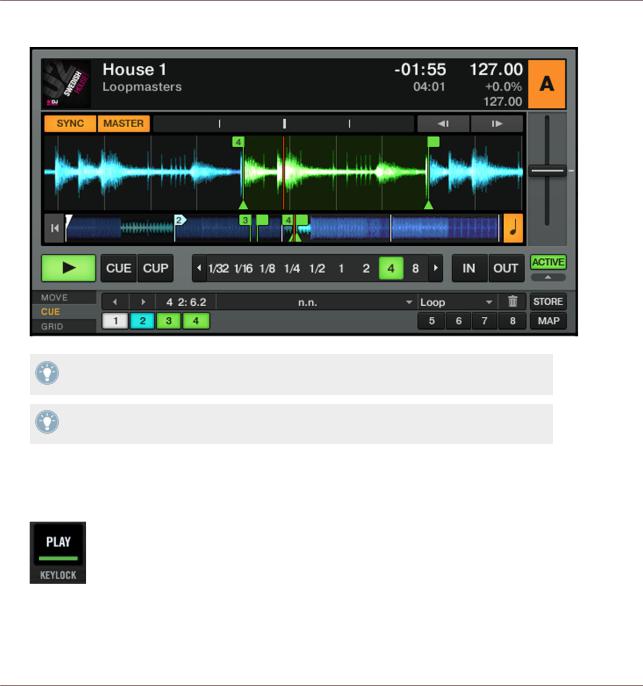
→The track is loaded. In TRAKTOR, its waveform and info appear on Deck A:
The LOAD button on the right Deck of your S4 would have loaded the track on to Deck B in
TRAKTOR.
In addition to using the S4 to load a track, you can also drag and drop tracks from the
Browser or from a folder on your computer directly into one of TRAKTOR’s Decks.
4.1.2Playing the Track
►Once the track is loaded, simply press the PLAY button at the bottom of the left Deck:
→The track starts playing. The PLAY button lights up and the waveform starts moving in TRAKTOR.
TRAKTOR KONTROL S4 — Manual — 28
Tutorials
Playing Your First Track
Again, pressing the PLAY button on the right Deck would have started the playback on
Deck B.
To Each Deck Its Own Channel
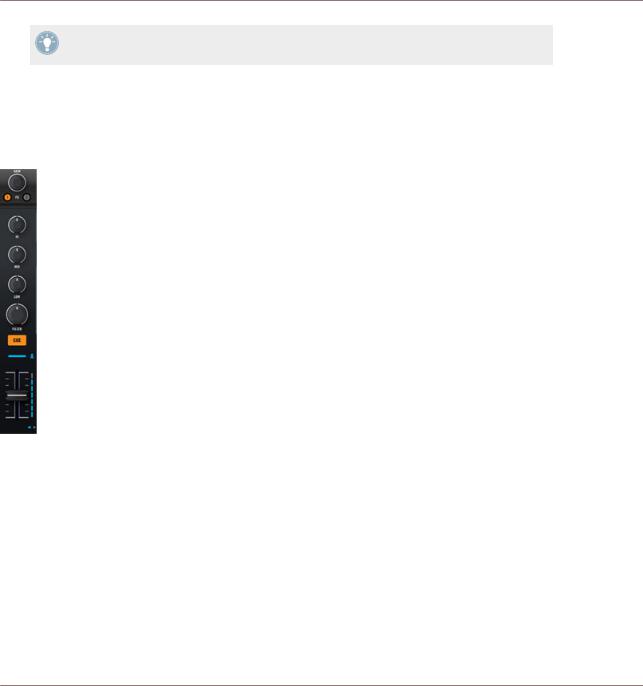
The audio playing on each Deck can be further shaped by the controls on the corresponding channel of the Mixer. Since the track is loaded on Deck A, you can control its sound on channel A (showing a lit blue “A” letter):
The Channel A
At this point you will probably hear some audio coming through your speakers or PA. If not, please check the following section.
4.1.3If You Don’t Hear the Track
If the track is playing on the Deck but the audio coming through your amplification system sounds too low, or if there is no sound at all, check the following:
TRAKTOR KONTROL S4 — Manual — 29
Tutorials
Playing Your First Track
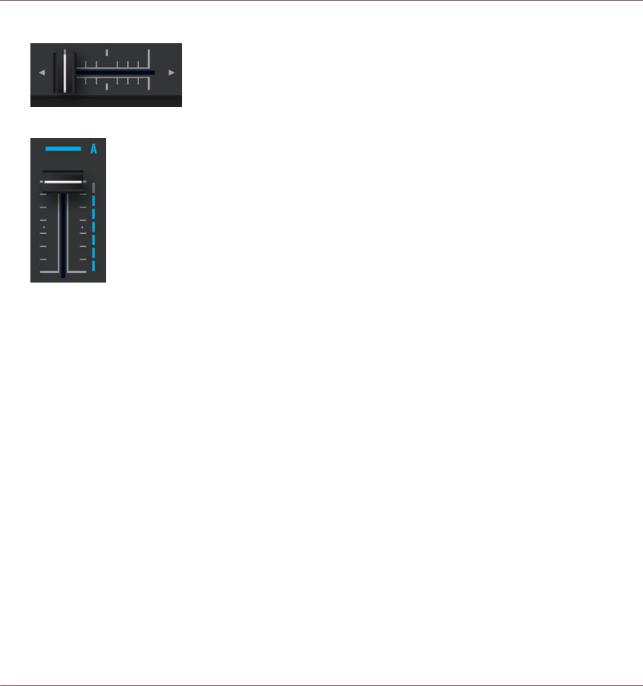
▪At the bottom of your S4, verify that the crossfader is moved all the way to the left:
▪Above, the channel fader should be raised on channel A:
▪The channel meter (the vertical bar of LEDs along the channel fader, see picture above) should show some activity. If not, check that the HI, MID, LOW and FILTER knobs higher up on that channel are set to center position; at the top of the channel, push the GAIN encoder once to reset the channel’s input gain to 0 dB.
TRAKTOR KONTROL S4 — Manual — 30
![]()
Tutorials
Mixing In a Second Track
▪At the top center of the Mixer, the MAIN LEVEL knob should be turned at least part of the way to the right. You should see the MAIN LEVEL meters going up and down:
If not, at the top center of the TRAKTOR window, check that the MAIN knob is raised:
If you see some activity on the MAIN LEVEL meters of your S4 but don’t hear any sound, then double-check the connection starting with the cable going from the S4’s Main Outputs to your PA.
4.2Mixing In a Second Track
Now that you have learned how to quickly load and play tracks using the TRAKTOR KONTROL S4 (see the previous tutorial), let’s see how to mix in a second track. On the way, you will learn a few basic mixing tasks that every digital DJ needs to know: how to pre-listen tracks, synchronize tracks, start the playback at the right position, and mix the tracks together using the crossfader.
Prerequisites
We assume here that you already followed the instructions in the previous tutorial (see ↑4.1, Playing Your First Track). TRAKTOR KONTROL S4 now is in the following state:
▪ The track “Techno 1” is loaded on Deck A. The track is playing and audible.
TRAKTOR KONTROL S4 — Manual — 31

Tutorials
Mixing In a Second Track
▪ The crossfader is all the way to the left.
4.2.1Pre-listening a Second Track Directly from the Browser
Before we load another track, we will use TRAKTOR KONTROL S4’s Preview Player to pre-lis- ten the track in the headphones directly from the Browser.
The PHONES socket and headphones controls on the front panel
1.If it’s not already done, plug in a pair of headphones to the PHONES socket on the front panel of your S4.
2.On the right of the PHONES socket, turn the CUE VOL knob fully down and put on your headphones.
3.Next to the PHONES socket, Turn the CUE MIX knob fully counter-clockwise.
4.On the top panel of your S4, turn the BROWSE encoder to select any track in the Playlist.
5.Now press the BROWSE encoder.
The selected track is loaded into the Preview Player, as indicated by the Preview Play (headphones) indicator in the top right corner of the Master Display in the middle of your S4:
6.On the front panel, turn up the CUE VOL knob to a suitable level. You should hear the track playing in the Preview Player.
7.By turning the BROWSE encoder, you can seek through the track and pre-listen other parts of the track.
8.To unload the track from the Preview Player, press the BROWSE encoder again.
TRAKTOR KONTROL S4 — Manual — 32

Tutorials
Mixing In a Second Track
→You get back to the list browsing. You can select another track for pre-listening or load the desired track on a Deck.
4.2.2Loading and Playing the Second Track
We will choose the track “Techno 2” and load it on Deck B, as we did on Deck A in the previous tutorial:
1.Turn the BROWSE encoder to select the track Techno 2 in the Playlist.
2.Press the LOAD button on the right Deck to load the track on to Deck B. In the TRAKTOR window, the track info and waveform appear on Deck B.
3.Press the PLAY button on the right Deck to start the playback.
→The track starts playing. The PLAY button lights up and the waveform starts moving on TRAKTOR’s Deck.
We don’t hear anything from Deck B through the speakers yet because we have set the crossfader on the S4 all the way to the left—our plan is to slowly mix in the track on Deck B.
You can already give it a try: by slowly moving the crossfader to the right, you should hear the track on Deck B fade in, whereas the track on Deck A progressively fades out as you move the crossfader further to the right. Obviously, our mix is not satisfying at all yet: before mixing in the second track, we first have to beat-match it to the track playing on Deck A. So for now, pull the crossfader all the way back to the left.
If you don’t hear any sound coming from Deck B even with the crossfader all the way to the right, check the few troubleshooting guidelines in section ↑4.1.3, If You Don’t Hear the Track above.
4.2.3Using Headphones to Prepare the Mix
From now on, let’s get used to preparing our mix with headphones until the next track (here on Deck B) is ready to be mixed in.
TRAKTOR KONTROL S4 — Manual — 33

Tutorials
Mixing In a Second Track
The CUE button on channel B
►On your S4, press the CUE button on the channel B.
→The button lights up, indicating that Deck B is now sent to the Cue channel, which you will hear in your headphones.
At any time, use the CUE MIX knob nearby to adjust the balance between the cued track (Deck B) and the main mix (Deck A) in your headphones: turn it counter-clockwise when you want to concentrate on the cued track; turn it clockwise when you want to hear more of the main mix.
You are now ready to work on the track playing on Deck B without interfering with the main mix sent to your audience. Regardless of the mix that you’re hearing in your headphones, the main mix is still controlled by the crossfader and channel faders.
4.2.4Synchronizing the Second Track
Before mixing in the track playing on Deck B, we will use TRAKTOR’s automatic Sync feature to adjust its tempo to that of Deck A. This is done in just one step via the SYNC button:
The SYNC button on the right Deck
TRAKTOR KONTROL S4 — Manual — 34

Tutorials
Mixing In a Second Track
►Press the SYNC button on the right Deck to synchronize its tempo and phase with those of Deck A.
→The SYNC button lights up. Now the two tracks are in perfect sync.
By slowly turning the CUE MIX knob on the front panel, you will hear the second track come into the mix in sync with Deck A.
Note that you should always adjust the tempo of the track that is not audible to the audience!
4.2.5Setting a Cue Point as Starting Point
You will probably want to have more control over which particular part of the track you mix in. For example, most of the time, not only the tempos but also the downbeats of both tracks should match. Using a particular point in a track (for mixing in, triggering, etc.) is called “cueing.”
TRAKTOR KONTROL S4 lets you mark points for cueing—we call them Cue Points. This notably allows you to re-use these points at a later stage, or in a later session.
The four unlit Hotcue buttons
►On the right Deck, whether or not the track is playing, simply press one of the unlit Hotcue buttons on a downbeat—let’s say the Hotcue button 1.
→The Hotcue button lights up in blue: you’ve just stored a Cue Point that you can return to simply by pressing the same Hotcue button again.
The first Hotcue button is now lit in blue.
TRAKTOR KONTROL S4 — Manual — 35

Tutorials
Mixing In a Second Track
Snapping to the Beats
You don’t have to worry about dropping a Hotcue directly on a beat: by default, TRAKTOR will make sure this happens automatically. This is because the so-called Snap mode is on, as you can see by the lit SNAP indicator on the Master Display, located in the middle of the Mixer:
The SNAP button and indicator on the Master Display
With Snap mode on, any point you set in the track will snap to the closest beat, thus ensuring that you get directly to that beat next time that you jump to that point.
Aligning the Tracks
Aligning both tracks is straightforward:
1.Make sure that Deck B is playing (its PLAY button must be lit).
2.When you hear a downbeat in the other track, press the Hotcue button you just used to store the downbeat position.
→The playback position on Deck B jumps to the stored Cue Point (as you can see in the TRAKTOR window), and the playback continues from there. Both tracks now are perfectly aligned, ready to be mixed.
Sticking to the Beats
Again, you don’t have to worry about pressing the lit Hotcue button exactly on the beat: by default, TRAKTOR will make sure that the beats of both tracks stick together and that the jump doesn’t ruin the beat matching. This is because the so-called Quantize mode is on, as you can see by the lit QUANT indicator on the Master Display (see picture above).
With Quantize mode on, whenever you jump through the track (e.g. by pressing a Hotcue button), the playback jumps to the nearest position that preserves the beat matching, thus ensuring that the current sync doesn’t get lost when you jump through the track.
TRAKTOR KONTROL S4 — Manual — 36

Tutorials
Mixing In a Second Track
4.2.6Interlude: In Case the Left Track Is Over
The track “Techno 1” on Deck A has been playing since we started with the tutorials, and it might happen that the playback reaches the end of the track. In this case, just do the following:
► On the left Deck, press SHIFT + CUE to skip back to the beginning of the track. You can then resume from where you left off.
4.2.7Mixing In the Track by Using the Channel EQ and Filter
Now would be a great time to audition some of TRAKTOR KONTROL S4’s EQs and filters:
The EQ and FILTER knobs on channel B
►Turn any of the EQ or FILTER knob on channel B to hear the effect on the cued track.
TRAKTOR KONTROL S4 — Manual — 37

Tutorials
Mixing In a Second Track
The EQs and filters are excellent tools for making adjustments to tracks before mixing them in so that you get the smoothest transition possible. The most common technique is to filter the bassline out of the incoming track—having 2 basslines running rarely sounds good. Do the following:
We will now carry out a first version of the mix “for real”. Thus, turn the CUE MIX knob fully clockwise to hear the main mix in your headphones (or put off your phones and listen to your mix coming through your amplification system).
→You just did your first mix with TRAKTOR KONTROL S4!
4.2.8Doing Everything by Hand
You can also do your mix manually instead of using TRAKTOR’s sync and cueing facilities.
Most probably, you won’t do everything by hand in your everyday DJ work. Nevertheless, it is a good idea to get familiar with the “handcrafted” way:
▪It can be necessary when synching to a playing vinyl record or to the previous DJ.
▪You can combine it with TRAKTOR’s advanced features, thus further developing your own mixing style.
To show this, let’s mix a new track on Deck A with the one we just mixed in on Deck B.
From now on, the track on Deck B is “on air,” i.e. it is heard by your audience. Hence, we will now exclusively work on the left Deck, which controls Deck A in the software.
First Steps
1.First check that the crossfader is at full right.
2.With the track on Deck B still playing, load the track “House 1” onto Deck A (reminder: turn the BROWSE encoder to select the track in the list, then push LOAD on the left Deck).
At first, it may help to select a track with a similar BPM.
3.Press PLAY on the left Deck to start the playback of the new track.
4.On the same Deck, make sure the SYNC button is off.
TRAKTOR KONTROL S4 — Manual — 38

Tutorials
Mixing In a Second Track
5.On the Mixer, deactivate the CUE button above channel B’s fader and activate that of channel A to hear the new track in the headphone mix (you might need to adjust the CUE MIX knob accordingly).
Adjusting the Tempo
The tempo for each Deck can be manually controlled via the TEMPO fader:
Use the TEMPO fader to adjust the Deck’s tempo.
►Adjust the TEMPO fader on the left Deck until the track’s BPM either “sounds right,” or directly matches the value of the other track’s BPM, which is displayed at the top of Deck B in TRAKTOR.
Manually Cueing with the Jog Wheel
You can use the jog wheel to manually seek through the track and find a nice bring-in point:
TRAKTOR KONTROL S4 — Manual — 39

Tutorials
Mixing In a Second Track
Use the jog wheel to manually seek through the track.
1.On the left Deck, press and spin the jog wheel’s top plate to seek through the track. (You can also fast seek through the track by holding the SHIFT button at the bottom of the Deck while spinning the jog wheel.)
2.Once you have found an interesting point for cueing (let’s say a downbeat), keep pressing the top plate and release it when a downbeat arrives in the other track.
Deck A starts playing from that point.
Note that you could also stop the playback (by pressing the PLAY button) before you seek an interesting point with the jog wheel. Once you have found the point, you can release the jog wheel—since the Deck is not playing, you won’t lose the point. When a downbeat arrives in the other track, press PLAY again on the left Deck.
Aligning the Beats
In case you still hear a slight offset between both tracks, you can use the outer rim of the jog wheel to adjust the track’s phase and cancel the offset:
►On the left Deck, move the jog wheel’s outer rim in the desired direction to temporarily bend the tempo and adjust the phase in order to cancel any minor offset.
→Your tracks now perfectly match.
TRAKTOR KONTROL S4 — Manual — 40
![]()
Tutorials
Adjusting Levels
Note that this can also be useful when using TRAKTOR’s Sync feature. Indeed, in some situations, the automatic beat detection might need a slight correction: for example, in tracks with unusual low frequency content, the beat “feeling” might occur slightly after the beat as detected by TRAKTOR. If you couldn’t make it to manually correct the Beatgrid of your track before you go on stage, you can cancel the offset on the fly with the jog wheel’s outer rim.
Mixing In the New Track
►When you’re ready, you can bring the crossfader over from Deck B and slowly mix in the track in Deck A.
→You just did your first handmade mix with TRAKTOR KONTROL S4!
Don’t expect to be capable of manually matching beats right away, though—this requires intensive training and can’t be fully explained here in detail. Practice makes perfect!
4.3Adjusting Levels
Before going any further, we would like you to be aware of how important it is to have your mix at the right level. We provide you here with a few simple hints in order to get the best sound out of your mix.
Even if this section might look a bit technical, please take the time to read these few pages, as they can save you a lot of trouble, especially in a live situation!
4.3.1The Theory
By mixing, you blend together signals coming from different sources (and possibly process them on the way).
The basic rule is: you need to ensure that no signal is clipping, while simultaneously trying to use the full dynamic range available. Just to keep it short, there are two reasons behind this:
▪By using the full dynamic range available, you keep the noise level low relative to your mix. As a result, all the details of your music are better rendered.
TRAKTOR KONTROL S4 — Manual — 41

Tutorials
Adjusting Levels
▪When a signal is clipping, it is not getting louder, just worse. The loud parts (typically the beats) are cut, which both reduces the dynamic range and introduces distortion in your mix. The speakers will suffer from this—and so will your audience! (Be also prepared for some angered sound technician or club owner coming down on you.)
Hence, you should always make sure that your signals stay at levels that satisfy these two requirements.
4.3.2The Practice
To assist you in adjusting levels, the Mixer of your S4 is equipped with various level meters and controls. Each level meter consists of a bar of blue LEDs indicating the signal level, along with an orange LED at the top indicating the clipping.
A channel meter
The rule mentioned above can thus be translated as follows:
►Best practices when adjusting levels: Ensure that the displayed levels go high enough in the blue areas but don’t reach the orange LEDs, or only rarely.
Letting your levels go “in the red” (or orange in this case) and using signal clipping to let your mix sound dirtier is definitely not recommended: to do this, make use of the great FX selection of TRAKTOR KONTROL S4 instead!
Checking the Level on Each Channel
Each channel on the Mixer provides you with a vertical channel meter next to the fader. This meter shows you the pre-fader level of the signal on that channel, i.e. the level of the signal before it is adjusted by the channel fader. To adjust this level, use the GAIN encoder at the very top of the channel:
TRAKTOR KONTROL S4 — Manual — 42

Tutorials
Adjusting Levels
A GAIN encoder sits at the top of each channel
►Adjust the channel’s GAIN encoder so that the level displayed on the channel meter stays in the upper part of the blue area without reaching the orange clipping LED.
Note that the channel’s EQ and filter settings also affect the signal level, as well as the possible FX Unit(s) it is assigned to. Hence, when modifying any of these, you might need to readjust the GAIN encoder accordingly.
Of course, the artistic side of your tracks should not be overlooked: for tracks with a variable average level over time (e.g. a track starting with a soft intro), you should consider the loudest parts of the track when adjusting the channel level.
Matching Levels Between Channels
Moreover, in order to avoid any level jump when crossfading between two channels, the average channel levels should match:
►Before mixing in a cued channel, adjust its GAIN encoder so that its channel meter activity roughly matches that of the channel currently on air.
TRAKTOR already does this for you by automatically setting the level for each newly loaded track to a satisfying value. This so-called “Autogain” feature relies on the gain values extracted from your tracks. Nevertheless, depending on the particular EQ, filter and FX applied to the cued track, you might have to double-check the level consistency before you mix in the track. Moreover, what is important here is the average level of the specific part of the track that you’re about to mix in.
Checking the Main Level
The signals coming from all channels are mixed together according to the relative levels set by the channel faders and by the crossfader. This mix is then sent from TRAKTOR’s main output to the Main section:
TRAKTOR KONTROL S4 — Manual — 43

Tutorials
Adjusting Levels
The Main section on your S4
In this section, the MAIN LEVEL meters show you the (left and right) overall level of your mix before it is adjusted by the MAIN LEVEL knob. These meters actually mirror the MAIN meter in the Header of TRAKTOR. To adjust this level, use the MAIN knob right below in TRAKTOR’s Master panel:
The MAIN meter and knob in TRAKTOR
►Adjust the MAIN knob in TRAKTOR’s Master panel so that the values on your S4’s MAIN LEVEL meters stay in the upper part of the blue areas without reaching the orange clipping LEDs.
By default, a limiter is enabled on TRAKTOR’s main output. With this limiter enabled, the MAIN LEVEL meters’ clipping LEDs don’t indicate clipping anymore, but instead they indicate when the limiter kicks in. While the limiter virtually cancels any distortion that might occur, the resulting contraction of the dynamic range, though, cannot be undone. Therefore, even with the limiter enabled, ensure that the clipping LEDs don’t light up too often!
When the orange clipping LEDs light up, turning down the MAIN LEVEL knob on your S4 is of no use: indeed, changing the level of the already distorted or shrinked signal coming from TRAKTOR won’t repair it!
Should the level stay low on the MAIN LEVEL meters, check also the channel faders—they are probably set too low as well!
TRAKTOR KONTROL S4 — Manual — 44

Tutorials
Looping and Cueing
4.4Looping and Cueing
Now that you have learned the basic mixing tasks, we will focus on one of TRAKTOR KONTROL S4’s great features: its looping facilities.
Prerequisites
As always, we assume here that you already followed the instructions in the previous tutorials. TRAKTOR KONTROL S4 now is in the following state:
▪The track “House 1” is loaded on Deck A. The track is playing and audible.
▪The crossfader is all the way to the left.
4.4.1Playing with Loops
On your S4, each Deck is equipped with dedicated loop controls, located in the Loop section, right under the Deck Display:
The Loop section, from left to right: LOOP MOVE encoder, LOOP IN and LOOP OUT buttons, and LOOP SIZE encoder.
Setting a Loop with a Predefined Size
Let’s add a Loop to the track on Deck A.
The LOOP SIZE encoder
►To engage a loop on a playing track, just push down the LOOP SIZE encoder.
TRAKTOR KONTROL S4 — Manual — 45

Tutorials
Looping and Cueing
→This will automatically add a loop at that position in the track.
The loop size will correspond to the number on the Deck Display just above the LOOP SIZE encoder:
The Loop Size Display
►To change the size of the Loop, just turn the same LOOP SIZE encoder until the display reads the number of beats you’d like the Loop to be.
Note that you can adjust the loop size either before or after you’ve set the Loop! When doing it beforehand, it will affect the next Loops you set.
Setting a Loop Manually
You can also manually set loop start and loop end points. To do this, use the LOOP IN and LOOP OUT buttons in the Loop section:
The LOOP IN and LOOP OUT buttons
1.Press the LOOP IN button to set the Loop In Point.
2.Press the LOOP OUT button to set the Loop Out Point.
As soon as you hit the LOOP OUT button, a Loop is set and the track will start looping.
We already introduced the Snap mode in the previous tutorial (see ↑4.2.5, Setting a Cue Point as Starting Point). This mode also affects the Loop In and Loop Out Points, so that they will automatically be positioned directly on the beat.
Of course, you can also change the size of manually set Loops via the LOOP SIZE encoder as described above.
TRAKTOR KONTROL S4 — Manual — 46

Tutorials
Looping and Cueing
When setting a Loop manually, the Loop Size Display (above the LOOP SIZE encoder) might not always match the actual loop size.
Moving a Loop
You can also quickly move the active Loop across your track by using the LOOP MOVE encoder, at the left of the Loop section:
The LOOP MOVE encoder
►To move the Loop, turn the LOOP MOVE encoder.
The size of the move also corresponds to the loop size that is currently set, as displayed above the LOOP SIZE encoder.
Turning the LOOP MOVE encoder when there is no Loop currently active lets you jump backward/forward through the track by the same loop size. See section ↑5.3.8, Loop Section for more info.
Storing a Loop
In the previous tutorial, we looked at how to store Cue Points. This is as simple as pressing an unlit Hotcue button.
An unlit Hotcue button
Storing Loops works similar:
►To store the active Loop, press an unlit Hotcue button.
TRAKTOR KONTROL S4 — Manual — 47

Tutorials
Looping and Cueing
→The Hotcue button lights up, this time in green: you’ve just stored a Loop that you can return to simply by pressing the same Hotcue button again.
The same Hotcue button lit in green
Deactivating Looping
If you want to deactivate the current Loop, do the following:
►To deactivate looping, push either of the LOOP MOVE or LOOP SIZE encoder.
→The playback continues after the Loop.
By pushing the LOOP MOVE encoder when there is no Loop currently active, you activate looping: the next Loop in the track will be activated.
4.4.2Using Hotcues
In this tutorial and in the previous one, we already used Hotcues to store Cue Points and Loops. We want to show you here a few more details on their use.
Hotcue buttons with various assignments
As already explained, when pressing an unlit Hotcue button, if there is no Loop active you store a Cue Point at the current playback position (the Hotcue button turns blue), and if there is a Loop active you store this Loop (the Hotcue button turns green).
On the waveform of the software Deck, you can see that a line with the same color appears in the track at the corresponding position. Moreover, a little number at the top reminds you which button you should use to jump to that Cue Point or Loop:
TRAKTOR KONTROL S4 — Manual — 48

Tutorials
Looping and Cueing
A waveform with a Cue Point stored as Hotcue 2 and a Loop stored as Hotcue 3.
If you make a mistake, or just decide you no longer want a particular Hotcue, you can quickly clear it:
►To clear a Hotcue, hold down the SHIFT button and press the corresponding Hotcue button.
→You can see that the button is no longer lit.
Creative Uses of Hotcues
Hotcues aren’t just bookmarks to particular sections of a track—they can also be used for creative techniques such as remixing parts of a song, beat juggling effects, etc.
As an example, we will show you here how you can quickly make use of a Loop stored in a Hotcue slot to introduce the track you’re about to mix in. By the way, this will allow us to sum up what we’ve learned until now.
Provided that you carefully followed the instructions in the previous tutorials, the track “Techno 2” is still loaded on Deck B. Let’s say that the track on Deck A is on air (crossfader at full left) and you want to prepare the track on Deck B for mixing in:
1.Start the playback of the next track and send it to your headphones by activating the CUE button on the corresponding channel.
2.Find an interesting Loop near the beginning of the track by using the controls in the Loop section of the right Deck.
3.Once you have a nice Loop running, store it by pressing an unlit Hotcue button and leave it playing.
4.Now start to bring this Loop in your mix, for example by implementing the lowcut we explained in the previous tutorial (see ↑4.2.7, Mixing In the Track by Using the Channel EQ and Filter).
TRAKTOR KONTROL S4 — Manual — 49

Tutorials
Using Samples in Your Mix
5.When you’re about to fade out the previous track completely, release the Loop on the new track, and you’re done.
4.5Using Samples in Your Mix
The Remix Decks are a great way to add Samples to your set, or capture Samples from Track Decks for on-the-fly remixing.
The Remix Deck C with a Sample loaded in the upper Sample Cell of the first Sample Slot.
You can also use the Remix Decks to build new tracks on the fly, layering One-shot Samples and Loops on top of each other. Now let’s find out how to control the Remix Decks with your S4.
In case you were using Sample Decks in an earlier TRAKTOR version, don’t panic! All former Sample Slot functionality stays preserved.
Prerequisites
As always, we assume here that you already followed the instructions in the previous tutorials. TRAKTOR KONTROL S4 now is in the following state:
TRAKTOR KONTROL S4 — Manual — 50
 Loading…
Посмотреть инструкция для Native Instruments Traktor Kontrol S4 бесплатно. Руководство относится к категории лицензии на программное обеспечение и дополнения, 1 человек(а) дали ему среднюю оценку 7.5. Руководство доступно на следующих языках: английский. У вас есть вопрос о Native Instruments Traktor Kontrol S4 или вам нужна помощь? Задайте свой вопрос здесь
Не можете найти ответ на свой вопрос в руководстве? Вы можете найти ответ на свой вопрос ниже, в разделе часто задаваемых вопросов о Native Instruments Traktor Kontrol S4.
Инструкция Native Instruments Traktor Kontrol S4 доступно в русский?
К сожалению, у нас нет руководства для Native Instruments Traktor Kontrol S4, доступного в русский. Это руководство доступно в английский.
Не нашли свой вопрос? Задайте свой вопрос здесь

Хотите научиться скретчингу, но не знаете с чего начать? В TRAKTOR KONTROL S4 скретчинг на джогах очень похож на игру с винилом. Контроллер оборудован прочными и надежными элементами управления, с которыми диджею будет очень удобно исполнять комбо. Перед вами руководство по скретчингу на TRAKTOR KONTROL S4.
Содержание:
- Инструментарий
- Выбор семплов и битов для скретчинга
- Настройка
- Постановка рук
- Как установить cue в Traktor и S4
- Режимы и тактильный отклик
- Приемы скретчинга
Инструментарий
Для начала работы Вам понадобится TRAKTOR KONTROL S4, ноутбук, USB-кабель для подключения контроллера, библиотека битов и лупов для скретчинга, а также коллекция цифровых семплов скретчей. Помимо этих инструментов, рекомендуем найти человека, который может выступить учителем, и нескольких диджеев, у которых вы будете заимствовать приемы.
Выбор семплов и битов для скретчинга
Прежде всего нужно освоить работу со скретч-семплами. Скретч-семплы — это слова и фразы, которые можно использовать в качестве перкуссии. На классических скретч-семплах можно услышать что-нибудь наподобие «ahhh», «scratch» и «fresh». Если у вас есть коллекция винила, запишите и оцифруйте скретч-семплы из своей баттл-библиотеки. Если вы начинаете с нуля, то можете поискать семплы эффектов в библиотеке вроде Sounds.com (можно найти множество звуков и эффектов специально для скретчинга).
Далее, нам нужно поискать биты для скретчинга. Для скретча отлично подходит инструментальный хип-хоп, трэп, электро, хотя на самом деле скретчить можно с любым битом. Лучше начинать с медленных битов (скажем, 70-95 bpm) и постепенно увеличивать темп. На Sounds.com можно найти множество хороших битов, а если вам интересен продакшн, то вы можете создать собственные лупы на основе семпл-пака. Биты не должны быть длинными; для использования в TRAKTOR подойдут фразы от 8 до 16 тактов.
Настройка
Далее нам понадобится расставить точки cue с помощью TRAKTOR и контроллера S4. Определитесь, какой рукой вы будете скретчить, а какой управлять кроссфейдером. Как правило, на джоге стоит использовать ту руку, которой вы пишете, поскольку так можно добиться лучшего контроля над исполнением. Однако, если вам удобнее, можете играть и наоборот. Если вы собираетесь использовать левый джог для скретчинга, загрузите скретч-семплы в деку A в TRAKTOR, а бит в деку B. Если будете играть как правша, бит нужно будет загрузить в деку А, а семплы в деку В. Существует стиль скретчинга под названием hamster, где ход кроссфейдера идет слева направо, но пока что мы не будем затрагивать этот способ.

Постановка рук
Чтобы понимать, где находится семпл в соответствии с позицией джога, стоит представить джог как циферблат. Положите руку на джог между шестью и девятью часами. Поставьте на джог указательный и средний, либо средний и безымянный палец. Расположите ладонь ближе к джогу; чем она ближе, тем лучше будет контроль над звуками. Другой рукой мы будем управлять кроссфейдером. Ваше запястье должно быть расслаблено, а кроссфейдер должен свободно удерживаться между большим и указательным пальцами.
Как установить cue в Traktor и S4
Отметка cue позволяет ди-джеям мгновенно перемещаться в определенный момент трека. Отметки Cue нужны, чтобы быстро переходить к семплам. Лучше всего разместить cue-отметки в начале каждого семпла или каждых нескольких семплов. Чтобы разместить отметку, положите руку на джог и ориентируйтесь на слух и дисплей с TRAKTOR. На деке, в которую вы загрузили семпл, мотайте джог вперед и назад, пока не услышите первый семпл. Чтобы найти самое начало семпла, приблизьте отображаемую форму волны в TRAKTOR с помощью клавиши +. Перед семплом вы увидите пустое пространство и услышите тишину. Начало семпла будет иметь цветную форму волны, и вы услышите звук при перемещении джога к семплу. Нажмите Cue 1 на S4, чтобы сделать отметку cue. Чтобы удалить отметку cue, нажмите клавишу Shift, а затем нажмите на отметку, которую нужно удалить. Повторите действие на каждой отметке, которую нужно выделить.
На дорожке, загруженной в деку B, найдите первый такт записи, используя джог, чтобы перемотать дорожку, пока не услышите звук. Первую долю в музыке также называют даунбитом; это, как правило, первый звук, который вы услышите в треке, но лучше проверить лишний раз, что бит начинается с бочки. Если это не так, медленно вращайте джог, пока не найдете первую бочку. Отметьте cue на первой доле, нажав Cue 1 на S4. Так нам нужно закольцевать биты, нажмите Loop из выпадающего меню ниже Cue и выберите Loop. Выберите количество тактов, которое вы хотите закольцевать. Луп будет воспроизводиться при нажатии клавиши Cue Button 1.
Режимы и тактильный отклик
S4 имеет три разных режима; Turntable Mode, Jog Mode и Beatgrid Adjust Mode. Выберите Turntable Mode, чтобы включить имитацию винила. Этот режим позволяет ди-джеям вращать джог, а также использовать край контроллера для замедления треков во время сета, как на виниле. Также можно отрегулировать инерционный момент джогов, как на виниле. С помощью опции Enable Haptic Hotcues во вкладке Preferences вы можете включить тактильный отклик джога при установке Cue-отметок и Loop-маркеров. Джоги Haptic Drive щелкают, когда вы мотаете через cue-отметки и лупы; вы также можете быстро промотать джог до следующей cue-отметки. С помощью опции Enable Haptic Hotcues во вкладке Preferences вы можете включить тактильный отклик джога при установке Cue-отметок и Loop-маркеров. Джоги Haptic Drive щелкают, когда вы проматываете через cue-отметки и лупы; вы также можете быстро промотать джог до следующей cue-отметки.
Приемы скретчинга
Baby Scratch
Это самый простой прием из всех. Загрузите длинный семпл и начните с начала семпла. Держите кроссфейдер на середине, сдвиньте джог вперед, а затем назад. Играйте так вместе с музыкой, сдвигая джог вперед на первую долю, а назад — на вторую. Как только вы овладеете приемом, попробуйте делать его дабл-тайм (в два раза быстрее). Сначала попробуйте скретчить без музыки, но как только вы освоите движение, начните играть поверх бита и старайтесь скретчить в сетке.
Forwards (Cutting)
Форвард или кат, это когда кроссфейдер закрывается во время обратного движения пластинки. Лучше всего использовать семплы короткой и средней длины, типа «fresh» или «aww yeah». Чтобы исполнить прием, начните с Cue 1 в начале семпла и откройте кроссфейдер. Пусть семпл начнет проигрываться; поставьте руку на джог и остановите воспроизведение. Закройте кроссфейдер, сдвинув его на противоположную сторону (чтобы семпл не было слышно) и аккуратно перемотайте запись до начала семпла. Например, если у вас есть скретч-семпл, загруженный в деку A, сместите кроссфейдер до упора вправо, чтобы семпл не было слышно во время перемотки назад.
Drag
Дрег — это прием без использования кроссфейдера, то есть на всем протяжении скретча он остается открытым (в среднем положении). Этот прием выполняется медленно, плавным перемещением джога; таким образом семпл проигрывается с понижением тона. Чтобы выполнить дрег, оставьте кроссфейдер открытым и начните с семпла с отметкой cue. Семпл должен быть достаточно длинным, наподобие белого шума или звука «ahhh». Медленно перемотайте семпл под музыку, а затем потяните джог назад.
Tears
Еще один прием скретча без использования фейдера, когда два звука создаются из одного длинного звука с помощью паузы между движением вперед и движением назад на джоге. Чтобы выполнить прием, начните с отметки cue на семпле и перемотайте джог вперед. Сделайте паузу, затем снова потяните джог вперед. Завершите прием движением джога обратно, чтобы переместить проигрывание семпла в самое начало. Чем ниже над джогом находится рука, тем лучше вы будете контролировать звук. Чтобы сделать обратную версию приема, начните с конца семпла, потяните джог назад, сделайте паузу, а затем снова потяните колесо назад. Завершите прием перемоткой семпла вперед. Вы также можете делать различные комбинации приемов, например два прямых и два обратных.
1. Disclaimer …………………………………………………………………………………………………… 1
2.1. Document Conventions …………………………………………………………………………. 2
2.3. In this Document …………………………………………………………………………………. 3
3. Concepts ……………………………………………………………………………………………………. 4
3.2. Haptic Drive Modes ……………………………………………………………………………… 5
3.3. Pad Modes …………………………………………………………………………………………. 5
3.4.1. Beatgrid ……………………………………………………………………………………. 6
4.4. Connecting Headphones ……………………………………………………………………… 10
4.6. Final Preparation ………………………………………………………………………………… 11
5.1. Decks ……………………………………………………………………………………………… 16
5.1.1. Browse Controls ……………………………………………………………………….. 18
5.1.2. Pad Section …………………………………………………………………………….. 18
5.2. Mixer ………………………………………………………………………………………………. 21
5.2.1. Mixer Channel ………………………………………………………………………….. 23
5.3. FX Unit ……………………………………………………………………………………………. 24
5.4. Front Panel View ……………………………………………………………………………….. 25
5.5. Rear Panel ……………………………………………………………………………………….. 25
6. Mixing Your First Tracks ……………………………………………………………………………….. 27
6.1. Prerequisites …………………………………………………………………………………….. 27