 |
|
— производитель: TV Star (ТВ Стар) |
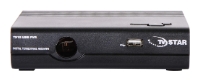
Описание и инструкции TV Star T910 USB PVR
TV STAR T1030 HD USB PVR установкаПриставка для просмотра цифрового эфирного телевидения стандарта DVB T2 , TV star T2 505HD USB PVR .
Понравился обзор? Не забывайте ставить лайки и репосты!
862 //
Теги: TV Star T910 USB PVR, внешний TV-тюнер, отзывы, фото, инструкция, видео, цена, обзор, купить TV Star работает без компьютера
Оценка TV Star T910 USB PVR на TV-Priem.ru:
4
из
5
на основании
338 голосов.
Индекс популярности этой модели:
Часто задаваемые вопросы, на которые мы устали отвечать:
- Что идет в комплекте с TV Star T910 USB PVR?
- Что означает цифровой внешний TV-тюнер? К чему и куда его подключать?
- Помогите, я полный чайник, как перезагрузить T910 USB PVR?
- Хочу научиться правильно фотографировать, ищу фотошколу во Владивостоке или какие-то фотокурсы для новичков. Подскажите адреса.
- Хочу иметь хороший приём ТВ сигнала. Видеозахват не нужен в принципе, самое главное качество приёма сигнала. Подойдет ли мне эта модель?
- Срочно разыскивается родное программное обеспечение для TV Star T910 USB PVR. Поделитесь ссылочкой пожалуйста
- Облазил весь интеренет. Помогите найти драйвера, заранее спасибо!
- Есть ли в нём поддержка FM радио?
- Нужно отремонтировать разъем питания, ищу адекватный сервис во Владивостоке. Цена ремонта?
- Не могу разобраться с инструкцией ( manual-tv-star-t910-usb-pvr.zip). Что такое MPEG-4?
- Изучил все модели TV Star, перечитал отзывы, но всё равно не могу определиться. Какой внешний USB TV-tuner выбрать?
- Куплю бу TV Star T910 USB PVR или что-то аналогичное по характеристикам во Владивостоке. Срочно!
Обзор и впечатления TV Star T910 USB PVR


Другие модели TV Star
— TV Star T1000 USB PVR HD
— TV Star T1020 HD USB PVR
— TV Star T1030 HD USB PVR
— TV Star T2 505 HD USB PVR
— TV Star T2 525 HD USB PVR
— TV Star T2404 DVB-T2
— TV Star T300 USB PVR
— TV Star T3000 HD USB PVR
— TV Star T7100 CX HD
Взгляните на похожие модели

Reflect Digital Mini DVB-T/T2

WandTV USB DVB-T Receiver

Beholder Behold TV 509FM
Попробуйте найти
- цифровая приставка для телевизора T910 USB
- tv star t910 usb pvr инструкция на русском
Ссылка на эту страницу
orsha.siti:
Так на фиг нужна такая цифра!!!!!!!!!!!!!!!!!!!!!!!!!!!!!!!!!!!!!!!!!!Пусть бы был аналог он и то лучше показывал чем этот кусок геммороя!!!!!!!!!!!!!!!!!!!!!!!!
Добавлено спустя 1 минута 13 секунд
На фиг такая цифра нужна у которой качество от ветра зависит??????????Смысл мне объясните????
Добавлено спустя 1 минута 22 секунды
Купи тюнер !!! Купи антену!!! И моли Бога чтоб ветра не было!!!! Ай да цифра!!!!
Добавлено спустя 1 минута 30 секунд
Почему же в жк на антене без усилителя ничего не тормозит?????
Добавлено спустя 16 секунд
А в старых теликах тормозит ???
Добавлено спустя 1 минута 54 секунды
Галиматьё какое то
Добавлено спустя 1 минута 37 секунд
А есть толковые приставки которые без антен и усилителей работают???? Говорю до самого ретранслятора 3 -4 км по чистому полю!!!!!!!!!!!!!!!!!!! А сигнал от уровня ветра зависит я в шоке!!!!!

Уважаемый, вы наверно толком не разобрались с настройками каналов.
На своем примере расскажу:
Вчера купил сию приставку в «Электросиле» ТЦ Глобо. стоила 369 тыров. + отдельно скарт кабель.
И вчера же завез в деревню. Она расположена между Столбцами и Негорелым.
В деревне стоит ЭЛТ Горизонт 5 лет ему и антена МВ-ДМВ на мачте смотрящая на Минск. С усилителем.
Я боялся что придется лезть на крышу и крутить ее на Столбцы, но все оказалось на много проще.
Воткнул скарт кабель в телевизор и приставку. Включил телевизор, включил приставку и тут все само начало работать: телевизор сам перешел в режим AVI, а приставка выкинула меню настройки региона. Я все выставил под Россию и произвел автооиск.
После автопоиска у меня появилось 18 каналов. 16 из них дублировались, на 2-ух небыло изображения.
Самое странное что дублирующиеся каналы имели разный уровень качестава. Которые с худшим, все время тормозили и сыпали пикселями.
Я понял что мой тюнер подхватил 2 передатчика Столбци и Дзержинск.
В последствии я просто стер каналы с худшим качеством и оставил «Столбцовские» 8 штук.
Замечу, Антенну не крутил на Столбцы. И все работает без тормозов. (И даже ловит радио)
И еще, без усилителя антенны сигнал не ловит ! До Столбцов 4 км. д. Задворье . ))))
Кстати предыдущий автор написал правду — видео кодированное со звуком AC или AAC не воспроизводит звук. Думаю что делать.
Уверен если вы приложите еще некоторые интелектуальные усилия то у вас все заработает как положено.
Успехов.
Добавлено спустя 4 минуты 11 секунд
прикрепил ссылку на инструкция на русском
DIGITAL TV RECEIVER
TV STAR T910 USB PVR
ENGLISH
CONTENIDO
1.SAFETY INFORMATION……………………………………………………………..
1
2.INTRODUCTION………………………………………………………………………..
2-4
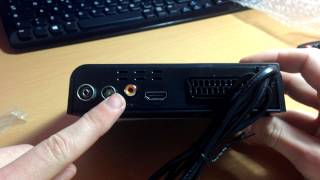
3.SYSTEM CONNECTION……………………………………………………………..
5
BASIC OPERATIONS
4.WELCOME PAGE ……………………………………………………………………..
6
5.EDIT CHANNEL…………………………………………………………………………
6-9
6.INSTALLATION………………………………………………………………………….
9-11
7.SYSTEM SETUP ……………………………………………………………………….
11-15
8.TOOLS …………………………………………………………………………………….
15-17
9.GAME……………………………………………………………………………………….
17
10.REC………………………………………………………………………………………..
18-21
11.HOTKEY………………………………………………………………………………….
21-25
Safety Information
Safety Information
Introduction
Remote control
Introduction
IR RECEIVER
USB PORT
Introduction
POWER
CHANNEL-
CHANNEL+
RF IN
RF LOOP through
TV SCART
NUMERIC ENTRY
MENU
3.CH+
L
7.CH-
GREEN BUTTON/FF
POWER
RECALL
19.EXIT
DN
PLAY
13.PAUSE
RED BUTTON/FB
RECORD
STOP
BLUE BUTTON/PVR
YELLOW BUTTON
System Connection
Basic Operations
4. Welcome Page
When turn on the power for the first time, the welcome page will be shown as below:
1 Press [Up/Down] key to move highlight.
2 Press [Left/Right] key to select region, language, Display mode, Aspect mode.
3 Move highlight to [OK] button and press [OK] key to begin the auto scan.
4 Press [Exit] key to exit welcome page and enter into main menu.
5. Edit Channel
When pressing the [MENU] key to enter the main menu, which shows as below:
1 Press [Up/Down] key to select menu pages among Edit Channel,
Installation, System Setup, Tools, Game, and REC.
2 Press [OK] or [Right] key to enter the “Edit Channel”. If Menu Lock is “On”, a dialogue inquires the password, “0000” is for default.
3 Press [Up/ down] key to select menu items among TV Channel List,
Radio Channel List and Delete All.
4 Press [Left] key or [Exit] key to go back to main menu.
5.1 TV Channel List
When entering the “TV Channel List” menu, the window shows as below.
Basic Operations
1 Move the highlight by pressing [Channel Up/Channel Down] key then press
[OK] key to preview the current highlighted program in the preview window.
2 By pressing [Page Up/Page Down] key to execute the Page Up/Page
down function.
3 By pressing the [Volume Up/Volume Down] key to switch to different
Program Group.
4 By pressing the [MENU] or [Exit] keys to go back to the “Edit Channel”
menu.
5 By pressing the color key to execute the corresponding functions in
“Channel List.
5.1.1 Favorite
1 Press the [FAV] key, and then [OK] key to open the “Favorite” window .
2 Move the highlight among the 8 favorite groups by pressing [Channel
Up/Channel Down] key, and press [OK] key to make a favorite mark in
the left side of the selected Favorite group.
3 Press [OK] key on the marked Favorite group to cancel the existing
favorite mark.
4 After marking, press [Exit] key to go back to “TV Channel List”, there
will be a favorite mark beside the marked channel
5.1.2 Lock
1 Press [Red] key to enter the lock mode.
2 Press [Up/Down] key to move the highlight, and press [OK] key to
display a dialogue to ask you to input password, “0000” is for default.
If the correct password is entered, then a “lock mark” can be seen on
the right side of the highlighted channel.
3 After saving and exiting the menu, the password dialog will be required
while you want to watch the locked channel.
5.1.3 Skip
1 Press [Green] key to enter skip mode.
2 Press [Up/Down] key to move the highlight and press [OK] to make a
“skip mark” in the right side of the highlighted channel.
3 After saving and exiting menu, the channel will be skipped while user
change channel in the full screen
5.1.4 Move
1 Press [Yellow] key, then press [Up/Down] key to move the highlight
and press [OK] key to make a mark. There will be a “moving mark” in the
right side of the selected channel .
Basic Operations
2 By pressing [Up/ down] key to move the selected channel to the
position that you want to place. Press [OK] key to confirm your decision.
5.1.5 Edit
1 Press [Blue] key to open “Edit” menu.
2 Press [Exit] to exit “Edit Channel” menu. If you have done some modification
in “Edit Channel” menu, the system will show up a message box to
inquire you whether saving or not when exiting.
5.1.5.1. Sort
1 Press [Red] key can open the “Sort” window. There are four kinds of
sorting approaches. By Press [Channel Up/Channel Down] key to move
highlight and press [OK] key to confirm your selection.
2 The four kinds of sorting approaches are:
Name (A-Z): Sorting in Alphabetical descending Order.
Name (Z-A): Sorting in Alphabetical ascending Order.
Lock: Collecting all locked channels and list in the bottom of TV Channel List.
Default: Return to original setting order.
5.1.5.2. Edit
In “Edit Channel” menu, press [Green], then press [Up/Down] key to move the highlight and press [OK] key to open the “Rename” window. Which shows as below:
1 Press [Yellow] key to switch whether capital or not.
2 Press [Red] key to delete the char
on the cursor.
3 Press [Blue] key to save the
modification.
5.1.5.3. Delete
Press [Blue] key, then press [Up/Down] key to move the highlight and press
[OK] key to make a delete mark in the right side of the highlighted channel.
After save and exit “Edit Channel” menu, the marked channel will be deleted.
5.2 Radio Channel List
Basically, the operations in “Radio Channel List” are almost the same as those of the “TV Channel List”.
Basic Operations
5.3 Delete All
Press [OK] key, it will pop up a warning message to inquire you whether delete all services or not .
1 If the selection is “Yes”, all channels will be deleted.
2 If the selection is “No” or press [Exit] key, this function will be ignored
directly without saving.
Frequently asked Questions
Q: IF I recklessly delete all channels, what should I do?
A: There are two ways to restore:
To re-search all channels in “Installation” functions.
Use “load Factory setting” function to restore all channels in “Tools” function.
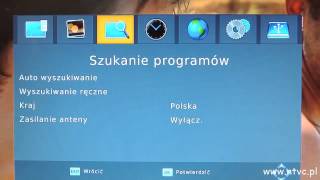
6. Installation
When you enter the “Installation” menu, the menu will be displayed as below:
1 Press [Up/Down] key to select menu pages among Auto scan, Channel
scan, Aerial adjustment, LCN.
2 Press [OK] or [Right] key to enter the “Installation”. If Menu Lock is “On”,
then a dialogue to inquiry the password will be shown. The default
Password is “0000”.
3 Press [Up/ down] key to select menu items.
4 Press [Left] key or [Exit] key to go back to main menu.
6.1 Auto Scan
When you enter to “Auto Scan” menu, there will display the screen like below:
1 In “FTA only” item, press [Left/Right] key to turn yes/no.
2 Moving the highlight to “Search” item and press [OK] key to start scanning.
3 In the “Auto Scan” menu, press [Exit] key to draw back from the scanning.
Basic Operationss
6.2 Channel Scan
When entering to “Channel Scan” menu, a channel scan menu will be shown as below:
1 There are two choices of “Scan Mode,” by channel or by frequency.
If you scan by channel, “Scan Band” and “Ch No” are available to be
adjusted. If you scan by frequency, “Frequency” and “Bandwidth” are
available to de adjusted.
2 There are two choices of “Scan Band,” “UHF” or “VHF.”
3 There are 56 choices of “CH No” ranging from In frequency
“CH05(177500Hz) ” to “CH69(858000Hz).”
4 You can adjust any frequency to search by.
5 There are three choices of “Bandwidth”, 6, 7, and 8 MHz.
6 When you complete your modification, move highlight to “Search” item
and press [OK] key, then it will begin to scan.
7 Press [Exit] key to exit the scanning.
6.3 Aerial Adjustment
When entering to “Aerial Adjustment” menu, a menu will be displayed as below:
1 The user can check and adjust the Signal Intensity and Signal Quality of every C and Signal Quality of every Ch No.
2 Tuner Power :on/off
6.4 LCN
LCN: To toggle the LCN mode On/Off
Basic Operations
7. System Setup
When entering to “System Setup” menu, a menu will be displayed as below:
Auto Standby
Press [Up/Down] key to select menu pages among Language
,
TV system
,
Local time setting, Time setting Parental lock, Osd setting
,
Favorite.
7.1 Language
When entering the “Language” menu, you will see the screen as below:
1 Language: press [Volume Up/ Volume Down] key to select menu languages,
the selections of languages include:English, French,Poland,Lithuania, Italian,
Portuguese, Russia, Latvia, Latvia, Slovenia.
2 First Audio: Some channels have more than one available audio
,
will play this audio language as default. If the channel hasn’t the suited
audio language, then the system will compare automatically with the
second audio language.
3 Second Audio: If the channel contains the audio track corresponding to
the “Second Audio” instead of the “First Audio”, system will play the
second audio language as default. If no audio language corresponds to
Basic Operations
the “Second Audio”, then the default language of current channel will
be played automatically.
4 Subtitle Language: Some channels have more than one subtitle for
choosing.With this function, a user can set the specified subtitle language.
If the playing channel has the same subtitle language as the “Subtitle
Language” the user set, system will play this subtitle language as
default. If the channel hasn’t the suited subtitle language, then the
default subtitle language of current channel will be played automatically.
5 Teletext: The user can set teletext language. If the streams have this
language you can see the teletext in language you set.
6 Press [Exit] key to draw back from “Language” menu.
7.2 TV System
When entering the “TV System” menu, you will see the screen as below:
1 Video Resolution:To switch the system output video resolution.
2 Aspect Mode:To switch the screen aspect ratio. By pressing [Left/Right] key
to select each mode circularly.
The following options are provided:
4:3 PS, 4:3 LB, 16:9, AUTO
Auto means system won’t do any aspect ratio switching.
3 Video out: setting the TV video output mode, there are two options are procvide: RGB/CVBS
4 Press [Exit] key to draw back from “TV System” menu
7.3 Local Time Setting
1 Region: Select the country which the user is in.
2 GMT Usage: Set to be ON/OFF.
Basic Operations
3 GMT Offset: Valid only when the setting of “GMT Usage” is “On”. By
pressing [Left/Right] keys to switch “GMT Offset” values ranging from
-11:30 ~ +12:00, with the increment unit by half an hour.
4 Summer Time: Valid only when the setting of “GMT Usage” is “On”. When
“Summer Time” is “On”, one hour will be added .
5 “Date” and “Time” items: Valid only when the setting of “GMT Usage”
is “Off”. By pressing [Left/Right] keys to moving highlight and the number
keys for inpout.
6 Press [Exit] key to draw back from “Time” menu
7.4 Timer Setting
Select “Timer Setting” item and press [OK] key to enter “Timer list” menu.
Press [up/down] key to select a timer, then press [ENTERZ] key to open and adjust the timer menu.
7.5 Parental Lock
Press [OK] key on “Parental Lock” item, a dialogue will be pop up to ask
for the password (“0000” for default.) Once the user make the password
correct, a screen will be shown as below.
1 Menu Lock: determining the users’ intention to block the following menus
with password: “Edit Channel /Installation/Tools”.
Basic Operations
2 Channel Lock: determining the users’ intention to play or lock channels
with password. If the setting is “Yes”, then the password will be asked
to play the channels with lock mark.
3 New Password: used for revising password, by keying in the new
password in this item. After the 4 digital numbers are filled, the Confirm
Password item will ask you to input the new password again. If the password
is correct, the screen will show up a message of “Saving Data, Please
Wait…” After finishing saving and drawing back to “System Setup” menu,
the revising is completed.
4 Press [Exit] key to draw back from the “Parental Lock” menu.
7.6 OSD Setting
When entering the “OSD Setting” menu, a screen will be shown as below:
1 OSD Timeout: set the duration of showing up for the program banner which
contains some information about the channel and shows up once the
channel is changed.
2 OSD Transparency: set the transparency of OSD.
Press [Left/Right] key to select the values. There are 5 levels of
transparency, 10%, 20%, 30%, 40%, and “Off” (Opaque of the OSD).
3 Load Default OSD Setting: press OK to restore default OSD setting.
4 Press [Exit] key to draw back from the “OSD Setting” menu.
7.7 Favortie
When entering the “Favorite” menu, a screen will be shown as below: press [OK] key to rename the favorite group. A dialog shows as below:
Basic Operations
1 Press [Yellow] key to switch whether capital or not.
2 Press [Red] key to delete the char on the cursor.
3 Press [Blue] key to save the modification.
7.8 Auto Standby
The STB will be automatically switched into standby mode after three hours in active mode following the last user interaction and/ or a channel change,an alert message will show 2 minutes before going into standby mode.
8. Tools
Press [OK] or [Right] key to enter the “Tools”. If Menu Lock is “On”, it will display a dialogue for user to key in password. The default Password is “0000”.
In “Tools” menu:
1 Press [Up/Down] key to select menu pages among Information, Load
factory setting, S/W Upgrade by OTA, Upgrade by USB, USB device,
Remove USB device safely.
8.1 Information
When entering the “Information” menu, a screen will be shown as below.
It shows the version and date for the items such as “boot loader, main
code, radio back, country band, user db” information.
Basic Operations
8.2 Load Factory Setting
press [OK] to load defaults settings, warning inquiry will be popup as below.
Once the “Yes” option is chosen, the all revised parameters of the receiver will be reset to the default alue. Please use this function carefully.
8.3 Upgrade by USB
This function is only valid when the USB device has been plugged-in and attached at the receiver box. Open Upgrade by USB menu according to
Menu -> Tools-> Upgrade By USB.
1. All Code: the user can only upgrade whole file to the STB flash ROM.
Please rename the new file name to be the format as “all*.bin”, Then
Press OK key to start upgrade by USB.
2. Main Code: the user can only upgrade part of the main code. Please
confirm the upgrading file format is “mcd*.bin” Radio Back: the user
can upgrade the background logo. Please confirm the associated file
name of the upgrading file to be as “*.m2v”
8.4 USB Device
USB menu will automatically be shown once inserting the USB disk to
USB port, except the status of auto scanning, multi picture displaying, and upgrading.
Another way to open USB menu is to go step by step according to SETUP ->Tools->USB Device. USB menu will be disabled when the USB device is unplugged. Media Player List will not be saved after unplugging USB and/or going to standby and power off.
Media player menu will be shown as below:
Basic Operations key operations:
FAV key: Put the selected file to play list .
0 Key: All the MP3 files in current directory will be added into MP3 play list .
1 Key: All the Image files in current directory will be added into Image play list.
2 Key:There are four kinds of sorting approaches. By Press [Channel Up/
Channel Down] key to move highlight and press [OK] key to confirm your selection.
The four kinds of sorting approaches are:
Name (A-Z): Sorting in Alphabetical descending Order.
Name (Z-A): Sorting in Alphabetical ascending Order.
Lock: Collecting all locked channels and list in the bottom of TV Channel List.
Default: Return to original setting order.
Yellow Key: The “Please select play list type” operation window will be shown by pressing Yellow key. After that, the user can play the image or music by choosing the files. If here is no file in the directory, an operation window “This type of play list doesnot exist” will be shown.
INFO: Set up slide show of images.
Blue Key: To rotate among the 3 repeat modes provided as below:
Repeat Folder
The entire Random Folder
Repeat Single
EPG Key: Change the different disk.
Music/Image play operation
Press Yellow key to enter into playlist and select music/group image
Basic Operations
Red Key: Play the file list from the 1st music file.
Yellow Key: Delete the file highlighted by Yellow key.
Blue Key: Delete all files by blue Key, with a remind “Are you sure to save?”
8.5 Remove USB device safely
Before removing the USB device, press “Remove USB device safely” first, with a reminding “You can safely remove USB device now!”. Then the USB device can be removed without concern.
9. Game
There are two games for selection:Othello/Sodolcu.
10. REC
When you enter to “REC” menu, you will see the screen like below:
1 Press [Up/Down] key to select menu pages among record manager Record
manager, DVR HDD Information, HDD FORMAT, Dvr configuration.
2 Press [OK] or [Right] key to enter the “REC”. If Menu Lock is “On”, it will
display a dialogue for user to key in password. The default Password is “0000”.
3 Press [Up/Down] key and [OK] key to select menu items
4 Press [Left] key or [Exit] key to go back to main menu.
Basic Operations
10.1 Record manager
.
10.1.1 Lock
1 Press [Green] key to lock a program on HDD.
2 If you want to cancel the lock mark for a program, press [Green] key
again. It will ask you to input password. Once you input the correct
password, it will cancel the lock feature for the program.
10.1.2 Delete
1 Press [Blue] key to make a delete mark on the highlight program.
2 If you want to cancel the delete operation, press [Blue] key again to
cancel the delete mark.
3 When exit the “Record Manager” menu, all the delete mark channel will
be deleted directly.
10.1.3 Rename
1 Press [Red] key to rename the highlight program. It will show the “Rename”
window.
2 You can press [Yellow] key to switch capital and lowercase.
3 Press [Red]key to delete the char on the cursor.
4 Press [Blue]key to save the modification.
10.2 Disk Information
1 Move the highlight to “DVR HDD Information” and press [OK] key. It will display “DVR HDD information” as below:
Basic Operations
10.3 DVR Configuration
Set up digital video recording
1. Turn ON/OFF timeshift
2. Set record type: TS/PS
10.3.1 Timeshift
1 Press [PAUSE] key to see time shift OSD as below:
2 You can press [Left/Right] to move the slide to left or right. Press [OK] key to play the point where the slide is.
3 You also can press [Pause] /[fast back]/[slow /back] can realize these function.
Then it will enter the mode which is playing the recorded program on HDD.
(like the picture below) Then you can do pause, fast forward, fast back, slow forward, and slow back.
10.3.2 Record
Basic Operations
14/01
1. Press record key to start recording
2. Press record key again to set and adjust recoring duration time
3. Press [Stop] key first time to end the playing mode. Press [Stop] key second time to stop the recording
4. Press blue key to show the recorded files fastly,press OK to play the selected file.
Notes: Time Shifting/recording will only be available when USB/ HDD is connected to system and read/write speed is high enough to do that.
11. Hotkey
11.1 Power
1 Press [Power] Key can enter the Standby state
2 In Standby state, press [Power] Key again can call back the unit and go
on play the previous channel
3 User can also disconnect the device’s main power to end the Standby state.
11.2 Channel Up/Channel Down
In full screen, press [CH+/CH-] to change channel.
11.3 Volume Up/Volume Down
In full screen, press [VOL+/VOL-] to adjust volume.
11.4 Number 0~9
In full screen, use number key and press [OK] on the Remote Control Unit to change channel.
11.5 TV/RADIO
In TV mode, pressing [TV/RADIO] key can switch to Radio mode. In Radio mode, press [TV/RADIO] key to switch to TV mode.
11.6 Audio
1 In full screen, press [AUDIO] key can open the “Audio” window on the screen.
2 You can modify the audio track by press [Channel Up / Channel Down]
key and modify the audio mode by press [Volume Up / Volume Down] key.
Basic Operations
3 Mode: Left/Right/Stereo/Mono
11.7 Mute
1 Press [MUTE] key to mute the sound and the screen will show up mute OSD.
2 Press [MUTE] key again to restore sound.
11.8 Favorite
1 In full screen, press [FAV] key, it will display a window of “Favorite
Group” on the left of the screen, which you can watch like below.
2 In the window of “Favorite”, you can move highlight by press [Channel
Up/Channel Down] key and press [OK] key to select favorite group.
3 In the window of “FAV group X”, you can move highlight by press
[Channel Up/Channel Down] key and press [OK] key to select favorite
channels. Pressing [Page Up/Page Down] keys can implement the “Page
up/Page down” function
Basic Operations
4 You also can press [Volume Up/Volume Down] keys to select different
“Favorite Group”.
5 Press [Exit] key to exit the current window.
Frequently Asked Question
Q: Why the screen displays “No Favorite Channel”, after pressing
[Favorite] key?
A: It is because that you haven’t set any channels as “favorite channel”.
Please refer to Favorite
11.9 Recall
Press [RECALL] key will directly switch to the previous channel that you
11.10 EPG
1 The STB has an Electronic Program Guide (EPG) to help you navigate
channels through all the possible viewing options. The EPG supplies
information such as channel listings and starting and ending times for all
available channels. Press [EPG] key to display EPG screen.
2 Press [OK] key in each item can see more detail information and press
[Red] key to cancel
Basic Operations
3 Press [Red] key in EPG menu can display “Time Bar” Menu. In “Time
Bar” menu, you can press [Left/Right] to select “back/current time/last
program or –0:30/next program or +0:30/-2:00/+2:00/last day /next day”.
Press [Up/Down] key to channel change.
4 Press [Green] key in EPG menu can open timer menu. User can save
a timer as he want.
5 In EPG menu, press [Exit] to close EPG screen.
19/11/2004
11.11 Subtitle
Press [SUBTITLE] key in full screen, you can select subtitle and teletext subtitle language or switch subtitle off.
11.12 TEXT
Basic Operations
1 Press [TEXT] key in full screen, you can open teletext page on the
channel which has teletext information.
2 If the channel has no teletext information, it will show “No Data” on the
screen.
11.13 Menu
1 Press [SETUP] key can open the menu, exit the current menu to last
menu or close the window.
11.14 Exit
Press [EXIT] key can exit the current menu to last menu or close the window.
11.15 Information
1 In full screen, press [INFO] key can open information screen, it will shows
program banner.
2 In the program banner, press [INFO] key again, the window shows the
parameters of current channel.
19/11
11.16 Channel List
1 In full screen, press [OK] key or [CH.LIST] can enter “Channel List”.
2 Press [Left/Right] key to change favorite.
3 Press [Up/Down] key to move highlight and press [OK] key to play the
highlighted channel.
4 Press [Page Up/Down] key to page up and page down.
5 Press [Exit] key to exit the channel list.
Basic Operations
11.17 Page Up/Page Down
1 In Channel list, press [Page+/Page-] key can page up and page down
the channel list.
11.18 Record
1 Press [Record] key can record current program to USB disc. The
default record duration is 2 hrs.
2 Press [Record] key again can input record duration.
11.19 PLAY
Press [PLAY] key can change to normal playback mode while other trick mode is enabled such as PAUSE, Forward or Reverse.
11.20 Pause
1 In playing mode, press [Pause] key, the picture will be paused, but the sound of the channel will still continues.
2 Press [PAUSE] key again, the screen’s picture will skip over to the current playing picture, and the sound of the channel will correspond playing.
3 In playing mode, press [Pause] key, the picture will be paused, but the sound of the channel will still continues.
4 Press [PAUSE] key again, the screen’s picture will skip over to the current playing picture, and the sound of the channel will correspond playing.
11.21 STOP
1 In the time-shift mode, press [STOP] key can stop time-shift play and comeback to life position.
2 When recording, press [STOP] key will list the recording programs. Press
[STOP] again will stop recorder.
3 When playing recorded file from record manager, press [stop] key will stop playing file and comeback to record manager menu.
Basic Operations
11.22 FB
Press [FB] button rewinds backward with X2, X4, X8, X16 and X24 speed
11.23 FF
Press [FF] button plays forward with X2, X4, X8, X16 and X24 speed.
TROUBLESHOOTING
0000
Specifications
VIDEO PROFILE
AND LEVEL
MPEG-1 MPEG-2 [email protected]
MPEG-4 AVC/H.264 [email protected]
MAX. 15Mbit/[email protected] [email protected]
MAX. 12.5Mbit/[email protected]/AVC
.
MP3/JPEG/BMP
MP4: Divx4.5.6; Maximal 1280×720 30fps;
(defined video codec)
AVI: Max L3.1 1280×720 30fps; (defined video codec)
Specifications
~220-240V 50/60Hz
STANDBY CONSUMPIION MAX.1W
5
( USB Max Load: DC 5V, 300mA)
- Главная
- TV-тюнеры
- TV Star
- ТипTV-тюнер
- Исполнениевнешнее
- Подключениебез подключения
- Тип тюнерацифровой
- ВидеозахватНет
- АвтономностьЕсть
- FM-тюнерНет
- Диапазон УКВНет
- Макс. разрешение на выходе720х576
- Прогрессивная разверткаНет
- Показать все
Перед приобретением TV Star T910 USB PVR по самой низкой цене, изучите характеристики, плюсы и минусы модели, отзывы покупателей.
Характеристики TV Star T910 USB PVR
*
| Тип | TV-тюнер |
| Исполнение | внешнее |
| Подключение | без подключения |
| Тип тюнера | цифровой |
| Видеозахват | Нет |
| Автономность | Есть |
| FM-тюнер | Нет |
| Диапазон УКВ | Нет |
Характеристики видео*
| Макс. разрешение на выходе | 720х576 |
| Прогрессивная развертка | Нет |
| Поддержка HD | Нет |
Формат видео на выходе*
| 16:9 | Нет |
| 4:3 | Нет |
| 16:10 | Нет |
| 5:4 | Нет |
Аналоговые стандарты*
| SECAM | Нет |
| DVB-T2 | Нет |
| DVB-C | Нет |
| DVB-T | Есть |
| DVB-S | Нет |
| NTSC | Нет |
| PAL | Нет |
Интерфейсы*
| Wi-Fi | Нет |
| Количество интерфейсов USB 2.0 Type A | 1 |
| Ethernet | Нет |
Выходы*
| S-Video | Нет |
| VGA | Нет |
| Аудио | Нет |
| HDMI | Нет |
| Видео композитный | Нет |
| DVI | Нет |
| SCART | Есть |
| Видео компонентный | Нет |
Дополнительная информация*
| Слот CI для CAM-модуля | Нет |
| Слот CI+ для CAM-модуля | Нет |
| Подключение внешнего ИК-датчика | Нет |
| Стереозвук NICAM | Нет |
| Наличие дисплея | Нет |
| Пульт ДУ | Есть |
| Мультиэкран | Нет |
| Картинка в картинке | Нет |
| Телетекст | Есть |
| Режим отложенного просмотра | Есть |
| Таймер записи | Есть |
Габариты*
| Вес | 350 г |
| Длина | 110 мм |
| Ширина | 150 мм |
| Высота | 35 мм |
* Точные параметры уточняйте на сайте продавца.
Отзывы пользователей о TV Star T910 USB PVR
Report abuse
Libble takes abuse of its services very seriously. We’re committed to dealing with such abuse according to the laws in your country of residence. When you submit a report, we’ll investigate it and take the appropriate action. We’ll get back to you only if we require additional details or have more information to share.
Product:
Get your user manual by e-mail
Enter your email address to receive the manual of TV STAR T910 USB PVR in the language / languages: English as an attachment in your email.
The manual is 2,88 mb in size.
You will receive the manual in your email within minutes. If you have not received an email, then probably have entered the wrong email address or your mailbox is too full. In addition, it may be that your ISP may have a maximum size for emails to receive.
The manual is sent by email. Check your email
If you have not received an email with the manual within fifteen minutes, it may be that you have a entered a wrong email address or that your ISP has set a maximum size to receive email that is smaller than the size of the manual.