The GEM-RX5 has a flat engraving area of 160 x 75mm a 50mm cylindrical capacity and self-centring vice, it’s perfect for dealing with individual items or production runs. Combining flat bed and cylindrical engraving has never been achieved in a computerised engraving machine of this size and quality before. The U-MARQ GEM-RX5 is the fastest and easiest gift small, 4-axes mechanical engraver in the World. The first truly versatile, small, affordable engraver to suite any budget. The GEM-RX5 comes with self-centring vice, jigs for holding a wide variety of merchandise (trophy plates, lighters, hand bag mirrors, pet tags etc.). With the cylindrical axis you are able to engrave 360° around a pen or mini flashlight. The spindle motor enables you to burnish in coated metals as well as engraving in to sme plastics. Ease of use enables everyone to engraving gifts, rings and jewellery to a professional standard, after just a short introduction to the GEM-RX5. The GEM-RX software has been configured to make this normally complicated task, ease for the ordinary retailer or their staff to use to get spectacular results.
Pens
One of the challenges for a traditional 3-axis machine is how to engrave a pen, or other round objects. The U-MARQ GEM-RX5 offers the perfect answer, by using true 4-axis functionality; it will engrave 360 degrees around a pen or other small cylindrical objects. The GEM 8 software has been configured to make this normally complicated task, ease for the ordinary retailer or their staff to use to get spectacular results.
Pet Tags
The GEM-RX5 is ideal for engraving Pet Tags quickly and efficiently with template for all U-MARQ Pet Tags, (much higher quality than most) and other makes. Why be restricted to text, with the GEM-RX5 you can engrave any type of graphic images, logos its only limit is your imagination.
Inside/Outside Rings
By fitting the U-MARQ optional Inside/Outside Ring Engraving attachment, your GEM-RX5 is turned into a fully featured jewellery engraving center with virtually no limits. At last the perfect machine for the jewellery workshop, to offer engraving services to the customer.
Jigs
The wide range of push-fit jigs quickly clamp any item, including; scrolls, medals, cufflinks, watches, trophy plates, pet and ID tags, rings, bracelets, clocks, pendants, baby gifts, key fobs, lighters, decanter labels, photo frames, hip flasks, business card holders, laminate signs, badges, labels, brass plates and other items. With unique pressure settings, even fine gold lockets can be engraved without fear of damaging them.
 Настольный гравировальный станок GEM RX5 U-MARQ
Компактный настольный гравировальный станок с ЧПУ управлением и функцией гравировки при вращении.
Цена 485 000 руб (полная комплектация)
Универсальный гравировальный станок GEM RX5 достаточно компактный, возможно разместить на любой торговой точке, в офисе, в домашних условиях. Позволяет оказывать услуги клиентам по гравировке, выполнять экспресс гравировку на:
- разнообразной сувенирной продукции, фляжках, зажигалках, визитницах, портсигарах, медальонах, кулонах, подвесках, шильдах, бейджах и других заготовках для гравировки
- столовых приборах: блюдцах, ложках
- адресниках для животных, табличках, жетонах для собак
- ювелирных изделиях: подвесках, кольцах, медальонах и других плоских и цилиндрических поверхностях
гравировка предает изделию индивидуальность, изящность и неповторимый шарм. Позволит увеличить стоимость заказа при производстве сувенирной продукции

Гравировка на бизнес сувенирах
гравировальный станок GEM — RX 5

Гравировка на ручках гравировальный станок GEM — RX 5
ПРОГРАММНОЕ ОБЕСПЕЧЕНИЕ И ДОПОЛНИТЕЛЬНЫЕ ОПЦИИ
Управление станком U-Marq GEM RX5 происходит с компьютера, либо с ноутбука. Станок подсоединяется с ПО при помощи USB — кабеля.
- Доступный любому пользователю интерфейс драйвера станка и простой в управление;
- Логичное масштабирование и выравнивание вставляемых объектов;
- Доступны две функции штриховки объекта;
- Простота импортирования векторных рисунков и всевозможных шрифтов из программ Adobe Illustrator;
- При помощи Функция «Repeat» — можете изготавливать серийные продукты;
- Подключение сканера для гравировки изображений;
- Планшета для создания эскизов от руки;
- Дополнительные элементы для фиксации заготовок для гравировки

Гравировка на кольцах станок GEM — RX 5

Рабочее окно программы настольного гравировального станка GEM RX5
ХАРАКТЕРИСТИКИ НАСТОЛЬНОГО ГРАВИРОВАЛЬНОГО СТАНКА GEM RX5
- Возможность работы от сети 220В, от аккумулятора 24В
- Частота вращения шпинделя — 18000 об/мин;
- Скорость перемещения цанги — до 8 метров/мин;
- Гравировка алмазным резцом или коническим гравером позволяет делать гравировку на плоских изделиях
- Цанга шпиндель амартизирующая, позволяет гравировать различные по высоте изделия;
- Мощность шпинделя 42 Вт;
- Вес 18 кг
- Размеры 350 х 350 х 390 мм

Компактное компьютеризированное
оборудование для гравировки

На компактном станке GEM
возможна гравировка на заготовках
для гравировки

Аксессуары и расходники
для гравировки
ЦЕНА НАСТОЛЬНОГО ГРАВИРОВАЛЬНОГО СТАНКА GEM Rx5 — 485 000 руб (полная комплектация)
Барахолка Б/У гравировальные станки GEM RX5 по низкой цене >>>>
Тел.: (499) 963-31-58 E-mail gravbiz(at)mail.ru
GEM-RX Engraving Software
Chapter 1Introduction
GEM-RX Reference Manual
Introduction
Thank you for choosing a GEM-RX GIFT ENGRAVER. The accompanying software has been designed to work under Windows XP and Vista, with total ease of use in mind.
Using This Reference Manual
This Reference Manual can be used in conjunction with the Tutorial Manual supplied with your machine. It is laid out in Chapters that as far as possible mimic the GEM-RX Engraving
Software’s Main Menu Bar, i.e. starting with the Files Menu and progressing through to the
Help Menu, with detailed explanations on each.
How to’s
In each Chapter you will find How to topics, these are more detailed descriptions of specific functions and usually involve some interactivity on your part, to complete a task. How to’s are probably the quickest way to become proficient using a specific function, but also teach you to incorporate things like < Hot Keys > which also interact with other functions.
Note : A full list of the How to’s with locations are in the Index.
Thanks and Good Luck !!!
From the GEM-RX and U-MARQ Development Team.
U-MARQ Ltd. 20 Darin Court, Crownhill Industrial, Milton Keynes, MK8 0AD, England.
www.u-marq.com
Important : Read this before using your copy of the U-MARQ GEM Engraving Software.
1
Reference Manual
Chapter 1Introduction
U-MARQ Ltd Software License Agreement.
This document is a legal agreement between you (an individual or business) and U-MARQ
Ltd. Use of the software indicates your acceptance of these terms. As used in this License
Agreement, the term «Software» means the software included on the CD or disk media provided with this License Agreement. The term «Software» does not include any software that is covered by a separate license offered or granted by a person other than U-MARQ Ltd.
IF YOU DO NOT AGREE TO THESE TERMS AND CONDITIONS, EITHER
DESTROY OR RETURN, INTACT, THE SOFTWARE PACKAGE, CONTAINING
THE CD OR DISK MEDIA, TOGETHER WITH THE OTHER COMPONENTS OF
THE PRODUCT TO THE PLACE OF PURCHASE FOR A REFUND OF THE
PURCHASE PRICE.
1. PROPRIETARY RIGHTS. The Software and any accompanying documentation are the proprietary products of U-MARQ Ltd., or its licensors and are protected under national laws and international treaty provisions. Ownership of the Software and all copies, modifications, translations, and merged portions thereof shall at all times remain with U-MARQ or its licensors.
2. GRANT OF LICENSE. The Software and accompanying documentation are being licensed to you, which means you have the right to use the Software only in accordance with this License Agreement. The Software is considered in use on a computer when it is loaded into temporary memory or installed into permanent memory. This License may not be assigned or otherwise transferred without prior written consent from U-MARQ Ltd., and any unauthorized transfer is null and void.
The end user is authorized to use ONLY a single copy of the Software on the number of computers for which they have purchased a license as indicated on the license agreement
(copies are on the CD and in all manuals). Each permitted copy of the Software may be used only in connection with a single computer owned or leased by the end user. If the Software is made available on a network, it may be accessed only by ONE specific computer. Once the
Software has been accessed by ONE specific computer it may not be used on any additional computers without purchasing additional licenses. The software may not be sold in separate parts or broken up in any way for sale by any party, without the express permission in writing of U-MARQ Ltd. All U-MARQ Ltd products that are sold with bundled software, the software may not be sold in separate parts or broken up in any way for sale by any party, without the express permission in writing of U-MARQ Ltd. All copies of the Software must include the copyright, trademark, and patent notices.
BACKUP COPY. In addition to any copies authorized under this license agreement, you may make a single copy of the Software solely for backup purposes.
2
GEM-RX Engraving Software
Chapter 1 Introduction
UPDATES AND SUPPORT. You are entitled to receive technical support as outlined in the
Software documentation. You are entitled to receive Software updates (updates shall include any patches or bug fixes that U-MARQ Ltd. makes generally available in accordance with
U-MARQ Ltd., policies as announced from time to time on terms comparable to those offered to other users of the Software under similar licenses.
TERM. This license is effective from your date of purchase and shall remain in force until terminated. You may terminate the license and this License Agreement at any time by destroying the Software and the accompanying documentation, together with all copies in any form.
3. NON PERMITTED USES. Without the express prior written permission of U-MARQ
Ltd., you may not (a) use, copy, modify, alter or transfer, electronically or otherwise, the
Software or documentation except as expressly permitted in this License Agreement, or (b) translate, reverse program, disassemble, decompile, or otherwise reverse engineer the
Software.
4. EXPORT CONTROLS. Certain uses of the Software by you may be subject to restrictions under UK. regulations relating to exports and ultimate end uses of computer software. You agree to fully comply with all applicable UK. laws and regulations, including but not limited to the Export Administration Act of 1979 as amended from time to time and any regulations promulgated thereunder.
5. LIMITED WARRANTY. (a) U-MARQ Ltd., warrants to you, the original end user, (I) that the Software, other than third-party software, will perform substantially in accordance with the accompanying documentation and (ii) that the Software is properly recorded on the disk media. This Limited Warranty extends for ninety (90) days from the date of purchase.
U-MARQ Ltd., does not warrant any third-party software that is provided with the Software, but U-MARQ Ltd., agrees to pass on to you any warranties of the owner or licensor to the extent permitted by the owner or licensor.
(b) This Limited Warranty does not apply to any Software that has been altered, damaged, abused, mis-applied, or used other than in accordance with this license and any instructions included on the Software and the accompanying documentation.
©) U-MARQ Ltd., entire liability and your exclusive remedy under this Limited Warranty shall be the repair or replacement of any Software that fails to conform to this Limited Warranty or, at U-MARQ Ltd., option, return of the price paid for the Software. U-MARQ Ltd., shall have no liability under this Limited Warranty unless the Software is returned to U-MARQ
Ltd., or its authorized representative, with a copy of your receipt, within the warranty period.
Any replacement Software will be warranted for the remainder of the original warranty period or 30 days, whichever is longer.
3
Reference Manual
Chapter 1 Introduction
(d) THIS WARRANTY IS IN LIEU OF AND EXCLUDES ALL OTHER WARRANTIES
NOT EXPRESSLY SET FORTH HEREIN, WHETHER EXPRESS OR IMPLIED,
INCLUDING BUT NOT LIMITED TO ANY WARRANTIES OF
MERCHANTABILITY, FITNESS FOR A PARTICULAR PURPOSE,
NON-INFRINGEMENT, OR WARRANTIES ARISING FROM USAGE OF TRADE
OR COURSE OF DEALING.
(e) THIS WARRANTY GIVES YOU SPECIFIC LEGAL RIGHTS : YOU MAY HAVE
OTHERS WHICH VARY FROM COUNTRY TO COUNTRY.
6. LIMITATION OF LIABILITY. IN NO EVENT SHALL U-MARQ Ltd’S LIABILITY
RELATED TO ANY OF THE SOFTWARE EXCEED THE LICENSE FEES
ACTUALLY PAID BY YOU FOR THE SOFTWARE. EXCEPT FOR A RETURN OF
THE PURCHASE PRICE UNDER THE CIRCUMSTANCES PROVIDED UNDER THE
LIMITED WARRANTY, NEITHER U-MARQ Ltd., NOR ITS SUPPLIERS SHALL IN
ANY EVENT BE LIABLE FOR ANY DAMAGES WHATSOEVER ARISING OUT OF
OR RELATED TO THE USE OF OR INABILITY TO USE THE SOFTWARE,
INCLUDING BUT NOT LIMITED TO DIRECT, INDIRECT, SPECIAL,
INCIDENTAL, OR CONSEQUENTIAL DAMAGES, AND DAMAGES FOR LOSS OF
BUSINESS PROFITS, BUSINESS INTERRUPTION, LOSS OF BUSINESS
INFORMATION, OR OTHER PECUNIARY LOSS, EVEN IF U-MARQ Ltd., HAS
BEEN ADVISED OF THE POSSIBILITY OF SUCH DAMAGES, WHETHER SUCH
LIABILITY IS BASED ON CONTRACT, TORT, WARRANTY, OR ANY OTHER
LEGAL OR EQUITABLE GROUNDS. BECAUSE SOME STATES DO NOT ALLOW
THE EXCLUSION OR LIMITATION OF LIABILITY FOR CONSEQUENTIAL OR
INCIDENTAL DAMAGES, THE ABOVE LIMITATION MAY NOT APPLY TO YOU.
7. NO WAIVER. Any failure by either party to this agreement to enforce a specific part of the agreement in a specific situation is not a waiver of rights under the agreement. The party may still enforce the rest of the agreement in that situation and may still enforce some or all of the agreement in other situations.
Copyright 2000 — 2009 U-MARQ Ltd. All rights reserved. The Software may be protected by
UK. patents, with other patents pending in the UK. and elsewhere. GEM-CX and GEM-CX
Engraving Software., are the registered trademark of U-MARQ Ltd.
Copyright
Copyright 2000 — 2009 U-MARQ Ltd.
All rights reserved, no part of this publication may be reproduced, rewritten, stored in a computer system, other than with this installation of Gem Engraving Software, or translated to any language, including data language, in any way, without prior, written permission from
4
GEM-RX Engraving Software
Chapter 1 Introduction
U-MARQ Ltd. U-MARQ Ltd., provides this publication «as is», without warranty of any kind, either express or implied, including but not limited to, the implied warranties of merchantability or fitness for a particular purpose. Further, U-MARQ Ltd., reserves the right to revise this publication and to make changes from time to time to the content hereof without obligation of Gem Engraving Software., to notify any person of such revision or changes. The specifications of the software may change from time to time. Occasionally changes or variations exist in the software that are not reflected in the manual. Be sure to read any release note or README file on the program disk before using the product. U-MARQ,
Gem and its logo are registered trademarks of U-MARQ Ltd. Ventura Publisher, Adobe
Illustrator, Windows, AutoCAD, and CorelDRAW are registered trademarks of their holders.
First edition, January 2000, first revision December 2006, second revision September 2007, third revision January 2009
5
6
Reference Manual
Table of Contents
Table of Contents
GEM-RX Reference Manual
Chapter 1 Introduction 1
Using This Reference Manual . . . . . . . . . . . . . . . . . . . . . . 1
Chapter 2 Getting Started 11
Components in GEM-RX Engraving Software . . . . . . . . . . . . 11
Main Menu Bar . . . . . . . . . . . . . . . . . . . . . . . . . . . . 11
Chapter 3 Terminology 15
Click On . . . . . . . . . . . . . . . . . . . . . . . . . . . . . . . . 15
Drag . . . . . . . . . . . . . . . . . . . . . . . . . . . . . . . . . . 15
Dotty Appearance . . . . . . . . . . . . . . . . . . . . . . . . . . . 15
Double Click On . . . . . . . . . . . . . . . . . . . . . . . . . . . . 15
File Names . . . . . . . . . . . . . . . . . . . . . . . . . . . . . . . 15
Hot Keys . . . . . . . . . . . . . . . . . . . . . . . . . . . . . . . . 15
Kerning. . . . . . . . . . . . . . . . . . . . . . . . . . . . . . . . . 15
Mouse . . . . . . . . . . . . . . . . . . . . . . . . . . . . . . . . . 16
Marquee Box . . . . . . . . . . . . . . . . . . . . . . . . . . . . . . 16
Select. . . . . . . . . . . . . . . . . . . . . . . . . . . . . . . . . . 16
Type Face . . . . . . . . . . . . . . . . . . . . . . . . . . . . . . . 16
Workspace . . . . . . . . . . . . . . . . . . . . . . . . . . . . . . . 16
Windows Clipboard . . . . . . . . . . . . . . . . . . . . . . . . . . 16
Chapter 4 Toolbars 17
Toolbars Overview . . . . . . . . . . . . . . . . . . . . . . . . . . . 17
File Toolbar . . . . . . . . . . . . . . . . . . . . . . . . . . . . . . 17
Text Toolbar . . . . . . . . . . . . . . . . . . . . . . . . . . . . . . 19
Edit Toolbar . . . . . . . . . . . . . . . . . . . . . . . . . . . . . . 20
Arrange Toolbar . . . . . . . . . . . . . . . . . . . . . . . . . . . . 21
Production Toolbar. . . . . . . . . . . . . . . . . . . . . . . . . . . 22
Shading Toolbar . . . . . . . . . . . . . . . . . . . . . . . . . . . . 23
Zoom Toolbar . . . . . . . . . . . . . . . . . . . . . . . . . . . . . 23
Transform Toolbar . . . . . . . . . . . . . . . . . . . . . . . . . . . 24
Chapter 5 File Functions 27
Reference Manual
Table of Contents
File Menu . . . . . . . . . . . . . . . . . . . . . . . . . . . . . . . 27
New Drawing . . . . . . . . . . . . . . . . . . . . . . . . . . . . . 27
New From Template . . . . . . . . . . . . . . . . . . . . . . . . . . 27
Open . . . . . . . . . . . . . . . . . . . . . . . . . . . . . . . . . . 27
Save Drawing . . . . . . . . . . . . . . . . . . . . . . . . . . . . . 28
Save As. . . . . . . . . . . . . . . . . . . . . . . . . . . . . . . . . 28
Save Setup Drawing . . . . . . . . . . . . . . . . . . . . . . . . . . 29
Import . . . . . . . . . . . . . . . . . . . . . . . . . . . . . . . . . 29
Export . . . . . . . . . . . . . . . . . . . . . . . . . . . . . . . . . 29
Supported File Formats . . . . . . . . . . . . . . . . . . . . . . . . 29
Select Source . . . . . . . . . . . . . . . . . . . . . . . . . . . . . . 30
Acquire. . . . . . . . . . . . . . . . . . . . . . . . . . . . . . . . . 30
Exit . . . . . . . . . . . . . . . . . . . . . . . . . . . . . . . . . . . 30
Chapter 6 Edit Menu 31
Edit Menu . . . . . . . . . . . . . . . . . . . . . . . . . . . . . . . 31
Undo . . . . . . . . . . . . . . . . . . . . . . . . . . . . . . . . . . 31
Redo . . . . . . . . . . . . . . . . . . . . . . . . . . . . . . . . . . 31
Cut to Clipboard . . . . . . . . . . . . . . . . . . . . . . . . . . . . 31
Copy to Clipboard . . . . . . . . . . . . . . . . . . . . . . . . . . . 31
Paste from Clipboard. . . . . . . . . . . . . . . . . . . . . . . . . . 32
Delete . . . . . . . . . . . . . . . . . . . . . . . . . . . . . . . . . 32
Duplicate Workspace . . . . . . . . . . . . . . . . . . . . . . . . . 32
Select All. . . . . . . . . . . . . . . . . . . . . . . . . . . . . . . . 33
Deselect All . . . . . . . . . . . . . . . . . . . . . . . . . . . . . . 33
Chapter 7 View Functions 35
View Menu. . . . . . . . . . . . . . . . . . . . . . . . . . . . . . . 35
Toolbars . . . . . . . . . . . . . . . . . . . . . . . . . . . . . . . . 35
Display Settings . . . . . . . . . . . . . . . . . . . . . . . . . . . . 36
Chapter 8 Text Functions 37
Text Menu . . . . . . . . . . . . . . . . . . . . . . . . . . . . . . . 37
Auto Layout . . . . . . . . . . . . . . . . . . . . . . . . . . . . . . 37
Auto Re-layout . . . . . . . . . . . . . . . . . . . . . . . . . . . . . 41
Basic Text Composer . . . . . . . . . . . . . . . . . . . . . . . . . 42
Disk Text . . . . . . . . . . . . . . . . . . . . . . . . . . . . . . . . 44
Edit Dynamic Arc Text . . . . . . . . . . . . . . . . . . . . . . . . 46
7
Reference Manual
Table of Contents
Kern Text . . . . . . . . . . . . . . . . . . . . . . . . . . . . . . . 47
Clear Kerning . . . . . . . . . . . . . . . . . . . . . . . . . . . . . 48
Circular Monogram . . . . . . . . . . . . . . . . . . . . . . . . . . 49
Chapter 9 Bitmap Function 51
Bitmap Menu. . . . . . . . . . . . . . . . . . . . . . . . . . . . . . 51
Picture Parameters . . . . . . . . . . . . . . . . . . . . . . . . . . . 53
Chapter 10 Transform Functions 59
Transform Menu . . . . . . . . . . . . . . . . . . . . . . . . . . . . 59
Resize . . . . . . . . . . . . . . . . . . . . . . . . . . . . . . . . . 59
Chapter 11 Arrange Function 63
Arrange Menu . . . . . . . . . . . . . . . . . . . . . . . . . . . . . 63
Centre to Workspace . . . . . . . . . . . . . . . . . . . . . . . . . . 63
Horizontal Centre . . . . . . . . . . . . . . . . . . . . . . . . . . . 63
Vertical Centre . . . . . . . . . . . . . . . . . . . . . . . . . . . . . 63
Ignore Groups . . . . . . . . . . . . . . . . . . . . . . . . . . . . . 63
Chapter 12 Tool Functions 65
Tools Menu . . . . . . . . . . . . . . . . . . . . . . . . . . . . . . 65
Workspace Setup. . . . . . . . . . . . . . . . . . . . . . . . . . . . 65
Units Setup . . . . . . . . . . . . . . . . . . . . . . . . . . . . . . . 67
Select Language. . . . . . . . . . . . . . . . . . . . . . . . . . . . . 67
Toggle Language. . . . . . . . . . . . . . . . . . . . . . . . . . . . 67
Preferences . . . . . . . . . . . . . . . . . . . . . . . . . . . . . . . 68
Chapter 13 Production Functions 71
Production Menu . . . . . . . . . . . . . . . . . . . . . . . . . . . . 71
Device = xxxx . . . . . . . . . . . . . . . . . . . . . . . . . . . . . 71
Engrave . . . . . . . . . . . . . . . . . . . . . . . . . . . . . . . . 71
Engrave Selected Only . . . . . . . . . . . . . . . . . . . . . . . . . 72
Measure Plate . . . . . . . . . . . . . . . . . . . . . . . . . . . . . 73
Read Reference Position . . . . . . . . . . . . . . . . . . . . . . . . 73
Measure Circle Centre/Point . . . . . . . . . . . . . . . . . . . . . . 74
Measure Circle 3 Points . . . . . . . . . . . . . . . . . . . . . . . . 74
Configuration Menu . . . . . . . . . . . . . . . . . . . . . . . . . . 75
Machine Setup . . . . . . . . . . . . . . . . . . . . . . . . . . . . . 75
Machine Parameters . . . . . . . . . . . . . . . . . . . . . . . . . . 75
8
Reference Manual
Table of Contents
Chapter 14 Shading 77
Chapter 15 Wizards 81
Wizards . . . . . . . . . . . . . . . . . . . . . . . . . . . . . . . . 81
Chapter 16 Help 83
Help Menu . . . . . . . . . . . . . . . . . . . . . . . . . . . . . . . 83
Help . . . . . . . . . . . . . . . . . . . . . . . . . . . . . . . . . . 83
Dongle Registration . . . . . . . . . . . . . . . . . . . . . . . . . . 83
Adding Extra Software Packs . . . . . . . . . . . . . . . . . . . . . 83
About GEM-RX Engraving Software . . . . . . . . . . . . . . . . . 83
Chapter 17 Keyboard Hot Keys 85
Hot Keys . . . . . . . . . . . . . . . . . . . . . . . . . . . . . . . . 85
Super Hot Keys . . . . . . . . . . . . . . . . . . . . . . . . . . . . 86
Chapter 18 Extra Software Packs 89
GEM-RX Extra Font Pack . . . . . . . . . . . . . . . . . . . . . . . 89
GEM-RX Logo Generation Scanning and Vectorising . . . . . . . . 89
GEM-RX Freehand Tablet & Pen . . . . . . . . . . . . . . . . . . . 89
Picture Engraving . . . . . . . . . . . . . . . . . . . . . . . . . . . 89
Adding Extra Software Packs . . . . . . . . . . . . . . . . . . . . . 89
Chapter 19 Frequently Asked Questions
Chapter 20 Trouble Shooting
91
93
9
GEM-RX Engraving Software
Chapter 2 Getting Started
Getting Started
Components in GEM-RX Engraving Software
Main Menu Bar
The Main Menu bar is where all the Drop down Menus are called from, by Clicking on the required Menu, you will have access to all functions from within that Menu and sub-menus.
Title Bar
This is where the Title of the current Drawing is displayed. It is located at the top of the
Drawing window.
Hint Bar
The Hints Bar is situated at the bottom left above the horizontal scroll bar, hints are given on the use of the selected tool.
Scroll Bars
The Scroll bars are used to shift the view in the window to see a portion of a drawing that is outside the current viewing Area. The Scroll bars are located at the right side and bottom of the window.
Docking Toolbars
The Docking toolbars are used to give you quick access to some of GEM-RX Engraving
Software‘s most used functions, they can be re-shaped, re-sized, moved and docked into any desired position.
Drop Down Menu
Drop down Menus are accessed from the Main Menu bar and Toolbars, sub- menus are available from within Drop down Menus, normally you are given a list of several options to choose from.
Check Box
Check boxes are used to Enable / Disable options by checking or un-checking the box, the function is disabled when the Check box is empty.
Cursors
GEM-RX Engraving Software‘s Cursor changes automatically, dependant on the function and actions that are being used at any specific time.
Search Cursor
11
Reference Manual
Getting Started
This is the normal Search Limit Cursor, you can use it to select Objects etc. Its size can be changed in the Tools Menu, Options Menu.
Drawing Cursor
The Cursor changes to this type when you are in a Drawing function.
Node Cursor
The Cursor changes to this when you are directly over a node on a selected object, or within a
Drawing function.
Segment Cursor
The Cursor changes to this when you are directly on a segment on a selected object, or within a Drawing function.
Intersection Cursor
The Cursor changes to this when you are directly on the intersection of two segments when one or both segments are selected, or you are in a Drawing function.
Dialogue Box
Many operation are carried out and controlled through Dialogue boxes. Dialogue boxes generally contain several controls, Buttons, Groups of related Buttons, Text boxes, List boxes etc. At any time one control in the Dialogue box has focus, this means that an action you perform from the Keyboard or Mouse will affect that control. You can < Tab > between each control, select with the mouse or use the appropriate key on the Keyboard.
Numeric Entry
Numeric entries are entered from the main keyboard or from the numeric keypad. Typical uses are, setting Dialogue box values, entering co-ordinates, i.e. entering Workspace sizes etc.
Command Button
Command buttons are normally used to make action occur, such as resetting Dialogue box values or calling up a supplementary Dialogue boxes.
Apply Button
The Apply button is used to confirm that the changes that have been made in a Dialogue box, are to be applied to the drawing.
Cancel Button
Clicking on this button will Cancel the current operation and return you to your drawing.
12
GEM-RX Engraving Software
Chapter 2 Getting Started
OK Button
The «OK» button confirms all changes that have been made in a Dialogue box and returns you to your drawing.
13
GEM-RX Engraving Software
Chapter 3 Terminology
Terminology
GEM-RX Engraving Software uses Windows XP and Vista terminology and conventions in its structure and Menus, a full description can be found in your Windows instruction manual.
Click On
Reference to Click On in this Reference Manual, means that you position the cursor on top of the designated item and press and release the Left Mouse Button once.
Drag
Reference to Drag, Dragging or Drag Draw means press the Left Mouse Button, and while continuing to hold the button down, move the mouse. When the desired action is completed, release the button.
Dotty Appearance
When an Object or a Group of Objects are Selected in GEM-RX Engraving Software, the
Selected items changes to have Dotty appearance. This is so when selecting multiple Objects or groups, you can distinguish between what is select and what is not.
Double Click On
Reference to Double Click On in this Reference Manual means that you are to position the on-screen cursor on top of the designated item and press and release the Left Mouse Button twice in quick succession, Windows interprets this as a single action.
Note : The Control panel option in Windows allows you to adjust the speed of a
Double Click to suit your style, (see your Widows manual).
File Names
GEM-RX Engraving Software for Windows supports File Names of up to 256 characters long, so you may give your files useful names.
Hot Keys
Hot Keys are Keyboard short cut commands that take you to a function, without use of the mouse, these may be single or multiple keystrokes, i.e. < Ctrl > + <V > is the same as selecting Paste..
Kerning
Kerning is the terminology used to describe the alteration of spaces between characters, within a line of text. In GEM-RX Engraving Software a single Kern, is either plus or minus
½6 th of a full character space.
15
Reference Manual
Terminology
Mouse
The Mouse is the preferred pointing device for use in GEM-RX Engraving Software. It is recommended that you use a high quality mouse with a least two buttons, as GEM-RX
Engraving Software uses both Left and Right Mouse Buttons., this will make for smooth operation when navigating around the program and maximise your productivity.
Primary Mouse Button
This is the Left Hand Button on the mouse. that is assuming the mouse is configured for right-handed use, (for mouse configuration see your Microsoft Windows operating system manual). From now on this will be referred to as the Left Mouse Button in this Reference
Manual.
Secondary Mouse Button
This is the Right Hand Button on the mouse that is assuming the mouse configured for right-handed use, (for mouse configuration see your Microsoft Windows operating system manual). From now on this will be referred to as the Right mouse button in this Reference
Manual.
Marquee Box
Marquee Box is an dotted rectangular box which are created by Dragging, whilst holding down the Left Mouse Button, this creates an invisible Bounding box around the items that have been Selected. This is a quick way to Select one or more Objects, all Selected Objects will go Dotty in appearance, so that you know they have been Selected.
Select
Select in GEM-RX Engraving Software is when an Object or Objects are Selected using the
Left Mouse Button, the outline of each Object will change to have a dotty appearance, this enables you to tell which Objects are actually Selected and which are not.
Type Face
A Type Face or Font is a style of lettering i.e. Helvetica, Times Roman, Baskerville etc. These are normally available in various weights i.e. Bold, Medium, Italic.
Workspace
The Workspace is normally defined as the total height and width of the working area, you may know it better as plate or drawing area.
Windows Clipboard
The Windows Clipboard is a temporary storage area which can hold only one item at a time.
If you have an item on the clipboard and cut another, the second one will overwrite the first.
The Windows Clipboard contents can be pasted an infinite number of times into GEM-RX
Engraving Software.
16
GEM-RX Engraving Software
Chapter 4 Toolbars & Toolbox Functions
Toolbars
Toolbars Overview
Toolbars can be re-shape however you wish, by selecting the edge of the Toolbar with the
Pick tool and Dragging the handles in the desired direction while holding down the Left mouse button. The Toolbar may be moved by selecting it on its face with the Pick tool and
Dragging while holding down the Left mouse button. Dock the Toolbar by Dragging whilst holding down the Left mouse button, release the button when the Toolbar is in the desired position. To move a Toolbar from the Menu bar to a different position, place the cursor next to the Toolbar separator it will change to a hand, you can then drag it to a new position.
Toolbars can be docked at the Top, Left or Right of the screen. To close a Toolbar completely either Click On the cross on the Toolbar title bar using the Left mouse button, or from the Toolbar Menu un-check the appropriate entry.
File Toolbar
The File Toolbar is used for quick access to some of GEM-RX Engraving’s File Functions.
File Toolbar Functions
New Drawing
Hot Key < Ctrl > + < N >
Clicking on this icon will create a New Drawing, if you are already working on a drawing you will be asked if you wish to save the drawing you are working on. A new drawing page will be created entitled UNTITLED, all new GEM-RX Engraving drawings you create are given this name until you save the drawing with a unique name. If you have assigned a Default Template to be loaded on startup, this will be the drawing that is used. For more information. For more
information see Page 27.
Open Drawing
Hot Key < Ctrl > + < O >
Clicking on this icon will allow you to find and Open an existing GEM-RX Engraving file. If you are already working on a drawing you will be asked if you wish to save it, you can now select a drive and a file name by scrolling through the options if necessary. For more
information, see Page 28.
Save Drawing
Hot Key < Ctrl > + < S >
If you have already saved your drawing with a unique name and then made changes to it, you can update the file by Clicking on Save, this will save all Properties for that file i.e. Workspace,
Orientation, Grid Size, Feed Rates, Notes etc. For more information, see Page 28.
17
Reference Manual
Toolbars & Toolbox Functions
Save As
Hot Key < Ctrl > + < H >
This command is used to Save the drawing currently on the screen either for the first time, under a New Name, in a different Directory or in another File Format. For more information,
see Page 28.
New From Template
Hot Key < Ctrl > + < T >
The New From Template function allows you to open a previously saved GEM-RX
Engraving Template. For more information, see Page 27.
Import File
Hot Key < Shift > + < Ctrl > + < I >
The Import File icon give you access to the GEM-RX Engraving‘s file import filters, these allows you to read files from most industry standard Graphics, Desktop Publishing and CAD packages. You are given the option to select the drive and folder that the required file exists
in. For more information, see Page 29.
Export File
Hot Key < Shift > + < Ctrl > + < X >
The Export File icon give you access to the GEM-RX Engraving‘s file export filters, these allows you to read files from most industry standard Graphics, Desktop Publishing and CAD packages. You are given the option to select the drive and folder that the file exists in. For
more information, see Page 29.
You can output your drawing to any supported Window Printer, you have installed on your system.
Note : Select Source and Acquire will only be visible if you have purchased the
Scanning and Logo Generation Package.
18
GEM-RX Engraving Software
Chapter 4 Toolbars & Toolbox Functions
Draw Toolbar Functions
Pick Tool
The Pick Tool is a selection tool and is used extensively in GEM-RX Engraving to select
Functions, Menus, Objects, Options etc., by Clicking on them.
Node Edit Tool
The Node Edit Tool is used to change the shape of Objects by moving the Nodes or in the case of Béziers curves the handles as well.
Freehand
With Freehand you write directly into the software with a Pen on our special Tablet. Your
Hand Writing or Design recreated exactly on your engraved item. Simple and easy to use !
Note : Freehand with only be visible if you have purchased the Freehand option.
Text Toolbar
Text
You can insert Line Text by Clicking on this icon with the Left mouse button.
Auto Layout
Clicking on this icon will take you into the Auto Layout Dialogue Box. For more information
see Page 37.
Auto Relayout
Clicking on this icon will Relayout a selected Auto Layed out text. For more information see
Page 41.
Edit Arc Text
Clicking on this icon will take you to the Disk Text Dialogue Box. For more information see
Page 46.
Disk Text
Clicking on this icon will allow you to Edit Arc Text. For more information see Page 44.
19
Reference Manual
Toolbars & Toolbox Functions
Previous Font
Clicking on this icon allows you select your text and toggle trough you font list showing the previous font.
Next Font
Clicking on this icon allows you select your text and toggle trough you font list showing the next font.
Kern Text
.
Clicking on this icon allows you to Kern your text characters. For more information see Page
Edit Toolbar
The Edit Toolbar gives you access to the most often used Edit functions.
Undo icon
Hot Key < Ctrl > + < Z >
GEM-RX Engraving’s Undo will take you back an unlimited number of undo moves.
Redo icon
Hot Key < Shift > + < Ctrl > + < Z >
GEM-RX Engraving’s Redo will restore an unlimited number of undo moves.
Cut to Clipboard icon
Hot Key < Ctrl > + < X >
The Cut function enables you to remove selected objects from one drawing and place in another drawing via the Windows Clipboard. The Clipboard is a temporary storage area and can hold only one item at a time. If you have an item on the Clipboard and Cut another the second one will overwrite the first. To place items on the Clipboard select the objects, (they will go dotty so you know what has been selected) then select Cut, the selected items will be removed from your drawing and will be held on the Clipboard until overwritten.
Copy to Clipboard icon
Hot Key < Ctrl > + < C >
20
GEM-RX Engraving Software
Chapter 4 Toolbars & Toolbox Functions
The Copy function is almost the same as the Cut function, except that the object or objects are not removed from the drawing, but are copied on to the Windows Clipboard, all other operations are identical.
Hot Key < Ctrl > + < V >
Paste from Clipboard icon
The Paste command put a copy of the contents of the Windows Clipboard into your drawing, the Clipboard can be Pasted an infinite number of times into GEM-RX Engraving. Some care is needed using this method of transferring objects to and from GEM-RX Engraving drawings and other Windows applications. One of the main considerations is that the item on the Clipboard, will be at the scale that it was cut or copied from the original drawing and may be much larger than the drawing you are pasting it into. If this is the case it may be that the pasted object does not appear on the screen. To check if the object has been placed outside the present screen, area invoke the View all command from the View Menu Hot Key < F4 >, this will zoom out to display all object that are in the drawing, including outside the
Workspace.
Select All icon
Clicking on this icon will select all Objects within your drawing, unless they have been given the property of not selectable in the Layer setup Menu.
Deselect All icon
Clicking on this icon will deselect all Selected Objects in your drawing.
Note : As the Clipboard is only temporary memory, when you switch off or reboot your computer, all the items on the Clipboard are lost.
Arrange Toolbar
The Arrange Toolbar gives you access to the GEM-RX Engraving Arrange functions.
Horizontal Centre icon
The Horizontal Centre function, enables you to select a number of objects and place them relative to the centre of the Workspace in the horizontal plane. No alteration to spacing of the objects in vertical plane will take place.
Vertical Centre icon
21
For a full description of the Line Drawing and Construction functions see
Draw Menu, Construct Objects and Draw Objects.
For a full description of the Bezier Drawing and Construction functions see
Draw Menu, Construct Objects and Draw Objects.
Reference Manual
Toolbars & Toolbox Functions
Vertical Centre icon
The Vertical Centre function, enables you to select a number of objects and place them relative to the centre of the Workspace in the vertical plane. No alteration to spacing of the objects in the horizontal will take place.
Align Bottom icon
This function will align all selected objects to the bottom of their bounding box.
Create Group icon
The Create Group function is used to group objects together, groups can also exist within groups.
Production Toolbar
The Tools Toolbar gives you easy access to some of GEM-RX Engraving’s Tool functions.
Engrave
Hot Key < Alt > + < 1 >
Click on this icon to go into the Quick Production function. For more information see Page
71.
Engrave Selected Only
Hot Key < Alt > + < 4 >
Click on this icon to produce Selected Objects only. For more details see Chapter 16,
Production, Selected Only. For more information see Page 71.
Preview
Hot Key < Ctl > + < F4 >
Click on this icon to Preview how your drawing will look when it is outputted to your chosen device.
Measure Plate
Hot Key < Shift > + < Alt > + < 3 >
Click on this icon to Digitize the plate size on your Machine Bed. For more details see
Chapter 16, Production, Digitize Plate. For more information see Page 73.
22
GEM-RX Engraving Software
Chapter 4 Toolbars & Toolbox Functions
Set Reference
Hot Key < Shift > + < Alt > + < 4 >
Click on this icon to set a Reference Point in a drawing with reference to the workpiece on the Machine Bed. For more details see Chapter 16, Production, Set Reference. For more
information see Page 73.
Measure Circle, Centre, Outside
Click on this icon to measure a circular object using your Engraving Machine. For more
information see Page 73.
Measure Circle, Using Three Points
Click on this icon to measure a circular object using your Engraving Machine. For more
information see Page 73.
Shading Toolbar
When working with logos or designs, you may wish to make them stand out. To achieve this you can use the Shading Function in the GEM-RX Engraving Software. For more
information see Page 77.
Shading, 45° Hatch
Clicking on this icon will allow you to Shade selected objects with a 45° Hatch.
Shading, Double Hatch
Clicking on this icon will allow you to Shade selected objects with a Double Hatch. r more
information see Page 77.
Zoom Toolbar
The Zoom Toolbar gives you access to GEM-RX Engravings most used viewing functions.
Zoom Window
Hot Key < F2 >
Selecting Zoom Window from the from the Zoom Toolbar, this brings up the Spy glass icon, you can zoom in to any part of your drawing using the marquee box principal. It is necessary to hold down the Left mouse button whilst Dragging around the part of the work area you require to view in detail, when you have the required area within the marquee box release the
Mouse button. You have virtually unlimited zooms available, so if you wish to see more detail you can zoom in again.
23
Reference Manual
Toolbars & Toolbox Functions
Zoom Previous
Hot Key < F3 >
Selecting Zoom Previous View from the Zoom Toolbar, takes you back to the previous view, you can go back all the way to the first view in the current drawing in that session.
Zoom All
Hot Key < F4 >
Selecting Zoom All from the from the Zoom Toolbar, will zoom in or out as required to show all Objects that exists within the present drawing on the screen.
Zoom
Selected
Hot Key < F6 >
Selecting Zoom Selected from the Zoom Toolbar, will bring all Selected Objects into a full view window.
Zoom Workspace
Hot Key < F7 >
Selecting Zoom Workspace from the Zoom Toolbar, will zoom in or out as required to show the full available Workspace on the screen, this including all Object in the Workspace.
Zoom Machine Bed
Hot Key < Ctrl > + < F7 >
Selecting Zoom Machine Bed from the from the Zoom Toolbar, allows you to view the with its associated position on the machine bed.
Transform Toolbar
The Transform Toolbar is used to give you quick access to the most used tools for altering and distorting text and Objects.
Move
The Move icon on the Transform Toolbar, gives you quick access to the dynamic and
precision move functions in GEM-RX Engraving. For more information see Page 59.
Resize
You can Resize any selected object, by selecting this icon. For more information see Page 59.
24
GEM-RX Engraving Software
Chapter 4 Toolbars & Toolbox Functions
Rotate
The Rotate icon on the Transform Toolbar, gives you quick access to the dynamic and
precision Rotate functions in GEM-RX Engraving. For more information see Page 60.
25
File Menu
GEM-RX Engraving Software
Chapter 5File Functions
File Functions
File functions are accessed from the Main Menu bar. The File Menu gives you to the tools associated with the managment of your files within directories and folders on your disk drives.
Opening, Saving, Scanning, Printing, Import / Export functions and Notes are all accessed from this Menu.
New Drawing
Hot Key < Ctrl > +< N >
To create a New Drawing in GEM-RX Engraving Software, select New from the File Menu.
If you are already working on a drawing you will be asked if you wish to Save the drawing you are working on. A new drawing page will be created entitled UNTITLED., all new GEM-RX
Engraving Software files you create are given this name until you Save the drawing with a unique name.
Note : Remember you can assign a name with up to 256 characters.
New From Template
Hot Key < Ctrl > + < T >
You can load a New Drawing from a Template by selecting this function. If you are already working on a drawing you will be asked if you wish to Save the drawing you are working on.
A new drawing page will be created entitled UNTITLED with the Properties of the Template.
This can then be Saved with a name of your choice without over righting the original
Template.
Open
Hot Key < Ctrl > + < O >
27
Reference Manual
File Functions
Click On Open from the, File Menu, this will allow you to find and open an existing
GEM-RX Engraving Software file.
How to
1
Select Open from the File Menu, the Open drawing dialogue box will now appear.
2
Select folder from the List In selection box.
3
Click On the required file name.
4
Click On Open the job will then be loaded, if you do not wish to load the Job, Click
On «Cancel».
If you are already working on a drawing you will be asked if you wish to Save it, you can now select a drive and a file name by scrolling through the options if necessary.
Save Drawing
Hot Key < Ctrl > + < S >
If you have already Saved your drawing with a unique name and then made changes to it, you can update the file by Clicking on Save, this will Save all Properties for that file i.e.
Workspace, Orientation, Grid Size, Feed Rates, Notes etc., these are all recalled when you reopen using Open from the File Menu.
Save As
Hot Key < Ctrl > + < M >
This command is used to Save the drawing currently on the screen either for the first time, under a New Name, in a different Directory or in another File Format.
How to
1
Select Save as from the File Menu, the Save as dialogue box will now appear.
2
Select file format you wish to save the file in, from the Save As Type selection box.
3
Select folder, from the Save In selection box.
4
Enter the required file name in the File name box.
5
Click On «Save», the job will then be saved in the format and to the destination specified. If you do not wish to save the file Click On «Cancel».
The Save File dialogue box gives you the options to save the file with any name and in any folder you wish.
Note : Remember you can use names up to 256 characters long, so you may give your files useful names, no extension is necessary as this is generated automatically.
28
GEM-RX Engraving Software
Chapter 5File Functions
Save Setup Drawing
You can use this command to save a modified Setup Drawing, this will be loaded on starting a
New Drawing, See Page
Import
Hot Key < Ctrl > + < I >
The Import Menu give you access to the GEM-RX Engraving Software‘s file import filters, these allows you to read files from most industry standard Graphics, Desktop Publishing and
CAD packages. You are given the option to select the drive and folder that the required file exists in.
How to
1
Select Import from the File Menu, the Import drawing dialogue box will now appear.
2
Select file type from the File type selection box.
3
Select folder from the List in selection box.
4
Click On the required File name.
5
Click On Open the job will then be loaded, if you do not wish to load the job Click
On «Cancel».
All file will be brought in to their original scale wherever possible.
Export
Hot Key < Shift > + < Ctrl > + < X >
The Export Menu give you access to the GEM-RX Engraving Software‘s file export filters, these allows you to read files from most industry standard Graphics, Desktop Publishing and
CAD packages. You are given the option to select the drive and folder that the file exists in.
How to
1
Select Export from the File Menu, the Export drawing dialogue box will now appear.
2
Select file type from the File Type selection box.
3
Select folder from the List In selection box.
4
Click On the required file name.
5
Click On Open the job will then be loaded, if you do not wish to load the job Click
On «Cancel».
Supported File Formats
EPS Adobe Illustrator
GEM-RX Engraving Software can READ or WRITE drawings in the EPS, AI
(Encapsulated PostScript, Adobe Illustrator) file generated by Adobe Illustrator,
CorelDRAW, PagePlus and many other software package that supports the format, on
29
Reference Manual
File Functions
PC or MAC. The EPS format supports Lines and Béziers Curves, this make it first choice filter for importing logos and graphic type drawings, text should be brought in as curves. GEM-RX Engraving Software automatically converts text to curves when
Exporting in this format.
HPGL
GEM-RX Engraving Software can READ or WRITE drawings in the HPGL (Hewlett
Packard Graphics Language) is supported by most graphic software. In most of its flavours, it only supports Lines, all curves being split up into small straight line segments, this makes it difficult to scale and will probably be the last resort for file exchange.
Select Source
Clicking on Select Source will bring up a selection box with all the TWAIN devices that are available on your system, Click On the appropriate device to make active.
Note : Vistool support all TWAIN compatible devices including Scanners and
Video Cameras, you will have load TWAIN Interface that came with your Scanner
(see your scanner manual for instructions).
Acquire
Hot Key < Shift > + < F3 >
Clicking on Acquire will launch the TWAIN Scanning Interface that came with your
Scanner, you will then be able to scan your artwork, (see you scanner manual for instructions). You can then Print you drawing to any Windows supported printer or
Vectorised for use when engraving or cutting. If you intend to Vectorised your artwork you will get better results if you scan in grayscale not line art. For details on
Vectorising See Page 52.
Exit
Hot Key < Ctrl > + < Q >
Select Exit from the File Menu to return to your Windows Desktop, you will be prompted to
Save your Drawing if you have not already done so.
30
Edit Menu
GEM-RX Engraving Software
Chapter 6 Edit Functions
Edit Menu
The Edit Menu is accessed from the Main Menu bar, this takes you to the tools associated with GEM-RX Engraving Software’s editing functions.
Undo
Hot Key < Ctrl > + < Z >
GEM-RX Engraving Software’s Undo will take you back an unlimited number of undo moves.
Redo
Hot Key < Shift > + < Ctrl > + < Z >
GEM-RX Engraving Software‘s Redo will restore an unlimited number of undo moves.
Cut to Clipboard
Hot Key < Ctrl > + < X >
The Cut function enables you to remove Selected Objects from one drawing and place in another drawing via the Windows Clipboard. The Clipboard is a temporary storage area and can hold only one item at a time. If you have an item on the Clipboard and Cut another the second one will overwrite the first. To place items on the Clipboard select the Objects, (they will go dotty so you know what has been Selected) then select Cut, the Selected items will be removed from your drawing and will be held on the Clipboard until overwritten.
Copy to Clipboard
Hot Key < Ctrl > + < C >
31
Reference Manual
Edit Functions
The Copy function is almost the same as the Cut function, except that the Object or Objects are not removed from the drawing, but are copied on to the Windows Clipboard, all other operations are identical.
Paste from Clipboard
Hot Key < Ctrl > + < V >
The Paste command put a copy of the contents of the Windows Clipboard into your drawing, the Clipboard can be Pasted an infinite number of times into GEM-RX Engraving Software.
Some care is needed using this method of transferring Objects to and from GEM-RX
Engraving Software drawings and other Windows applications. One of the main considerations is that the item on the Clipboard, will be at the scale that it was cut or copied from the original drawing and may be much larger than the drawing you are pasting it into. If this is the case it may be that the pasted Object does not appear on the screen. To check if the
Object has been placed outside the present screen, area inv»OK»e the View all command from the View Menu Hot Key < F4 >, this will zoom out to display all Object that are in the drawing, including outside the Workspace.
Note : As the Clipboard is only temporary memory, when you switch off or reboot your computer, all the items on the Clipboard are lost.
Delete
Hot Key < Delete >
This command deletes all select Object from the screen.
Duplicate Single
Hot Key < D >
The Duplicate Single functions is accessed from the Edit Menu, GEM-RX Engraving
Software will make a duplicate of all Selected Objects. You are given a choice to apply an offset in the “X” and “Y” from the original, the default is zero. After copying the new
Objects are automatically Selected, you can now apply one of the other editing or move commands from the appropriate toolbar Menu, to Move, Rotate, Group etc., the copies.
Duplicate Workspace
The Duplicate Workspace function allows you to compose a single plate, with text logo’s etc., then duplicate it a selected number of times. This is very useful if you have multiple plates of the same size to engrave, with the same or similar designs on them.
How to
1
Compose your drawing on the correct size plate, using Auto Layout or simple Line
Text.
2
Select Duplicate Workspace from the Edit Menu. You can then select how many copies you require in the «X» and «Y» directions.
32
GEM-RX Engraving Software
Chapter 6 Edit Functions
3
Edit each individual plate as required.
The job is now ready to send to your engraving machine.
Select All
Hot Key < Ctrl > + < A >
This command Selects All Objects in the drawing, without having to marquee box or Click <
Shift > on individual Objects.
Deselect All
This command causes all Selected Objects to be deselected.
33
View Menu
GEM-RX Engraving Software
Chapter 7View Functions
View Functions
The View Menu takes you to all GEM-RX Engraving Software’s viewing functions.
Toolbars
The Toolbar Menu is accessed from the Tools Menu, this allows you to turn on or off the individual Toolbars by checking for visible and un-checking for invisible.
Zoom Window
Hot Key < F2 >
Selecting Zoom Window from the View Menu, or the Zoom Toolbar, this brings up the spy glass icon, you can zoom in to any part of your drawing using the marquee box principal. It is necessary to hold down the Left Mouse Button whilst Dragging around the part of the work area you require to view in detail. When you have the required area within the marquee box release the Mouse button. You have virtually unlimited Zooms available, so if you wish to see more detail you can Zoom in again.
Zoom Last View
Hot Key < F3 >
Selecting Zoom Last view from the View Menu, or from the Zoom Toolbar, this takes you back to the previous Views, you can go back all the way to the first View in the current drawing in that session.
Zoom All
Hot Key < F4 >
Selecting Zoom All from the View Menu or, from the Zoom Toolbar, GEM-RX Engraving
Software will Zoom in or out as required to show all Objects that exists within the drawing on the screen.
35
Reference Manual
View Functions
Redraw
Hot Key < F5 >
Selecting Redraw from the View Menu, will refresh the current drawing window.
Zoom Selected Objects
Hot Key < F6 >
Selecting Zoom Selected Objects from the View Menu, or from the Zoom Toolbar,
GEM-RX Engraving Software will bring all Selected Objects into a full view window.
Zoom Workspace
Hot Key < F7 >
Selecting Zoom Workspace from the View Menu or from the Zoom Toolbar, GEM-RX
Engraving Software will Zoom in or out as required to show the full available Workspace on the screen, including all Object that are in the Workspace.
Zoom Machine Bed
Hot Key < Ctrl > + < F7 >
Selecting Zoom Machine Bed from the View Menu, or from the Zoom Toolbar, allows you to view the Workspace with its associated position on the machine bed.
Display Settings
You can alter display settings in this menu.
Display Nodes : By checking this box you can make the Nodes visible in your drawing.
Display Directions : By checking this box you can make the Direction of Cut visible in your drawing.
Show Bitmaps : Check this box if you wish Bitmaps to be visible.
Bitmap Colour Frame : Check this if you wish to show a coloured frame around aa bitmap corresponding to the layer that it’s on.
Note : Other settings of this type can be found in the Options Menu.
36
Text Menu
GEM-RX Engraving Software
Chapter 8 Text Functions
Text Functions
The Text Menu is accessed from the Main Menu bar, this takes you to the tools used to place
Text of all types within your drawings. Text functions can also be accessed from the Text
Toolbar.
Auto Layout
Hot Key < Alt > + < A >
Auto Layout icon
Auto Layout is used to layout your Workspace automatically with Text and Logos. The layout normally consists of Horizontal text with or without columns, or a combination of both.
Logos can be Imported in any supported format or Scanned and Vectorised automatically.
•
Options (from left to right)
Centre Vice
37
Reference Manual
Text Functions
This mode is used if you are engraving flat using jigs held in the self centring vice. Typically this mode is used for trophy plates, watch backs, salvers etc.
Cylindrical
This mode is used if you are engraving round objects. Typically this mode is used for trophies, glasses, pens etc.
Inside Ring Engraving
This mode sets up you GEM-RX Engraving Machine to handle Inside Ring Engraving, this is normally purchased as a separate item. You need to load the GEM-RX 2 Plus Driver to be able to activate this mode.
Outside Ring Engraving
This mode sets up you GEM-RX Engraving Machine to handle the Outside Engraving of
Rings, this is part of the Inside Ring Engraving Package. You need to load the GEM-RX 2
Plus Driver to be able to activate this mode.
Note : The Machine Bed colour will change to indicate which mode you have selected. Olive Green for centre vice, Magenta for cylindrical Orange for Inside
Ring Engraving and Blue for Outside Ring Engraving.
•
Options
Dimension
Width : Enter the width of the Workspace your in the numeric entry box.
Height : Enter the height of the Workspace your in the numeric entry box.
Options
Italicise : f you Check this box you can Italicise your chosen Font, enter the angle required in the drop down Menu. You may enter a – value, this will Italicise the text to the backwards. The Text will Italicise forwards, if you do not enter negative value.
Tight : Check this box to set the Line Spacing to a Tight form.
Medium : Check this box to set the Line Spacing to a Medium form.
Loose : Check this box to set the Line Spacing to Loose form.
Font
Vistool Fonts : Check this box to use GEM-RX Engraving Software’s native fonts, these include ready cleared Engraving, Single Str»OK»e Engraving and Outline Fonts.
38
GEM-RX Engraving Software
Chapter 8Text Functions
Text Entry
You can enter your Text in this box, to enter another line press < Return >, the command for separating columns is < Tab >, i.e. If line 2 has 2 columns you would enter Text for left column < Tab> Text for right column.
Function Buttons
Measure Plate
Clicking on this button will enable you to Digitize the plate using your machine, (this function is only available on the MicroStep series of Control Systems).
Import Logos
If you select this function a Logos can be Imported in any Supported Format, (each
Logo is classed as a Line), you are prompted for the height of the logo and the line number to place the Logo in.
Scan Logos
If you select this function a Logos can be Scanned (you have to have purchased the
Scanning and Logo Generation Package to use this feature), into your layout (each
Logo is classed as a Line), you are prompted for the height of the logo and the line number to place the Logo in and if you wish to Trace the Logo or not see Figure 1.
Figure 1
Freehand
Freehand allows you to engrave Signatures, Hand Written Personal Message without scanning. Just write you message on our pad with the special pen provided and engrave, no cleaning up. Freehand has to be purchased as an additional package, see your Dealer.
How to
Auto Layout Text
1
Select Auto Layout from the Text Menu, or the Auto Layout icon from the Toolbar.
2
Set Workspace Size 50mm x 25mm, Options to Medium and Select Font
Times Engraving. Enter in the White Text box first line, Open All Hours.
Second line, Between. Third line, 12pm — 6am pressing < Return > between each line.
39
Reference Manual
Text Functions
3
Click On «»OK»».
You should now have a drawing similar to Figure 2.
Figure 2
Adding Logo’s Using Auto Layout
1
Select Auto Layout from the Text Menu, or the Auto Layout icon from the Toolbar.
2
Set Workspace Size 50mm x 25mm.
3
Select Import Logo, you will now have access to the Import Logo Dialogue Box,
Select the DHL.Ai logo in the GEM-RX Engraving Software EPS Folder.
4
Select line number one to place the Logo in and enter 10mm for the height of the Logo.
5
Enter the Text in the White Text box, Deliver Next Day, next line That’s For
Sure, Click On «OK».
Figure 3
You will now have a Plate similar to Figure 3.
40
GEM-RX Engraving Software
Chapter 8Text Functions
As you can see, the Auto Layout is a very useful tool that makes the production of Plates quick and easy.
Auto Re-layout
Hot Key < Alt > + < R >
Auto Re-Layout icon
You can Auto Re-layout your text if you are not happy with the results.
How to
1
Select Auto Layout from the Text Menu, or the Auto Layout icon from the
Toolbar.
2
Set Workspace Size 50mm x 25mm, Options to Medium and Select Font Times
Engraving. Enter in the White Text box first line, Open All Hours. Second line,
Between. Third line, 12pm — 6am pressing < Return > between each line. Click On
«OK».
You should now have a drawing similar to Figure 1. You can now alter the look of your Plate.
1
Select all the text in your sign.
2
Select Auto Re-Layout from the Text Menu or from the Text Toolbar.
3
You will now be able to alter the lo»OK» of your Plate by selecting, the required option i.e alter the line spacing to Loose. See Figure 4.
Figure 4
4
Alter the line spacing to Tight. See Figure 4.
You can also change the size of the plate whilst retaining the same text, using Auto
Re-Layout.
41
Reference Manual
Text Functions
Figure 5
1
Recreate the plate as in Figure 5 and Select all the text.
2
Select Auto Re-Layout from the Text Menu or from the Text Toolbar.
3
Enter 60 x 30 for the Width and Height and check Scale, Click on «OK».
Figure 6
As you can see in Figure 6, the plate and the text has been resizes. If you had not checked
Scale, just the plate would have been resized.
Basic Text Composer
Hot Key < S >
GEM-RX Engraving Software’s Standard Text Composer is available by Clicking with the
Left mouse button on the Text icon on the Draw Toolbar, or from the Text Menu.
•
Options
Text Entry : Enter the required text in the Text Entry box, there is no practical limit to the amount of text you can enter here.
42
GEM-RX Engraving Software
Chapter 8Text Functions
Font
GEM-RX Engraving Software Fonts : Check this box to use GEM-RX Engraving
Software’s native fonts, these include ready cleared engraving, single str»OK»e engraving and outline fonts.
Sizes
Cap Height : This is where you enter the cap height of the text, it is calculated from the upper case W in the Selected font.
Stretch : You can stretch or condense your text by entering a higher or lower that
100% figure in the Numeric Box.
Spacing : You can increase or decrease the space between the letters in your text by entering a higher or lower that 100% figure in the Numeric Box.
Alignment
Horizontal : You select the horizontal alignment of the text from the drop down List box.
Left Justify : This will move the text to the left of the width set in the Width Entry box, minus the left margin, entered in the Left Margin Entry box.
Right Justify :This will move the text to the right of the width set in the Width Entry box, minus the right margin, entered in the Right Margin entry box.
Centre Justify : This will move the text to the centre of the width set in the Width
Calculate
Total Length : This is the calculated width of the text, (this is a calculated field and is only for information) .
Total Height : This is the total height of the text, this includes any descender or ascender in the text, (this is a calculated field and is only for information).
How to
Enter Text
1
Select Workspace from the Tools Menu or Right Clicking on the Workspace and set the
Workspace dimensions to say 60 x 30.
2
Select the Basic Text Composer, by clicking with the Left mouse button on the Text icon on the Toolbar or the Text Menu.
3
The Select Position to start the text line.
4
Enter the following, ONE LINE TEXT enter a text height of 4mm, Centre Justify and
Select Times Engraving as the font.
5
Click on «OK».
43
Reference Manual
Text Functions
6
The Text will probably not be in the centre of the plate. To rectify this ensure that the
Text is Selected and Click on Centre to Workspace icon on the Toolbar.
Centre to Workspace icon
You should now have a Drawing similar to Figure 6.
Figure 6
If you wish to edit the Text you can Right Click on the Text. This will bring up the Properties
Menu, Select Basic Text Editor, you can now alter any of the settings you wish.
Disk Text
Hot Key < Alt > + < E >
The Disk Text function is a special function for use when engraving or routing circular
Objects that require curved text.
•
Options
Text
Text : This is where you enter your text
Parameters
Diameter : Enter the diameter of the circular Object to be machined.
Margin : Enter the margin required from the top of the text in the clockwise direction, or the bottom of the text in the anti-clockwise direction, to the diameter of the disk.
Cap Height : Enter the text height.
Upper Arc : Check this box to place the text in a clockwise direction on the upper arc, see Figure 1.
Lower Arc : Check this box to place the text in an anti-clockwise direction on the lower arc, see Figure 2.
44
GEM-RX Engraving Software
Chapter 8Text Functions
Fonts
Vistool Fonts : Check this box if you wish to use native GEM-RX Engraving
Software fonts.
How to
1
Select Disc Text from the Text Menu, you will be presented with the Disk text
Dialogue box.
2
Enter the following Diameter 25, Margin 1, Cap Height, 2, Check : Upper Arc, Times
Engraving.
3
In the Text Box enter Text On An Upper Curve.
4
Click On «OK».
You should have a drawing similar to Figure 7.
Figure 7
To edit any of the text properties, Click On the text with the Right mouse button and select
Edit Disk text you can then alter any parameters you wish. Text can be Kerned by selecting the text and activating Kerning in the normal way (see Kerning Text). When GEM-RX
Engraving Software creates the drawing, it places a circle of the specified diameter to give you a visual representation of the finished article.
45
Reference Manual
Text Functions
Note : The circle has been placed on the Design Layer and is blue, this will not be engraved.
Edit Disk Text
1
Select the Text you have created in the Disk Text by Left Clicking with the Mouse button.
2
Right Click On the Selected text, or select Edit Disk Text from the Text Menu.
3
The Disk Text Edit Dialogue box will be shown.
4
Now you can edit the settings as required.
5
Click On «OK» when you are happy with your alterations.
Note : Disk Text can be Kerned the same as any other text by Clicking with the
Right Mouse Button and selecting Kern Text.
Edit Dynamic Arc Text
You can Arc Text Dynamically by selecting and Clicking on Edit Arc Text from the Text
Toolbar and the Text Menu.
Figure 8
How to
1
Select the Text by Clicking with the Left Mouse Button.
2
Select Edit Dynamic Arc Text from the Text Menu or by Clicking with the Right
Mouse Button on the text.
4
You will now see two green nodes, which you can Drag to arc the text either in an upper or lower arc. See Figure 8.
Once you have Dragged one of the green nodes the text will arc, then four further nodes will be then available two red and two blue, See Figure 9.
Clicking on one of the blue nodes allows you can Drag the text around the centre of the arc of the text, see Figure 3. By holding down the < Ctrl > key while dragging, constraints the
46
GEM-RX Engraving Software
Chapter 8Text Functions
angle of the Line being drawn in steps of 15°, this is an easy way to make an arc that is 0°,
15°, 30°, 45°, 60°, 75° or 90° rotation.
By Clicking on one of the red nodes, you can Drag the text and increase or decrease the angle of the text, from the fixed arc centre.
Figure 9
Note : Dynamic Arc Text can be Kerned the same as any other text by Clicking with the Right Mouse Button and selecting Kern Text.
Kern Text
Hot Key < K >
Lines of Text can be Kerned individually i.e. the spacing between text characters can be adjusted.
How to
Open Spaces between Characters
1
Select Text to be Kerned by Clicking with the Left mouse button, the K&E and the
R&N are obviously to close together. See Figure 10.
2
Select Kern Text from the Text Menu, or press <K> on the Keyboard.
Figure 10
3
Place the Cursor between the characters to be Kerned.
4
Click and release the Left mouse button whilst holding down the <Ctrl > key, each
Click of the Mouse button represents plus ½6 th of a character space.
47
Reference Manual
Text Functions
You will see the letters that required Kerning have been re-spaced..
How to
Close Space between Character
1
Select Text to be Kerned by Clicking with the Left mouse button, the T&E and the
E&R are obviously too far apart. See Figure 12
2
Select Kern Text from the Text Menu.
3
Place the Cursor between the characters to be Kerned.
Figure 12
4
Click and release the Left mouse button whilst holding down the < Shift > key, each
Click of the Mouse button represents plus ½6 th of a character space.
You will see the letters that required Kerning have been re-spaced, (see Figure 4).
Clear Kerning
This function will clear any Kerning that has been set to all Selected lines of text.
48
GEM-RX Engraving Software
Chapter 8 Text Functions
Circular Monogram
This function is only available if you have purchased the GEM-RX Extra Font Pack.
How to
1
Enter either the two or three initials that are required in the Text Box.
2
Enter the height of the Monogram. You will get a visual representation in the View
Box.
3
When satisfied Click On «OK».
The Monogram will be placed in you drawing, you can now position it ready to output to your
GEM-RX Engraving Machine.
49
GEM-RX Engraving Software
Chapter 9 Picture Engraving
Bitmap Function
The GEM-RX supports the new and unique U-MARQ Picture Engraving (this is an optional extra and has to be purchased separately), This Dialogue box is not available unless you have purchased the Scanning and Logo Generation or the Picture Engraving modules.
Bitmap Menu
U-MARQ GEM-RX Engraving supports many bitmap formats including BMP, Tiff, Gif,
JPEG, Exif, WMF, PNG and EMF. These formats enable you to insert pictures in many formats to engrave.
Insert Bitmap
Hot Key < Shift > + < K >
This function is only available if you have purchased the Picture Engraving or the Scanning and Logo Generation module.
Selecting this function from the Bitmaps menu, allows you to Insert a Bitmap into your drawing, this can be placed and scaled using the tools provided.
Figure 1
•
Options
Import Picture : Select this to import the picture for normal viewing in the
Workspace.
51
Reference Manual
Picture Engraving
Trace Picture : Select this option to Vectorised the bitmap in preparation for normal engraving.
Edit Picture Engraving Settings : Select this function to proceed to the parameter settings Dialogue Box for picture engraving.
Height : Enter the required height, the Bitmap will be scaled proportionally.
Hide Pictures : Select this function to hide the bitmap on the screen, you may wish to use this when vectorising an image.
Show Bitmap
Check this to show bitmaps in your drawing, uncheck to hide.
Bitmap Selection
Check this to allow the selection of bitmaps in your drawing.
Insert a Bitmap in a Drawing
How to
1
Select Insert Bitmap.
2
The Import Bitmap file Selector Dialogue box is made available for you to navigate to the Folder containing the required Bitmap.
3
Once you have Selected the file the Bitmap Parameters Dialogue box will now be available so you will be able to pick you preferences.
4
Click On OK.
The Bitmap will now be placed in your drawing.
How to
Trace Bitmap
Hot Key < Shift > + < T >
Selecting Trace Bitmap from the Bitmap Menu, enables Universal Engraving’s Vectorising function to be applied to the Selected Bitmap. This function is only available if you have purchased the Scanning and Logo Generation Package.
How to
1
Pick your Scanner in the Select Source Dialogue box.
2
Scan you artwork (remember to scan in Grayscale).
3
When your scan is finished, select Trace Bitmap, select the quality of the original artwork i.e. Fine, Medium or Course, this will determine the accuracy of the
Vectorization process.
52
GEM-RX Engraving Software
Chapter 9 Picture Engraving
4
Click On OK Universal Engraving it will automatically Vectorised the scan, (that is
Universal Engraving will take the bitmap file and trace the outline to make a vector file), the outline will then be placed in your drawing for use.
The definition of Fine, Medium and Course Vectorising is as follows :
Fine : This setting is normally used when the original artwork is of Bromide quality or this taken from high quality black and white images.
Medium : This setting is normally used for 300 dpi Laser or Photocopy quality artwork.
Course : This setting is normally used with Fax or poor quality Printed artwork.
Note : All Vectorised images are created as closed paths, this allows you to create Toolpaths without any editing.
Show Bitmap
Hot Key < Shift > + < 7 >
This function will toggle the Bitmap to be visible or invisible in your drawing, this can be very useful when editing after Vectorization.
Picture Parameters
This function is only available if you have purchased the Picture Engraving module. Before you can use this function you must have a suitable picture on the screen see Figure 2.
Figure 2
How to
1
Place your chosen picture in the workspace at the size you wish to engrave it at using
«Insert Bitmap». This should be a suitable image for picture engraving see Page .
2
Select the image if not already selected, then select «Picture Parameters» from the
Bitmap Menu.
3
You will now have your picture ready to edit in the Picture Editor, see Figure 3. This is how your picture will look when engraved on an object.
53
Reference Manual
Picture Engraving
If you look at Figure 4, you will see the results are quite striking using the default values.
You can enhance the quality of the picture for engraving, if you think the results could be bettered by accessing the Advanced functions. You will now be able to adjust various parameters setting to accents certain areas of the picture.
Figure 4
Figure 3
How to
1
Right Click somewhere on the picture and select «Picture Parameters» from the menu.
2
From the Bitmap function dialogue box select «Advanced». You will now be presented with an extended set of editing parameters, see Figure 5.
3
We will now look at a description of how these extra parameters should be used.
4
First select the number of Grey Levels, a lower number gives you more details (higher resolution), a higher number gives a smoother picture, but takes longer to engrave.
5
Choose the desired Sharpness using the slider, a higher the value may make the face look older and takes longer to engrave.
6
You should then increase the black level as much as possible, without losing important details.
7
Decrease the white level as much as possible, without losing important details.
8
Set the gamma value to emphasise features.
54
GEM-RX Engraving Software
Chapter 9 Picture Engraving
You are now ready to engrave your picture. When selecting your engraving process you should use the one for picture engraving for optimum results.
Figure 5
Note : The picture that was used in the above example, has a black background.
The Picture Engraving software will not engrave black, therefore only the portrait
will be engraved and the background will be ignored, see Page 55 for more
details. Your picture will look normal in your drawing and will not reflect any changes made.
Masking
In some circumstances you may wish to remove the background from the picture, just leaving the portrait to be engraved.
Edit Mask
If you Right Click on the picture on your screen, you will be able to access the Transform menu, select «Edit Mask».
You will now have access to the Masking Toolbar.
The Masking functions all have easy access from the Masking Toolbars, which by default are docked on the right-hand side of your screen. These are only visible when the Masking function is accessed.
Masking Toolbar
Normal Brush
The Normal Brush is used to paint and flood fill a mask.
55
Reference Manual
Picture Engraving
Magic Brush
The Magic Brush is used to pick out edges when masking and has some special properties.
Clear Mask
Clear Mask is used to delete a mask from a picture.
Invert Mask
Invert Mask will cause all masked areas to be unmasked and all unmasked areas to be masked.
Mask Settings Toolbar
Depending on the colour of the background you wish to mask, you have a choice of colours to paint the mask.
Mask Setting Red
Mask setting red sets the mask to be red in colour.
Mask Setting Green
Mask setting green sets the mask to be green in colour.
Mask Setting Blue
Mask setting blue sets the mask to be blue in colour.
You can vary the intensity of the chosen mask colour by selecting one of the grayscale boxes on the right of the Mask Settings Toolbar.
Mask Intensity Low
Select the above to give the chosen mask colour a transparency.
Mask Intensity High
Select the above to give the mask a solid colour.
You now need to see how to use the Masking Tools, to remove the background of a picture before engraving.
56
GEM-RX Engraving Software
Chapter 9 Picture Engraving
How to
1
Insert a picture using the methods described previously, see Page 51. Right Click on it
and select «Edit Mask» from the Dialogue Box.
2
You will now be able to use the Masking Tools. Select the «Magic Brush» and a mask colour, the best colour is one that is a complete contrast to the background you wish to mask.
3
You can adjust the size of the mask brush, using the scroll wheel on your mouse. Now start to follow the edge of the person with the Left Mouse Button held down, the background will now be painted over. You do not have to be very accurate when using the Magic Brush, the idea is to detect the edges for you, see Figure 1.
Figure 1
Figure 2
4
Do not worry if you stray over the edge, to remove any excess just Click and hold down the Right Mouse Button over the excess and it will be removed. To finish off your mask once you have completed the outline just Click somewhere on the background holding down the shift key, see Figure 2.
5
To exit the masking function press < Esc > you will now see the picture with the background removed. You can then go on to process the picture ready for engraving,
using the Picture Parameters as before see Page 53.
•
Options
Re Sample
You can alter the size of your picture by Clicking on Re Sample. You will be presented with a
Dialogue box similar to above, just enter the size in pixels you wish to alter your picture to.
Your picture will now be changed to the size, by re sampling the quality of your picture is maintained.
57
Reference Manual
Picture Engraving
Trim to Mask
You can trim your picture to the extremities of the mask you have painted.
Clear Mask
Clear Mask is used to delete a mask from a picture.
Invert Mask
Invert Mask will cause all masked areas to be unmasked and all unmasked areas to be masked.
U-MARQ Picture Engraving software produces some excellent results and is really worth spending the time learning how to get the best results.
Note : To get the best result your picture should be brought in to the software at the highest resolution possible, i.e., a minimum of 120dpi.
58
GEM-RX Engraving Software
Chapter 10Transform Functions
Transform Functions
Transform Menu
The Transform Menu give you access to all of GEM-RX Engraving Software’s Object transformation and alteration functions.
Move Dynamic
Move
The Move Dynamic function is accessed by Clicking with the Left mouse button on the
Transform Toolbar, Move icon, this function is used to Move objects dynamically using the only the mouse.
How to
1
Select the Object with the Pick tool by Clicking with the Left mouse button, you can select more than one Object, using any of the multi-select options, all the Selected
Object will go Dotty.
2
Select the Move icon by Clicking with the Left mouse button on the Transform
Toolbar.
3
Place the Pick tool on any segment and holding the Left mouse button down, Drag to the desired position, when satisfied release the Mouse button.
Resize
Resize icon
The Resize function is accessed from the Transform Menu or by Clicking with the Left mouse button on the Transform Toolbar, Resize icon.
Scaling Dynamic
The Scale Dynamic function is accessed by Clicking with the Left mouse button on the
Transform Toolbar, Resize icon, this function is used to scale objects dynamically using the only the mouse.
How to
1
Select the Object with the Pick Tool by Clicking with the Left mouse button, you can select more than one Object, using any of the multi-select options, all the selected objects will go Dotty.
2
Select the Resize icon by Clicking with the Left mouse button on the Transform
Toolbar.
59
Reference Manual
Transform Functions
3
Eight Nodes will appear, you can now Scale by grabbing one of the corner nodes and
Dragging with the Left mouse button depressed, when satisfied release the Mouse button. In this mode all selected objects will be scaled from the centre.
•
Options
If you press < Left Shift > while Dragging, the Object will scale, locking the opposite node to the one being Dragged.
Stretch Dynamic
The Stretch Dynamic function is accessed by Clicking with the Left mouse button on the
Transform Toolbar, Resize icon, this function is used to stretch Objects dynamically using the only the mouse.
How to
1
Select the Object with the Pick Tool by Clicking with the Left mouse button, you can select more than one object, using any of the multi-select options, all the selected object will go Dotty.
2
Eight Nodes will appear, you can now stretch by grabbing one of the centre nodes and
Dragging with the Left mouse button depressed, when satisfied release the Mouse
Button.
•
Options
If you press < Left Shift > while Dragging, the movement will be restricted to horizontal only (i.e. in the «X» direction). If you press < Alt > while Dragging, the movement will be restricted to vertical only (i.e. in the «Y» direction).
Rotate Dynamic
Rotate
The Rotate Dynamic function is accessed by Clicking with the Left mouse button on the
Transform Toolbar, Rotate icon, this function is used to Rotate objects dynamically using the only the mouse.
How to
1
Select the Object with the Pick tool by Clicking with the Left mouse button, you can select more than one Object, using any of the multi-select options, all the Selected Object will go Dotty.
2
Eight Nodes will appear you can now rotate by grabbing the appropriate node and
Dragging with the Left mouse button depressed, when satisfied release the Mouse
Button.
GEM-RX Engraving Software will Rotate the Objects locking the centre point.
60
Multi Mode
GEM-RX Engraving Software
Chapter 10 Transform Functions
•
Options
If you press < Shift > while Dragging the right node the left corner diagonally opposite will be locked. Conversely if you If you press < Shift > while Dragging the left node the right corner diagonally opposite will be locked. If you press < Ctrl > while Dragging, the rotation angle will be restrained to 15° increments.
Note : An important feature to note is that all Selected circles and arcs will be converted to Béziers curves using the Stretch functions, since they cannot survive as Circles and Arcs. An Object can be a single segment or number of segment connected or not, a Path, a single Object, a Face or group of Objects.
61
Arrange Menu
GEM-RX Engraving Software
Chapter 11Arrange Functions
Arrange Function
The Arrange Menu takes you to the tools used to Align, Space, Distribute and generally
Arrange Objects within your drawing.
Centre to Workspace
Centre to Workspace
The Centre to Workspace function will centre all selected object vertically and horizontally in the Workspace, without changing the spacing.
Horizontal Centre
Horizontal Centre icon
The Horizontal Centre function, enables you to select a number of Objects and place them relative to the centre of the Workspace in the horizontal plane. No alteration to spacing of the
Objects in either the horizontal or vertical plane will take place.
Vertical Centre
Vertical Centre icon
The Vertical Centre function, enables you to select a number of Objects and place them relative to the centre of the Workspace in the vertical plane. No alteration to spacing of the
Objects in either the horizontal or vertical plane will take place.
Ignore Groups
Ignore Groups icon
Click On this icon will allow you to select object that are grouped together and edit individual items without ungrouping them.
63
Tools Menu
GEM-RX Engraving Software
Chapter 12Tool Functions
Tool Functions
The Tools Menu takes you to GEM-RX Engraving Software’s utility and setup functions.
Workspace Setup
The Workspace Dialogue box, accessed from the Workspace Setup Menu, this is where you setup all your Workspace environments.
•
Options
Machining Modes
Centre Vice : Select this Mode for flat work using the Self Centring Vice. For more information see Page .
Cylindrical : Select this Mode to use the Cylindrical assembly when engraving pens etc. For more information see Page .
Inside Ring Engraving : Select this mode for use with the GEM-RX Ring Engraving attachment, (this has to be purchased as an extra). For more information see Page .
65
Reference Manual
Tool Functions
Outside Ring Engraving : Select this mode for use with the GEM-RX Ring
Engraving attachment, (this has to be purchased as an extra). For more information see Page .
Workspace Size
Width : This may be entered in the numeric entry box, this set the Workspace size in the «X» direction.
Height : This may be entered in the numeric entry box, this set the Workspace size in the «Y» direction, select Workspace : Clicking on this button will allow you to select the Workspace from a list box of sizes you have saved previously.
Workspace Positions
Machine Bed Bottom Left Corner : Clicking on Change, you can setup where the
Workspace is with reference to the Bottom Left Corner of the Machine Bed. Using the position on Machine Bed Dialogue box, you can pick one of the nine points where the Workspace will be placed. An offset can also be applied, to take into account things like machine home positions, not being at the exact top left of the machine bed etc.
Note : A quick way to setup the position of the Workspace on the Machine Bed, is to Right Click On the Machine Bed and select the required position using the
Workspace Position Toolbox.
Setting up the Workspace
How to
1
Select Workspace setup from the Tools Menu.
2
Enter the Width and Height of your plate to be engraved.
3
Click On the Change button Workspace position on the Machine bed.
4
Click On one of the nine positions, this will refer to the centre of the Workspace.
As you can see the Workspace can be placed anywhere on the machine bed precisely, with very little effort.
66
Units Setup
GEM-RX Engraving Software
Chapter 12Tool Functions
The Units Menu is accessed from the Tools Menu, this is used to setup all your working unit
.e., metric or imperial, decimal places, scale etc.
Drawing Co-ordinates
Decimals : This is the number of decimal places you wish to use for Drawing
Co-ordinates.
Units : This is the unit of measurement you wish to use. You can choose between the following :
1 m
2 cm
3 mm
4 u
5 In
: metre
: centimetre
: millimetre
: micron, 1/1.000.000 metre
: Inch, English / American
Production
Speed : You set the units for Feed Rates here.
Time : You set the units for Dwells here.
Select Language.
Hot Key < Shift > + < F12 >
You can select any supported language in GEM-RX Engraving Software direct from the
Tools Menu, there is no need to re-boot your computer.
Toggle Language
Hot Key < F12 >
67
Reference Manual
Tool Functions
You can toggle between the present Language and the previous Language, there is no need to re-boot your computer.
Preferences
The Preferences Dialogue box is accessed from the Tools Menu, this is where you can configure various setting and preferred options in GEM-RX Engraving Software.
Screen Tab
This is where you set your preferences for visible screen functions.
•
Options
Scroll Bars : By un-checking this box you can turn the Scroll Bars off to give you more screen space.
Status Bar : By un-checking this box you can turn the Status Bar off to give you more screen space.
Show Machine : By checking this box you can make the Machine Bed visible.
Text Tab
This is where you set your preferences for Text functions in GEM-RX Engraving Software.
•
Options
Auto Text Welding : When this box is Checked, the outline font automatic text welding is activated.
Use Font Kerning : When this box is Checked, the auto font kerning is activated.
Auto Condense Parameters
Min Word Spacing : This is the amount of condensing that will be applied between words, when using the Auto Condense Function.
Min Char Spacing : This is the amount of condensing that will be applied between characters, when using the Auto Condense Function.
Minimum Stretch : This is the amount of condensing that will be applied to each character, when using the Auto Condense Function.
Import / Export Tab
This is where you set your preferences for the Import / Export functions in GEM-RX
Engraving Software.
•
Options
No Polylines in DXF Export : Some Third Party programmes, (see their technical documentation) will not import DXF file correctly that contain Polylines. You have the option to export DXF file without Polylines by checking this box.
Import Auto-Connect : When this box is Checked, all imported Objects will automatically have their paths connected if the nodes are over each other.
68
GEM-RX Engraving Software
Chapter 12Tool Functions
Misc Tab
•
Options
Auto Snap Angle : You can enter the snap angle which will be applied when Holding down the <Ctrl > Key in certain functions.
Auto Snap Length : This sets the distance for the Auto Snap.
Nudge : This entry set the distance of the Nudge when using the Arrow Keys.
Precision : This sets the general precision of the conversion and output functions in
GEM-RX Engraving Software.
69
GEM-RX Engraving Software
Chapter 13Production Functions
Production Menu
Production Functions
The Production Menu takes you to the tools used to setup production parameters, create offset and clearing Toolpaths within your drawing.
Device = xxxx
Clicking on this will allow you to select a machine to output to, you are offered a choice from the List box.
Engrave
Hot Key < Atl > + < 1 >
Engrave icon
Basic Production allows you to send a job to the Production Manager after having Selected a material from your Material Database, this will have been assigned pre-set Depths, Feed Rate etc.
How to
1
Click On «Engrave», you will then be taken into the Processes Dialogue Box.
2
You will then select a Process, this will depend on the type of engraving you are doing, i.e. Diamond Drag, Engraving Brass etc. Select the one that is appropriate, see Figure
1.
3
If you wish to alter any of the Process settings, Click On the Padlock. You are now able to alter any setting for this job.
4
The Click On «OK».
The job will now be sent to your GEM-RX Engraving Machine..
71
Reference Manual
Production Functions
Engrave Selected Only
Hot Key < Alt > + < 4 >
Selected Only
By Selecting this icon you can produce only the items that you select. This is useful for re-engraving parts of a job that have not been engraved deep enough.
How to
1
Select the object or objects you wish to send to your GEM-RX Engraving Machine, using the Pick Tool.
2
You now select the settings required, in the Processes Dialogue Box. See Figure 1.
3
Click On «OK».
72
Figure 1
GEM-RX Engraving Software
Chapter 13Production Functions
Your GEM-RX Engraving Machine will now engrave only the selected objects.
Measure Plate
Hot Key < Shift > + < Alt > + < 3 >
You can use your machine to measure the size and position of your plate.
Measure Plate icon
How to
1
Place your Plate on the machine.
2
Select Measure Plate from the Production Toolbar or the Production Menu.
3
You are asked to select the first position. Move the “X” and “Y” axes using your
GEM-RX Engraving Machine Keypad, to the Top Left corner of your plate.
4
You are then asked to select the opposite corner of your plate. Move the «X», «Y» axes to the Bottom Right corner of your plate.
The Workspace will bee moved to the correct position and sized on your computer screen.
You can now design your drawing, if you have not already done so and send to your
GEM-RX Engraving Machine as normal.
Note : You can Jog the «Z» axis down to near the surface. This will make it easier to select the exact corner of your plate.
Read Reference Position
Hot Key < Shift > + < Alt > + < 4 >
Read Reference icon
This function allows you to set a position on your Workspace with reference to the “X”, “Y” position of your machine, this is transferred to your screen.
How to
1
Move the “X” and “Y” axes using your GEM-RX Engraving Machine Keypad, to the required position. This can be a position in the Workspace, or an object in the drawing etc.
2
Click On Read Reference Position from the Production Menu.
3
Select the position on the screen, that reflects the position you have jogged the machine too.
The Workspace will now be moved within the Machine Bed on your drawing to reflect the chosen position.
73
Reference Manual
Production Functions
Note : You can Jog the «Z» axis down to near the surface. This will make it easier to select the exact corner of your plate.
Measure Circle Centre/Point
You can use your GEM-RX Engraving Machine to measure circular objects, or areas to be engraved.
How to
1
Place the circular object to be engraved in the Self Centring Vice, you do not need to be very accurate when doing this.
2
Move the «X» and «Y» axes using the GEM-RX Engraving Machine Keypad, to the centre
On «OK».
point on the circular item, or the centre of the circular engraving area, Click
3
Move the «X» and «Y» axes using the GEM-RX Engraving Machine Keypad, to the outer point on the circular item, or the outer extent of the circular engraving area,
Click On «OK».
4
You will notice that the Workspace has been positioned on the Machine Bed to reflect the exact position of the circular item or circular engraving area. Now compose your engraving, if you have not already done so.
You can now send your job to the GEM-RX Engraving Machine in the normal way, setting your Processes etc.
Measure Circle 3 Points
You can also use your GEM-RX Engraving Machine to measure circular object or engraving areas, where the centre is difficult to find.
1
Place the circular object to be engraved in the Self Centring Vice, you do not need to be very accurate when doing this.
2
Move the «X» and «Y» axes using the GEM-RX Engraving Machine Keypad, to an outside point on the circular item, or the outside of the circular engraving area, Click
On «OK».
3
Move the «X» and «Y» axes using the GEM-RX Engraving Machine Keypad, to another outside point on the circular item, approximately 1/3rd of the way round from the first selected point, or the outer extent of the circular engraving area, Click On
«OK».
4
Move the «X» and «Y» axes using the GEM-RX Engraving Machine Keypad, to another from the
On outside point on the circular item, approximately 1/3rd of the way round second selected point, or the outer extent of the circular engraving area, Click
«OK»
74
GEM-RX Engraving Software
Chapter 13 Production Functions
5
You will notice that the Workspace has been positioned on the Machine Bed to reflect the exact position of the circular item or circular engraving area. Now compose your engraving, if you have not already done so.
You can now send your job to the GEM-RX Engraving Machine in the normal way, setting your Processes etc.
Configuration Menu
The Configuration Menu is accessed from the Production Menu, this takes you to GEM-RX
Engraving Software’s Machine setup and Parameters.
Machine Setup
This is where you set the Start and Finish points on the Workspace, offsets etc.
•
Options
Stop At First Cut : Checking this box will cause the cutter to stop at first cut, material surface.
X Y Setup Point : You can set an “X” “Y” start position by selecting one of the
Standard Nine Positions, this is where you would reference the start on your
Workspace. You may also set an “X” “Y” offset from the chosen position. (if no selection is made the “X “Y” and “Z” axes will go straight to surface first cut).
Finish Point : You can set an “X” “Y” finish position by selecting one of the
Standard Nine Positions, this is where you would want your “X” “Y” axes to finish on your Workspace. You may also set an “X” “Y” offset from the chosen position. (if no selection is made the “X “Y” and “Z” axes will go bake to its home position).
Machine Parameters
This is where the general parameters are set for the GEM-RX Engraving Machine.
•
Options
Dimensions
X : This is the maximum travel in the “X” direction of machine.
Y : This is the maximum travel in the “Y” direction of machine.
Z Axis
Max Travel : This is the maximum travel of the “Z” axis on the machine.
75
GEM-RX Engraving Software
Chapter 14 Shading
Shading
When working with logos or designs, you may wish to make them stand out. To achieve this you can use the Shading Function in the GEM-RX Engraving Software.
You can select an image from the Clipart in the GEM-RX Engraving Software or Import one from another source (see Figure 1).
Figure 1
Holding the left mouse button drag a box around your logo, it will go Dotty. From the Main
Toolbar select the Shading 45° Icon.
The 45° Shading Icon
Figure 2
77
Reference Manual
Shading
You will now see a Shading Parameters Dialogue Box (see Figure 2), this will allow you to alter the level of shading. Holding the Left Mouse Button Down, move the slider to the left to make the Shading appear finer, to the right to make the Shading appear coarser. Now Left
Click On the area of your selected item, you wish to shade.
Figure 3 Figure 4
The results are shown in (Figure 3) using the midway setting and in (figure 4) using a fine setting.
You can Shade different areas in the same drawing, with different Shading Parameters. Select all parts of you drawing similar to (Figure 5).
Figure 5
Select 45° Shading from the Main Toolbar. Select a Medium Shading from the Shading
Parameters Dialogue Box. Click somewhere inside the left hand side leaf of the holly, then on the right hand leaf. See the results in (Figure 6).
78
GEM-RX Engraving Software
Chapter 14 Shading
Figure 6
Ensure that the drawing is still selected i.e. is Dotty and select the Double Hatch from the
Main Toolbar.
Double Hatch Icon
You will now have the familiar Shading Parameters Dialogue Box, move the slide towards fine. Click On «OK», the Click somewhere inside the holly berries. the results should be similar to (Figure 7).
As you can see you can create many interesting effects and designs, to enhance the value of some quite ordinary items by using the unique Shading function, in your GEM-RX Engraving
Software.
79
GEM-RX Engraving Software
Chapter 15 Wizards
Wizards
Wizards
The GEM-RX Engraving Software contains a number of Wizards to assist you in completing various tasks and setups with ease.
New Device
You use this Wizard to install a new driver for a new device.
How to
1
Click On Wizards on the Main Menu Bar and select New Device.
2
You will now be able to choose any machine from the list box. You would normally choose GEM-RX 1, GEM-RX 2, GEM-RX 2 Plus, GEM-RX 3 or GEM-RX 3 Plus.
3
You now have to select the Output Device, Select «Stepper Controller», then Click On
«OK».
4
The Destination Setting will now appear, Select the Com Port you have connected your
GEM-RX Engraving Machine to, then Click On «OK».
5
Now the Machine Set-up menu will appear, these setting are correct so just Click On
«OK».
Your GEM-RX Engraving Machine is now ready for use.
Note : If you have purchased a GEM-RX Engraving Machine Ring attachment, you would load the GEM-RX 2 Plus driver. If you have not you would load the
GEM-RX 2 driver. The GEM-RX 1 does not support the Ring attachment.
Delete Device
Clicking On this will delete the selected device, the device will be removed from the device entries. If you wish to use a device that has been deselected, you will have to use the New
Device Wizard to re-install it.
81
GEM-RX Engraving Software
Chapter 16 Help Menu
Help
Help Menu
The Help Menu is accessed from the Main Menu bar, this will take you to the on screen Help files, give you details of your version of GEM-RX Engraving Software and allow you to register your copy of GEM-RX Engraving Software.
Help
Hot Key < F1 >
This takes you to the Help File table of Contents and Index, you can Click On any subject and will be guided through to the appropriate Help section.
Dongle Registration
The Dongle Registration is normally used to register additional GEM-RX Engraving Software
Packages.
Adding Extra Software Packs
To upgrade your software to the next level is easy.
1
Contact your Supplier. Ensure you have your Dongle Serial Number to hand, it is on the Dongle plugged into the USB Port on your PC.
2
Tell your supplier the Dongle Number and the software package(s) you wish to upgrade to eg. Extra Fonts.
3
Inform your Supplier of your contact details.
You will then receive a Registration Key for the package(s) you have ordered., this is normally within 24 Hrs.
To enter your new Registration Key, launch the GEM-RX Engraving Software. From the
Main Menu Bar Select «Help» , then select «Registration (see Figure 1). Now enter the 16 digit code you have been issued, this is case sensitive. Click On «OK», close the software down
then restart. Your new features are now ready to use., for more information see Page 89.
About GEM-RX Engraving Software
This gives you information on the version of GEM-RX Engraving Software you are running and brief details of the Copyright.
83
GEM-RX Engraving Software
Chapter 17Keyboard Shortcuts
Hot Keys
File Functions
New Drawing
New From Template
Open Drawing
Save Drawing
Save Drawing As
Import File
Export File
Edit Functions
Undo
Redo
Cut to Clipboard
Copy to Clipboard
Paste from Clipboard
Delete
Duplicate Single
Select All
Deselect All
Text Functions
Auto Layout
Auto Re-layout
Disk Text
Basic Text Composer
Basic Text Editor
Edit Dynamic Arc Text
Kern Text
Clear Kerning
Arrange Functions
Keyboard Hot Keys
< Ctrl > + < N >
< Ctrl > + < T >
< Ctrl > + < O >
< Ctrl > + < S >
< Ctrl > + < H >
< Ctrl > + < Shift > + < I >
< Ctrl > + < Shift > + < E >
< Ctrl > + < Z >
< Shift > + < Ctrl > + < Z >
< Ctrl > + < X >
< Ctrl > + < C >
< Ctrl > + < V >
< Del >
< Ctrl > + < Alt > + < S >
< Ctrl > + < A >
< Ctrl > + < Alt > + < D >
< Alt > + < A >
< Alt > + < R >
< Alt > + < N >
< S >
< Alt > + < S >
< Alt > + < F >
< K >
< Alt > + < K >
85
Reference Manual
Chapter 17Keyboard Shortcuts
Centre to Workspace
Horizontal Centre
Vertical Centre
Tool Functions
Workspace
Units Setup
Select Language
Toggle Language
Preferences
Production Functions
Quick Production
Produce Selected
Digitize Plate
Rotary Workpiece
Zoom Functions
Zoom Window
Zoom Last View
Zoom All
Redraw
Zoom Selected
Zoom Workspace
Zoom Machine Bed
Help Functions
Help
Super Hot Keys
Arrow Left
Arrow Right
Arrow Up
Arrow Down
Arrow Left
Arrow Right
Arrow Up
86
< Shift > + < Q >
< Shift > + < H >
< Shift > + < V >
< Alt > + < W >
< Alt > + < U >
< Shift > + < F12 >
< F12 >
< Alt > + < Y >
< Alt > + < 1 >
< Alt > + < 4 >
< Shift > + < Alt > + < 3 >
< Shift > + < Alt > + < W >
< F2 >
< F3 >
< F4 >
< F5 >
< F6 >
< F7 >
< Ctrl > + < F7 >
< F1 >
Nudge Left
Nudge Right
Nudge Up
Nudge Down
Nudge Left x 10
Nudge Right x 10
Nudge Up x 10
Arrow Down
Show Nodes
Show Direction
Zoom In !0%
Zoom In 100%
Zoom Out 10%
Zoom Out 100%
Zoom Machine Bed
GEM-RX Engraving Software
Chapter 17Keyboard Shortcuts
Nudge Down x 10
< Shift > + < F5 >
< Shift > + < F 6 >
< Shift > + < x >
< Shift > + < Z >
< X >
< Z >
< Ctrl > + < F7 >
87
GEM-RX Engraving Software
Chapter 18 Extra Software Packs
Extra Software Packs
You GEM-RX Engraving Software, can be expanded by purchasing Extra Software Packs.
GEM-RX Extra Font Pack
The GEM-RX Extra Font Pack containing 80 Extra Engraving Fonts, to add to the 20 in the original software.
GEM-RX Logo Generation Scanning and Vectorising
The GEM-RX Logo Generation, Scanning & Vectorising Software, allows you to Scan an image directly into the software, Vectorised and Engrave.
GEM-RX Freehand Tablet & Pen
Write directly into the software with a Pen on our special Tablet, your Hand Writing or
Design recreated exactly on your engraved item. Simple and easy to use !
Picture Engraving
For a full description of Picture Engraving see Page 51.
Adding Extra Software Packs
To upgrade your software to the next level is easy.
1
Contact your Supplier. Ensure you have your Dongle Serial Number to hand, it is on the Dongle plugged into the USB Port on your PC.
2
Tell your supplier the Dongle Number and the software package(s) you wish to upgrade to eg. Extra Fonts.
3
Inform your Supplier of your contact details.
You will then receive a Registration Key for the package(s) you have ordered., this is normally within 24 Hrs.
To enter your new Registration Key, launch the GEM-RX Engraving Software. From the
Main Menu Bar Select «Help» , then select «Registration (see Figure 1).
Figure 1
89
Reference Manual
Extra Software Packs
Now enter the 16 digit code you have been issued, this is case sensitive (see Figure 2).
Figure 2
Click On «OK», close the software down then restart. Your new features are now ready to use.
Note : You can receive your Registration Key by Fax or E-mail.
90
GEM-RX Engraving Software
Chapter 19 F. A. Q.
Frequently Asked Questions
How do I remove the cutter knob question
Both the brass cutter knob and the light touch work on a reverse thread, to remove turn clockwise, to put on turn anti-clockwise.
What do I do if I want to practice the engraving on the item question
Use engravers test tape with the diamond cutter and light touch. Put a three layers of tape over the item, the diamond will the mark the tape instead of your item. You can then check the accuracy of your setup and adjust if necessary.
What is the difference between the diamond cutter and the carbide cutters question
The diamonds are used primarily to scratch the surface of the material. The carbide cutters deep engraves the job, removing material from the cut, this necessary for paint infill.
Can I quit a rotary job half way through question
The machine isn’t doing what I want. What’s wrong question
When doing a rotary job if it has gone completely wrong. Press «Off-line» to pause the job, remove your cutter. Press
«Off-line» again to resume. The machine will now ghost over the surface of the material.
This is an easier method than trying to realign the workpiece.
You are sending the machine the wrong information from your computer. Press
«Home» on the controller. Check you have set the job up correctly and try again. Both the computer and GEM-RX Engraving
Machine, will only do what you the operator tell them.
When importing a bitmap there are parts I don’t want. How do I get rid of them question
Left Click On the «Ignore Groups» Icon then select the parts you do not need., then
Press «Delete» on your keyboard.
91
Reference Manual
F. A. Q.
Occasionally when doing complicated jobs, my Computer crashes and I lose my work. What do
I do question
Computers are strange beasts, too much information and they give up. When doing complex work that may take time, save the job occasionally, two seconds spent saving a job, is a lot better than repeating the work.
I cannot open a customers disc with their artwork on, Why question
Ensure that the disc is PC compatible and not Apple Mac format, to be certain ask your customer.
I have opened the customers Adobe
Illustrator file artwork, and the image is solid, and will not engrave
Why question
Your customer has saved a bitmap as an adobe illustrator file, contact your customer and tell them you need the image as a vector image, not a bitmap saved as an Adobe
Illustrator image.
I am trying to engrave a flat plate, but the machine moves to the middle and only moves backwards and forwards. What have I done
Wrong question
You have selected the Rotary Mode instead of Centre Vice, this will also be indicated by the background Machine Bed colour being
Magenta, instead of Dark Green. You need to Right Click on the Workspace, then select
«Workspace» and change the Mode to Centre
Vice.
92
GEM-RX Engraving Software
Chapter 20 Trouble Shooting
Trouble Shooting
USB to Serial Connection not working properly.
If you having problems connecting a Notebook or other PC to your GEM-RX Engraving Machine because it has no serial connection, you have to use a USB to Serial Converter. This device is plugged into a free USB Port and it creates a virtual serial port on your PC. For further information on configuration and use see your Quick Start Guide.
Sometimes my GEM-RX
Engraving Machine slows down or stops before finishing the job, especially on complicated jobs.
On your PC you should disable any screen savers and all power management. These can affect communications between your PC and your
GEM-RX Engraving Machine. If you are in doubt about how to do this, you should consult you PC
Supplier.
GEM-RX Engraving Machine runs erratically.
I only have the Standard 20
Font and have paid for the
Extra Font Pack.
You need to check that you have selected the correct voltage setting for your Country, for more information see your Quick Start Guide.
The Extra Fonts are an additional Software
Package, that has to be purchase separately. You have to enter a Code obtainable from your supplier, in the Registration Dialogue Box, within the
GEM-RX Engraving Software, for more
information see Page 83.
I Can’t access the my scanner in the GEM-RX Engraving
Software.
The Scanning and Logo Generation is an additional
Software Package, that has to be purchase separately. You have to enter a Code obtainable from your supplier, in the Registration Dialogue
Box, within the GEM-RX Engraving Software, for more information see your Quick Start Guide.
The vice is not centred in the
«X» axis.
Make sure you have loaded the correct driver for your machine, i.e. GEM-RX 1 for a GEM-RX 1,
GEM-RX 2 for a GEM-RX 2 etc. If you are in doubt you can check the model from the Serial No.
Plate, located on the back of your machine.
93
Reference Manual
Trouble Shooting
The PC will not recognise the
Security Device (Dongle).
Ensure that you have not plugged the Dongle into you PC, before you have installed the GEM-RX
Engraving Software. If you have you may be able to switch off your PC with the Dongle removed., then switch the PC back on again and replace the
Dongle in the USB Port, Windows should then be able to find the correct driver.
The Dongle or Scanner or USB to Serial Port Converter will not work when all plugged in together.
On some Computers although you may have 2 or more USB Ports, you may find that when you have some, or all of them populated certain devices plugged into them will not work. The reason for this is that although you may have a number of
Ports, they may all share the same internal power source, this will have a current limit. Modern
Scanners, USB to Serial Converters, Printers and
Dongle take their power from the USB Port, once the current limit is exceeded, they will cease to work correctly. The only solution if this occurs is to obtain a Powered Hub, these plug into the main to give extra current and are available from most
Computer Stores.
If Vismec is shut down and needs re-starting and the
GEM-RX Engraving Software is still open
If you accidentally shut Vismec down, the quickest way to re-start it is, from the GEM-RX Engraving
Software, select Production from the Main Menu
Bar, then Select Device and re-select the driver.
Vismec should then re-launch and your GEM-RX
Engraving Machine will Home, you can then use it as normal
94
GEM-RX Engraving Software
Index
Index
A
About GEM Engraving Software. . . . . . . . 83
Acquire . . . . . . . . . . . . . . . . . . . . . . . . . . . 30
Apply Button . . . . . . . . . . . . . . . . . . . . . . . 12
Arrange Menu . . . . . . . . . . . . . . . . . . . . . . 63
Centre to Workspace . . . . . . . . . . . . . . . . 63
Horizontal Centre. . . . . . . . . . . . . . . . . . . 63
Ignore Groups . . . . . . . . . . . . . . . . . . . . . 63
Vertical Centre . . . . . . . . . . . . . . . . . . . . . 63
Arrange Toolbar. . . . . . . . . . . . . . . . . . . . . 21
B
Basic Text Composer. . . . . . . . . . . . . . . . . 42
Bitmaps Menu
Toggle Bitmap . . . . . . . . . . . . . . . . . . . . . 53
Trace Bitmap . . . . . . . . . . . . . . . . . . . . . . 52
C
Cancel Button . . . . . . . . . . . . . . . . . . . . . . 12
Centre to Workspace . . . . . . . . . . . . . . . . . 63
Circular Monogram . . . . . . . . . . . . . . . . . . 49
Clear Kerning . . . . . . . . . . . . . . . . . . . . . . 48
Command Button. . . . . . . . . . . . . . . . . . . . 12
Components in GEM Engraving Software. 11
Apply Button . . . . . . . . . . . . . . . . . . . . . . 12
Cancel Button. . . . . . . . . . . . . . . . . . . . . . 12
Check Box . . . . . . . . . . . . . . . . . . . . . . . . 11
Command Button . . . . . . . . . . . . . . . . . . . 12
Cursors . . . . . . . . . . . . . . . . . . . . . . . . . . . 11
Dialogue Box . . . . . . . . . . . . . . . . . . . . . . 12
Docking Toolbars. . . . . . . . . . . . . . . . . . . 11
Drop Down Menu . . . . . . . . . . . . . . . . . . 11
Hint Bar . . . . . . . . . . . . . . . . . . . . . . . . . . 11
Main Menu Bar . . . . . . . . . . . . . . . . . . . . 11
Numeric Entry . . . . . . . . . . . . . . . . . . . . . 12
OK Button . . . . . . . . . . . . . . . . . . . . . . . . 13
Scroll Bars . . . . . . . . . . . . . . . . . . . . . . . . 11
Title Bar . . . . . . . . . . . . . . . . . . . . . . . . . . 11
Configuration Menu. . . . . . . . . . . . . . . . . . 75
Copy to Clipboard . . . . . . . . . . . . . . . . . . . 31
Cursors. . . . . . . . . . . . . . . . . . . . . . . . . . . . 11
Cut to Clipboard . . . . . . . . . . . . . . . . . . . . 31
D
Delete Device . . . . . . . . . . . . . . . . . . . . . . 81
Delete. . . . . . . . . . . . . . . . . . . . . . . . . . . . . 32
Deselect All . . . . . . . . . . . . . . . . . . . . . . . . 33
Device = xxxx . . . . . . . . . . . . . . . . . . . . . . 71
Dialogue Box. . . . . . . . . . . . . . . . . . . . . . . 12
Disk Text . . . . . . . . . . . . . . . . . . . . . . . . . . 44
Display Settings . . . . . . . . . . . . . . . . . . . . . 36
Docking Toolbars . . . . . . . . . . . . . . . . . . . 11
Dongle Registration . . . . . . . . . . . . . . . . . . 83
Draw Toolbar. . . . . . . . . . . . . . . . . . . . . . . 19
Drop Down Menu . . . . . . . . . . . . . . . . . . . 11
Duplicate Single. . . . . . . . . . . . . . . . . . . . . 32
Duplicate Workspace. . . . . . . . . . . . . . . . . 32
E
Edit Dynamic Arc Text . . . . . . . . . . . . . . . 46
Edit Menu . . . . . . . . . . . . . . . . . . . . . . . . . 31
Copy to Clipboard . . . . . . . . . . . . . . . . . . 31
Cut to Clipboard. . . . . . . . . . . . . . . . . . . . 31
Delete . . . . . . . . . . . . . . . . . . . . . . . . . . . . 32
Deselect All . . . . . . . . . . . . . . . . . . . . . . . 33
Duplicate Single. . . . . . . . . . . . . . . . . . . . 32
Duplicate Workspace . . . . . . . . . . . . . . . . 32
Paste from Clipboard . . . . . . . . . . . . . . . . 32
Redo . . . . . . . . . . . . . . . . . . . . . . . . . . . . . 31
Select All . . . . . . . . . . . . . . . . . . . . . . . . . 33
Undo. . . . . . . . . . . . . . . . . . . . . . . . . . . . . 31
Edit Toolbar. . . . . . . . . . . . . . . . . . . . . . . . 20
Engrave . . . . . . . . . . . . . . . . . . . . . . . . . . . 71
Engrave Selected Only. . . . . . . . . . . . . . . . 72
Exit . . . . . . . . . . . . . . . . . . . . . . . . . . . . . . 30
Export File . . . . . . . . . . . . . . . . . . . . . . . . . 18
Extra Software Packages . . . . . . . . . . . . . . 89
GEM Extra Font Pack . . . . . . . . . . . . . . . 89
Extra Software Packs
Add Extra Software Packs . . . . . . . . . . . 83,
89
GEM Feehand Tablet and Pen . . . . . . . . . 89
GEM Logo Generation, Vectorisation and
Scanning. . . . . . . . . . . . . . . . . . . . . . . . . . 89
F
File Menu
Acquire . . . . . . . . . . . . . . . . . . . . . . . . . . . 30
Exit . . . . . . . . . . . . . . . . . . . . . . . . . . . . . . 30
Export. . . . . . . . . . . . . . . . . . . . . . . . . . . . 29
New Drawing . . . . . . . . . . . . . . . . . . . . . . 27
New From Template . . . . . . . . . . . . . . . . 27
Save As. . . . . . . . . . . . . . . . . . . . . . . . . . . 28
Save Drawing . . . . . . . . . . . . . . . . . . . . . . 28
Save Setup Drawing. . . . . . . . . . . . . . . . . 29
Select Source . . . . . . . . . . . . . . . . . . . . . . 30
File Toolbar . . . . . . . . . . . . . . . . . . . . . . . . 17
New Drawing . . . . . . . . . . . . . . . . . . . . . . 17
95
Reference Manual
Index
Open Drawing . . . . . . . . . . . . . . . . . . . . . 17
Save As. . . . . . . . . . . . . . . . . . . . . . . . . . . 18
Save Drawing . . . . . . . . . . . . . . . . . . . . . . 17
Frequently Asked Questions . . . . . . . . . . . 91
G
Getting Started . . . . . . . . . . . . . . . . . . . . . . 11
H
I
Help . . . . . . . . . . . . . . . . . . . . . . . . . . . . . . 83
Dongle Registration . . . . . . . . . . . . . . . . . 83
Help Menu . . . . . . . . . . . . . . . . . . . . . . . . . 83
About GEM Engraving Software . . . . . . 83
Help . . . . . . . . . . . . . . . . . . . . . . . . . . . . . 83
Hint Bar . . . . . . . . . . . . . . . . . . . . . . . . . . . 11
Horizontal Centre. . . . . . . . . . . . . . . . . . . . 63
How to
Acquire . . . . . . . . . . . . . . . . . . . . . . . . . . . 52
Edit Bitmap . . . . . . . . . . . . . . . . . . . . . . . 52
Insert Bitmap . . . . . . . . . . . . . . . . . . . . . . 52
Scale . . . . . . . . . . . . . . . . . . . . . . . . . . . . . 59
Stretch Dynamic. . . . . . . . . . . . . . . . . . . . 60
How to’s. . . . . . . . . . . . . . . . . . . . . . . . . . . . 1
Ignore Groups . . . . . . . . . . . . . . . . . . . . . . 63
Import File . . . . . . . . . . . . . . . . . . . . . . . . . 18
Insert a Bitmap. . . . . . . . . . . . . . . . . . . . . . 52
Introduction . . . . . . . . . . . . . . . . . . . . . . . . . 1
K
Kern Text. . . . . . . . . . . . . . . . . . . . . . . . . . 47
Keyboard Hot Keys . . . . . . . . . . . . . . . . . . 85
L
License Agreement . . . . . . . . . . . . . . . . . . . 2
M
Machine Parameters. . . . . . . . . . . . . . . . . . 75
Machine Setup . . . . . . . . . . . . . . . . . . . . . . 75
Main Menu Bar . . . . . . . . . . . . . . . . . . . . . 11
Measure Circle 3 Points . . . . . . . . . . . . . . . 74
Measure Circle Centre/Point . . . . . . . . . . . 74
Measure Plate . . . . . . . . . . . . . . . . . . . . . . 73
Move Dynamic . . . . . . . . . . . . . . . . . . . . . 24,
59
N
New Device . . . . . . . . . . . . . . . . . . . . . . . . 81
New Drawing. . . . . . . . . . . . . . . . . . . . . . . 17
Numeric Entry . . . . . . . . . . . . . . . . . . . . . . 12
O
OK Button . . . . . . . . . . . . . . . . . . . . . . . . . 13
Open Drawing . . . . . . . . . . . . . . . . . . . . . . 17
P
Paste from Clipboard . . . . . . . . . . . . . . . . . 32
Production Menu . . . . . . . . . . . . . . . . . . . . 71
Configuration Menu. . . . . . . . . . . . . . . . . 75
Device = xxx . . . . . . . . . . . . . . . . . . . . . . 71
Engrave . . . . . . . . . . . . . . . . . . . . . . . . . . 71
Engrave Selected Only. . . . . . . . . . . . . . . 72
Measure Circle 3 Point. . . . . . . . . . . . . . . 74
Measure Circle Centre/Point . . . . . . . . . . 74
Measure Plate . . . . . . . . . . . . . . . . . . . . . . 73
Read Reference Position . . . . . . . . . . . . . 73
Production Toolbar . . . . . . . . . . . . . . . . . . 22
R
Read Reference Position . . . . . . . . . . . . . . 73
Redo. . . . . . . . . . . . . . . . . . . . . . . . . . . . . . 31
Redraw. . . . . . . . . . . . . . . . . . . . . . . . . . . . 36
Resize . . . . . . . . . . . . . . . . . . . . . . . . . . . . 59
Rotate Dynamic . . . . . . . . . . . . . . . . . . . . . 60
S
Save As . . . . . . . . . . . . . . . . . . . . . . . . . . . 18
Save Drawing . . . . . . . . . . . . . . . . . . . . . . 17
Save Setup Drawing . . . . . . . . . . . . . . . . . 29
Scaling Dynamic . . . . . . . . . . . . . . . . . . . . 59
Scroll Bars . . . . . . . . . . . . . . . . . . . . . . . . . 11
Select All . . . . . . . . . . . . . . . . . . . . . . . . . . 33
Select Source . . . . . . . . . . . . . . . . . . . . . . . 30
Select Toolbar
Deselect icon . . . . . . . . . . . . . . . . . . . . . . 21
Select All icon . . . . . . . . . . . . . . . . . . . . . 21
Shading . . . . . . . . . . . . . . . . . . . . . . . . . . . 77
Shading Toolbar. . . . . . . . . . . . . . . . . . . . . 23
T
Terminology . . . . . . . . . . . . . . . . . . . . . . . 15
Text Menu . . . . . . . . . . . . . . . . . . . . . . . . . 37
Auto Layout . . . . . . . . . . . . . . . . . . . . . . . 37
Auto Re-layout. . . . . . . . . . . . . . . . . . . . . 41
Basic Text Composer . . . . . . . . . . . . . . . . 42
Disk Text . . . . . . . . . . . . . . . . . . . . . . . . . 44
96
GEM-RX Engraving Software
Index
Edit Dynamic Arc Text . . . . . . . . . . . . . . 46
Title Bar. . . . . . . . . . . . . . . . . . . . . . . . . . . 11
Toggle Bitmap . . . . . . . . . . . . . . . . . . . . . . 53
Tool Menu
Units Setup . . . . . . . . . . . . . . . . . . . . . . . . 67
Workspace Setup . . . . . . . . . . . . . . . . . . . 65
Toolbars . . . . . . . . . . . . . . . . . . . . . . . . . . . 35
Arrange Toolbar. . . . . . . . . . . . . . . . . . . . 21
Draw Toolbar . . . . . . . . . . . . . . . . . . . . . . 19
Edit Toolbar . . . . . . . . . . . . . . . . . . . . . . . 20
File . . . . . . . . . . . . . . . . . . . . . . . . . . . . . . 17
Production Toolbar . . . . . . . . . . . . . . . . . 22
Shading Toolbar. . . . . . . . . . . . . . . . . . . . 23
Transform. . . . . . . . . . . . . . . . . . . . . . . . . 24
Zoom . . . . . . . . . . . . . . . . . . . . . . . . . . . . 23
Toolbars Overview . . . . . . . . . . . . . . . . . . 17
Tools Menu . . . . . . . . . . . . . . . . . . . . . . . . 65
Trace Bitmap . . . . . . . . . . . . . . . . . . . . . . . 52
Transform Menu . . . . . . . . . . . . . . . . . . . . 59
Move Dynamic. . . . . . . . . . . . . . . . . . . . . 59
Resize . . . . . . . . . . . . . . . . . . . . . . . . . . . . 59
Transform Toolbar. . . . . . . . . . . . . . . . . . . 24
Stretch
Dynamic . . . . . . . . . . . . . . . . . . . . . . 60
U
Undo . . . . . . . . . . . . . . . . . . . . . . . . . . . . . 31
Units Setup . . . . . . . . . . . . . . . . . . . . . . . . 67
V
Veiw Menu
Kern Text . . . . . . . . . . . . . . . . . . . . . . . . . 47
Zoom Selected Objects . . . . . . . . . . . . . . 36
Zoom Workspace . . . . . . . . . . . . . . . . . . . 36
Vertical Centre. . . . . . . . . . . . . . . . . . . . . . 63
View Menu
Circular Mongram . . . . . . . . . . . . . . . . . . 49
Clear Kerning . . . . . . . . . . . . . . . . . . . . . . 48
Display Settings . . . . . . . . . . . . . . . . . . . . 36
Redraw . . . . . . . . . . . . . . . . . . . . . . . . . . . 36
Toolbars . . . . . . . . . . . . . . . . . . . . . . . . . . 35
Zoom All . . . . . . . . . . . . . . . . . . . . . . . . . 35
Zoom Last View. . . . . . . . . . . . . . . . . . . . 35
Zoom Machine Bed . . . . . . . . . . . . . . . . . 36
Zoom Window . . . . . . . . . . . . . . . . . . . . . 35
W
Wizards . . . . . . . . . . . . . . . . . . . . . . . . . . . 81
Delete Device . . . . . . . . . . . . . . . . . . . . . . 81
New Device . . . . . . . . . . . . . . . . . . . . . . . 81
Workspace Setup . . . . . . . . . . . . . . . . . . . . 65
Z
Zoom All . . . . . . . . . . . . . . . . . . . . . . . . . . 35
Zoom Last View . . . . . . . . . . . . . . . . . . . . 35
Zoom Machine Bed . . . . . . . . . . . . . . . . . . 36
Zoom Selected Objects . . . . . . . . . . . . . . . 36
Zoom Toolbar . . . . . . . . . . . . . . . . . . . . . . 23
Zoom Window . . . . . . . . . . . . . . . . . . . . . . 35
Zoom Workspace. . . . . . . . . . . . . . . . . . . . 36
97
►
U-marq gem-rx5 , крик о помощи)))))
|
magahas
Пользователь
Сообщений: 51 |
Добавлено: 20.02.2013 10:40:14
Взяли аппарат, программное обеспечение на английском(с которым у нас в мастерской у всех проблемы))). Надписи кое как освоили(совершенно случайно, методом тыка). А вот с гравированием рисунков проблемы, рисунок принципе как наносить знаем, но вот как его обработать (что бы убрать задний фон, обработка в других программах и все что связано с этим).В идеале конечно же хотелось бы узнать как софт перевести на русский язык и получить консультации по работе с аппаратом, но согласны и на любую посильную помощь Я не волшебник, я пока еще только учусь |
||||||
|
Аксессуары и расходники ЦЕНА НАСТОЛЬНОГО ГРАВИРОВАЛЬНОГО СТАНКА GEM Rx5 — 485 000 руб (полная комплектация)
Тел.: (499) 963-31-58 E-mail gravbiz(at)mail.ru |

|
magahas
Пользователь
Сообщений: 51 |
Добавлено: 20.02.2013 10:40:14
Взяли аппарат, программное обеспечение на английском(с которым у нас в мастерской у всех проблемы))). Надписи кое как освоили(совершенно случайно, методом тыка). А вот с гравированием рисунков проблемы, рисунок принципе как наносить знаем, но вот как его обработать (что бы убрать задний фон, обработка в других программах и все что связано с этим).В идеале конечно же хотелось бы узнать как софт перевести на русский язык и получить консультации по работе с аппаратом, но согласны и на любую посильную помощь Я не волшебник, я пока еще только учусь |
|
|
|
ilmar 
Пользователь Сообщений: 177 |
Добавлено: 20.02.2013 21:20:22 magahas, http://depositfiles.com/files/huc31bhku Немного пользы от RX-4 будет думаю они одинаково работают и если так разница маленькая Изменено: |
|
|
|
magahas
Пользователь
Сообщений: 51 |
Добавлено: 21.02.2013 09:46:25 Спасибо ilmar , уже кое что нашел в том что вы отправили. А сам работаешь на аппарате? Я не волшебник, я пока еще только учусь |
|
|
|
ilmar
Пользователь Сообщений: 177 |
Добавлено: 21.02.2013 19:27:54 рад помочь. да уже несколько лет, нормальный аппарат |
|
|
|
lorka 
Пользователь
Сообщений: 365 |
Добавлено: 21.02.2013 20:24:34 magahas, |
|
|
|
ps_var
Пользователь
Сообщений: 728 |
Добавлено: 22.02.2013 21:50:51 мне больше нравится корел,рисую вектор в кореле потом закидываю на гравировку режу алм. фрезой без вражения получается грань. люстру.корел,ну фотошоп знать нужно (хоть поверхностно) ссылка удалена |
|
|
|
ilmar
Пользователь Сообщений: 177 |
Добавлено: 23.02.2013 16:50:08
да Corel хорош для векторграфики, а так рисовать и в Рино можно и сохранить как AI файлы |
||||
|
Offline
ЛС |
|
|
ювелир12345
Пользователь Сообщений: 362 |
Добавлено: 23.02.2013 22:24:37 у мя тож такой аппарат, если есть конкретные вопросы пиши, рисую обычно в адобе и жабе либо ,что чаще бывает сдёрнул с инета нужный вектор и награвил. Изменено: Никакой ветер не будет попутным, если не знаешь куда плыть |
|
|
|
vitjek
Пользователь
Сообщений: 1 |
Добавлено: 25.11.2013 15:35:49
помогите найти программу на русском |
||||
|
Offline
ЛС |
|
|
ювелир12345
Пользователь Сообщений: 362 |
Добавлено: 26.11.2013 10:23:06 vitjek, Изменено: Никакой ветер не будет попутным, если не знаешь куда плыть |
|
|
|
Gniko 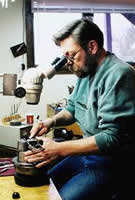
Пользователь
Сообщений: 49 |
Добавлено: 25.04.2014 23:27:49
Уже не раз слышу отрицательные отзывы на плохое программное обеспечение оборудования GEM RX 5 и отсутствия русского интерфейса. GEM RX 5 многие функции отсутствуют , что составляет определенные сложности в ювелирном деле. Может кто посоветует , какой все таки выбрать аппарат? за ранее благодарен за совет … http://www.metaza-zagotovki.ru/ru/oborudovanie-dlya-gravirovki/379-u-marq-gem-rx5-gravirovalnyi-stanok-chpu Изменено: Ювелир — моя профессия ! |
||||
|
Offline
ЛС |
|
 Конечно в полной комплектации цена кусается…
|
ps_var
Пользователь
Сообщений: 728 |
Добавлено: 26.04.2014 06:36:14 Работаю на Джеме 2 года проблем нет. Десяток терминов на англиском переведи с помощью гугла и запомни. Пост от гравбиза это рекламный ход их манагеров по продажам ( читать впариванию) китайско-корейского чуда под названием Магик 5-7. Кто понимает тот восковки режет на Стриже или Роланде ссылка удалена |
|
|
|
ювелир12345
Пользователь Сообщений: 362 |
Добавлено: 26.04.2014 14:08:36
Воистину золотые слова! Видимо совсем дела у Magic7 плохи, раз таким образом не стесняясь»заплевывая конкуретна «наводят себе рекламу. Изменено: Никакой ветер не будет попутным, если не знаешь куда плыть |
||||
|
Offline
ЛС |
|
|
Gniko
Пользователь
Сообщений: 49 |
Добавлено: 27.04.2014 00:04:44
Уважаемый PS-VAR, огромное спасибо за совет. Буду иметь ввиду , что для нормальной работы помимо U-marq gem-rx5 — необходимо еще докупать оборудование Стриж или Роланд… Ювелир — моя профессия ! |
||||||
|
Offline
ЛС |
|
|
ps_var
Пользователь
Сообщений: 728 |
Добавлено: 27.04.2014 06:18:59 Гравбиз вы в никах не запутались? или у вас есть какая то система? Сам того не желая я оживляю темы давно забытые с вашим участием……… не буду больше. Надеюсь всем понятно что в подписи у вас должно быть «МОЯ ПРОФФЕСИЯ -МАНАГЕР(ПРОДОВАН)» ссылка удалена |
|
|
|
Gniko
Пользователь
Сообщений: 49 |
Добавлено: 27.04.2014 14:34:13
По всей видимости PS-VAR, это интересная идея Остается к этой идеи подобрать стоящее оборудование, которое Вы посоветовали MAGIC 7 , прикрутить приставку «МАНАГЕР»(ПРОДОВАН) и в путь стричь бабло… Спасибо, Вы профи!!! Ювелир — моя профессия ! |
||||
|
Offline
ЛС |
|
 , то …
 — это я так образно
|
Faza
Пользователь
Сообщений: 75 |
Добавлено: 25.06.2014 18:27:58 В отличие от гравировальным станков с мотором
|
|
|
|
Gniko
Пользователь
Сообщений: 49 |
Добавлено: 25.06.2014 18:37:31
Вы вроде и штихелем хорошо справляетесь и термины переводите — мечта любого работодателя! Стриж только для воска, Роланд — дорогие Какой выбрать настольный гравировальный станок Roland EGX350 MAGIC F300 GEM FX5 А на Magic Можно много чего делать и ничего докупать не надо!
Ювелир — моя профессия ! |
||||
|
Offline
ЛС |
|
|
tof71 
Пользователь Сообщений: 2179 |
Добавлено: 28.06.2014 00:31:36
Лично сам подобными станками не пользовался и знаний не имею но вот парадокс — неделю назад пришёл знакомый мальчик который получил на стороне малый курс знаний по ювелирке типа обручалку выполнить или бисмарк и вообщем он у меня спросил то на что я не смог ответить |
||||
|
Offline
ЛС |
|
 Вопрос его был примерно таким » Я( он) не владеет компьютером но хочет купить что-то типа МАГИК — 7 и спросил сможет-ли он его освоить ??? без знаний и владения компом ? с чего начать и как ему быть ??? » — я ему не смог дать разумного ответа и спустя час задал себе такой-же вопрос — » А как быть и как поступить если я тоже хочу купить МАГИК-7 но компьютером не владею ??? тыркать одним пальцем в клаву умею и это не в счёт . ДАЙТЕ разумный совет какие есть варианты в таком случае если иметь магик-7 и самостоятельно использовать его очень охота а компа не знаю
 |
danila master
Пользователь Сообщений: 710 |
Добавлено: 28.06.2014 00:45:07 tof71, |
|
|
GEM-RX Engraving Software
Chapter 1Introduction
GEM-RX Reference Manual
Introduction
Thank you for choosing a GEM-RX GIFT ENGRAVER. The accompanying software has been designed to work under Windows XP and Vista, with total ease of use in mind.
Using This Reference Manual
This Reference Manual can be used in conjunction with the Tutorial Manual supplied with your machine. It is laid out in Chapters that as far as possible mimic the GEM-RX Engraving
Software’s Main Menu Bar, i.e. starting with the Files Menu and progressing through to the
Help Menu, with detailed explanations on each.
How to’s
In each Chapter you will find How to topics, these are more detailed descriptions of specific functions and usually involve some interactivity on your part, to complete a task. How to’s are probably the quickest way to become proficient using a specific function, but also teach you to incorporate things like < Hot Keys > which also interact with other functions.
Note : A full list of the How to’s with locations are in the Index.
Thanks and Good Luck !!!
From the GEM-RX and U-MARQ Development Team.
U-MARQ Ltd. 20 Darin Court, Crownhill Industrial, Milton Keynes, MK8 0AD, England.
www.u-marq.com
Important : Read this before using your copy of the U-MARQ GEM Engraving Software.
1
Reference Manual
Chapter 1Introduction
U-MARQ Ltd Software License Agreement.
This document is a legal agreement between you (an individual or business) and U-MARQ
Ltd. Use of the software indicates your acceptance of these terms. As used in this License
Agreement, the term «Software» means the software included on the CD or disk media provided with this License Agreement. The term «Software» does not include any software that is covered by a separate license offered or granted by a person other than U-MARQ Ltd.
IF YOU DO NOT AGREE TO THESE TERMS AND CONDITIONS, EITHER
DESTROY OR RETURN, INTACT, THE SOFTWARE PACKAGE, CONTAINING
THE CD OR DISK MEDIA, TOGETHER WITH THE OTHER COMPONENTS OF
THE PRODUCT TO THE PLACE OF PURCHASE FOR A REFUND OF THE
PURCHASE PRICE.
1. PROPRIETARY RIGHTS. The Software and any accompanying documentation are the proprietary products of U-MARQ Ltd., or its licensors and are protected under national laws and international treaty provisions. Ownership of the Software and all copies, modifications, translations, and merged portions thereof shall at all times remain with U-MARQ or its licensors.
2. GRANT OF LICENSE. The Software and accompanying documentation are being licensed to you, which means you have the right to use the Software only in accordance with this License Agreement. The Software is considered in use on a computer when it is loaded into temporary memory or installed into permanent memory. This License may not be assigned or otherwise transferred without prior written consent from U-MARQ Ltd., and any unauthorized transfer is null and void.
The end user is authorized to use ONLY a single copy of the Software on the number of computers for which they have purchased a license as indicated on the license agreement
(copies are on the CD and in all manuals). Each permitted copy of the Software may be used only in connection with a single computer owned or leased by the end user. If the Software is made available on a network, it may be accessed only by ONE specific computer. Once the
Software has been accessed by ONE specific computer it may not be used on any additional computers without purchasing additional licenses. The software may not be sold in separate parts or broken up in any way for sale by any party, without the express permission in writing of U-MARQ Ltd. All U-MARQ Ltd products that are sold with bundled software, the software may not be sold in separate parts or broken up in any way for sale by any party, without the express permission in writing of U-MARQ Ltd. All copies of the Software must include the copyright, trademark, and patent notices.
BACKUP COPY. In addition to any copies authorized under this license agreement, you may make a single copy of the Software solely for backup purposes.
2
GEM-RX Engraving Software
Chapter 1 Introduction
UPDATES AND SUPPORT. You are entitled to receive technical support as outlined in the
Software documentation. You are entitled to receive Software updates (updates shall include any patches or bug fixes that U-MARQ Ltd. makes generally available in accordance with
U-MARQ Ltd., policies as announced from time to time on terms comparable to those offered to other users of the Software under similar licenses.
TERM. This license is effective from your date of purchase and shall remain in force until terminated. You may terminate the license and this License Agreement at any time by destroying the Software and the accompanying documentation, together with all copies in any form.
3. NON PERMITTED USES. Without the express prior written permission of U-MARQ
Ltd., you may not (a) use, copy, modify, alter or transfer, electronically or otherwise, the
Software or documentation except as expressly permitted in this License Agreement, or (b) translate, reverse program, disassemble, decompile, or otherwise reverse engineer the
Software.
4. EXPORT CONTROLS. Certain uses of the Software by you may be subject to restrictions under UK. regulations relating to exports and ultimate end uses of computer software. You agree to fully comply with all applicable UK. laws and regulations, including but not limited to the Export Administration Act of 1979 as amended from time to time and any regulations promulgated thereunder.
5. LIMITED WARRANTY. (a) U-MARQ Ltd., warrants to you, the original end user, (I) that the Software, other than third-party software, will perform substantially in accordance with the accompanying documentation and (ii) that the Software is properly recorded on the disk media. This Limited Warranty extends for ninety (90) days from the date of purchase.
U-MARQ Ltd., does not warrant any third-party software that is provided with the Software, but U-MARQ Ltd., agrees to pass on to you any warranties of the owner or licensor to the extent permitted by the owner or licensor.
(b) This Limited Warranty does not apply to any Software that has been altered, damaged, abused, mis-applied, or used other than in accordance with this license and any instructions included on the Software and the accompanying documentation.
©) U-MARQ Ltd., entire liability and your exclusive remedy under this Limited Warranty shall be the repair or replacement of any Software that fails to conform to this Limited Warranty or, at U-MARQ Ltd., option, return of the price paid for the Software. U-MARQ Ltd., shall have no liability under this Limited Warranty unless the Software is returned to U-MARQ
Ltd., or its authorized representative, with a copy of your receipt, within the warranty period.
Any replacement Software will be warranted for the remainder of the original warranty period or 30 days, whichever is longer.
3
Reference Manual
Chapter 1 Introduction
(d) THIS WARRANTY IS IN LIEU OF AND EXCLUDES ALL OTHER WARRANTIES
NOT EXPRESSLY SET FORTH HEREIN, WHETHER EXPRESS OR IMPLIED,
INCLUDING BUT NOT LIMITED TO ANY WARRANTIES OF
MERCHANTABILITY, FITNESS FOR A PARTICULAR PURPOSE,
NON-INFRINGEMENT, OR WARRANTIES ARISING FROM USAGE OF TRADE
OR COURSE OF DEALING.
(e) THIS WARRANTY GIVES YOU SPECIFIC LEGAL RIGHTS : YOU MAY HAVE
OTHERS WHICH VARY FROM COUNTRY TO COUNTRY.
6. LIMITATION OF LIABILITY. IN NO EVENT SHALL U-MARQ Ltd’S LIABILITY
RELATED TO ANY OF THE SOFTWARE EXCEED THE LICENSE FEES
ACTUALLY PAID BY YOU FOR THE SOFTWARE. EXCEPT FOR A RETURN OF
THE PURCHASE PRICE UNDER THE CIRCUMSTANCES PROVIDED UNDER THE
LIMITED WARRANTY, NEITHER U-MARQ Ltd., NOR ITS SUPPLIERS SHALL IN
ANY EVENT BE LIABLE FOR ANY DAMAGES WHATSOEVER ARISING OUT OF
OR RELATED TO THE USE OF OR INABILITY TO USE THE SOFTWARE,
INCLUDING BUT NOT LIMITED TO DIRECT, INDIRECT, SPECIAL,
INCIDENTAL, OR CONSEQUENTIAL DAMAGES, AND DAMAGES FOR LOSS OF
BUSINESS PROFITS, BUSINESS INTERRUPTION, LOSS OF BUSINESS
INFORMATION, OR OTHER PECUNIARY LOSS, EVEN IF U-MARQ Ltd., HAS
BEEN ADVISED OF THE POSSIBILITY OF SUCH DAMAGES, WHETHER SUCH
LIABILITY IS BASED ON CONTRACT, TORT, WARRANTY, OR ANY OTHER
LEGAL OR EQUITABLE GROUNDS. BECAUSE SOME STATES DO NOT ALLOW
THE EXCLUSION OR LIMITATION OF LIABILITY FOR CONSEQUENTIAL OR
INCIDENTAL DAMAGES, THE ABOVE LIMITATION MAY NOT APPLY TO YOU.
7. NO WAIVER. Any failure by either party to this agreement to enforce a specific part of the agreement in a specific situation is not a waiver of rights under the agreement. The party may still enforce the rest of the agreement in that situation and may still enforce some or all of the agreement in other situations.
Copyright 2000 — 2009 U-MARQ Ltd. All rights reserved. The Software may be protected by
UK. patents, with other patents pending in the UK. and elsewhere. GEM-CX and GEM-CX
Engraving Software., are the registered trademark of U-MARQ Ltd.
Copyright
Copyright 2000 — 2009 U-MARQ Ltd.
All rights reserved, no part of this publication may be reproduced, rewritten, stored in a computer system, other than with this installation of Gem Engraving Software, or translated to any language, including data language, in any way, without prior, written permission from
4
GEM-RX Engraving Software
Chapter 1 Introduction
U-MARQ Ltd. U-MARQ Ltd., provides this publication «as is», without warranty of any kind, either express or implied, including but not limited to, the implied warranties of merchantability or fitness for a particular purpose. Further, U-MARQ Ltd., reserves the right to revise this publication and to make changes from time to time to the content hereof without obligation of Gem Engraving Software., to notify any person of such revision or changes. The specifications of the software may change from time to time. Occasionally changes or variations exist in the software that are not reflected in the manual. Be sure to read any release note or README file on the program disk before using the product. U-MARQ,
Gem and its logo are registered trademarks of U-MARQ Ltd. Ventura Publisher, Adobe
Illustrator, Windows, AutoCAD, and CorelDRAW are registered trademarks of their holders.
First edition, January 2000, first revision December 2006, second revision September 2007, third revision January 2009
5
6
Reference Manual
Table of Contents
Table of Contents
GEM-RX Reference Manual
Chapter 1 Introduction 1
Using This Reference Manual . . . . . . . . . . . . . . . . . . . . . . 1
Chapter 2 Getting Started 11
Components in GEM-RX Engraving Software . . . . . . . . . . . . 11
Main Menu Bar . . . . . . . . . . . . . . . . . . . . . . . . . . . . 11
Chapter 3 Terminology 15
Click On . . . . . . . . . . . . . . . . . . . . . . . . . . . . . . . . 15
Drag . . . . . . . . . . . . . . . . . . . . . . . . . . . . . . . . . . 15
Dotty Appearance . . . . . . . . . . . . . . . . . . . . . . . . . . . 15
Double Click On . . . . . . . . . . . . . . . . . . . . . . . . . . . . 15
File Names . . . . . . . . . . . . . . . . . . . . . . . . . . . . . . . 15
Hot Keys . . . . . . . . . . . . . . . . . . . . . . . . . . . . . . . . 15
Kerning. . . . . . . . . . . . . . . . . . . . . . . . . . . . . . . . . 15
Mouse . . . . . . . . . . . . . . . . . . . . . . . . . . . . . . . . . 16
Marquee Box . . . . . . . . . . . . . . . . . . . . . . . . . . . . . . 16
Select. . . . . . . . . . . . . . . . . . . . . . . . . . . . . . . . . . 16
Type Face . . . . . . . . . . . . . . . . . . . . . . . . . . . . . . . 16
Workspace . . . . . . . . . . . . . . . . . . . . . . . . . . . . . . . 16
Windows Clipboard . . . . . . . . . . . . . . . . . . . . . . . . . . 16
Chapter 4 Toolbars 17
Toolbars Overview . . . . . . . . . . . . . . . . . . . . . . . . . . . 17
File Toolbar . . . . . . . . . . . . . . . . . . . . . . . . . . . . . . 17
Text Toolbar . . . . . . . . . . . . . . . . . . . . . . . . . . . . . . 19
Edit Toolbar . . . . . . . . . . . . . . . . . . . . . . . . . . . . . . 20
Arrange Toolbar . . . . . . . . . . . . . . . . . . . . . . . . . . . . 21
Production Toolbar. . . . . . . . . . . . . . . . . . . . . . . . . . . 22
Shading Toolbar . . . . . . . . . . . . . . . . . . . . . . . . . . . . 23
Zoom Toolbar . . . . . . . . . . . . . . . . . . . . . . . . . . . . . 23
Transform Toolbar . . . . . . . . . . . . . . . . . . . . . . . . . . . 24
Chapter 5 File Functions 27
Reference Manual
Table of Contents
File Menu . . . . . . . . . . . . . . . . . . . . . . . . . . . . . . . 27
New Drawing . . . . . . . . . . . . . . . . . . . . . . . . . . . . . 27
New From Template . . . . . . . . . . . . . . . . . . . . . . . . . . 27
Open . . . . . . . . . . . . . . . . . . . . . . . . . . . . . . . . . . 27
Save Drawing . . . . . . . . . . . . . . . . . . . . . . . . . . . . . 28
Save As. . . . . . . . . . . . . . . . . . . . . . . . . . . . . . . . . 28
Save Setup Drawing . . . . . . . . . . . . . . . . . . . . . . . . . . 29
Import . . . . . . . . . . . . . . . . . . . . . . . . . . . . . . . . . 29
Export . . . . . . . . . . . . . . . . . . . . . . . . . . . . . . . . . 29
Supported File Formats . . . . . . . . . . . . . . . . . . . . . . . . 29
Select Source . . . . . . . . . . . . . . . . . . . . . . . . . . . . . . 30
Acquire. . . . . . . . . . . . . . . . . . . . . . . . . . . . . . . . . 30
Exit . . . . . . . . . . . . . . . . . . . . . . . . . . . . . . . . . . . 30
Chapter 6 Edit Menu 31
Edit Menu . . . . . . . . . . . . . . . . . . . . . . . . . . . . . . . 31
Undo . . . . . . . . . . . . . . . . . . . . . . . . . . . . . . . . . . 31
Redo . . . . . . . . . . . . . . . . . . . . . . . . . . . . . . . . . . 31
Cut to Clipboard . . . . . . . . . . . . . . . . . . . . . . . . . . . . 31
Copy to Clipboard . . . . . . . . . . . . . . . . . . . . . . . . . . . 31
Paste from Clipboard. . . . . . . . . . . . . . . . . . . . . . . . . . 32
Delete . . . . . . . . . . . . . . . . . . . . . . . . . . . . . . . . . 32
Duplicate Workspace . . . . . . . . . . . . . . . . . . . . . . . . . 32
Select All. . . . . . . . . . . . . . . . . . . . . . . . . . . . . . . . 33
Deselect All . . . . . . . . . . . . . . . . . . . . . . . . . . . . . . 33
Chapter 7 View Functions 35
View Menu. . . . . . . . . . . . . . . . . . . . . . . . . . . . . . . 35
Toolbars . . . . . . . . . . . . . . . . . . . . . . . . . . . . . . . . 35
Display Settings . . . . . . . . . . . . . . . . . . . . . . . . . . . . 36
Chapter 8 Text Functions 37
Text Menu . . . . . . . . . . . . . . . . . . . . . . . . . . . . . . . 37
Auto Layout . . . . . . . . . . . . . . . . . . . . . . . . . . . . . . 37
Auto Re-layout . . . . . . . . . . . . . . . . . . . . . . . . . . . . . 41
Basic Text Composer . . . . . . . . . . . . . . . . . . . . . . . . . 42
Disk Text . . . . . . . . . . . . . . . . . . . . . . . . . . . . . . . . 44
Edit Dynamic Arc Text . . . . . . . . . . . . . . . . . . . . . . . . 46
7
Reference Manual
Table of Contents
Kern Text . . . . . . . . . . . . . . . . . . . . . . . . . . . . . . . 47
Clear Kerning . . . . . . . . . . . . . . . . . . . . . . . . . . . . . 48
Circular Monogram . . . . . . . . . . . . . . . . . . . . . . . . . . 49
Chapter 9 Bitmap Function 51
Bitmap Menu. . . . . . . . . . . . . . . . . . . . . . . . . . . . . . 51
Picture Parameters . . . . . . . . . . . . . . . . . . . . . . . . . . . 53
Chapter 10 Transform Functions 59
Transform Menu . . . . . . . . . . . . . . . . . . . . . . . . . . . . 59
Resize . . . . . . . . . . . . . . . . . . . . . . . . . . . . . . . . . 59
Chapter 11 Arrange Function 63
Arrange Menu . . . . . . . . . . . . . . . . . . . . . . . . . . . . . 63
Centre to Workspace . . . . . . . . . . . . . . . . . . . . . . . . . . 63
Horizontal Centre . . . . . . . . . . . . . . . . . . . . . . . . . . . 63
Vertical Centre . . . . . . . . . . . . . . . . . . . . . . . . . . . . . 63
Ignore Groups . . . . . . . . . . . . . . . . . . . . . . . . . . . . . 63
Chapter 12 Tool Functions 65
Tools Menu . . . . . . . . . . . . . . . . . . . . . . . . . . . . . . 65
Workspace Setup. . . . . . . . . . . . . . . . . . . . . . . . . . . . 65
Units Setup . . . . . . . . . . . . . . . . . . . . . . . . . . . . . . . 67
Select Language. . . . . . . . . . . . . . . . . . . . . . . . . . . . . 67
Toggle Language. . . . . . . . . . . . . . . . . . . . . . . . . . . . 67
Preferences . . . . . . . . . . . . . . . . . . . . . . . . . . . . . . . 68
Chapter 13 Production Functions 71
Production Menu . . . . . . . . . . . . . . . . . . . . . . . . . . . . 71
Device = xxxx . . . . . . . . . . . . . . . . . . . . . . . . . . . . . 71
Engrave . . . . . . . . . . . . . . . . . . . . . . . . . . . . . . . . 71
Engrave Selected Only . . . . . . . . . . . . . . . . . . . . . . . . . 72
Measure Plate . . . . . . . . . . . . . . . . . . . . . . . . . . . . . 73
Read Reference Position . . . . . . . . . . . . . . . . . . . . . . . . 73
Measure Circle Centre/Point . . . . . . . . . . . . . . . . . . . . . . 74
Measure Circle 3 Points . . . . . . . . . . . . . . . . . . . . . . . . 74
Configuration Menu . . . . . . . . . . . . . . . . . . . . . . . . . . 75
Machine Setup . . . . . . . . . . . . . . . . . . . . . . . . . . . . . 75
Machine Parameters . . . . . . . . . . . . . . . . . . . . . . . . . . 75
8
Reference Manual
Table of Contents
Chapter 14 Shading 77
Chapter 15 Wizards 81
Wizards . . . . . . . . . . . . . . . . . . . . . . . . . . . . . . . . 81
Chapter 16 Help 83
Help Menu . . . . . . . . . . . . . . . . . . . . . . . . . . . . . . . 83
Help . . . . . . . . . . . . . . . . . . . . . . . . . . . . . . . . . . 83
Dongle Registration . . . . . . . . . . . . . . . . . . . . . . . . . . 83
Adding Extra Software Packs . . . . . . . . . . . . . . . . . . . . . 83
About GEM-RX Engraving Software . . . . . . . . . . . . . . . . . 83
Chapter 17 Keyboard Hot Keys 85
Hot Keys . . . . . . . . . . . . . . . . . . . . . . . . . . . . . . . . 85
Super Hot Keys . . . . . . . . . . . . . . . . . . . . . . . . . . . . 86
Chapter 18 Extra Software Packs 89
GEM-RX Extra Font Pack . . . . . . . . . . . . . . . . . . . . . . . 89
GEM-RX Logo Generation Scanning and Vectorising . . . . . . . . 89
GEM-RX Freehand Tablet & Pen . . . . . . . . . . . . . . . . . . . 89
Picture Engraving . . . . . . . . . . . . . . . . . . . . . . . . . . . 89
Adding Extra Software Packs . . . . . . . . . . . . . . . . . . . . . 89
Chapter 19 Frequently Asked Questions
Chapter 20 Trouble Shooting
91
93
9
GEM-RX Engraving Software
Chapter 2 Getting Started
Getting Started
Components in GEM-RX Engraving Software
Main Menu Bar
The Main Menu bar is where all the Drop down Menus are called from, by Clicking on the required Menu, you will have access to all functions from within that Menu and sub-menus.
Title Bar
This is where the Title of the current Drawing is displayed. It is located at the top of the
Drawing window.
Hint Bar
The Hints Bar is situated at the bottom left above the horizontal scroll bar, hints are given on the use of the selected tool.
Scroll Bars
The Scroll bars are used to shift the view in the window to see a portion of a drawing that is outside the current viewing Area. The Scroll bars are located at the right side and bottom of the window.
Docking Toolbars
The Docking toolbars are used to give you quick access to some of GEM-RX Engraving
Software‘s most used functions, they can be re-shaped, re-sized, moved and docked into any desired position.
Drop Down Menu
Drop down Menus are accessed from the Main Menu bar and Toolbars, sub- menus are available from within Drop down Menus, normally you are given a list of several options to choose from.
Check Box
Check boxes are used to Enable / Disable options by checking or un-checking the box, the function is disabled when the Check box is empty.
Cursors
GEM-RX Engraving Software‘s Cursor changes automatically, dependant on the function and actions that are being used at any specific time.
Search Cursor
11
Reference Manual
Getting Started
This is the normal Search Limit Cursor, you can use it to select Objects etc. Its size can be changed in the Tools Menu, Options Menu.
Drawing Cursor
The Cursor changes to this type when you are in a Drawing function.
Node Cursor
The Cursor changes to this when you are directly over a node on a selected object, or within a
Drawing function.
Segment Cursor
The Cursor changes to this when you are directly on a segment on a selected object, or within a Drawing function.
Intersection Cursor
The Cursor changes to this when you are directly on the intersection of two segments when one or both segments are selected, or you are in a Drawing function.
Dialogue Box
Many operation are carried out and controlled through Dialogue boxes. Dialogue boxes generally contain several controls, Buttons, Groups of related Buttons, Text boxes, List boxes etc. At any time one control in the Dialogue box has focus, this means that an action you perform from the Keyboard or Mouse will affect that control. You can < Tab > between each control, select with the mouse or use the appropriate key on the Keyboard.
Numeric Entry
Numeric entries are entered from the main keyboard or from the numeric keypad. Typical uses are, setting Dialogue box values, entering co-ordinates, i.e. entering Workspace sizes etc.
Command Button
Command buttons are normally used to make action occur, such as resetting Dialogue box values or calling up a supplementary Dialogue boxes.
Apply Button
The Apply button is used to confirm that the changes that have been made in a Dialogue box, are to be applied to the drawing.
Cancel Button
Clicking on this button will Cancel the current operation and return you to your drawing.
12
GEM-RX Engraving Software
Chapter 2 Getting Started
OK Button
The «OK» button confirms all changes that have been made in a Dialogue box and returns you to your drawing.
13
GEM-RX Engraving Software
Chapter 3 Terminology
Terminology
GEM-RX Engraving Software uses Windows XP and Vista terminology and conventions in its structure and Menus, a full description can be found in your Windows instruction manual.
Click On
Reference to Click On in this Reference Manual, means that you position the cursor on top of the designated item and press and release the Left Mouse Button once.
Drag
Reference to Drag, Dragging or Drag Draw means press the Left Mouse Button, and while continuing to hold the button down, move the mouse. When the desired action is completed, release the button.
Dotty Appearance
When an Object or a Group of Objects are Selected in GEM-RX Engraving Software, the
Selected items changes to have Dotty appearance. This is so when selecting multiple Objects or groups, you can distinguish between what is select and what is not.
Double Click On
Reference to Double Click On in this Reference Manual means that you are to position the on-screen cursor on top of the designated item and press and release the Left Mouse Button twice in quick succession, Windows interprets this as a single action.
Note : The Control panel option in Windows allows you to adjust the speed of a
Double Click to suit your style, (see your Widows manual).
File Names
GEM-RX Engraving Software for Windows supports File Names of up to 256 characters long, so you may give your files useful names.
Hot Keys
Hot Keys are Keyboard short cut commands that take you to a function, without use of the mouse, these may be single or multiple keystrokes, i.e. < Ctrl > + <V > is the same as selecting Paste..
Kerning
Kerning is the terminology used to describe the alteration of spaces between characters, within a line of text. In GEM-RX Engraving Software a single Kern, is either plus or minus
½6 th of a full character space.
15
Reference Manual
Terminology
Mouse
The Mouse is the preferred pointing device for use in GEM-RX Engraving Software. It is recommended that you use a high quality mouse with a least two buttons, as GEM-RX
Engraving Software uses both Left and Right Mouse Buttons., this will make for smooth operation when navigating around the program and maximise your productivity.
Primary Mouse Button
This is the Left Hand Button on the mouse. that is assuming the mouse is configured for right-handed use, (for mouse configuration see your Microsoft Windows operating system manual). From now on this will be referred to as the Left Mouse Button in this Reference
Manual.
Secondary Mouse Button
This is the Right Hand Button on the mouse that is assuming the mouse configured for right-handed use, (for mouse configuration see your Microsoft Windows operating system manual). From now on this will be referred to as the Right mouse button in this Reference
Manual.
Marquee Box
Marquee Box is an dotted rectangular box which are created by Dragging, whilst holding down the Left Mouse Button, this creates an invisible Bounding box around the items that have been Selected. This is a quick way to Select one or more Objects, all Selected Objects will go Dotty in appearance, so that you know they have been Selected.
Select
Select in GEM-RX Engraving Software is when an Object or Objects are Selected using the
Left Mouse Button, the outline of each Object will change to have a dotty appearance, this enables you to tell which Objects are actually Selected and which are not.
Type Face
A Type Face or Font is a style of lettering i.e. Helvetica, Times Roman, Baskerville etc. These are normally available in various weights i.e. Bold, Medium, Italic.
Workspace
The Workspace is normally defined as the total height and width of the working area, you may know it better as plate or drawing area.
Windows Clipboard
The Windows Clipboard is a temporary storage area which can hold only one item at a time.
If you have an item on the clipboard and cut another, the second one will overwrite the first.
The Windows Clipboard contents can be pasted an infinite number of times into GEM-RX
Engraving Software.
16
GEM-RX Engraving Software
Chapter 4 Toolbars & Toolbox Functions
Toolbars
Toolbars Overview
Toolbars can be re-shape however you wish, by selecting the edge of the Toolbar with the
Pick tool and Dragging the handles in the desired direction while holding down the Left mouse button. The Toolbar may be moved by selecting it on its face with the Pick tool and
Dragging while holding down the Left mouse button. Dock the Toolbar by Dragging whilst holding down the Left mouse button, release the button when the Toolbar is in the desired position. To move a Toolbar from the Menu bar to a different position, place the cursor next to the Toolbar separator it will change to a hand, you can then drag it to a new position.
Toolbars can be docked at the Top, Left or Right of the screen. To close a Toolbar completely either Click On the cross on the Toolbar title bar using the Left mouse button, or from the Toolbar Menu un-check the appropriate entry.
File Toolbar
The File Toolbar is used for quick access to some of GEM-RX Engraving’s File Functions.
File Toolbar Functions
New Drawing
Hot Key < Ctrl > + < N >
Clicking on this icon will create a New Drawing, if you are already working on a drawing you will be asked if you wish to save the drawing you are working on. A new drawing page will be created entitled UNTITLED, all new GEM-RX Engraving drawings you create are given this name until you save the drawing with a unique name. If you have assigned a Default Template to be loaded on startup, this will be the drawing that is used. For more information. For more
information see Page 27.
Open Drawing
Hot Key < Ctrl > + < O >
Clicking on this icon will allow you to find and Open an existing GEM-RX Engraving file. If you are already working on a drawing you will be asked if you wish to save it, you can now select a drive and a file name by scrolling through the options if necessary. For more
information, see Page 28.
Save Drawing
Hot Key < Ctrl > + < S >
If you have already saved your drawing with a unique name and then made changes to it, you can update the file by Clicking on Save, this will save all Properties for that file i.e. Workspace,
Orientation, Grid Size, Feed Rates, Notes etc. For more information, see Page 28.
17
Reference Manual
Toolbars & Toolbox Functions
Save As
Hot Key < Ctrl > + < H >
This command is used to Save the drawing currently on the screen either for the first time, under a New Name, in a different Directory or in another File Format. For more information,
see Page 28.
New From Template
Hot Key < Ctrl > + < T >
The New From Template function allows you to open a previously saved GEM-RX
Engraving Template. For more information, see Page 27.
Import File
Hot Key < Shift > + < Ctrl > + < I >
The Import File icon give you access to the GEM-RX Engraving‘s file import filters, these allows you to read files from most industry standard Graphics, Desktop Publishing and CAD packages. You are given the option to select the drive and folder that the required file exists
in. For more information, see Page 29.
Export File
Hot Key < Shift > + < Ctrl > + < X >
The Export File icon give you access to the GEM-RX Engraving‘s file export filters, these allows you to read files from most industry standard Graphics, Desktop Publishing and CAD packages. You are given the option to select the drive and folder that the file exists in. For
more information, see Page 29.
You can output your drawing to any supported Window Printer, you have installed on your system.
Note : Select Source and Acquire will only be visible if you have purchased the
Scanning and Logo Generation Package.
18
GEM-RX Engraving Software
Chapter 4 Toolbars & Toolbox Functions
Draw Toolbar Functions
Pick Tool
The Pick Tool is a selection tool and is used extensively in GEM-RX Engraving to select
Functions, Menus, Objects, Options etc., by Clicking on them.
Node Edit Tool
The Node Edit Tool is used to change the shape of Objects by moving the Nodes or in the case of Béziers curves the handles as well.
Freehand
With Freehand you write directly into the software with a Pen on our special Tablet. Your
Hand Writing or Design recreated exactly on your engraved item. Simple and easy to use !
Note : Freehand with only be visible if you have purchased the Freehand option.
Text Toolbar
Text
You can insert Line Text by Clicking on this icon with the Left mouse button.
Auto Layout
Clicking on this icon will take you into the Auto Layout Dialogue Box. For more information
see Page 37.
Auto Relayout
Clicking on this icon will Relayout a selected Auto Layed out text. For more information see
Page 41.
Edit Arc Text
Clicking on this icon will take you to the Disk Text Dialogue Box. For more information see
Page 46.
Disk Text
Clicking on this icon will allow you to Edit Arc Text. For more information see Page 44.
19
Reference Manual
Toolbars & Toolbox Functions
Previous Font
Clicking on this icon allows you select your text and toggle trough you font list showing the previous font.
Next Font
Clicking on this icon allows you select your text and toggle trough you font list showing the next font.
Kern Text
.
Clicking on this icon allows you to Kern your text characters. For more information see Page
Edit Toolbar
The Edit Toolbar gives you access to the most often used Edit functions.
Undo icon
Hot Key < Ctrl > + < Z >
GEM-RX Engraving’s Undo will take you back an unlimited number of undo moves.
Redo icon
Hot Key < Shift > + < Ctrl > + < Z >
GEM-RX Engraving’s Redo will restore an unlimited number of undo moves.
Cut to Clipboard icon
Hot Key < Ctrl > + < X >
The Cut function enables you to remove selected objects from one drawing and place in another drawing via the Windows Clipboard. The Clipboard is a temporary storage area and can hold only one item at a time. If you have an item on the Clipboard and Cut another the second one will overwrite the first. To place items on the Clipboard select the objects, (they will go dotty so you know what has been selected) then select Cut, the selected items will be removed from your drawing and will be held on the Clipboard until overwritten.
Copy to Clipboard icon
Hot Key < Ctrl > + < C >
20
GEM-RX Engraving Software
Chapter 4 Toolbars & Toolbox Functions
The Copy function is almost the same as the Cut function, except that the object or objects are not removed from the drawing, but are copied on to the Windows Clipboard, all other operations are identical.
Hot Key < Ctrl > + < V >
Paste from Clipboard icon
The Paste command put a copy of the contents of the Windows Clipboard into your drawing, the Clipboard can be Pasted an infinite number of times into GEM-RX Engraving. Some care is needed using this method of transferring objects to and from GEM-RX Engraving drawings and other Windows applications. One of the main considerations is that the item on the Clipboard, will be at the scale that it was cut or copied from the original drawing and may be much larger than the drawing you are pasting it into. If this is the case it may be that the pasted object does not appear on the screen. To check if the object has been placed outside the present screen, area invoke the View all command from the View Menu Hot Key < F4 >, this will zoom out to display all object that are in the drawing, including outside the
Workspace.
Select All icon
Clicking on this icon will select all Objects within your drawing, unless they have been given the property of not selectable in the Layer setup Menu.
Deselect All icon
Clicking on this icon will deselect all Selected Objects in your drawing.
Note : As the Clipboard is only temporary memory, when you switch off or reboot your computer, all the items on the Clipboard are lost.
Arrange Toolbar
The Arrange Toolbar gives you access to the GEM-RX Engraving Arrange functions.
Horizontal Centre icon
The Horizontal Centre function, enables you to select a number of objects and place them relative to the centre of the Workspace in the horizontal plane. No alteration to spacing of the objects in vertical plane will take place.
Vertical Centre icon
21
For a full description of the Line Drawing and Construction functions see
Draw Menu, Construct Objects and Draw Objects.
For a full description of the Bezier Drawing and Construction functions see
Draw Menu, Construct Objects and Draw Objects.
Reference Manual
Toolbars & Toolbox Functions
Vertical Centre icon
The Vertical Centre function, enables you to select a number of objects and place them relative to the centre of the Workspace in the vertical plane. No alteration to spacing of the objects in the horizontal will take place.
Align Bottom icon
This function will align all selected objects to the bottom of their bounding box.
Create Group icon
The Create Group function is used to group objects together, groups can also exist within groups.
Production Toolbar
The Tools Toolbar gives you easy access to some of GEM-RX Engraving’s Tool functions.
Engrave
Hot Key < Alt > + < 1 >
Click on this icon to go into the Quick Production function. For more information see Page
71.
Engrave Selected Only
Hot Key < Alt > + < 4 >
Click on this icon to produce Selected Objects only. For more details see Chapter 16,
Production, Selected Only. For more information see Page 71.
Preview
Hot Key < Ctl > + < F4 >
Click on this icon to Preview how your drawing will look when it is outputted to your chosen device.
Measure Plate
Hot Key < Shift > + < Alt > + < 3 >
Click on this icon to Digitize the plate size on your Machine Bed. For more details see
Chapter 16, Production, Digitize Plate. For more information see Page 73.
22
GEM-RX Engraving Software
Chapter 4 Toolbars & Toolbox Functions
Set Reference
Hot Key < Shift > + < Alt > + < 4 >
Click on this icon to set a Reference Point in a drawing with reference to the workpiece on the Machine Bed. For more details see Chapter 16, Production, Set Reference. For more
information see Page 73.
Measure Circle, Centre, Outside
Click on this icon to measure a circular object using your Engraving Machine. For more
information see Page 73.
Measure Circle, Using Three Points
Click on this icon to measure a circular object using your Engraving Machine. For more
information see Page 73.
Shading Toolbar
When working with logos or designs, you may wish to make them stand out. To achieve this you can use the Shading Function in the GEM-RX Engraving Software. For more
information see Page 77.
Shading, 45° Hatch
Clicking on this icon will allow you to Shade selected objects with a 45° Hatch.
Shading, Double Hatch
Clicking on this icon will allow you to Shade selected objects with a Double Hatch. r more
information see Page 77.
Zoom Toolbar
The Zoom Toolbar gives you access to GEM-RX Engravings most used viewing functions.
Zoom Window
Hot Key < F2 >
Selecting Zoom Window from the from the Zoom Toolbar, this brings up the Spy glass icon, you can zoom in to any part of your drawing using the marquee box principal. It is necessary to hold down the Left mouse button whilst Dragging around the part of the work area you require to view in detail, when you have the required area within the marquee box release the
Mouse button. You have virtually unlimited zooms available, so if you wish to see more detail you can zoom in again.
23
Reference Manual
Toolbars & Toolbox Functions
Zoom Previous
Hot Key < F3 >
Selecting Zoom Previous View from the Zoom Toolbar, takes you back to the previous view, you can go back all the way to the first view in the current drawing in that session.
Zoom All
Hot Key < F4 >
Selecting Zoom All from the from the Zoom Toolbar, will zoom in or out as required to show all Objects that exists within the present drawing on the screen.
Zoom
Selected
Hot Key < F6 >
Selecting Zoom Selected from the Zoom Toolbar, will bring all Selected Objects into a full view window.
Zoom Workspace
Hot Key < F7 >
Selecting Zoom Workspace from the Zoom Toolbar, will zoom in or out as required to show the full available Workspace on the screen, this including all Object in the Workspace.
Zoom Machine Bed
Hot Key < Ctrl > + < F7 >
Selecting Zoom Machine Bed from the from the Zoom Toolbar, allows you to view the with its associated position on the machine bed.
Transform Toolbar
The Transform Toolbar is used to give you quick access to the most used tools for altering and distorting text and Objects.
Move
The Move icon on the Transform Toolbar, gives you quick access to the dynamic and
precision move functions in GEM-RX Engraving. For more information see Page 59.
Resize
You can Resize any selected object, by selecting this icon. For more information see Page 59.
24
GEM-RX Engraving Software
Chapter 4 Toolbars & Toolbox Functions
Rotate
The Rotate icon on the Transform Toolbar, gives you quick access to the dynamic and
precision Rotate functions in GEM-RX Engraving. For more information see Page 60.
25
File Menu
GEM-RX Engraving Software
Chapter 5File Functions
File Functions
File functions are accessed from the Main Menu bar. The File Menu gives you to the tools associated with the managment of your files within directories and folders on your disk drives.
Opening, Saving, Scanning, Printing, Import / Export functions and Notes are all accessed from this Menu.
New Drawing
Hot Key < Ctrl > +< N >
To create a New Drawing in GEM-RX Engraving Software, select New from the File Menu.
If you are already working on a drawing you will be asked if you wish to Save the drawing you are working on. A new drawing page will be created entitled UNTITLED., all new GEM-RX
Engraving Software files you create are given this name until you Save the drawing with a unique name.
Note : Remember you can assign a name with up to 256 characters.
New From Template
Hot Key < Ctrl > + < T >
You can load a New Drawing from a Template by selecting this function. If you are already working on a drawing you will be asked if you wish to Save the drawing you are working on.
A new drawing page will be created entitled UNTITLED with the Properties of the Template.
This can then be Saved with a name of your choice without over righting the original
Template.
Open
Hot Key < Ctrl > + < O >
27
Reference Manual
File Functions
Click On Open from the, File Menu, this will allow you to find and open an existing
GEM-RX Engraving Software file.
How to
1
Select Open from the File Menu, the Open drawing dialogue box will now appear.
2
Select folder from the List In selection box.
3
Click On the required file name.
4
Click On Open the job will then be loaded, if you do not wish to load the Job, Click
On «Cancel».
If you are already working on a drawing you will be asked if you wish to Save it, you can now select a drive and a file name by scrolling through the options if necessary.
Save Drawing
Hot Key < Ctrl > + < S >
If you have already Saved your drawing with a unique name and then made changes to it, you can update the file by Clicking on Save, this will Save all Properties for that file i.e.
Workspace, Orientation, Grid Size, Feed Rates, Notes etc., these are all recalled when you reopen using Open from the File Menu.
Save As
Hot Key < Ctrl > + < M >
This command is used to Save the drawing currently on the screen either for the first time, under a New Name, in a different Directory or in another File Format.
How to
1
Select Save as from the File Menu, the Save as dialogue box will now appear.
2
Select file format you wish to save the file in, from the Save As Type selection box.
3
Select folder, from the Save In selection box.
4
Enter the required file name in the File name box.
5
Click On «Save», the job will then be saved in the format and to the destination specified. If you do not wish to save the file Click On «Cancel».
The Save File dialogue box gives you the options to save the file with any name and in any folder you wish.
Note : Remember you can use names up to 256 characters long, so you may give your files useful names, no extension is necessary as this is generated automatically.
28
GEM-RX Engraving Software
Chapter 5File Functions
Save Setup Drawing
You can use this command to save a modified Setup Drawing, this will be loaded on starting a
New Drawing, See Page
Import
Hot Key < Ctrl > + < I >
The Import Menu give you access to the GEM-RX Engraving Software‘s file import filters, these allows you to read files from most industry standard Graphics, Desktop Publishing and
CAD packages. You are given the option to select the drive and folder that the required file exists in.
How to
1
Select Import from the File Menu, the Import drawing dialogue box will now appear.
2
Select file type from the File type selection box.
3
Select folder from the List in selection box.
4
Click On the required File name.
5
Click On Open the job will then be loaded, if you do not wish to load the job Click
On «Cancel».
All file will be brought in to their original scale wherever possible.
Export
Hot Key < Shift > + < Ctrl > + < X >
The Export Menu give you access to the GEM-RX Engraving Software‘s file export filters, these allows you to read files from most industry standard Graphics, Desktop Publishing and
CAD packages. You are given the option to select the drive and folder that the file exists in.
How to
1
Select Export from the File Menu, the Export drawing dialogue box will now appear.
2
Select file type from the File Type selection box.
3
Select folder from the List In selection box.
4
Click On the required file name.
5
Click On Open the job will then be loaded, if you do not wish to load the job Click
On «Cancel».
Supported File Formats
EPS Adobe Illustrator
GEM-RX Engraving Software can READ or WRITE drawings in the EPS, AI
(Encapsulated PostScript, Adobe Illustrator) file generated by Adobe Illustrator,
CorelDRAW, PagePlus and many other software package that supports the format, on
29
Reference Manual
File Functions
PC or MAC. The EPS format supports Lines and Béziers Curves, this make it first choice filter for importing logos and graphic type drawings, text should be brought in as curves. GEM-RX Engraving Software automatically converts text to curves when
Exporting in this format.
HPGL
GEM-RX Engraving Software can READ or WRITE drawings in the HPGL (Hewlett
Packard Graphics Language) is supported by most graphic software. In most of its flavours, it only supports Lines, all curves being split up into small straight line segments, this makes it difficult to scale and will probably be the last resort for file exchange.
Select Source
Clicking on Select Source will bring up a selection box with all the TWAIN devices that are available on your system, Click On the appropriate device to make active.
Note : Vistool support all TWAIN compatible devices including Scanners and
Video Cameras, you will have load TWAIN Interface that came with your Scanner
(see your scanner manual for instructions).
Acquire
Hot Key < Shift > + < F3 >
Clicking on Acquire will launch the TWAIN Scanning Interface that came with your
Scanner, you will then be able to scan your artwork, (see you scanner manual for instructions). You can then Print you drawing to any Windows supported printer or
Vectorised for use when engraving or cutting. If you intend to Vectorised your artwork you will get better results if you scan in grayscale not line art. For details on
Vectorising See Page 52.
Exit
Hot Key < Ctrl > + < Q >
Select Exit from the File Menu to return to your Windows Desktop, you will be prompted to
Save your Drawing if you have not already done so.
30
Edit Menu
GEM-RX Engraving Software
Chapter 6 Edit Functions
Edit Menu
The Edit Menu is accessed from the Main Menu bar, this takes you to the tools associated with GEM-RX Engraving Software’s editing functions.
Undo
Hot Key < Ctrl > + < Z >
GEM-RX Engraving Software’s Undo will take you back an unlimited number of undo moves.
Redo
Hot Key < Shift > + < Ctrl > + < Z >
GEM-RX Engraving Software‘s Redo will restore an unlimited number of undo moves.
Cut to Clipboard
Hot Key < Ctrl > + < X >
The Cut function enables you to remove Selected Objects from one drawing and place in another drawing via the Windows Clipboard. The Clipboard is a temporary storage area and can hold only one item at a time. If you have an item on the Clipboard and Cut another the second one will overwrite the first. To place items on the Clipboard select the Objects, (they will go dotty so you know what has been Selected) then select Cut, the Selected items will be removed from your drawing and will be held on the Clipboard until overwritten.
Copy to Clipboard
Hot Key < Ctrl > + < C >
31
Reference Manual
Edit Functions
The Copy function is almost the same as the Cut function, except that the Object or Objects are not removed from the drawing, but are copied on to the Windows Clipboard, all other operations are identical.
Paste from Clipboard
Hot Key < Ctrl > + < V >
The Paste command put a copy of the contents of the Windows Clipboard into your drawing, the Clipboard can be Pasted an infinite number of times into GEM-RX Engraving Software.
Some care is needed using this method of transferring Objects to and from GEM-RX
Engraving Software drawings and other Windows applications. One of the main considerations is that the item on the Clipboard, will be at the scale that it was cut or copied from the original drawing and may be much larger than the drawing you are pasting it into. If this is the case it may be that the pasted Object does not appear on the screen. To check if the
Object has been placed outside the present screen, area inv»OK»e the View all command from the View Menu Hot Key < F4 >, this will zoom out to display all Object that are in the drawing, including outside the Workspace.
Note : As the Clipboard is only temporary memory, when you switch off or reboot your computer, all the items on the Clipboard are lost.
Delete
Hot Key < Delete >
This command deletes all select Object from the screen.
Duplicate Single
Hot Key < D >
The Duplicate Single functions is accessed from the Edit Menu, GEM-RX Engraving
Software will make a duplicate of all Selected Objects. You are given a choice to apply an offset in the “X” and “Y” from the original, the default is zero. After copying the new
Objects are automatically Selected, you can now apply one of the other editing or move commands from the appropriate toolbar Menu, to Move, Rotate, Group etc., the copies.
Duplicate Workspace
The Duplicate Workspace function allows you to compose a single plate, with text logo’s etc., then duplicate it a selected number of times. This is very useful if you have multiple plates of the same size to engrave, with the same or similar designs on them.
How to
1
Compose your drawing on the correct size plate, using Auto Layout or simple Line
Text.
2
Select Duplicate Workspace from the Edit Menu. You can then select how many copies you require in the «X» and «Y» directions.
32
GEM-RX Engraving Software
Chapter 6 Edit Functions
3
Edit each individual plate as required.
The job is now ready to send to your engraving machine.
Select All
Hot Key < Ctrl > + < A >
This command Selects All Objects in the drawing, without having to marquee box or Click <
Shift > on individual Objects.
Deselect All
This command causes all Selected Objects to be deselected.
33
View Menu
GEM-RX Engraving Software
Chapter 7View Functions
View Functions
The View Menu takes you to all GEM-RX Engraving Software’s viewing functions.
Toolbars
The Toolbar Menu is accessed from the Tools Menu, this allows you to turn on or off the individual Toolbars by checking for visible and un-checking for invisible.
Zoom Window
Hot Key < F2 >
Selecting Zoom Window from the View Menu, or the Zoom Toolbar, this brings up the spy glass icon, you can zoom in to any part of your drawing using the marquee box principal. It is necessary to hold down the Left Mouse Button whilst Dragging around the part of the work area you require to view in detail. When you have the required area within the marquee box release the Mouse button. You have virtually unlimited Zooms available, so if you wish to see more detail you can Zoom in again.
Zoom Last View
Hot Key < F3 >
Selecting Zoom Last view from the View Menu, or from the Zoom Toolbar, this takes you back to the previous Views, you can go back all the way to the first View in the current drawing in that session.
Zoom All
Hot Key < F4 >
Selecting Zoom All from the View Menu or, from the Zoom Toolbar, GEM-RX Engraving
Software will Zoom in or out as required to show all Objects that exists within the drawing on the screen.
35
Reference Manual
View Functions
Redraw
Hot Key < F5 >
Selecting Redraw from the View Menu, will refresh the current drawing window.
Zoom Selected Objects
Hot Key < F6 >
Selecting Zoom Selected Objects from the View Menu, or from the Zoom Toolbar,
GEM-RX Engraving Software will bring all Selected Objects into a full view window.
Zoom Workspace
Hot Key < F7 >
Selecting Zoom Workspace from the View Menu or from the Zoom Toolbar, GEM-RX
Engraving Software will Zoom in or out as required to show the full available Workspace on the screen, including all Object that are in the Workspace.
Zoom Machine Bed
Hot Key < Ctrl > + < F7 >
Selecting Zoom Machine Bed from the View Menu, or from the Zoom Toolbar, allows you to view the Workspace with its associated position on the machine bed.
Display Settings
You can alter display settings in this menu.
Display Nodes : By checking this box you can make the Nodes visible in your drawing.
Display Directions : By checking this box you can make the Direction of Cut visible in your drawing.
Show Bitmaps : Check this box if you wish Bitmaps to be visible.
Bitmap Colour Frame : Check this if you wish to show a coloured frame around aa bitmap corresponding to the layer that it’s on.
Note : Other settings of this type can be found in the Options Menu.
36
Text Menu
GEM-RX Engraving Software
Chapter 8 Text Functions
Text Functions
The Text Menu is accessed from the Main Menu bar, this takes you to the tools used to place
Text of all types within your drawings. Text functions can also be accessed from the Text
Toolbar.
Auto Layout
Hot Key < Alt > + < A >
Auto Layout icon
Auto Layout is used to layout your Workspace automatically with Text and Logos. The layout normally consists of Horizontal text with or without columns, or a combination of both.
Logos can be Imported in any supported format or Scanned and Vectorised automatically.
•
Options (from left to right)
Centre Vice
37
Reference Manual
Text Functions
This mode is used if you are engraving flat using jigs held in the self centring vice. Typically this mode is used for trophy plates, watch backs, salvers etc.
Cylindrical
This mode is used if you are engraving round objects. Typically this mode is used for trophies, glasses, pens etc.
Inside Ring Engraving
This mode sets up you GEM-RX Engraving Machine to handle Inside Ring Engraving, this is normally purchased as a separate item. You need to load the GEM-RX 2 Plus Driver to be able to activate this mode.
Outside Ring Engraving
This mode sets up you GEM-RX Engraving Machine to handle the Outside Engraving of
Rings, this is part of the Inside Ring Engraving Package. You need to load the GEM-RX 2
Plus Driver to be able to activate this mode.
Note : The Machine Bed colour will change to indicate which mode you have selected. Olive Green for centre vice, Magenta for cylindrical Orange for Inside
Ring Engraving and Blue for Outside Ring Engraving.
•
Options
Dimension
Width : Enter the width of the Workspace your in the numeric entry box.
Height : Enter the height of the Workspace your in the numeric entry box.
Options
Italicise : f you Check this box you can Italicise your chosen Font, enter the angle required in the drop down Menu. You may enter a – value, this will Italicise the text to the backwards. The Text will Italicise forwards, if you do not enter negative value.
Tight : Check this box to set the Line Spacing to a Tight form.
Medium : Check this box to set the Line Spacing to a Medium form.
Loose : Check this box to set the Line Spacing to Loose form.
Font
Vistool Fonts : Check this box to use GEM-RX Engraving Software’s native fonts, these include ready cleared Engraving, Single Str»OK»e Engraving and Outline Fonts.
38
GEM-RX Engraving Software
Chapter 8Text Functions
Text Entry
You can enter your Text in this box, to enter another line press < Return >, the command for separating columns is < Tab >, i.e. If line 2 has 2 columns you would enter Text for left column < Tab> Text for right column.
Function Buttons
Measure Plate
Clicking on this button will enable you to Digitize the plate using your machine, (this function is only available on the MicroStep series of Control Systems).
Import Logos
If you select this function a Logos can be Imported in any Supported Format, (each
Logo is classed as a Line), you are prompted for the height of the logo and the line number to place the Logo in.
Scan Logos
If you select this function a Logos can be Scanned (you have to have purchased the
Scanning and Logo Generation Package to use this feature), into your layout (each
Logo is classed as a Line), you are prompted for the height of the logo and the line number to place the Logo in and if you wish to Trace the Logo or not see Figure 1.
Figure 1
Freehand
Freehand allows you to engrave Signatures, Hand Written Personal Message without scanning. Just write you message on our pad with the special pen provided and engrave, no cleaning up. Freehand has to be purchased as an additional package, see your Dealer.
How to
Auto Layout Text
1
Select Auto Layout from the Text Menu, or the Auto Layout icon from the Toolbar.
2
Set Workspace Size 50mm x 25mm, Options to Medium and Select Font
Times Engraving. Enter in the White Text box first line, Open All Hours.
Second line, Between. Third line, 12pm — 6am pressing < Return > between each line.
39
Reference Manual
Text Functions
3
Click On «»OK»».
You should now have a drawing similar to Figure 2.
Figure 2
Adding Logo’s Using Auto Layout
1
Select Auto Layout from the Text Menu, or the Auto Layout icon from the Toolbar.
2
Set Workspace Size 50mm x 25mm.
3
Select Import Logo, you will now have access to the Import Logo Dialogue Box,
Select the DHL.Ai logo in the GEM-RX Engraving Software EPS Folder.
4
Select line number one to place the Logo in and enter 10mm for the height of the Logo.
5
Enter the Text in the White Text box, Deliver Next Day, next line That’s For
Sure, Click On «OK».
Figure 3
You will now have a Plate similar to Figure 3.
40
GEM-RX Engraving Software
Chapter 8Text Functions
As you can see, the Auto Layout is a very useful tool that makes the production of Plates quick and easy.
Auto Re-layout
Hot Key < Alt > + < R >
Auto Re-Layout icon
You can Auto Re-layout your text if you are not happy with the results.
How to
1
Select Auto Layout from the Text Menu, or the Auto Layout icon from the
Toolbar.
2
Set Workspace Size 50mm x 25mm, Options to Medium and Select Font Times
Engraving. Enter in the White Text box first line, Open All Hours. Second line,
Between. Third line, 12pm — 6am pressing < Return > between each line. Click On
«OK».
You should now have a drawing similar to Figure 1. You can now alter the look of your Plate.
1
Select all the text in your sign.
2
Select Auto Re-Layout from the Text Menu or from the Text Toolbar.
3
You will now be able to alter the lo»OK» of your Plate by selecting, the required option i.e alter the line spacing to Loose. See Figure 4.
Figure 4
4
Alter the line spacing to Tight. See Figure 4.
You can also change the size of the plate whilst retaining the same text, using Auto
Re-Layout.
41
Reference Manual
Text Functions
Figure 5
1
Recreate the plate as in Figure 5 and Select all the text.
2
Select Auto Re-Layout from the Text Menu or from the Text Toolbar.
3
Enter 60 x 30 for the Width and Height and check Scale, Click on «OK».
Figure 6
As you can see in Figure 6, the plate and the text has been resizes. If you had not checked
Scale, just the plate would have been resized.
Basic Text Composer
Hot Key < S >
GEM-RX Engraving Software’s Standard Text Composer is available by Clicking with the
Left mouse button on the Text icon on the Draw Toolbar, or from the Text Menu.
•
Options
Text Entry : Enter the required text in the Text Entry box, there is no practical limit to the amount of text you can enter here.
42
GEM-RX Engraving Software
Chapter 8Text Functions
Font
GEM-RX Engraving Software Fonts : Check this box to use GEM-RX Engraving
Software’s native fonts, these include ready cleared engraving, single str»OK»e engraving and outline fonts.
Sizes
Cap Height : This is where you enter the cap height of the text, it is calculated from the upper case W in the Selected font.
Stretch : You can stretch or condense your text by entering a higher or lower that
100% figure in the Numeric Box.
Spacing : You can increase or decrease the space between the letters in your text by entering a higher or lower that 100% figure in the Numeric Box.
Alignment
Horizontal : You select the horizontal alignment of the text from the drop down List box.
Left Justify : This will move the text to the left of the width set in the Width Entry box, minus the left margin, entered in the Left Margin Entry box.
Right Justify :This will move the text to the right of the width set in the Width Entry box, minus the right margin, entered in the Right Margin entry box.
Centre Justify : This will move the text to the centre of the width set in the Width
Calculate
Total Length : This is the calculated width of the text, (this is a calculated field and is only for information) .
Total Height : This is the total height of the text, this includes any descender or ascender in the text, (this is a calculated field and is only for information).
How to
Enter Text
1
Select Workspace from the Tools Menu or Right Clicking on the Workspace and set the
Workspace dimensions to say 60 x 30.
2
Select the Basic Text Composer, by clicking with the Left mouse button on the Text icon on the Toolbar or the Text Menu.
3
The Select Position to start the text line.
4
Enter the following, ONE LINE TEXT enter a text height of 4mm, Centre Justify and
Select Times Engraving as the font.
5
Click on «OK».
43
Reference Manual
Text Functions
6
The Text will probably not be in the centre of the plate. To rectify this ensure that the
Text is Selected and Click on Centre to Workspace icon on the Toolbar.
Centre to Workspace icon
You should now have a Drawing similar to Figure 6.
Figure 6
If you wish to edit the Text you can Right Click on the Text. This will bring up the Properties
Menu, Select Basic Text Editor, you can now alter any of the settings you wish.
Disk Text
Hot Key < Alt > + < E >
The Disk Text function is a special function for use when engraving or routing circular
Objects that require curved text.
•
Options
Text
Text : This is where you enter your text
Parameters
Diameter : Enter the diameter of the circular Object to be machined.
Margin : Enter the margin required from the top of the text in the clockwise direction, or the bottom of the text in the anti-clockwise direction, to the diameter of the disk.
Cap Height : Enter the text height.
Upper Arc : Check this box to place the text in a clockwise direction on the upper arc, see Figure 1.
Lower Arc : Check this box to place the text in an anti-clockwise direction on the lower arc, see Figure 2.
44
GEM-RX Engraving Software
Chapter 8Text Functions
Fonts
Vistool Fonts : Check this box if you wish to use native GEM-RX Engraving
Software fonts.
How to
1
Select Disc Text from the Text Menu, you will be presented with the Disk text
Dialogue box.
2
Enter the following Diameter 25, Margin 1, Cap Height, 2, Check : Upper Arc, Times
Engraving.
3
In the Text Box enter Text On An Upper Curve.
4
Click On «OK».
You should have a drawing similar to Figure 7.
Figure 7
To edit any of the text properties, Click On the text with the Right mouse button and select
Edit Disk text you can then alter any parameters you wish. Text can be Kerned by selecting the text and activating Kerning in the normal way (see Kerning Text). When GEM-RX
Engraving Software creates the drawing, it places a circle of the specified diameter to give you a visual representation of the finished article.
45
Reference Manual
Text Functions
Note : The circle has been placed on the Design Layer and is blue, this will not be engraved.
Edit Disk Text
1
Select the Text you have created in the Disk Text by Left Clicking with the Mouse button.
2
Right Click On the Selected text, or select Edit Disk Text from the Text Menu.
3
The Disk Text Edit Dialogue box will be shown.
4
Now you can edit the settings as required.
5
Click On «OK» when you are happy with your alterations.
Note : Disk Text can be Kerned the same as any other text by Clicking with the
Right Mouse Button and selecting Kern Text.
Edit Dynamic Arc Text
You can Arc Text Dynamically by selecting and Clicking on Edit Arc Text from the Text
Toolbar and the Text Menu.
Figure 8
How to
1
Select the Text by Clicking with the Left Mouse Button.
2
Select Edit Dynamic Arc Text from the Text Menu or by Clicking with the Right
Mouse Button on the text.
4
You will now see two green nodes, which you can Drag to arc the text either in an upper or lower arc. See Figure 8.
Once you have Dragged one of the green nodes the text will arc, then four further nodes will be then available two red and two blue, See Figure 9.
Clicking on one of the blue nodes allows you can Drag the text around the centre of the arc of the text, see Figure 3. By holding down the < Ctrl > key while dragging, constraints the
46
GEM-RX Engraving Software
Chapter 8Text Functions
angle of the Line being drawn in steps of 15°, this is an easy way to make an arc that is 0°,
15°, 30°, 45°, 60°, 75° or 90° rotation.
By Clicking on one of the red nodes, you can Drag the text and increase or decrease the angle of the text, from the fixed arc centre.
Figure 9
Note : Dynamic Arc Text can be Kerned the same as any other text by Clicking with the Right Mouse Button and selecting Kern Text.
Kern Text
Hot Key < K >
Lines of Text can be Kerned individually i.e. the spacing between text characters can be adjusted.
How to
Open Spaces between Characters
1
Select Text to be Kerned by Clicking with the Left mouse button, the K&E and the
R&N are obviously to close together. See Figure 10.
2
Select Kern Text from the Text Menu, or press <K> on the Keyboard.
Figure 10
3
Place the Cursor between the characters to be Kerned.
4
Click and release the Left mouse button whilst holding down the <Ctrl > key, each
Click of the Mouse button represents plus ½6 th of a character space.
47
Reference Manual
Text Functions
You will see the letters that required Kerning have been re-spaced..
How to
Close Space between Character
1
Select Text to be Kerned by Clicking with the Left mouse button, the T&E and the
E&R are obviously too far apart. See Figure 12
2
Select Kern Text from the Text Menu.
3
Place the Cursor between the characters to be Kerned.
Figure 12
4
Click and release the Left mouse button whilst holding down the < Shift > key, each
Click of the Mouse button represents plus ½6 th of a character space.
You will see the letters that required Kerning have been re-spaced, (see Figure 4).
Clear Kerning
This function will clear any Kerning that has been set to all Selected lines of text.
48
GEM-RX Engraving Software
Chapter 8 Text Functions
Circular Monogram
This function is only available if you have purchased the GEM-RX Extra Font Pack.
How to
1
Enter either the two or three initials that are required in the Text Box.
2
Enter the height of the Monogram. You will get a visual representation in the View
Box.
3
When satisfied Click On «OK».
The Monogram will be placed in you drawing, you can now position it ready to output to your
GEM-RX Engraving Machine.
49
GEM-RX Engraving Software
Chapter 9 Picture Engraving
Bitmap Function
The GEM-RX supports the new and unique U-MARQ Picture Engraving (this is an optional extra and has to be purchased separately), This Dialogue box is not available unless you have purchased the Scanning and Logo Generation or the Picture Engraving modules.
Bitmap Menu
U-MARQ GEM-RX Engraving supports many bitmap formats including BMP, Tiff, Gif,
JPEG, Exif, WMF, PNG and EMF. These formats enable you to insert pictures in many formats to engrave.
Insert Bitmap
Hot Key < Shift > + < K >
This function is only available if you have purchased the Picture Engraving or the Scanning and Logo Generation module.
Selecting this function from the Bitmaps menu, allows you to Insert a Bitmap into your drawing, this can be placed and scaled using the tools provided.
Figure 1
•
Options
Import Picture : Select this to import the picture for normal viewing in the
Workspace.
51
Reference Manual
Picture Engraving
Trace Picture : Select this option to Vectorised the bitmap in preparation for normal engraving.
Edit Picture Engraving Settings : Select this function to proceed to the parameter settings Dialogue Box for picture engraving.
Height : Enter the required height, the Bitmap will be scaled proportionally.
Hide Pictures : Select this function to hide the bitmap on the screen, you may wish to use this when vectorising an image.
Show Bitmap
Check this to show bitmaps in your drawing, uncheck to hide.
Bitmap Selection
Check this to allow the selection of bitmaps in your drawing.
Insert a Bitmap in a Drawing
How to
1
Select Insert Bitmap.
2
The Import Bitmap file Selector Dialogue box is made available for you to navigate to the Folder containing the required Bitmap.
3
Once you have Selected the file the Bitmap Parameters Dialogue box will now be available so you will be able to pick you preferences.
4
Click On OK.
The Bitmap will now be placed in your drawing.
How to
Trace Bitmap
Hot Key < Shift > + < T >
Selecting Trace Bitmap from the Bitmap Menu, enables Universal Engraving’s Vectorising function to be applied to the Selected Bitmap. This function is only available if you have purchased the Scanning and Logo Generation Package.
How to
1
Pick your Scanner in the Select Source Dialogue box.
2
Scan you artwork (remember to scan in Grayscale).
3
When your scan is finished, select Trace Bitmap, select the quality of the original artwork i.e. Fine, Medium or Course, this will determine the accuracy of the
Vectorization process.
52
GEM-RX Engraving Software
Chapter 9 Picture Engraving
4
Click On OK Universal Engraving it will automatically Vectorised the scan, (that is
Universal Engraving will take the bitmap file and trace the outline to make a vector file), the outline will then be placed in your drawing for use.
The definition of Fine, Medium and Course Vectorising is as follows :
Fine : This setting is normally used when the original artwork is of Bromide quality or this taken from high quality black and white images.
Medium : This setting is normally used for 300 dpi Laser or Photocopy quality artwork.
Course : This setting is normally used with Fax or poor quality Printed artwork.
Note : All Vectorised images are created as closed paths, this allows you to create Toolpaths without any editing.
Show Bitmap
Hot Key < Shift > + < 7 >
This function will toggle the Bitmap to be visible or invisible in your drawing, this can be very useful when editing after Vectorization.
Picture Parameters
This function is only available if you have purchased the Picture Engraving module. Before you can use this function you must have a suitable picture on the screen see Figure 2.
Figure 2
How to
1
Place your chosen picture in the workspace at the size you wish to engrave it at using
«Insert Bitmap». This should be a suitable image for picture engraving see Page .
2
Select the image if not already selected, then select «Picture Parameters» from the
Bitmap Menu.
3
You will now have your picture ready to edit in the Picture Editor, see Figure 3. This is how your picture will look when engraved on an object.
53
Reference Manual
Picture Engraving
If you look at Figure 4, you will see the results are quite striking using the default values.
You can enhance the quality of the picture for engraving, if you think the results could be bettered by accessing the Advanced functions. You will now be able to adjust various parameters setting to accents certain areas of the picture.
Figure 4
Figure 3
How to
1
Right Click somewhere on the picture and select «Picture Parameters» from the menu.
2
From the Bitmap function dialogue box select «Advanced». You will now be presented with an extended set of editing parameters, see Figure 5.
3
We will now look at a description of how these extra parameters should be used.
4
First select the number of Grey Levels, a lower number gives you more details (higher resolution), a higher number gives a smoother picture, but takes longer to engrave.
5
Choose the desired Sharpness using the slider, a higher the value may make the face look older and takes longer to engrave.
6
You should then increase the black level as much as possible, without losing important details.
7
Decrease the white level as much as possible, without losing important details.
8
Set the gamma value to emphasise features.
54
GEM-RX Engraving Software
Chapter 9 Picture Engraving
You are now ready to engrave your picture. When selecting your engraving process you should use the one for picture engraving for optimum results.
Figure 5
Note : The picture that was used in the above example, has a black background.
The Picture Engraving software will not engrave black, therefore only the portrait
will be engraved and the background will be ignored, see Page 55 for more
details. Your picture will look normal in your drawing and will not reflect any changes made.
Masking
In some circumstances you may wish to remove the background from the picture, just leaving the portrait to be engraved.
Edit Mask
If you Right Click on the picture on your screen, you will be able to access the Transform menu, select «Edit Mask».
You will now have access to the Masking Toolbar.
The Masking functions all have easy access from the Masking Toolbars, which by default are docked on the right-hand side of your screen. These are only visible when the Masking function is accessed.
Masking Toolbar
Normal Brush
The Normal Brush is used to paint and flood fill a mask.
55
Reference Manual
Picture Engraving
Magic Brush
The Magic Brush is used to pick out edges when masking and has some special properties.
Clear Mask
Clear Mask is used to delete a mask from a picture.
Invert Mask
Invert Mask will cause all masked areas to be unmasked and all unmasked areas to be masked.
Mask Settings Toolbar
Depending on the colour of the background you wish to mask, you have a choice of colours to paint the mask.
Mask Setting Red
Mask setting red sets the mask to be red in colour.
Mask Setting Green
Mask setting green sets the mask to be green in colour.
Mask Setting Blue
Mask setting blue sets the mask to be blue in colour.
You can vary the intensity of the chosen mask colour by selecting one of the grayscale boxes on the right of the Mask Settings Toolbar.
Mask Intensity Low
Select the above to give the chosen mask colour a transparency.
Mask Intensity High
Select the above to give the mask a solid colour.
You now need to see how to use the Masking Tools, to remove the background of a picture before engraving.
56
GEM-RX Engraving Software
Chapter 9 Picture Engraving
How to
1
Insert a picture using the methods described previously, see Page 51. Right Click on it
and select «Edit Mask» from the Dialogue Box.
2
You will now be able to use the Masking Tools. Select the «Magic Brush» and a mask colour, the best colour is one that is a complete contrast to the background you wish to mask.
3
You can adjust the size of the mask brush, using the scroll wheel on your mouse. Now start to follow the edge of the person with the Left Mouse Button held down, the background will now be painted over. You do not have to be very accurate when using the Magic Brush, the idea is to detect the edges for you, see Figure 1.
Figure 1
Figure 2
4
Do not worry if you stray over the edge, to remove any excess just Click and hold down the Right Mouse Button over the excess and it will be removed. To finish off your mask once you have completed the outline just Click somewhere on the background holding down the shift key, see Figure 2.
5
To exit the masking function press < Esc > you will now see the picture with the background removed. You can then go on to process the picture ready for engraving,
using the Picture Parameters as before see Page 53.
•
Options
Re Sample
You can alter the size of your picture by Clicking on Re Sample. You will be presented with a
Dialogue box similar to above, just enter the size in pixels you wish to alter your picture to.
Your picture will now be changed to the size, by re sampling the quality of your picture is maintained.
57
Reference Manual
Picture Engraving
Trim to Mask
You can trim your picture to the extremities of the mask you have painted.
Clear Mask
Clear Mask is used to delete a mask from a picture.
Invert Mask
Invert Mask will cause all masked areas to be unmasked and all unmasked areas to be masked.
U-MARQ Picture Engraving software produces some excellent results and is really worth spending the time learning how to get the best results.
Note : To get the best result your picture should be brought in to the software at the highest resolution possible, i.e., a minimum of 120dpi.
58
GEM-RX Engraving Software
Chapter 10Transform Functions
Transform Functions
Transform Menu
The Transform Menu give you access to all of GEM-RX Engraving Software’s Object transformation and alteration functions.
Move Dynamic
Move
The Move Dynamic function is accessed by Clicking with the Left mouse button on the
Transform Toolbar, Move icon, this function is used to Move objects dynamically using the only the mouse.
How to
1
Select the Object with the Pick tool by Clicking with the Left mouse button, you can select more than one Object, using any of the multi-select options, all the Selected
Object will go Dotty.
2
Select the Move icon by Clicking with the Left mouse button on the Transform
Toolbar.
3
Place the Pick tool on any segment and holding the Left mouse button down, Drag to the desired position, when satisfied release the Mouse button.
Resize
Resize icon
The Resize function is accessed from the Transform Menu or by Clicking with the Left mouse button on the Transform Toolbar, Resize icon.
Scaling Dynamic
The Scale Dynamic function is accessed by Clicking with the Left mouse button on the
Transform Toolbar, Resize icon, this function is used to scale objects dynamically using the only the mouse.
How to
1
Select the Object with the Pick Tool by Clicking with the Left mouse button, you can select more than one Object, using any of the multi-select options, all the selected objects will go Dotty.
2
Select the Resize icon by Clicking with the Left mouse button on the Transform
Toolbar.
59
Reference Manual
Transform Functions
3
Eight Nodes will appear, you can now Scale by grabbing one of the corner nodes and
Dragging with the Left mouse button depressed, when satisfied release the Mouse button. In this mode all selected objects will be scaled from the centre.
•
Options
If you press < Left Shift > while Dragging, the Object will scale, locking the opposite node to the one being Dragged.
Stretch Dynamic
The Stretch Dynamic function is accessed by Clicking with the Left mouse button on the
Transform Toolbar, Resize icon, this function is used to stretch Objects dynamically using the only the mouse.
How to
1
Select the Object with the Pick Tool by Clicking with the Left mouse button, you can select more than one object, using any of the multi-select options, all the selected object will go Dotty.
2
Eight Nodes will appear, you can now stretch by grabbing one of the centre nodes and
Dragging with the Left mouse button depressed, when satisfied release the Mouse
Button.
•
Options
If you press < Left Shift > while Dragging, the movement will be restricted to horizontal only (i.e. in the «X» direction). If you press < Alt > while Dragging, the movement will be restricted to vertical only (i.e. in the «Y» direction).
Rotate Dynamic
Rotate
The Rotate Dynamic function is accessed by Clicking with the Left mouse button on the
Transform Toolbar, Rotate icon, this function is used to Rotate objects dynamically using the only the mouse.
How to
1
Select the Object with the Pick tool by Clicking with the Left mouse button, you can select more than one Object, using any of the multi-select options, all the Selected Object will go Dotty.
2
Eight Nodes will appear you can now rotate by grabbing the appropriate node and
Dragging with the Left mouse button depressed, when satisfied release the Mouse
Button.
GEM-RX Engraving Software will Rotate the Objects locking the centre point.
60
Multi Mode
GEM-RX Engraving Software
Chapter 10 Transform Functions
•
Options
If you press < Shift > while Dragging the right node the left corner diagonally opposite will be locked. Conversely if you If you press < Shift > while Dragging the left node the right corner diagonally opposite will be locked. If you press < Ctrl > while Dragging, the rotation angle will be restrained to 15° increments.
Note : An important feature to note is that all Selected circles and arcs will be converted to Béziers curves using the Stretch functions, since they cannot survive as Circles and Arcs. An Object can be a single segment or number of segment connected or not, a Path, a single Object, a Face or group of Objects.
61
Arrange Menu
GEM-RX Engraving Software
Chapter 11Arrange Functions
Arrange Function
The Arrange Menu takes you to the tools used to Align, Space, Distribute and generally
Arrange Objects within your drawing.
Centre to Workspace
Centre to Workspace
The Centre to Workspace function will centre all selected object vertically and horizontally in the Workspace, without changing the spacing.
Horizontal Centre
Horizontal Centre icon
The Horizontal Centre function, enables you to select a number of Objects and place them relative to the centre of the Workspace in the horizontal plane. No alteration to spacing of the
Objects in either the horizontal or vertical plane will take place.
Vertical Centre
Vertical Centre icon
The Vertical Centre function, enables you to select a number of Objects and place them relative to the centre of the Workspace in the vertical plane. No alteration to spacing of the
Objects in either the horizontal or vertical plane will take place.
Ignore Groups
Ignore Groups icon
Click On this icon will allow you to select object that are grouped together and edit individual items without ungrouping them.
63
Tools Menu
GEM-RX Engraving Software
Chapter 12Tool Functions
Tool Functions
The Tools Menu takes you to GEM-RX Engraving Software’s utility and setup functions.
Workspace Setup
The Workspace Dialogue box, accessed from the Workspace Setup Menu, this is where you setup all your Workspace environments.
•
Options
Machining Modes
Centre Vice : Select this Mode for flat work using the Self Centring Vice. For more information see Page .
Cylindrical : Select this Mode to use the Cylindrical assembly when engraving pens etc. For more information see Page .
Inside Ring Engraving : Select this mode for use with the GEM-RX Ring Engraving attachment, (this has to be purchased as an extra). For more information see Page .
65
Reference Manual
Tool Functions
Outside Ring Engraving : Select this mode for use with the GEM-RX Ring
Engraving attachment, (this has to be purchased as an extra). For more information see Page .
Workspace Size
Width : This may be entered in the numeric entry box, this set the Workspace size in the «X» direction.
Height : This may be entered in the numeric entry box, this set the Workspace size in the «Y» direction, select Workspace : Clicking on this button will allow you to select the Workspace from a list box of sizes you have saved previously.
Workspace Positions
Machine Bed Bottom Left Corner : Clicking on Change, you can setup where the
Workspace is with reference to the Bottom Left Corner of the Machine Bed. Using the position on Machine Bed Dialogue box, you can pick one of the nine points where the Workspace will be placed. An offset can also be applied, to take into account things like machine home positions, not being at the exact top left of the machine bed etc.
Note : A quick way to setup the position of the Workspace on the Machine Bed, is to Right Click On the Machine Bed and select the required position using the
Workspace Position Toolbox.
Setting up the Workspace
How to
1
Select Workspace setup from the Tools Menu.
2
Enter the Width and Height of your plate to be engraved.
3
Click On the Change button Workspace position on the Machine bed.
4
Click On one of the nine positions, this will refer to the centre of the Workspace.
As you can see the Workspace can be placed anywhere on the machine bed precisely, with very little effort.
66
Units Setup
GEM-RX Engraving Software
Chapter 12Tool Functions
The Units Menu is accessed from the Tools Menu, this is used to setup all your working unit
.e., metric or imperial, decimal places, scale etc.
Drawing Co-ordinates
Decimals : This is the number of decimal places you wish to use for Drawing
Co-ordinates.
Units : This is the unit of measurement you wish to use. You can choose between the following :
1 m
2 cm
3 mm
4 u
5 In
: metre
: centimetre
: millimetre
: micron, 1/1.000.000 metre
: Inch, English / American
Production
Speed : You set the units for Feed Rates here.
Time : You set the units for Dwells here.
Select Language.
Hot Key < Shift > + < F12 >
You can select any supported language in GEM-RX Engraving Software direct from the
Tools Menu, there is no need to re-boot your computer.
Toggle Language
Hot Key < F12 >
67
Reference Manual
Tool Functions
You can toggle between the present Language and the previous Language, there is no need to re-boot your computer.
Preferences
The Preferences Dialogue box is accessed from the Tools Menu, this is where you can configure various setting and preferred options in GEM-RX Engraving Software.
Screen Tab
This is where you set your preferences for visible screen functions.
•
Options
Scroll Bars : By un-checking this box you can turn the Scroll Bars off to give you more screen space.
Status Bar : By un-checking this box you can turn the Status Bar off to give you more screen space.
Show Machine : By checking this box you can make the Machine Bed visible.
Text Tab
This is where you set your preferences for Text functions in GEM-RX Engraving Software.
•
Options
Auto Text Welding : When this box is Checked, the outline font automatic text welding is activated.
Use Font Kerning : When this box is Checked, the auto font kerning is activated.
Auto Condense Parameters
Min Word Spacing : This is the amount of condensing that will be applied between words, when using the Auto Condense Function.
Min Char Spacing : This is the amount of condensing that will be applied between characters, when using the Auto Condense Function.
Minimum Stretch : This is the amount of condensing that will be applied to each character, when using the Auto Condense Function.
Import / Export Tab
This is where you set your preferences for the Import / Export functions in GEM-RX
Engraving Software.
•
Options
No Polylines in DXF Export : Some Third Party programmes, (see their technical documentation) will not import DXF file correctly that contain Polylines. You have the option to export DXF file without Polylines by checking this box.
Import Auto-Connect : When this box is Checked, all imported Objects will automatically have their paths connected if the nodes are over each other.
68
GEM-RX Engraving Software
Chapter 12Tool Functions
Misc Tab
•
Options
Auto Snap Angle : You can enter the snap angle which will be applied when Holding down the <Ctrl > Key in certain functions.
Auto Snap Length : This sets the distance for the Auto Snap.
Nudge : This entry set the distance of the Nudge when using the Arrow Keys.
Precision : This sets the general precision of the conversion and output functions in
GEM-RX Engraving Software.
69
GEM-RX Engraving Software
Chapter 13Production Functions
Production Menu
Production Functions
The Production Menu takes you to the tools used to setup production parameters, create offset and clearing Toolpaths within your drawing.
Device = xxxx
Clicking on this will allow you to select a machine to output to, you are offered a choice from the List box.
Engrave
Hot Key < Atl > + < 1 >
Engrave icon
Basic Production allows you to send a job to the Production Manager after having Selected a material from your Material Database, this will have been assigned pre-set Depths, Feed Rate etc.
How to
1
Click On «Engrave», you will then be taken into the Processes Dialogue Box.
2
You will then select a Process, this will depend on the type of engraving you are doing, i.e. Diamond Drag, Engraving Brass etc. Select the one that is appropriate, see Figure
1.
3
If you wish to alter any of the Process settings, Click On the Padlock. You are now able to alter any setting for this job.
4
The Click On «OK».
The job will now be sent to your GEM-RX Engraving Machine..
71
Reference Manual
Production Functions
Engrave Selected Only
Hot Key < Alt > + < 4 >
Selected Only
By Selecting this icon you can produce only the items that you select. This is useful for re-engraving parts of a job that have not been engraved deep enough.
How to
1
Select the object or objects you wish to send to your GEM-RX Engraving Machine, using the Pick Tool.
2
You now select the settings required, in the Processes Dialogue Box. See Figure 1.
3
Click On «OK».
72
Figure 1
GEM-RX Engraving Software
Chapter 13Production Functions
Your GEM-RX Engraving Machine will now engrave only the selected objects.
Measure Plate
Hot Key < Shift > + < Alt > + < 3 >
You can use your machine to measure the size and position of your plate.
Measure Plate icon
How to
1
Place your Plate on the machine.
2
Select Measure Plate from the Production Toolbar or the Production Menu.
3
You are asked to select the first position. Move the “X” and “Y” axes using your
GEM-RX Engraving Machine Keypad, to the Top Left corner of your plate.
4
You are then asked to select the opposite corner of your plate. Move the «X», «Y» axes to the Bottom Right corner of your plate.
The Workspace will bee moved to the correct position and sized on your computer screen.
You can now design your drawing, if you have not already done so and send to your
GEM-RX Engraving Machine as normal.
Note : You can Jog the «Z» axis down to near the surface. This will make it easier to select the exact corner of your plate.
Read Reference Position
Hot Key < Shift > + < Alt > + < 4 >
Read Reference icon
This function allows you to set a position on your Workspace with reference to the “X”, “Y” position of your machine, this is transferred to your screen.
How to
1
Move the “X” and “Y” axes using your GEM-RX Engraving Machine Keypad, to the required position. This can be a position in the Workspace, or an object in the drawing etc.
2
Click On Read Reference Position from the Production Menu.
3
Select the position on the screen, that reflects the position you have jogged the machine too.
The Workspace will now be moved within the Machine Bed on your drawing to reflect the chosen position.
73
Reference Manual
Production Functions
Note : You can Jog the «Z» axis down to near the surface. This will make it easier to select the exact corner of your plate.
Measure Circle Centre/Point
You can use your GEM-RX Engraving Machine to measure circular objects, or areas to be engraved.
How to
1
Place the circular object to be engraved in the Self Centring Vice, you do not need to be very accurate when doing this.
2
Move the «X» and «Y» axes using the GEM-RX Engraving Machine Keypad, to the centre
On «OK».
point on the circular item, or the centre of the circular engraving area, Click
3
Move the «X» and «Y» axes using the GEM-RX Engraving Machine Keypad, to the outer point on the circular item, or the outer extent of the circular engraving area,
Click On «OK».
4
You will notice that the Workspace has been positioned on the Machine Bed to reflect the exact position of the circular item or circular engraving area. Now compose your engraving, if you have not already done so.
You can now send your job to the GEM-RX Engraving Machine in the normal way, setting your Processes etc.
Measure Circle 3 Points
You can also use your GEM-RX Engraving Machine to measure circular object or engraving areas, where the centre is difficult to find.
1
Place the circular object to be engraved in the Self Centring Vice, you do not need to be very accurate when doing this.
2
Move the «X» and «Y» axes using the GEM-RX Engraving Machine Keypad, to an outside point on the circular item, or the outside of the circular engraving area, Click
On «OK».
3
Move the «X» and «Y» axes using the GEM-RX Engraving Machine Keypad, to another outside point on the circular item, approximately 1/3rd of the way round from the first selected point, or the outer extent of the circular engraving area, Click On
«OK».
4
Move the «X» and «Y» axes using the GEM-RX Engraving Machine Keypad, to another from the
On outside point on the circular item, approximately 1/3rd of the way round second selected point, or the outer extent of the circular engraving area, Click
«OK»
74
GEM-RX Engraving Software
Chapter 13 Production Functions
5
You will notice that the Workspace has been positioned on the Machine Bed to reflect the exact position of the circular item or circular engraving area. Now compose your engraving, if you have not already done so.
You can now send your job to the GEM-RX Engraving Machine in the normal way, setting your Processes etc.
Configuration Menu
The Configuration Menu is accessed from the Production Menu, this takes you to GEM-RX
Engraving Software’s Machine setup and Parameters.
Machine Setup
This is where you set the Start and Finish points on the Workspace, offsets etc.
•
Options
Stop At First Cut : Checking this box will cause the cutter to stop at first cut, material surface.
X Y Setup Point : You can set an “X” “Y” start position by selecting one of the
Standard Nine Positions, this is where you would reference the start on your
Workspace. You may also set an “X” “Y” offset from the chosen position. (if no selection is made the “X “Y” and “Z” axes will go straight to surface first cut).
Finish Point : You can set an “X” “Y” finish position by selecting one of the
Standard Nine Positions, this is where you would want your “X” “Y” axes to finish on your Workspace. You may also set an “X” “Y” offset from the chosen position. (if no selection is made the “X “Y” and “Z” axes will go bake to its home position).
Machine Parameters
This is where the general parameters are set for the GEM-RX Engraving Machine.
•
Options
Dimensions
X : This is the maximum travel in the “X” direction of machine.
Y : This is the maximum travel in the “Y” direction of machine.
Z Axis
Max Travel : This is the maximum travel of the “Z” axis on the machine.
75
GEM-RX Engraving Software
Chapter 14 Shading
Shading
When working with logos or designs, you may wish to make them stand out. To achieve this you can use the Shading Function in the GEM-RX Engraving Software.
You can select an image from the Clipart in the GEM-RX Engraving Software or Import one from another source (see Figure 1).
Figure 1
Holding the left mouse button drag a box around your logo, it will go Dotty. From the Main
Toolbar select the Shading 45° Icon.
The 45° Shading Icon
Figure 2
77
Reference Manual
Shading
You will now see a Shading Parameters Dialogue Box (see Figure 2), this will allow you to alter the level of shading. Holding the Left Mouse Button Down, move the slider to the left to make the Shading appear finer, to the right to make the Shading appear coarser. Now Left
Click On the area of your selected item, you wish to shade.
Figure 3 Figure 4
The results are shown in (Figure 3) using the midway setting and in (figure 4) using a fine setting.
You can Shade different areas in the same drawing, with different Shading Parameters. Select all parts of you drawing similar to (Figure 5).
Figure 5
Select 45° Shading from the Main Toolbar. Select a Medium Shading from the Shading
Parameters Dialogue Box. Click somewhere inside the left hand side leaf of the holly, then on the right hand leaf. See the results in (Figure 6).
78
GEM-RX Engraving Software
Chapter 14 Shading
Figure 6
Ensure that the drawing is still selected i.e. is Dotty and select the Double Hatch from the
Main Toolbar.
Double Hatch Icon
You will now have the familiar Shading Parameters Dialogue Box, move the slide towards fine. Click On «OK», the Click somewhere inside the holly berries. the results should be similar to (Figure 7).
As you can see you can create many interesting effects and designs, to enhance the value of some quite ordinary items by using the unique Shading function, in your GEM-RX Engraving
Software.
79
GEM-RX Engraving Software
Chapter 15 Wizards
Wizards
Wizards
The GEM-RX Engraving Software contains a number of Wizards to assist you in completing various tasks and setups with ease.
New Device
You use this Wizard to install a new driver for a new device.
How to
1
Click On Wizards on the Main Menu Bar and select New Device.
2
You will now be able to choose any machine from the list box. You would normally choose GEM-RX 1, GEM-RX 2, GEM-RX 2 Plus, GEM-RX 3 or GEM-RX 3 Plus.
3
You now have to select the Output Device, Select «Stepper Controller», then Click On
«OK».
4
The Destination Setting will now appear, Select the Com Port you have connected your
GEM-RX Engraving Machine to, then Click On «OK».
5
Now the Machine Set-up menu will appear, these setting are correct so just Click On
«OK».
Your GEM-RX Engraving Machine is now ready for use.
Note : If you have purchased a GEM-RX Engraving Machine Ring attachment, you would load the GEM-RX 2 Plus driver. If you have not you would load the
GEM-RX 2 driver. The GEM-RX 1 does not support the Ring attachment.
Delete Device
Clicking On this will delete the selected device, the device will be removed from the device entries. If you wish to use a device that has been deselected, you will have to use the New
Device Wizard to re-install it.
81
GEM-RX Engraving Software
Chapter 16 Help Menu
Help
Help Menu
The Help Menu is accessed from the Main Menu bar, this will take you to the on screen Help files, give you details of your version of GEM-RX Engraving Software and allow you to register your copy of GEM-RX Engraving Software.
Help
Hot Key < F1 >
This takes you to the Help File table of Contents and Index, you can Click On any subject and will be guided through to the appropriate Help section.
Dongle Registration
The Dongle Registration is normally used to register additional GEM-RX Engraving Software
Packages.
Adding Extra Software Packs
To upgrade your software to the next level is easy.
1
Contact your Supplier. Ensure you have your Dongle Serial Number to hand, it is on the Dongle plugged into the USB Port on your PC.
2
Tell your supplier the Dongle Number and the software package(s) you wish to upgrade to eg. Extra Fonts.
3
Inform your Supplier of your contact details.
You will then receive a Registration Key for the package(s) you have ordered., this is normally within 24 Hrs.
To enter your new Registration Key, launch the GEM-RX Engraving Software. From the
Main Menu Bar Select «Help» , then select «Registration (see Figure 1). Now enter the 16 digit code you have been issued, this is case sensitive. Click On «OK», close the software down
then restart. Your new features are now ready to use., for more information see Page 89.
About GEM-RX Engraving Software
This gives you information on the version of GEM-RX Engraving Software you are running and brief details of the Copyright.
83
GEM-RX Engraving Software
Chapter 17Keyboard Shortcuts
Hot Keys
File Functions
New Drawing
New From Template
Open Drawing
Save Drawing
Save Drawing As
Import File
Export File
Edit Functions
Undo
Redo
Cut to Clipboard
Copy to Clipboard
Paste from Clipboard
Delete
Duplicate Single
Select All
Deselect All
Text Functions
Auto Layout
Auto Re-layout
Disk Text
Basic Text Composer
Basic Text Editor
Edit Dynamic Arc Text
Kern Text
Clear Kerning
Arrange Functions
Keyboard Hot Keys
< Ctrl > + < N >
< Ctrl > + < T >
< Ctrl > + < O >
< Ctrl > + < S >
< Ctrl > + < H >
< Ctrl > + < Shift > + < I >
< Ctrl > + < Shift > + < E >
< Ctrl > + < Z >
< Shift > + < Ctrl > + < Z >
< Ctrl > + < X >
< Ctrl > + < C >
< Ctrl > + < V >
< Del >
< Ctrl > + < Alt > + < S >
< Ctrl > + < A >
< Ctrl > + < Alt > + < D >
< Alt > + < A >
< Alt > + < R >
< Alt > + < N >
< S >
< Alt > + < S >
< Alt > + < F >
< K >
< Alt > + < K >
85
Reference Manual
Chapter 17Keyboard Shortcuts
Centre to Workspace
Horizontal Centre
Vertical Centre
Tool Functions
Workspace
Units Setup
Select Language
Toggle Language
Preferences
Production Functions
Quick Production
Produce Selected
Digitize Plate
Rotary Workpiece
Zoom Functions
Zoom Window
Zoom Last View
Zoom All
Redraw
Zoom Selected
Zoom Workspace
Zoom Machine Bed
Help Functions
Help
Super Hot Keys
Arrow Left
Arrow Right
Arrow Up
Arrow Down
Arrow Left
Arrow Right
Arrow Up
86
< Shift > + < Q >
< Shift > + < H >
< Shift > + < V >
< Alt > + < W >
< Alt > + < U >
< Shift > + < F12 >
< F12 >
< Alt > + < Y >
< Alt > + < 1 >
< Alt > + < 4 >
< Shift > + < Alt > + < 3 >
< Shift > + < Alt > + < W >
< F2 >
< F3 >
< F4 >
< F5 >
< F6 >
< F7 >
< Ctrl > + < F7 >
< F1 >
Nudge Left
Nudge Right
Nudge Up
Nudge Down
Nudge Left x 10
Nudge Right x 10
Nudge Up x 10
Arrow Down
Show Nodes
Show Direction
Zoom In !0%
Zoom In 100%
Zoom Out 10%
Zoom Out 100%
Zoom Machine Bed
GEM-RX Engraving Software
Chapter 17Keyboard Shortcuts
Nudge Down x 10
< Shift > + < F5 >
< Shift > + < F 6 >
< Shift > + < x >
< Shift > + < Z >
< X >
< Z >
< Ctrl > + < F7 >
87
GEM-RX Engraving Software
Chapter 18 Extra Software Packs
Extra Software Packs
You GEM-RX Engraving Software, can be expanded by purchasing Extra Software Packs.
GEM-RX Extra Font Pack
The GEM-RX Extra Font Pack containing 80 Extra Engraving Fonts, to add to the 20 in the original software.
GEM-RX Logo Generation Scanning and Vectorising
The GEM-RX Logo Generation, Scanning & Vectorising Software, allows you to Scan an image directly into the software, Vectorised and Engrave.
GEM-RX Freehand Tablet & Pen
Write directly into the software with a Pen on our special Tablet, your Hand Writing or
Design recreated exactly on your engraved item. Simple and easy to use !
Picture Engraving
For a full description of Picture Engraving see Page 51.
Adding Extra Software Packs
To upgrade your software to the next level is easy.
1
Contact your Supplier. Ensure you have your Dongle Serial Number to hand, it is on the Dongle plugged into the USB Port on your PC.
2
Tell your supplier the Dongle Number and the software package(s) you wish to upgrade to eg. Extra Fonts.
3
Inform your Supplier of your contact details.
You will then receive a Registration Key for the package(s) you have ordered., this is normally within 24 Hrs.
To enter your new Registration Key, launch the GEM-RX Engraving Software. From the
Main Menu Bar Select «Help» , then select «Registration (see Figure 1).
Figure 1
89
Reference Manual
Extra Software Packs
Now enter the 16 digit code you have been issued, this is case sensitive (see Figure 2).
Figure 2
Click On «OK», close the software down then restart. Your new features are now ready to use.
Note : You can receive your Registration Key by Fax or E-mail.
90
GEM-RX Engraving Software
Chapter 19 F. A. Q.
Frequently Asked Questions
How do I remove the cutter knob question
Both the brass cutter knob and the light touch work on a reverse thread, to remove turn clockwise, to put on turn anti-clockwise.
What do I do if I want to practice the engraving on the item question
Use engravers test tape with the diamond cutter and light touch. Put a three layers of tape over the item, the diamond will the mark the tape instead of your item. You can then check the accuracy of your setup and adjust if necessary.
What is the difference between the diamond cutter and the carbide cutters question
The diamonds are used primarily to scratch the surface of the material. The carbide cutters deep engraves the job, removing material from the cut, this necessary for paint infill.
Can I quit a rotary job half way through question
The machine isn’t doing what I want. What’s wrong question
When doing a rotary job if it has gone completely wrong. Press «Off-line» to pause the job, remove your cutter. Press
«Off-line» again to resume. The machine will now ghost over the surface of the material.
This is an easier method than trying to realign the workpiece.
You are sending the machine the wrong information from your computer. Press
«Home» on the controller. Check you have set the job up correctly and try again. Both the computer and GEM-RX Engraving
Machine, will only do what you the operator tell them.
When importing a bitmap there are parts I don’t want. How do I get rid of them question
Left Click On the «Ignore Groups» Icon then select the parts you do not need., then
Press «Delete» on your keyboard.
91
Reference Manual
F. A. Q.
Occasionally when doing complicated jobs, my Computer crashes and I lose my work. What do
I do question
Computers are strange beasts, too much information and they give up. When doing complex work that may take time, save the job occasionally, two seconds spent saving a job, is a lot better than repeating the work.
I cannot open a customers disc with their artwork on, Why question
Ensure that the disc is PC compatible and not Apple Mac format, to be certain ask your customer.
I have opened the customers Adobe
Illustrator file artwork, and the image is solid, and will not engrave
Why question
Your customer has saved a bitmap as an adobe illustrator file, contact your customer and tell them you need the image as a vector image, not a bitmap saved as an Adobe
Illustrator image.
I am trying to engrave a flat plate, but the machine moves to the middle and only moves backwards and forwards. What have I done
Wrong question
You have selected the Rotary Mode instead of Centre Vice, this will also be indicated by the background Machine Bed colour being
Magenta, instead of Dark Green. You need to Right Click on the Workspace, then select
«Workspace» and change the Mode to Centre
Vice.
92
GEM-RX Engraving Software
Chapter 20 Trouble Shooting
Trouble Shooting
USB to Serial Connection not working properly.
If you having problems connecting a Notebook or other PC to your GEM-RX Engraving Machine because it has no serial connection, you have to use a USB to Serial Converter. This device is plugged into a free USB Port and it creates a virtual serial port on your PC. For further information on configuration and use see your Quick Start Guide.
Sometimes my GEM-RX
Engraving Machine slows down or stops before finishing the job, especially on complicated jobs.
On your PC you should disable any screen savers and all power management. These can affect communications between your PC and your
GEM-RX Engraving Machine. If you are in doubt about how to do this, you should consult you PC
Supplier.
GEM-RX Engraving Machine runs erratically.
I only have the Standard 20
Font and have paid for the
Extra Font Pack.
You need to check that you have selected the correct voltage setting for your Country, for more information see your Quick Start Guide.
The Extra Fonts are an additional Software
Package, that has to be purchase separately. You have to enter a Code obtainable from your supplier, in the Registration Dialogue Box, within the
GEM-RX Engraving Software, for more
information see Page 83.
I Can’t access the my scanner in the GEM-RX Engraving
Software.
The Scanning and Logo Generation is an additional
Software Package, that has to be purchase separately. You have to enter a Code obtainable from your supplier, in the Registration Dialogue
Box, within the GEM-RX Engraving Software, for more information see your Quick Start Guide.
The vice is not centred in the
«X» axis.
Make sure you have loaded the correct driver for your machine, i.e. GEM-RX 1 for a GEM-RX 1,
GEM-RX 2 for a GEM-RX 2 etc. If you are in doubt you can check the model from the Serial No.
Plate, located on the back of your machine.
93
Reference Manual
Trouble Shooting
The PC will not recognise the
Security Device (Dongle).
Ensure that you have not plugged the Dongle into you PC, before you have installed the GEM-RX
Engraving Software. If you have you may be able to switch off your PC with the Dongle removed., then switch the PC back on again and replace the
Dongle in the USB Port, Windows should then be able to find the correct driver.
The Dongle or Scanner or USB to Serial Port Converter will not work when all plugged in together.
On some Computers although you may have 2 or more USB Ports, you may find that when you have some, or all of them populated certain devices plugged into them will not work. The reason for this is that although you may have a number of
Ports, they may all share the same internal power source, this will have a current limit. Modern
Scanners, USB to Serial Converters, Printers and
Dongle take their power from the USB Port, once the current limit is exceeded, they will cease to work correctly. The only solution if this occurs is to obtain a Powered Hub, these plug into the main to give extra current and are available from most
Computer Stores.
If Vismec is shut down and needs re-starting and the
GEM-RX Engraving Software is still open
If you accidentally shut Vismec down, the quickest way to re-start it is, from the GEM-RX Engraving
Software, select Production from the Main Menu
Bar, then Select Device and re-select the driver.
Vismec should then re-launch and your GEM-RX
Engraving Machine will Home, you can then use it as normal
94
GEM-RX Engraving Software
Index
Index
A
About GEM Engraving Software. . . . . . . . 83
Acquire . . . . . . . . . . . . . . . . . . . . . . . . . . . 30
Apply Button . . . . . . . . . . . . . . . . . . . . . . . 12
Arrange Menu . . . . . . . . . . . . . . . . . . . . . . 63
Centre to Workspace . . . . . . . . . . . . . . . . 63
Horizontal Centre. . . . . . . . . . . . . . . . . . . 63
Ignore Groups . . . . . . . . . . . . . . . . . . . . . 63
Vertical Centre . . . . . . . . . . . . . . . . . . . . . 63
Arrange Toolbar. . . . . . . . . . . . . . . . . . . . . 21
B
Basic Text Composer. . . . . . . . . . . . . . . . . 42
Bitmaps Menu
Toggle Bitmap . . . . . . . . . . . . . . . . . . . . . 53
Trace Bitmap . . . . . . . . . . . . . . . . . . . . . . 52
C
Cancel Button . . . . . . . . . . . . . . . . . . . . . . 12
Centre to Workspace . . . . . . . . . . . . . . . . . 63
Circular Monogram . . . . . . . . . . . . . . . . . . 49
Clear Kerning . . . . . . . . . . . . . . . . . . . . . . 48
Command Button. . . . . . . . . . . . . . . . . . . . 12
Components in GEM Engraving Software. 11
Apply Button . . . . . . . . . . . . . . . . . . . . . . 12
Cancel Button. . . . . . . . . . . . . . . . . . . . . . 12
Check Box . . . . . . . . . . . . . . . . . . . . . . . . 11
Command Button . . . . . . . . . . . . . . . . . . . 12
Cursors . . . . . . . . . . . . . . . . . . . . . . . . . . . 11
Dialogue Box . . . . . . . . . . . . . . . . . . . . . . 12
Docking Toolbars. . . . . . . . . . . . . . . . . . . 11
Drop Down Menu . . . . . . . . . . . . . . . . . . 11
Hint Bar . . . . . . . . . . . . . . . . . . . . . . . . . . 11
Main Menu Bar . . . . . . . . . . . . . . . . . . . . 11
Numeric Entry . . . . . . . . . . . . . . . . . . . . . 12
OK Button . . . . . . . . . . . . . . . . . . . . . . . . 13
Scroll Bars . . . . . . . . . . . . . . . . . . . . . . . . 11
Title Bar . . . . . . . . . . . . . . . . . . . . . . . . . . 11
Configuration Menu. . . . . . . . . . . . . . . . . . 75
Copy to Clipboard . . . . . . . . . . . . . . . . . . . 31
Cursors. . . . . . . . . . . . . . . . . . . . . . . . . . . . 11
Cut to Clipboard . . . . . . . . . . . . . . . . . . . . 31
D
Delete Device . . . . . . . . . . . . . . . . . . . . . . 81
Delete. . . . . . . . . . . . . . . . . . . . . . . . . . . . . 32
Deselect All . . . . . . . . . . . . . . . . . . . . . . . . 33
Device = xxxx . . . . . . . . . . . . . . . . . . . . . . 71
Dialogue Box. . . . . . . . . . . . . . . . . . . . . . . 12
Disk Text . . . . . . . . . . . . . . . . . . . . . . . . . . 44
Display Settings . . . . . . . . . . . . . . . . . . . . . 36
Docking Toolbars . . . . . . . . . . . . . . . . . . . 11
Dongle Registration . . . . . . . . . . . . . . . . . . 83
Draw Toolbar. . . . . . . . . . . . . . . . . . . . . . . 19
Drop Down Menu . . . . . . . . . . . . . . . . . . . 11
Duplicate Single. . . . . . . . . . . . . . . . . . . . . 32
Duplicate Workspace. . . . . . . . . . . . . . . . . 32
E
Edit Dynamic Arc Text . . . . . . . . . . . . . . . 46
Edit Menu . . . . . . . . . . . . . . . . . . . . . . . . . 31
Copy to Clipboard . . . . . . . . . . . . . . . . . . 31
Cut to Clipboard. . . . . . . . . . . . . . . . . . . . 31
Delete . . . . . . . . . . . . . . . . . . . . . . . . . . . . 32
Deselect All . . . . . . . . . . . . . . . . . . . . . . . 33
Duplicate Single. . . . . . . . . . . . . . . . . . . . 32
Duplicate Workspace . . . . . . . . . . . . . . . . 32
Paste from Clipboard . . . . . . . . . . . . . . . . 32
Redo . . . . . . . . . . . . . . . . . . . . . . . . . . . . . 31
Select All . . . . . . . . . . . . . . . . . . . . . . . . . 33
Undo. . . . . . . . . . . . . . . . . . . . . . . . . . . . . 31
Edit Toolbar. . . . . . . . . . . . . . . . . . . . . . . . 20
Engrave . . . . . . . . . . . . . . . . . . . . . . . . . . . 71
Engrave Selected Only. . . . . . . . . . . . . . . . 72
Exit . . . . . . . . . . . . . . . . . . . . . . . . . . . . . . 30
Export File . . . . . . . . . . . . . . . . . . . . . . . . . 18
Extra Software Packages . . . . . . . . . . . . . . 89
GEM Extra Font Pack . . . . . . . . . . . . . . . 89
Extra Software Packs
Add Extra Software Packs . . . . . . . . . . . 83,
89
GEM Feehand Tablet and Pen . . . . . . . . . 89
GEM Logo Generation, Vectorisation and
Scanning. . . . . . . . . . . . . . . . . . . . . . . . . . 89
F
File Menu
Acquire . . . . . . . . . . . . . . . . . . . . . . . . . . . 30
Exit . . . . . . . . . . . . . . . . . . . . . . . . . . . . . . 30
Export. . . . . . . . . . . . . . . . . . . . . . . . . . . . 29
New Drawing . . . . . . . . . . . . . . . . . . . . . . 27
New From Template . . . . . . . . . . . . . . . . 27
Save As. . . . . . . . . . . . . . . . . . . . . . . . . . . 28
Save Drawing . . . . . . . . . . . . . . . . . . . . . . 28
Save Setup Drawing. . . . . . . . . . . . . . . . . 29
Select Source . . . . . . . . . . . . . . . . . . . . . . 30
File Toolbar . . . . . . . . . . . . . . . . . . . . . . . . 17
New Drawing . . . . . . . . . . . . . . . . . . . . . . 17
95
Reference Manual
Index
Open Drawing . . . . . . . . . . . . . . . . . . . . . 17
Save As. . . . . . . . . . . . . . . . . . . . . . . . . . . 18
Save Drawing . . . . . . . . . . . . . . . . . . . . . . 17
Frequently Asked Questions . . . . . . . . . . . 91
G
Getting Started . . . . . . . . . . . . . . . . . . . . . . 11
H
I
Help . . . . . . . . . . . . . . . . . . . . . . . . . . . . . . 83
Dongle Registration . . . . . . . . . . . . . . . . . 83
Help Menu . . . . . . . . . . . . . . . . . . . . . . . . . 83
About GEM Engraving Software . . . . . . 83
Help . . . . . . . . . . . . . . . . . . . . . . . . . . . . . 83
Hint Bar . . . . . . . . . . . . . . . . . . . . . . . . . . . 11
Horizontal Centre. . . . . . . . . . . . . . . . . . . . 63
How to
Acquire . . . . . . . . . . . . . . . . . . . . . . . . . . . 52
Edit Bitmap . . . . . . . . . . . . . . . . . . . . . . . 52
Insert Bitmap . . . . . . . . . . . . . . . . . . . . . . 52
Scale . . . . . . . . . . . . . . . . . . . . . . . . . . . . . 59
Stretch Dynamic. . . . . . . . . . . . . . . . . . . . 60
How to’s. . . . . . . . . . . . . . . . . . . . . . . . . . . . 1
Ignore Groups . . . . . . . . . . . . . . . . . . . . . . 63
Import File . . . . . . . . . . . . . . . . . . . . . . . . . 18
Insert a Bitmap. . . . . . . . . . . . . . . . . . . . . . 52
Introduction . . . . . . . . . . . . . . . . . . . . . . . . . 1
K
Kern Text. . . . . . . . . . . . . . . . . . . . . . . . . . 47
Keyboard Hot Keys . . . . . . . . . . . . . . . . . . 85
L
License Agreement . . . . . . . . . . . . . . . . . . . 2
M
Machine Parameters. . . . . . . . . . . . . . . . . . 75
Machine Setup . . . . . . . . . . . . . . . . . . . . . . 75
Main Menu Bar . . . . . . . . . . . . . . . . . . . . . 11
Measure Circle 3 Points . . . . . . . . . . . . . . . 74
Measure Circle Centre/Point . . . . . . . . . . . 74
Measure Plate . . . . . . . . . . . . . . . . . . . . . . 73
Move Dynamic . . . . . . . . . . . . . . . . . . . . . 24,
59
N
New Device . . . . . . . . . . . . . . . . . . . . . . . . 81
New Drawing. . . . . . . . . . . . . . . . . . . . . . . 17
Numeric Entry . . . . . . . . . . . . . . . . . . . . . . 12
O
OK Button . . . . . . . . . . . . . . . . . . . . . . . . . 13
Open Drawing . . . . . . . . . . . . . . . . . . . . . . 17
P
Paste from Clipboard . . . . . . . . . . . . . . . . . 32
Production Menu . . . . . . . . . . . . . . . . . . . . 71
Configuration Menu. . . . . . . . . . . . . . . . . 75
Device = xxx . . . . . . . . . . . . . . . . . . . . . . 71
Engrave . . . . . . . . . . . . . . . . . . . . . . . . . . 71
Engrave Selected Only. . . . . . . . . . . . . . . 72
Measure Circle 3 Point. . . . . . . . . . . . . . . 74
Measure Circle Centre/Point . . . . . . . . . . 74
Measure Plate . . . . . . . . . . . . . . . . . . . . . . 73
Read Reference Position . . . . . . . . . . . . . 73
Production Toolbar . . . . . . . . . . . . . . . . . . 22
R
Read Reference Position . . . . . . . . . . . . . . 73
Redo. . . . . . . . . . . . . . . . . . . . . . . . . . . . . . 31
Redraw. . . . . . . . . . . . . . . . . . . . . . . . . . . . 36
Resize . . . . . . . . . . . . . . . . . . . . . . . . . . . . 59
Rotate Dynamic . . . . . . . . . . . . . . . . . . . . . 60
S
Save As . . . . . . . . . . . . . . . . . . . . . . . . . . . 18
Save Drawing . . . . . . . . . . . . . . . . . . . . . . 17
Save Setup Drawing . . . . . . . . . . . . . . . . . 29
Scaling Dynamic . . . . . . . . . . . . . . . . . . . . 59
Scroll Bars . . . . . . . . . . . . . . . . . . . . . . . . . 11
Select All . . . . . . . . . . . . . . . . . . . . . . . . . . 33
Select Source . . . . . . . . . . . . . . . . . . . . . . . 30
Select Toolbar
Deselect icon . . . . . . . . . . . . . . . . . . . . . . 21
Select All icon . . . . . . . . . . . . . . . . . . . . . 21
Shading . . . . . . . . . . . . . . . . . . . . . . . . . . . 77
Shading Toolbar. . . . . . . . . . . . . . . . . . . . . 23
T
Terminology . . . . . . . . . . . . . . . . . . . . . . . 15
Text Menu . . . . . . . . . . . . . . . . . . . . . . . . . 37
Auto Layout . . . . . . . . . . . . . . . . . . . . . . . 37
Auto Re-layout. . . . . . . . . . . . . . . . . . . . . 41
Basic Text Composer . . . . . . . . . . . . . . . . 42
Disk Text . . . . . . . . . . . . . . . . . . . . . . . . . 44
96
GEM-RX Engraving Software
Index
Edit Dynamic Arc Text . . . . . . . . . . . . . . 46
Title Bar. . . . . . . . . . . . . . . . . . . . . . . . . . . 11
Toggle Bitmap . . . . . . . . . . . . . . . . . . . . . . 53
Tool Menu
Units Setup . . . . . . . . . . . . . . . . . . . . . . . . 67
Workspace Setup . . . . . . . . . . . . . . . . . . . 65
Toolbars . . . . . . . . . . . . . . . . . . . . . . . . . . . 35
Arrange Toolbar. . . . . . . . . . . . . . . . . . . . 21
Draw Toolbar . . . . . . . . . . . . . . . . . . . . . . 19
Edit Toolbar . . . . . . . . . . . . . . . . . . . . . . . 20
File . . . . . . . . . . . . . . . . . . . . . . . . . . . . . . 17
Production Toolbar . . . . . . . . . . . . . . . . . 22
Shading Toolbar. . . . . . . . . . . . . . . . . . . . 23
Transform. . . . . . . . . . . . . . . . . . . . . . . . . 24
Zoom . . . . . . . . . . . . . . . . . . . . . . . . . . . . 23
Toolbars Overview . . . . . . . . . . . . . . . . . . 17
Tools Menu . . . . . . . . . . . . . . . . . . . . . . . . 65
Trace Bitmap . . . . . . . . . . . . . . . . . . . . . . . 52
Transform Menu . . . . . . . . . . . . . . . . . . . . 59
Move Dynamic. . . . . . . . . . . . . . . . . . . . . 59
Resize . . . . . . . . . . . . . . . . . . . . . . . . . . . . 59
Transform Toolbar. . . . . . . . . . . . . . . . . . . 24
Stretch
Dynamic . . . . . . . . . . . . . . . . . . . . . . 60
U
Undo . . . . . . . . . . . . . . . . . . . . . . . . . . . . . 31
Units Setup . . . . . . . . . . . . . . . . . . . . . . . . 67
V
Veiw Menu
Kern Text . . . . . . . . . . . . . . . . . . . . . . . . . 47
Zoom Selected Objects . . . . . . . . . . . . . . 36
Zoom Workspace . . . . . . . . . . . . . . . . . . . 36
Vertical Centre. . . . . . . . . . . . . . . . . . . . . . 63
View Menu
Circular Mongram . . . . . . . . . . . . . . . . . . 49
Clear Kerning . . . . . . . . . . . . . . . . . . . . . . 48
Display Settings . . . . . . . . . . . . . . . . . . . . 36
Redraw . . . . . . . . . . . . . . . . . . . . . . . . . . . 36
Toolbars . . . . . . . . . . . . . . . . . . . . . . . . . . 35
Zoom All . . . . . . . . . . . . . . . . . . . . . . . . . 35
Zoom Last View. . . . . . . . . . . . . . . . . . . . 35
Zoom Machine Bed . . . . . . . . . . . . . . . . . 36
Zoom Window . . . . . . . . . . . . . . . . . . . . . 35
W
Wizards . . . . . . . . . . . . . . . . . . . . . . . . . . . 81
Delete Device . . . . . . . . . . . . . . . . . . . . . . 81
New Device . . . . . . . . . . . . . . . . . . . . . . . 81
Workspace Setup . . . . . . . . . . . . . . . . . . . . 65
Z
Zoom All . . . . . . . . . . . . . . . . . . . . . . . . . . 35
Zoom Last View . . . . . . . . . . . . . . . . . . . . 35
Zoom Machine Bed . . . . . . . . . . . . . . . . . . 36
Zoom Selected Objects . . . . . . . . . . . . . . . 36
Zoom Toolbar . . . . . . . . . . . . . . . . . . . . . . 23
Zoom Window . . . . . . . . . . . . . . . . . . . . . . 35
Zoom Workspace. . . . . . . . . . . . . . . . . . . . 36
97