1. Overview
What you’ll learn
In this tutorial, we will guide you through the steps required to install Ubuntu Desktop on your laptop or PC.
What you’ll need
-
A laptop or PC with at least 25GB of storage space.
-
A flash drive (12GB or above recommended).
Whilst Ubuntu works on a wide range of devices, it is recommended that you use a device listed on the Ubuntu certified hardware page. These devices have been tested and confirmed to work well with Ubuntu.
If you are installing Ubuntu on a PC or laptop you have used previously, it is always recommended to back up your data prior to installation.
2. Download an Ubuntu Image
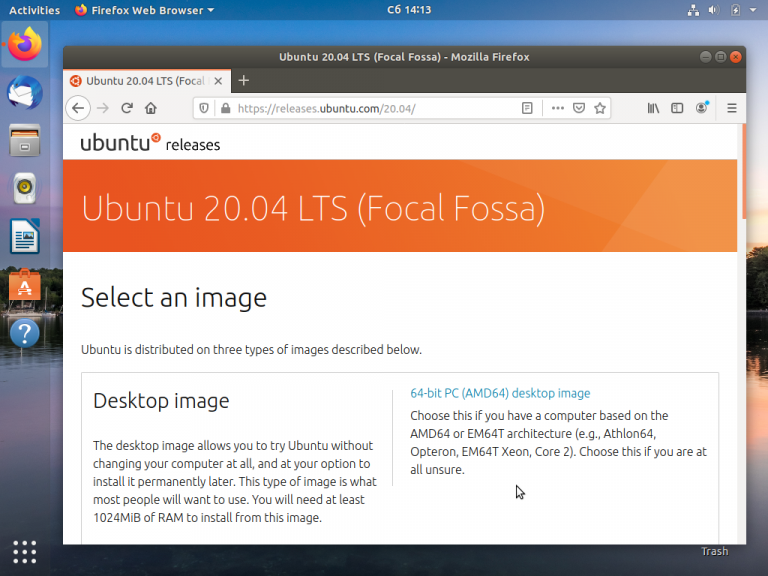
You can download an Ubuntu image here. Make sure to save it to a memorable location on your PC! For this tutorial, we will use the Ubuntu 23.04 release which uses the new Ubuntu Desktop installer that will be included in all future Ubuntu releases.
If you are installing an older version of Ubuntu, such as Ubuntu 22.04 LTS, you will find that the visual presentation of the installer is different, but the overall flow should remain the same.

3. Create a Bootable USB stick
To install Ubuntu Desktop, you need to write your downloaded ISO to a USB stick to create the installation media. This is not the same as copying the ISO, and requires some bespoke software.
For this tutorial, we’ll use balenaEtcher, as it runs on Linux, Windows and Mac OS. Choose the version that corresponds to your current operating system, download and install the tool.
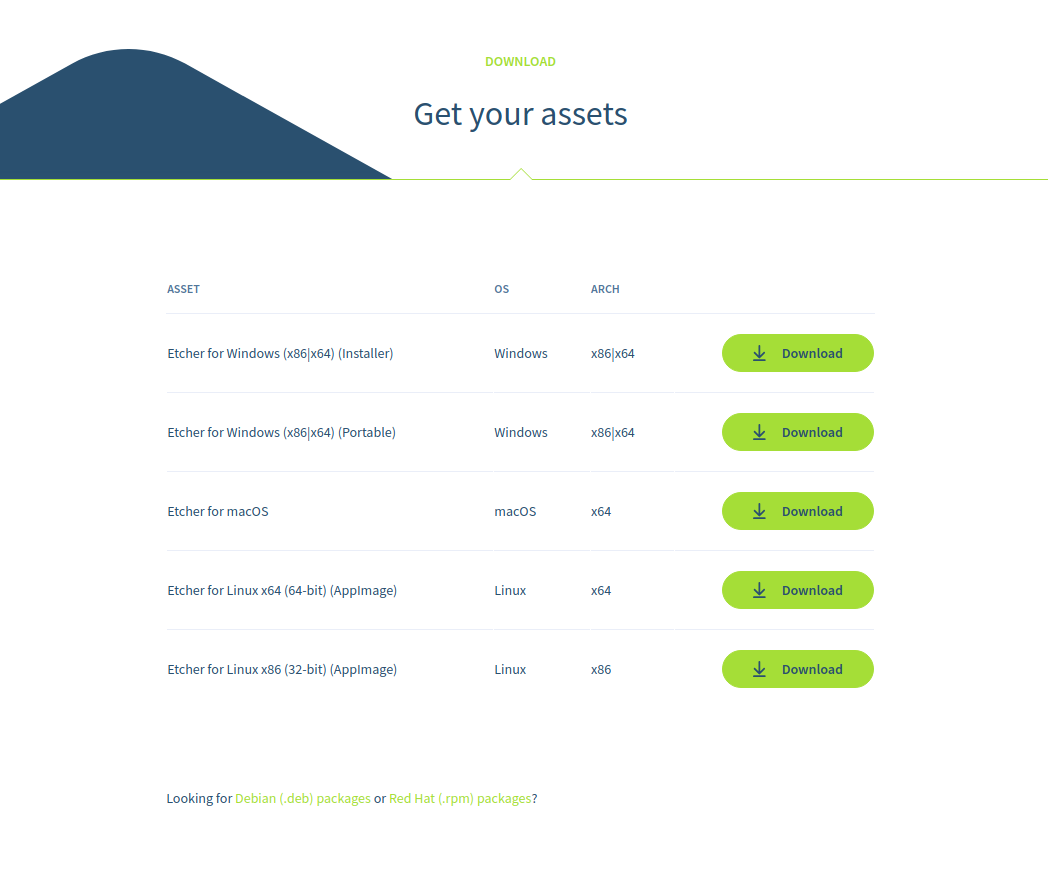
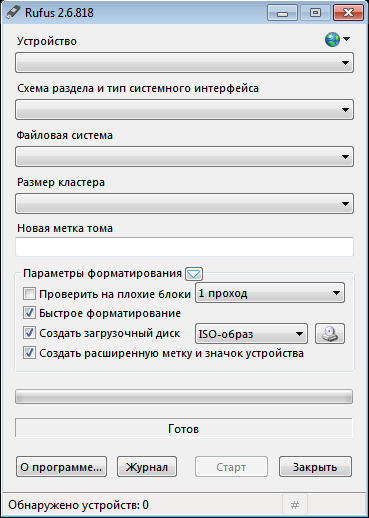
If you prefer to use a different tool to create your USB, we also have tutorials for Rufus on Windows, Etcher on Mac OS and Startup Disk Creator on Ubuntu.
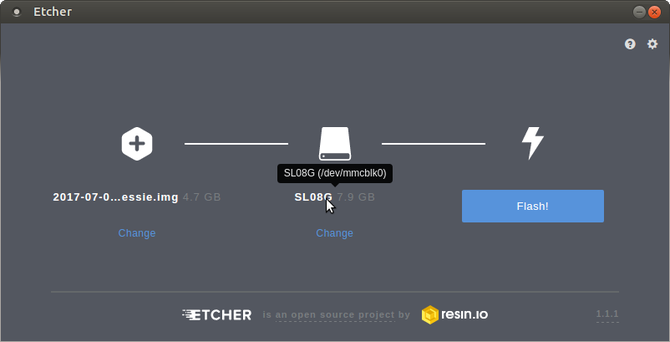
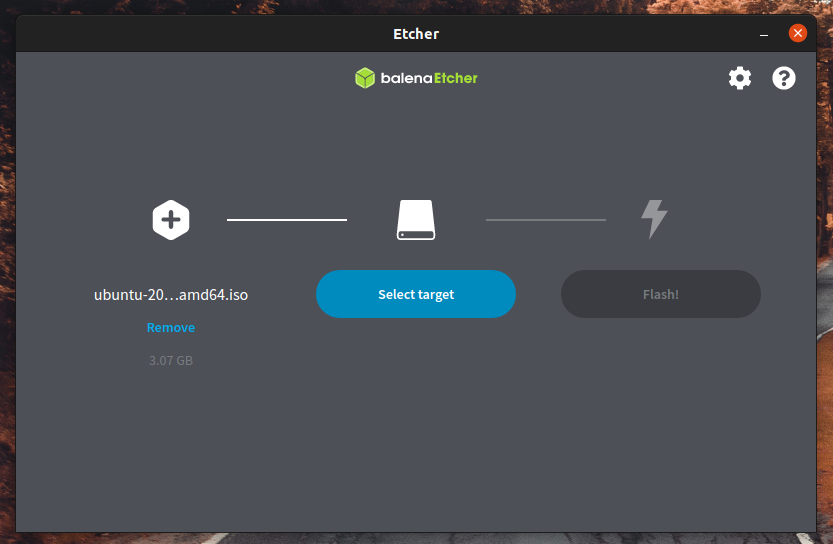
Select your downloaded ISO, choose your USB flash drive, and then click Flash! to install your image.
Installing Ubuntu from a DVD
It’s also possible to install Ubuntu from a DVD instead of USB. Follow these guides to burn an Ubuntu installation DVD on Windows, MacOS or Ubuntu, then select the CD drive instead of USB device on the boot options screen in the following step.
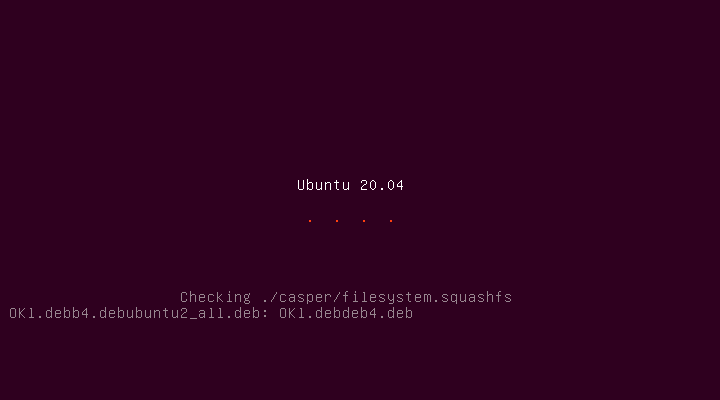
4. Boot from USB flash drive
Insert the USB flash drive into the laptop or PC you want to use to install Ubuntu and boot or restart the device. It should recognise the installation media automatically. If not, try holding F12 during startup and selecting the USB device from the system-specific boot menu.
F12 is the most common key for bringing up your system’s boot menu, but Escape, F2 and F10 are common alternatives. If you’re unsure, look for a brief message when your system starts – this will often inform you of which key to press to bring up the boot menu.
Once the installer has initialised you will be invited to choose your language

3. Create a Bootable USB stick
To install Ubuntu Desktop, you need to write your downloaded ISO to a USB stick to create the installation media. This is not the same as copying the ISO, and requires some bespoke software.
For this tutorial, we’ll use balenaEtcher, as it runs on Linux, Windows and Mac OS. Choose the version that corresponds to your current operating system, download and install the tool.
If you prefer to use a different tool to create your USB, we also have tutorials for Rufus on Windows, Etcher on Mac OS and Startup Disk Creator on Ubuntu.
Select your downloaded ISO, choose your USB flash drive, and then click Flash! to install your image.
Installing Ubuntu from a DVD
It’s also possible to install Ubuntu from a DVD instead of USB. Follow these guides to burn an Ubuntu installation DVD on Windows, MacOS or Ubuntu, then select the CD drive instead of USB device on the boot options screen in the following step.
4. Boot from USB flash drive
Insert the USB flash drive into the laptop or PC you want to use to install Ubuntu and boot or restart the device. It should recognise the installation media automatically. If not, try holding F12 during startup and selecting the USB device from the system-specific boot menu.
F12 is the most common key for bringing up your system’s boot menu, but Escape, F2 and F10 are common alternatives. If you’re unsure, look for a brief message when your system starts – this will often inform you of which key to press to bring up the boot menu.
Once the installer has initialised you will be invited to choose your language
And then presented with the option to try or install Ubuntu.
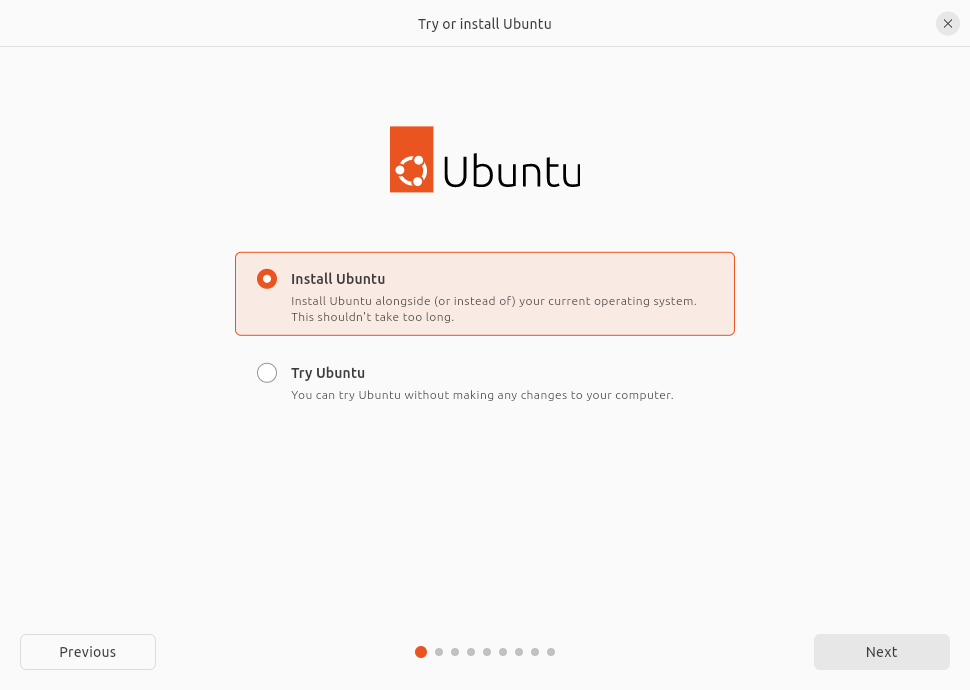
If you click Try Ubuntu, you can preview Ubuntu without making any changes to your PC. You can return to the installer menu at any time by clicking the Install Ubuntu shortcut on the desktop.
To proceed, click Install Ubuntu.
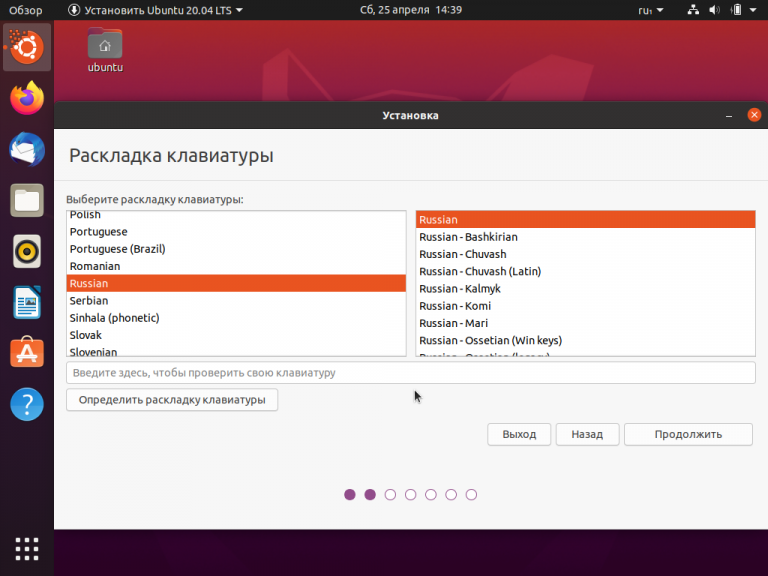
You will be asked to select your keyboard layout. Once you’ve chosen one, click Continue.

If you click Try Ubuntu, you can preview Ubuntu without making any changes to your PC. You can return to the installer menu at any time by clicking the Install Ubuntu shortcut on the desktop.
To proceed, click Install Ubuntu.
You will be asked to select your keyboard layout. Once you’ve chosen one, click Continue.
Next you will be asked to connect to wi-fi, this will allow Ubuntu to download updates and third party drivers (such as NVIDIA graphics drivers) during installation. Once you have connected to wi-fi (or chosen to proceed offline) then we can continue to the installation setup.
(Alert) RST is enabled
Some PC’s use Intel RST (Rapid Storage Technology) which is not supported by Ubuntu. If this is the case then you will not be able to proceed beyond this point without disabling RST in the bios menu of your machine. If you encounter this pop-up please visit help.ubuntu.com/rst for more information.

5. Installation Setup
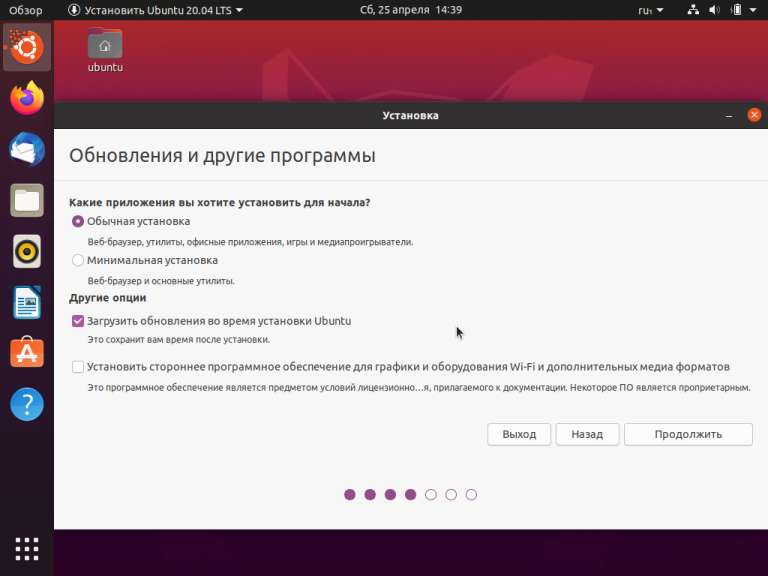
You will be prompted to choose between the Normal installation and Minimal installation options. The minimal installation is useful for those with smaller hard drives or who don’t require as many pre-installed applications.
In Other options, you will be prompted to download updates as well as third-party software that may improve device support and performance (for example, Nvidia graphics drivers) during the installation. It is recommended to check both of these boxes.

5. Installation Setup
You will be prompted to choose between the Normal installation and Minimal installation options. The minimal installation is useful for those with smaller hard drives or who don’t require as many pre-installed applications.
In Other options, you will be prompted to download updates as well as third-party software that may improve device support and performance (for example, Nvidia graphics drivers) during the installation. It is recommended to check both of these boxes.
6. Type of installation
This screen allows you to configure your installation. If you would like Ubuntu to be the only operating system on your hard drive, select Erase disk and install Ubuntu.
If your device currently has another operating system installed, you will receive additional options to install Ubuntu alongside that OS rather than replacing it.

Let’s take a moment to review all of the above options in detail.
Installing Ubuntu alongside another operating system
If you select this option you will be given a simple interface that allows you to select the drive you want to install Ubuntu on and a slider to determine the amount of disk space you would like Ubuntu to use. The available space is limited by the existing contents of the disk and is designed to avoid overwriting existing files.
This view automatically selects the largest partition on the drive. For more fine-grained control you can switch to the Manual partitioning option that is detailed further down.
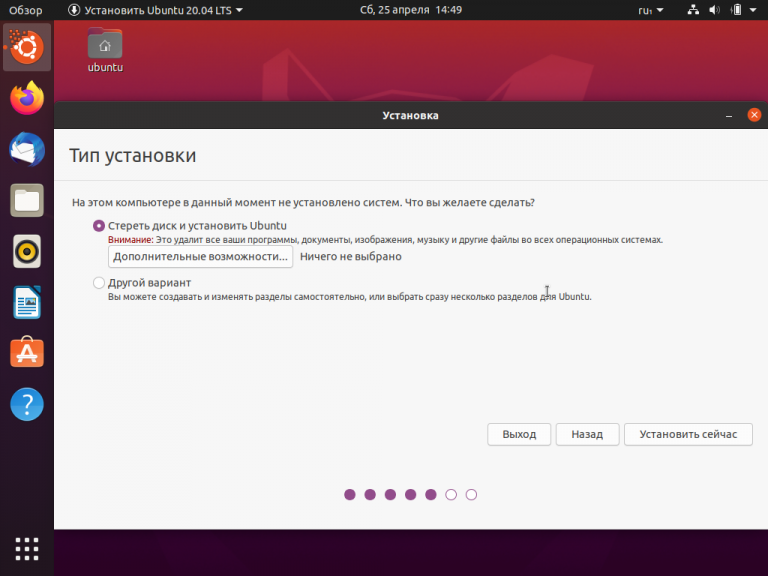
Erase disk and install Ubuntu
If you select this option Ubuntu will take up the entire disk space on the selected drive.

If your PC has multiple hard drives then this option allows you to install Ubuntu alongside an existing OS as long as they each have their own drive. Take care to ensure that you are selecting the right drive in this instance!
This option also allows you to encrypt your entire drive using LVM. To do this open the Advanced features option before proceeding to the above screen and select ‘Encrypt the new Ubuntu installation for security’
LVM stands for Logical Volume Management. By using LVM during the setup, it makes it easier to create and manage partitions post installation.
In the following step you will be prompted to create a Security key that you will need to enter on boot before logging in with your user credentials.

If you select encryption, it is important that you do not lose your security key! Write it down and store it in a safe place outside of your local system. You will not be able to recover your data without it!
Manual partitioning
Manual partitioning is designed for advanced users who want to create specific configurations for their use-cases. As such we assume that these users will be comfortable with this interface and will not go into detail during this tutorial on specific setups.
Here users can see all existing drives and partitions and create and manage new partition tables and configurations.
(Alert) Windows BitLocker is enabled
If your device has Windows BitLocker Drive Encryption enabled then Ubuntu will not be able to gather the drive information it needs to install Ubuntu safely alongside Windows.
If this is the case you will get a prompt to disable BitLocker in Windows before restarting the Ubuntu installer.

Disabling Windows BitLocker is not required when fully erasing Windows or when there is a separate, unencrypted drive available for Ubuntu. For more information see the final section at the end of this tutorial.
7. Ready to install
Regardless of the option you select, clicking Next will take you to a summary of your installation configuration to give you a chance to confirm your setup before clicking Install
Once you proceed, Ubuntu will begin the installation process in the background and you will not be able to return to this point.
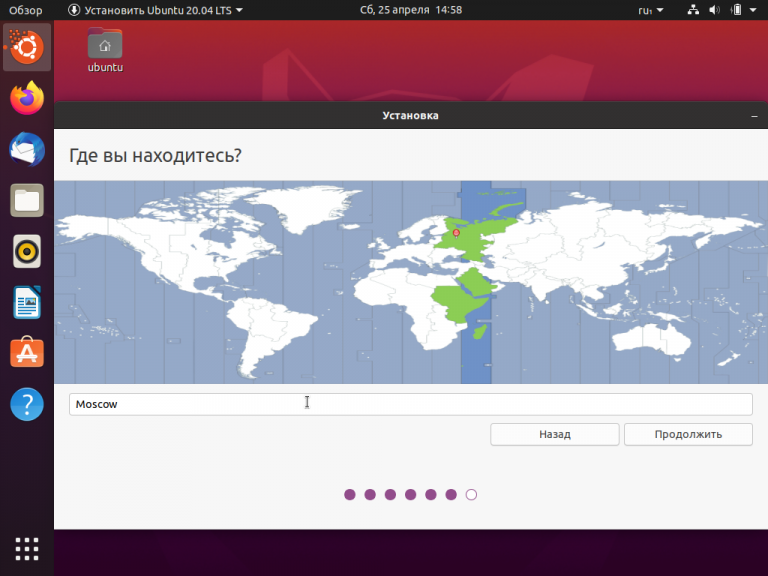
8. Choose your Location
Select your location and timezone from the map screen and click Continue. This information will be detected automatically if you are connected to the internet.

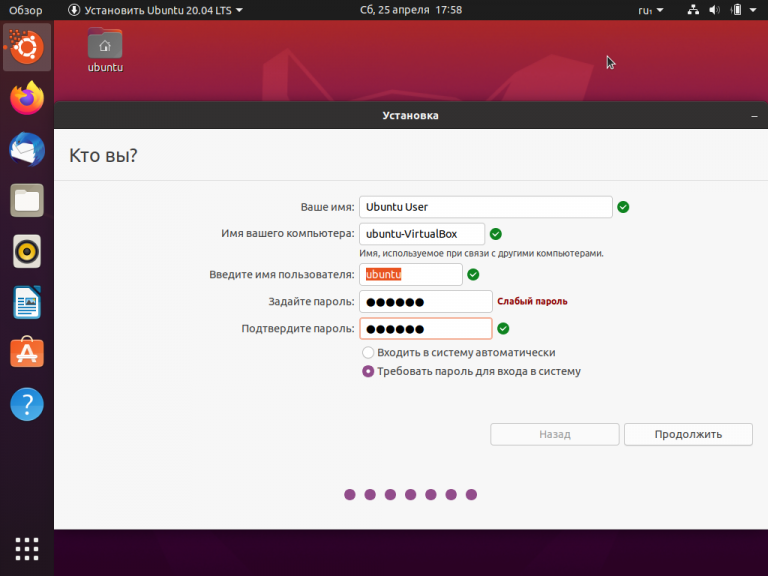
9. Create Your Login Details
On this screen, you will be prompted to enter your name and the name of your computer as it will appear on the network. Finally, you will create a username and a strong password.
You can choose to log in automatically or require a password. If you are using your device whilst travelling, it’s recommended to keep “Require my password to log in” enabled.
10. Complete the Installation
Finally you can choose to switch your desktop from Light to Dark theme.

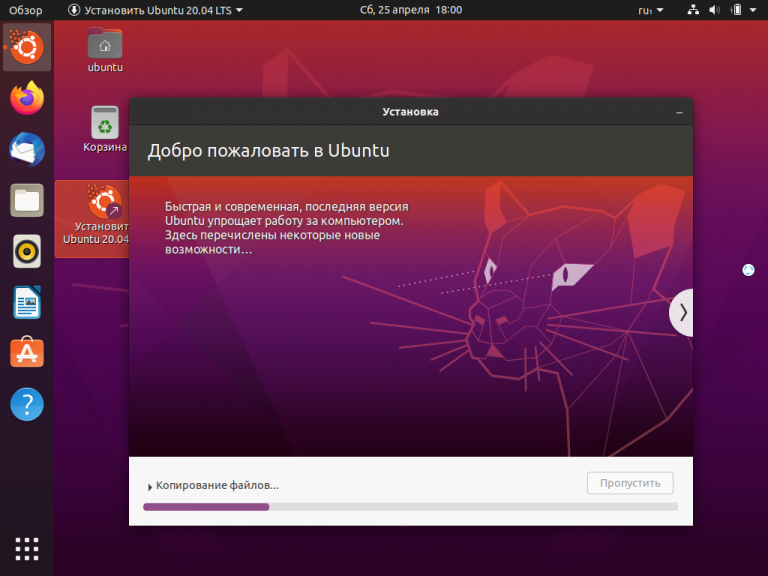
And then sit back and enjoy the slideshow as Ubuntu installs in the background! 

And then sit back and enjoy the slideshow as Ubuntu installs in the background!
Once the installation has completed, you will be prompted to restart your machine.
Click Restart Now.
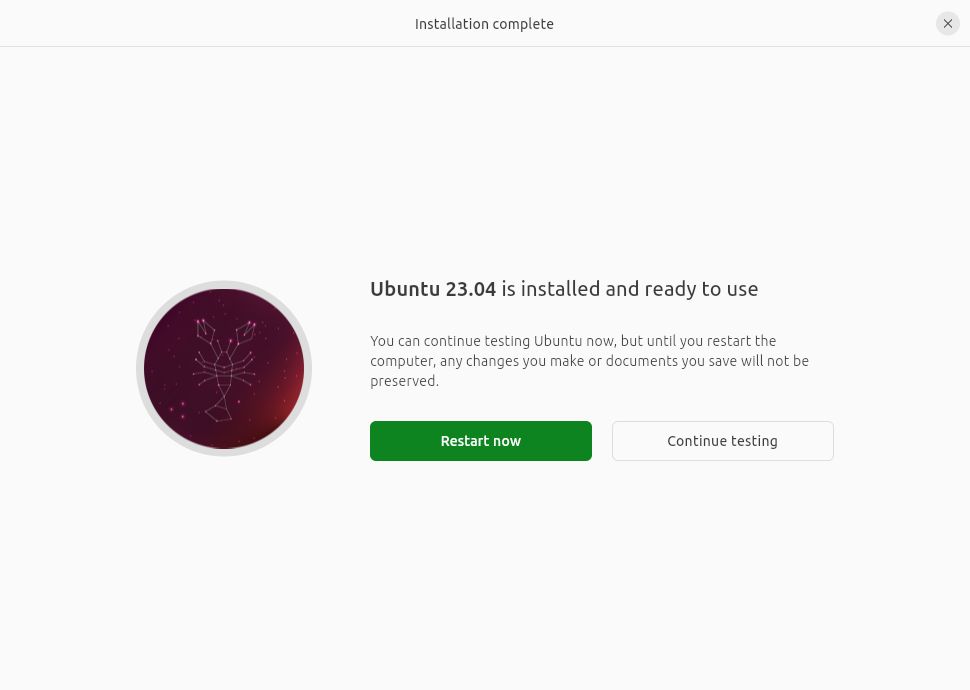
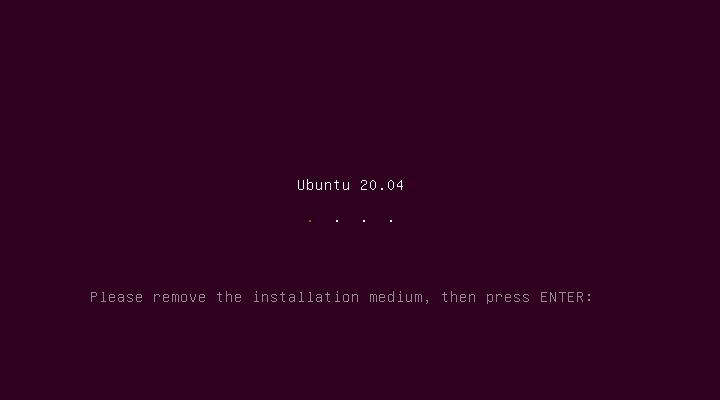
When you restart, you will be prompted to remove your USB flash drive from the device. Once you’ve done this, press ENTER.
Enter your encryption password if you created one, followed by your user password on the login screen.
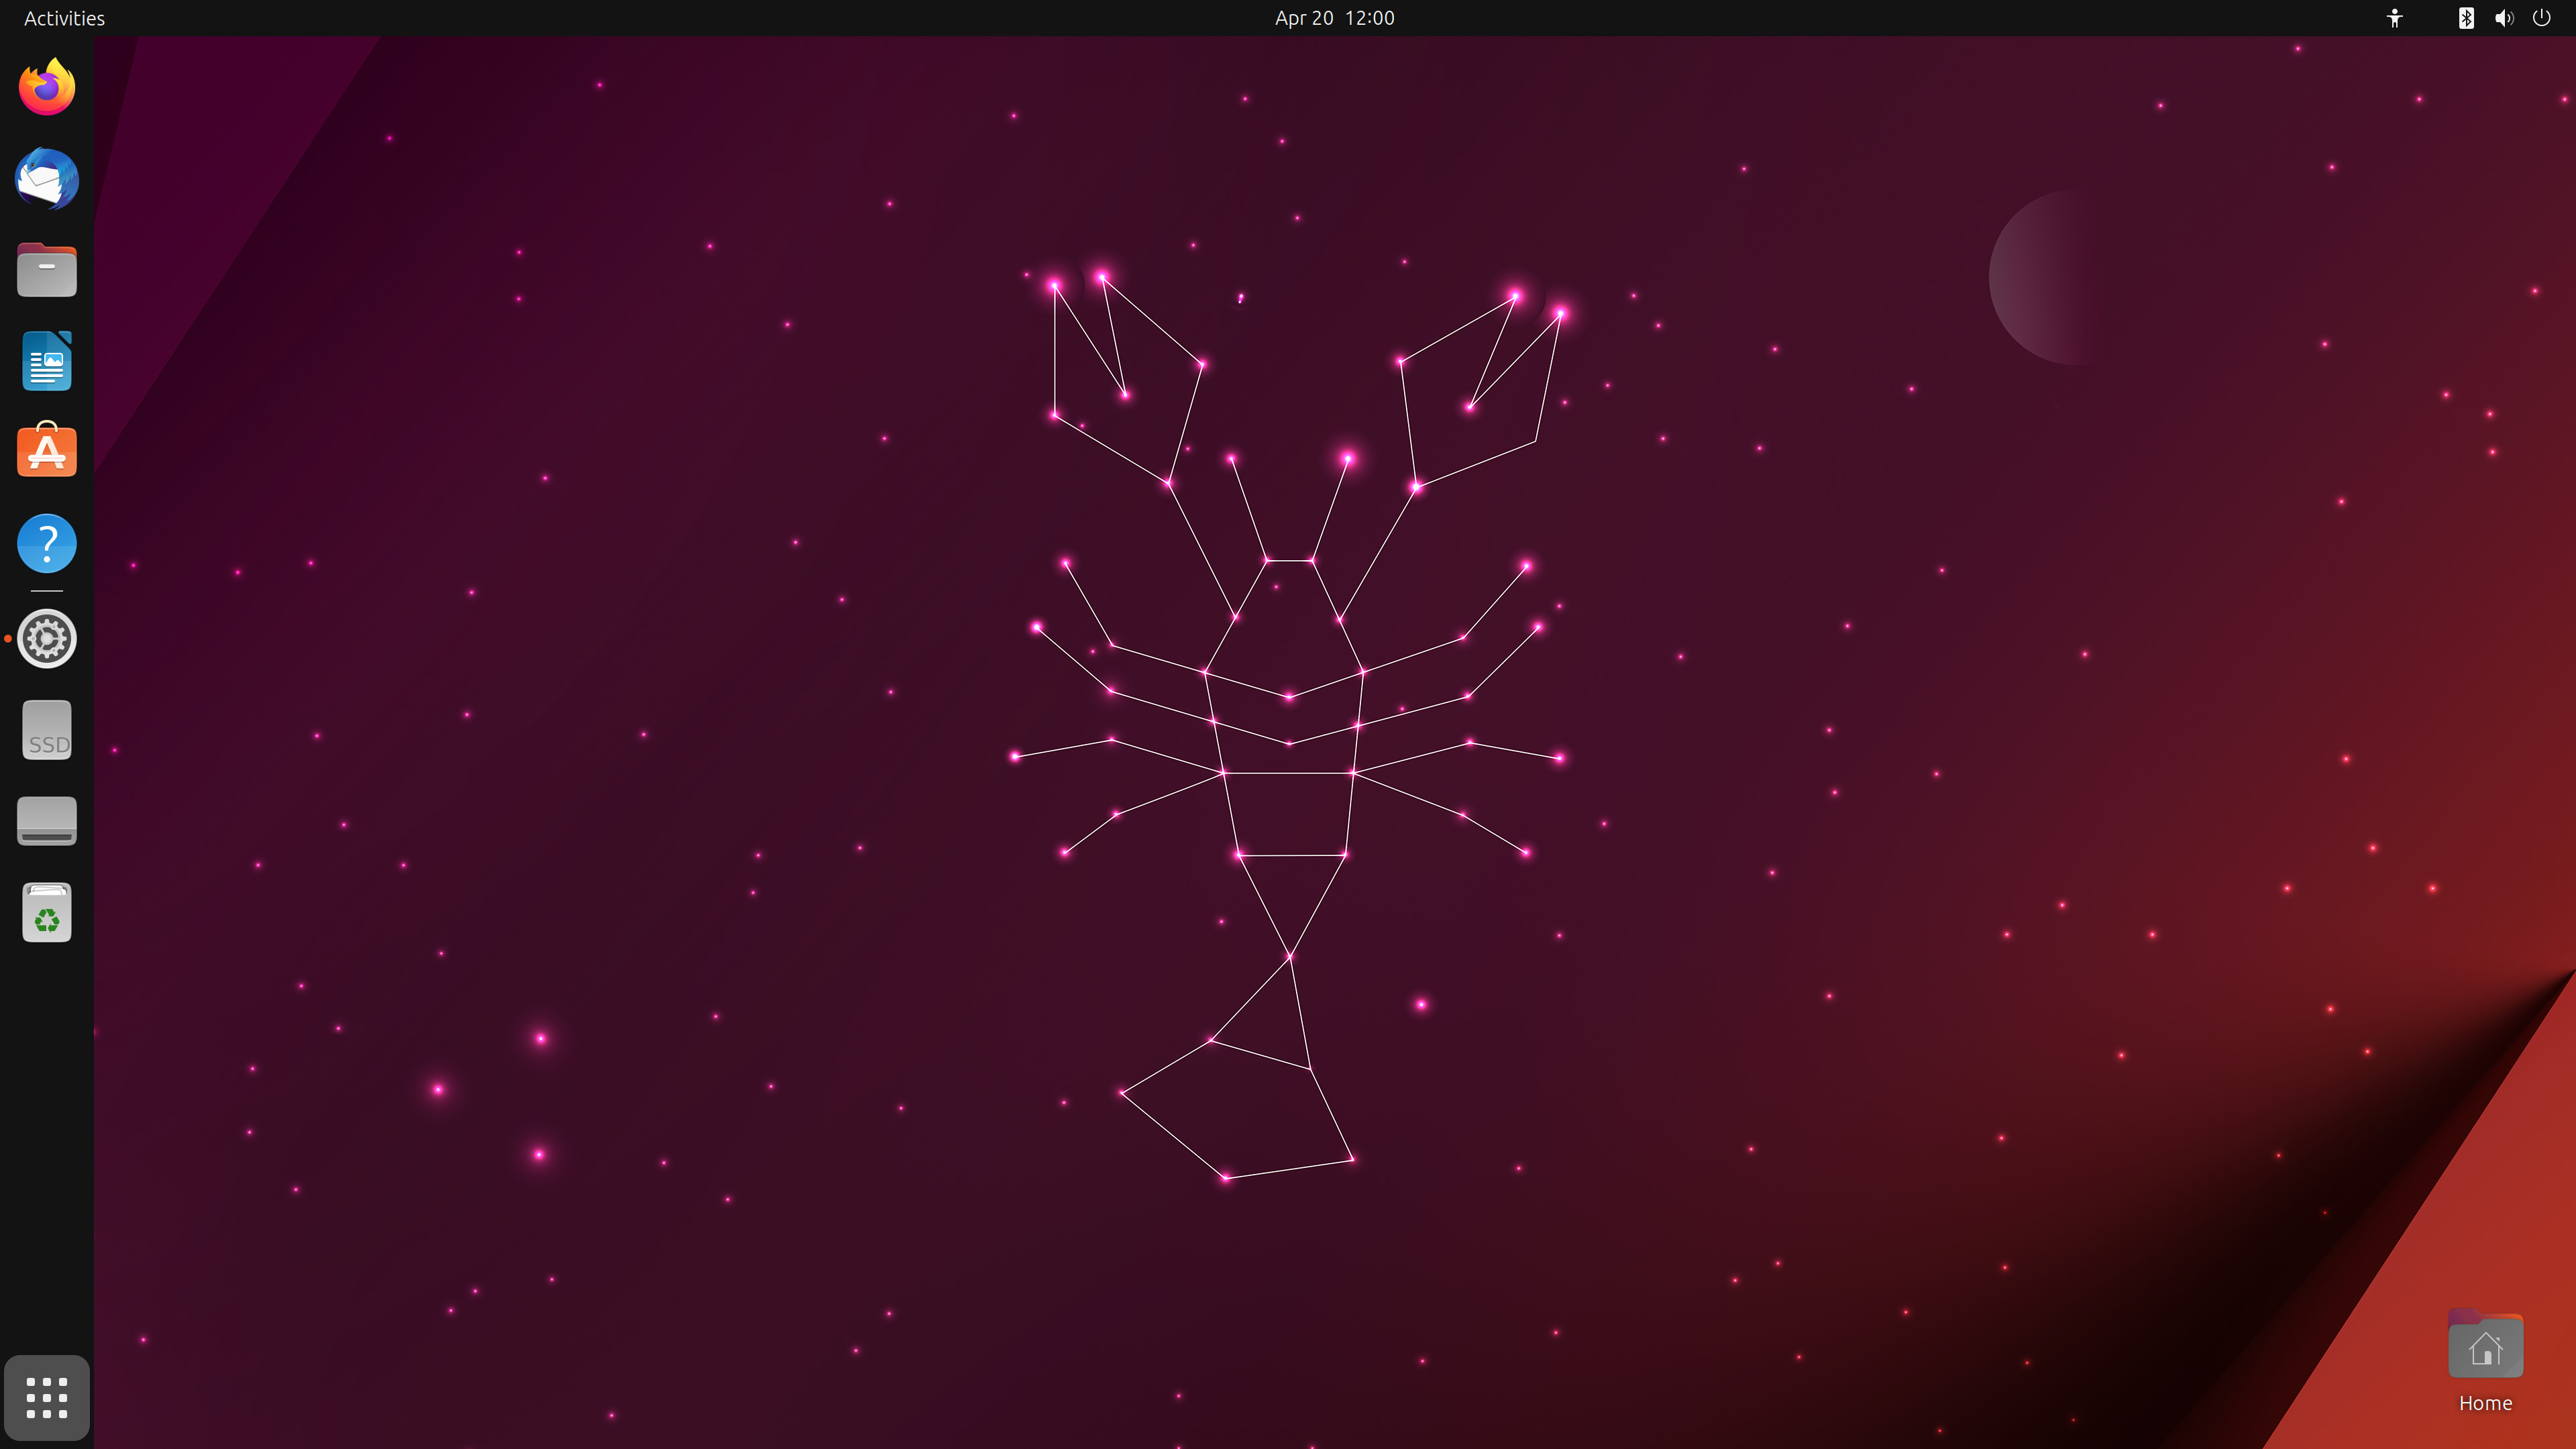
And that’s it, welcome to your new Ubuntu Desktop!
When you restart, you will be prompted to remove your USB flash drive from the device. Once you’ve done this, press ENTER.
Enter your encryption password if you created one, followed by your user password on the login screen.
And that’s it, welcome to your new Ubuntu Desktop!
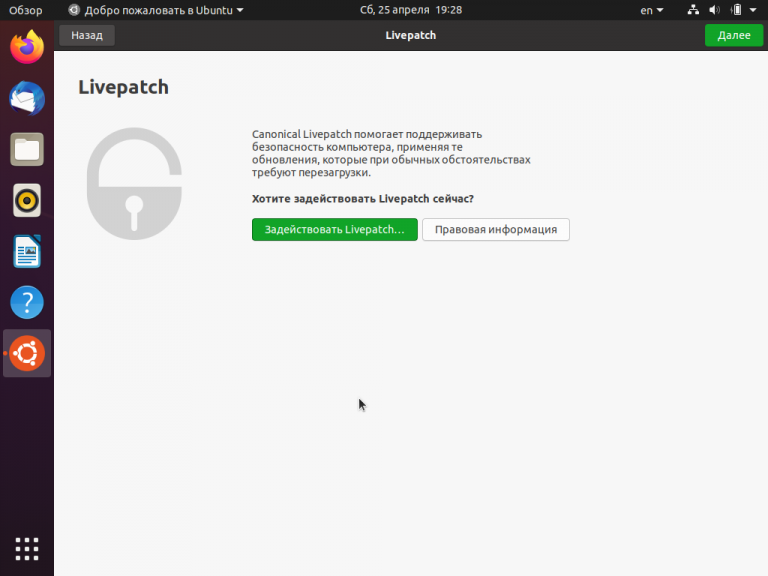
The welcome widget will help you with some additional setup options, including:
-
Connecting your profile to various online accounts.
-
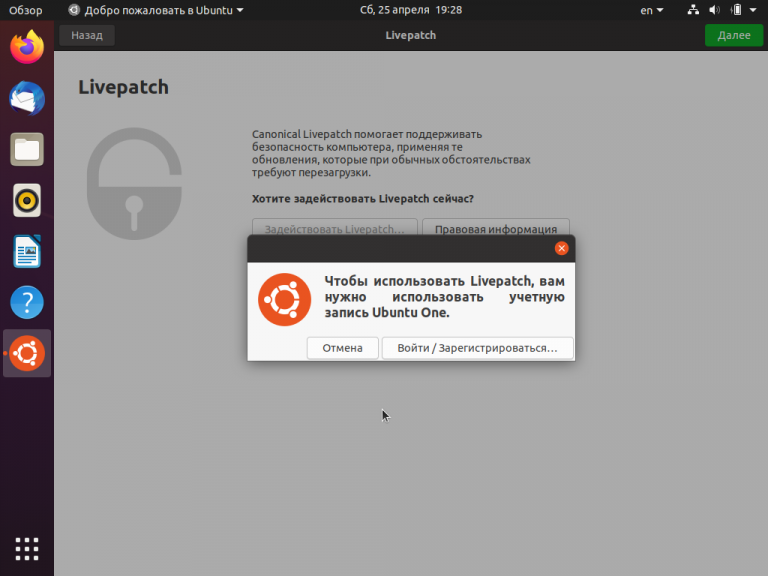
Attach an Ubuntu Pro free personal or paid subscription to apply additional security patches to your device (this option is only available when using a long term support [LTS] version of Ubuntu).
-
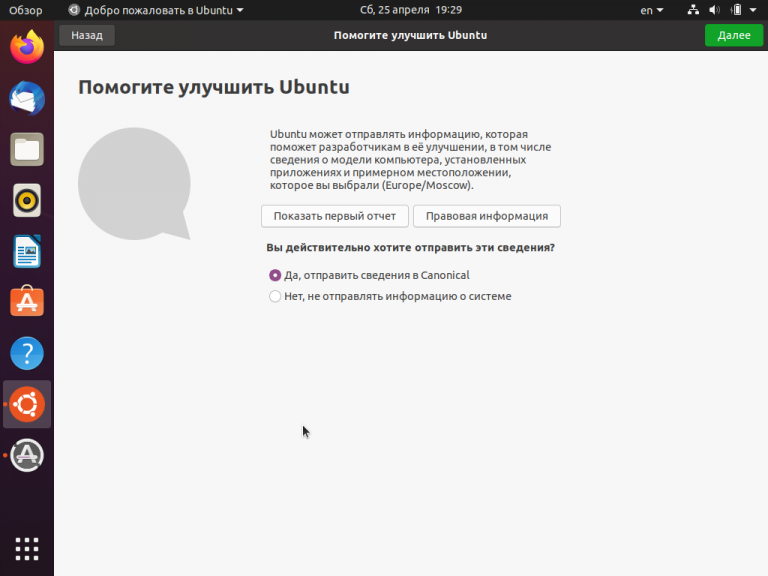
Opting into sending device information to Canonical to help improve Ubuntu (by default, Canonical doesn’t collect device information).
-
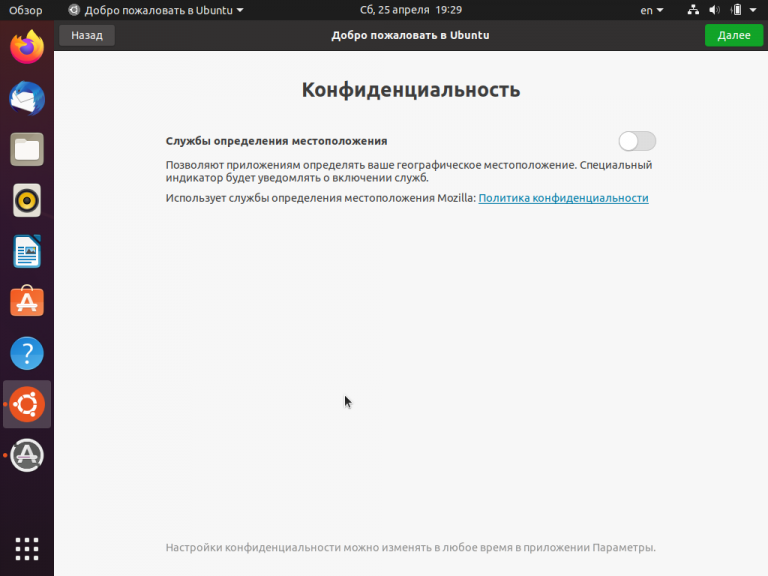
Activating location services.
-
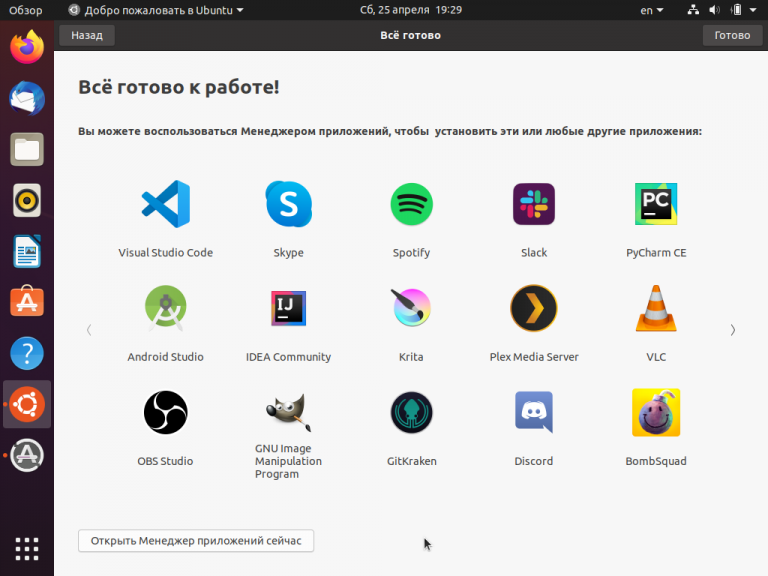
Downloading additional apps from Ubuntu Software.
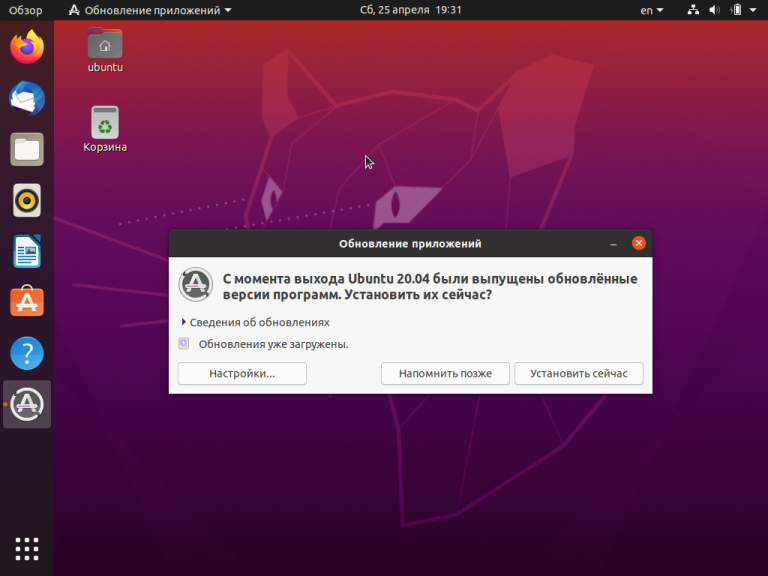
11. Don’t forget to Update!
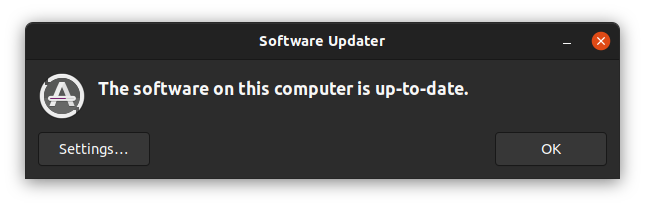
It’s always good practice to ensure your system is up to date, especially after a fresh install.
The easiest way to do this is via the Software Updater app. Search for Software Updater via the app menu (the icon with 9 squares in the bottom corner of your window) and it will check for updates and apply them.
You can also update Ubuntu using the terminal.
Press CTRL+ALT+T to bring up a Terminal window (or click the terminal icon in the sidebar).
Type in:
sudo apt update
You will be prompted to enter your login password.
This will check for updates and tell you if there are any that need applying. To apply any updates, type:
sudo apt upgrade
Type Y, then press ENTER to confirm to finish the update process.
12. You’ve installed Ubuntu!
Thank you for completing this tutorial. We hope you enjoy your new desktop.
Check out our picks for Top 10 apps for a fresh Linux install in 2021.
If you have any issues, please contact us via the Ubuntu Discourse, or visit Ask Ubuntu.
You can also read the latest news about Ubuntu Desktop on the Ubuntu Blog.
As a next step, why not try:
-
Installing Ubuntu Desktop on a Raspberry Pi 4
-
Using VirtualBox to try out different Ubuntu flavours
For users who need to run both Ubuntu and Windows you can also install Ubuntu via Windows Subsystem for Linux (WSL).
- Install Ubuntu on Windows Subsystem for Linux (WSL)
To help us improve our tutorials, please let us know how you got on!
Survey:
I found this tutorial helpful
Yes
No
I found Ubuntu easy to install
Very Easy
Easy
Neutral
Difficult
Very Difficult
13. (Additional) Installing Ubuntu alongside Windows with BitLocker
During the installation type step, you may find that you are unable to proceed with the installation without first deactivating Windows Bitlocker.
BitLocker Drive Encryption is a data protection feature that integrates with the Windows operating system. When activated, it will encrypt the contents of the hard drives in Windows, making the data inaccessible without the correct decryption key. It is designed to minimize the risk of data theft or exposure from lost or stolen computers.
When a user starts their computer and properly authenticates with the correct credentials, BitLocker will decrypt the data and allow seamless usage of the hard drive and the data it contains. Without the correct credentials, the encrypted hard drive data will look like random noise.
BitLocker & Ubuntu installation
If you plan to install Ubuntu side by side with Windows, you need to take into consideration the operational setup on your computer.
-
If you are not using BitLocker, Ubuntu will be able to see the correct hard drive structure, including any partitions and data stored on it. This allows the guided wizard to correctly map the data, and safely make adjustments to accommodate the additional installation of Ubuntu alongside Windows.
-
If you are using BitLocker, the hard drive contents will not be accessible, and they will appear as random noise. This means that the Ubuntu installer cannot correctly map data, and the additional installation cannot be safely performed without data loss… Additionally, some manufacturers ship systems with BitLocker enabled but the hard drive contents not yet encrypted. In this case the Ubuntu installer will also not be able to correctly map data.
You can:
-
Cancel the installation of Ubuntu and continue using Windows only.
-
Decide that the data stored in Windows is not important, and that you are willing to overwrite the data contents. The Ubuntu installer can then erase the entire contents of the hard drive and create its own structure (partitions and data). This is a destructive operation, with no option to recover any Windows data.
-
Decide to turn BitLocker off. This will turn off the encryption feature, and the hard drive and its data will be visible and accessible from the Ubuntu installer, allowing it to correctly and safely set up a side-by-side configuration. For systems with BitLocker enabled but not yet encrypted you will need to first turn BitLocker on and then turn it off.
-
Note: Not all versions of Windows will allow you to re-enable BitLocker after disabling it. If you wish to re-encrypt your Windows partition after installing Ubuntu alongside it, please check that your version of Windows supports this.
Turn BitLocker off
If you decide to proceed with the third option, you will need to do the following:
-
Back your data up — any encryption procedure, hard drive structure change or installation of new operating systems on a hard drive that already contains data can potentially lead to a data loss. You need to make sure your personal data is safe. Even simply copying the important files to an external drive can minimize the risk of data loss.
-
Quit the Ubuntu installer and reboot the computer into Windows.
-
In Windows, open Settings > type Manage BitLocker in the search box. Alternatively, open Control Panel > System and Security > BitLocker Drive Encryption.

Windows will now inform you that it is going to decrypt the data.

Windows will now inform you that it is going to decrypt the data.
This process can take a little bit of time:


-
Once this step is complete, reboot the computer, log into Windows, to make sure everything works correctly, and that all your data is intact.
-
Reboot your computer again, and launch the Ubuntu installer. At this point, you will be able to proceed with the hard disk configuration step.
Was this tutorial useful?
Thank you for your feedback.
![]()
Правильная установка Ubuntu с флешки обеспечит возможность работать на компьютере или ноутбуке в операционной системе, предусматривающей легальное бесплатное использование большинства программ и самой платформы, в отличие от Windows, распространяемой бесплатно или с помощью «пиратских» дистрибутивов.

Правильная установка Ubuntu с флешки обеспечит возможность работать на компьютере или ноутбуке в операционной системе, предусматривающей легальное бесплатное использование большинства программ и самой платформы, в отличие от Windows, распространяемой бесплатно или с помощью «пиратских» дистрибутивов.
Содержание:
Есть у Linux и другие достоинства, которые пользователь получит после установки «Убунту». А потребуется для этого не так много времени и выполнение нескольких несложных рекомендаций.
Преимущества установки с USB‑накопителя
Устанавливая ОС Ubuntu с флешки, пользователь получает ряд преимуществ по сравнению с установкой дистрибутива в CD или DVD диска:
- Возможность поставить систему на устройство без дисковода (который может быть, например, сломан или вообще отсутствует, как у некоторых современных ПК, практически всех нетубков или неттопов);
- Высокую скорость установки, так как флешки USB 2.0 и 3.0 работают значительно быстрее по сравнению с дисками;
- Отсутствие проблем с доступом к информации из-за поцарапанной поверхности дисков.
к содержанию ↑
Создание флешки для установки Ubuntu
Перед тем, как устанавливать операционную систему на компьютер, следует предварительно скачать её дистрибутив с надёжного сайта и установить на флешку, преобразовав в подходящий формат ISO.
Если образ системы уже есть, его следует записать на носитель.
Уже имеющийся на флешке дистрибутив ещё больше упростит процедуру, но, как правило, занимать её только установочной программой неэффективно – проще хранить Ubuntu на жестком диске компьютера.
Или на том же носителе, но настроенном не для загрузки, а для хранения информации – дистрибутив по размеру не превышает 2 Гб и может свободно находиться на носителе, отформатированном в FAT32.
1. Скачивание дистрибутива
Скачивание дистрибутива не займёт много времени – найти более или менее современные версии можно на сайтах Ubuntu.com или Ubuntu.ru.
На сегодняшний день одной из самых актуальных систем является Ubuntu 14.04.
Здесь же можно найти и более старые версии, однако требования к ресурсам компьютера у Linux не так сильно отличаются для разных вариантов, как для Windows.
А последние платформы обладают большей функциональностью.
2. Создание загрузочного диска в Windows
Создавать загрузочные диски можно из операционной системы Windows, если пользователь собирается перейти с программного обеспечения Microsoft на так называемый свободный софт, или будет устанавливать Ubuntu на другой компьютер, или даже собирается получить компьютер с двумя ОС на разных дисках.
Проще всего создаётся загрузочная флешка с «Убунту» из-под «Виндовс» с помощью бесплатного приложения Unetbootin, которое можно свободно скачать из сети и не требуется устанавливать.
Работа программы Unetbootin
Перед установкой дистрибутива на носитель требуется отформатировать его в FAT32, используя стандартные настройки системы. Далее необходимо выполнить пошагово следующие действия:
- Запустить программу;
- Указать в её главном окне пусть к дистрибутиву Ubuntu;
- Выбрать букву, под которой будет обозначаться флешка (иногда определние происходит автоматически);
- Нажать «ОК» и подождать несколько минут, пока создаётся загрузочный диск.
В основном, даже на не самых быстрых компьютерах на работу приложения требуется не больше 15–20 минут.
Использование других программ, типа XBoot или WinSetupFromUSB позволит также просто создать системный диск, обеспечив примерно ту же скорость.
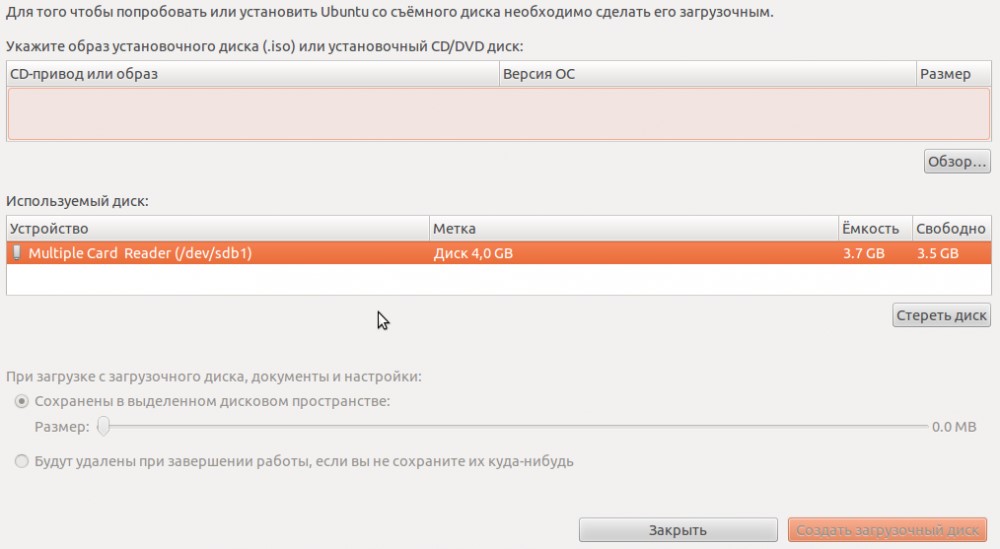
3. Как сделать загрузочный носитель в Ubuntu
Если «Линукс» любой версии, в том числе и «Убунту», уже установлен на компьютере, процесс создания загрузочной флешки займёт ещё меньше времени.
Для этого понадобится найти и открыть стандартную утилиту Startup Disk Creator, указать путь к дистрибутиву и запустить установку на носитель системных файлов.
Встроенная утилита в Linux
к содержанию ↑
Установка системы
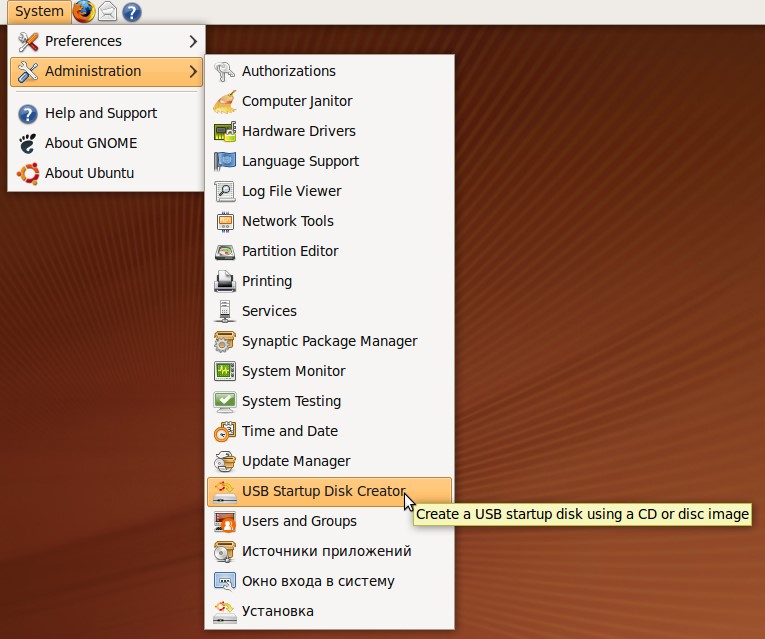
Для того чтобы установить Ubuntu или Ubuntu Server (более подходящей для решения серверных задач) на компьютер, работающий на любой платформе, сначала требуется выбрать загрузку с флешки в BIOS.
Затем вставить устройство в USB-порт, перезагрузить компьютер и начать установку.
Ещё один вариант – вызвать boot menu при загрузке компьютера (нажав Esc, F2, F8 или одну из других функциональных клавиш верхнего ряда) и выбрать загрузку с носителя.
Загрузка Ubuntu Live
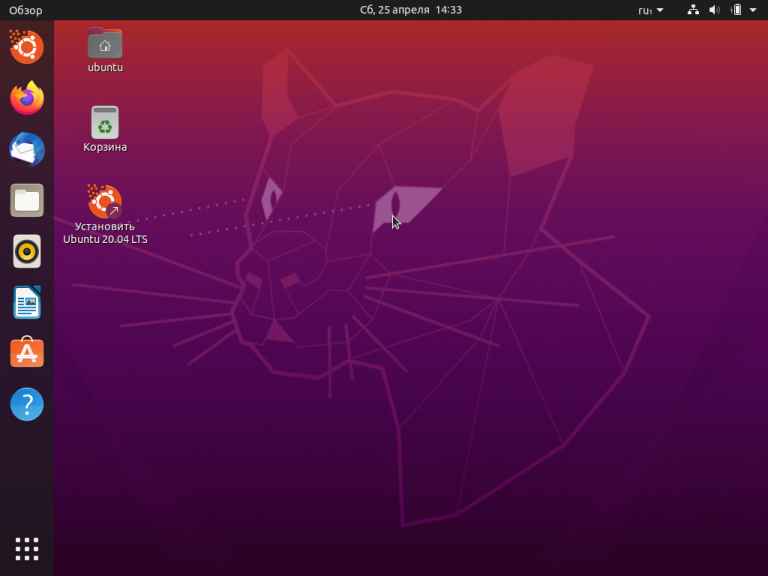
Дистрибутив Ubuntu Desktop представляет собой операционную систему, загружаемую в режиме Live, то есть без необходимости установки на ПК.
При этом функциональность платформы будет примерно одинаковой.
Однако удобнее работать в системе, когда системные файлы находятся всё-таки на жёстком диске.
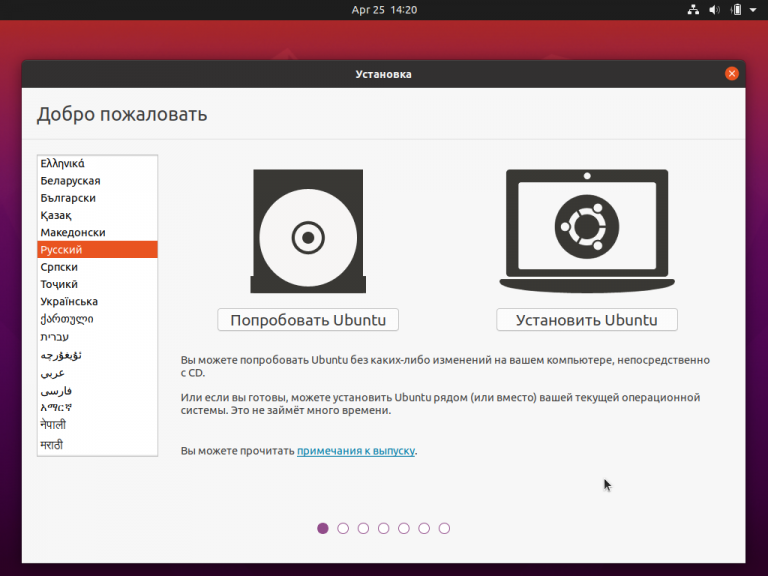
Сразу же после того как загрузочная флешка автоматически запустилась, на экране появится окно с предложением выбрать сначала язык, с которым предпочитает работать пользователь, а затем подходящий режим запуска или установки:
- Загрузка системы без установки;
- Установка Ubuntu.
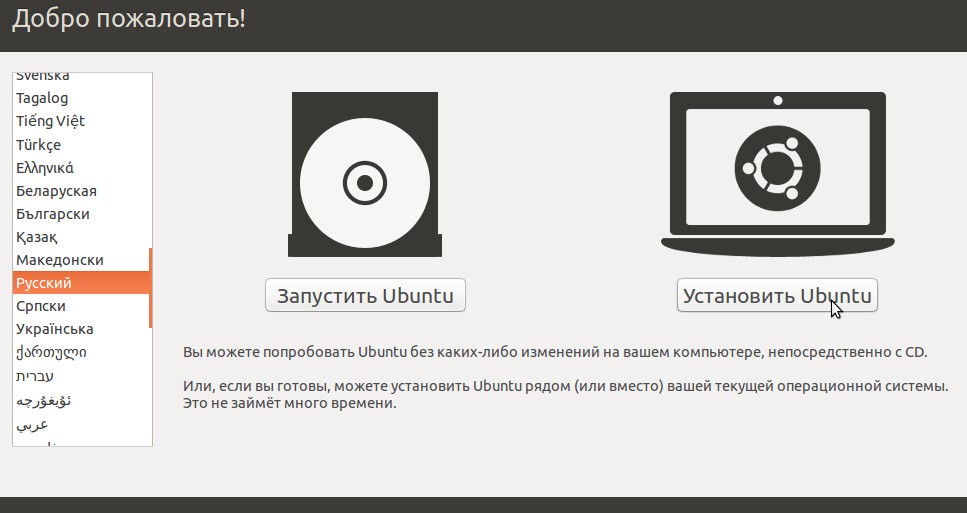
Выбор варианта загрузки
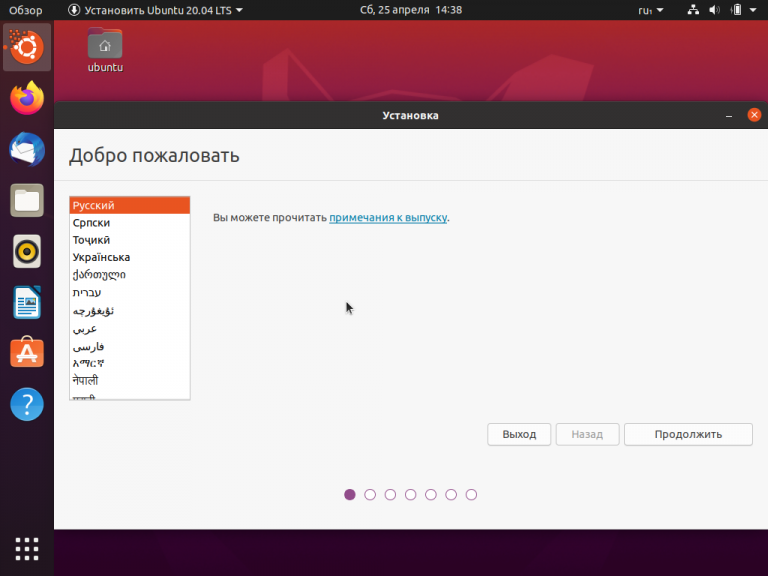
После выбора второго варианта и русского (или английского, если так удобнее для каких-то целей, или любого другого) языка открывается новое окно под названием «Подготовка к установке Ubuntu».
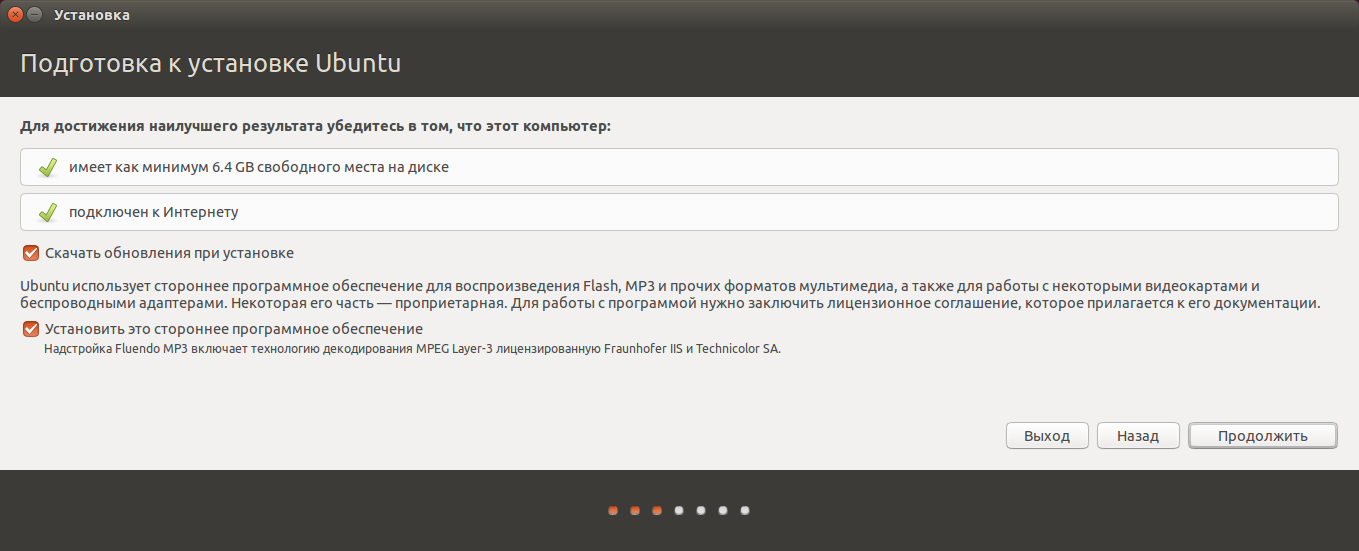
Окно подготовки к установке Ubuntu
Здесь будет видно, сколько места есть на разделах жесткого диска, куда будет устанавливаться система, и есть ли подключение к Интернету – обычно при установке оно отключается, но все обновления для «Убунту» можно скачать и позже.
Также в меню предлагается установка стороннего программного обеспечения, если оно встроено в дистрибутив (кодеков для воспроизведения звука и т.д.).
В качестве следующего шага проводится выбор варианта установки. Среди них есть возможность:
- Установить систему, оставив работоспособной уже имеющуюся на компьютере платформу (например, Windows);
- Заменить старую систему новой;
- Провести установку с возможностью шифрования записей для увеличения уровня безопасности работы на компьютере;
- Самостоятельно разметить диски, полностью изменив их существующие размеры.
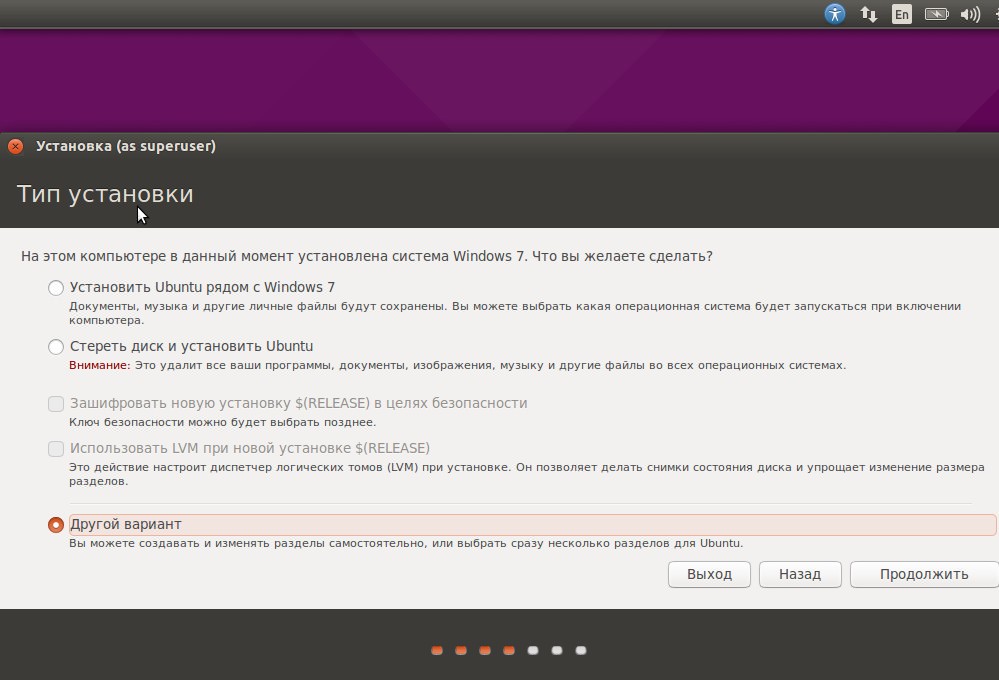
Выбор варианта установки
Совет! В большинстве случаев для пользователей, только начавших работать с Linux Ubuntu, стоит выбрать первый вариант. Опытным пользователям рекомендуется выбирать второй или последний пункт меню.
Выбор размера раздела жесткого диска
При выборе установки одновременно двух ОС следующее окно показывает размеры разделов HDD. Здесь можно выбрать, какая их часть будет занята новой ОС, а какая останется закрепленной за старой.
И, хотя можно разбить диск и с помощью специальных редакторов разделов, лучше сделать это, передвигая разделитель между томами.
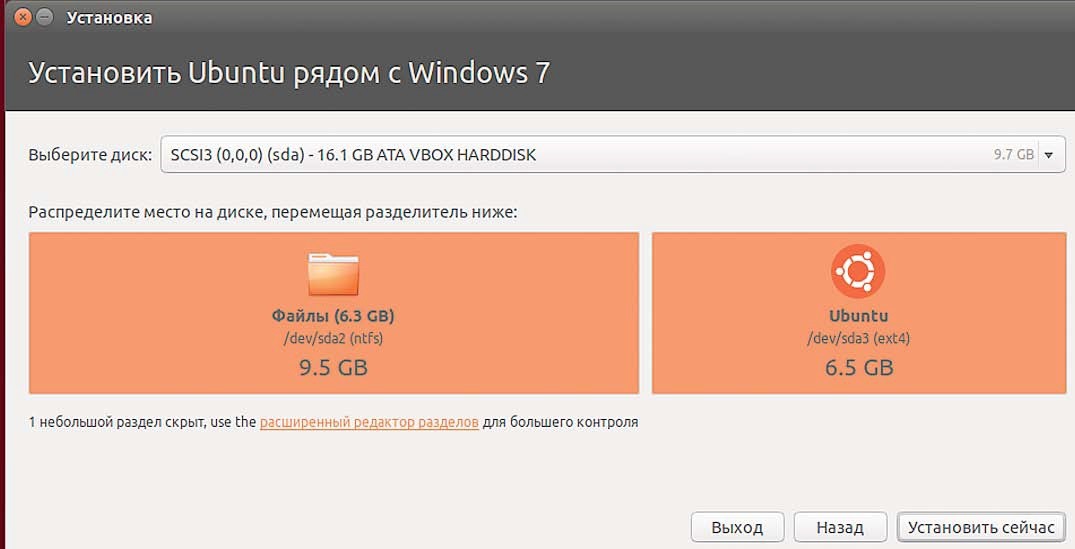
Вариант установки Ubuntu с оставлением второй OS
На приведенном примере один из дисков имеет размер 16 Гб. При этом большая его часть (9,5 Гб, отформатированные в NTFS) будет отдана ОС Windows, а 6,5 Гб с файловой системой ext4 сможет пользоваться «Убунту».
На сегодняшний день установка полноценной и современной версии (14.04) займёт сравнительно немного, около 10 Гб.
Однако есть условие – при установке поверх Windows требуется ещё 4–5 Гб для раздела swap, куда будет временно записываться содержимое ОЗУ при работе Ubuntu.
Кроме того, Linux в случае оставления второй системы должен занимать 2 раздела.
А на физическом диске, уже разбитом на 3–4 части, такой возможности нет (количество логических дисков не должно превышать 4).
В этом случае для установки операционной системы придётся создавать отдельный раздел.
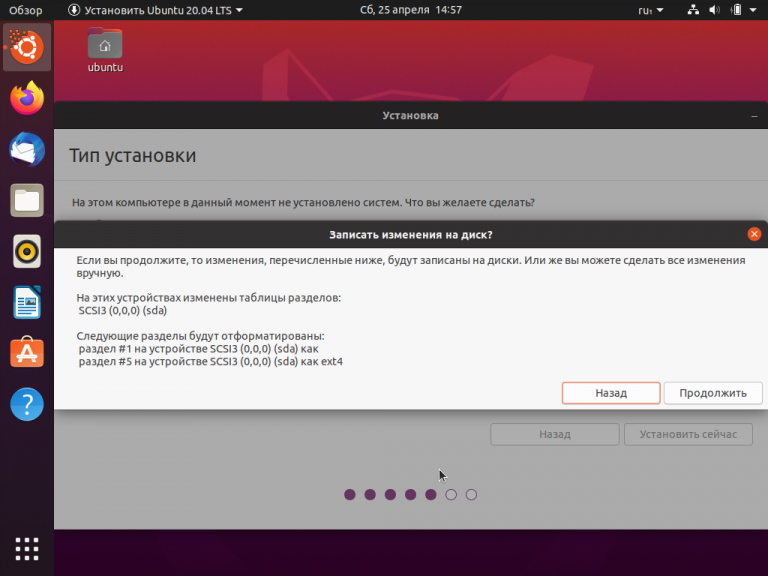
Завершение установки операционной системы
После выбора пункта «Установить сейчас» появится предупреждение о создании дополнительных разделов и изменениях размеров старых.
Всё это занимает достаточно много времени – чем больше изменений, тем дольше будет устанавливаться ОС.
По окончании установки пользователю предлагается выбор региональных стандартов для новой системы, включая язык и раскладку, а также часовой пояс.
На этом перенесение Ubuntu с флешки на компьютер закончено.
Выбор региональных стандартов для новой системы
к содержанию ↑
Заключение
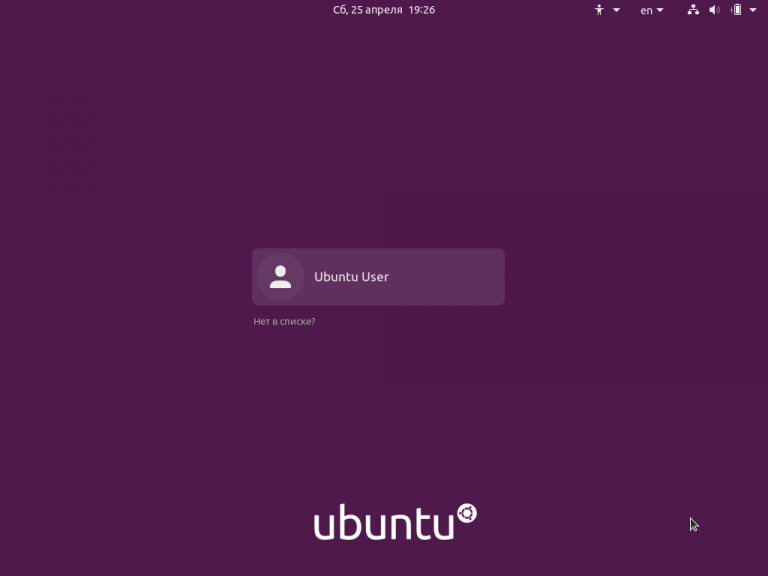
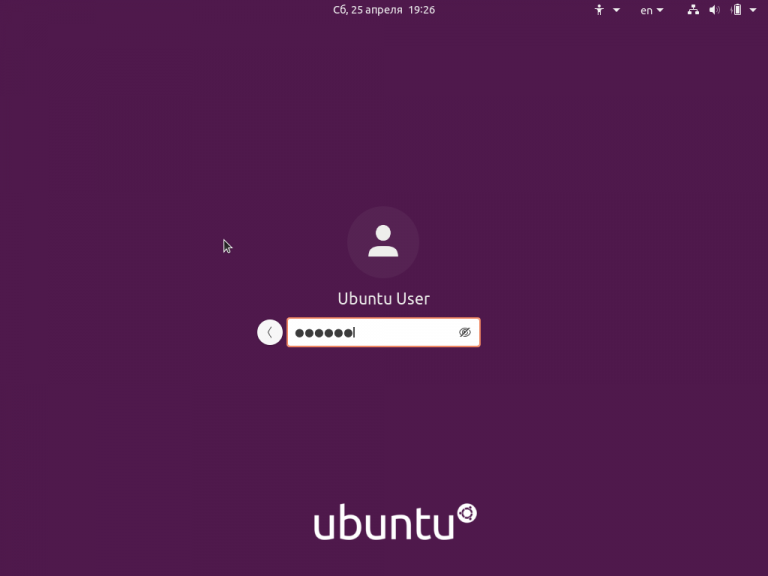
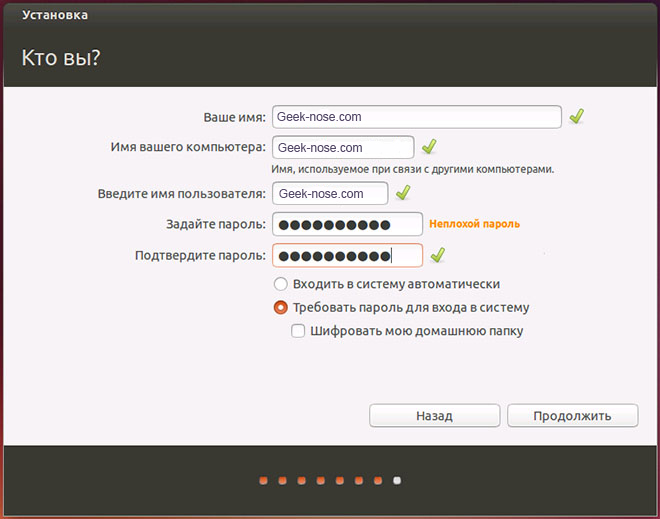
После выбора имени пользователя и, при необходимости, установке пароля, требуется перезагрузить компьютер.
На экране снова появляется меню выбора вариантов загрузки, требующее ввода пароля.
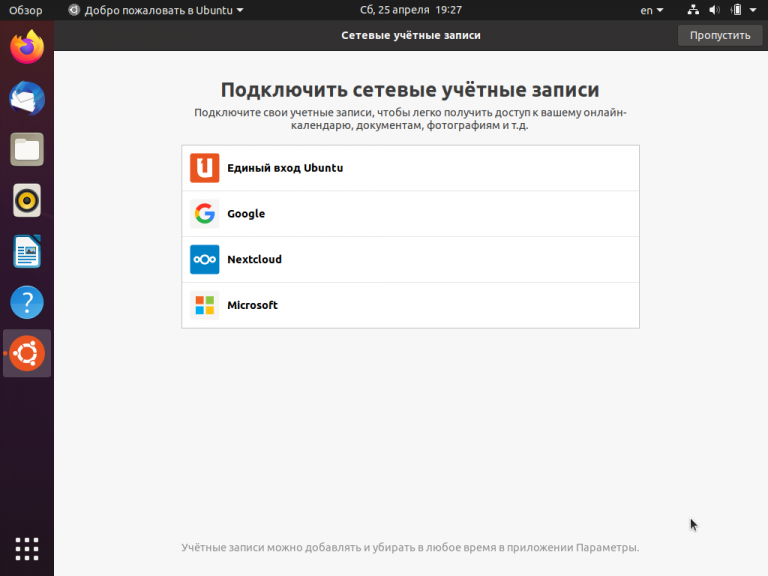
А после первого входа в систему останется только настроить её под себя, подключив Интернет, установить необходимые кодеки, драйвера и программы, в зависимости от требований к функциональности системы.
Тематические видеоматериалы: