-
Contents
-
Table of Contents
-
Troubleshooting
-
Bookmarks
Quick Links
Related Manuals for Yamaha PORTATONE PSR-S500
Summary of Contents for Yamaha PORTATONE PSR-S500
-
Page 1
Owner’s Manual… -
Page 2: Special Message Section
Yamaha. This product should be used only with the components supplied or; a cart, rack, or stand that is recommended by Yamaha. If a cart, etc., is used, please observe all safety markings and instructions that accom- pany the accessory product.
-
Page 3
Compliance with FCC regulations does * This applies only to products distributed by YAMAHA CORPORATION OF AMERICA. OBSERVERA! Apparaten kopplas inte ur växelströmskällan (nätet) så länge som den ar ansluten till vägguttaget, även om själva apparaten har stängts av. -
Page 4
• Use the specified adaptor (PA-300, PA-301 or an equivalent recommended by Yamaha) only. Using the wrong adaptor can result in damage to the instrument or overheating. • Check the electric plug periodically and remove any dirt or dust which may have accumulated on it. -
Page 5
Yamaha cannot be held responsible for damage caused by improper use or modifications to the instrument, or data that is lost or destroyed. Always turn the power off when the instrument is not in use. -
Page 6: Logos
This product incorporates and bundles computer programs and contents in which Yamaha owns copyrights or with respect to which it has license to use others’ copyrights. Such copyrighted materials include, without limitation, all computer software, style files, MIDI files, WAVE data, musical scores and sound recordings. Any unauthorized use of such programs and contents outside of personal use is not permitted under relevant laws.
-
Page 7: Accessories
Congratulations and thank you for purchasing the Yamaha PSR-S500 PortaTone! Please read this owner’s manual carefully before using the instrument in order to take full advantage of its various features. Make sure to keep this manual in a safe and handy place even after you finish reading, and refer to it often when you need to better understand…
-
Page 8: Special Features Of The Psr-S500
Special Features of the PSR-S500 ■ Play a Variety of Instrument Voices The instrument voice that sounds when you play the keyboard can be changed to violin, flute, harp, or any of an extensive range of voices. You can change the mood of a song written for piano, for example, by using vio- lin to play it instead.
-
Page 9: Table Of Contents
Logos… 6 Accessories … 7 Special Features of the PSR-S500 … 8 Setting Up Power Requirements … 10 Connecting Headphones (PHONES/OUTPUT Jack) … 10 Connecting a Footswitch (SUSTAIN Jack)… 10 Connecting to a Computer (USB Terminal)… 11 Turning the Power On … 11 Changing the Display language …
-
Page 10: Setting Up
Make sure that the [STANDBY/ON] switch of the instrument is set to STANDBY. • Use ONLY a Yamaha PA-300 or PA-301 AC Power Adaptor (or other adaptor specifically recommended by Yamaha) to power your instrument from the AC mains. The use of other adaptors may result in irreparable damage to both the adaptor and the instrument.
-
Page 11: Connecting To A Computer (Usb Terminal)
Connecting to a Computer (USB Terminal) Connect the instrument’s USB terminal to the USB ter- minal of a computer, and you can transfer performance data and song files between the two (page 85). To use the USB data-transfer features you’ll need to do the fol- lowing: •…
-
Page 12: Changing The Display Language
Setting Up Changing the Display language This instrument allows you to select English or Japa- nese as the display language. The default display lan- guage is English, but if you switch to Japanese the lyrics, file names and some messages will be displayed in Japanese where appropriate.
-
Page 13
Setting Up ● Music Rest Insert the music rest into the slots as shown. PSR-S500 Owner’s Manual… -
Page 14: Panel Controls And Terminals
Panel Controls and Terminals Front Panel q [STANDBY/ON] switch … page 16 w [MASTER VOLUME] control… pages 16, 40 e [DEMO] button … page 16 r [SONG MODE] button … page 27 t SONG [PRESET], [USER], [USB] buttons … page 27 [SCORE] button …
-
Page 15: Rear Panel
Rear Panel !9 Dial… page 41 @0 [+/YES] and [-/NO] buttons … page 41 @1 CATEGORY [ ] and [ ] buttons … page 41 @2 [FUNCTION] button … page 70 @3 [MDB] button … page 26 @4 FILE MENU [MENU] and [EXECUTE] buttons…
-
Page 16: Playing Songs
Playing Songs Quick Guide This instrument include a Demonstration Song. Let’s start by playing the Demonstration Song. Press the [STANDBY/ON] button until it locks in the ON position. The Main display appears in the LCD. Press the [DEMO] button to start the Demo. The Demo display appears in the LCD.
-
Page 17: Try Playing A Variety Of Instrument Voices
Try playing a variety of Instrument Voices In addition to piano, organ, and other “standard” keyboard instruments, this instrument has a large range of realistic Voices—including guitar, bass, strings, sax, trumpet, drums and percussion, sound effects, and a wide variety of other musical sounds. Select and Play a Voice In this operation, you’ll select a Main Voice and play it on the keyboard.
-
Page 18: Playing Two Voices Simultaneously-Dual
Try playing a variety of Instrument Voices Playing Two Voices Simultaneously—DUAL This lets you select a second Voice which you can play in addition to the Main Voice. The second Voice is known as the “Dual” Voice. Press the [DUAL] button. The [DUAL] button turns the Dual Voice on or off.
-
Page 19: Playing Different Voices With The Left And Right Hands-Left
Select the Voice you want to play. Look at the highlighted Voice name and rotate the dial. The available Voices will be selected and displayed in sequence. The Voice selected here becomes the Dual Voice. For this example, select the “003 Marimba” Voice. Play the keyboard.
-
Page 20
Try playing a variety of Instrument Voices Press and hold the [LEFT] button for longer than a sec- ond. The LEFT Voice selection display will appear. The currently selected category name, Voice number and name will be highlighted. Hold for longer than a second Select and press the desired Voice category button in the VOICE section. -
Page 21: Playing Drum Kits
Playing Drum Kits Drum Kits are collections of drum and percussion instruments. When you select a violin or other normal instrument—as a Main Voice, for example—all keys produce the sound of the same violin, only at different pitches. If you select a Drum Kit as the Main Voice, however, each key produces the sound of a different drum or percussion instrument.
-
Page 22: Playing Styles
Playing Styles This instrument includes an auto-accompaniment feature that plays appropriate “Styles” (rhythm + bass + chord accompaniment) when you play left-hand chords. You can select from 150 different Styles covering a range of musical genres and time signatures (see page 107 for a complete list of the avail- able Styles).
-
Page 23: Playing Along With A Style
Playing Along with a Style You learned how to select a Style rhythm on the preceding page. Here we’ll see how to add bass and chord accompaniment to the basic rhythm to produce a full, rich accom- paniment that you can play along with. Select and press the desired Style category button in the Style section.
-
Page 24
Playing Styles Play a left-hand chord to start the Style. You can still “play” chords even if you don’t actually know any chords. This instrument will recognize even a single note as a chord. Try play- ing from one to three notes at the same time to the left of the split point. The chord will change according to the left-hand notes you play. -
Page 25: Playing Auto-Accompaniment Chords
Playing Auto-accompaniment Chords There are two ways of playing auto-accompaniment chords: ● Easy Chords ● Standard Chords The instrument will automatically recognize the different chord types. The keyboard to the left of the split point (default: 54/F#2) becomes the “accompaniment range.” Play the accompaniment chords in this area of the keyboard.
-
Page 26: Playing With The Music Database
Playing with the Music Database You want to play music in your favorite Style, but you’re not sure how to select the best Voice and Style for the type of music you want to play, sim- ply select the appropriate Style from the Music Database. The panel set- tings will automatically be adjusted for the ideal combination of sounds and Style! Press the [MDB] button.
-
Page 27: Using Songs
Using Songs With this instrument the term “Song” refers the data that makes up a piece of music. In this section we’ll learn how to select and play Songs. Listen Selecting and Listening to a Song Select and press one of the Song category buttons, which corresponds to the type of Song you want to listen to.
-
Page 28: Song Fast Forward, Fast Reverse, And Pause
Using Songs Built-in Songs 1 Annie Laurie (Traditional) 2 Oh, Susanna (Sunny Skylar, S. Foster) PRESET 3 Little Brown Jug (Traditional) 4 Waltz Op.18 (F. Chopin) 5 Piano Concerto No.21 2nd Mov. (W.A. Mozart) User Songs (Songs you record yourself) or Songs transferred from a USER computer (pages 85–87) Songs in a USB flash memory connected to the instrument (page 74)
-
Page 29: Types Of Songs
Types of Songs The following four types of Songs can be used by this instrument. ● Preset Songs (the five Songs built into the instrument)… Preset Song numbers 001–005. ● User Songs (recordings of your own performances) … USER Song numbers 001–005. ●…
-
Page 30: Displaying The Song Score
Using Songs Displaying the Song Score This instrument is capable of display the scores (notation) of Songs. Scores are displayed for the preset Songs. Scores can also be displayed for Songs loaded from computer as well as Songs played back from USB flash memory. Although User Songs you record yourself cannot display a score as is, they can be converted to SMF (Stan- dard MIDI File) format and stored to USB flash memory, from where they can be played with score display.
-
Page 31: Displaying The Lyrics
Displaying the Lyrics If a Song contains lyric data, the lyrics can be made to appear on the display. No lyrics will be displayed for a Song that contains no lyric data, even if the [LYRICS] button is pressed. Select a Song. Follow steps 1 and 2 of the procedure described on page 27.
-
Page 32: Recording Your Own Performance
Recording Your Own Performance You can record up to five of your own performances and save them as user Songs 001 through 005. These Songs can be played in the same manner as the preset Songs. Once your performances have been saved as user Songs, they can be converted to SMF (Standard MID File) format files and saved to USB flash memory (page 77) and used with the score display function.
-
Page 33: Quick Recording Procedure
Melody or other parts Track Track Track Main Dual Left Voice Voice Voice part part part Example: Part settings in Multi Recording Quick Recording Procedure You can easily start recording your performance by simply pressing the [REC] button. In this case, the track number and part number of tracks are set automatically.
-
Page 34: Multi-Track Recording Procedure
Recording Your Own Performance Recording will start when you play the keyboard. Stop recording by pressing the [> > > > /■] or [REC] button. Track numbers containing recorded data are indicated with framed rect- angles. Press the [> > > > /■] button to play back the recording. Multi-track Recording Procedure You can set the recorded user Song number and the parts for tracks individually.
-
Page 35
Select the recording part for each track (Part Assign). ◆ Selecting the part for the Melody track (tracks 1–8) While holding down the [REC] button, press one of the track buttons [1]–[8] until the desired part is shown at the track button. Each time you press the button, the part is changed in order (such as MAIN, DUAL, LEFT) in the Main display. -
Page 36
Recording Your Own Performance Recording will start when you play the keyboard. You can also start recording by pressing the [ > / ■ ] button. Press the [EXIT] button, and the measure number is shown in the Main display. When recording is started, the display automatically returns to the Main display. -
Page 37: Song Clear-Deleting User Songs
● Not recorded data The following data is recorded before the beginning of the Song. Even if you change the data while recording is in progress, the data is not recorded. Reverb type, Chorus type, DSP type, DSP send level, Dry level, Style number, Style volume, Time signature Song Clear—Deleting User Songs This function clears an entire user Song (all tracks).
-
Page 38: Track Clear-Deleting A Specified Track From A User Song
Recording Your Own Performance Track Clear—Deleting a Specified Track From a User Song This function lets you delete a specified track from a User Song. From the MAIN display select the User Song (001 to 005) you want to clear. Press the [REGIST/TRACK] button a number of times until the item you want to clear appears.
-
Page 39: Backup And Initialization
Backup and Initialization Backup The following data items are automatically saved as backup data in the internal memory even if you turn the power off. To recall the default settings and data, use the Initialization operation. ● Backup parameters • USER Song •…
-
Page 40: Basic Operation And Displays
Basic Operation and Displays Basic Operation Overall PSR-S500 control is based on the following simple operations. Use the category buttons to select a CATEGORY. Use the dial to select an item or value. Starting/stopping a Song or Style. Song Style category category ●…
-
Page 41: Use The Dial To Select An Item Or Value
● Category buttons [ ], [ ] You can change the category after you’ve selected a Song, Style or Voice category. Pressing these buttons allow you to step in sequence through the catego- ries. Use the dial to select an item or value. When you select the category such as Song, Style or Voice, the selected category name and item is shown on the display.
-
Page 42: The Displays
Basic Operation and Displays The Displays ● Display names The display provides important, easy-to-understand indications for performing all operations. The name of the current display appears at the top of the display. You can see the “MAIN” indication at the top on the display. ●…
-
Page 43: Main Display Items
MAIN Display Items The MAIN display shows all of the current basic settings: Song, Style, Voice. It also includes a range of indicators that show the on/off status of a range of functions. Transpose (page 53) Tempo (page 49, 51) Chord Display (page 25) Measure number…
-
Page 44: Playing With The Effects
Reference Playing with the Effects Adding Harmony This feature adds Harmony, Tremolo or Echo effects to the Main Voice. Press the [HARMONY] button to turn the Harmony function on. The [HARMONY] button lights indicating that Harmony is on. To turn Harmony off, press the [HARMONY] button again.
-
Page 45: Changing The Reverb Type
Changing the Reverb Type Reverb enhances the sound of the Voices with the rich ambience of a concert hall. When you select a Style or Song the optimum reverb type for the Voice used is automatically selected. If you want to select a different reverb type, use the operation described below. Press the [FUNCTION] button to call up the FUNCTION display.
-
Page 46: Changing The Chorus Type
Playing with the Effects Changing the Chorus Type The Chorus effect creates a thick sound that is similar to many of the same Voices being played in unison. When you select a Style or Song the optimum chorus type for the Voice used is automatically selected. If you want to select a different Chorus Type, use the procedure described below.
-
Page 47: Panel Sustain
Panel Sustain This function adds sustain to the keyboard Voices. Use it when you want to add sustain to the Voices at all times, regardless of footswitch operation. The sustain function does not affect the Left Voice. Press the [SUSTAIN] button to turn the sustain function on.
-
Page 48: Pitch Bend
Playing with the Effects Pitch Bend The pitch bend wheel can be used to add smooth pitch variations to notes you play on the keyboard. Roll the wheel upward to raise the pitch, or downward to lower the pitch. If you use this feature with a Voice such as the “042 Overdriven”…
-
Page 49: Using Various Functions
Using Various Functions Playing with the metronome This instrument includes a metronome with adjustable tempo and time signature. Play and set the tempo that is most comfortable for you. ■Turn the metronome on Press the [METRONOME] button to start the metronome. To stop the metronome, press the [METRO- NOME] button again.
-
Page 50: Changing The Time Signature
Using Various Functions ■Changing the Time Signature In this example we’ll set up a 3/8 time signature. Press and hold the [METRONOME] but- ton for longer than a second. The currently selected time signature is dis- played. Hold for longer than a second Number of beats Note value (the note value…
-
Page 51: Using Tap Start
Using Tap Start You can also set the tempo by simply tapping the [TAP TEMPO] button at the required tempo—four times for time signatures in 4, and three times for time signatures in 3. You can change the tempo during Song or Style playback by pressing the button just twice. Touch Response ■Turning Touch Response on/off Keyboard Touch Response can be turned on by…
-
Page 52: Eq Settings
Using Various Functions EQ settings Five pre-programmed EQ settings are available. Settings 1 and 2 are best for listening via the instrument’s built-in speakers, setting 3 is for headphones, and settings 4 and 5 are ideal for listening via external speak- ers or when connecting to an external mixer.
-
Page 53: Pitch Controls
Pitch Controls ◆ Large Pitch Changes (Transpose) The overall pitch of the instrument can be shifted up or down by a maximum of one octave in semitone increments. Press one of the TRANSPOSE [+]/[-] buttons. The value is shown in the display, indicating the amount of transposition over or below the normal value.
-
Page 54: Changing The Pitch Of The Instrument In Octaves
Using Various Functions Changing the pitch of the instrument in octaves You can change the playing pitch of the Main and Dual Voices in octave intervals. Press the UPPER OCTAVE [+] button to raise the pitch by one octave. The newly changed value is shown in the LCD. Press the [EXIT] button to return to the Main display.
-
Page 55: Style (Auto Accompaniment) Functions
Style (Auto Accompaniment) Functions Basic operation of the Style (Auto Accompaniment) feature is described on page 22 of the Quick Guide. Included here is information on how you can play the Styles in various ways, how to adjust the Style volume, how you can play chords using the Styles, and more. Pattern Variation (sections) The instrument features a wide variety of Style “sections”…
-
Page 56: [Acmp] Button
Style (Auto Accompaniment) Functions Select the desired Style. (See page 22.) Press the [ACMP] button to turn Auto Accompaniment on. The [ACMP] button lights when ACMP is turned on. Press the [AUTO FILL IN] button to turn the Auto Fill In function on. The initial default setting for Auto Fill In is “on.”…
-
Page 57: Ending/Rit. [I]-[Iii] Buttons
Press one of the MAIN VARIATION [A]– [D] buttons. When the fill-in is finished, it leads smoothly into the selected Main section A–D. Press one of the ENDING/rit. [I]–[III] but- tons. This switches to the Ending section. When the Ending is finished, the Auto Accom- paniment stops automatically.
-
Page 58: One Touch Setting
Style (Auto Accompaniment) Functions One Touch Setting Sometimes selecting the ideal Voice to play with a Song or Style can be confusing. The One Touch Setting feature automatically selects four ideally matched Voices for the Style you’ve selected. Select the desired Style. (See page 22.) Press one of the ONE TOUCH SETTING [1]–[4] buttons.
-
Page 59: Setting The Split Point
Setting the Split Point The initial default Split Point is key number 54 (the F#2 key), but you can change it to another key using the procedure described below. Press the [FUNCTION] button. Use the CATEGORY [ ] and [ ] but- tons as many times as necessary to call up Split Point.
-
Page 60: Playing A Style With Chords But Without Rhythm (Stop Accompaniment)
Style (Auto Accompaniment) Functions Playing a Style with Chords but without Rhythm (Stop Accompaniment) When Auto Accompaniment is on (ACMP button lights) and Synchro Start is off, you can play chords in the left-hand accompaniment range of the keyboard while the Style is stopped and still hear the accompani- ment chords.
-
Page 61: Chord Basics
Chord Basics Two or more notes played together constitute a “chord”. The most basic chord type is the “triad” consisting of three notes: the root, third, and fifth degrees of the corresponding scale. A C major triad, for example, is made up of the notes C (the root), E (the third note of the C major scale), and G (the fifth note of the C major scale).
-
Page 62
Style (Auto Accompaniment) Functions ■Recognized Standard Chords All chords in the chart are “C-root” chords. Chord Name/[Abbreviation] Major [M] Add ninth [(9)] Sixth [6] Sixth ninth [6(9)] Major seventh [M7] Major seventh ninth [M7(9)] Major seventh add sharp eleventh [M7(#11)] Flatted fifth [(b5)] Major seventh flatted fifth [M7b5] Suspended fourth [sus4]… -
Page 63: User Style
User Style This instrument features 11 internal Style categories, but it also allows you to import additional Styles (only those with an “.sty” extension) that you’ve downloaded from the Internet or gotten from other sources, and load them into a User Style and use them in the same way as the internal Styles. For details on loading a Style file, see “…
-
Page 64: Song Settings
Song Settings Song Volumes Press the [FUNCTION] button. Use the CATEGORY [ ] and [ ] but- tons as many times as necessary to call up Song Volume. Changing the Tempo When playing the Song you can change the tempo as required. Press the TEMPO [+]/[-] buttons. The tempo display will appear and you can use the dial or the TEMPO [+]/[-] buttons to set to tempo to anywhere from 011 and 280 quarter-note beats per minute.
-
Page 65: A-B Repeat
A-B Repeat You can specify a section of a Song—“A” is the start point and “B” is the end point—for repeat playback. The A-B Repeat function is also very convenient for practicing when used along with the score display fea- tures of the instrument (page 30).
-
Page 66: Muting Independent Song Parts
Song Settings Muting Independent Song Parts Each “track” of a Song plays a different part of the Song—melody, percussion, accompaniment, etc. You can mute individual tracks and play the muted part on the keyboard yourself, or simply mute tracks other than the ones you want to listen to. Use the [REGIST/TRACK] button to select the TR 1–8, TR 9–16 or ACMP.TR and use the REGISTRA- TION MEMORY [1]–[8] buttons to mute or un-mute the corresponding tracks ([1]–[8], [9]–[16] or ACMP).
-
Page 67: Memorize Your Favorite Panel Settings
Memorize Your Favorite Panel Settings This instrument has a Registration Memory feature that lets you save your favorite set- tings for easy recall whenever they’re needed. Up to 64 complete setups can be saved (8 banks of 8 setups each). 8 Banks Memory 1 Memory 2…
-
Page 68: Recalling A Registration Memory
Memorize Your Favorite Panel Settings Recalling a Registration Memory Make sure that “REGIST” appears in the display (press the [REGIST/TRACK] button until it is shown). Press the REGIST BANK [+]/[-] button to select the desired bank. You can also use the dial to select the bank number.
-
Page 69: Registration Clear-Deleting A Specified Registration Memory
Registration Clear—Deleting a Specified Registration Memory Keep in mind that groups of data cannot be deleted or cleared from the instrument at a single time. Press the [REGIST/TRACK] button a number of times until the “REGIST.” item appears. The item changes in order from “REGIST.” to “TR 1–8”…
-
Page 70: The Functions
The Functions The “Functions” provide a wide range of both detailed and overall instrument parame- ters, such as adjusting the tuning, setting the split point, and editing the voices and effects. Selecting and Setting Functions There are 49 function parameters in all. Find the function you want to set in the list that begins on page 71.
-
Page 71
■ Function Setting List Group Function Item Display Indication VOLUME Style Volume Style Volume Song Volume Song Volume OVERALL Tuning Tuning Pitch Bend Pitch Bend Range 01–12 Range Split Point Split Point Touch Sensitivity Touch Sensitivity Chord Fingering Chord Fingering MAIN Volume Main Volume… -
Page 72
The Functions Group Function Item Display Indication EFFECT Reverb Type Reverb Type Chorus Type Chorus Type DSP Type DSP Type Master EQ Type Master EQ Type HARMONY Harmony Type Harmony Type Harmony Volume Harmony Volume PC MODE PC Mode PC Mode MIDI Local ON/OFF Local… -
Page 73: Using Usb Flash Memory
Yamaha cannot guarantee operation of USB storage devices that you pur- chase. Before purchasing a USB storage device, please consult your Yamaha dealer, or an authorized Yamaha distributor (see list at end of the Owner’s Manual) for advice. USB Flash Memory Before using a USB device, read through the “Precautions when using the USB TO DEVICE terminal”…
-
Page 74: Using Usb Flash Memory
Using USB Flash Memory Using USB Flash Memory Connect a USB flash memory to the USB TO DEVICE terminal, being careful to insert it in the proper direction. (Do not try to force an improper connec- tion.) IMPORTANT • In order to play songs copied to a USB flash memory from a computer or other device, the songs must be stored either in the USB flash memory’s root directory or a first-level/second- level folder in the root directory.
-
Page 75: Formatting Usb Flash Memory
Formatting USB Flash Memory A new USB flash memory device must be formatted before it can be used by this instrument. CAUTION • If you format a USB flash memory that already contains data, all of the data will be erased. Be careful not to erase important data when using the format function.
-
Page 76: Saving Data
Using USB Flash Memory Saving Data Three types of data are saved to one “User File” by this operation: user song, style file, and registration mem- ory data. When you save a “User File” the style file and registration memory are also saved automatically. Make sure that a appropriately format- ted USB flash memory device has been properly connected to the instrument’s…
-
Page 77: Convert A User Song To Smf Format And Save
Convert a User Song to SMF Format and Save This operation converts a user song (song numbers 001–005) to SMF Format 0 and saves the file to USB flash memory. ● What is SMF (Standard MIDI File)? The SMF (Standard MIDI File) format is one of the most common and widely compatible sequence formats used for storing sequence data.
-
Page 78: Loading User Files And Style Files
Using USB Flash Memory Loading User Files and Style Files User files and style file residing on a USB flash memory can be loaded to the instrument. CAUTION • Save important data to a USB flash memory before loading data that will overwrite it.
-
Page 79: Deleting Data From Usb Flash Memory
Deleting Data from USB Flash Memory This procedure deletes selected user files and SMF files from a USB flash memory device. Make sure that the USB flash memory device containing the file(s) you want to delete has been properly connected to the instrument’s USB TO DEVICE termi- nal, and that the “CONNECT”…
-
Page 80: Connections
Before purchasing USB storage devices, please consult your Yamaha dealer, or an authorized Yamaha distributor (see list at end of the Owner’s Manual) for advice. CAUTION • Avoid frequently turning the power on/off to the USB storage device, or connecting/disconnecting the cable too often.
-
Page 81
Backing up the instrument data to a computer Once you’ve saved data to a USB flash memory device, you can copy the data to the hard disk of your computer, then archive and organize the files as desired. Simply reconnect the device as shown below. -
Page 82: Connecting A Personal Computer
Connections Connecting a Personal Computer The following functions become available when this instrument is connected to a computer. ● Performance data can be transferred between the instrument and the computer (page 83). ● Files can be transferred between the instrument and the computer (page 85). The connection procedure is as follows: Install the USB-MIDI driver on your computer.
-
Page 83: Transferring Performance Data To And From A Computer
Transferring Performance Data to and from a Computer By connecting the instrument to a computer, the instrument’s performance data can be used on the com- puter, and performance data from the computer can be played on the instrument. ● When the instrument is connected with computer, it transmits/receives performance data.
-
Page 84: Initial Send
Connections ■PC Mode ● ● ● ● ● ● ● ● ● ● ● ● ● ● ● ● ● ● ● A number of MIDI settings need to be made when you want to transfer performance data between the computer and the instrument.
-
Page 85: Transferring Data Between The Computer And Instrument
Transferring Data Between the Computer and Instrument MIDI songs and Style files stored to a computer can be transferred to the instrument. Backup files can also be transferred from the instrument to the computer and back. In order to transfer songs between your computer and the instrument you will need to install the Musicsoft Downloader application and the USB MIDI Driver included on the Accessory CD-ROM…
-
Page 86
Connections A copy of the selected MIDI song file will appear in the “List of files stored temporarily” at the top of the window. The memory medium will also be dis- played at the bottom of the window to specify the destination for the transfer. Click “Instrument,”… -
Page 87
■Transferring Backup files from the Instrument to a Computer You can use the Musicsoft Downloader to transfer Backup files containing backup data (page 39 ), including the five User Songs stored on the instru- ment, to a computer. If you click “Electronic Musi- cal Instruments”… -
Page 88: Accessory Cd-Rom Installation Guide
• Yamaha makes no representations or warranties with regard to the use of the software and documentation and can- not be held responsible for the results of the use of this manual and the software.
-
Page 89: Cd-Rom Contents
CD-ROM Contents Folder Name Application / Data Name MSD_ Musicsoft Downloader DMN_FlashDemo Flash Demo USB-MIDI Driver (Windows 98/Me) USB-MIDI Driver USBdrv2k (Windows 2000/XP) ■Using the CD-ROM ● ● ● ● ● ● ● ● ● ● ● Please read the Software License Agreement on page 94 before opening the CD-ROM pack- age.
-
Page 90: System Requirements
Accessory CD-ROM Installation Guide System Requirements Application/Data Windows 98SE/Me/2000/ Musicsoft Downloader XP Home Edition/ XP Professional USB Driver for Windows Windows 98/Me 98/Me USB Driver for Windows Windows 2000/XP Home 2000/XP Edition/XP Professional Windows ® Digital Music Notebook Professional Edition, SP1a more Windows ®…
-
Page 91
When the system detects the driver on the CD-ROM and is ready for installation, it is shown as a message on the screen. Make sure that the “YAMAHA USB MIDI Driver” is listed, and click [Next]. The sys- tem starts the installation. -
Page 92: Downloader And Digital Music Notebook Applications
Downloader application and click “Help”. * You can obtain the latest version of the Musicsoft Downloader at the following Internet URL. http://music.yamaha.com/download/ IMPORTANT • Only Musicsoft Downloader can be used to transfer files between this instrument and a computer. No other file transfer application can be used.
-
Page 93: Troubleshooting
When the instrument is recognized cor- rectly, double-click “System” in the Con- trol Panel to open the System window. Double-click the “Device Manager” tab, select “YAMAHA USB MIDI Driver” and delete it. Use the MS-DOS prompt or Explorer to delete the following three files.
-
Page 94
(14) days from the date of receipt, as evidenced by a copy of the receipt. Yamaha’s entire liability and your exclusive remedy will be replacement of the defective media if it is returned to Yamaha or an authorized Yamaha dealer within fourteen days with a copy of the receipt. -
Page 95: Troubleshooting
Appendix Troubleshooting Problem When the instrument is turned on or off, a popping sound is temporarily produced. When using a mobile phone, noise is produced. There is no sound even when the keyboard is played or when a song or style is being played back.
-
Page 96: Messages
Messages LCD Message Access error! All Memory Clearing… Are you sure? Backup Clearing… Cancel Clearing… Com Mode Completed Copy File Create Directory Data Error! Delete File Delete OK ? Delete Directory Deleting… Error! File information area is not large enough. File is not found.
-
Page 97
LCD Message Saving… Send OK? Sending… Since the media is in use now, this function is not available. Sure ? [YES/NO] The limit of the media has been reached. The media is not formatted. The media is write-protected. The song data is too large to be converted to notation. -
Page 98: Voice List
Voice List Voice List ■ Maximum Polyphony ● ● ● ● ● ● ● ● ● ● ● ● ● ● ● ● ● ● The instrument has 32-note maximum polyphony. This means that it can play a maximum of up to 32 notes at once, regard- less of what functions are used.
-
Page 99
Bank Select MIDI Voice Program Voice Name Change# (0–127) (0–127) (1–128) FullHorns SmoothTromb HighBrass OberBrass TrumpetEns MellowHorns BigBandBrs PopBrass AnalogBrs Trb.Section SmallBrass SoftAnalog FunkyAnalog TechnoBrass SynthBrass Trumpet Sweet! Trumpet Sweet! Trombone JazzTrumpet SoloTrumpet FlugelHorn Trombone SoftTromb SoloTromb MellowTromb MutedTrump BaritonHorn BaritonHit Tuba AlpBass… -
Page 100
Voice List Bank Select MIDI Voice Program Change# (0–127) (0–127) (1–128) AnalogKit DanceKit SymphonyKit CubanKit PopLatinKit ArabicKit SFXKit1 SFXKit2 Accordion Musette Steirisch TuttiAccrd SmallAccrd Accordion TangoAccrd Bandoneon SoftAccrd ModernHarp BluesHarp Insomnia NeoWarmPad CyberPad Wave2001 Atmosphere XenonPad Equinox Fantasia DX Pad Symbiont Stargate Area51… -
Page 101
● XGlite Voice/XGlite Optional Voice* List Bank Select MIDI Voice Program Change# (0–127) (0–127) (1–128) Grand Piano Grand Piano KSP Piano Strings Dream Bright Piano Bright Piano KSP Electric Grand Piano Electric Grand Piano KSP Detuned CP80 Honky-tonk Piano Honky-tonk Piano KSP Electric Piano 1 Electric Piano 1 KSP Chorus Electric Piano 1… -
Page 102
Voice List Bank Select MIDI Voice Program Change# (0–127) (0–127) (1–128) Timpani Strings 1 Stereo Strings Slow Strings 60’s Strings Orchestra Orchestra 2 Tremolo Orchestra Velocity Strings Strings 2 Stereo Slow Strings Legato Strings Warm Strings Kingdom Synth Strings 1 Synth Strings 2 Choir Aahs Stereo Choir… -
Page 103
Bank Select MIDI Voice Program Voice Name Change# (0–127) (0–127) (1–128) Muted Banjo Rabab Gopichant Shamisen Koto Taisho-kin Kanoon Kalimba Bagpipe Fiddle Shanai Tinkle Bell Bonang Altair Gamelan Gongs Stereo Gamelan Gongs Rama Cymbal Agogo Steel Drums Glass Percussion Thai Bells Woodblock Castanets Taiko Drum… -
Page 104: Drum Kit List
Drum Kit List Drum Kit List • “ ” indicates that the drum sound is the same as “Standard Kit 1”. • Each percussion voice uses one note. • The MIDI Note # and Note are actually one octave lower than keyboard Note # and Note. For example, in “128: Standard Kit 1”, the “Seq Click H”…
-
Page 105
Voice No. MSB (0–127) / LSB (0–127) / PC (1–128) Keyboard MIDI Alternate Note Note# Note Note# Note C# -1 D# -1 G# -1 127/000/001 127/000/28 127/000/033 Standard Kit 1 Dance Kit* Jazz Kit Surdo Mute Kick Dance 1 Surdo Open Kick Dance 2 Hi Q Whip Slap… -
Page 106
Drum Kit List Voice No. MSB (0–127) / LSB (0–127) / PC (1–128) Keyboard MIDI Alternate Note Note# Note Note# Note C# -1 D# -1 G# -1 PSR-S500 Owner’s Manual 127/000/001 126/000/001 126/000/002 Standard Kit 1 SFX Kit 1 SFX Kit 2 Surdo Mute Surdo Open Hi Q… -
Page 107: Style List
Style List Style List Style No. Style Name Pop&Rock FunkPopRock AcousticRock Cool8Beat 60’sRock1 60’sRock2 VintageGtrPop 60’sGuitarPop 70’s8Beat 90’sGuitarPop KoolShuffle BubblegumPop BritPopSwing JazzPop HardRock RootRock RockShuffle Unplugged Ballad 8BeatAdria OrganBallad PianoBallad 8BeatBallad EPBallad 6-8Modern Chillout NewR&BBallad 16BeatBallad PowerBallad EasyBallad Dance Ibiza TechnoParty DiscoHouse DiscoPhilly…
-
Page 108: Music Database List
Music Database List Music Database List MDB Name Christmas Manger Away Noel First Rednosed Rudolph Silent Christmas Wonderful Time Traditional Abide This Hymn Ave Maria NoMore Can Can Orpheus Moulin Heart Texas YellowRose Showtime Dance Lord For Cabaret! Night Time NoBusiness Like! The Cat’s Memory The Great Times…
-
Page 109
MDB Name Espana Viva Hard To SaySorry Eyes Of Green Hi, Greetings Face Dance Music I T’Aime Free Best Things I’m Saving Love Green Mountain Know Me Now Hear Music Leave Me Now Heaven Blue Live Without You He’s Got To Go London Streets High Moon Love’s Glory… -
Page 110: Effect Type List
Effect Type List Effect Type List ● Harmony Types Type Duet Trio Block Country Octave Trill 1/4 note Trill 1/6 note Trill 1/8 note Trill 1/12 note Trill 1/16 note Trill 1/24 note Trill 1/32 note Tremolo 1/4 note Tremolo 1/6 note Tremolo 1/8 note Tremolo 1/12 note Tremolo 1/16 note…
-
Page 111
● Chorus Types Type CHORUS1 CHORUS2 CHORUS3 CHORUS4 CHORUS5 CHORUS6 CHORUS7 Conventional chorus program with rich, warm chorusing. CHORUS8 GM CHORUS1 GM CHORUS2 GM CHORUS3 GM CHORUS4 FB CHORUS CELESTE1 A 3-phase LFO adds modulation and spaciousness to the sound. CELESTE2 FLANGER1 FLANGER2… -
Page 112
Effect Type List Type SYMPHONIC1 Adds more stages to the modulation of Celeste. SYMPHONIC2 ENS DETUNE Chorus effect without modulation, created by adding a slightly pitch-shifted sound. KARAOKE1 KARAOKE2 Echo for karaoke. KARAOKE3 This effect isolates only the early reflection components of the reverb. GATE REVERB Simulation of gated reverb. -
Page 113
Type PHASER1 PHASER2 EP PHASER1 Cyclically modulates the phase to add modulation to the sound. EP PHASER2 EP PHASER3 DYN PHASER PITCH CHG1 PITCH CHG2 Changes the pitch of the input signal. PITCH CHG3 ROTARY SP1 ROTARY SP2 ROTARY SP3 ROTARY SP4 ROTARY SP5 ROTARY SP6… -
Page 114: Midi Implementation Chart
MIDI Implementation Chart MIDI Implementation Chart PSR-S500 Owner’s Manual…
-
Page 115
MIDI Implementation Chart PSR-S500 Owner’s Manual… -
Page 116: Midi Data Format
MIDI Data Format MIDI Data Format NOTE: 1 By default (factory settings) the instrument ordinarily functions as a 16-channel multi-timbral tone generator, and incoming data does not affect the panel voices or panel settings. How- ever, the MIDI messages listed below do affect the panel voices, auto accompaniment, and songs.
-
Page 117: Specifications
• Footswitch: FC4/FC5 * Specifications and descriptions in this owner’s manual are for infor- mation purposes only. Yamaha Corp. reserves the right to change or modify products or specifications at any time without prior notice. Since specifications, equipment or options may not be the same in ev- ery locale, please check with your Yamaha dealer.
-
Page 118: Index
Index +/YES, -/NO button … 15, 41 >/■ button… 14, 28, 41 button … 14, 28 B button… 14, 65 button… 14, 28 button … 14, 28 A-B Repeat… 65 Accessories… 7 ACMP button … 14, 23 Auto Accompaniment Region… 23 AUTO FILL IN button…
-
Page 119
PAUSE … 28 PC … 84 PHONES/OUTPUT jack… 10, 15 Pitch Bend … 48 Pitch Bend Range … 71 PITCH BEND wheel… 15, 48 Power Adaptor … 10 PRESET button … 14, 27 Preset Song… 29 Quantize … 72 Quick Recording … 33 REC button… -
Page 120: Limited Warranty
PSR SERIES OF PORTATONE ELECTRONIC KEYBOARDS If during the first 90 days that immediately follows the purchase date, your new Yamaha product covered by this warranty is found to have a defect in material and/or workmanship, Yamaha and/or its authorized representative will repair such defect without charge for parts or labor.
-
Page 121
For details of products, please contact your nearest Yamaha representative or the authorized distributor listed below. Pour plus de détails sur les produits, veuillez-vous adresser à Yamaha ou au distributeur le plus proche de vous figurant dans la liste suivante. -
Page 122
Yamaha Home Keyboards Home Page (English Only) http://music.yamaha.com/homekeyboard Yamaha Manual Library http://www.yamaha.co.jp/manual/ U.R.G., Pro Audio & Digital Musical Instrument Division, Yamaha Corporation © 2006 Yamaha Corporation WH27920 XXXPOXXX.X-01A0 Printed in China…

SPECIAL MESSAGE SECTION
This product utilizes batteries or an external power supply (adapter).
This product may also use “household” type batteries. Some of these
DO NOT connect this product to any power supply or adapter other
may be rechargeable. Make sure that the battery being charged is a
than one described in the manual, on the name plate, or specifically
rechargeable type and that the charger is intended for the battery being
recommended by Yamaha.
charged.
This product should be used only with the components supplied or; a
When installing batteries, do not mix batteries with new, or with batter-
cart, rack, or stand that is recommended by Yamaha. If a cart, etc., is
ies of a different type. Batteries MUST be installed correctly. Mis-
used, please observe all safety markings and instructions that accom-
matches or incorrect installation may result in overheating and battery
pany the accessory product.
case rupture.
SPECIFICATIONS SUBJECT TO CHANGE:
Warning:
The information contained in this manual is believed to be correct at the
Do not attempt to disassemble, or incinerate any battery. Keep all bat-
time of printing. However, Yamaha reserves the right to change or mod-
teries away from children. Dispose of used batteries promptly and as
ify any of the specifications without notice or obligation to update exist-
regulated by the laws in your area. Note: Check with any retailer of
ing units.
household type batteries in your area for battery disposal information.
This product, either alone or in combination with an amplifier and head-
Disposal Notice:
phones or speaker/s, may be capable of producing sound levels that
Should this product become damaged beyond repair, or for some rea-
could cause permanent hearing loss. DO NOT operate for long periods
son its useful life is considered to be at an end, please observe all local,
of time at a high volume level or at a level that is uncomfortable. If you
state, and federal regulations that relate to the disposal of products that
experience any hearing loss or ringing in the ears, you should consult
contain lead, batteries, plastics, etc. If your dealer is unable to assist
an audiologist.
you, please contact Yamaha directly.
IMPORTANT: The louder the sound, the shorter the time period before
damage occurs.
NAME PLATE LOCATION:
The name plate is located on the bottom of the product. The model
NOTICE:
number, serial number, power requirements, etc., are located on this
Service charges incurred due to a lack of knowledge relating to how a
plate. You should record the model number, serial number, and the date
function or effect works (when the unit is operating as designed) are not
of purchase in the spaces provided below and retain this manual as a
covered by the manufacturer’s warranty, and are therefore the owners
permanent record of your purchase.
responsibility. Please study this manual carefully and consult your
dealer before requesting service.
ENVIRONMENTAL ISSUES:
Model
Yamaha strives to produce products that are both user safe and envi-
ronmentally friendly. We sincerely believe that our products and the pro-
duction methods used to produce them, meet these goals. In keeping
Serial No.
with both the letter and the spirit of the law, we want you to be aware of
the following:
Purchase Date
Battery Notice:
This product MAY contain a small non-rechargeable battery which (if
applicable) is soldered in place. The average life span of this type of
battery is approximately five years. When replacement becomes neces-
sary, contact a qualified service representative to perform the replace-
ment.
PLEASE KEEP THIS MANUAL
92-BP (bottom)
2 PSR-S500 уководство пользователя

FCC INFORMATION (U.S.A.)
1. IMPORTANT NOTICE: DO NOT MODIFY THIS UNIT!
not guarantee that interference will not occur in all installations. If
This product, when installed as indicated in the instructions con-
this product is found to be the source of interference, which can be
tained in this manual, meets FCC requirements. Modifications not
determined by turning the unit “OFF” and “ON”, please try to elimi-
expressly approved by Yamaha may void your authority, granted by
nate the problem by using one of the following measures:
the FCC, to use the product.
Relocate either this product or the device that is being affected by
the interference.
2. IMPORTANT: When connecting this product to accessories and/
or another product use only high quality shielded cables. Cable/s
Utilize power outlets that are on different branch (circuit breaker or
supplied with this product MUST be used. Follow all installation
fuse) circuits or install AC line filter/s.
instructions. Failure to follow instructions could void your FCC
In the case of radio or TV interference, relocate/reorient the
authorization to use this product in the USA.
antenna. If the antenna lead-in is 300 ohm ribbon lead, change the
lead-in to co-axial type cable.
3. NOTE: This product has been tested and found to comply with the
requirements listed in FCC Regulations, Part 15 for Class “B” digital
If these corrective measures do not produce satisfactory results,
devices. Compliance with these requirements provides a reason-
please contact the local retailer authorized to distribute this type of
able level of assurance that your use of this product in a residential
product. If you can not locate the appropriate retailer, please contact
environment will not result in harmful interference with other elec-
Yamaha Corporation of America, Electronic Service Division, 6600
tronic devices. This equipment generates/uses radio frequencies
Orangethorpe Ave, Buena Park, CA90620
and, if not installed and used according to the instructions found in
The above statements apply ONLY to those products distributed by
the users manual, may cause interference harmful to the operation
Yamaha Corporation of America or its subsidiaries.
of other electronic devices. Compliance with FCC regulations does
* This applies only to products distributed by YAMAHA CORPORATION OF AMERICA.
(class B)
OBSERVERA!
Apparaten kopplas inte ur växelströmskällan (nätet) så länge som den ar
ansluten till vägguttaget, även om själva apparaten har stängts av.
ADVARSEL: Netspæendingen til dette apparat er IKKE afbrudt, sålæenge
netledningen siddr i en stikkontakt, som er t endt — også selvom der or
slukket på apparatets afbryder.
VAROITUS: Laitteen toisiopiiriin kytketty käyttökytkin ei irroita koko laitetta
verkosta.
(standby)
This product contains a high intensity lamp that contains
a small amount of mercury. Disposal of this material
may be regulated due to environmental considerations.
For disposal information in the United States, refer to the Electronic
Industries Alliance web site:
www.eiae.org
(mercury)* This applies only to products distributed by YAMAHA CORPORATION OF AMERICA.
IMPORTANT NOTICE FOR THE UNITED KINGDOM
Connecting the Plug and Cord
IMPORTANT. The wires in this mains lead are coloured in accordance
with the following code:
BLUE : NEUTRAL
BROWN : LIVE
As the colours of the wires in the mains lead of this apparatus may not
correspond with the coloured makings identifying the terminals in your
plug proceed as follows:
The wire which is coloured BLUE must be connected to the terminal
which is marked with the letter N or coloured BLACK.
The wire which is coloured BROWN must be connected to the termi-
nal which is marked with the letter L or coloured RED.
Making sure that neither core is connected to the earth terminal of the
three pin plug.
• This applies only to products distributed by Yamaha-Kemble Music (U.K.) Ltd. (2 wires)
PSR-S500 уководство пользователя 3
èêÄÇàãÄ íÖïçàäà ÅÖáéèÄëçéëíà
ÇçàåÄíÖãúçé èêéóàíÄâíÖ, èêÖÜÑÖ óÖå èêàëíìèÄíú ä ùäëèãìÄíÄñàà
* ï‡ÌËÚ ˝ÚÓ ÛÍÓ‚Ó‰ÒÚ‚Ó ‚ ·ÂÁÓÔ‡ÒÌÓÏ ÏÂÒÚÂ. éÌÓ ‚‡Ï ¢ ÔÓ̇‰Ó·ËÚÒfl.
èêÖÑìèêÖÜÑÖçàÖ
ÇÓ ËÁ·ÂʇÌË Ò¸ÂÁÌ˚ı Ú‡‚Ï Ë ‰‡Ê ÒÏÂÚË ÓÚ Û‰‡‡ ˝ÎÂÍÚ˘ÂÒÍËÏ ÚÓÍÓÏ, ‡ Ú‡ÍÊ ÍÓÓÚÍÓ„Ó Á‡Ï˚͇ÌËfl,
ÔÓ‚ÂʉÂÌËfl Ó·ÓÛ‰Ó‚‡ÌËfl, ÔÓʇ‡ Ë ‰Û„Ëı Ë̈ˉÂÌÚÓ‚ ‚Ò„‰‡ Òӷ≇ÈÚ ÒÎÂ‰Û˛˘Ë ÏÂ˚ ·ÂÁÓÔ‡ÒÌÓÒÚË:
àÒÚÓ˜ÌËÍ ÔËÚ‡ÌËfl/‡‰‡ÔÚ ÔÂÂÏÂÌÌÓ„Ó ÚÓ͇
ظ ÓÚ ‚Ó‰˚
• àÒÔÓθÁÛÈÚ ÚÓθÍÓ Ì‡ÔflÊÂÌËÂ, Á‡‰‡ÌÌÓ ‰Îfl ËÌÒÚÛÏÂÌÚ‡.
• Å„ËÚ ËÌÒÚÛÏÂÌÚ ÓÚ ‰Óʉfl, Ì ËÒÔÓθÁÛÈÚÂ Â„Ó fl‰ÓÏ Ò ‚Ó‰ÓÈ,
ùÚÓ Ì‡ÔflÊÂÌË Û͇Á‡ÌÓ Ì‡ ËÌÒÚÛÏÂÌÚÂ.
‚ ÛÒÎÓ‚Ëflı Ò˚ÓÒÚË Ë ÔÓ‚˚¯ÂÌÌÓÈ ‚·ÊÌÓÒÚË; Ì ÒÚ‡‚¸Ú ̇ Ì„Ó
ÂÏÍÓÒÚË Ò ÊˉÍÓÒÚ¸˛, ÍÓÚÓ‡fl ÏÓÊÂÚ ‡ÁÎËÚ¸Òfl Ë ÔÓÔ‡ÒÚ¸ ‚ÌÛÚ¸.
• àÒÔÓθÁÛÈÚ ÚÓθÍÓ Û͇Á‡ÌÌ˚È ‡‰‡ÔÚ (PA-301, PA-300 ËÎË ‡Ì‡Îӄ˘-
Ì˚È, ÂÍÓÏẨӂ‡ÌÌ˚È ÍÓÔÓ‡ˆËÂÈ Yamaha). àÒÔÓθÁÓ‚‡ÌË ÌÂÔ‡-
• çËÍÓ„‰‡ Ì ‚ÒÚ‡‚ÎflÈÚÂ Ë Ì ‚˚ÌËχÈÚ ‚ËÎÍÛ ˝ÎÂÍÚÓËÌÒÚÛÏÂÌÚ‡
‚ËθÌÓ„Ó ‡‰‡ÔÚ‡ ÏÓÊÂÚ ÔË‚ÂÒÚË Í ÔÓ‚ÂʉÂÌ˲ ËÎË Ô„‚Û
ÏÓÍ˚ÏË Û͇ÏË.
ËÌÒÚÛÏÂÌÚ‡.
• èÂËӉ˘ÂÒÍË ÔÓ‚ÂflÈÚ ‚ËÎÍÛ ˝ÎÂÍÚÓËÌÒÚÛÏÂÌÚ‡ Ë Û‰‡ÎflÈÚÂ Ò ÌÂÂ
ظ ÓÚ Ó„Ìfl
„flÁ¸ Ë Ô˚θ.
• ç ÒÚ‡‚¸Ú ̇ ËÌÒÚÛÏÂÌÚ „Ófl˘Ë Ô‰ÏÂÚ˚, ̇ÔËÏ ҂˜Ë.
• òÌÛ ‡‰‡ÔÚ‡ ÔÂÂÏÂÌÌÓ„Ó ÚÓ͇ Ì ‰ÓÎÊÂÌ Ì‡ıÓ‰ËÚ¸Òfl fl‰ÓÏ Ò ËÒ-
ÉÓfl˘ËÈ Ô‰ÏÂÚ ÏÓÊÂÚ ÛÔ‡ÒÚ¸ Ë ‚˚Á‚‡Ú¸ ÔÓʇ.
ÚÓ˜ÌË͇ÏË ÚÂÔ· (̇„‚‡ÚÂÎflÏË, ‡‰Ë‡ÚÓ‡ÏË Ë ‰.). ç ‰ÓÔÛÒ͇ÈÚÂ
Ú‡ÍÊ ˜ÂÁÏÂÌÓ„Ó Ò„Ë·‡ÌËfl Ë ÔÓ‚ÂʉÂÌËfl ¯ÌÛ‡, Ì ÒÚ‡‚¸Ú ̇ Ì„Ó
Ç̯ڇÚÌ˚ ÒËÚÛ‡ˆËË
ÚflÊÂÎ˚ Ô‰ÏÂÚ˚ Ë ‰ÂÊËÚÂ Â„Ó ‚ Ú‡ÍÓÏ ÏÂÒÚÂ, „‰Â ̇ ÌÂ„Ó ÌÂθÁfl
• Ç ÒÎÛ˜‡Â ËÁÌÓÒ‡ Ë ÔÓ‚ÂʉÂÌËfl ¯ÌÛ‡ ËÎË ‚ËÎÍË ‡‰‡ÔÚ‡ ÔÂÂÏÂÌÌÓ-
̇ÒÚÛÔËÚ¸, Á‡‰ÂÚ¸ ÌÓ„ÓÈ ËÎË ˜ÚÓ-ÌË·Û‰¸ ÔÓ ÌÂÏÛ ÔÂÂ͇ÚËÚ¸.
„Ó ÚÓ͇, ‡ Ú‡ÍÊ ÔË ‚ÌÂÁ‡ÔÌÓÏ ËÒ˜ÂÁÌÓ‚ÂÌËË Á‚Û͇ ‚Ó ‚ÂÏfl ˝ÍÒÔÎÛ‡-
Ú‡ˆËË, ÔË ÔÓfl‚ÎÂÌËË ÌÂÓ·˚˜ÌÓ„Ó Á‡Ô‡ı‡ Ë ‰˚χ ÌÂωÎÂÌÌÓ ÓÚÍβ˜Ë-
ç ÓÚÍ˚‚‡Ú¸
Ú ˝ÎÂÍÚÓÔËÚ‡ÌËÂ, ‚˚̸Ú ‚ËÎÍÛ ‡‰‡ÔÚ‡ ËÁ ÓÁÂÚÍË Ë Ó·‡ÚËÚÂÒ¸ Á‡
• ç ÓÚÍ˚‚‡ÈÚ ËÌÒÚÛÏÂÌÚ Ë Ì Ô˚Ú‡ÈÚÂÒ¸ ‡ÁÓ·‡Ú¸ ËÎË ÏÓ‰ËÙˈË-
ÔÓÏÓ˘¸˛ Í ÒÔˆˇÎËÒÚ‡Ï ˆÂÌÚ‡ ÚÂıÌ˘ÂÒÍÓ„Ó Ó·ÒÎÛÊË‚‡ÌËfl ÍÓÔÓ‡-
Ó‚‡Ú¸ Â„Ó ‚ÌÛÚÂÌÌË ÍÓÏÔÓÌÂÌÚ˚. Ç ËÌÒÚÛÏÂÌÚ ÌÂÚ ÍÓÏÔÓÌÂÌÚÓ‚,
ˆËË Yamaha.
ÍÓÚÓ˚ ‰ÓÎÊÂÌ Ó·ÒÎÛÊË‚‡Ú¸ ÔÓθÁÓ‚‡ÚÂθ. èË ÔÓfl‚ÎÂÌËË ÌÂËÒÔ‡‚-
ÌÓÒÚË ÌÂωÎÂÌÌÓ ÔÂ͇ÚËÚ ˝ÍÒÔÎÛ‡Ú‡ˆË˛ Ë Ó·‡ÚËÚÂÒ¸ Á‡ ÔÓÏÓ˘¸˛
Í Í‚‡ÎËÙˈËÓ‚‡ÌÌ˚Ï ÒÔˆˇÎËÒÚ‡Ï ˆÂÌÚ‡ ÚÂıÌ˘ÂÒÍÓ„Ó Ó·ÒÎÛÊË‚‡-
ÌËfl ÍÓÔÓ‡ˆËË Yamaha.
ÇçàåÄçàÖ!
ÇÓ ËÁ·ÂʇÌË ̇ÌÂÒÂÌËfl Ò¸ÂÁÌ˚ı Ú‡‚Ï ÒÂ·Â Ë ÓÍÛʇ˛˘ËÏ, ‡ Ú‡ÍÊ ÔÓ‚ÂʉÂÌËfl ËÌÒÚÛÏÂÌÚ‡ Ë ‰Û„Ó„Ó
ËÏÛ˘ÂÒÚ‚‡, ÔÓÏËÏÓ ÔÓ˜Ëı ‚Ò„‰‡ Òӷ≇ÈÚ ÒÎÂ‰Û˛˘Ë ÓÒÌÓ‚Ì˚ ÏÂ˚ ·ÂÁÓÔ‡ÒÌÓÒÚË:
àÒÚÓ˜ÌËÍ ÔËÚ‡ÌËfl/‡‰‡ÔÚ ÔÂÂÏÂÌÌÓ„Ó ÚÓ͇
• ÇÓ ËÁ·ÂʇÌË ÒÎÛ˜‡ÈÌÓ„Ó Ô‡‰ÂÌËfl ËÌÒÚÛÏÂÌÚ‡ Ì ÓÒÚ‡‚ÎflÈÚ „Ó
• èË ÓÚÍβ˜ÂÌËË Í‡·ÂÎfl ÓÚ ËÌÒÚÛÏÂÌÚ‡ ËÎË ÓÚ ˝ÎÂÍÚÓÒÂÚË ·ÂËÚÂÒ¸
‚ ÌÂÛÒÚÓȘ˂ÓÏ ÔÓÎÓÊÂÌËË.
Á‡ ‚ËÎÍÛ, ‡ Ì Á‡ ͇·Âθ.
• è‰ ÔÂÂÏ¢ÂÌËÂÏ ËÌÒÚÛÏÂÌÚ‡ ÓÚÒÓ‰ËÌËÚ ÔÓ‰Íβ˜ÂÌÌ˚È Í ÌÂÏÛ
• äÓ„‰‡ ËÌÒÚÛÏÂÌÚ Ì ËÒÔÓθÁÛÂÚÒfl, ‡ Ú‡ÍÊ ‚Ó ‚ÂÏfl „ÓÁ˚ ÓÚÍβ˜‡È-
‡‰‡ÔÚÂ Ë ‰Û„Ë ͇·ÂÎË.
Ú ‡‰‡ÔÚ ÔÂÂÏÂÌÌÓ„Ó ÚÓ͇.
• è‰ ̇ÒÚÓÈÍÓÈ ËÁ‰ÂÎËfl ۷‰ËÚÂÒ¸, ˜ÚÓ ËÒÔÓθÁÛÂχfl
• ç ÔÓ‰Íβ˜‡ÈÚ ËÌÒÚÛÏÂÌÚ Í Ó‰ÌÓÈ ˝ÎÂÍÚ˘ÂÒÍÓÈ ÓÁÂÚÍÂ Ò ‰Û„ËÏË
˝ÎÂÍÚÓÓÁÂÚ͇ ΄ÍÓ ‰ÓÒÚÛÔ̇. Ç ÒÎÛ˜‡Â ‚ÓÁÌËÍÌÓ‚ÂÌËfl ͇ÍËı-ÎË·Ó
ÛÒÚÓÈÒÚ‚‡ÏË (̇ÔËÏÂ, ˜ÂÂÁ ÚÓÈÌËÍ). ùÚÓ ÏÓÊÂÚ ÔË‚ÂÒÚË Í ÒÌË-
ÌÂÔÓ·‰ÓÍ ÌÂωÎÂÌÌÓ ‚˚Íβ˜ËÚ ËÌÒÚÛÏÂÌÚ Ë ÓÚÍβ˜ËÚÂ Â„Ó ÓÚ
ÊÂÌ˲ ͇˜ÂÒÚ‚‡ Á‚Û͇ ËÎË ÔÂÂ„Â‚Û ÓÁÂÚÍË.
˝ÎÂÍÚÓÒÂÚË. чÊ ÂÒÎË ÔËÚ‡ÌË ‚˚Íβ˜ÂÌÓ, ËÁ‰ÂÎË ÔÓ‰ÓÎʇÂÚ
ÔÓÚ·ÎflÚ¸ ˝ÎÂÍÚÓ˝Ì„˲ ‚ ÏËÌËχθÌÓÏ ÍÓ΢ÂÒÚ‚Â. ÖÒÎË ËÁ‰ÂÎËÂ
Ì ËÒÔÓθÁÛÂÚÒfl ‚ Ú˜ÂÌË ‰ÎËÚÂθÌÓ„Ó ‚ÂÏÂÌË, ÓÚÍβ˜ËÚ ¯ÌÛ
åÂÒÚÓ ÛÒÚ‡ÌÓ‚ÍË
ÔËÚ‡ÌËfl ÓÚ ˝ÎÂÍÚÓÒÂÚË.
• ÇÓ ËÁ·ÂʇÌË ‰ÂÙÓχˆËË Ô‡ÌÂÎË Ë ÔÓ‚ÂʉÂÌËfl ‚ÌÛÚÂÌÌËı ÍÓÏÔÓ-
ÌÂÌÚÓ‚ ·Â„ËÚ ËÌÒÚÛÏÂÌÚ ÓÚ ˜ÂÁÏÂÌÓÈ Ô˚ÎË Ë ÒËθÌÓÈ ‚Ë·‡ˆËË
• àÒÔÓθÁÛÈÚ ÚÓθÍÓ ÔÓ‰ÒÚ‡‚ÍÛ, ÒÔˆˇθÌÓ Ô‰̇Á̇˜ÂÌÌÛ˛ ‰Îfl
Ë Ì ËÒÔÓθÁÛÈÚÂ Â„Ó ÔË Ó˜Â̸ ‚˚ÒÓÍÓÈ ËÎË ÌËÁÍÓÈ ÚÂÏÔ‡ÚÛ (̇Ô-
ËÌÒÚÛÏÂÌÚ‡.
ÑÎfl ÍÂÔÎÂÌËfl ÒÚÓÈÍË ËÎË ÔÓ‰ÒÚ‡‚ÍË ËÒÔÓθÁÛÈ
Ú ÚÓθÍÓ
ËÏÂ, ̇ ÒÓÎ̈Â, fl‰ÓÏ Ò Ì‡„‚‡ÚÂÎÂÏ ËÎË ‚ χ¯ËÌ ‚ ‰Ì‚ÌÓ ‚ÂÏfl).
‚ËÌÚ˚, ÔÓÒÚ‡‚ÎflÂÏ˚ ‚ ÍÓÏÔÎÂÍÚÂ. Ç ÔÓÚË‚ÌÓÏ ÒÎÛ˜‡Â ‚ÓÁ
ÏÓÊÌÓ
ÔÓ‚ÂʉÂÌË ‚ÌÛÚÂÌÌËı ÍÓÏÔÓÌÂÌÚÓ‚ Ë Ô‡‰ÂÌË ËÌÒÚÛÏÂÌÚ‡.
• ç ËÒÔÓθÁÛÈÚ ËÌÒÚÛÏÂÌÚ ‚ ÌÂÔÓÒ‰ÒÚ‚ÂÌÌÓÈ ·ÎËÁÓÒÚË ÓÚ ÚÂ΂Ë-
ÁÓ‡, ‡‰ËÓÔËÂÏÌË͇, ÒÚÂÂÓÓ·ÓÛ‰Ó‚‡ÌËfl, ÏÓ·ËθÌÓ„Ó ÚÂÎÂÙÓ̇ Ë
‰Û„Ëı ˝ÎÂÍÚÓÔË·ÓÓ‚. Ç ÔÓÚË‚ÌÓÏ ÒÎÛ˜‡Â ‚ ËÌÒÚÛÏÂÌÚÂ, ÚÂ΂Ë-
ÁÓ ËÎË ‡‰ËÓÔËÂÏÌËÍ ÏÓ„ÛÚ ‚ÓÁÌËÍÌÛÚ¸ ÔÓÏÂıË.
(3)-10 1/2
4 PSR-S500 уководство пользователя
èÓ‰Íβ˜ÂÌËÂ
ëÓı‡ÌÂÌË ‰‡ÌÌ˚ı
• è‰ ÔÓ‰Íβ˜ÂÌËÂÏ ËÌÒÚÛÏÂÌÚ‡ Í ‰Û„ËÏ ˝ÎÂÍÚÓÌÌ˚Ï ÍÓÏÔÓÌÂÌ-
ëÓı‡ÌÂÌËÂ Ë ÂÁ‚ÌÓ ÍÓÔËÓ‚‡ÌË ‰‡ÌÌ˚ı
Ú‡Ï ÓÚÍβ˜ËÚ Ëı ÔËÚ‡ÌËÂ. è‰ ‚Íβ˜ÂÌËÂÏ ËÎË ÓÚÍβ˜ÂÌËÂÏ
• èË ÓÚÍβ˜ÂÌËË ÔËÚ‡ÌËfl ËÌÒÚÛÏÂÌÚ‡ ̇ÒÚÓÈÍË Ô‡ÌÂÎË Ë ÌÂÍÓÚÓ˚Â
˝ÎÂÍÚÓÌÌ˚ı ÍÓÏÔÓÌÂÌÚÓ‚ ÛÒÚ‡ÌÓ‚ËÚ ÏËÌËχθÌ˚È ÛÓ‚Â̸ „ÓÏ-
‰Û„Ë ÚËÔ˚ ‰‡ÌÌ˚ı Ì ÒÓı‡Ìfl˛ÚÒfl ‚ Ô‡ÏflÚË. ëÓı‡ÌflÈÚ ÌÛÊÌ˚Â
ÍÓÒÚË. ì·Â‰ËÚÂÒ¸ Ú‡ÍÊ ‚ ÚÓÏ, ˜ÚÓ Ì‡ ‚ÒÂı ÍÓÏÔÓÌÂÌÚ‡ı ÛÒÚ‡ÌÓ‚ÎÂÌ
‰‡ÌÌ˚ ‚ „ËÒÚ‡ˆËÓÌÌÓÈ Ô‡ÏflÚË (ÒÚ. 67).
ÏËÌËχθÌ˚È ÛÓ‚Â̸ „ÓÏÍÓÒÚË, ‡ ‚Ó ‚ÂÏfl Ë„˚ ̇ ËÌÒÚÛÏÂÌÚÂ
ëÓı‡ÌÂÌÌ˚ ‰‡ÌÌ˚ ڇÍÊ ÏÓ„ÛÚ ·˚Ú¸ ÛÚÂflÌ˚ ËÁ-Á‡ ÌÂËÒÔ‡‚ÌÓÒÚË
ÔÓÒÚÂÔÂÌÌÓ Û‚Â΢¸Ú „ÓÏÍÓÒÚ¸ ‰Ó ÌÛÊÌÓÈ.
ËÎË ÌÂÔ‡‚ËθÌÓÈ ‡·ÓÚ˚ ËÌÒÚÛÏÂÌÚ‡.
LJÊÌ˚ ‰‡ÌÌ˚ ÒÓı‡ÌflÈÚ ̇ USB-ÌÓÒËÚÂθ ËÎË Ì‡ ‚̯ÌÂÂ
é·ÒÎÛÊË‚‡ÌËÂ
ÛÒÚÓÈÒÚ‚Ó, ̇ÔËÏÂ, ̇ ÍÓÏÔ¸˛ÚÂ. (ÒÚ. 76, 87)
• ÑÎfl ˜ËÒÚÍË ËÌÒÚÛÏÂÌÚ‡ ÔÓθÁÛÈÚÂÒ¸ Ïfl„ÍÓÈ ÒÛıÓÈ Ú̸͇˛. çËÍÓ„‰‡ ÌÂ
êÂÁ‚ÌÓ ÍÓÔËÓ‚‡ÌË ̇ USB-ÛÒÚÓÈÒÚ‚Ó ı‡ÌÂÌËfl
ËÒÔÓθÁÛÈÚ ÔflÚÌÓ‚˚‚Ó‰ËÚÂÎË, ‡ÒÚ‚ÓËÚÂÎË, ÊˉÍË ӘËÒÚËÚÂÎË ËÎË
‰‡ÌÌ˚ı ËÎË ‚̯ÌËÈ ÌÓÒËÚÂθ
˜ËÒÚfl˘Ë ҇ÎÙÂÚÍË Ò ÔÓÔËÚÍÓÈ.
• óÚÓ·˚ Á‡˘ËÚËÚ¸ ‰‡ÌÌ˚ ÓÚ ÔÓÚÂË ËÁ-Á‡ ÔÓ‚ÂʉÂÌËfl ÌÓÒËÚÂÎfl,
åÂ˚ ·ÂÁÓÔ‡ÒÌÓÒÚË ÔË ˝ÍÒÔÎÛ‡Ú‡ˆËË
ÂÍÓÏẨÛÂÚÒfl ÒÓı‡ÌflÚ¸ ̇˷ÓΠ‚‡ÊÌ˚ ‰‡ÌÌ˚ ̇ ‰‚Ûı USB-
ÛÒÚÓÈÒÚ‚‡ı ı‡ÌÂÌËfl ‰‡ÌÌ˚ı ËÎË ‚̯ÌËı ÌÓÒËÚÂÎflı.
• çËÍÓ„‰‡ Ì ‚ÒÚ‡‚ÎflÈÚÂ Ë Ì ÓÌflÈÚ ·Ûχ„Û, ÏÂÚ‡Î΢ÂÒÍËÂ Ë ÔÓ˜ËÂ
Ô‰ÏÂÚ˚ ‚ ÓÚ‚ÂÒÚËfl ̇ Ô‡ÌÂÎË Ë Í·‚ˇÚÛÂ. ÖÒÎË ˝ÚÓ ÒÎÛ˜ËÎÓÒ¸,
ÌÂωÎÂÌÌÓ ‚˚Íβ˜ËÚ ËÌÒÚÛÏÂÌÚ Ë ‚˚̸Ú ͇·Âθ ÔËÚ‡ÌËfl ËÁ
ÓÁÂÚÍË. á‡ÚÂÏ Ó·‡ÚËÚÂÒ¸ Á‡ ÔÓÏÓ˘¸˛ Í ÒÔˆˇÎËÒÚ‡Ï ˆÂÌÚ‡
ÚÂıÌ˘ÂÒÍÓ„Ó Ó·ÒÎÛÊË‚‡ÌËfl ÍÓÔÓ‡ˆËË Yamaha.
• ç Í·‰ËÚ ̇ ËÌÒÚÛÏÂÌÚ Ô‰ÏÂÚ˚ ËÁ ‚ËÌË·, Ô·ÒÚχÒÒ˚ ËÎË
ÂÁËÌ˚: ˝ÚÓ ÏÓÊÂÚ ‚˚Á‚‡Ú¸ ‚˚ˆ‚ÂÚ‡ÌË ԇÌÂÎË ËÎË Í·‚ˇÚÛ˚.
• ç ӷÎÓ͇˜Ë‚‡ÈÚÂÒ¸ ̇ ËÌÒÚÛÏÂÌÚ, Ì ÒÚ‡‚¸Ú ̇ ÌÂ„Ó ÚflÊÂÎ˚ Ô‰-
ÏÂÚ˚ Ë Ì ÔËÍ·‰˚‚‡ÈÚ ÒÎ˯ÍÓÏ ·Óθ¯ÓÈ ÒËÎ˚ ÔË ÔÓθÁÓ‚‡ÌËË
ÍÌÓÔ͇ÏË, ‚˚Íβ˜‡ÚÂÎflÏË Ë ‡Á˙ÂχÏË.
• ç ÒΉÛÂÚ ‰ÓÎ„Ó ‡·ÓÚ‡Ú¸ Ò ‚˚ÒÓÍËÏ ËÎË ÌÂÍÓÏÙÓÚÌ˚Ï ÛÓ‚ÌÂÏ
„ÓÏÍÓÒÚË ËÌÒÚÛÏÂÌÚ‡/ÛÒÚÓÈÒÚ‚‡ ËÎË Ì‡Û¯ÌËÍÓ‚, Ú‡Í Í‡Í ˝ÚÓ ÏÓÊÂÚ
ÔË‚ÂÒÚË Í ÔÓÚ ÒÎÛı‡. èË ÛıÛ‰¯ÂÌËË ÒÎÛı‡ ËÎË Á‚ÓÌ ‚ Û¯‡ı
Ó·‡ÚËÚÂÒ¸ Í ‚‡˜Û.
äÓÔÓ‡ˆËfl Yamaha Ì ÌÂÒÂÚ ÓÚ‚ÂÚÒÚ‚ÂÌÌÓÒÚË Á‡ ÔÓ‚ÂʉÂÌËfl, ‚˚Á‚‡ÌÌ˚ ÌÂÔ‡‚ËθÌÓÈ ˝ÍÒÔÎÛ‡Ú‡ˆËÂÈ ËÎË ÏÓ‰ËÙË͇ˆËÂÈ
ËÌÒÚÛÏÂÌÚ‡, ‡ Ú‡ÍÊ Á‡ ÔÓÚÂflÌÌ˚ ËÎË ËÒÔÓ˜ÂÌÌ˚ ‰‡ÌÌ˚Â.
ÇÒ„‰‡ ‚˚Íβ˜‡ÈÚ ËÌÒÚÛÏÂÌÚ, ÂÒÎË Ì ËÒÔÓθÁÛÂÚ „Ó.
чÊ ‚ ÚÂı ÒÎÛ˜‡flı, ÍÓ„‰‡ ‚˚Íβ˜‡ÚÂθ ÔËÚ‡ÌËfl ̇ıÓ‰ËÚÒfl ‚ ÔÓÎÓÊÂÌËË STANDBY, ËÌÒÚÛÏÂÌÚ ÔÓ‰ÓÎʇÂÚ ‚ ÏËÌËχθÌ˚ı ÍÓ΢ÂÒÚ‚‡ı ÔÓÚ·ÎflÚ¸
˝ÎÂÍÚÓ˝Ì„˲. ÖÒÎË ËÌÒÚÛÏÂÌÚ Ì ËÒÔÓθÁÛÂÚÒfl ‰ÎËÚÂθÌÓ ‚ÂÏfl, ÓÚÍβ˜ËÚ ‡‰‡ÔÚ ÔÂÂÏÂÌÌÓ„Ó ÚÓ͇ ÓÚ ÓÁÂÚÍË.
àÎβÒÚ‡ˆËË Ë ÒÌËÏÍË Üä—‰ËÒÔ΂ Ô˂‰ÂÌ˚ ‚ ÛÍÓ‚Ó‰ÒÚ‚Â ÔÓθÁÓ‚‡ÚÂÎfl ÚÓθÍÓ ‚ ͇˜ÂÒÚ‚Â ÔËÏÂÓ‚. Ç ‰ÂÈÒÚ‚ËÚÂθÌÓÒÚË ‚ÒÂ
ÏÓÊÂÚ ‚˚„Îfl‰ÂÚ¸ ÌÂÒÍÓθÍÓ Ë̇˜Â.
● оварные знаки
•астровые шрифты, используемые в данном инструменте, предоставлены корпорацией Ricoh Co., Ltd. и являются ее
собственностью.
®
•Windows является охраняемым товарным знаком корпорации Microsoft
.
•азвания фирм и продуктов, используемые в этом руководстве пользователя, являются товарными знаками или
зарегистрированными товарными знаками соответствующих компаний.
(3)-10 2/2
PSR-S500 уководство пользователя 5
Этот продукт включает компьютерные программы и содержимое, авторские права на которые принадлежат корпорации
Yamaha или право на использование которых получено по лицензии от других фирм. материалам, защищенным
авторскими правами, относятся все без ограничения компьютерные программы, файлы стиля, файлы MIDI, данные WAVE
и музыкальные звукозаписи. юбое несанкционированное использование таких программ и содержимого, выходящее за
рамки личного пользования, запрещено соответствующими законами. юбое нарушение авторских прав преследуется по
закону. ОАА, АОАЯ ОЬУ АО О.
опирование коммерческих музыкальных данных, включая MIDI-данные и/или аудиоданные, но не ограничиваясь ими,
строго запрещается, за исключением использования в личных целях.
ãÓ„ÓÚËÔ˚
GM System Level 1
«GM System Level 1» – это дополнение к MIDI-стандарту, благодаря которому любые GM-
совместимые музыкальные данные могут быть точно воспроизведены любым GM-совместимым тон-
генератором независимо от фирмы-изготовителя. аркировка GM ставится на все программное
обеспечение и оборудование, поддерживающее стандарт GM System Level.
XGlite
XGlite – это упрощенная версия формата высококачественных тон-генераторов XG корпорации
Yamaha. азумеется, с помощью тон-генератора XGlite можно воспроизвести любую песню
в формате XG. Однако имейте в виду, что из-за сокращенного набора параметров управления
и эффектов некоторые песни могут воспроизводиться не так, как оригинал.
XF
ормат XF корпорации Yamaha представляет собой вариант стандарта SMF (Standard MIDI File),
усовершенствованный за счет увеличения функциональности и возможности дальнейшего
расширения. ри воспроизведении файла в формате XF, содержащего текст, синтезатор может
выводить на экран тексты песен.
STYLE FILE
Style File Format – это оригинальный формат файла стиля, разработанный корпорацией Yamaha,
в котором используется уникальная система преобразования, позволяющая автоматически создавать
высококачественный аккомпанемент на основе большого количества типов аккордов.
USB
USB – это сокращение от Universal Serial Bus (универсальная последовательная шина). Это
последовательный интерфейс для связи компьютера с периферийными устройствами. Он позволяет
осуществлять «горячую» замену периферийных устройств (без выключения питания компьютера).
6 PSR-S500 уководство пользователя

оздравляем и благодарим за приобретение Yamaha PSR-S500
PortaTone!
нимательно прочитайте данное руководство пользователя
перед использованием инструмента, чтобы полностью
использовать его преимущества.
Обязательно храните руководство в надежном и удобном месте
даже после прочтения и обращайтесь к нему всякий раз, когда
необходимо получить более подробную информацию об
операциях или функциях.
ÑÓÔÓÎÌËÚÂθÌ˚ ÔË̇‰ÎÂÊÌÓÒÚË
комплект поставки инструмента входят следующие принадлежности (удостоверьтесь, что все они
имеются в наличии).
• юпитр
• иск CD-ROM
• уководство пользователя (данная книга)
• лок питания переменного тока (может не входить в комплект поставки для вашего
региона, поэтому уточните у регионального дилера Yamaha).
PSR-S500 уководство пользователя 7
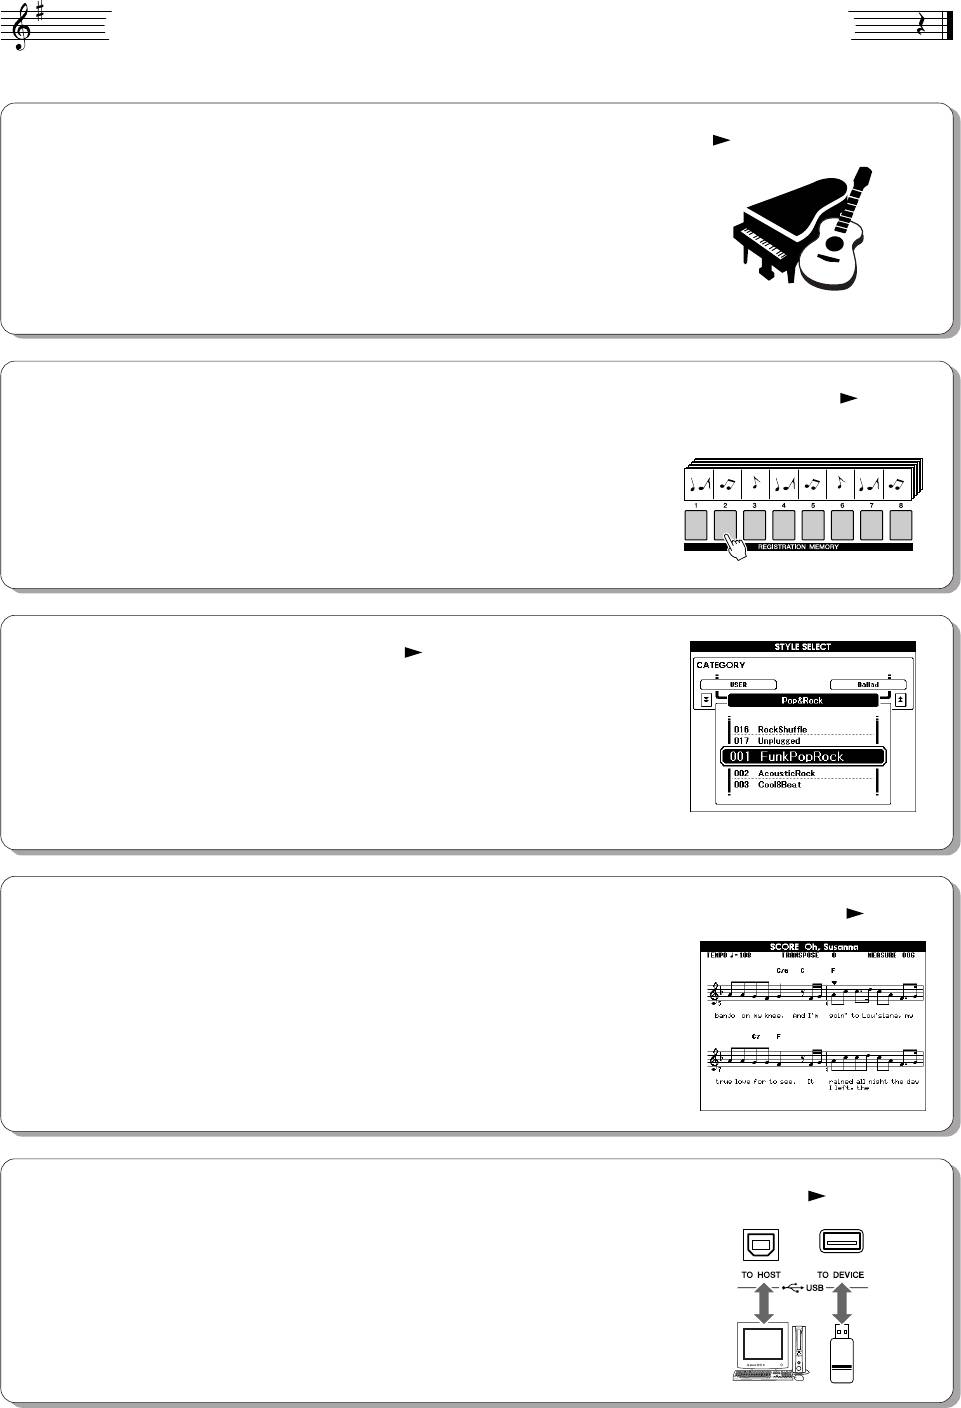
ëÔˆˇθÌ˚ ‚ÓÁÏÓÊÌÓÒÚË ËÌÒÚÛÏÂÌÚ‡ PSR-S500
■ оспроизведение разных инструментальных тембров стр. 17
ожно изменить тембр инструмента, звучащий во время игры на
клавиатуре. Это может быть тембр скрипки, флейты, арфы или любой
другой из множества различных тембров. апример, можно изменить
настроение песни, написанной для фортепиано, используя для ее
воспроизведения тембр скрипки. Откройте для себя мир музыкального
разнообразия!
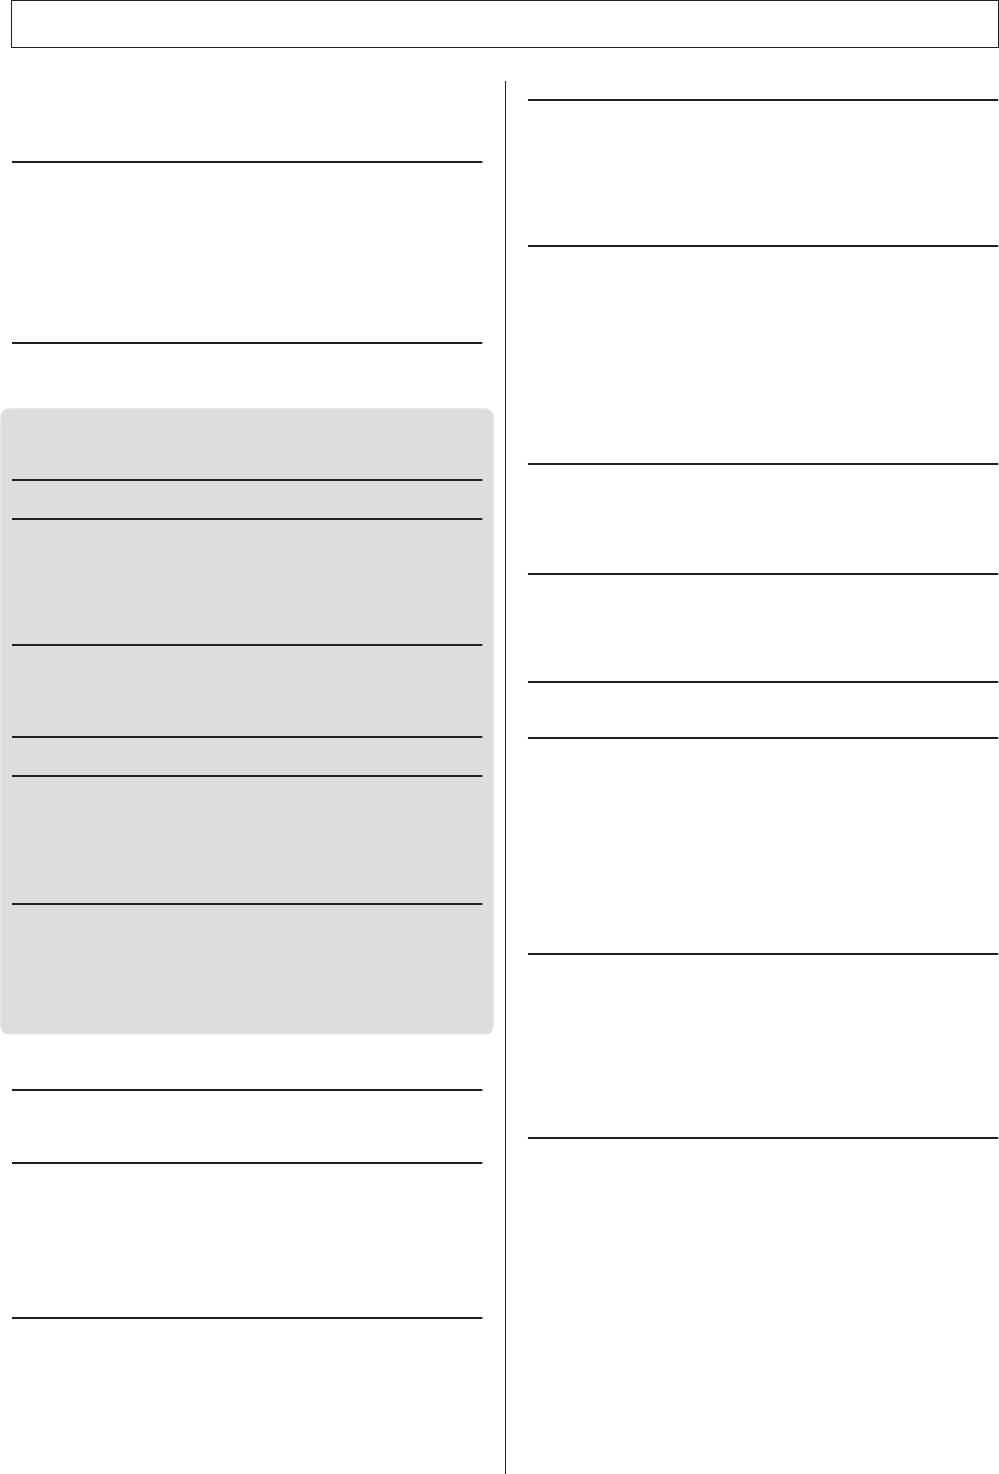
■ охранение и вызов настроек панели в регистрационной памяти стр. 67
8 банков x 8 встроенных
Эта удобная функция позволяет сохранять «мгновенный снимок»
песен = 64 регистрации
пользовательских настроек панели — до 64 полных «регистраций». х
можно вызывать мгновенно и в любое время. Это идеальный вариант
для широкого изменения звука или эффектов при живом исполнении!
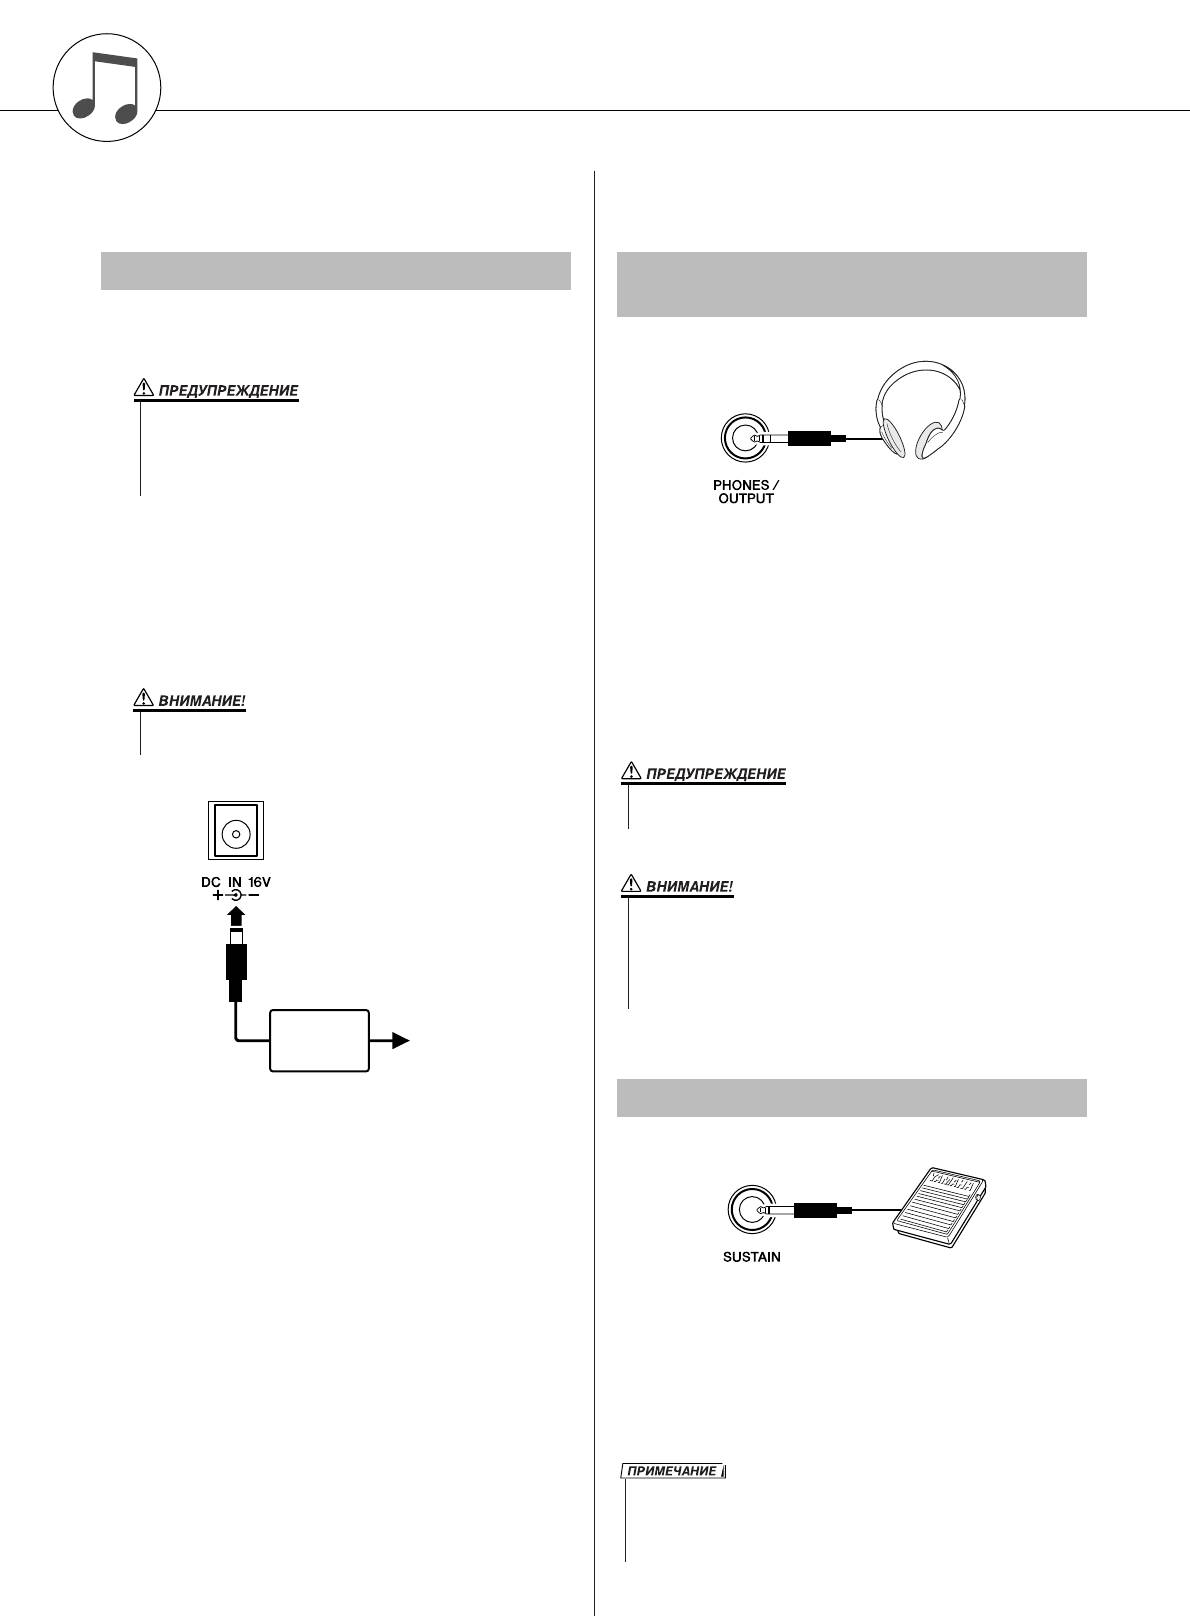
■ гра в определенном стиле стр. 23
отите играть с полным аккомпанементом? опробуйте стили
автоаккомпанемента. тили аккомпанемента позволяют создать полное
оркестровое звучание со множеством стилей от вальса до 8-beat
и самбы. ыберите стиль, подходящий для музыки, которую вы хотите
сыграть, или для расширения своих музыкальных горизонтов
поэкспериментируйте с новыми стилями.
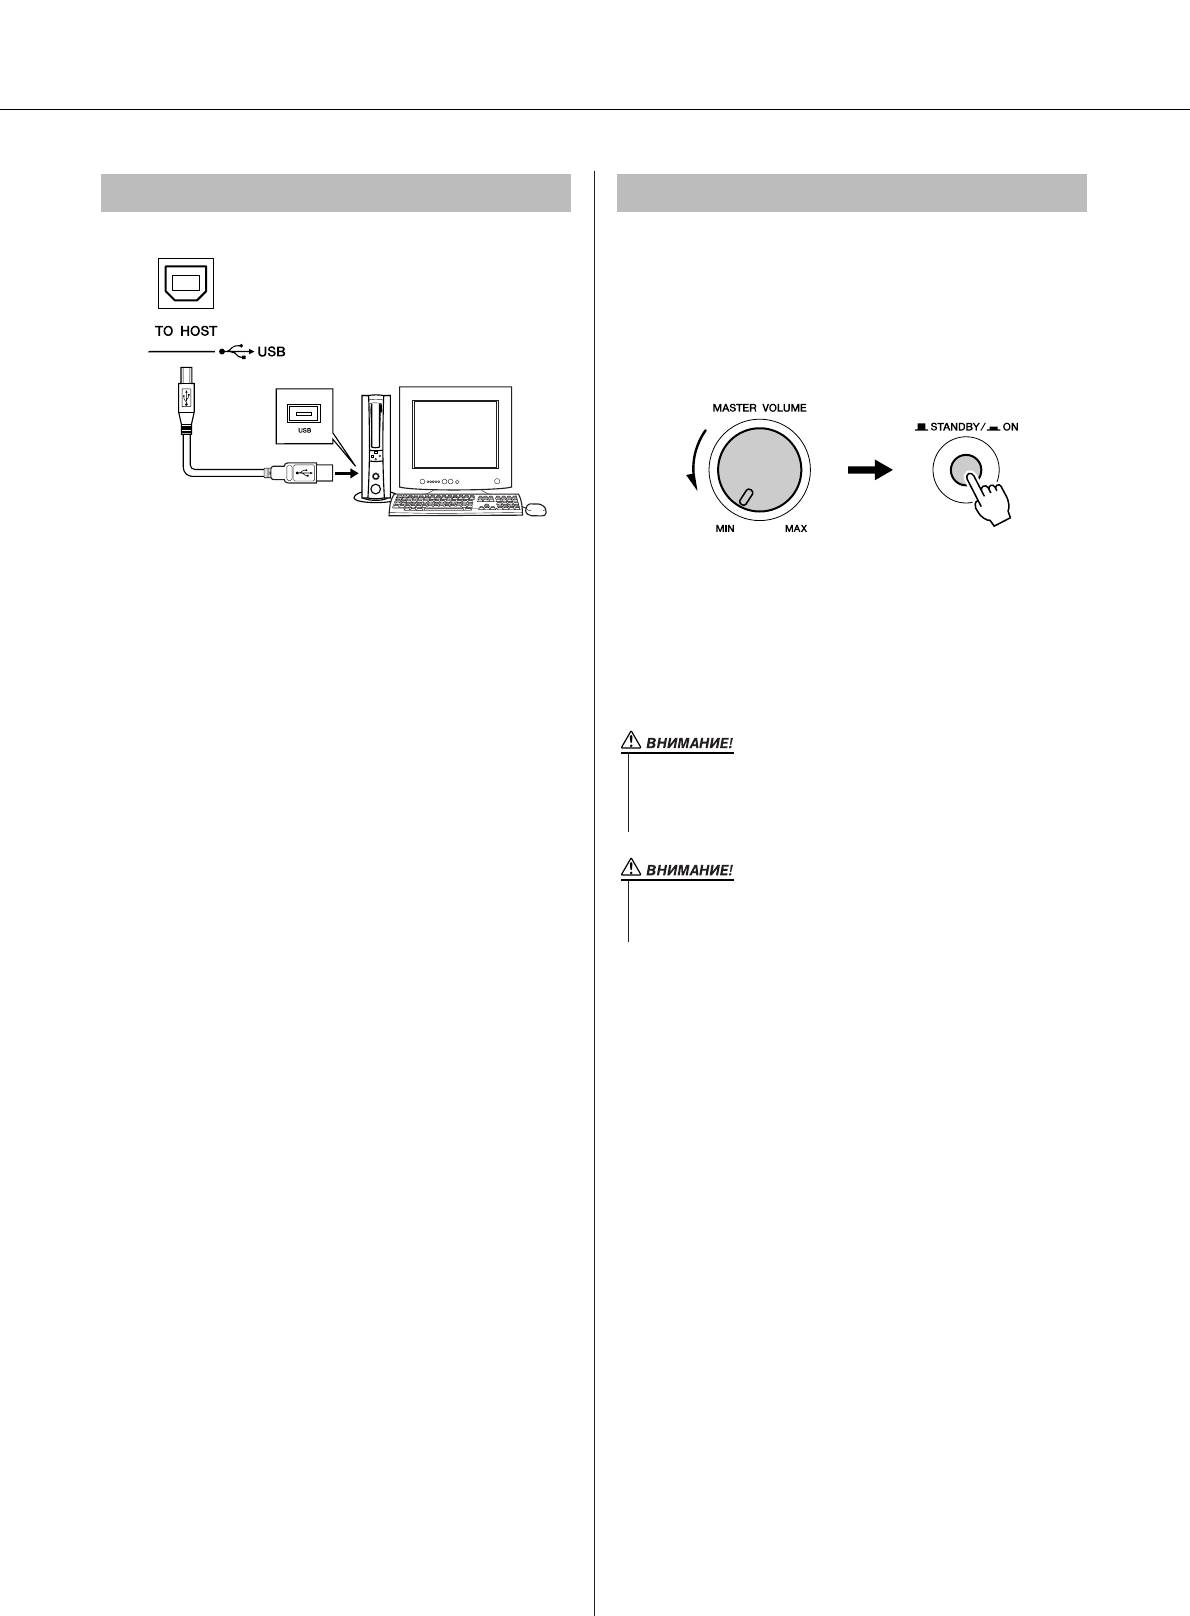
■ ростота использования с помощью экрана для отображения нот стр. 30
ри воспроизведении песни на экране будет отображаться
соответствующая партитура. Это хороший способ научиться читать
музыку. сли в песне содержаться текст и аккорды, они также будут
отображаться на экране партитуры.
*ексты и аккорды не будут отображаться на экране, если используемая в режиме партитуры
песня не содержит соответствующих текстов и аккордов.
■
охранение и загрузка данных на флэш-памяти USB или компьютере
стр. 73 и 83
Эти средства организации данных позволяют хранить исходные
песни пользователя или пользовательские настройки панели
(регистрационная память) на флэш-памяти USB или компьютере,
а затем загружать данные обратно в инструмент при необходимости.
8 PSR-S500 уководство пользователя
ëÓ‰ÂʇÌËÂ
оготипы…………………………………………………………………………………………. 6
спользование различных функций 49
ополнительные принадлежности …………………………………………………… 7
гра с метрономом………………………………………………………………………….49
пециальные возможности инструмента PSR-S500………………………….. 8
спользование Tap Start ………………………………………………………………….51
Установка 10
Touch Response (увствительность к силе нажатия)………………………..51
астройки EQ………………………………………………………………………………….52
ребования к электропитанию ……………………………………………………….. 10
Элементы управления высотой звука………………………………………………53
одключение наушников
зменение высоты инструмента в октавах ………………………………………54
(разъем PHONES/OUTPUT) ………………………………………………………. 10
одключение педали (гнездо SUSTAIN) …………………………………………. 10
ункции стиля (автоаккомпанемент) 55
одключение к компьютеру (USB-порт)………………………………………….. 11
ключение питания ……………………………………………………………………….. 11
асти стиля (разделы) …………………………………………………………………….55
зменение языка экрана………………………………………………………………… 12
астройка «в одно касание»……………………………………………………………..58
астройка контрастности -дисплея (LCD CONTRAST)……………….. 12
зменение вариации и OTS (OTS LINK)……………………………………………58
Установка параметра Split Point……………………………………………………….59
анель управления и разъемы 14
оспроизведение стиля с аккордами, но без ритма
(остановка аккомпанемента)………………………………………………………60
ередняя панель……………………………………………………………………………. 14
астройка громкости стиля……………………………………………………………..60
адняя панель ……………………………………………………………………………….. 15
Основы аккордов…………………………………………………………………………….61
тиль пользователя ………………………………………………………………………..63
оспроизведение стилей с использованием всей клавиатуры…………..63
раткое руководство
траница Song Settings 64
оспроизведение песен 16
ромкость песни ……………………………………………………………………………..64
зменение темпа…………………………………………………………………………….64
оспроизведение разных инструментальных тембров 17
A-B Repeat ………………………………………………………………………………………65
ыбор и воспроизведение тембра ………………………………………………….. 17
риглушение отдельных частей песни …………………………………………….66
Одновременная игра двумя тембрами — DUAL (аложение) ………….. 18
охранение избранных настроек панели управления 67
оспроизведение разных тембров для левой и правой рук — LEFT
(евый) ……………………………………………………………………………………. 19
охранение настроек в регистрационной памяти……………………………..67
оспроизведение наборов ударных………………………………………………… 21
агрузка данных из регистрационной памяти…………………………………..68
Registration Clear (Очистка регистрации) — очистка указанной
оспроизведение стилей 22
памяти регистрации …………………………………………………………………..69
ыбор ритма стиля ………………………………………………………………………… 22
ункции 70
гра со стилем ………………………………………………………………………………. 23
сполнение аккордов автоаккомпанемента ……………………………………. 25
ыбор и настройка функций…………………………………………………………….70
оспроизведение с помощью музыкальной базы данных 26
спользование флэш-памяти USB 73
лэш-память USB …………………………………………………………………………..73
спользование песен 27
спользование флэш-памяти USB …………………………………………………..74
ыбор и прослушивание песни……………………………………………………….. 27
орматирование флэш-памяти USB………………………………………………..75
еремотка песни вперед, назад и установка на паузу …………………….. 28
охранение данных…………………………………………………………………………76
ипы песен…………………………………………………………………………………….. 29
реобразование песни пользователя в формат SMF
Отображение партитуры песни………………………………………………………. 30
и ее сохранение …………………………………………………………………………77
Отображение текста песни…………………………………………………………….. 31
агрузка файлов пользователя и файлов стилей …………………………….78
Удаление данных с устройства флэш-памяти USB …………………………..79
апись собственного произведения 32
оспроизведение песен, сохраненных на устройстве
флэш-памяти USB ……………………………………………………………………..79
онфигурация дорожки………………………………………………………………….. 32
роцедура быстрой записи…………………………………………………………….. 33
одключение 80
роцедура многодорожечной записи ……………………………………………… 34
Удаление песни — удаление песен пользователей …………………………. 37
азъемы …………………………………………………………………………………………80
Очистка дорожки — удаление указанной дорожки из песни
одключение USB-устройства хранения данных………………………………80
пользователя……………………………………………………………………………. 38
одключение персонального компьютера………………………………………..82
ередача данных об исполнении на компьютер и прием
с компьютера …………………………………………………………………………….83
Initial Send (сходная передача) ………………………………………………………84
езервное копирование и инициализация 39
ередача данных между компьютером и инструментом…………………..85
охранение……………………………………………………………………………………. 39
уководство по установке программ с поставляемого
нициализация………………………………………………………………………………. 39
диска «Accessory CD-ROM» 88
Основные операции и экраны 40
ажная информация о компакт-диске ……………………………………………..88
одержимое компакт-диска…………………………………………………………….89
Основные операции ……………………………………………………………………….. 40
истемные требования……………………………………………………………………90
Экраны ………………………………………………………………………………………….. 42
Установка программного обеспечения …………………………………………….90
Элементы экрана MAIN ………………………………………………………………….. 43
риложение
правочник
Устранение неполадок…………………………………………………………………….95
ообщения …………………………………………………………………………………….96
гра с эффектами 44
писок тембров ………………………………………………………………………………98
обавление эффекта Harmony ………………………………………………………. 44
писок ударных установок …………………………………………………………….104
зменение типа эффекта Reverb (еверберация)…………………………… 45
список стилей………………………………………………………………………………..107
зменение типа эффекта Chorus (орус) ……………………………………….. 46
писок музыкальных баз данных……………………………………………………108
едаль Sustain……………………………………………………………………………….. 47
типы эффектов……………………………………………………………………………..110
обавление эффектов DSP (ифровая обработка сигнала)……………. 47
аблица характеристик MIDI-интерфейса ………………………………………114
Pitch Bend (зменение высоты звука) …………………………………………….. 48
формат MIDI-данных ……………………………………………………………………..116
технические характеристики………………………………………………………….117
редметный указатель ………………………………………………………………….118
PSR-S500 уководство пользователя 9
Установка
Обязательно выполните следующие действия,
се необходимые подключения следует
включать питание.
выполнить О включения питания.
í·ӂ‡ÌËfl Í ˝ÎÂÍÚÓÔËÚ‡Ì˲
èÓ‰Íβ˜ÂÌË ̇ۯÌËÍÓ‚
(‡Á˙ÂÏ PHONES/OUTPUT)
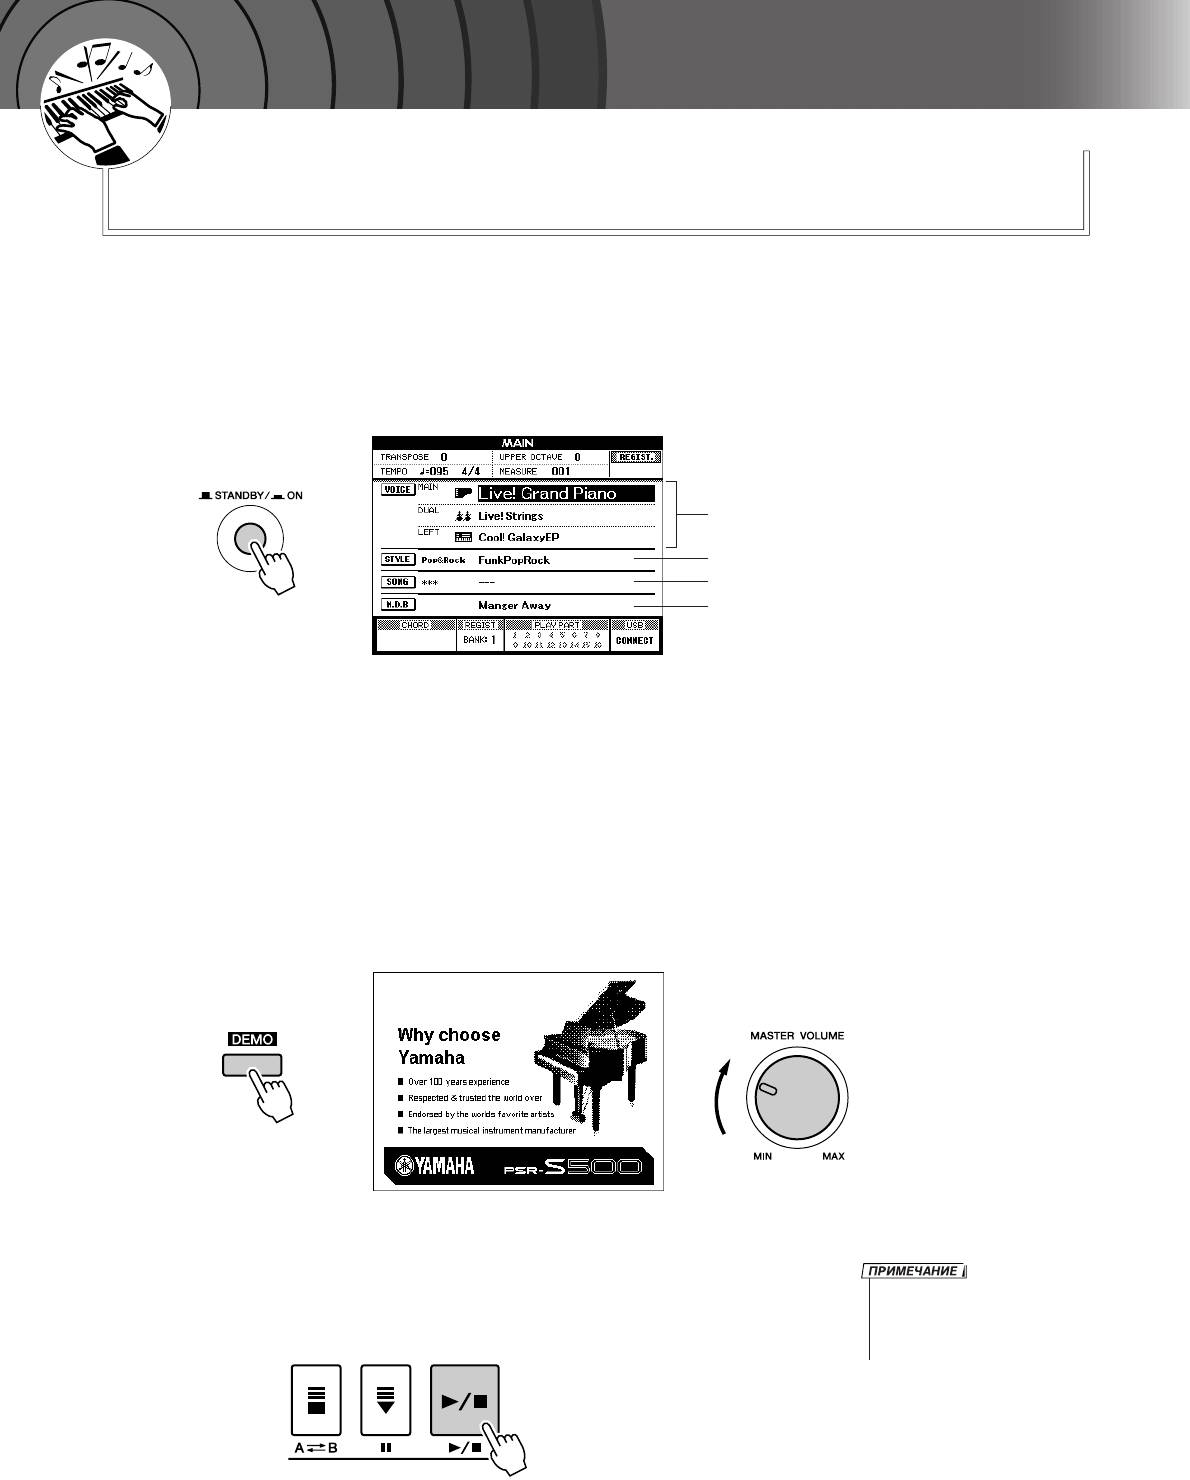
Установите переключатель [STANDBY/ON]
в положение STANDBY.
•ля питания инструмента от электросети используйте ОЬО
адаптер переменного тока Yamaha PA-300 или PA-301 (либо другой,
рекомендованный корпорацией Yamaha). спользование других
адаптеров может нанести непоправимый вред адаптеру
и инструменту.
одключите блок питания переменного тока
(PA-300, PA-301 или другой блок,
ри подключении шнура к этому гнезду динамики
рекомендованный корпорацией Yamaha)
инструмента автоматически отключаются. нездо
к разъему питания инструмента.
PHONES/OUTPUT можно также использовать как
внешний выход. гнезду PHONES/OUTPUT можно
одключите адаптер к электросети.
подключить усилитель клавиатуры, стереосистему,
микшер, магнитофон или другое линейное
устройство для передачи выходного сигнала от
•Отключайте адаптер переменного тока, если инструмент не
инструмента к подключенному устройству.
используется, а также во время грозы.
PA-300 или
Электророзетка
PA-301
èÓ‰Íβ˜ÂÌË Ô‰‡ÎË („ÌÂÁ‰Ó SUSTAIN)
ункция сустейна позволяет воспроизвести
длительное звучание нот при нажатии педали.
одключите к этому разъему педальный
переключатель FC4 или FC5 и используйте его для
включения или выключения эффекта «сустейн».
10 PSR-S500 уководство пользователя
• е следует долго использовать наушники при повышенном уровне
громкости. Это может привести к нарушению слуха.
• тобы не повредить динамики, перед их подключением установите
минимальную громкость на внешних устройствах. есоблюдение этого
правила может привести к поражению электрическим током или
повреждению оборудования. Установите на всех устройствах
минимальную громкость и во время игры на инструменте постепенно
увеличивайте ее до необходимого уровня.
•еред включением питания убедитесь, что педальный переключатель
правильно подсоединен к гнезду SUSTAIN.
•е нажимайте на педаль в момент включения питания. Это изменяет
принятую полярность педали, что приводит к ее обратному действию.
Установка
èÓ‰Íβ˜ÂÌËÂ Í ÍÓÏÔ¸˛ÚÂÛ (USB-ÔÓÚ) ÇÍβ˜ÂÌË ÔËÚ‡ÌËfl
Установите минимальную громкость, повернув
регулятор [MASTER VOLUME] влево, и включите
питание, нажав переключатель [STANDBY/ON].
нова нажмите кнопку [STANDBY/ON], чтобы
выключить пианино.
оединив USB-порт инструмента с USB-портом
компьютера, вы можете осуществлять обмен
ри включении питания сохраненные во флэш-
данными исполнения и песенными файлами между
памяти данные загружаются в инструмент. сли во
этими устройствами (стр. 85). ля использования
флэш-памяти не сохранена резервная копия данных,
функций передачи данных USB выполните
при включении питания восстанавливаются
следующие действия:
исходные настройки производителя.
•Убедитесь, что переключатель POWER инструмента
установлен в положение OFF, затем воспользуйтесь
кабелем USB для подключения инструмента к
компьютеру. одключив кабель, включите питание
инструмента.
•Установите на компьютер драйвер USB MIDI.
Установка драйвера USB-MIDI описана на стр. 90.
PSR-S500 уководство пользователя 11
• аже если кнопка питания находится в положении STANDBY, инструмент
продолжает в минимальном количестве потреблять электроэнергию. сли
инструмент не используется в течение длительного времени, отключите
адаптер переменного тока от розетки.
• и в коем случае не отключайте питание, если на экран отображается
сообщение «Writing..» (апись). Это может повредить внутреннюю флэш-
память и привести к потере данных.
Установка
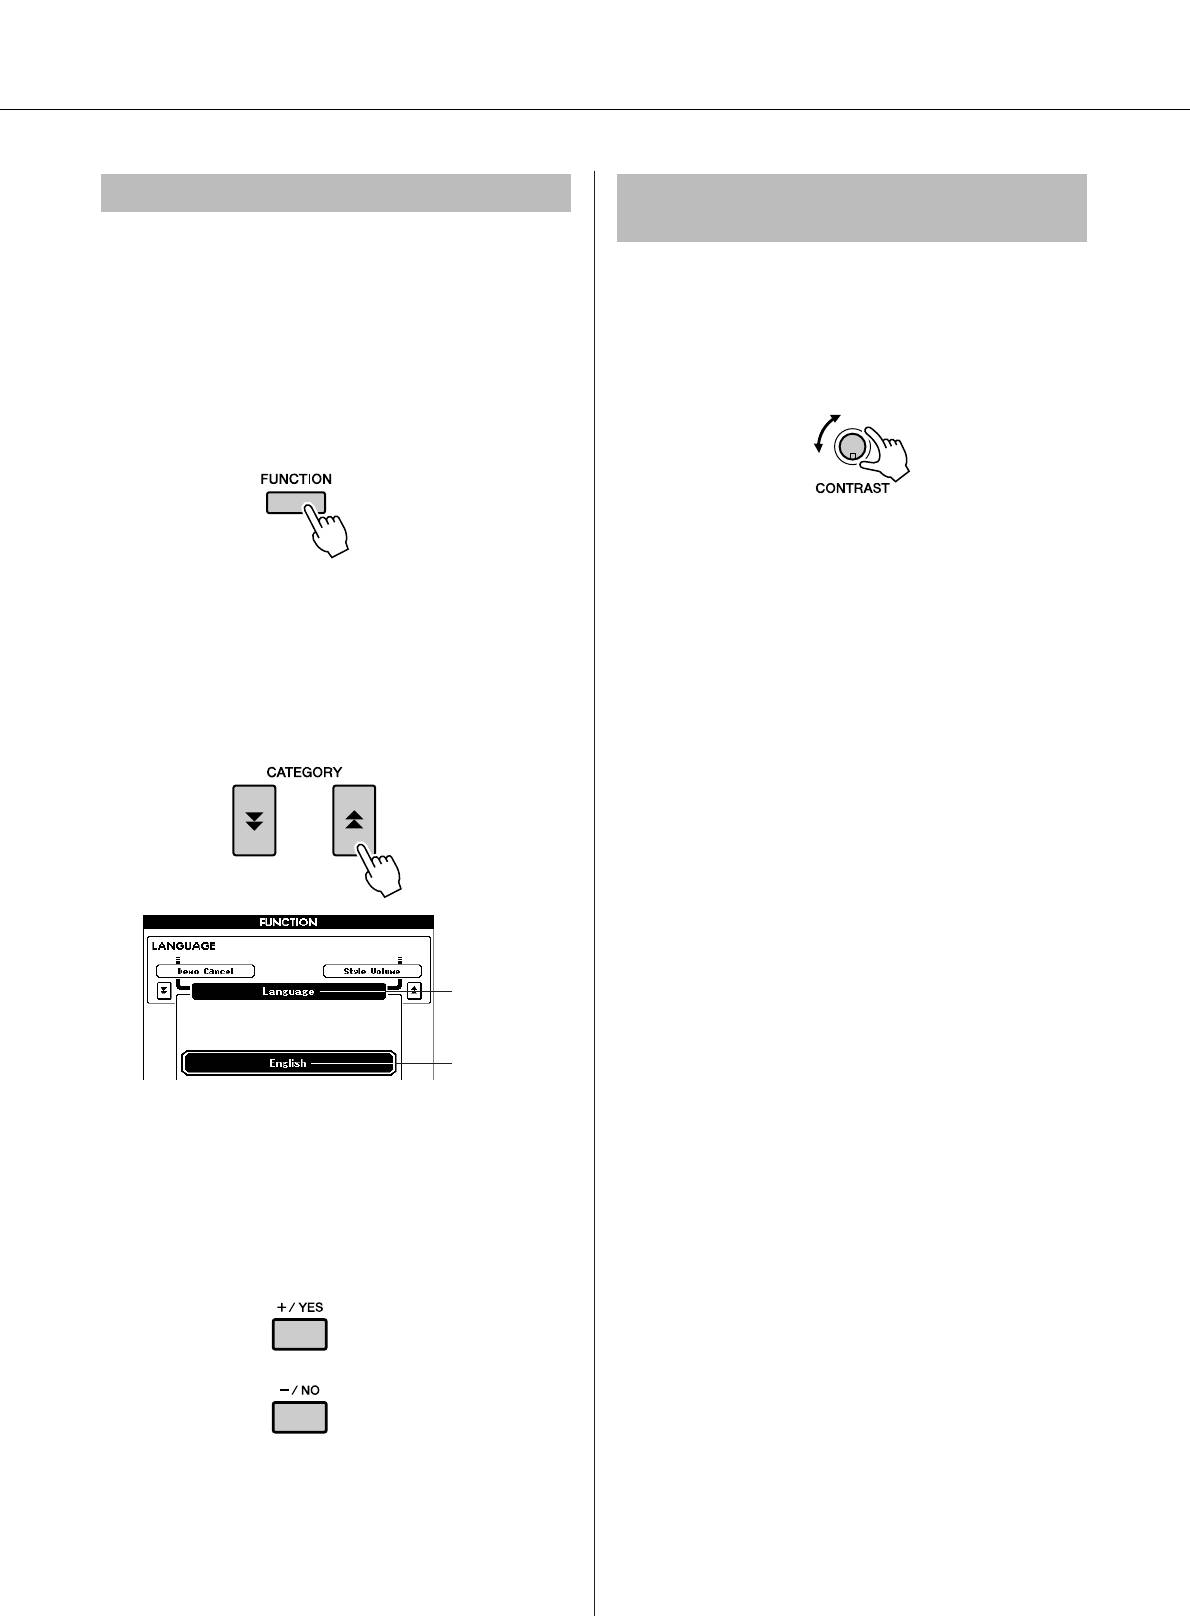
àÁÏÂÌÂÌË flÁ˚͇ ˝Í‡Ì‡
ç‡ÒÚÓÈ͇ ÍÓÌÚ‡ÒÚÌÓÒÚË Üä-‰ËÒÔÎÂfl
(LCD CONTRAST)
анный инструмент позволяет выбирать английский
или японский язык в качестве языка экрана. о
астройте четкость экрана инструмента,
умолчанию установлен английский язык, но если
воспользовавшись регулятором контрастности
переключить инструмент в режим японского языка,
-дисплея (LCD CONTRAST), который
тексты, имена файлов и некоторые сообщения будут
расположен на задней панели.
соответственно отображаться на японском языке.
ажмите кнопку [FUNCTION].
ажмите кнопки CATEGORY [ ] и [ ]
f
r
несколько раз, пока не появится элемент
«Language» (Язык).
ыбранный в данный момент язык будет
отображаться под элементом «Language».
Элемент языка
ыбранный
в данный
момент язык
ыберите язык отображения.
помощью кнопки [+] выбирается английский
язык, а с помощью кнопки [-] — японский.
ыбор языка сохраняется во внутреннюю
флэш-память, оставляя выбранный язык
активным даже при выключении питания.
тобы перейти к главному экрану, нажмите
кнопку [EXIT].
12 PSR-S500 уководство пользователя
Установка
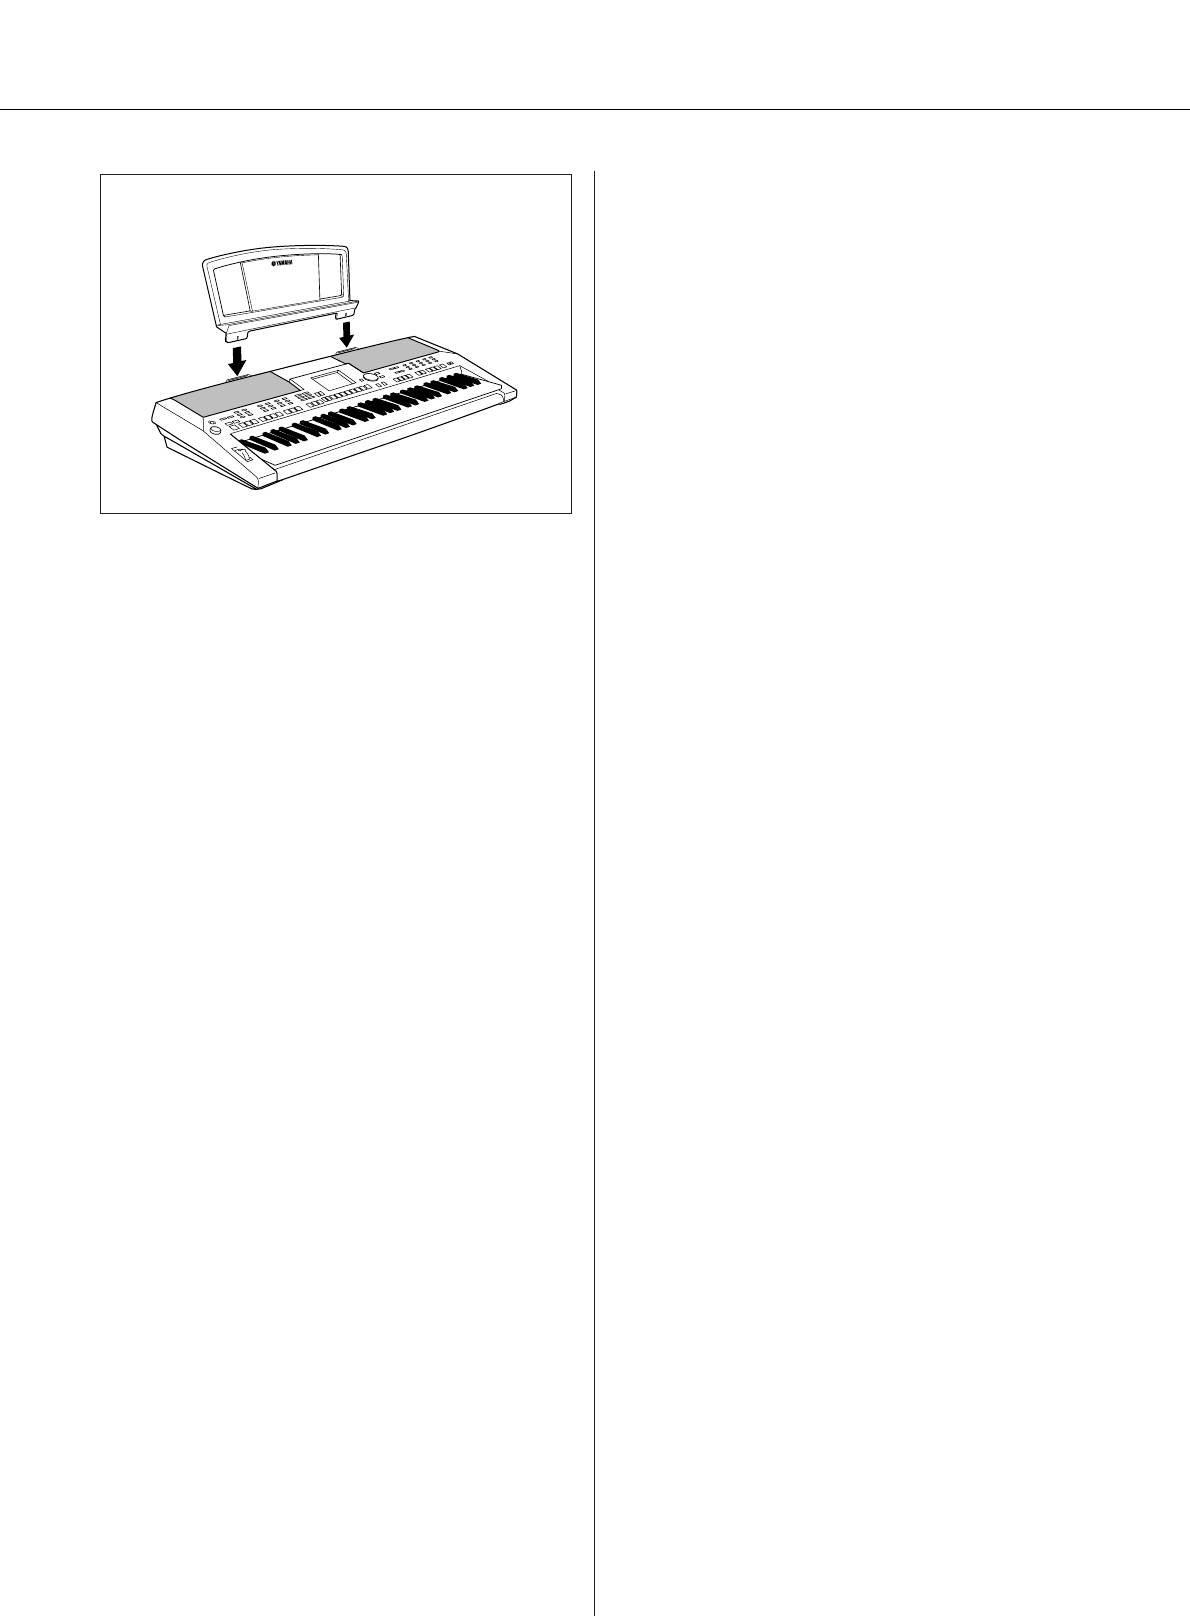
● юпитр
ставьте пюпитр
в гнезда, как показано
на рисунке.
PSR-S500 уководство пользователя 13
анель управления и разъемы
t y
o
e
r
!3
!4
q
!0 !1
!2
u
w
i
!5
@9
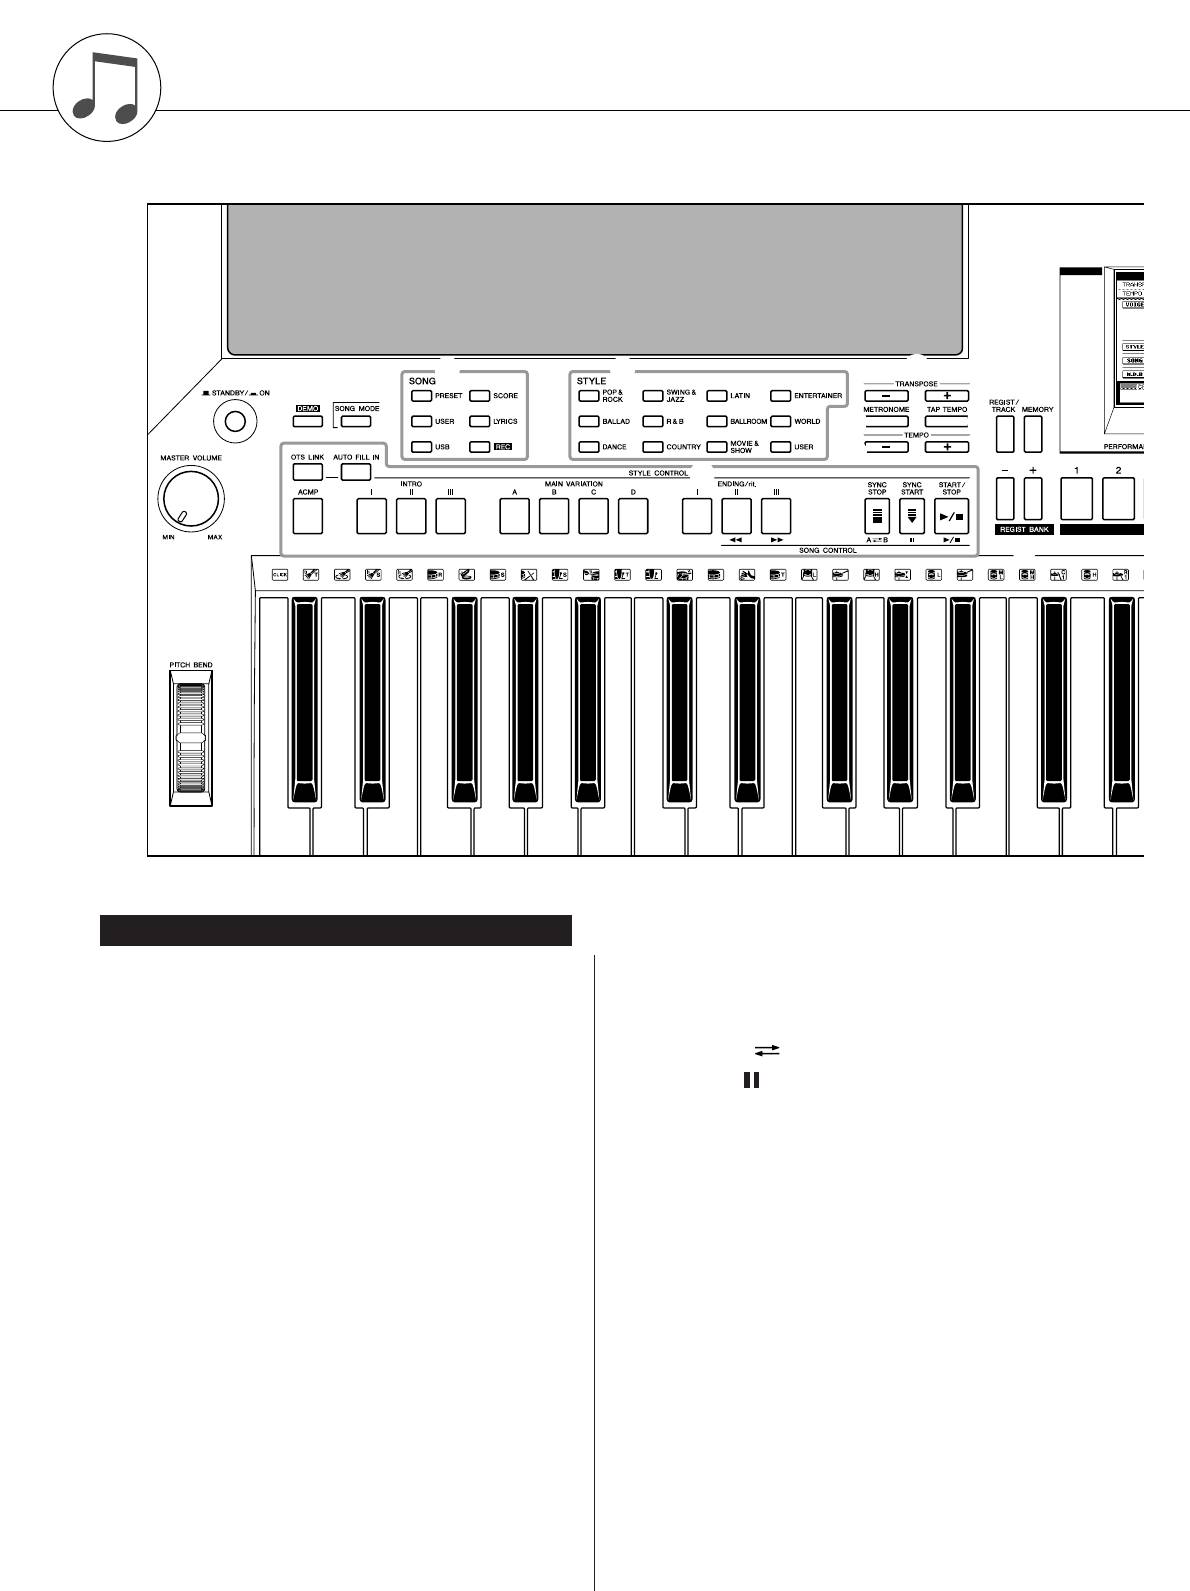
è‰Ìflfl Ô‡ÌÂθ
q ереключатель [STANDBY/ON] ……………….стр. 16
i SONG CONTROL
нопка [r]…………………………………………..стр. 28
w егулятор [MASTER VOLUME]……………. стр. 16, 40
нопка [f]…………………………………………..стр. 28
e нопка [DEMO] ………………………………………… стр. 16
нопка [A B] ……………………………………..стр. 65
r нопка [SONG MODE]………………………………. стр. 27
нопка [ ]……………………………………………стр. 28
t SONG
нопка [>/■] …………………………………..стр. 28, 41
нопки [PRESET], [USER], [USB]…………… стр. 27
o нопки TRANSPOSE [+] и [-]……………………..стр. 53
нопка [SCORE]……………………………………. стр. 30
!0 нопка [METRONOME] ……………………………..стр. 49
нопка [LYRICS]…………………………………….стр. 31
!1 нопка [TAP TEMPO] ………………………………..стр. 51
нопка [REC]………………………………………… стр. 33
!2 нопки TEMPO [+] и [-] ……………………………..стр. 49
y STYLE………………………………………………………. стр. 22
!3 нопка [REGIST/TRACK] …………………………..стр. 66
u STYLE CONTROL
нопка [OTS LINK]………………………………… стр. 58
!4 нопка [MEMORY] …………………………………….стр. 67
нопка [AUTO FILL IN] ………………………….. стр. 55
!5 нопки REGIST BANK [+] и [-] …………………..стр. 67
нопка [ACMP]……………………………………… стр. 23
!6 нопки REGISTRATION MEMORY [1] — [8] ….стр. 67
нопки INTRO [I]–[III]…………………………….. стр. 55
!7 Экран…………………………………………………..стр. 12, 42
нопки MAIN VARIATION [A]–[D] …………… стр. 55
нопки ENDING/rit. [I]–[III] …………………….. стр. 55
!8 нопка [EXIT] ……………………………………………стр. 42
нопка [SYNC STOP]…………………………….. стр. 57
нопка [SYNC START]……………………… стр. 23, 56
нопка [START/STOP] ……………………… стр. 22, 41
14 PSR-S500 уководство пользователя
анель управления и разъемы
!7
@2 @3
@6
!8
!9
@0
@4
@5
@7
@1
@8
!6
адняя панель
#0 #1 #2 #3 #4
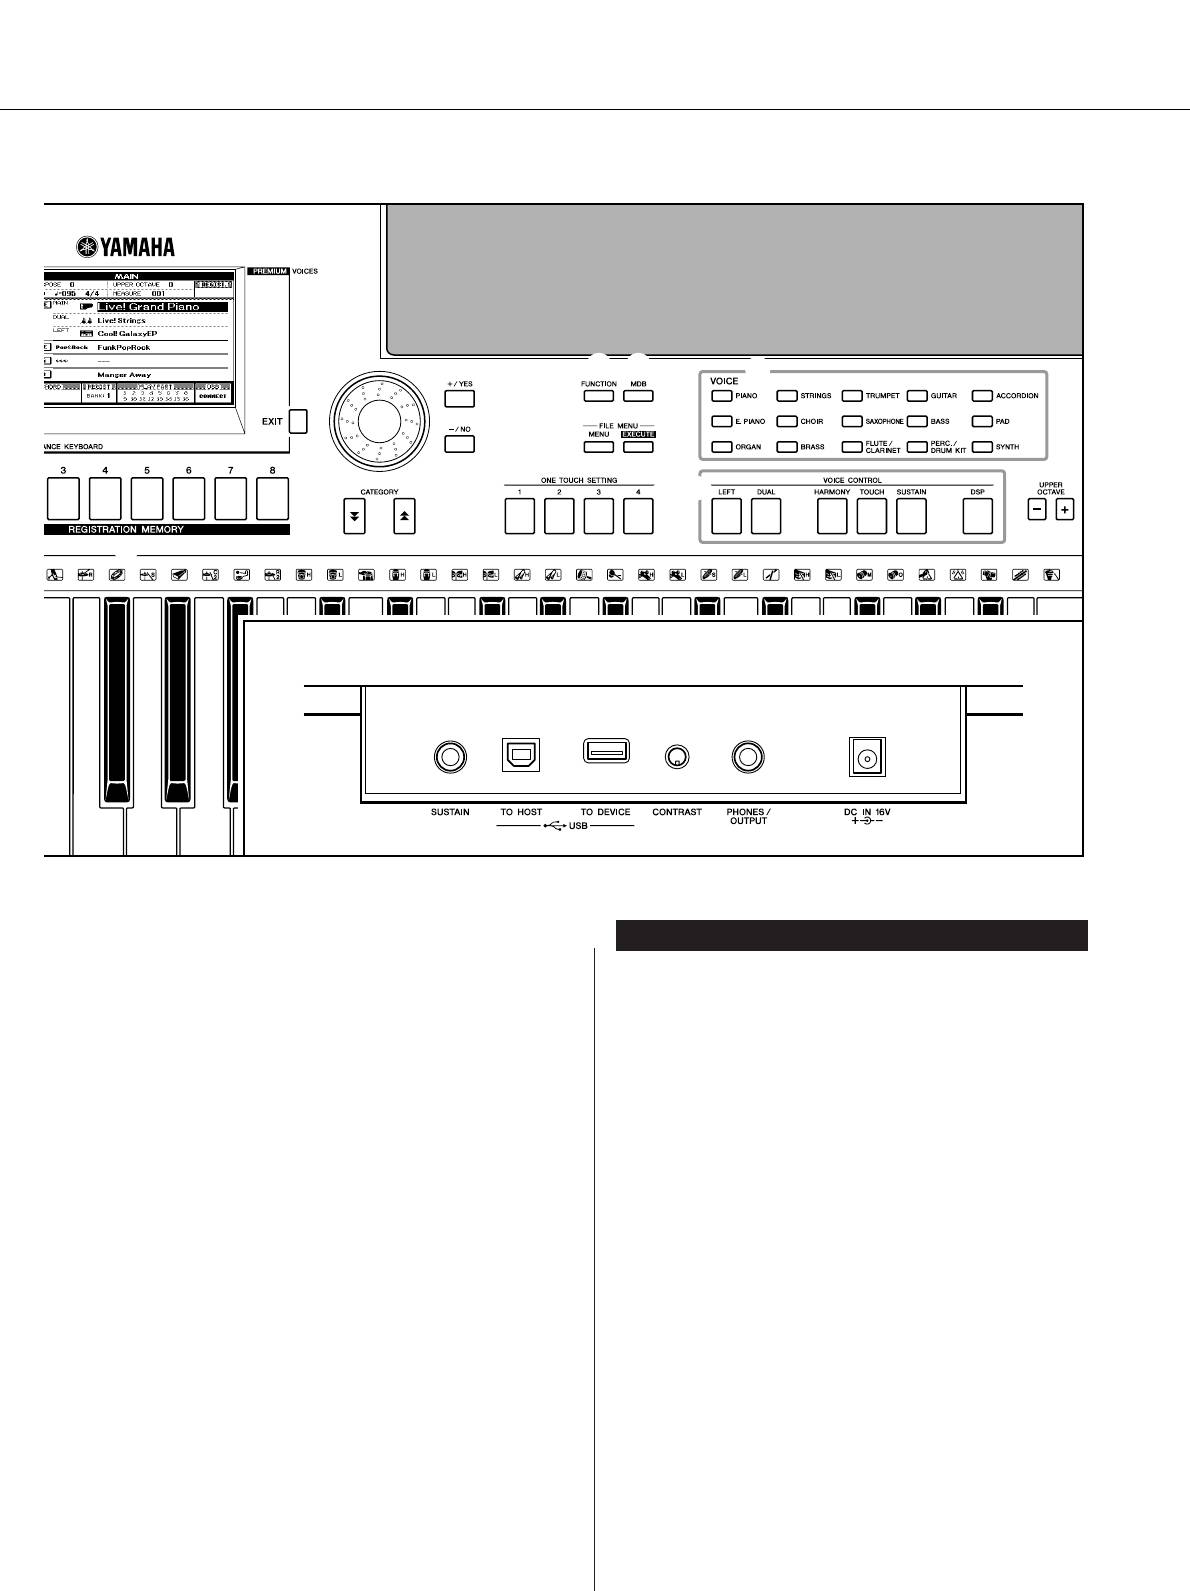
ᇉÌflfl Ô‡ÌÂθ
!9 иск управления ……………………………………..стр. 41
#0 азъем SUSTAIN……………………………………….стр. 10
@0 нопки [+/YES] и [-/NO] ……………………………. стр. 41
#1 азъемы USB TO HOST и TO DEVICE………..стр. 80
@1 нопка CATEGORY [ ] и [ ] …………………..стр. 41
f
r
#2 егулятор CONTRAST………………………………стр. 12
@2 нопка [FUNCTION] ………………………………….стр. 70
#3 азъем PHONES/OUTPUT …………………………стр. 10
@3 нопка [MDB]…………………………………………… стр. 26
#4 азъем DC IN 16V ……………………………………..стр. 10
@4 нопки FILE MENU [MENU] и
[EXECUTE] ………………………………………….. стр. 74, 75
@5 нопки ONE TOUCH SETTING [1] — [4] ………стр. 58
@6 VOICE ………………………………………………………. стр. 17
@7 нопка VOICE CONTROL
нопка [LEFT]……………………………………….. стр. 19
нопка [DUAL]………………………………………. стр. 18
нопка [HARMONY]………………………………. стр. 44
[TOUCH], кнопка ……………………………………стр. 51
нопка [SUSTAIN] …………………………………. стр. 47
нопка [DSP] ………………………………………… стр. 47
@8 нопки UPPER OCTAVE [+] и [-] ……………….. стр. 54
@9 олесо [PITCH BEND]………………………………. стр. 48
PSR-S500 уководство пользователя 15
Û
Í
Ó
Â
‚
Ó
Ó
‰
Í
Ò
Ú
Ú
‡
‚
Ó
оспроизведение песен
ä
раткое руководство
анный инструмент содержит демонстрационную песню. авайте начнем
ознакомление с инструментом с воспроизведения демонстрационной песни.
ажмите кнопку [STANDBY/ON] (ежим ожидания/кл.), чтобы она
1
зафиксировалась в положении ON (кл.).
а -дисплее отобразится главный экран.
азвание тембра
азвание стиля
азвание песни
азвание музыкальной базы данных
ля запуска демонстрации нажмите кнопку [DEMO]
2
(емонстрация).
а -дисплее отобразится экран демонстрации.
ри воспроизведении постепенно увеличивайте громкость
с помощью регулятора [MASTER VOLUME] для установки
нужного уровня громкости для прослушивания.
осле окончания воспроизведение демонстрационной песни
начинается заново.
тобы остановить демонстрацию, нажмите кнопку [>>
>>
/■].
• нопка [DEMO] не функционирует,
3
озврат к главному экрану осуществляется автоматически.
если включена функция отмены
демонстрационных песен.
(см. стр. 72).
16 PSR-S500 уководство пользователя
Страницы и текст этой инструкции
 Инструкция — PSR-S500
 Информация отображена на картинке
 Информация отображена на картинке
 Информация отображена на картинке
 Информация отображена на картинке
Как использовать наш сайт инструкций OnlineManuals.ru
Наша цель состоит в том, чтобы предоставить вам быстрый доступ к содержанию инструкции для — PSR-S500.
С помощью онлайн просмотра, Вы можете быстро просмотреть содержимое инструкции и найти решение проблемы с — PSR-S500.
Для Вашего удобства
Если листать руководство пользователя — PSR-S500 прямо на сайте, не очень удобно для Вас, есть два возможных решения:
• Просмотр в полноэкранном режиме — легко просмотреть руководство пользователя (без загрузки его на свой компьютер), Вы можете использовать режим полноэкранного просмотра.
Для просмотра инструкции пользователя — PSR-S500 на полном экране, используйте кнопку «Открыть в Pdf-viewer».
• Загрузка на компьютер — Вы можете также скачать Инструкция — PSR-S500 на свой компьютер и сохранить его в файлах.
Многие люди предпочитают читать документы не на экране, а в печатной версии.
Возможность печати руководства пользователя также была предусмотрена на нашем сайте,
и вы можете использовать ее, нажав на иконку «печать» в Pdf-viewer.
Нет необходимости печатать все руководство — PSR-S500, можно выбрать только нужные страницы инструкции.
-
Страница 1
Owner’ s Manual EN[…]
-
Страница 2
2 PSR-S500 Owner’s Manual PLEASE KEEP THIS MANU AL This product utilizes batteries or an e xternal power supply (adapter). DO NO T connect this product to an y power supply or adapter other than one described in the manual, on the name plate , or specifically recommended b y Y amaha. This product should be used only with the components supplied […]
-
Страница 3
PSR-S500 Owner’s Manual 3 1. IMPORT ANT NOTICE: DO NO T MODIFY THIS UNIT! This product, when installed as indicated in the instr uctions con- tained in this manual, meets FCC requirements . Modifications not e xpressly appro ved b y Y amaha may v oid your authority , granted by the FCC , to use the product. 2. IMPORT ANT: When connecting this pr[…]
-
Страница 4
4 PSR-S500 Owner’s Manual (3)-10 1/2 PRECAUTIONS PLEASE READ CAREFULL Y BEFORE PROCEEDING * Please keep this man ual in a saf e place for future ref erence . W ARNING Always follow the basic precautions listed below to avoid the possibility of serious injury or even death from electrical shock, short-circuiting, damages, fire or other hazards. T[…]
-
Страница 5
PSR-S500 Owner’s Manual 5 (3)-10 2/2 • Before connecting the instrument to other electronic components, turn off the power for all components. Before turning the power on or off for all components, set all volume levels to minimum. Also, be sure to set the volumes of all components at their minimum levels and gradually raise the volume controls[…]
-
Страница 6
6 PSR-S500 Owner’s Manual GM System Level 1 “GM System Le vel 1” is an addition to the MIDI standard which ensures that an y GM-compatible music data can be accurately played by an y GM-compatible tone generator , regardless of manuf acturer . The GM mark is af fixed to all software and hardw are products that support GM System Le vel. XGlit[…]
-
Страница 7
PSR-S500 Owner’s Manual 7 Congratulations and thank you for purc hasing the Y amaha PSR-S500 P ortaT one! Please read this o wner’ s manual carefully before using the instrument in order to tak e full advantage of its various features. Mak e sure to k eep this manual in a safe and handy place ev en after you finish reading, and refer to it oft[…]
-
Страница 8
8 PSR-S500 Owner’s Manual Special Features of the PSR-S500 ■ Pla y a V ariety of Instrument V oices P age 17 The instrument voice that sounds when you play the k eyboard can be changed to violin, flute, harp, or any of an e xtensiv e range of voices. Y ou can change the mood of a song written for piano, for example, by using vio- lin to play i[…]
-
Страница 9
PSR-S500 Owner’s Manual 9 Logos ……………………………………………………………………………. 6 Accessories …………………………………………………………………… 7 Special Features of the PSR-S500 …………………………………… 8 Setting Up 10 Power Requirements …………………[…]
-
Страница 10
10 PSR-S500 Owner’s Manual Setting Up Be sure to do the follo wing operations BEFORE turning on the power . Make sure that the [ST ANDBY/ON] switch of the instrument is set to ST ANDBY . Connect the A C adaptor (P A-300, P A-301 or other adaptor specifically recommended by Y amaha) to the po wer supply jack. Plug the A C adaptor into[…]
-
Страница 11
Setting Up PSR-S500 Owner’s Manual 11 Connect the instrument’ s USB terminal to the USB ter — minal of a computer , and you can transfer performance data and song files between the two (page 85). T o use the USB data-transfer features you’ll need to do the fol- lo wing: • First, make sure the PO WER switc h on the instru- ment is set to OF[…]
-
Страница 12
Setting Up 12 PSR-S500 Owner’s Manual This instrument allo ws you to select English or Japa- nese as the display language. The def ault display lan- guage is English, but if you switch to Japanese the lyrics, file names and some messages will be displayed in Japanese where appropriate. Press the [FUNCTION] button. Press the CA TEGOR Y [ […]
-
Страница 13
Setting Up PSR-S500 Owner’s Manual 13 ● Music Rest Inser t the music rest into the slots as shown.[…]
-
Страница 14
14 PSR-S500 Owner’s Manual Panel Contr ols and T erminals q [ST ANDBY/ON] switch ……………….. page 16 w [MASTER V OLUME] control …. pages 16, 40 e [DEMO] button …………………………… page 16 r [SONG MODE] button ………………… page 27 t SONG [PRESET], [USER], [USB] buttons ………………………………………[…]
-
Страница 15
Panel Controls and Terminals PSR-S500 Owner’s Manual 15 !9 Dial ……………………………………………. page 41 @0 [+/YES] and [-/NO] buttons …………. page 41 @1 CA TEGOR Y [ ] and [ ] b uttons … page 41 @2 [FUNCTION] button ……………………. page 70 @3 [MDB] button …………………………….. page 26 @4 FILE M[…]
-
Страница 16
16 PSR-S500 Owner’s Manual Q u i c k G u i d e Playing Songs This instrument include a Demonstration Song. Let’ s start by pla ying the Demonstration Song. 1 Press the [ST ANDBY/ON] button until it loc ks in the ON position. The Main display appears in the LCD. 2 Press the [DEMO] button to start the Demo. The Demo display appears in the LCD. Gr[…]
-
Страница 17
PSR-S500 Owner’s Manual 17 Q u i c k G u i d e T ry playing a variety of Instrument V oices In addition to piano, or gan, and other “standard” keyboard instruments, this instrument has a large range of realistic V oices—including guitar , bass, strings, sax, trumpet, drums and per cussion, sound effects, and a wide variety of other m usical[…]
-
Страница 18
Try playing a variety of Instrument Voices 18 PSR-S500 Owner’s Manual This lets you select a second V oice which you can play in addition to the Main V oice. The second V oice is known as the “Dual” V oice. 1 Press the [DU AL] b utton. The [DU AL] button turns the Dual V oice on or off. When Dual V oice is turned on, the [DUAL] b utton is lit[…]
-
Страница 19
Try playing a variety of Instrument Voices PSR-S500 Owner’s Manual 19 4 Select the V oice y ou want to play . Look at the highlighted V oice name and rotate the dial. The av ailable V oices will be selected and displayed in sequence. The V oice selected here becomes the Dual V oice. For this example, select the “003 Marimba” V oice. 5 Play th[…]
-
Страница 20
Try playing a variety of Instrument Voices 20 PSR-S500 Owner’s Manual 2 Press and hold the [LEFT] button f or longer than a sec- ond. The LEFT V oice selection display will appear. The currently selected category name, V oice number and name will be highlighted. 3 Select and press the desired V oice category button in the V OICE section. F or thi[…]
-
Страница 21
Try playing a variety of Instrument Voices PSR-S500 Owner’s Manual 21 Drum Kits are collections of drum and percussion instruments. When you select a violin or other normal instrument—as a Main V oice, for example—all keys produce the sound of the same violin, only at dif ferent pitches. If you select a Drum Kit as the Main V oice, howe ver ,[…]
-
Страница 22
22 PSR-S500 Owner’s Manual Q u i c k G u i d e Playing Styles This instrument includes an auto-accompaniment f eature that plays appropriate “Styles” (rhythm + bass + chor d accompaniment) when y ou play left-hand c hords. Y ou can select from 150 different Styles co vering a range of musical genres and time signatures (see page 107 for a com[…]
-
Страница 23
Playing Styles PSR-S500 Owner’s Manual 23 Y ou learned how to select a Style rh ythm on the preceding page. Here we’ll see how to add bass and chord accompaniment to the basic rh ythm to produce a full, rich accom- paniment that you can play along with. 1 Select and press the desired Style category button in the Style section. Press the [EXIT] […]
-
Страница 24
Playing Styles 24 PSR-S500 Owner’s Manual 4 Play a left-hand c hord to start the Style . Y ou can still “play” chords e ven if you don’t actually kno w any chords. This instrument will recognize even a single note as a chord. Try play- ing from one to three notes at the same time to the left of the split point. The chord will change accordi[…]
-
Страница 25
Playing Styles PSR-S500 Owner’s Manual 25 There are two ways of playing auto-accompaniment chords: ● Easy Chords ● Standard Chords The instrument will automatically recognize the dif ferent chord types. The keyboard to the left of the split point (default: 54/F # 2) becomes the “accompaniment range.” Play the accompaniment chords in this […]
-
Страница 26
26 PSR-S500 Owner’s Manual 1 Press the [MDB] button. The music database selection display will appear. The currently selected category name, MDB number and name will be highlighted. 2 Select the desired Music Database which matches the music style or type y ou want to pla y . Press [ ], [ ] category b utton when changing the MDB cate gory . Refer[…]
-
Страница 27
PSR-S500 Owner’s Manual 27 Q u i c k G u i d e Using Songs With this instrument the term “Song” refers the data that makes up a piece of music. In this section we’ll learn ho w to select and play Songs. 1 Select and press one of the Song category buttons, whic h corresponds to the type of Song y ou want to listen to. [PRESET] : Fiv e preset[…]
-
Страница 28
Using Songs 28 PSR-S500 Owner’s Manual 3 Listen to the Song. Press the [ > / ■ ] button to begin playback of the selected Song. Y ou can stop playback at an y time by pressing the [ > / ■ ] button again. These are just like the transport controls on a cassette deck or CD player , letting you fast forward [ f ], re wind [ r ], and pause […]
-
Страница 29
Using Songs PSR-S500 Owner’s Manual 29 The following four types of Songs can be used by this instrument. ● Preset Songs (the five Songs built into the instrument) …………… Preset Song numbers 001–005. ● User Songs (recordings of your own performances) ………………. USER Song numbers 001–005. ● Loaded Songs (Song data loade[…]
-
Страница 30
Using Songs 30 PSR-S500 Owner’s Manual This instrument is capable of display the scores (notation) of Songs. Scores are displayed for the preset Songs. Scores can also be displayed for Songs loaded from computer as well as Songs played back from USB fl ash memory . Although User Songs you record yourself cannot display a score as is, the y can b[…]
-
Страница 31
Using Songs PSR-S500 Owner’s Manual 31 If a Song contains lyric data, the lyrics can be made to appear on the display . No lyrics will be displayed for a Song that contains no lyric data, e ven if the [L YRICS] button is pressed. 1 Select a Song. F ollo w steps 1 and 2 of the procedure described on page 27. T ry to select the Preset SONG 001–00[…]
-
Страница 32
32 PSR-S500 Owner’s Manual Q u i c k G u i d e Recor ding Y our Own Performance Y ou can record up to five of y our own perf ormances and save them as user Songs 001 through 005. These Songs can be play ed in the same manner as the preset Songs. Once y our performances ha ve been saved as user Songs, the y can be con verted to SMF (Standard MID […]
-
Страница 33
Recording Your Own Performance PSR-S500 Owner’s Manual 33 Y ou can easily start recording your performance by simply pressing the [REC] b utton. In this case, the track number and part number of tracks are set automatically. 1 Press the [REC] button. The User Song number for recording will be selected automatically and tracks [1]–[3] will be se[…]
-
Страница 34
Recording Your Own Performance 34 PSR-S500 Owner’s Manual 2 Recording will start when y ou play the ke yboard. 3 Stop recording b y pressing the [ > > > > / ■ ] or [REC] button. T rack numbers containing recorded data are indicated with framed rect- angles. 4 Press the [ > > > > / ■ ] button to pla y bac k the recordin[…]
-
Страница 35
Recording Your Own Performance PSR-S500 Owner’s Manual 35 2 Select the recording part for eac h track (P art Assign). ◆ Selecting the par t for the Melody track (trac ks 1–8) While holding down the [REC] button, press one of the track buttons [1]–[8] until the desired part is shown at the track button. Each time you press the button, the pa[…]
-
Страница 36
Recording Your Own Performance 36 PSR-S500 Owner’s Manual 3 Recording will start when y ou play the ke yboard. Y ou can also start recording by pressing the [ > / ■ ] button. Press the [EXIT] button, and the measure number is shown in the Main display . When recording is started, the display automatically returns to the Main display . 4 Stop[…]
-
Страница 37
Recording Your Own Performance PSR-S500 Owner’s Manual 37 This function clears an entire user Song (all tracks). 1 From the MAIN displa y , select the user Song (001 to 005) y ou want to clear . 2 Press the [REGIST/TRA CK] button a n umber of times until the “TR 1–8” item appear s on the display . 3 Press and hold the REGISTRA TION MEMOR Y […]
-
Страница 38
Recording Your Own Performance 38 PSR-S500 Owner’s Manual This function lets you delete a specifi ed track from a User Song. 1 From the MAIN displa y select the User Song (001 to 005) y ou want to clear . 2 Press the [REGIST/TRA CK] b utton a number of times until the item y ou want to clear appear s. The item changes in order from “REGIST . ?[…]
-
Страница 39
PSR-S500 Owner’s Manual 39 Backup and Initialization The following data items are automatically saved as backup data in the internal memory even if you turn the po wer off. T o recall the default settings and data, use the Initialization operation. This function erases all backup data in the instrument’s internal memory and restores the init[…]
-
Страница 40
40 PSR-S500 Owner’s Manual Basic Operation and Displays Overall PSR-S500 control is based on the following simple operations. Basic Operation 1 Use the category b uttons to select a CA TEGOR Y . 2 Use the dial to select an item or v alue. 3 Starting/stopping a Song or Style . 1 1 3 2 1 Display (pages 42, 43) ● V olume Adjustment Adjusts the vol[…]
-
Страница 41
Basic Operation and Displays PSR-S500 Owner’s Manual 41 3 Star ting/stopping a Song or Style . Press the [ST AR T/ST OP] button after selecting the Song cate- gory or Style category to start playback of the selected Song or Style (rhythm). ● Category buttons [ ], [ ] Y ou can change the cate gory after you’ ve selected a Song, Style or V oice[…]
-
Страница 42
Basic Operation and Displays 42 PSR-S500 Owner’s Manual ● Display names The display provides important, easy-to-understand indications for performing all operations. The name of the current display appears at the top of the display. Y ou can see the “MAIN” indication at the top on the display. ● MAIN Display ● FUNCTION display (page 70)[…]
-
Страница 43
Basic Operation and Displays PSR-S500 Owner’s Manual 43 The MAIN display shows all of the current basic settings: Song, Style, V oice. It also includes a range of indicators that sho w the on/off status of a range of functions. MAIN Display Items T empo (page 49, 51) T ranspose (page 53) Measure number (page 36) OCT A VE (page 54) REGISTRA TION m[…]
-
Страница 44
R e f e r e n c e 44 PSR-S500 Owner’s Manual Playing with the Ef fects This feature adds Harmony , T remolo or Echo effects to the Main V oice. 1 Press the [HARMONY] button to turn the Harmony function on. The [HARMONY] button lights indicating that Harmony is on. To turn Harmony off, press the [HARMONY] b utton again. 2 Press and hold the [HARMO[…]
-
Страница 45
Playing with the Effects PSR-S500 Owner’s Manual 45 Re verb enhances the sound of the V oices with the rich ambience of a concert hall. When you select a Style or Song the optimum re verb type for the V oice used is automatically selected. If you want to select a different re verb type, use the operation described belo w . 1 Press the [FUNCTION] […]
-
Страница 46
Playing with the Effects 46 PSR-S500 Owner’s Manual The Chorus effect creates a thick sound that is similar to man y of the same V oices being played in unison. When you select a Style or Song the optimum chorus type for the V oice used is automatically selected. If you want to select a different Chorus T ype, use the procedure described belo w .[…]
-
Страница 47
Playing with the Effects PSR-S500 Owner’s Manual 47 This function adds sustain to the k eyboard V oices. Use it when you w ant to add sustain to the V oices at all times, regardless of footswitch operation. The sustain function does not af fect the Left V oice. Press the [SUST AIN] button to turn the sustain function on. The [SUST AIN] button lig[…]
-
Страница 48
Playing with the Effects 48 PSR-S500 Owner’s Manual The pitch bend wheel can be used to add smooth pitch v ariations to notes you play on the k eyboard. Roll the wheel upward to raise the pitch, or downward to lower the pitch. If you use this feature with a V oice such as the “042 Overdriv en” guitar V oice (page 17), you can produce remarkab[…]
-
Страница 49
R e f e r e n c e PSR-S500 Owner’s Manual 49 Using V arious Functions This instrument includes a metronome with adjustable tempo and time signature. Play and set the tempo that is most comfortable for you. ■ T urn the metronome on ● ● ● ● ● ● ● ● Press the [METRONOME] button to star t the metronome. To stop the metronome, press […]
-
Страница 50
Using Various Functions 50 PSR-S500 Owner’s Manual ■ Changing the Time Signature ● ● ● In this example we’ll set up a 3/8 time signature. 1 Press and hold the [METRONOME] but- ton for longer than a second. The currently selected time signature is dis- played. 2 Use the dial to select the n umber of beats per measure . A chime will sound[…]
-
Страница 51
Using Various Functions PSR-S500 Owner’s Manual 51 Y ou can also set the tempo by simply tapping the [TAP TEMPO] button at the required tempo—four times for time signatures in 4, and three times for time signatures in 3. Y ou can change the tempo during Song or Style playback by pressing the b utton just twice. ■ T urning T ouch Response on/o[…]
-
Страница 52
Using Various Functions 52 PSR-S500 Owner’s Manual Fi ve pre-programmed EQ settings are a v ailable. Settings 1 and 2 are best for listening via the instrument’ s b uilt-in speakers, setting 3 is for headphones, and settings 4 and 5 are ideal for listening via e xternal speak- ers or when connecting to an external mixer . 1 Press the [FUNCTION][…]
-
Страница 53
Using Various Functions PSR-S500 Owner’s Manual 53 ◆ Large Pitch Changes (T ranspose) The ov erall pitch of the instrument can be shifted up or down by a maximum of one octave in semitone increments. 1 Press one of the TRANSPOSE [+]/[-] buttons. The value is sho wn in the display , indicating the amount of transposition over or below the normal[…]
-
Страница 54
Using Various Functions 54 PSR-S500 Owner’s Manual Y ou can change the playing pitch of the Main and Dual V oices in octave interv als. 1 Press the UPPER OCT A VE [+] button to raise the pitch by one octave. The newly changed v alue is shown in the LCD. Press the [EXIT] button to return to the Main display . 2 Press the UPPER OCT A VE [-] button […]
-
Страница 55
R e f e r e n c e PSR-S500 Owner’s Manual 55 Style (Auto Accompaniment) Functions Basic operation of the Style (A uto Accompaniment) feature is described on page 22 of the Quick Guide. Included here is inf ormation on how y ou can pla y the Styles in various wa ys, how to adjust the Style v olume, how y ou can play c hords using the Styles, and m[…]
-
Страница 56
Style (Auto Accompaniment) Functions 56 PSR-S500 Owner’s Manual 1 Select the desired Style . (See page 22.) 2 Press the [A CMP] button to turn Auto Accompaniment on. 3 Press the [A UT O FILL IN] button to turn the A uto Fill In function on. The initial default setting for Auto Fill In is “on. ” 4 Press the [SYNC ST ART] button to turn Synchro[…]
-
Страница 57
Style (Auto Accompaniment) Functions PSR-S500 Owner’s Manual 57 8 Press one of the MAIN V ARIA TION [A]– [D] buttons. When the fill-in is fi nished, it leads smoothly into the selected Main section A–D. 9 Press one of the ENDING/rit. [I]–[III] but- tons. This switches to the Ending section. When the Ending is fi nished, the Auto Accom- p[…]
-
Страница 58
Style (Auto Accompaniment) Functions 58 PSR-S500 Owner’s Manual Sometimes selecting the ideal V oice to play with a Song or Style can be confusing. The One T ouch Setting feature automatically selects four ideally matched V oices for the Style you’v e selected. 1 Select the desired Style . (See page 22.) 2 Press one of the ONE T OUCH SETTING [1[…]
-
Страница 59
Style (Auto Accompaniment) Functions PSR-S500 Owner’s Manual 59 The initial default Split Point is key number 54 (the F # 2 key), b ut you can change it to another k ey using the procedure described below . 1 Press the [FUNCTION] button. 2 Use the CA TEGOR Y [ ] and [ ] but- tons as many times as necessar y to call up Split P oint. 3 Use the dial[…]
-
Страница 60
Style (Auto Accompaniment) Functions 60 PSR-S500 Owner’s Manual When Auto Accompaniment is on (ACMP button lights) and Synchro Start is off, you can play chords in the left-hand accompaniment range of the k eyboard while the Style is stopped and still hear the accompani- ment chords. This is called “Stop Accompaniment, ” and any of the chord […]
-
Страница 61
Style (Auto Accompaniment) Functions PSR-S500 Owner’s Manual 61 Tw o or more notes played together constitute a “chord”. The most basic chord type is the “triad” consisting of three notes: the root, third, and fifth degrees of the corresponding scale. A C major triad, for example, is made up of the notes C (the root), E (the third note o[…]
-
Страница 62
Style (Auto Accompaniment) Functions 62 PSR-S500 Owner’s Manual ■ Recognized Standard Chor ds ● ● ● ● ● ● ● ● ● ● ● ● ● ● ● ● ● ● ● ● ● ● ● ● ● ● ● ● ● ● ● ● ● ● ● All chords in the chart are “C-root” chords. Chord Name/[Abbre viation] Normal V oicing Chord (C) Display Ma[…]
-
Страница 63
Style (Auto Accompaniment) Functions PSR-S500 Owner’s Manual 63 This instrument features 11 internal Style categories, b ut it also allows you to import additional Styles (only those with an “.sty” extension) that you’ ve downloaded from the Internet or gotten from other sources, and load them into a User Style and use them in the same way […]
-
Страница 64
R e f e r e n c e 64 PSR-S500 Owner’s Manual Song Settings 1 Press the [FUNCTION] button. 2 Use the CA TEGOR Y [ ] and [ ] but- tons as many times as necessar y to call up Song V olume . 3 Use the dial to set the Song volume between 000 and 127. When playing the Song you can change the tempo as required. Press the TEMPO [+]/[-] buttons. The tempo[…]
-
Страница 65
Song Settings PSR-S500 Owner’s Manual 65 Y ou can specify a section of a Song—“A” is the start point and “B” is the end point—for repeat playback. The A-B Repeat function is also very con venient for practicing when used along with the score display fea- tures of the instrument (page 30). 1 Play the Song (page 27) and press the [A B] […]
-
Страница 66
Song Settings 66 PSR-S500 Owner’s Manual Each “track” of a Song plays a different part of the Song—melody, percussion, accompaniment, etc. Y ou can mute individual tracks and play the muted part on the k eyboard yourself, or simply mute tracks other than the ones you want to listen to. Use the [REGIST/TRACK] b utton to select the TR 1–8, […]
-
Страница 67
R e f e r e n c e PSR-S500 Owner’s Manual 67 Memorize Y our Favorite Panel Settings This instrument has a Registration Memory feature that lets y ou save y our fav orite set- tings for easy recall whene ver they’ re needed. Up to 64 complete setups can be sa ved (8 banks of 8 setups each). 1 Set the panel controls as required— select a V oice[…]
-
Страница 68
Memorize Your Favorite Panel Settings 68 PSR-S500 Owner’s Manual Make sure that “REGIST” appears in the display (press the [REGIST/TRA CK] button until it is shown). 1 Press the REGIST BANK [+]/[-] button to select the desired bank. Y ou can also use the dial to select the bank number . 2 Press the REGISTRA TION MEMORY button, [1]–[8], cont[…]
-
Страница 69
Memorize Your Favorite Panel Settings PSR-S500 Owner’s Manual 69 K eep in mind that groups of data cannot be deleted or cleared from the instrument at a single time. 1 Press the [REGIST/TRACK] button a number of times until the “REGIST . ” item appears. The item changes in order from “REGIST . ” to “TR 1–8” to “ A CMP .TR”. This[…]
-
Страница 70
R e f e r e n c e 70 PSR-S500 Owner’s Manual The Functions The “Functions” pro vide a wide range of both detailed and overall instrument parame- ters, such as adjusting the tuning, setting the split point, and editing the v oices and effects. There are 49 function parameters in all. 1 Find the function you want to set in the list that begins […]
-
Страница 71
The Functions PSR-S500 Owner’s Manual 71 ■ Function Setting List Group Function Item Displa y Indication Range/Settings Description V OLUME Style V olume Style V olume 000–127 Determines the volume of the Style. Song V olume Song V olume 000–127 Deter mines the volume of the Song. O VERALL T uning T uning 415.3–466.2 Sets the pitch of the[…]
-
Страница 72
The Functions 72 PSR-S500 Owner’s Manual * All these settings can be con veniently reset to their initial def ault v alues by pressing the [+/YES] and [-/NO] b uttons sim ultaneously . (The exception to this is Initial Send, which is an oper ation, not a setting.) EFFECT Reverb T ype Rev erb T ype 01–26 Determines the Reverb type , including of[…]
-
Страница 73
R e f e r e n c e PSR-S500 Owner’s Manual 73 Using USB Flash Memory USB flash memory is a memory medium used for storing data. When a USB flash memory device is inserted in this instrument’ s USB T O DEVICE ter- minal, user songs created on the instrument and the registered settings can be saved to or loaded from the de vice. USB flash memor[…]
-
Страница 74
Using USB Flash Memory 74 PSR-S500 Owner’s Manual 1 Connect a USB fl ash memor y to the USB T O DEVICE terminal, being careful to inser t it in the proper direction. (Do not try to force an improper connec- tion.) 2 Check that the “CONNECT” messag e is shown in the MAIN display . Y ou can go to the FILE CONTROL display from which you can acc[…]
-
Страница 75
Using USB Flash Memory PSR-S500 Owner’s Manual 75 A new USB flash memory device must be formatted before it can be used by this instrument. 1 After connecting the USB fl ash memor y to be formatted to the instrument’ s USB TO DEVICE terminal, check that the “CONNECT” messag e is shown in the MAIN display . 2 Press the FILE MENU [MENU] b u[…]
-
Страница 76
Using USB Flash Memory 76 PSR-S500 Owner’s Manual Three types of data are sa v ed to one “User File” by this operation: user song, style fi le, and re gistration mem- ory data. When you sa ve a “User File” the style fi le and re gistration memory are also sa ved automatically . 1 Make sure that a appropriately format- ted USB flash mem[…]
-
Страница 77
Using USB Flash Memory PSR-S500 Owner’s Manual 77 This operation conv erts a user song (song numbers 001–005) to SMF F ormat 0 and saves the file to USB flash memory . 1 Make sure that a properly formatted USB flash memor y device has been properl y connected to the instrument’s USB T O DEVICE terminal, and that the “CONNECT” messag e […]
-
Страница 78
Using USB Flash Memory 78 PSR-S500 Owner’s Manual User files and style fi le residing on a USB fl ash memory can be loaded to the instrument. 1 With the USB flash memor y device con- taining the file you want to load con- nected to the USB T O DEVICE connector , chec k that the “CONNECT” message is shown in the MAIN display . 2 Press the[…]
-
Страница 79
Using USB Flash Memory PSR-S500 Owner’s Manual 79 This procedure deletes selected user fi les and SMF fi les from a USB fl ash memory device. 1 Make sure that the USB fl ash memor y device containing the file(s) you want to delete has been properly connected to the instrument’ s USB T O DEVICE termi- nal, and that the “CONNECT” is show[…]
-
Страница 80
R e f e r e n c e 80 PSR-S500 Owner’s Manual Connections q USB T O HOST terminal This terminal allows direct connection to a per- sonal computer . Refer to “Connecting a Per- sonal Computer” on page 82 for more information. w USB T O DEVICE terminal This terminal allows connection to USB stor- age devices. Refer to “Connection to a USB Stor[…]
-
Страница 81
Connections PSR-S500 Owner’s Manual 81 Bac king up the instrument data to a computer Once you’ ve sa ved data to a USB flash memory de vice, you can cop y the data to the hard disk of your computer , then archive and organize the files as desired. Simply reconnect the device as shown below . Copying fi les from a computer har d disk to USB ?[…]
-
Страница 82
Connections 82 PSR-S500 Owner’s Manual The following functions become av ailable when this instrument is connected to a computer. ● Perf ormance data can be transferred between the instrument and the computer (page 83). ● Files can be transferred between the instrument and the computer (page 85). The connection procedure is as follows: 1 Inst[…]
-
Страница 83
Connections PSR-S500 Owner’s Manual 83 By connecting the instrument to a computer, the instrument’ s performance data can be used on the com- puter , and performance data from the computer can be played on the instrument. ● When the instrument is connected with computer, it transmits/receives performance data. ■ MIDI settings ● ● ● ?[…]
-
Страница 84
Connections 84 PSR-S500 Owner’s Manual ■ PC Mode ● ● ● ● ● ● ● ● ● ● ● ● ● ● ● ● ● ● ● A number of MIDI settings need to be made when you want to transfer performance data between the computer and the instrument. The PC Mode item can con veniently make multiple settings for you in one operation. Three setti[…]
-
Страница 85
Connections PSR-S500 Owner’s Manual 85 MIDI songs and Style fi les stored to a computer can be transferred to the instrument. Backup files can also be transferred from the instrument to the computer and back. In order to transfer songs between your computer and the instrument you will need to install the Musicsoft Downloader application and the[…]
-
Страница 86
Connections 86 PSR-S500 Owner’s Manual 5 A copy of the selected MIDI song fi le will appear in the “List of fi les stored temporarily” at the top of the window. The memor y medium will also be dis- play ed at the bottom of the windo w to specify the destination for the transfer . Click “Instrument, ” and then “Flash memory . ” “Fl[…]
-
Страница 87
Connections PSR-S500 Owner’s Manual 87 ■ T ransferring Bac kup files from the Instrument to a Computer ● ● Y ou can use the Musicsoft Do wnloader to transfer Backup files containing backup data (page 39 ), including the five User Songs stored on the instru- ment, to a computer . If you click “Electronic Musi- cal Instruments” in the […]
-
Страница 88
R e f e r e n c e 88 PSR-S500 Owner’s Manual Accessory CD-ROM Installation Guide This CD-R OM is cop y-protected. Y amaha makes no representations or warranties with regard to an y problems while attempting to copy the CD-R OM or software and cannot be held responsible for the results of attempts to copy the data. • The software and this o wner[…]
-
Страница 89
Accessory CD-ROM Installation Guide PSR-S500 Owner’s Manual 89 ■ Using the CD-R OM ● ● ● ● ● ● ● ● ● ● ● Please read the Software License Agreement on page 94 before opening the CD-ROM pack- age. 1 Check the system requirements to make sure that the software will run on y our computer . 2 Inser t the included CD-ROM into t[…]
-
Страница 90
Accessory CD-ROM Installation Guide 90 PSR-S500 Owner’s Manual ■ Installing the USB-MIDI Driver ● ● ● ● In order to be able to communicate with and use MIDI devices connected to your computer, the appropriate driv er software must be properly installed on your computer . The USB-MIDI driver allo ws sequence software and similar applicat[…]
-
Страница 91
Accessory CD-ROM Installation Guide PSR-S500 Owner’s Manual 91 Installing the driver on Windows 98/Me 1 Start the computer . 2 Insert the supplied CD-ROM into the CD- ROM drive. A start window will appear automatically . 3 First, make sure the PO WER switch on the instrument is set to OFF , then use a USB cable to connect the USB terminal of the […]
-
Страница 92
Accessory CD-ROM Installation Guide 92 PSR-S500 Owner’s Manual Installing the driver on Windows XP 1 Start the computer and use the “Adminis- trator” account to log into Windows. 2 Select [Start] ➔ [Control P anel]. If the control panel appear s as “Pick a cate- gory”, clic k “Switch to Classic View” in the upper left of the window […]
-
Страница 93
Accessory CD-ROM Installation Guide PSR-S500 Owner’s Manual 93 ■ Tr oubleshooting • Is the USB cable connected corr ectly? Check the USB cable connection. Disconnect the USB cable, then connect it ag ain. • Is the USB function enabled on y our com- puter? When you connect the instrument to the computer for the first time, if the “ Add Ne[…]
-
Страница 94
Accessory CD-ROM Installation Guide 94 PSR-S500 Owner’s Manual 4 Disconnect the USB cable. 5 Restart the computer . 6 Re-install the driver . A TTENTION SOFTW ARE LICENSE AGREEMENT PLEASE READ THIS SOFTW ARE LICENSE AGREEMENT (“ AGREE- MENT”) CAREFULL Y BEFORE USING THIS SOFTW ARE. YOU ARE ONL Y PERMITTED TO USE THIS SOFTW ARE PURSUANT TO THE[…]
-
Страница 95
PSR-S500 Owner’s Manual 95 Tr oubleshooting Prob lem P ossible Cause and Solution When the instrument is tur ned on or off, a popping sound is temporarily produced. This is normal and indicates that the instr ument is receiving electrical power . When using a mobile phone, noise is produced. Using a mobile phone in close pro ximity to the instr u[…]
-
Страница 96
96 PSR-S500 Owner’s Manual Messages LCD Message Comment Access error! Indicates the f ailure in reading or wr iting from/to the media or the flash memor y . All Memor y Clearing… Displa yed while erasing all data in the flash memory . Nev er turn the power off during data transmission. Are you sure? Confirms whether Song Clear or T rack Clea[…]
-
Страница 97
Messages PSR-S500 Owner’s Manual 97 Saving… Displa yed while sa ving data in the memor y . Ne ver turn the power off while saving. Doing so may result in data loss. Send OK? Confirms whether the data transmission is ex ecuted or not. Sending… Displa y ed while transmitting data. Since the media is in use now , this function is not av ailable[…]
-
Страница 98
98 PSR-S500 Owner’s Manual V oice List ■ Maximum P olyphony ● ● ● ● ● ● ● ● ● ● ● ● ● ● ● ● ● ● The instrument has 32-note maximum polyphon y . This means that it can play a maximum of up to 32 notes at once, re gard- less of what functions are used. Auto accompaniment uses a number of the av ailable notes, s[…]
-
Страница 99
Voice List PSR-S500 Owner’s Manual 99 14 0 114 62 FullHor ns 15 0 118 58 SmoothT romb 16 0 115 62 HighBrass 17 0 113 64 OberBrass 18 0 122 62 T rumpetEns 19 0 119 62 MellowHorns 20 0 113 62 BigBandBrs 21 0 118 62 P opBrass 22 0 112 64 AnalogBrs 23 0 113 58 T rb .Section 24 0 117 62 SmallBrass 25 0 114 64 SoftAnalog 26 0 115 63 FunkyAnalog 27 0 11[…]
-
Страница 100
Voice List 100 PSR-S500 Owner’s Manual 20 127 0 26 AnalogKit 21 127 0 28 DanceKit 22 127 0 49 SymphonyKit 23 126 0 41 CubanKit 24 126 0 44 P opLatinKit 25 126 0 36 ArabicKit 26 126 0 1 SFXKit1 27 126 0 2 SFXKit2 Accordion 10 112 22 Musette 20 117 22 Steirisch 30 113 22 T uttiAccrd 40 115 22 SmallAccrd 50 116 22 Accordion 60 112 24 T angoAccrd 70 […]
-
Страница 101
Voice List PSR-S500 Owner’s Manual 101 ● XGlite V oice/XGlite Optional V oice* List V oice No. Bank Select MIDI Program Change# (1–128) V oice Name MSB (0–127) LSB (0–127) XG 100 1G r and Piano 201 1G r and Piano KSP 30 40 1 Piano Strings 40 41 1 Dream 500 2B r ight Piano 601 2B r ight Piano KSP 700 3 Electric Grand Piano 801 3 Electric G[…]
-
Страница 102
Voice List 102 PSR-S500 Owner’s Manual 139 0 0 48 Timpani 140 0 0 49 Str ings 1 141 0 3 49 Stereo Str ings 142 0 8 49 Slow Strings 143 0 35 49 60’s Strings 144 0 40 49 Orchestra 145 0 41 49 Orchestra 2 146 0 42 49 T remolo Orchestra 147 0 45 49 V elocity Strings 148 0 0 50 Str ings 2 149 0 3 50 Stereo Slow Strings 150 0 8 50 Legato Str ings […]
-
Страница 103
Voice List PSR-S500 Owner’s Manual 103 The voice n umber with an aster isk (*) is XGlite optional voice . 279 0 28 106 Muted Banjo 280 0 96 106 Rabab 281 0 97 106 Gopichant 282 0 98 106 Oud 283 0 0 107 Shamisen 284 0 0 108 K oto 285 0 96 108 T aisho-kin 286 0 97 108 Kanoon 287 0 0 109 Kalimba 288 0 0 110 Bagpipe 289 0 0 111 Fiddle 290 0 0 112 Sha[…]
-
Страница 104
104 PSR-S500 Owner’s Manual Drum Kit List Voice No. 13 14 17 18 19 20 MSB (0–127) / LSB (0–127) / PC (1–128) 127/000/001 127/000/002 127/000/009 127/000/017 127/000/025 127/000/026 Keyboard MIDI Key Off Alternate Note Standard Kit 1 Standard Kit 2 Room Kit Rock Kit Electronic Kit Analog Kit Note# Note Note# Note 25 C # 01 3C # -1 3 Surdo Mu[…]
-
Страница 105
Drum Kit List PSR-S500 Owner’s Manual 105 Voice No. 13 21 15 16 22 MSB (0–127) / LSB (0–127) / PC (1–128) 127/000/001 127/000/28 127/000/033 127/000/041 127/000/049 Keyboard MIDI Key Off Alternate Note Standard Kit 1 Dance Kit* Jazz Kit Brush Kit Symphony Kit Note# Note Note# Note 25 C # 01 3C # -1 3 Surdo Mute Kick Dance 1 26 D 0 14 D -1 3[…]
-
Страница 106
Drum Kit List 106 PSR-S500 Owner’s Manual E1 F1 F # 1 G1 G # 1 A1 A # 1 B1 C1 D # 1 D1 C # 1 E2 F2 F # 2 G2 G # 2 A2 A # 2 B2 C2 D # 2 D2 C # 2 E3 F3 F # 3 G3 G # 3 A3 A # 3 B3 C3 D # 3 D3 C # 3 E4 F4 F # 4 G4 G # 4 A4 A # 4 B4 C4 D # 4 D4 C # 4 E5 F5 F # 5 G5 G # 5 A5 A # 5 B5 C5 D # 5 D5 C # 5 C6 Voice No. 13 26 27 25 23 24 MSB (0–127) / LSB […]
-
Страница 107
PSR-S500 Owner’s Manual 107 Style List Style No. Style Name Pop&Rock 1 FunkPopRock 2 AcousticRock 3 Cool8Beat 4 60’sRock1 5 60’sRock2 6 VintageGtrPop 7 60’sGuitarPop 8 70’s8Beat 9 90’sGuitarPop 10 KoolShuffle 11 BubblegumPop 12 BritPopSwing 13 JazzPop 14 HardRock 15 RootRock 16 RockShuffle 17 Unplugged Ballad 1 8BeatA[…]
-
Страница 108
108 PSR-S500 Owner’s Manual Music Database List No. MDB Name Christmas 1 Manger Away 2 Noel First 3 Rednosed Rudolph 4 Silent Christmas 5 Wonderful Time Traditional 6 Abide This Hymn 7 Ave Maria NoMore 8 Can Can Orpheus 9 Moulin Heart 10 Texas YellowRose Showtime 11 Dance Lord 12 For Cabaret! 13 Night Time 14 NoBusiness Like! 15 The Cat’s Me[…]
-
Страница 109
Music Database List PSR-S500 Owner’s Manual 109 251 Espana Viva 252 Eyes Of Green 253 Face Dance Music 254 Free Best Things 255 Green Mountain 256 Hear Music 257 Heaven Blue 258 He’s Got To Go 259 High Moon 260 Holiday Home 261 I Won’t Be Cruel 262 Jealous Tango 263 Jeeps Creepers 264 Knife, Mack 265 Lift Yourself Up 266 Moon Waltz 267 […]
-
Страница 110
110 PSR-S500 Owner’s Manual Ef fect T ype List ● Harmony T ypes ● Reverb T ypes No. T ype Description 01 Duet Harmony types 01–05 are pitch-based and add one-, tw o- or three-note harmonies to the single- note melody pla yed in the right hand. These types sound when chords are pla yed in the auto accompaniment range of the k eyboard. These […]
-
Страница 111
Effect Type List PSR-S500 Owner’s Manual 111 ● Chorus T ypes ● DSP T ypes No. T ype Description MSB LSB 1 CHOR US1 Conv entional chorus program with rich, w ar m chorusing. 66 17 2 CHOR US2 66 8 3 CHOR US3 66 16 4 CHOR US4 66 1 5 CHOR US5 65 2 6 CHOR US6 65 0 7 CHOR US7 65 1 8 CHOR US8 65 8 9 GM CHOR US1 65 3 10 GM CHOR US2 65 4 11 GM CHOR US[…]
-
Страница 112
Effect Type List 112 PSR-S500 Owner’s Manual 41 SYMPHONIC1 Adds more stages to the modulation of Celeste . 68 16 42 SYMPHONIC2 68 0 43 ENS DETUNE Chorus eff ect without modulation, created b y adding a slightly pitch-shifted sound. 87 0 44 KARA OKE1 Echo f or karaoke . 20 0 45 KARA OKE2 20 1 46 KARA OKE3 20 2 47 ER1 This eff ect isolates only the[…]
-
Страница 113
Effect Type List PSR-S500 Owner’s Manual 113 113 PHASER1 Cyclically modulates the phase to add modulation to the sound. 72 0 114 PHASER2 72 8 115 EP PHASER1 72 17 116 EP PHASER2 72 18 117 EP PHASER3 72 16 118 D YN PHASER 111 0 119 PITCH CHG1 Changes the pitch of the input signal. 80 16 120 PITCH CHG2 80 0 121 PITCH CHG3 80 1 122 RO T AR Y SP1 Sim[…]
-
Страница 114
114 PSR-S500 Owner’s Manual MIDI Implementation Chart YAMAHA [ Portable Keyboard ] Date: 18-Jul-2006 Model PSR-S500 MIDI Implementation Chart Version:1.0 Transmitted Recognized Remarks Function… Basic Default 1 — 16 1 — 16 Channel Changed x x Default 3 3 Mode Messages x x Altered ************** x Note 0 — 127 0 — 127 Number : True voice *******[…]
-
Страница 115
MIDI Implementation Chart PSR-S500 Owner’s Manual 115 Prog o 0 — 127 o 0 — 127 Change : True # ************** System Exclusive o o : Song Pos. x x Common : Song Sel. x x : Tune x x System : Clock o o Real Time: Commands o o Aux :All Sound OFF x o(120,126,127) : Reset All Cntrls x o(121) :Local ON/OFF x o(122) :All Notes OFF x o(123-125) Mes- :Act[…]
-
Страница 116
116 PSR-S500 Owner’s Manual MIDI Data Format NO TE: 1 By default (f actory settings) the instr ument ordinarily functions as a 16-channel multi-timbral tone generator , and incoming data does not affect the panel v oices or panel settings. Ho w- ev er , the MIDI messages listed below do aff ect the panel voices , auto accompaniment, and songs. ?[…]
-
Страница 117
PSR-S500 Owner’s Manual 117 Specifications Ke yboards • 61 Standerd-size keys (C1–C6), with Touch Response. Display • 320 x 240 dots LCD display (backlit) Setup • STANDBY/ON • MASTER VOLUME: MIN–MAX • LCD CONTRAST P anel Controls • DEMO, SONG MODE • SONG-PRESET, SONG-USER, SONG-USB, SONG-SCORE, SONG-LYRICS, SONG-REC • STYLE C[…]
-
Страница 118
118 PSR-S500 Owner’s Manual +/YES, -/NO button …………………. 15, 41 > / ■ button ………………………… 14, 28, 41 button …………………………………. 14, 28 AB button…………………………… 14, 65 f button……………………………….. 14, 28 r button ………………………………. 14, 2[…]
-
Страница 119
Index PSR-S500 Owner’s Manual 119 PAUSE ………………………………………… 28 PC ……………………………………………….. 84 PHONES/OUTPUT jack …………… 10, 15 Pitch Bend ……………………………………. 48 Pitch Bend Range ………………………….. 71 PITCH BEND wheel ………………… 1[…]
-
Страница 120
120 PSR-S500 Owner’s Manual L imited W arr anty 90 D A YS LABOR 1 YEAR P AR TS Y amaha Corporation of America, hereafter referred to as Y amaha, warrants to the original consumer of a product included in the categories listed below , that the product will be free of defects in materials and/or workmanship for the periods indicated. This warranty […]
-
Страница 121
For details of products, please contact your nearest Y amaha representativ e or the authorized distributor listed belo w . Pour plus de détails sur les produits, v euillez-vous adresser à Y amaha ou au distributeur le plus proche de v ous figurant dans la liste sui vante. Die Einzelheiten zu Produkten sind bei Ihrer unten aufgeführten Niederlas[…]
-
Страница 122
U.R.G., Pro Audio & Digital Musical Instrument Division, Yamaha Corporation © 2006 Yamaha Corporation WH27920 XXXPOXXX.X-01A0 Printed in China Yamaha Home Keyboards Home Page (English Only) http://music.yamaha.com/homekeyboard Yamaha Manual Library http://www.yamaha.co.jp/manual/[…]