Сегодня мы сделаем змейку из бумаги. «Змейка» — поделка, эффективно снимающая стресс.
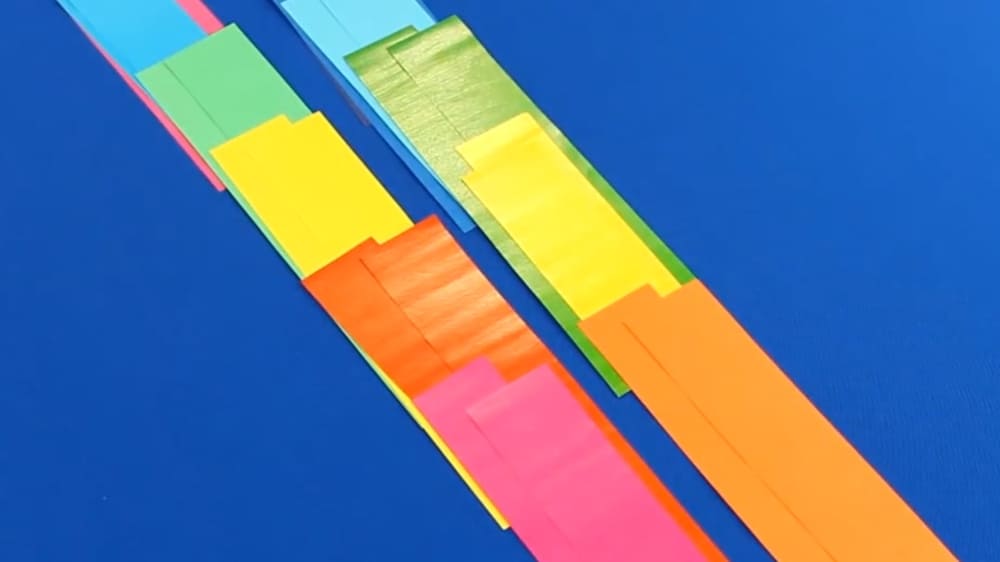
Для изготовления этой поделки нам потребуются полоски из цветной бумаги шириной 3,5 на 20 сантиметров. Нам потребуется много таких полосок.
Заранее я нарезала полоски разного цвета.

Сейчас мы будем их склеивать в длинную ленту. Клей намазываем на самый краешек нашей полосочки, приклеиваем ленточку. В нахлест у нас получится. Немножко подержим, чтобы клей схватился.

Я склеила две цветных полоски. Сейчас мы будем их переплетать. Обратите внимание, что цвета полосок должны быть контрастными. Склеивать полоски мы будем под углом 90 градусов. Вот так, методом наложения одной полоски на другую. Намазываем клей на краешек бумажной полоски, накладываем вторую полоску на нее.

Вот, я склеила две полосочки. Начинаем их переплетать. Верхняя у нас оранжевая. Кладем малиновую полосочку на оранжевую, делаем сгиб. Теперь оранжевую на малиновую. Теперь в другую сторону. Всё время чередуем полосочки.
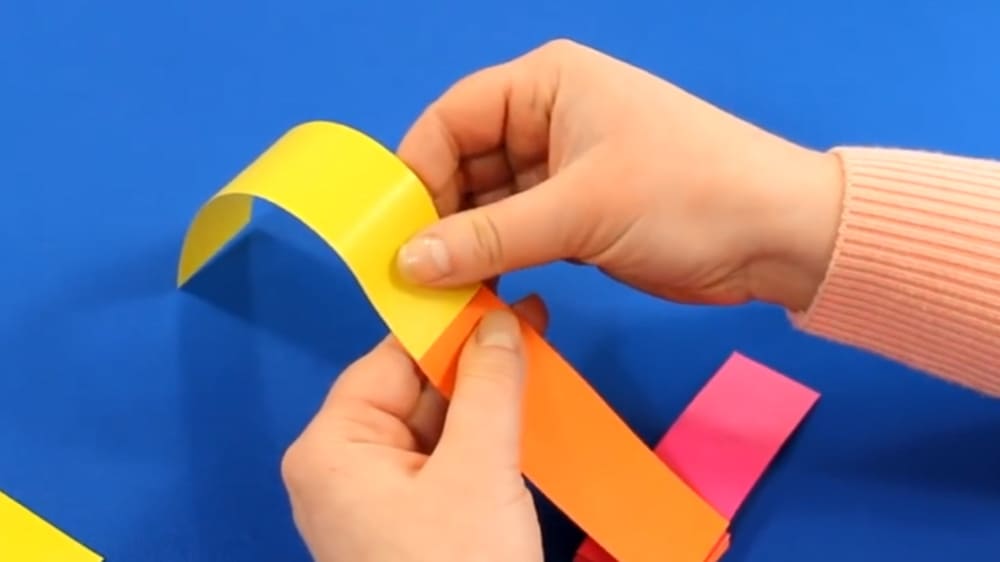
Когда бумажные полоски у нас заканчиваются, мы подклеиваем новые. Опять, аккуратно край бумаги намажем клеем и подклеим длинную полосочку на одну сторону, а затем на другую сторону.
Поделка будет интересно смотреться, если каждый раз, как будете подклеивать новые полоски, будете подбирать контрастные цвета. Продолжаем сборку ленточек.
Смотрите, чем дольше мы складываем, тем длиннее получается наша змейка из бумаги.

Когда мы собрали все полоски, наклеиваем последние квадратики друг на друга.

Наша змейка из бумаги готова.
![]()
Download Article
![]()
Download Article
Paper snakes are fun and easy to make. They are a great craft to learn about snakes. They also make great decorations for Halloween, or for nature lovers. This article will show you a few simple and fun ways of making a snake out of paper.
-

1
Gather your supplies. This is a simple snake that you can make out of a paper plate. It lays flat on your table, but springs up into a long snake when you hang it! Here’s a list of what you will need:
- Paper plate
- Acrylic or tempera paint
- Paintbrushes, spongers, etc
- Pencil or pen
- Scissors
- Crayons, markers, or googly eyes
- Red paper or ribbon
- White school glue or tacky glue
- String, thumbtack, hole punch (optional)
- Rhinestones, glitter, etc (optional)
-

2
Cut off the raised edge of a paper plate. Be sure not to go too far into the middle or else it may not be big enough.
- If you don’t have a paper plate, use a small plate to trace a circle onto a large sheet of paper. Cut the circle out using a pair of scissors, and use that circle instead.
Advertisement
-

3
Paint or decorate the paper plate. You can paint the snake however you want. You can use a paintbrush, a sponge, or even your fingers. Snakes come in many different colors and patterns. Here are some ideas to get you started:
- Paint the plate a solid color and let the paint dry. Next, dip a sponge into a different color and tap the excess paint off onto a paper towel. Then, dab the sponge all over the plate. If you want to add another color, wait for the first one to dry. This will give you a scale-like effect.[1]
- Wrap a sheet of bubble wrap (bubble-side-out) around a rolling pin and secure it with tape. Pour two colors of paint onto a palette and gently roll the pin across. Next, roll the pin across the plate. You will get a scale effect.[2]
- You can also color the other side of the plate to make the snake’s belly. Most snakes have a plain, light colored belly. Do this once the top of the snake dries.[3]
- Paint the plate a solid color and let the paint dry. Next, dip a sponge into a different color and tap the excess paint off onto a paper towel. Then, dab the sponge all over the plate. If you want to add another color, wait for the first one to dry. This will give you a scale-like effect.[1]
-

4
Draw a spiral on the back of the plate. Make the spiral about half an inch thick. It doesn’t have to be perfect, but try to make it even all the way around. The center of the spiral will be the snake’s head, so make it rounded.
- You are drawing the spiral on the back so that you won’t see it on the top.
-

5
Cut out the spiral shape. Start front the outside of the spiral, and work your way in. Try to do this right on the line, because you don’t want the line to show on the finished product.
-

6
Add more decorations to the snake. At this point, you can paint on some extra designs to make your snake even more special. Here are some ideas to get you started:
- Paint thick stripes across the spiral to make a striped snake.
- Paint Xs or diamond shapes across the spiral to make a diamond pattern.
- Glue some colorful rhinestones using white school glue or tacky glue.[4]
Try not to add too many, or your snake will be too heavy. - Make some squiggles and patterns on the snake using white glue. Then, shake some glitter onto the glue. Tap off the excess glitter and let the glue dry.
-

7
Add the eyes onto the front of the head. You can draw the eyes on using a marker or crayons. You can also paint the eyes on. If you have googly eyes at home, you can glue them on using white school glue or tacky glue.
- Remember, the head is the rounded part in the middle of the spiral.
-

8
Add the tongue. Cut a thin 1 to 2 inch (2.54 to 5.08) long rectangle out of red paper. You can also use a piece of thin, red ribbon. Cut a V shape into one end of the rectangle. This will be the snake’s forked tongue. Lift the head up and glue the tongue under it.
-

9
Punch a hole through the snake if you want to hang it. You can punch the hole at the end of the tail, right between the eyes, or even in the tongue. Thread a piece of string through the hole and tie it in a knot. Use the other end of the string to hang the snake from a door knob, a stick, or even a thumbtack in the wall.
Advertisement
-

1
Gather your supplies. You can easily make a snake out of construction paper rings. The more rings you add, the longer your snake will be. Here’s a list of what you will need to make such a snake:
- Several sheets of construction paper
- Red paper
- Scissors
- Glue stick, tape, or stapler
- White school glue or tacky glue
- Markers, crayons, or googly eyes
-

2
Find some construction paper. You will need at least three pieces. You can use all one color to make a solid-colored snake. You can also use different colors if you want a striped snake.
-

3
Cut the paper into 1½ to 2 inch (3.81 to 5.08 centimeters) thick strips. You will need at least 16 strips. The more you make, the longer your snake will be.[5]
- Consider stacking the paper and cutting several sheets at the same time. This will make the cutting part faster.
-

4
Make a ring out of a strip of paper and glue it shut. Pick up a strip of paper and bring the two ends together. Overlap them by about 1 inch (2.54 centimeters). Use a glue stick to hold them together. You can also use tape or a stapler instead.
- Do not use white school glue or tacky glue. It does not dry fast enough. Your snake will fall apart before the glue dries.
- If you are using a stapler, ask an adult to help you.
-

5
Slip a strip of paper through the ring and glue the ends together.[6]
Keep repeating this step until you run out of strips of paper. You can make your snake just one color, or you can make it many colors. You can give your snake a pattern, or make the colors random. -

6
Add the tongue. Cut a skinny rectangle from red paper and cut a V shape into one end to make the fork. Fold the flat side over by about ½ inch (1.27 centimeters) to make a tab. Glue the tab to one of the end rings.
-

7
Add the eyes right above the tongue. You can draw them on using a marker or crayon. You can also glue them on using some white school glue or tacky glue.
Advertisement
-

1
Gather your supplies. If you have any spare toilet paper rolls laying around, you can turn them into a fun, wiggly snake using a bit of paint and string. Here’s a list of what you will need:
- 3 – 4 toilet paper rolls
- Acrylic or tempera paint
- Paintbrushes
- Scissors
- Yarn
- Red paper or ribbon
- White school glue or tacky glue
- Markers, crayons, or googly eyes
- Hole punch
-

2
Gather three to four toilet paper rolls. If you cannot find that many toilet paper rolls, you can use some paper towel rolls instead.
-
3
Use scissors to cut each toilet paper roll in half. If you are using paper towel rolls, cut them into thirds.
-

4
Paint the toilet paper rolls and let them dry. You can paint them all one color. You can also paint each roll a different color. If you want to add patterns and designs, wait for the paint to dry first.
-

5
Choose two rolls to be your head and tail tip and set them aside. You don’t want them to get mixed up with the body of the snake.
-

6
Punch four holes in each body piece. There will be two holes on the top, and two holes on the bottom. The holes need to be straight across from each other. Make sure that the top and bottom holes on each side are aligned.
-

7
Punch two holes into the head and tail tip piece. The holes need to be straight across from each other.
-

8
Cut some yarn into 5 inch (12.7 centimeters) long pieces.[7]
You will need enough pieces to tie the rolls together. -

9
Tie the pieces together using the yarn. Don’t tie the yarn too tight, or the snake won’t be able to wiggle. There should be a gap between each piece. Try to hide the knot inside the snake.
-

10
Add the tongue. Cut a long, skinny rectangle from a piece of red paper and cut a V shape into on end. You can also use a piece of red ribbon. Glue the flat end inside the snake’s head. Make sure that it is in the middle of the mouth.
- If you want your snake to have a closed mouth, ask an adult to staple the end of the roll shut, right over the tongue.
-

11
Add the eyes. You can draw the eyes on using a crayon or marker. You can also paint them on. If you have any googly eyes at home, you can glue them on using white school glue or tacky glue.
Advertisement
Add New Question
-
Question
Do I have to use glue?

You could use tape, but it would look quite bad.
-
Question
Do I always need glue?

Elizabeth Bolster
Community Answer
You don’t have to use glue. You can use tape, but it might not look as good as if you use glue.
-
Question
Do I have to use yarn?
Elizabeth Bolster
Community Answer
You don’t have to use yarn. You can use sewing thread, or just a thin thread.
Ask a Question
200 characters left
Include your email address to get a message when this question is answered.
Submit
Advertisement
-
Look at pictures of real snakes to get ideas for your snake.
-
Read a book about snakes while you work. This way, you can learn about them too.
Thanks for submitting a tip for review!
Advertisement
-
Play gently with these snakes. Paper is fragile and can rip easily.
-
Do not let these snakes to get wet.
-
Adult supervision is required for cutting steps.
Advertisement
Things You’ll Need
- Paper plate
- Acrylic or tempera paint
- Paintbrushes, spongers, etc
- Pencil or pen
- Scissors
- Crayons, markers, or googly eyes
- Red paper or ribbon
- White school glue or tacky glue
- String, thumbtack, hole punch (optional)
- Rhinestones, glitter, etc (optional)
- Several sheets of construction paper
- Red paper
- Scissors
- Glue stick, tape, or stapler
- White school glue or tacky glue
- Markers, crayons, or googly eyes
- 3 – 4 toilet paper rolls
- Acrylic or tempera paint
- Paintbrushes
- Scissors
- Yarn
- Red paper or ribbon
- White school glue or tacky glue
- Markers, crayons, or googly eyes
- Hole punch
References
About This Article
Article SummaryX
To make a paper snake, cut off the raised edge of a paper plate and paint the plate however you like. Next, draw a 1/2 inch spiral on the back of the plate and cut out the spiral, starting from the outside and working your way in. Then, paint eyes onto the front of the head, or glue on googly eyes. Lastly, cut a thin 1 to 2 inch long rectangle out of red paper and cut a V into 1 end to make a forked tongue. Lift the head up and glue the tongue under it! For tips on how to make a paper snake using construction paper or toilet paper rolls, read on!
Did this summary help you?
Thanks to all authors for creating a page that has been read 235,708 times.
Did this article help you?
Оригами
Как сделать змею в технике оригами?
Содержание
- Простой вариант
- Создание модульной фигуры
- Полезные советы
Для чего бы вам ни понадобилось мастерить змею, хочется отметить, что процесс довольно легкий, а фигура получается очень изысканной. Многие дети, да и взрослые тоже боятся змей, но только не бумажных! Поделку можно сделать яркой, тогда она будет казаться забавной.
Бумага может уже быть цветной или можно создать поделку из белой, а потом по своему желанию разукрасить ее. В данной статье показаны мастер-классы – четко им следуйте, и в результате вы получите змейку, которую можно использовать для игр.
Простой вариант
Простой вариант создания змеи из бумаги для начинающих не требует больших временных затрат. Результат вас впечатлит. Все что вам понадобится – это 2 листа цветной бумаги (лучше разного цвета), мы будем складывать листики несколько раз. Такая схема подходит как для начинающих, так и для тех, кому понадобилась змейка для игр или украшения детского стеллажа.
Перечислим этапы работы.
- Берем листик и складываем его несколько раз (должна получиться длинная полоска). Для справки: можно сложить лист пополам, потом еще один раз пополам, и продолжать до тех пор, пока не образуется полоска (смотрим на рисунок).
- Берем второй лист и проделываем с ним то же самое.
- Перед вами окажется 2 полоски – их нужно положить друг на друга (смотрим на рисунок 7).
- Сгибаем полоски в квадрат, в результате получится гармошка.


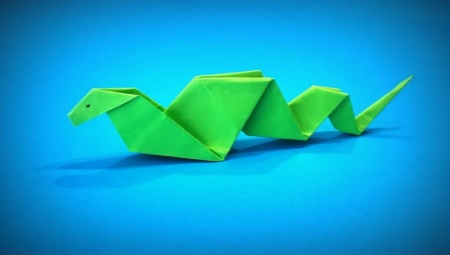
Есть еще один элементарный вариант. С ним самостоятельно справляются даже дошкольники. Мы будем делать змейку из зеленой бумаги (по желанию можно выбрать другую). Если вы делаете пресмыкающееся к какому-либо празднику, например ко дню рождения, можно приобрести блестящую бумагу.
Итак, для работы понадобятся:
- зеленая бумага А4;
- вдохновение.
Будет хорошо, если вы также возьмете маленький кусочек белой бумаги и черный фломастер – это нужно для создания глазок. Все что от вас требуется – смотреть на картинку и повторять изображенные на ней манипуляции.


Змея – одно из самых распространенных оригами, которое любят собирать дети. Простая схема была разработана специально для того, чтобы фигурку было удобно складывать ребенку. Это отличный способ весело и с пользой провести с ним время. Возможно, он даже захочет приобщиться к древнему искусству. Змейка, собранная по этой схеме, прекрасно украсит письменный стол ребенка.
Для справки: змейке можно сделать жало, для этого нужно слегка разрезать красную полоску вдоль и отогнуть одну сторону, а затем приклеить к мордочке. Когда оригами-змейка собрана, вырезаем 2 маленьких кружочка из белой бумаги и рисуем на них глазки черным фломастером. Приклеиваем на мордочку. Змея готова! Она получается очень эффектной – ребенок будет рад с ней играть.


Создание модульной фигуры
Есть разнообразные способы создания змеи. Сборка кобры своими руками – занятие творческое, оно однозначно идет на пользу, но стоит сразу предупредить, что оригами из модулей занимает какое-то время. Если вы хотите создать эффектное пресмыкающееся, начните работу с создания ее головы. В этом вам поможет пошаговая инструкция.
Для изготовления модульной змейки понадобятся следующие модули:
- 326 зеленых;
- 223 желтых;
- 79 оранжевых;
- 1 красный;
- 1 светло-зеленый.
Плюс в том, что в ходе сборки нельзя ошибиться, если следовать мастер-классу. Можно подробно проследить, как и какие добавляются модули, какие чередуются цвета. Если вы не уверены в своих силах – обязательно включите видео.
Этапы работы:
- собираем модели по снимку, меняя цвета;
- начиная с первого ряда, делаем чередование (наружу длинными сторонами);
- следующий ряд должен собираться короткими сторонами наружу;
- продолжаем чередование до самого конца, то есть хвостика.
В этой схеме брюшко получится желтым, а спинка – зеленой.

Полезные советы
Если вы неопытный оригамист, то поначалу вам будет трудно идеально собрать оригами. Но начинать всегда нелегко, и важно, чтобы схема подходила для новичка. Оригами – хобби, которое пришло к нам из Японии, оно прекрасно развивает мелкую моторику и надолго занимает. Оно хорошо тем, что не требует больших материальных затрат, главное – умелые руки, цветная бумага и желание творить. Техника его выполнения относительно проста, на начальных этапах лучше взяться за легкие поделки. Словом, если вы научились делать лягушку (одна из самых известных поделок), значит, можно переходить к чему-то посложнее. Подготовьте перед началом работы все нужные материалы – так вам не придется отвлекаться на их поиск.
Принято считать, что для оригами используется только цветная бумага, но это не совсем так. Вполне подойдут и журнальные страницы – так у вас даже будет поделка с изюминкой! А вот для модульного оригами лучше взять блоки для записей – их размер удобен для создания блоков. Собирать оригами можно детям с 3–4 лет, но процесс должен контролировать взрослый. Люди всех возрастов любят делать оригами: процесс дарит хорошее настроение, успокаивает нервы, развивает творческую жилку. Для поделки можно использовать дополнительные материалы в виде ленточек, страз, лака для ногтей и прочего. Схемы моделей и видеоуроки не составляет труда найти в интернете – оригамисты с радостью делятся ими.
Обычно на схемах указываются степени сложности: низкая, средняя, высокая, что сразу позволит вам определить, подходит ли вам работа или нет.
О том, как смастерить кобру в технике модульного оригами, смотрите в следующем видео.